

Now some users cannot freely use certain sites due to restrictions from the provider or the creators of the web resources themselves. Others want to get the minimum level of anonymity, scorch their true IP address. The standard functionality of the Mozilla Firefox browser does not allow this, so you have to resort to installing additional tools. Anonymox applies to the number of similar extensions, we want to talk about its use.
Use anonymox extension in Mozilla Firefox
Anonymox is one of the standard browser add-ons that allows you to select a country for the IP substitution and use the VPN server connecting with certain sites. It provides the user with a minimum set of necessary functions in the free version, as well as a wider selection of stable and fast servers in a premium. Next, we step by step will analyze the process of interaction with this program, so that even a beginner user understood each nuance.Step 1: Installation
Of course, you should start with the installation of additions to the web browser. This is done in the same way as with all other tools. Those who have never come across the execution of such a task, we recommend to study the following instructions.
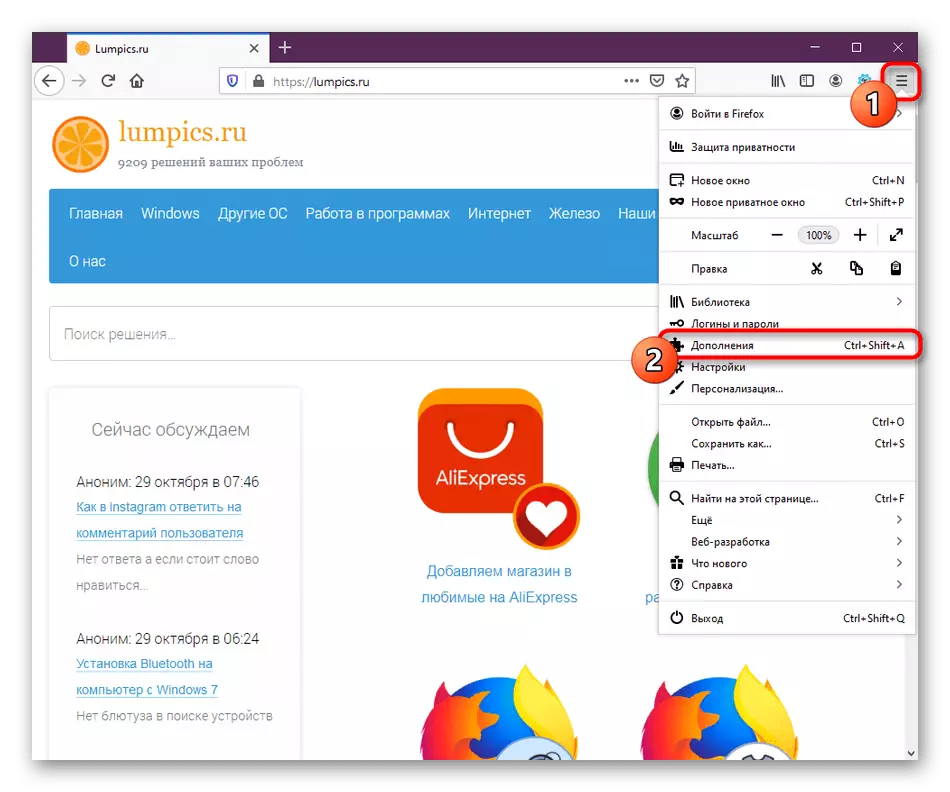
- Open the Firefox main menu by clicking on the button with three horizontal strips. There, select the section "Additions". A quick transition to this menu is performed by pressing the hot key Ctrl + Shift + A.
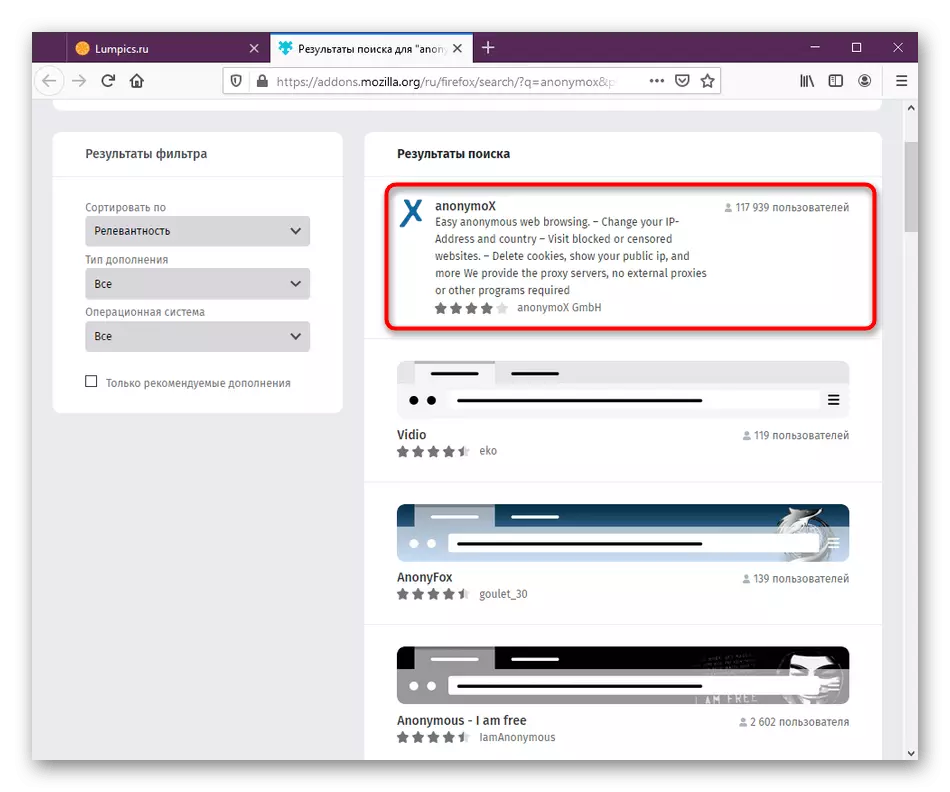
- In the Appendix Management window that appears, you can use the search by entering the name of today's expansion there.
- There will be a transition to search results in Firefox Add-ONS. Here you are interested in the first application with the appropriate name. Click on it to go to the installation.
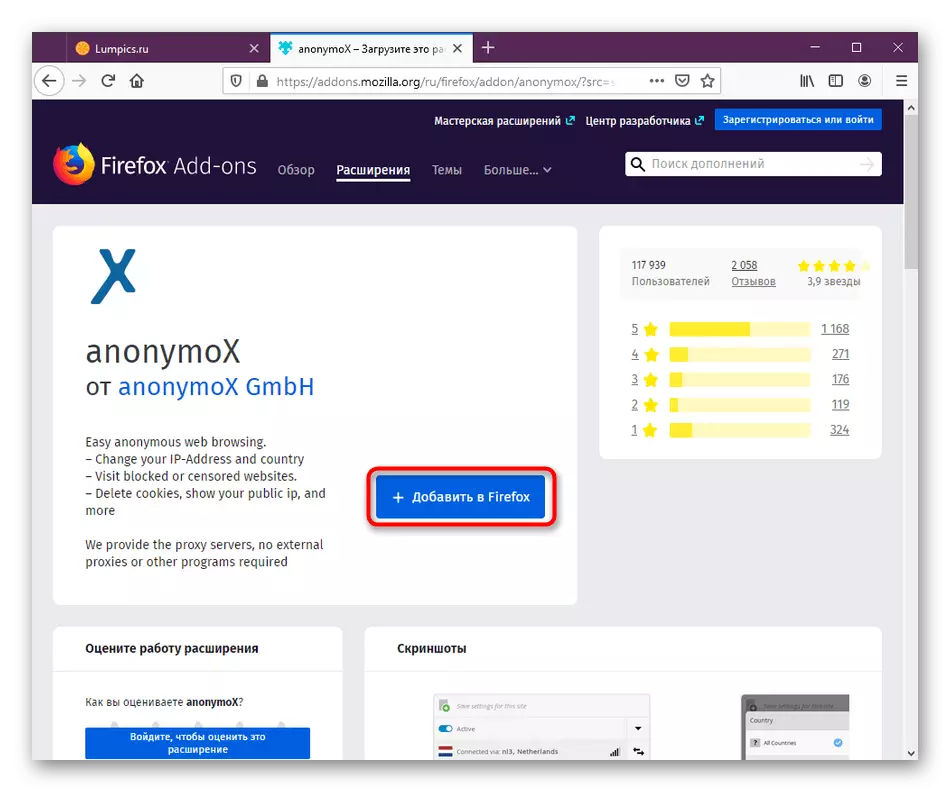
- It remains only to click on the "Add to Firefox" button.
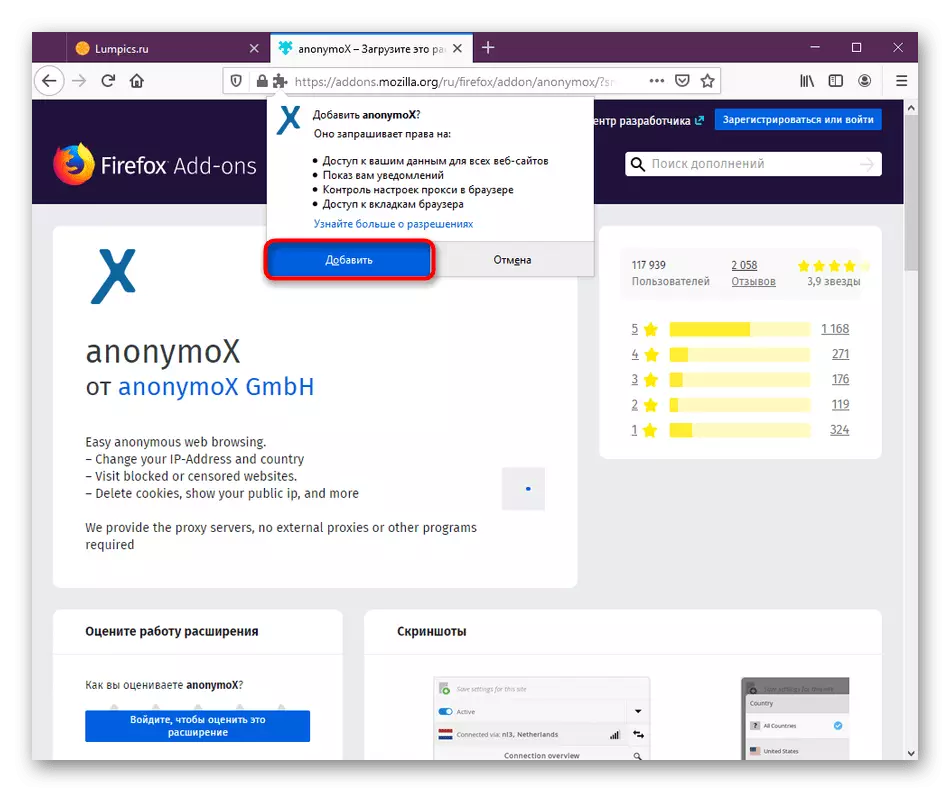
- Additionally confirm your intentions in the installation.
- You will be notified that the Anonymox extension has been successfully added to the browser, and will also automatically go to the developer page, where it will be detailed information about it.

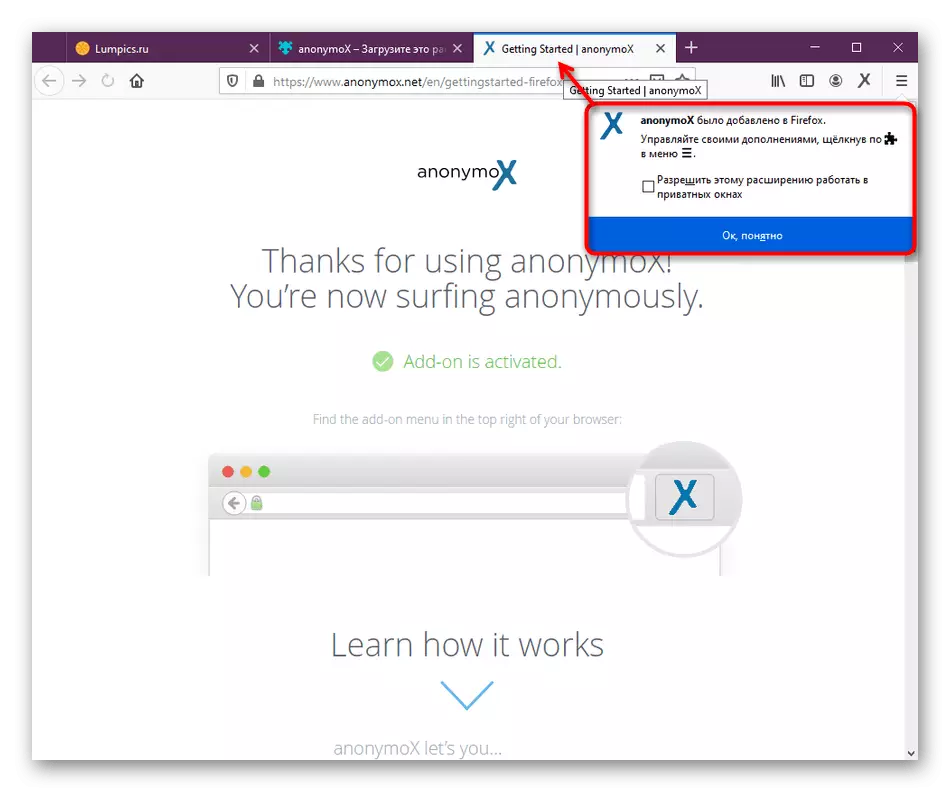
In the last point of instructions in the pop-up window, pay attention to the "Allow this extension to work in private windows" item. Install a tick near it if you want to enable this option. In the case when this notification has already been closed and you did not have time to activate the parameter, but you want to do this, go to the next step. If there is no desire to turn on the setting, just skip it.
Step 2: Configuring work in private windows
By default, most extensions will not work when you open a new private window in the browser. However, developers allow you to configure this option if there is a need. This is done directly through the parameters of the application itself.
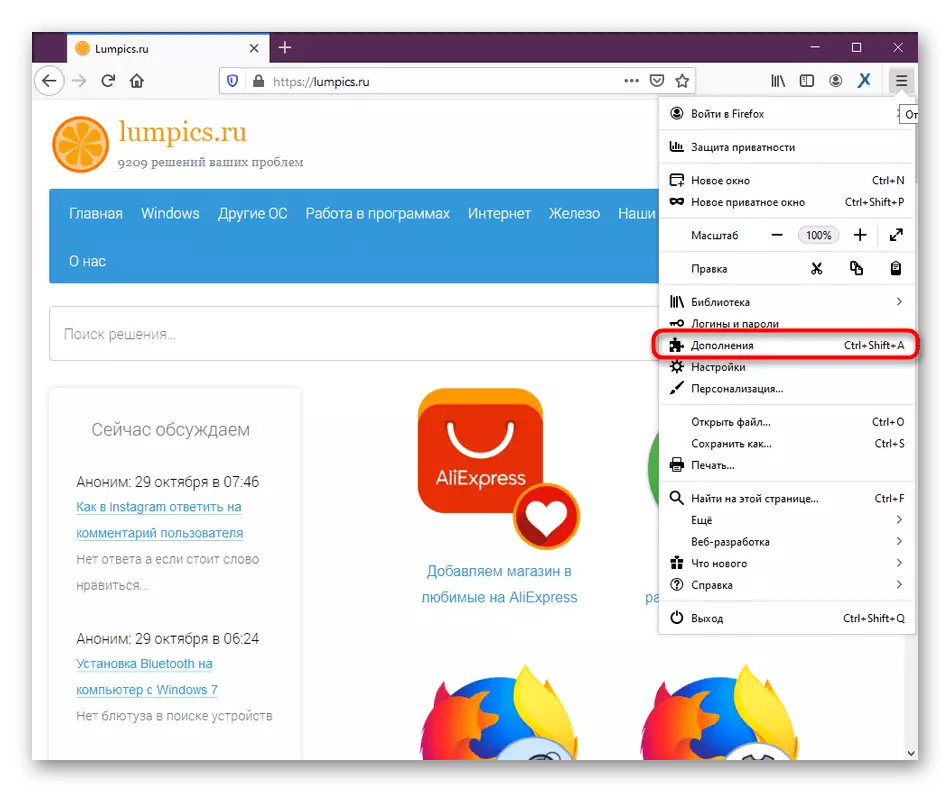
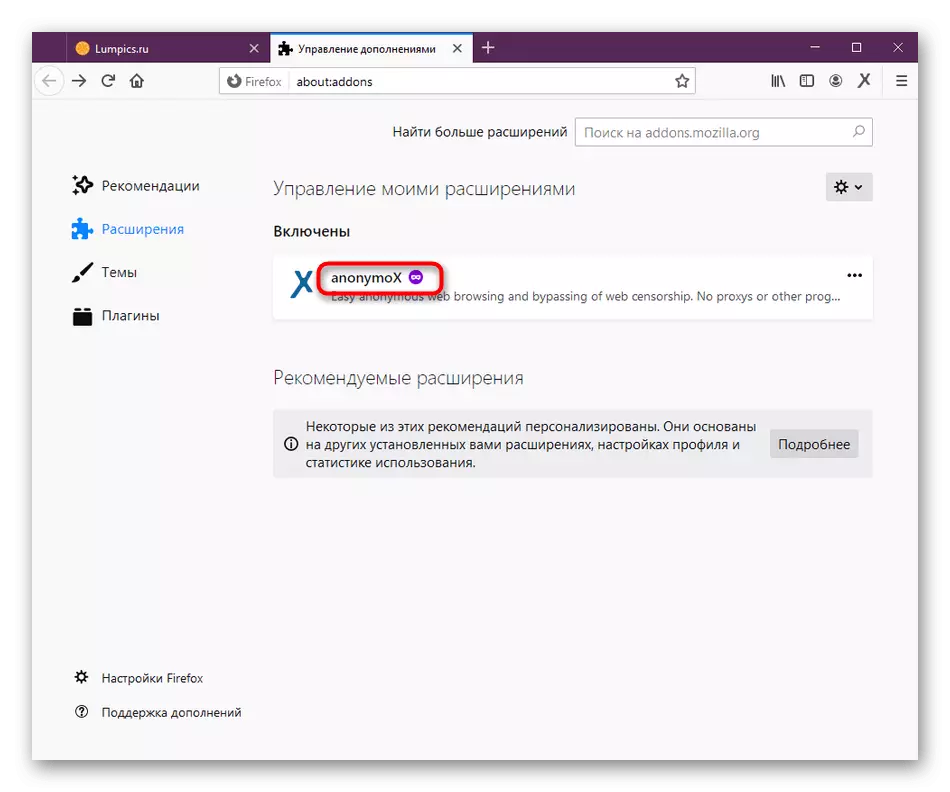
- Open the Firefox menu and go to the appropriate section to control extensions.
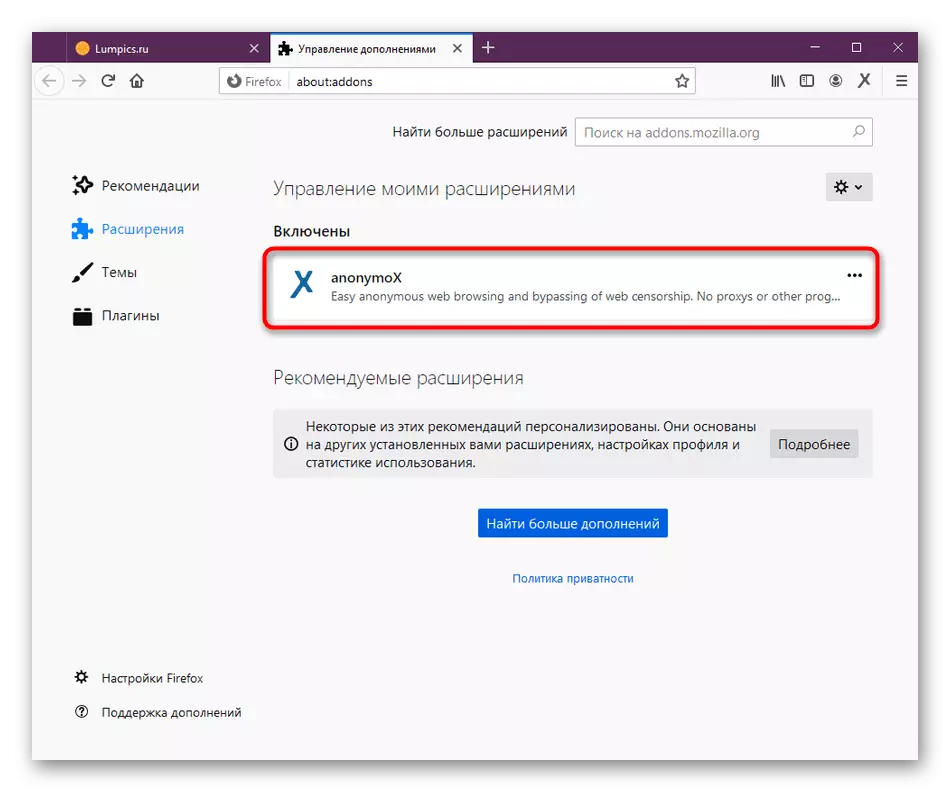
- Here, find anonymox here and click on the tile with the app.
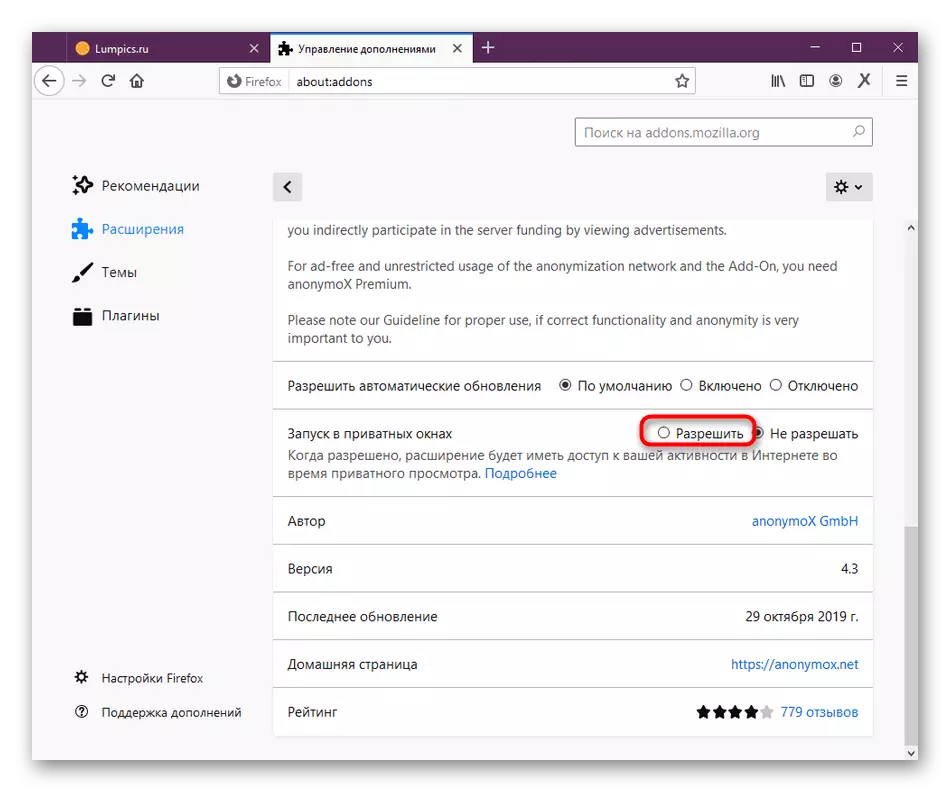
- Run down the tab to find all the parameters present. Here in the "Startup in private windows" row, put a marker near the "Allow" item.
- If the extension starts in privacy mode, then a special icon will appear in the menu, which you see in the screenshot below.
At any time, it is possible to switch to the same menu to disable the considered mode, and then re-activate it when necessary.
Step 3: Enable expansion
This stage will be useful for consideration to those users who have not previously encountered interaction with such expansions and does not know how they are activated and disconnected. Use the manual below to deal with the principle of actions.
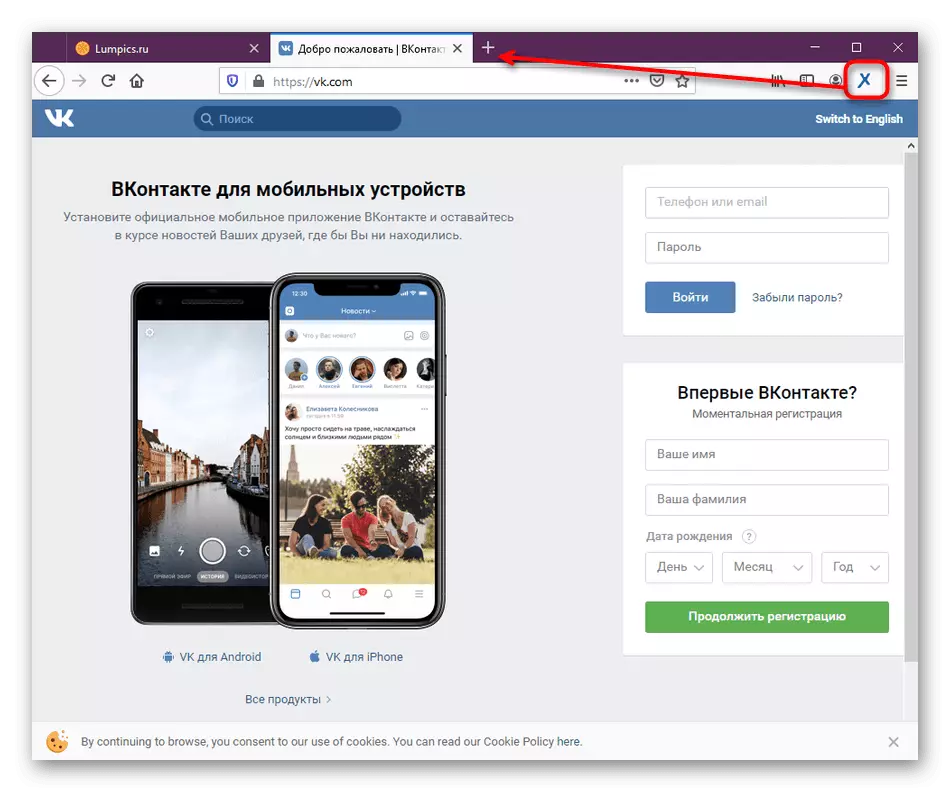
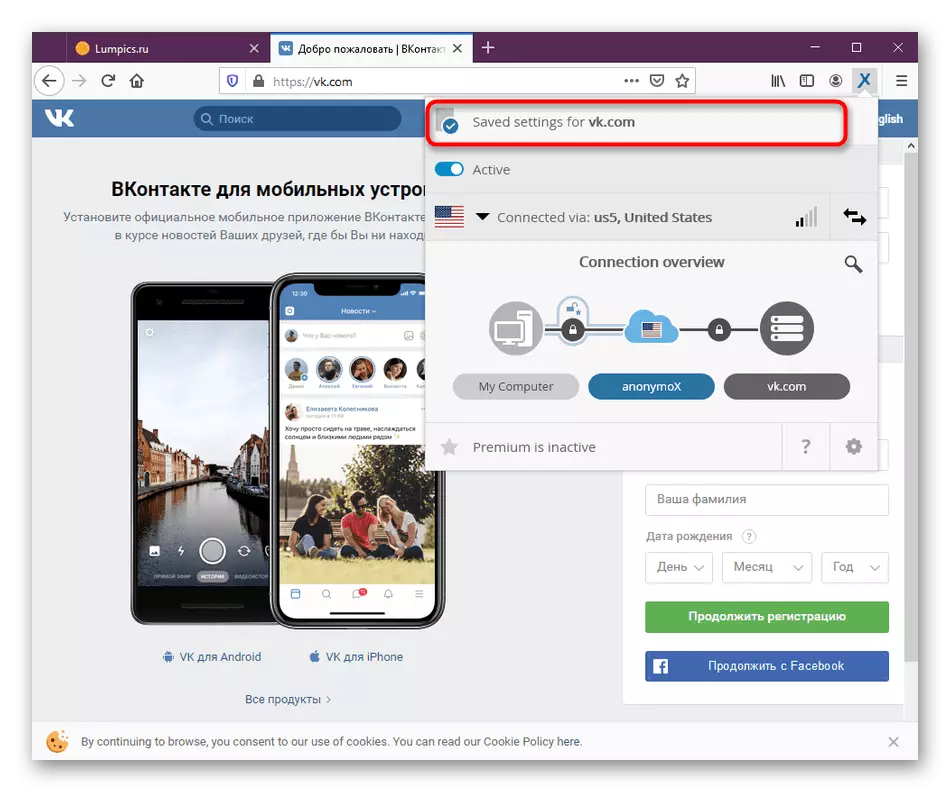
- If Anonymox is now not connected to the proxy server, which means it is in a disconnected state, its icon on the top panel will burn with gray.
- After adding an extension to the browser, immediately open any site. You will see that the icon has changed its color to the blue - the extension connected to the server and uses the IP substitution on the open site.
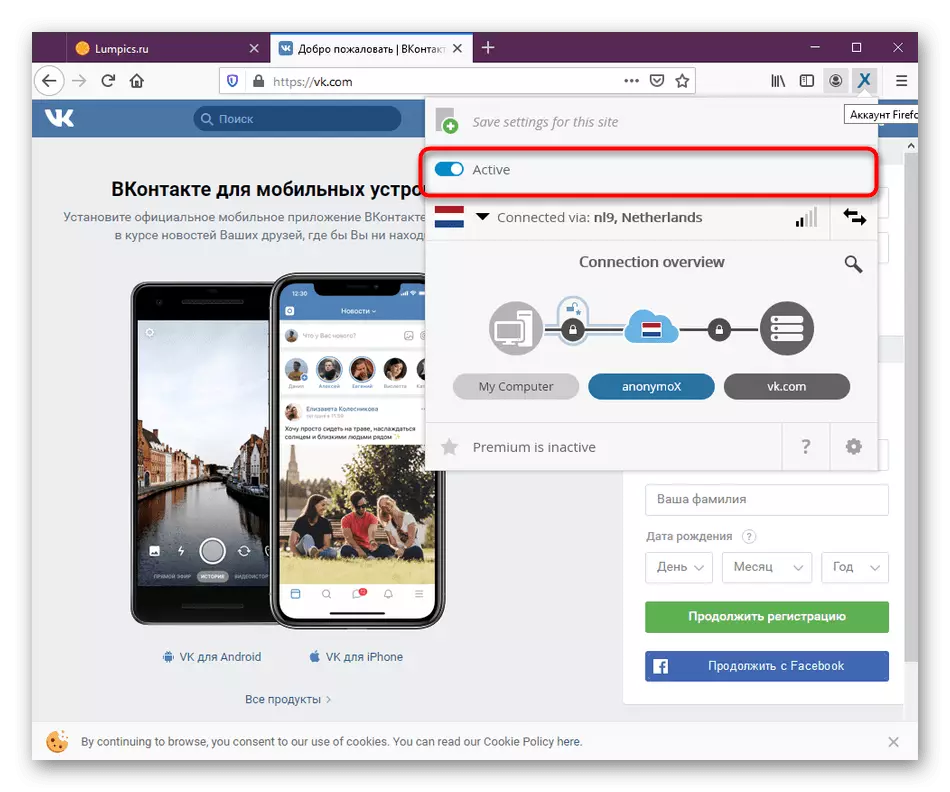
- If you need to manually activate or turn off AnonymOx, open the control menu by clicking on its icon, and use the "ACTIVE" switch.

If you do not want anonymox to be activated on some site automatically, it can be configured using a specific parameter. We will talk about it in more detail when parsing the next stage.
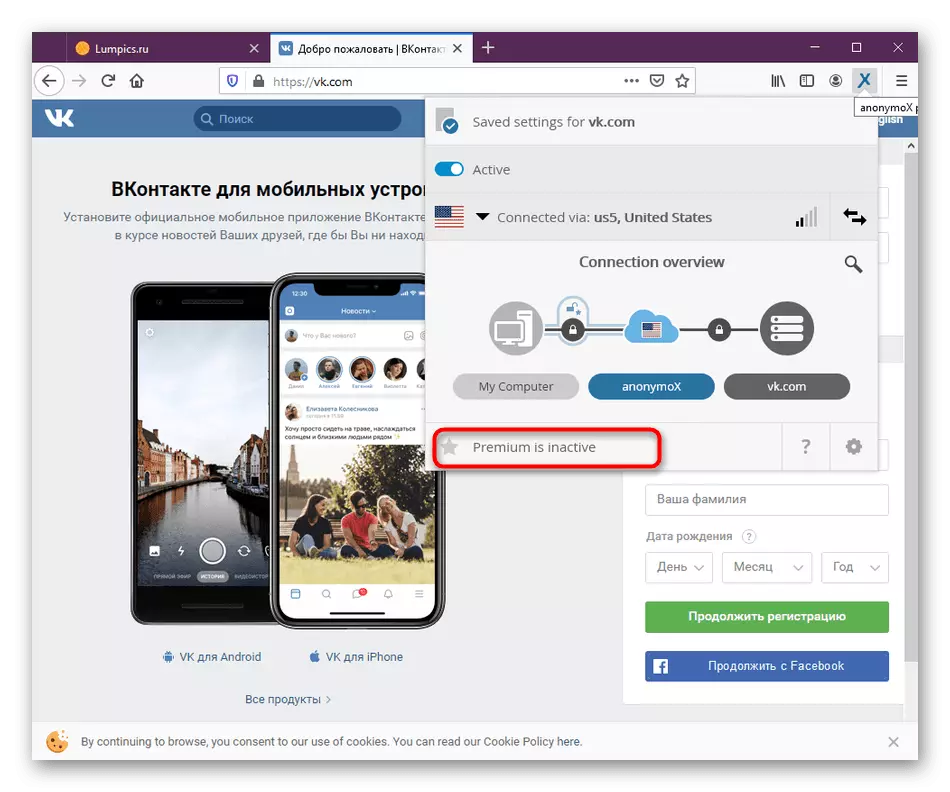
Step 4: Conxy Setup
The free version of Anonymox has limitations in choosing countries and servers, so often users face not enough good quality compounds. This causes the need to change the connection source, which is as follows:
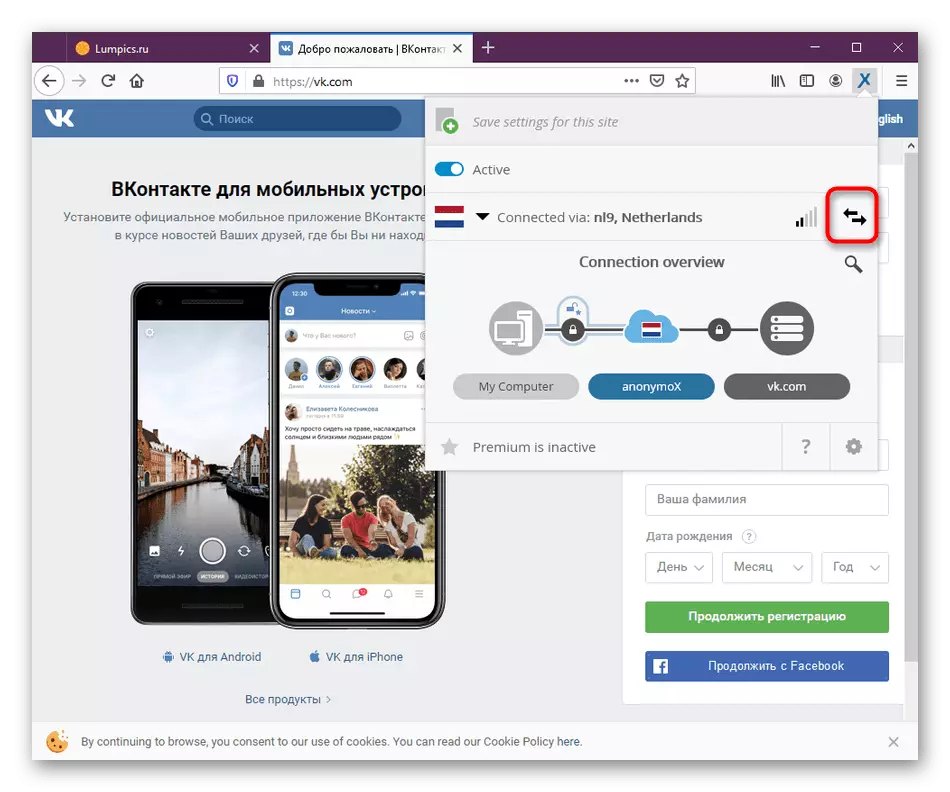
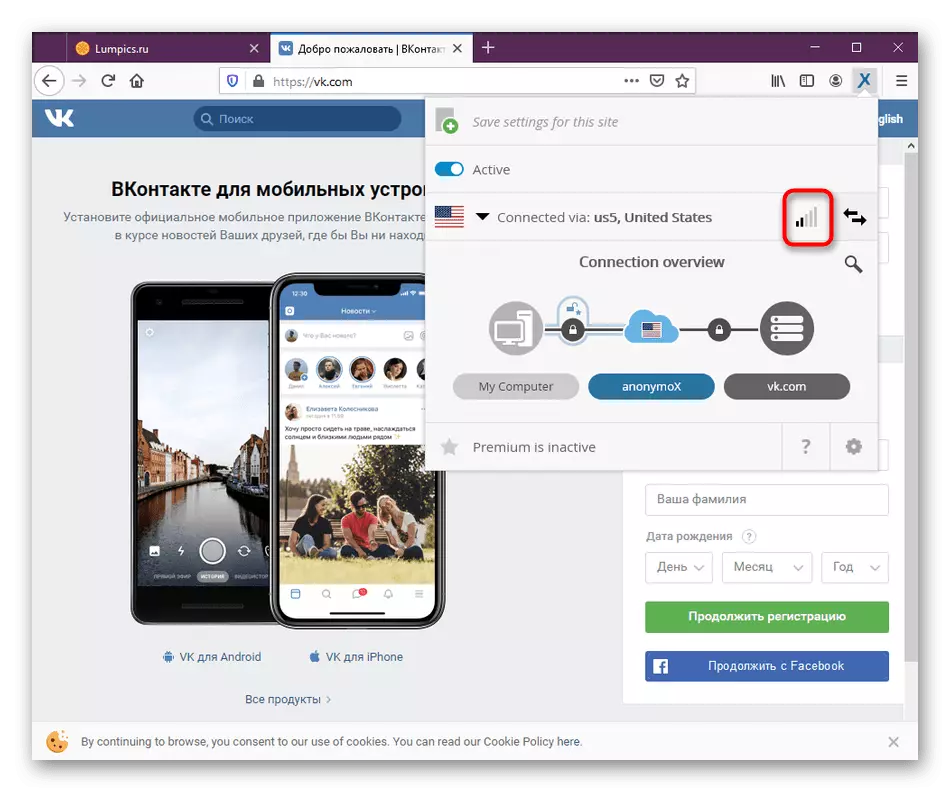
- To quickly change the server, you will need to open the Anonymox menu and press the button in the form of two directions in different directions. You can do this unlimited number of times, however, the sources will be repeated.
- The signal quality corresponds to a special scale, which is similar to the Wi-Fi icon in Windows. Relieve yourself from its indicators to determine the quality of the connection.
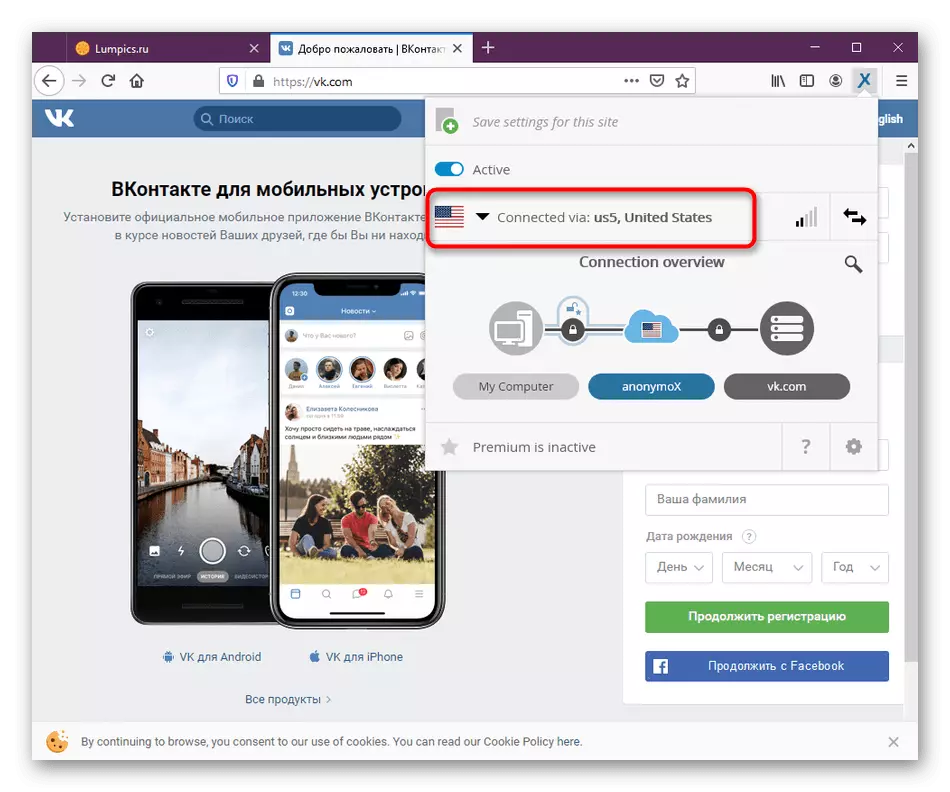
- To change the servers manually, click on the "Connected" line to open the new menu.
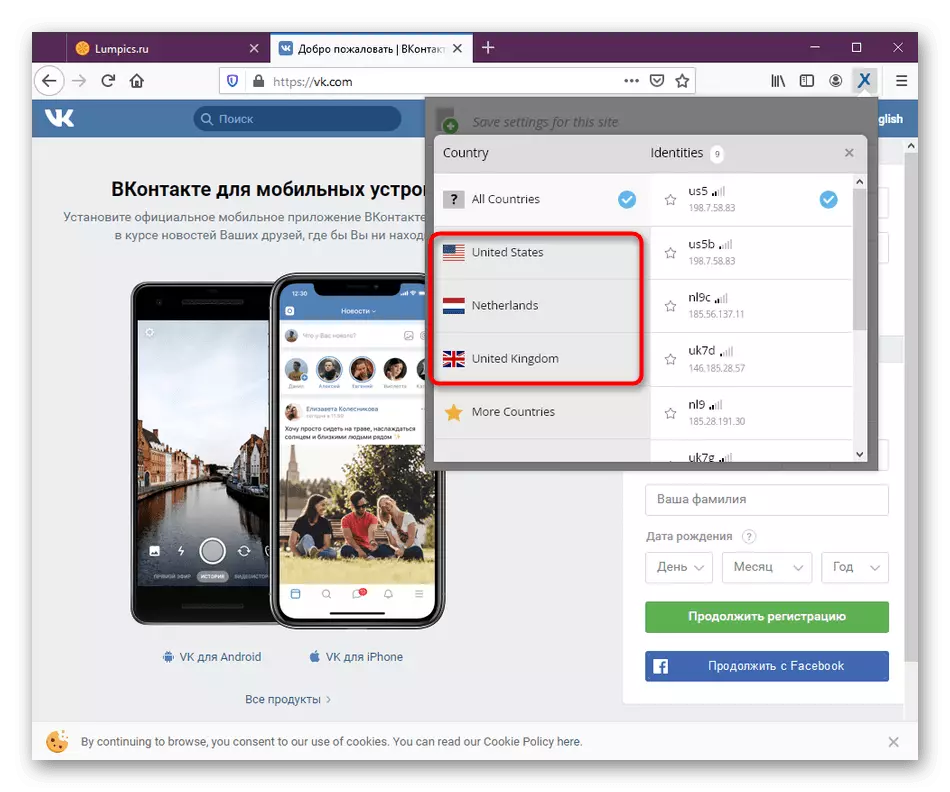
- Here in the free version to choose from only three countries. After purchasing the premium version, this list will be much more.
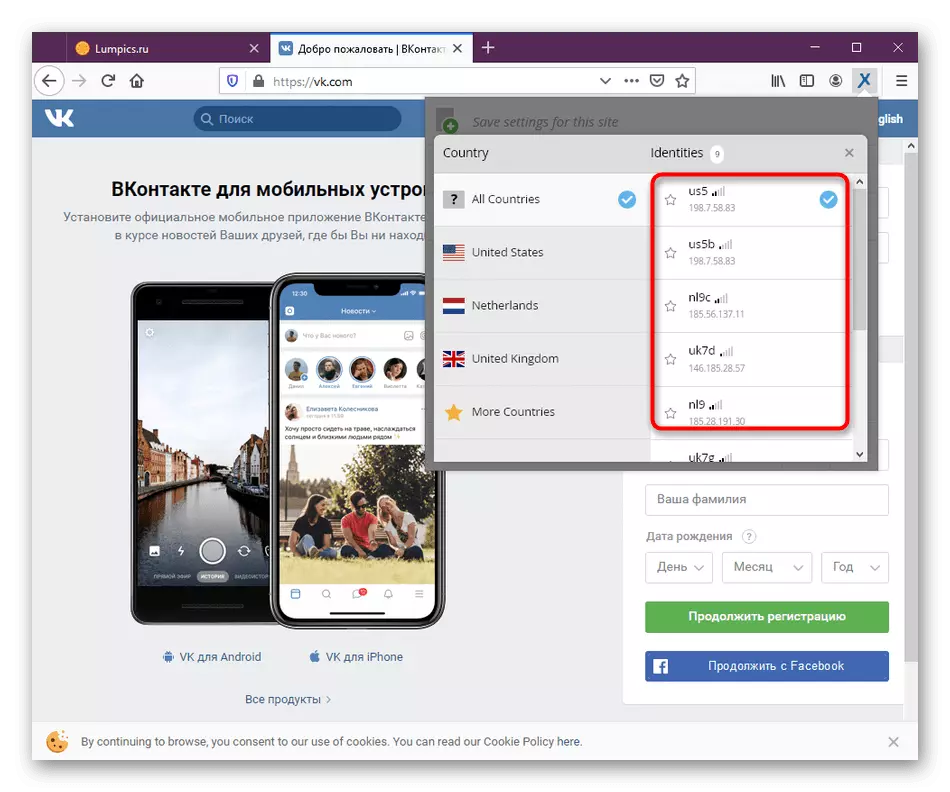
- On the right are available IP addresses, and also immediately displays their communication quality. Check the appropriate item to select the server yourself.
- After that, the configuration function is activated specifically for a specific site. Set some server or completely disconnect the anonymox action.
As you can see, there is nothing difficult in configuring Anonymox, because the main menu is implemented very simple, and the number of possible options is minimal.
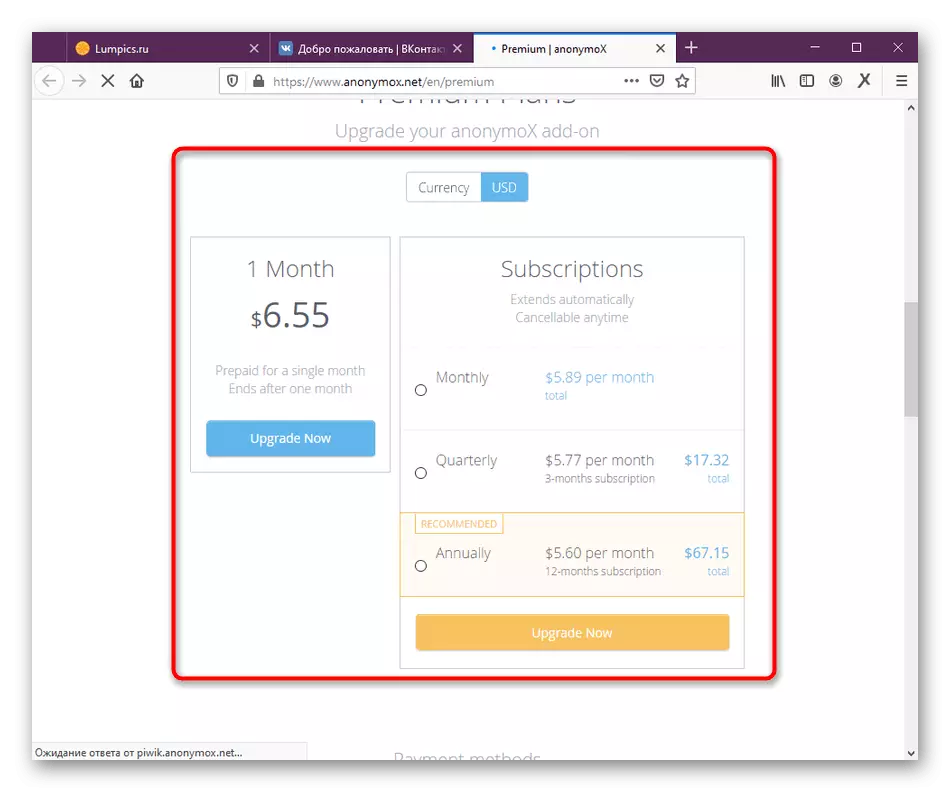
Step 5: Activation of Premium Version
Above, we have repeatedly said that the add-ons under consideration have a premium version, which opens a huge number of countries and IP to connect with the best communication quality. If you have a desire to buy it, do it like this:
- Open the Anonymox menu and click on the "Premium IS Inactive" inscription.
- There will be an automatic transition to the official website. Here you can get acquainted with tariff plans and learn about the benefits of a paid assembly.
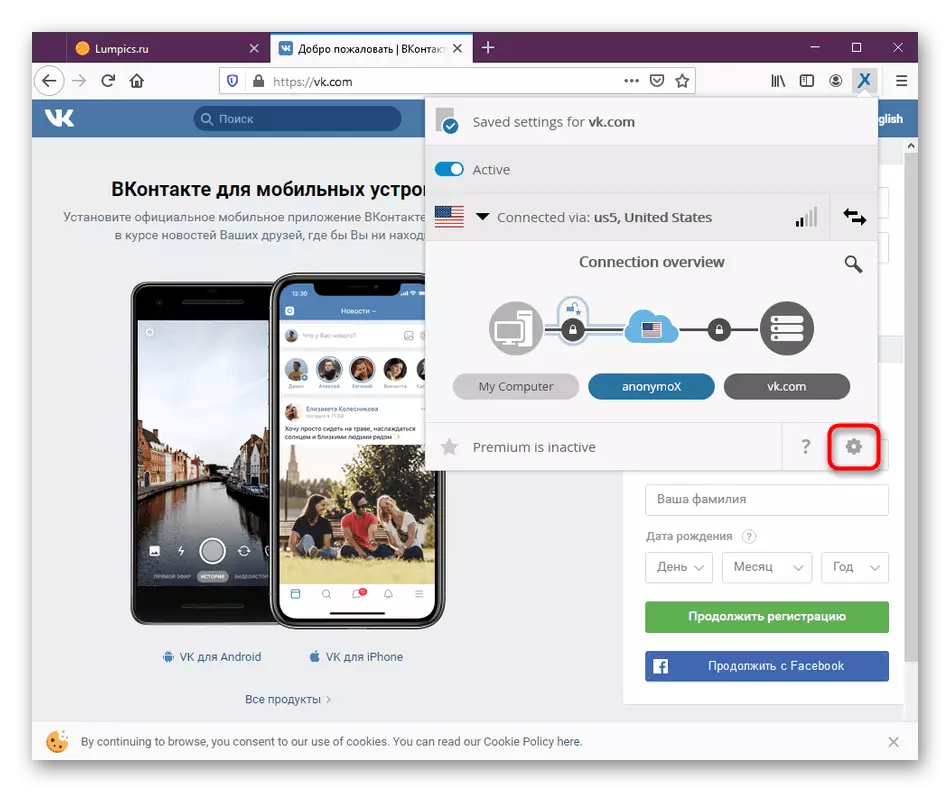
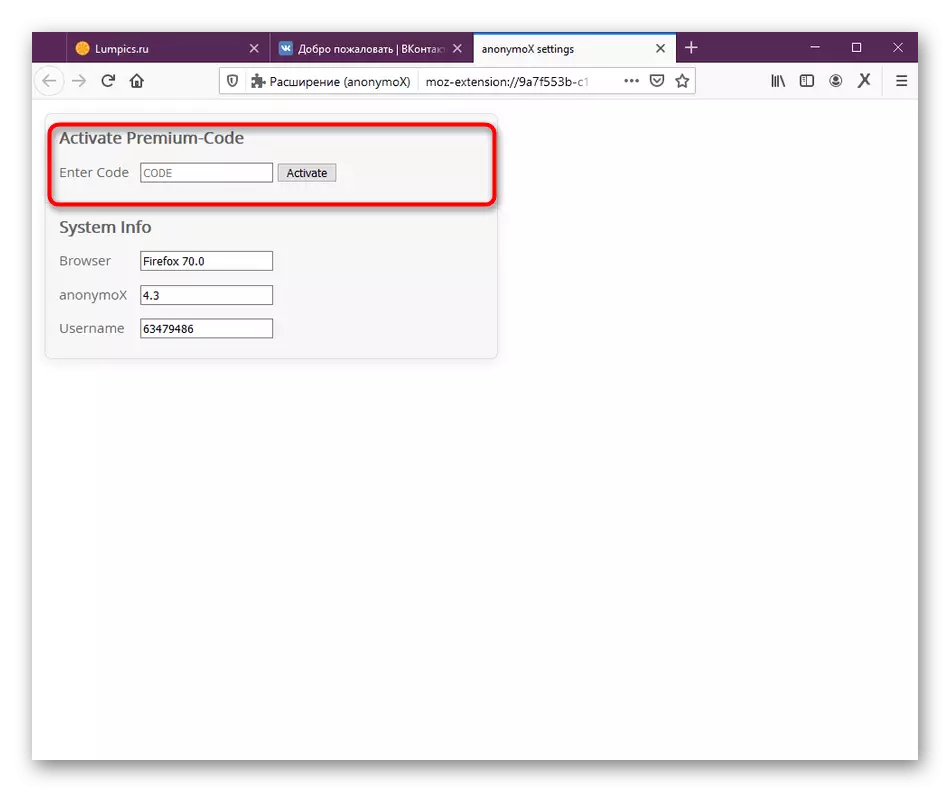
- If you received the key after the purchase, but the updates did not happen, go to the add-on settings through its menu.
- It manually enter the code and activate it. After that, there will be a restart of the application, and you can proceed to work.
We told about all aspects of interaction with the supplement changing IP, Anonymox for Mozilla Firefox. If, as a result, you decided to choose another option for yourself, read the submitted material to learn about the available analogues.
Read more: Methods for bypassing locked sites in Mozilla Firefox