

Communication of a group of people in one chat is an opportunity provided by almost every modern messenger. The popular Viber provides functions that allow any service participant very simply and quickly create group chats, consider what actions need to be done to solve this task in Android, iOS and Windows environment.
Regardless of the application option, which is used to access the Viber service features, before combining its participants in one chat, it is desirable that their identifiers are entered into the address book of the user's messenger, initiating group communication.
Read more: How to add contact in Viber for Android, iOS and Windows
How to create a group in Viber for Android
Let's start considering possible solutions of the task from the title of the article on the example of the most common version of the messenger - Viber for Android. The creation of the group here is very simple.

Method 1: Tab "Chats"
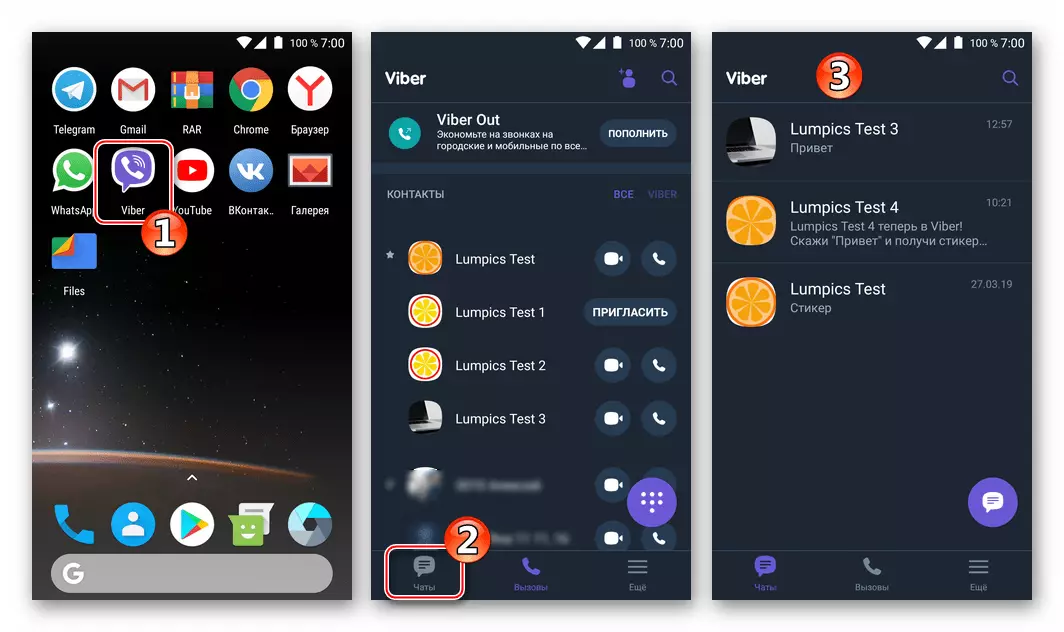
- Open Viber for Android or go to the "Chats" section if the messenger is already running.
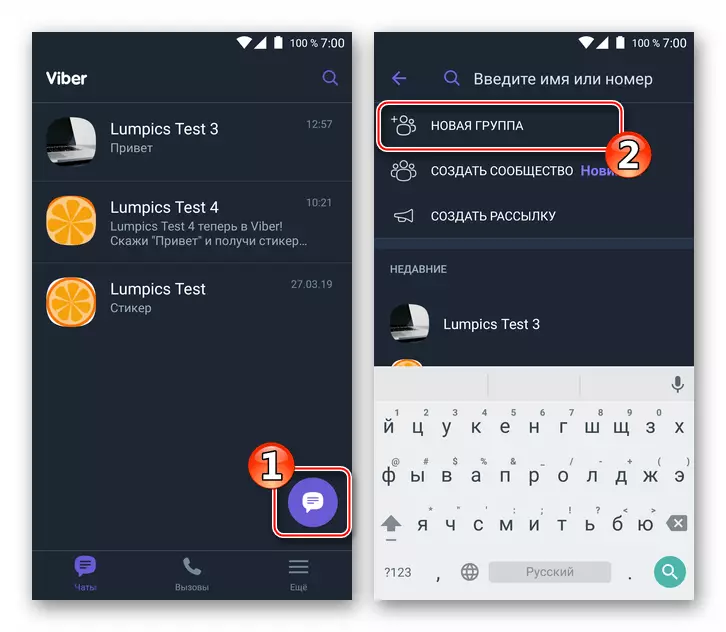
- We touch the "Write" icon, always located on top of the list of headers of existing dialogs. Next, click "New Group".
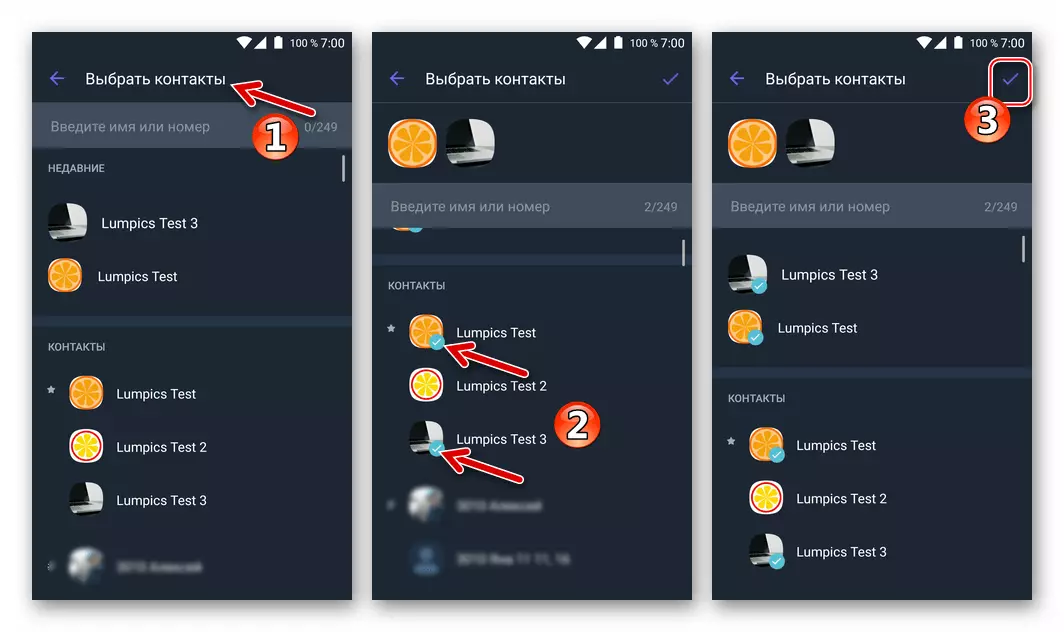
- Tabay by the names of the contacts added to the group chat created, thus highlighting them. After the avatars of all alleged conversation participants are noted, click on a tick in the upper right corner of the screen.
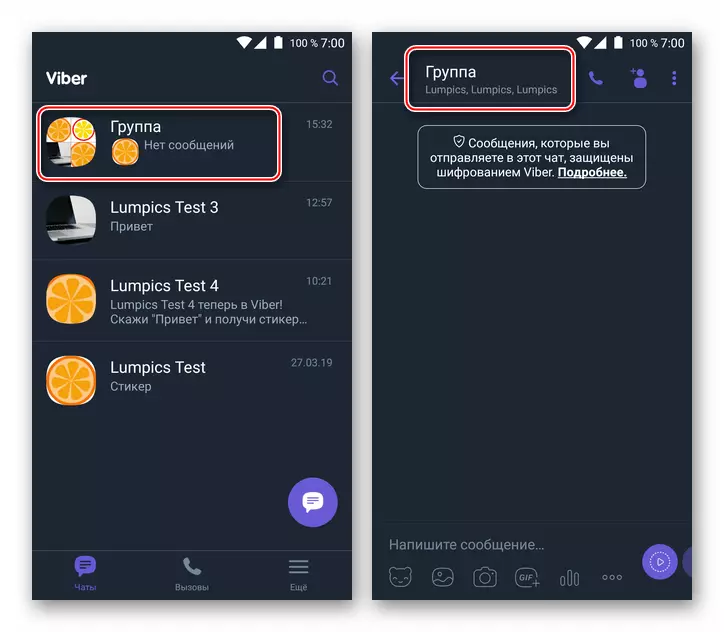
- In fact, a peculiar public in Vaiber is created and already functions. Next you can do the design of the group.
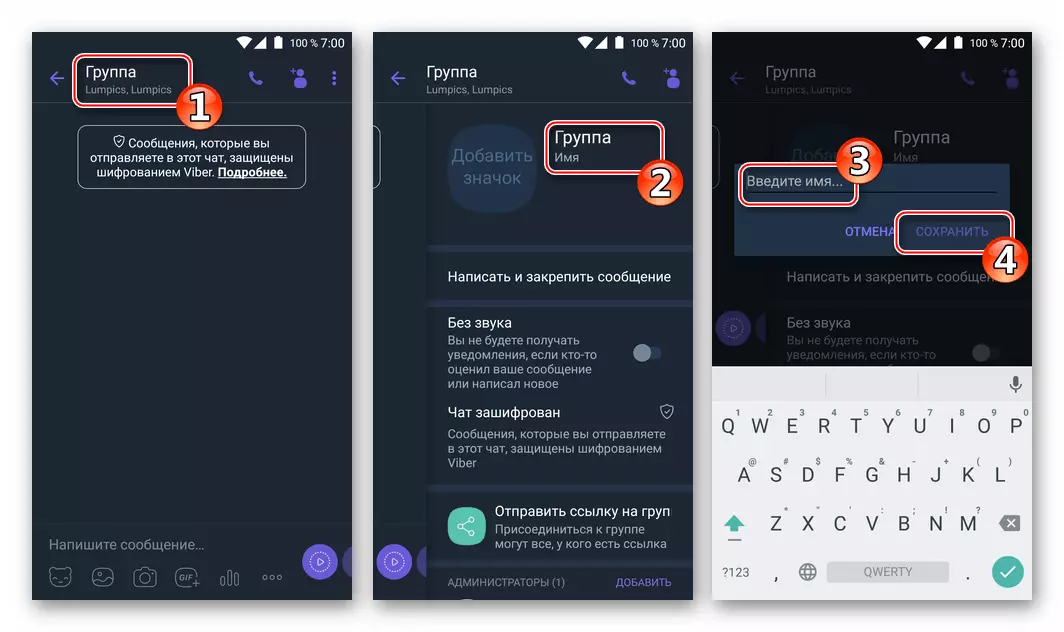
- Tapack on the Assatically assigned name "Group" at the top of the screen concerning the "name", we enter the name and confirm the rename by clicking on "Save".
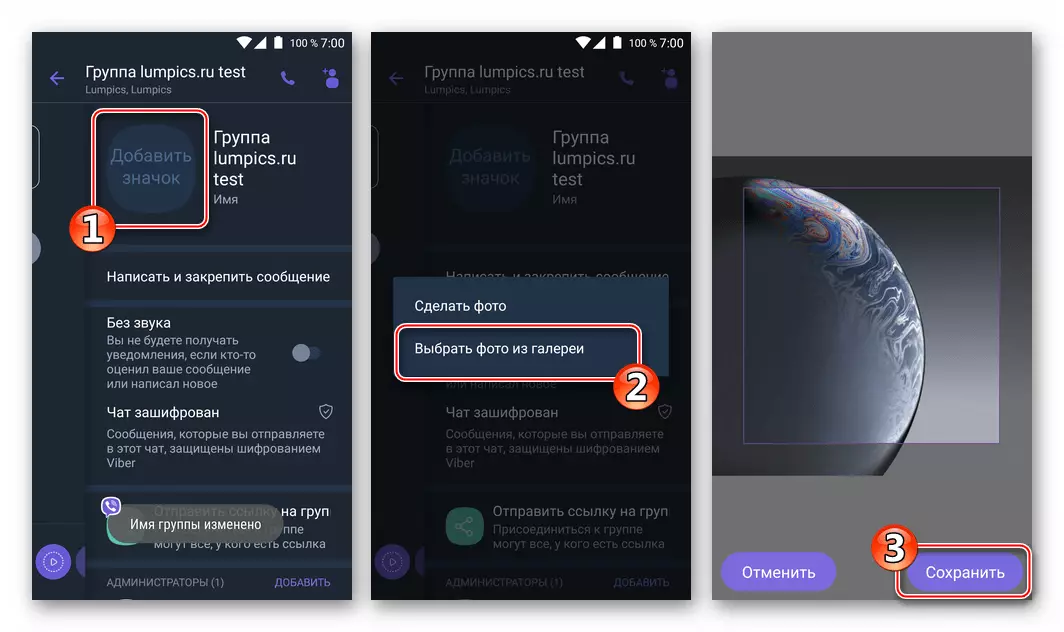
- Click "Add an icon" and select the image from the memory of the smartphone (or we make photos using the camera), which will become the group logo.
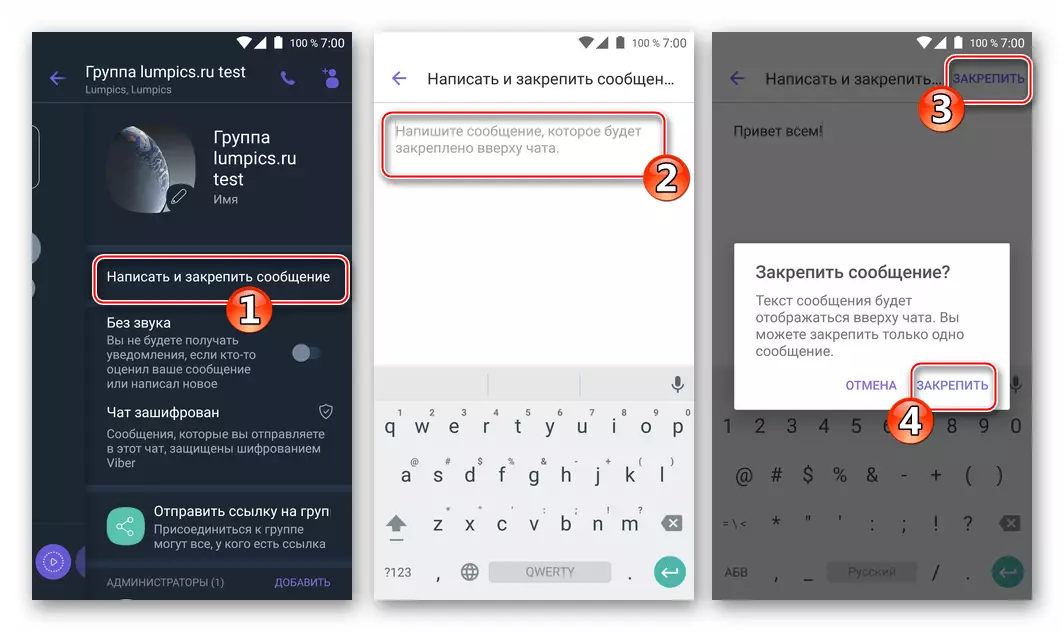
- Create an assigned message at the request, always demonstrated by the conversation participants. We click "write and consolidate a message", we introduce the text and confirm the creation of "status" with a touch of "consolidate" twice.
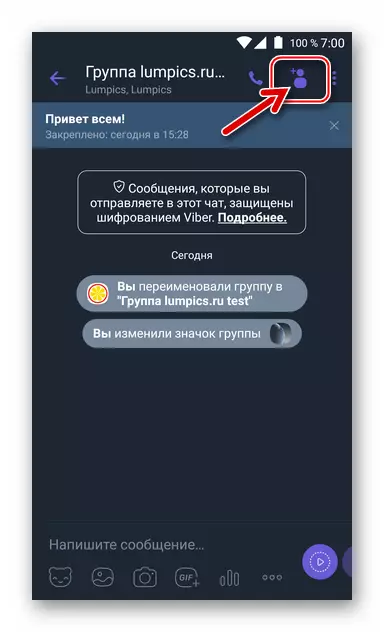
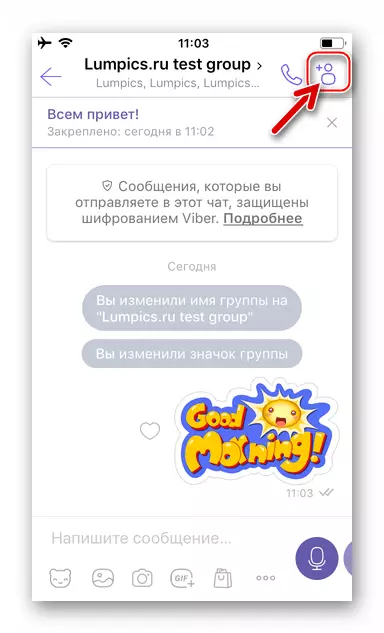
- To replenish the list of members of the group with new persons tapack on the "Add" icon in its header area.
Further:
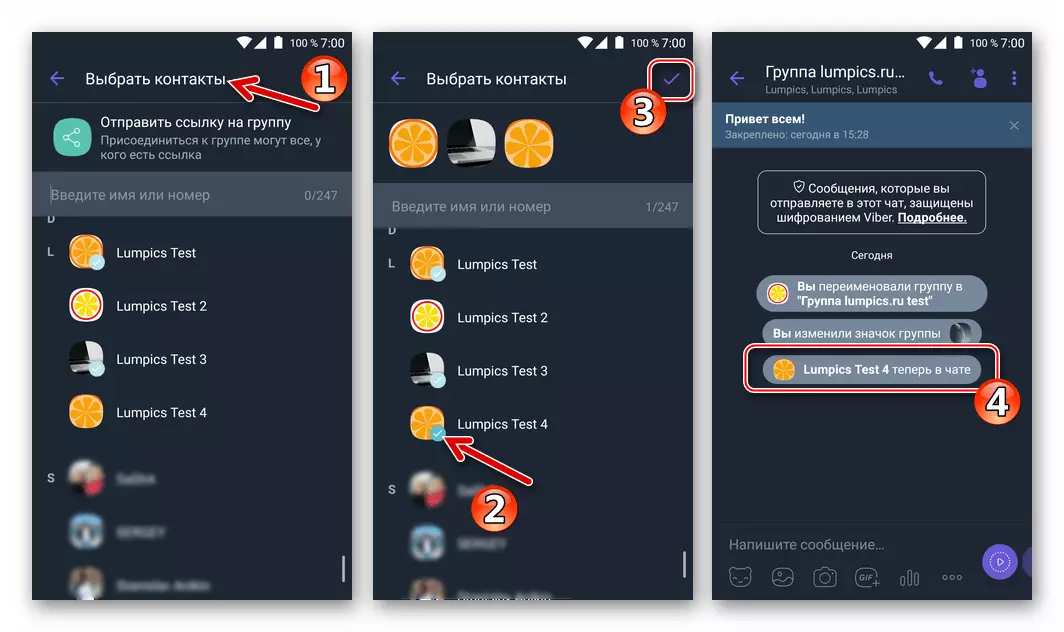
- We set the mark on the avatars of the contacts present in the Viber's address book, and confirm their addition to the tick-tick group at the top.
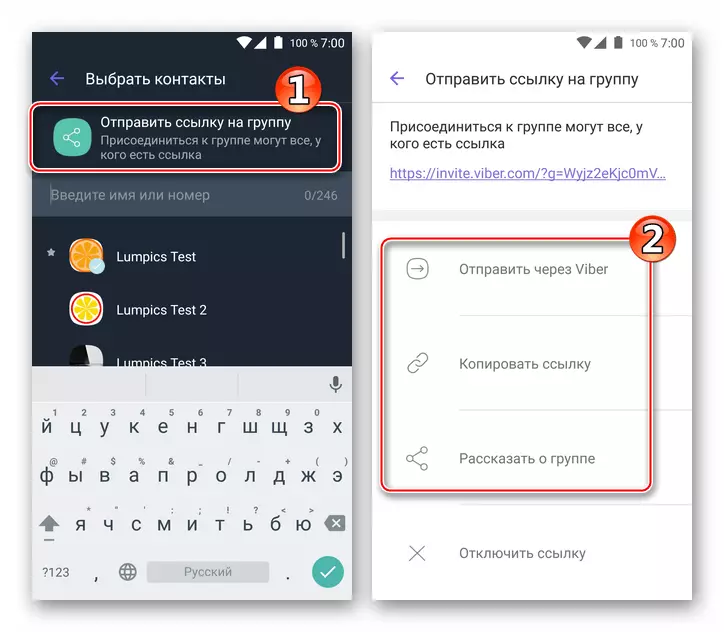
- Or use to invite new participants in the chat item "Send a link to a group", tapping on its name and then choosing a method for transmitting an Internet address to another user in the menu that opens.
Method 2: Existing dialogue
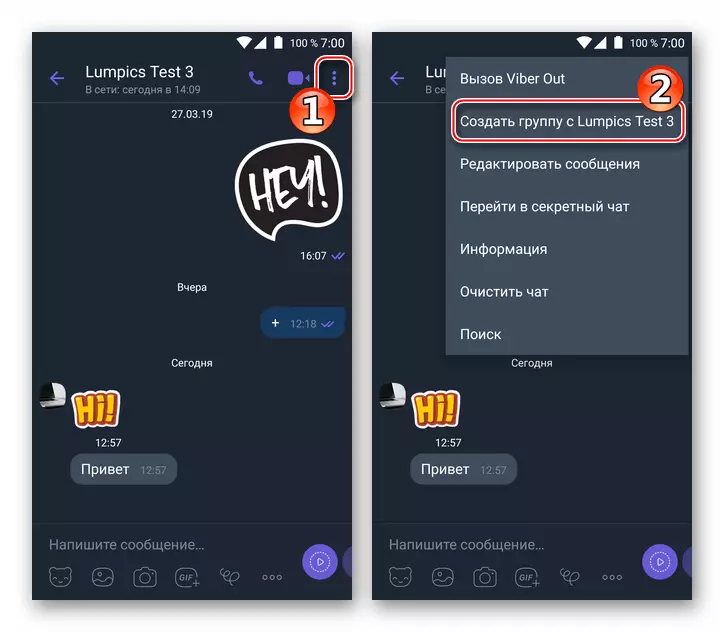
- Being on the conversation screen, call the options menu by touching three points on the right above. Select the "Create a group from username" item.
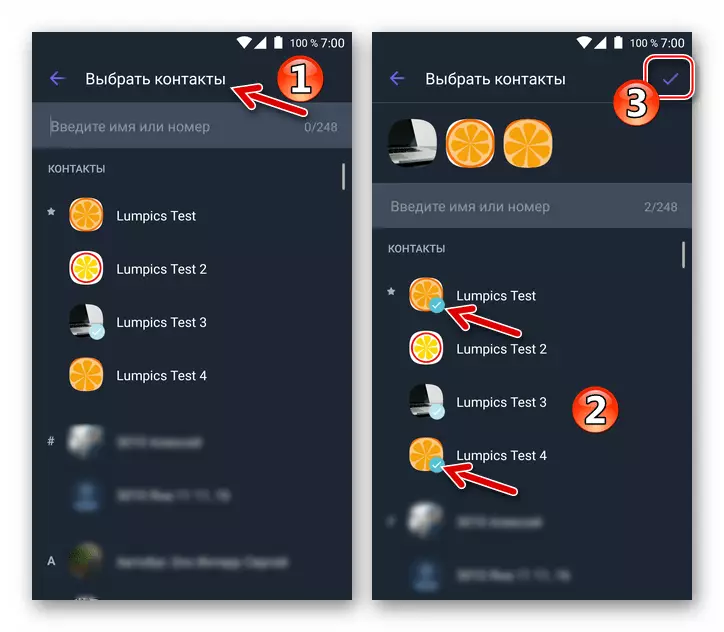
- I put the mark on the avatars of all contacts added to the group chat from the address book of the messenger and confirm your choice tape on the check mark at the top of the screen.
- We draw up a group and add new participants to it in exactly the same way as described in the previous instruction from this article.
How to create a group in Viber for iOS
To organize a group chat, users of Viber application for iPhone as well as preferring the above described Android will not have to make special efforts. Operational algorithms are identical for both mobile operating systems, and the difference in actions is dictated only by some differences in the interface of the Messenger clients.

Method 1: Tab "Chats"
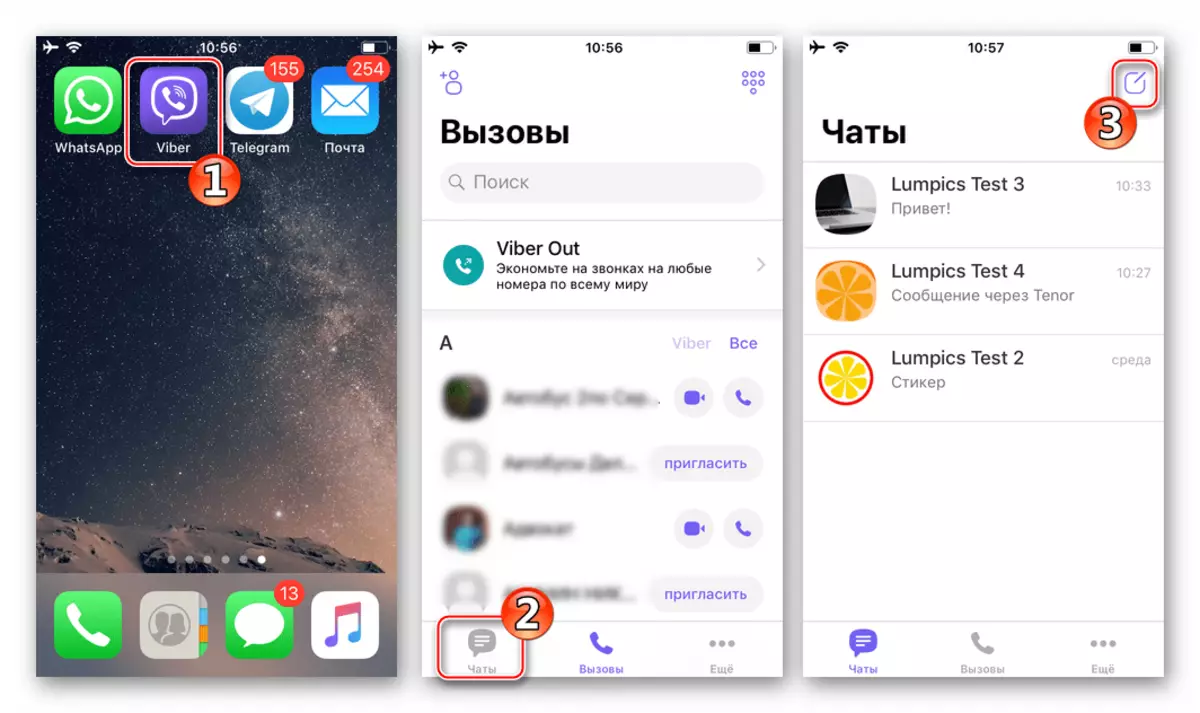
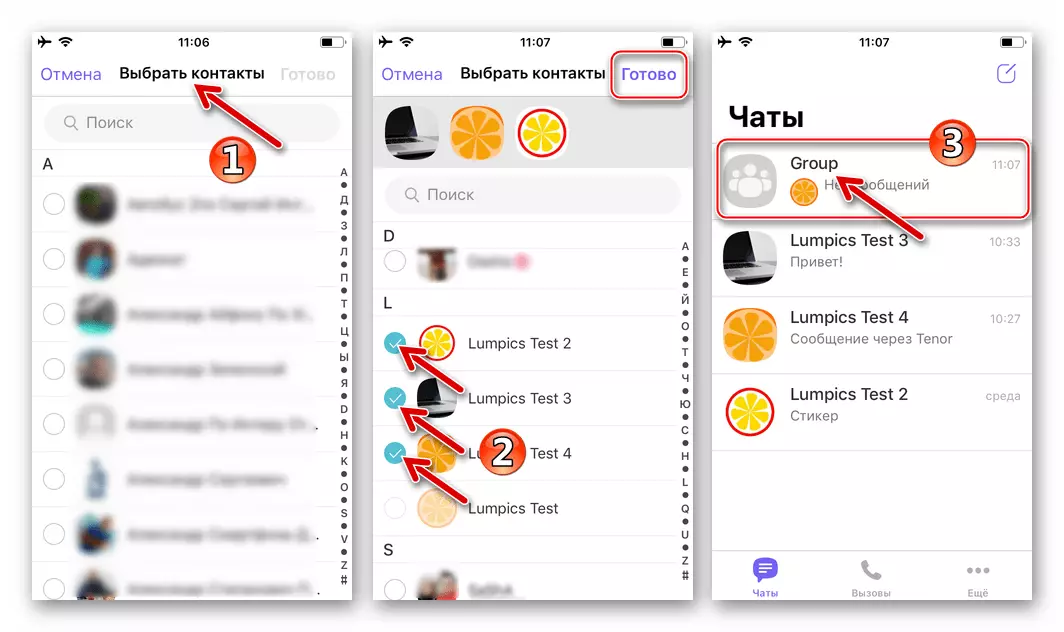
- By running the messenger on the iPhone and turning to the "Chats" section, taping on the "Write" button, located at the top of the screen on the right.
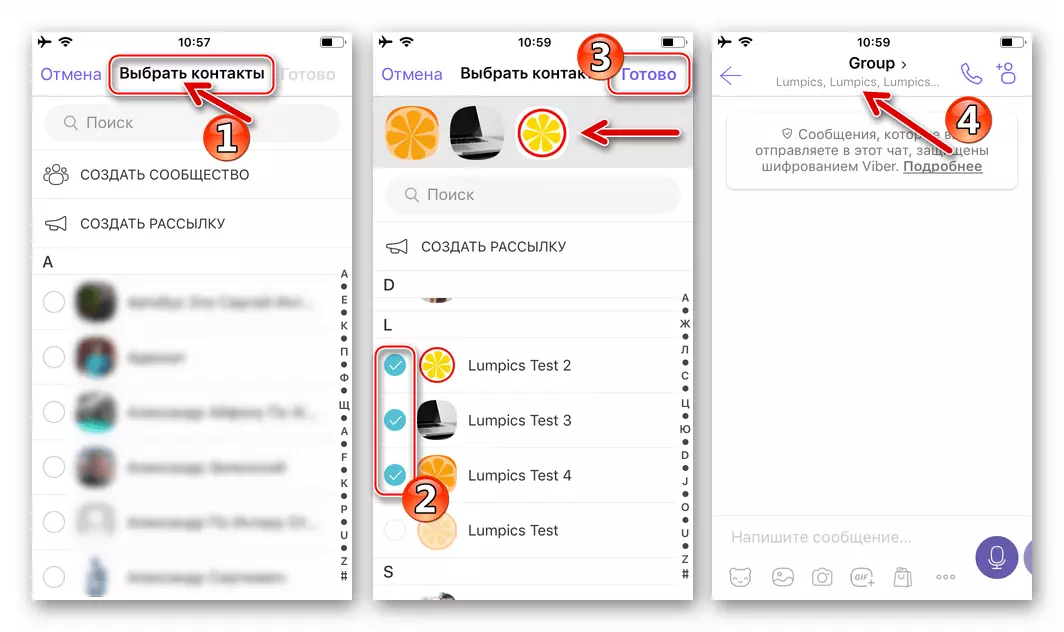
- I put the marks near the names of the future group participants, in the address book of the Messenger. After completing the choice, tada "ready."
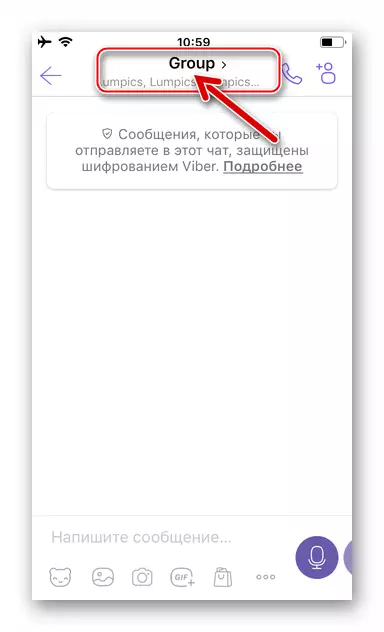
- We are issued as part of the Vaiber Service Association. To do this, concerning the default "Group" assigned to him.
Further:
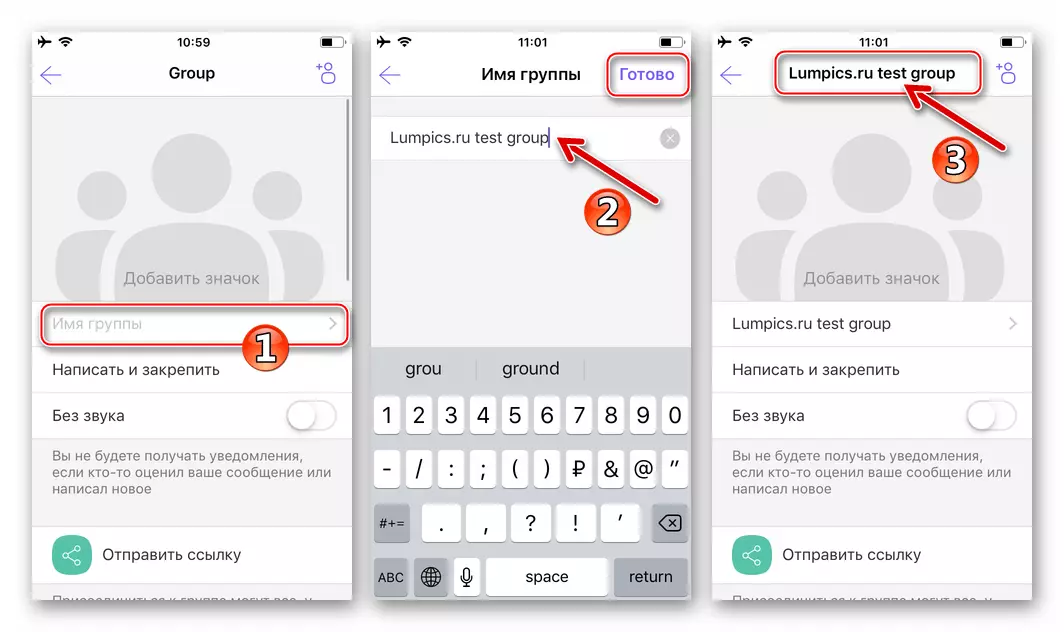
- We assign a name to the group by touching the relevant item, bringing the name and clicking "ready."
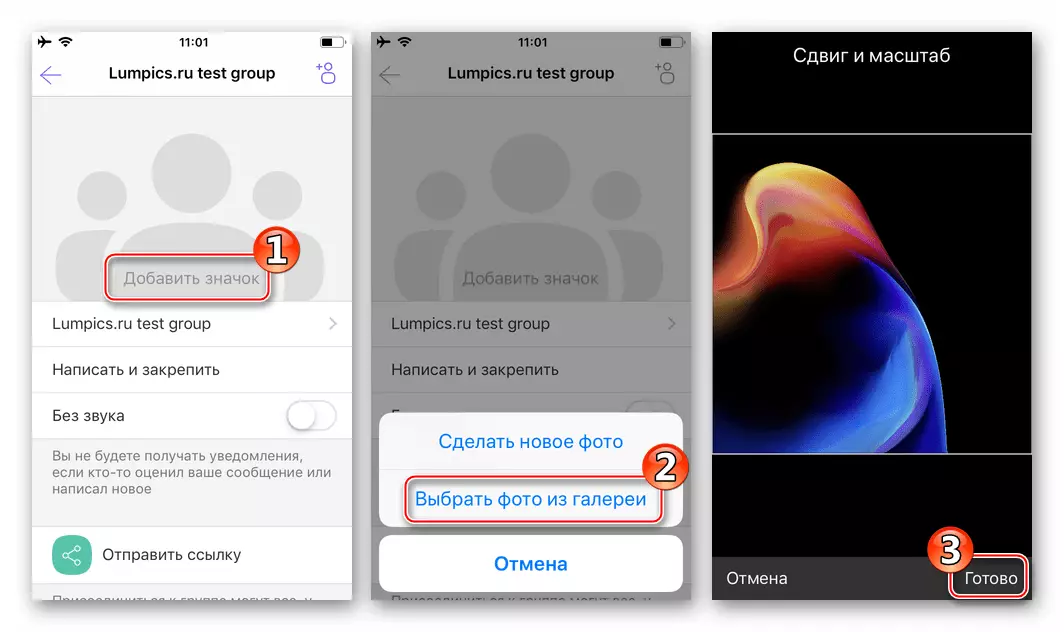
- Add avatar. Click "Add an icon", go to the "gallery" and find a suitable picture there (or make a new photo using a smartphone camera). Confirm the image selection by TAP is ready.
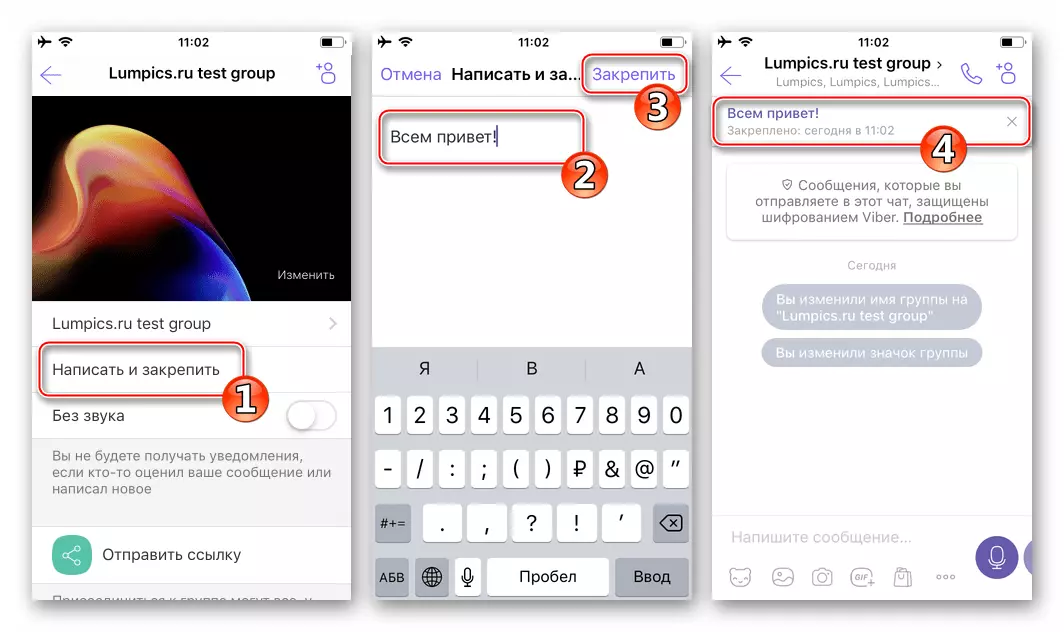
- If you wish, we place the top of the conversation a short message, always visible by the participants. To do this, click "write and secure", we introduce the text and concern to "fix".
- In the future, the list of group chat participants can be expanded. To add new users, we use a button with a man's image in the upper right corner of the conversation screen.
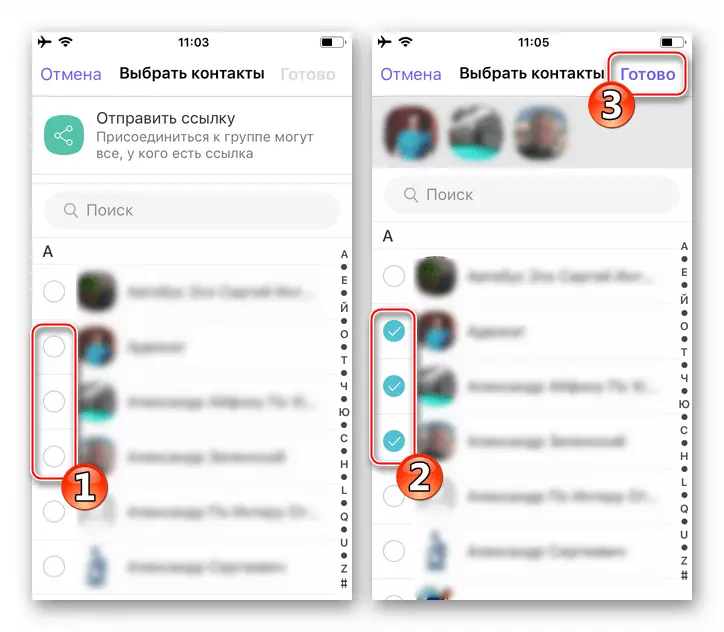
After clicking on the specified item, two options for action become available:
- Select the contacts from the Address Book of Weber by simplication of marks near the names in the displayed list and click "Finish".
- Tabay "Send a link" and then specify the system, how the link invitation to the group will be delivered to the addressee (AM).

Method 2: Existing dialogue
- Opening the conversation screen with another member of the messenger, taping by the name of the interlocutor at the top of the screen. In the menu that appears, select "Create a group with username".
- We set the marks opposite the names of the contacts of the alleged participants of the future group. Upon completion of the procedure, tadam "Ready".
- We perform paragraphs 3-4 of the proposed instructions "Method 1", that is, we make a combination and add / invite new users to it.

How to create a group in Viber for Windows
Weber users for PC are familiar with some limited functionality of this client in comparison with the variants for mobile OS. In this case, the creation of a group chat in an application for Windows is not only possible, but can not be implemented by the only method.

Method 1: Menu "Conversation"
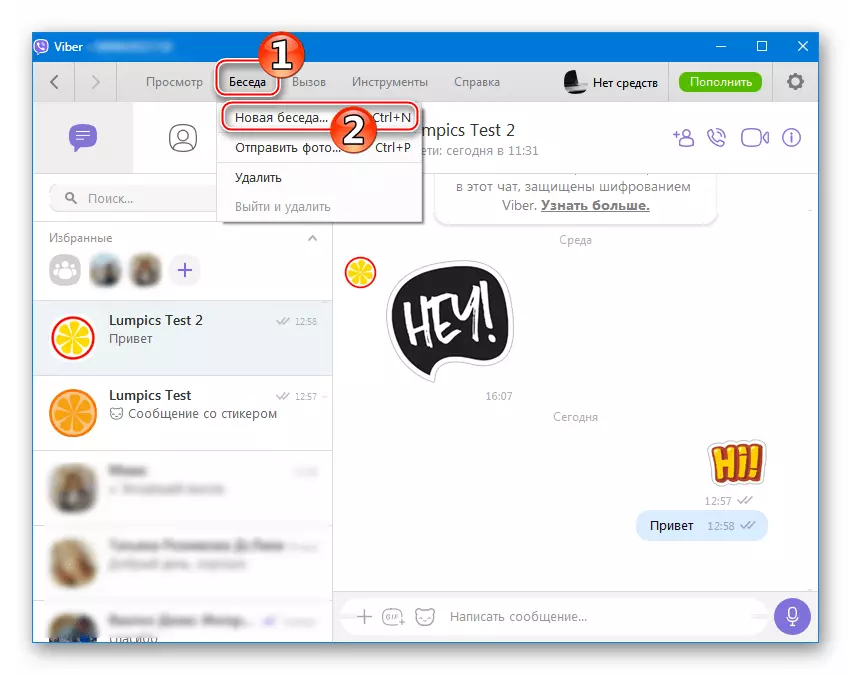
- The click on the "conversation" in the Windows client window, you open the menu and select the "New Conversation ..." item.
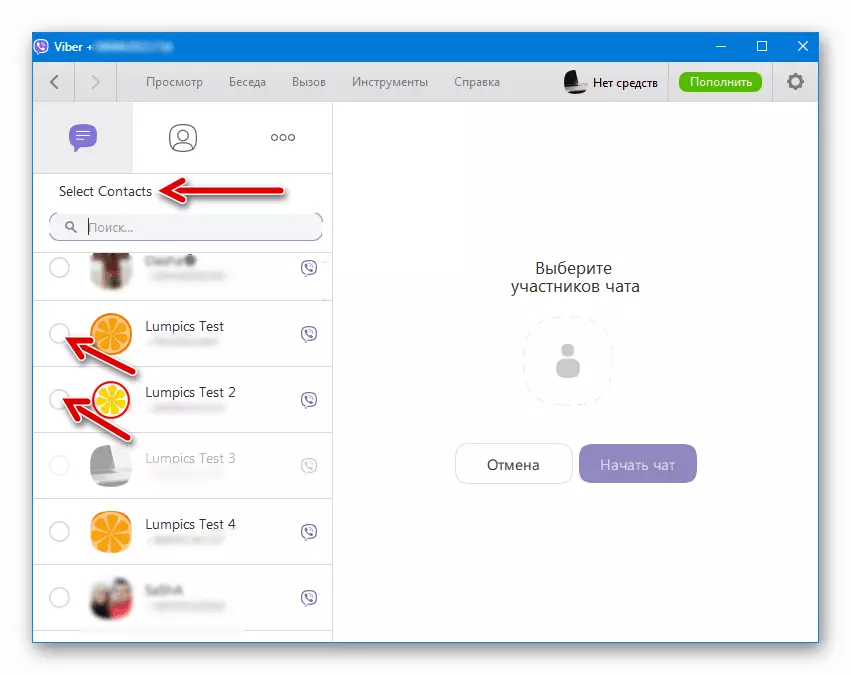
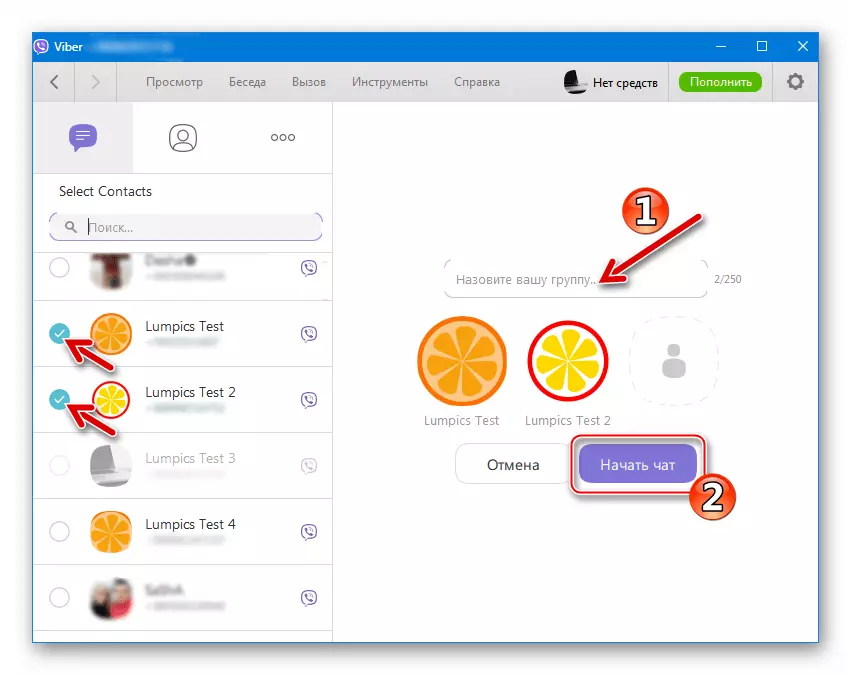
- In the "Select Contacts" area, on the left windows, we put the mark near the names of the participants being created by the group chat.
- After completing the choice of interlocutors, we write in the appropriate group name field, and then click "Start Chat".
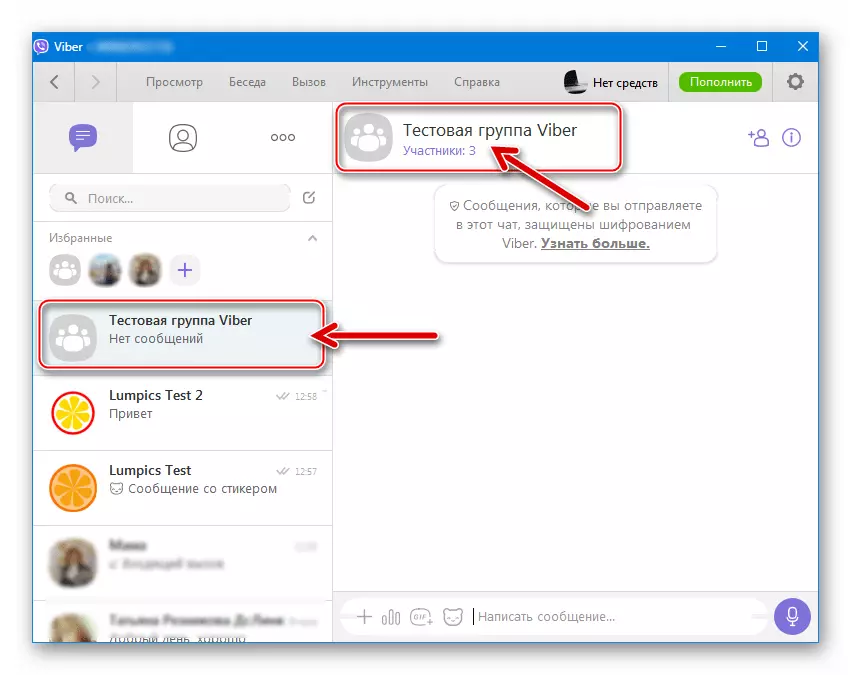
- After executing the previous point, the instructions considered task is considered solved, the exchange of information between several people is already available.
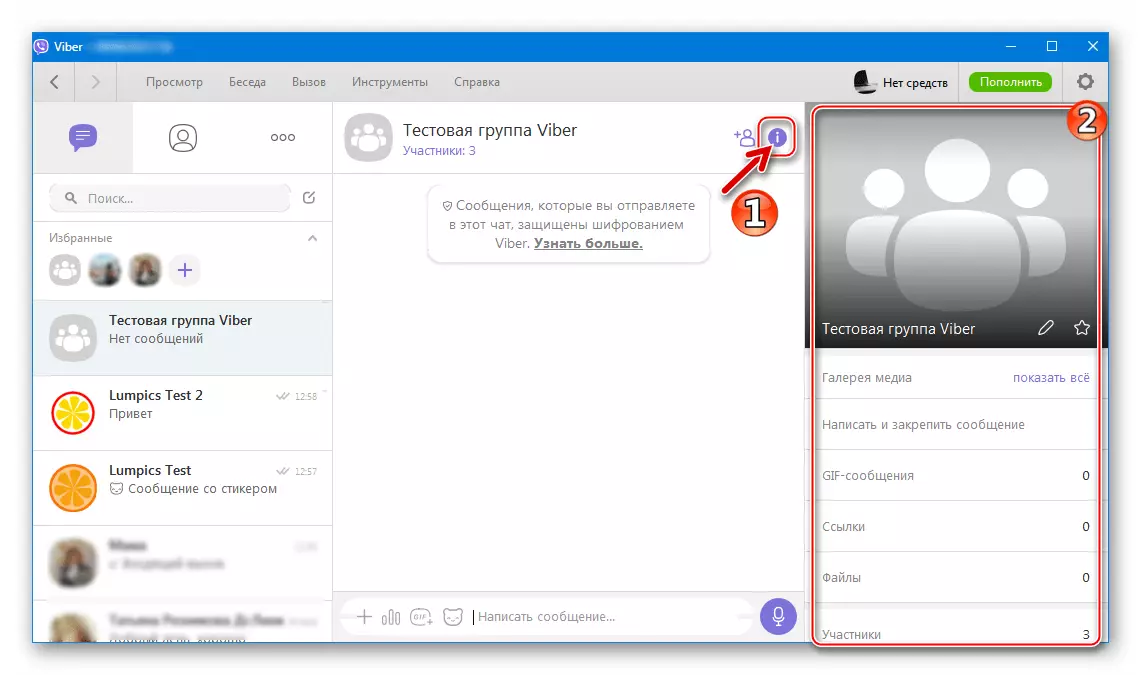
- Additionally, you can bring a group to the corresponding view. For this:
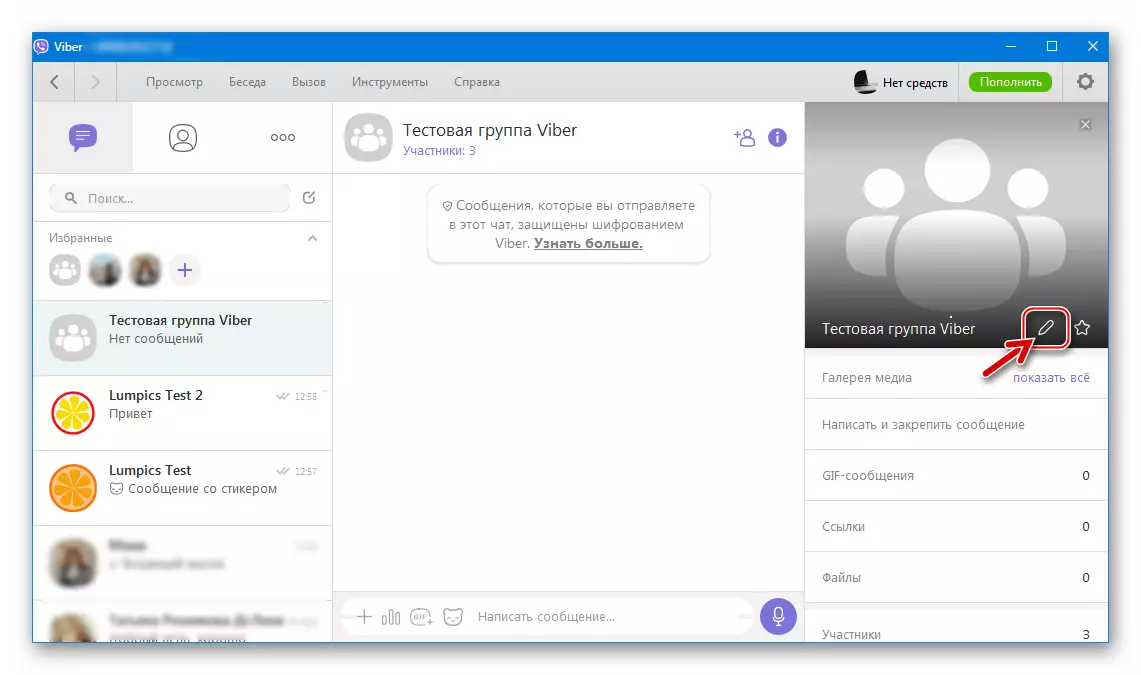
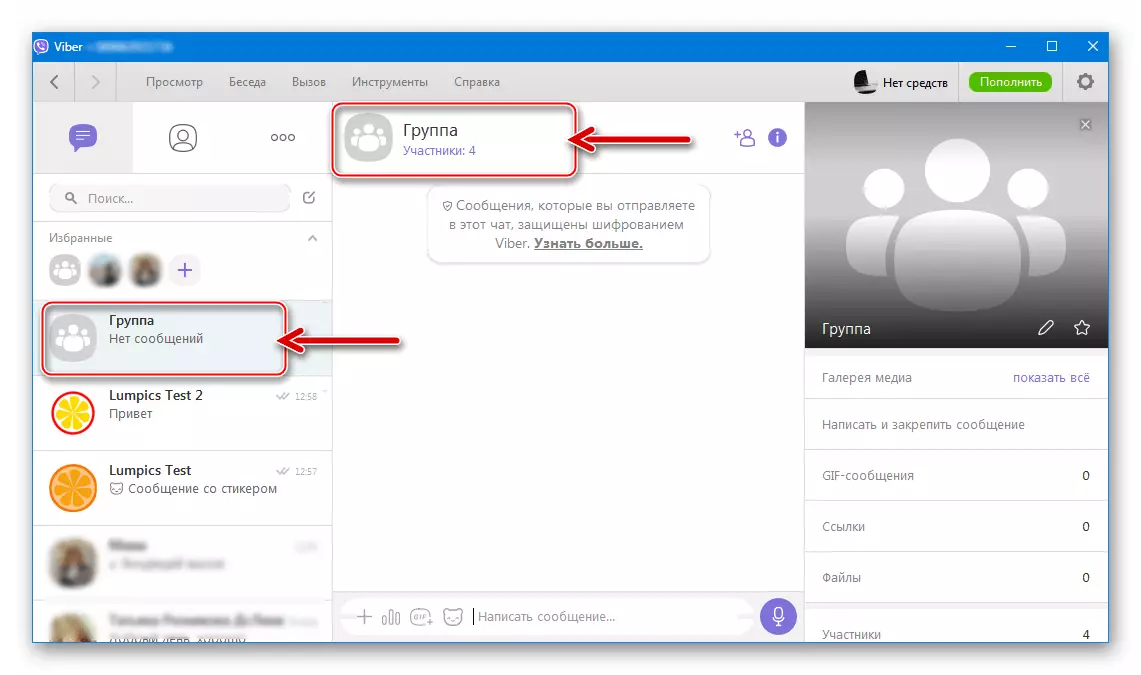
- Click on the icon "I" in the heading area of the conversation.
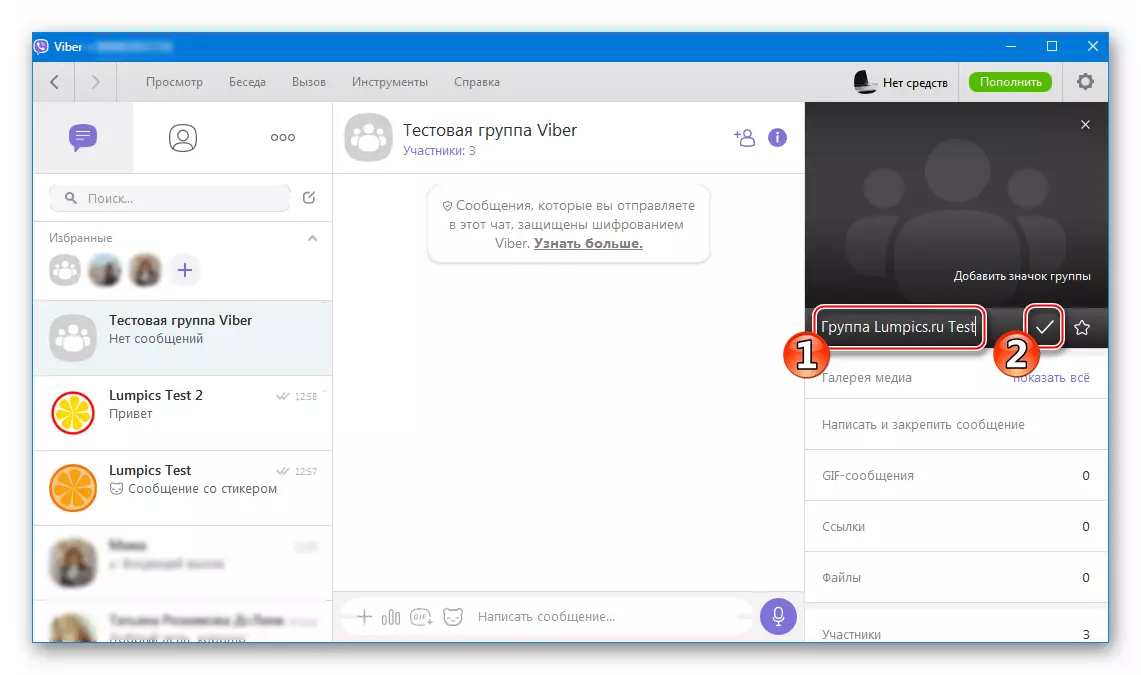
- In the panel that appears on the right, click on the image of a pencil to change the name of the chat.
Entering a new name, confirm the change in the checkmark.
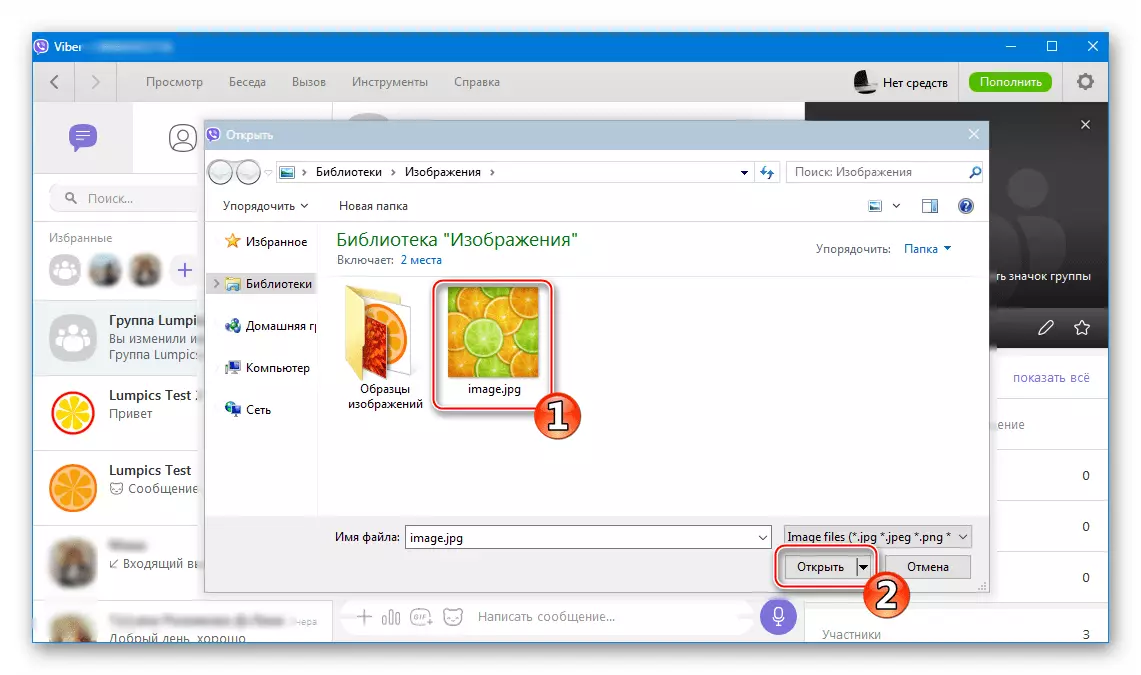
- We bring the cursor to the area above the chat name and click on the "Add group icon" displayed to set your own image avatar.
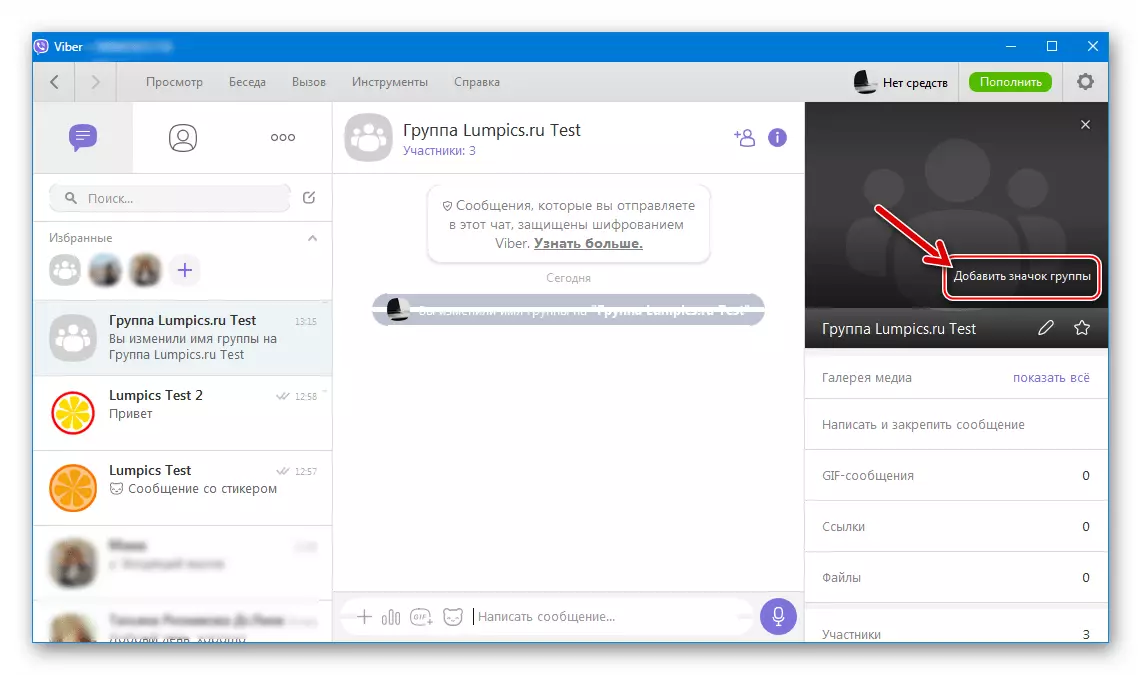
Next, specify the path to the picture on the PC disk, select the desired file and click "Open".
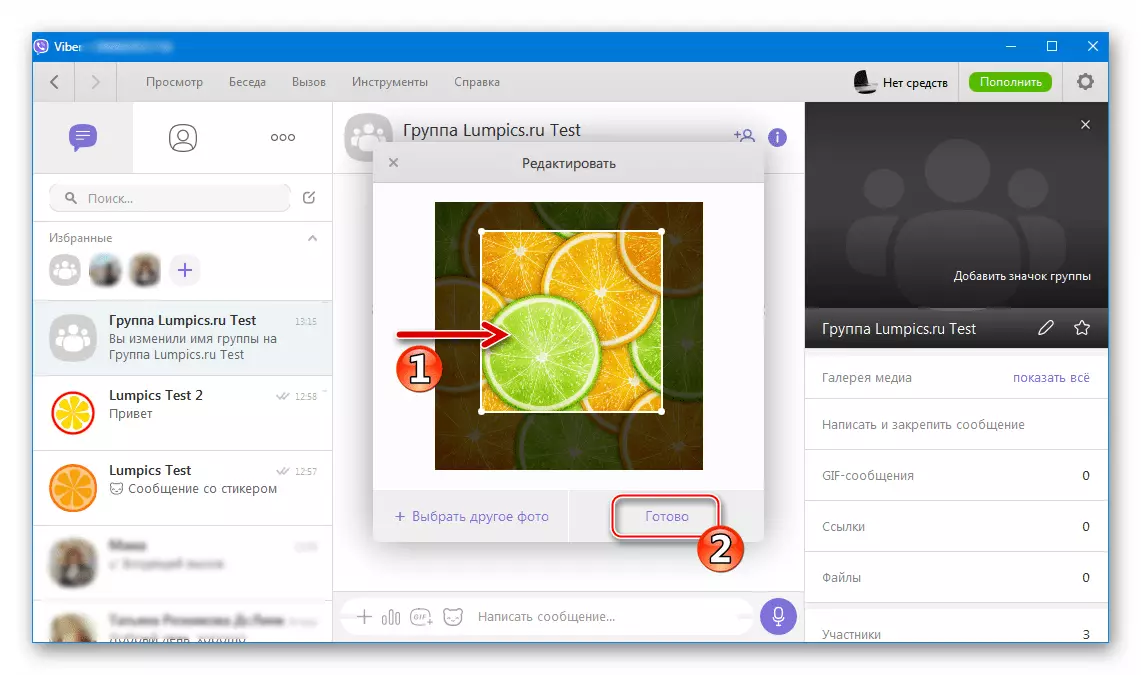
We highlight the image area that will be displayed as a conversation icon in the Edit window and click "Finish".
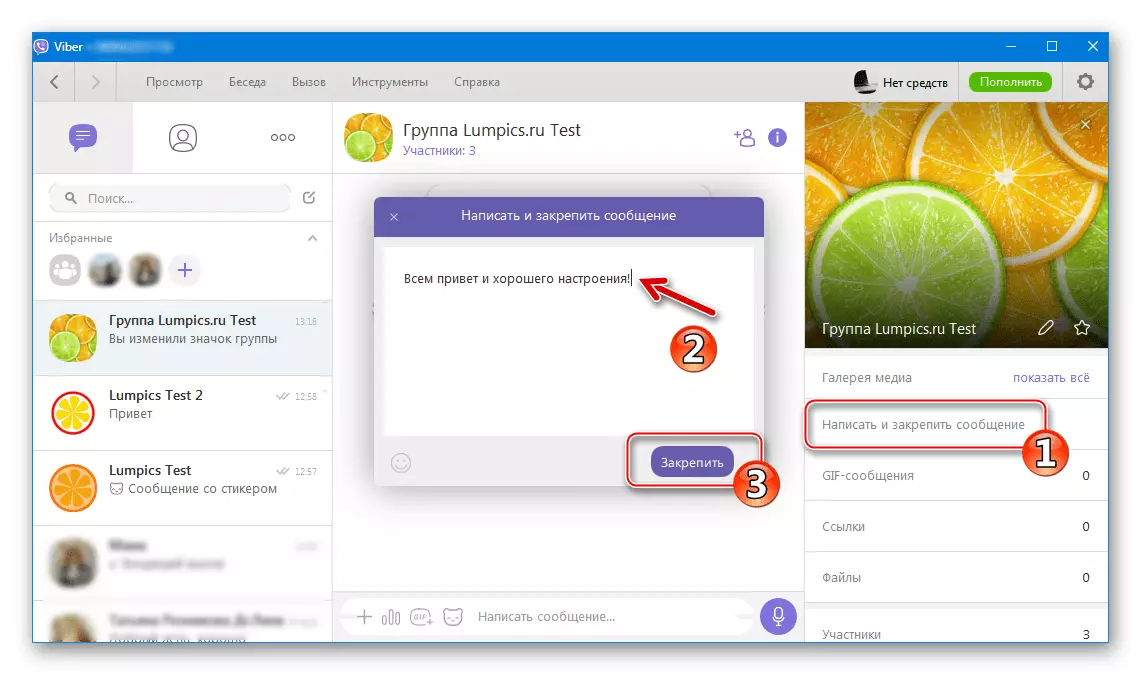
- Optionally, we can "write and consolidate a message" - a peculiar "status" chat broadcast by all its participants.
- Adding new interlocutors to a Viber group with a PC is subsequently possible only from the list of contacts stored in the Messenger's address book (if a link is required - we use a synchronized mobile client). To replenish the chat with new users from the Vibeber application for Windows:
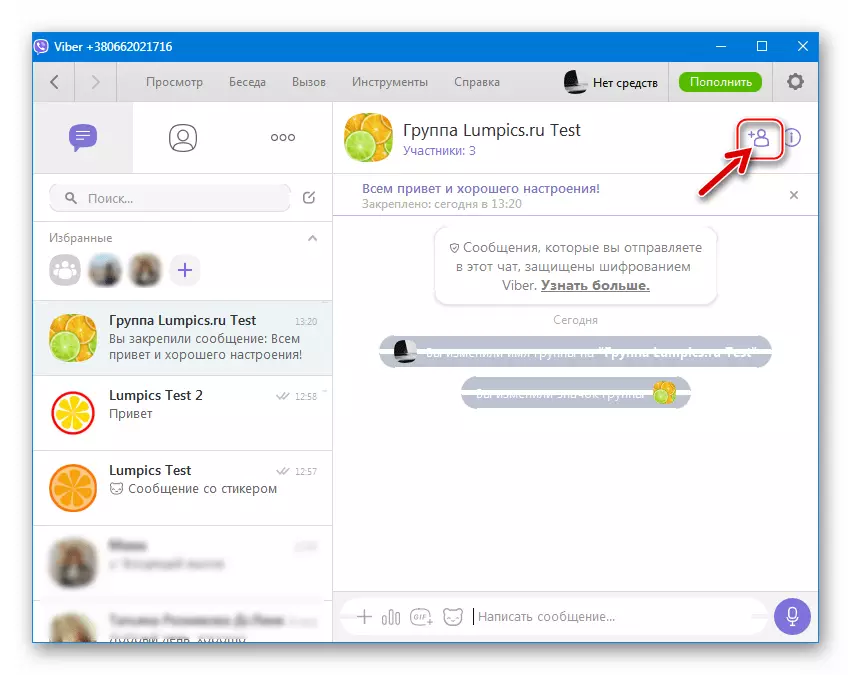
- Click on the "Add" icon in the area containing the name of the group.
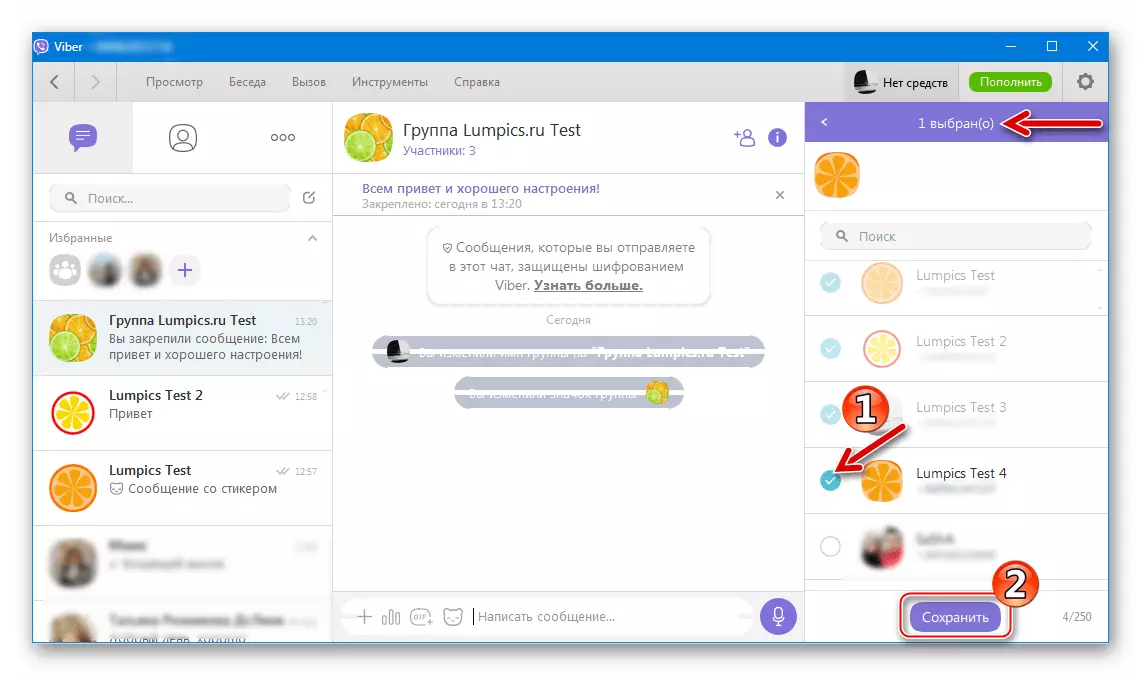
- In the one that appears on the right, we set the marks near the names of the added contacts and then click "Save".
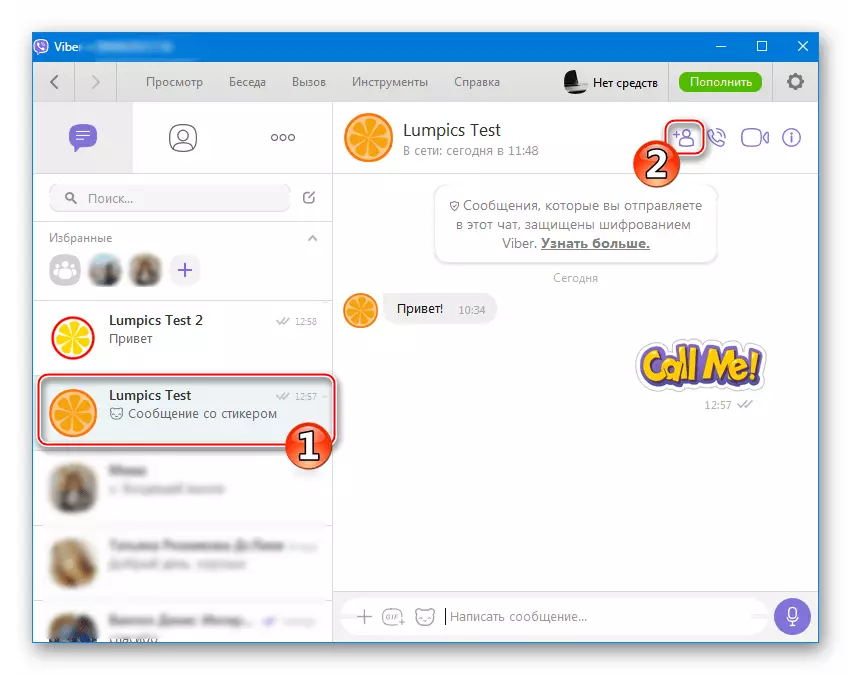
Method 2: Existing dialogue
- Click on the "Add" icon, located on the right of the name of the participant with which the dialogue is underway through the VIBERS for Windows.
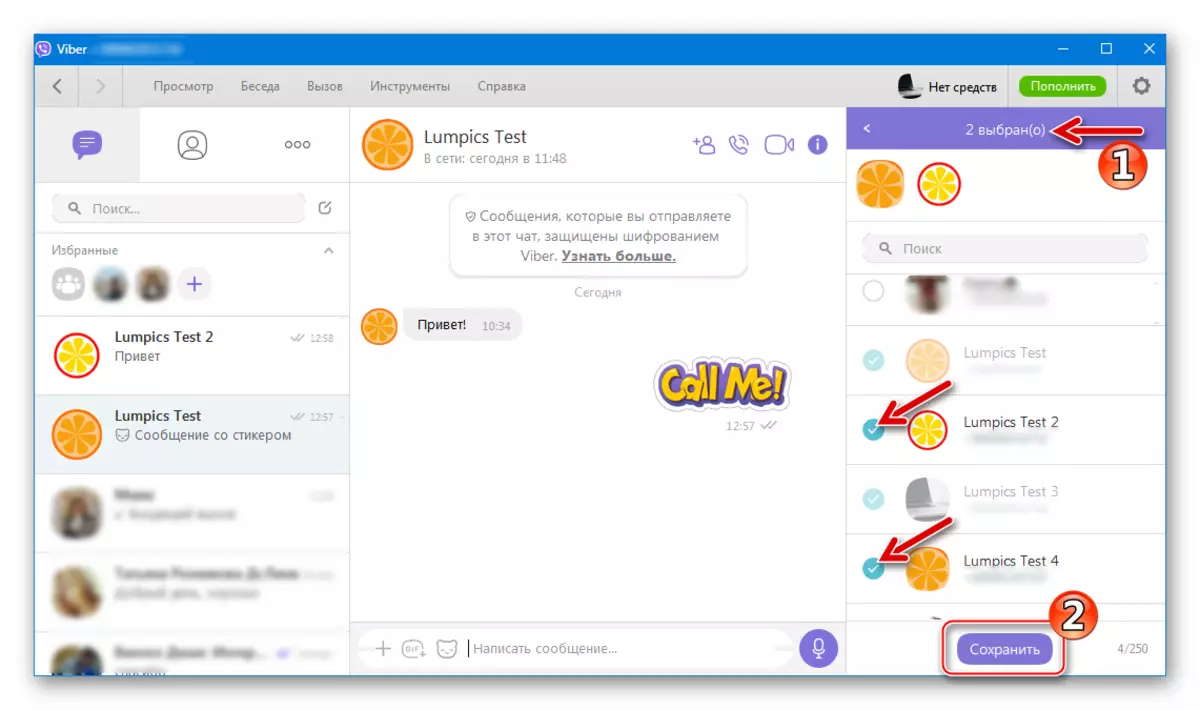
- We set the checkboxes in checkboxes near the names of the Group's future participants in the Messenger and click "Save".
- If you wish, change the decoration of the chat and add new users in the same way as indicated in paragraphs 5-6 of the previous part of the present material.
As you can see, the instructions for organizing groups in Viber are very short and consist of a description of the simplest steps, so it can be argued that the possibility considered in the article is available to all, even novice users of the messenger.