

Step 1: Cover Preparing
If you want to achieve a unique and, which is important, attractive block design with relevant stories on the Profile page in Instagram, you will have to first pay attention to the procedure for creating suitable images. For this there are at least three solutions.Option 1: Ready solutions
The easiest way to prepare the cover is to search for ready-made options using any convenient search engine or on special photo hosting. One of the best resources can include Pinterest, providing a huge number of suitable images for different purposes without restrictions on the use.
Online service Pinterest
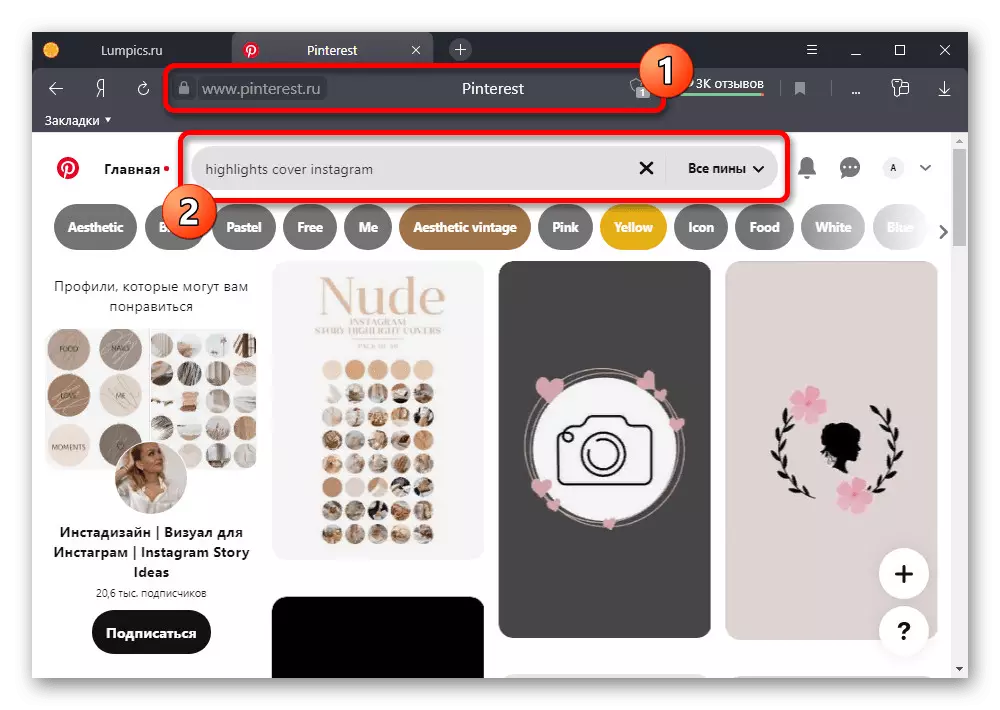
It is best to search for files on English-speaking requests and not forget about similar pictures that are selected based on open content. After the image or a whole set is found, you should download using the "Save As" item in the context menu of the Internet browser.
Option 2: third-party applications
Since ready-made options may not always be original due to free distribution, as well as non-satisfying requirements in minor details, a much more optimal solution will be the personnel creation of a file using one of the third-party applications. As part of the example, we will consider two enough powerful editor for different situations.
Highlight Cover Maker
For devices on different platforms, there are many applications that have practically completely copying each other and created to work on the covers for the current. As part of the instructions, we will consider one such program, while the closest analogue for another OS is practically no different.
Download Highlight Cover Maker from App Store
Download Highlight Cover Maker from Google Play Market
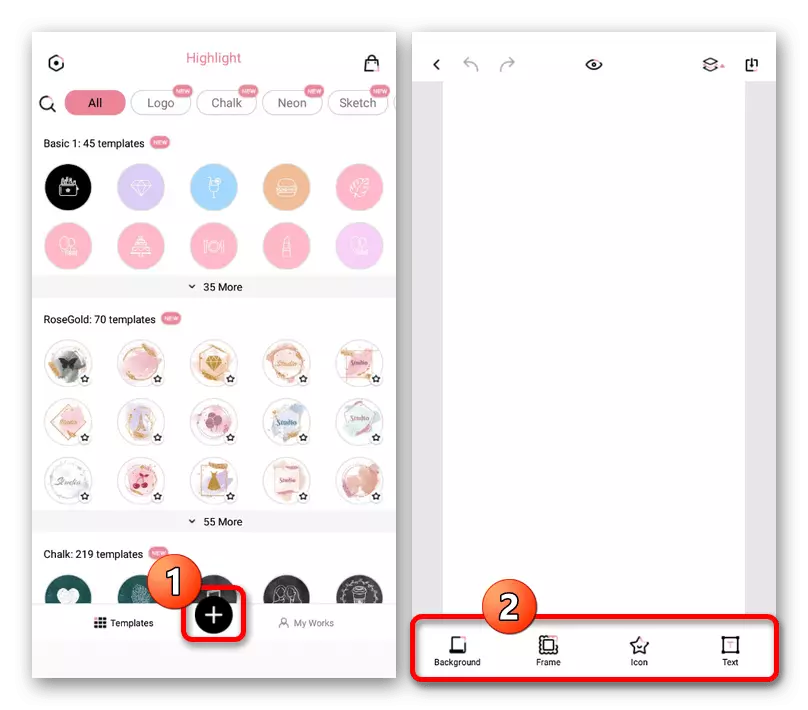
- After installing and opening a program on the bottom panel, click on the "+" icon and first go to the "Frame" selection. Here is a fairly large gallery with many free options.
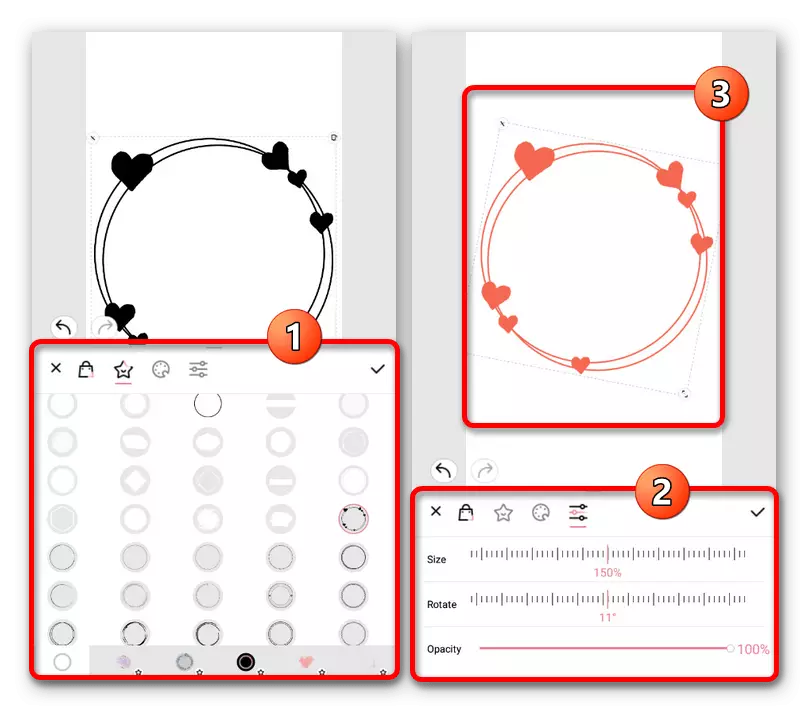
- The main advantage is to manually choose any color for the added element and use the convenient positioning and scaling tools. Upon completion of the object on the object, use the check mark on the bottom panel.
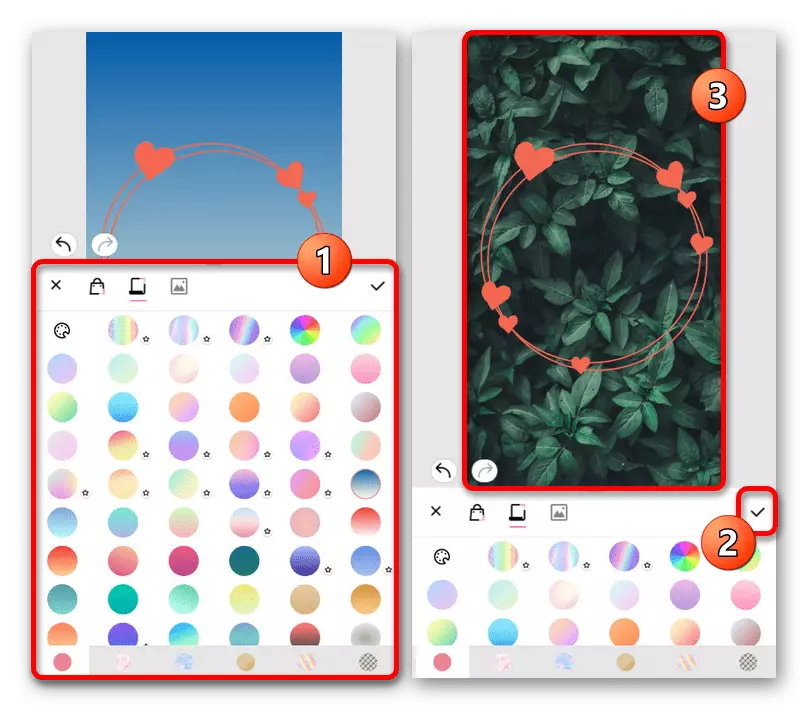
- Now you can go to the "Background" gallery to add the back background for the cover, which will always be behind the initially selected stroke. You can also use not only the standard library, but also upload your own graphic files.
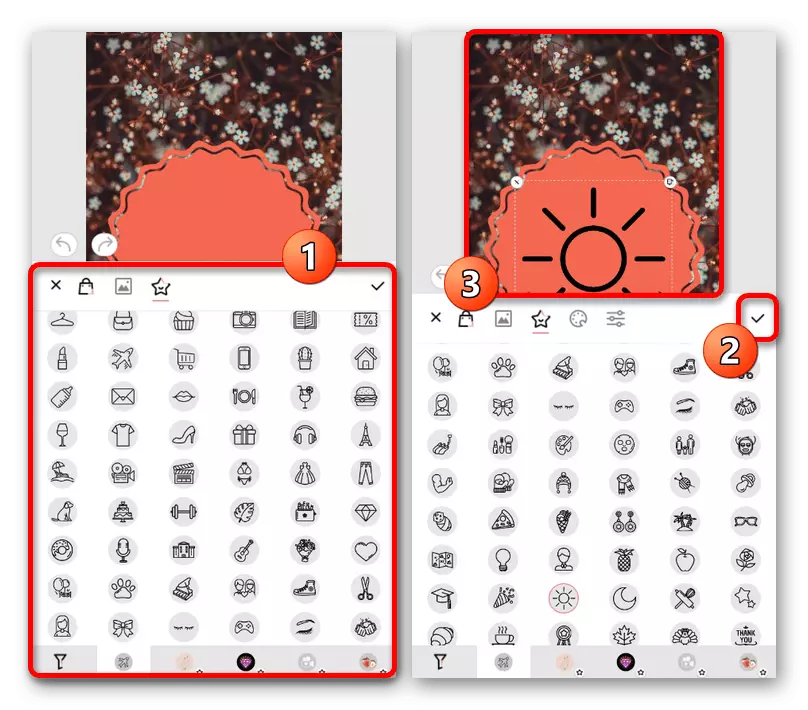
- Next, click the "Icon" button on the same bottom panel and select the gallery icon. By analogy with the background discussed above, a choice of both standard and user sketches is available here, with a difference only in the fact that for third-party icons it is impossible to set the color of the fill.
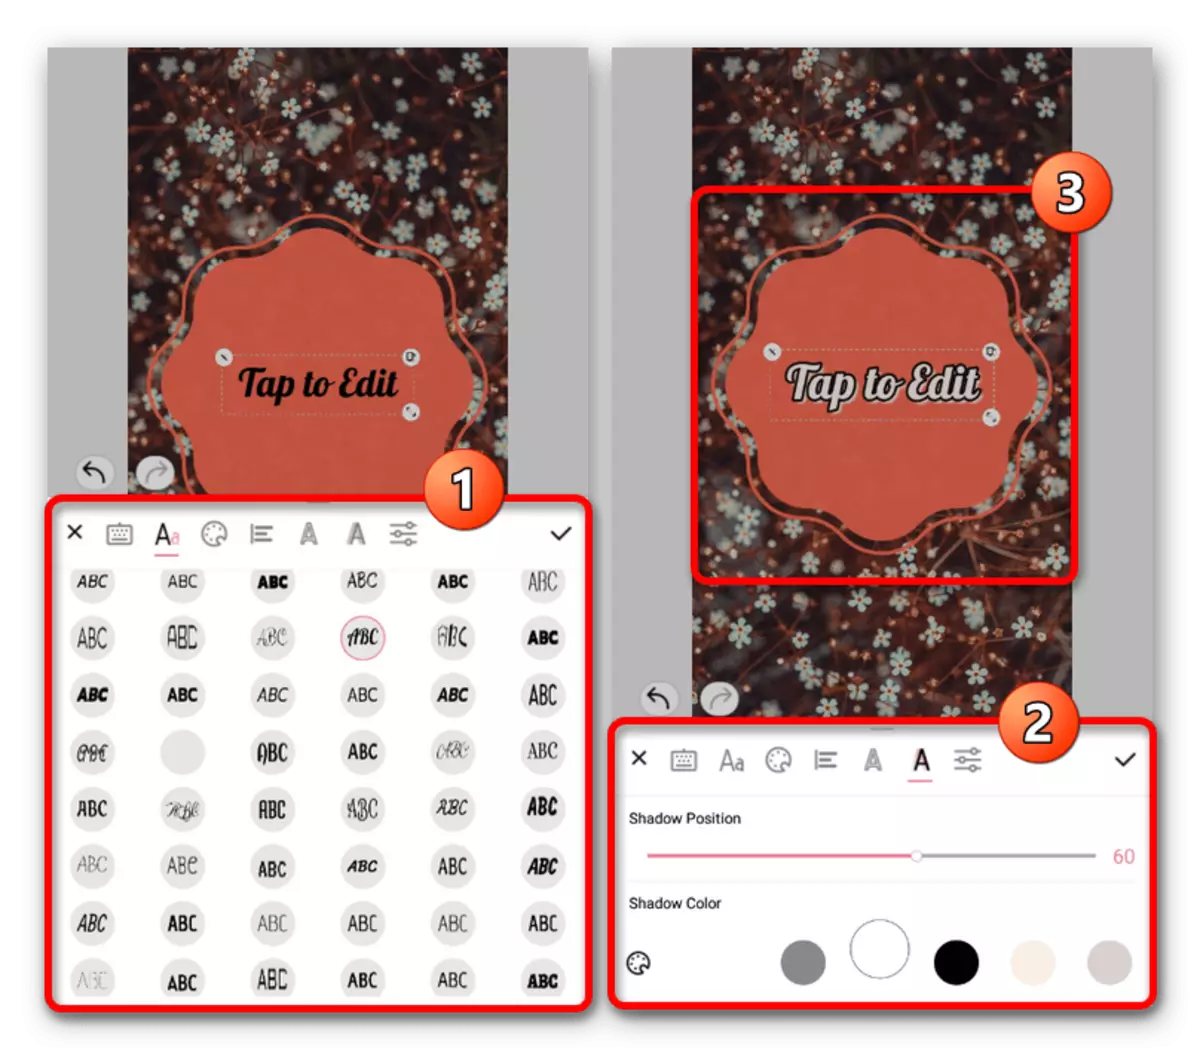
- If required, you can also use the "Text" tool to add an inscription at your discretion. In addition to the usual parameters, such as color and size, you can choose additional effects.
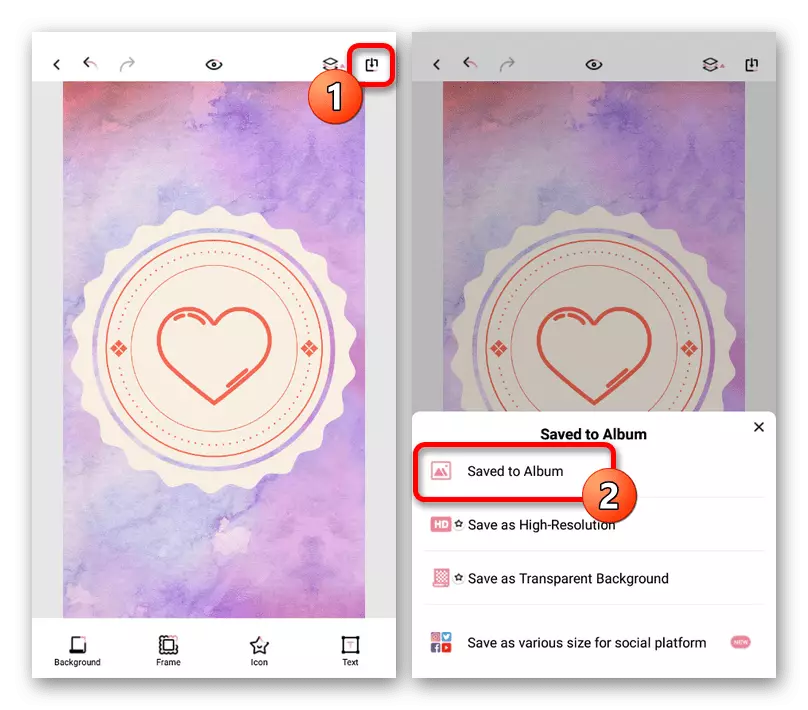
- Upon completion of the cover with the cover on the top of the panel, click the downlift icon and in the pop-up window, select "Saved to Album". To save in the best quality, unfortunately, you need a premium account.
You can find the final file in the internal memory of the device among other pictures or in the gallery. At the same time, you may well prepare a few single options in advance, since the editor remains open.
Picsart photo editor
The PICSART graphics editor for iOS and Android provides many functions, including free templates and a certain number of sources. First of all, this program is used to draw by hand, because there are no tools for quick centering or stretching files while preserving proportions.
Download Picsart from App Store
Download Picsart from Google Play Market
- Install and unplug the application in question. To get started, on the main page it will be necessary to provide access to files in the memory of the mobile device using the "Allow" button in the pop-up window.
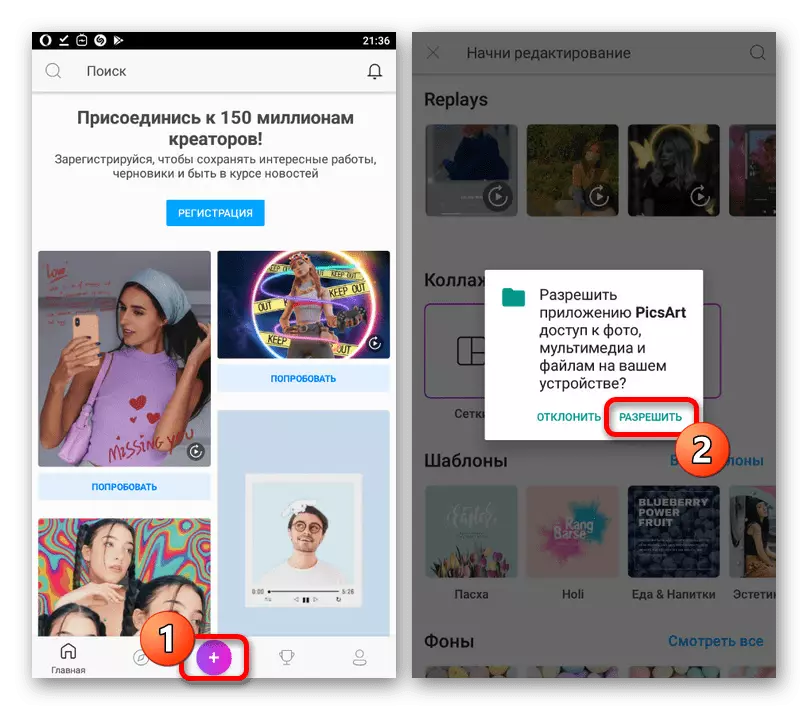
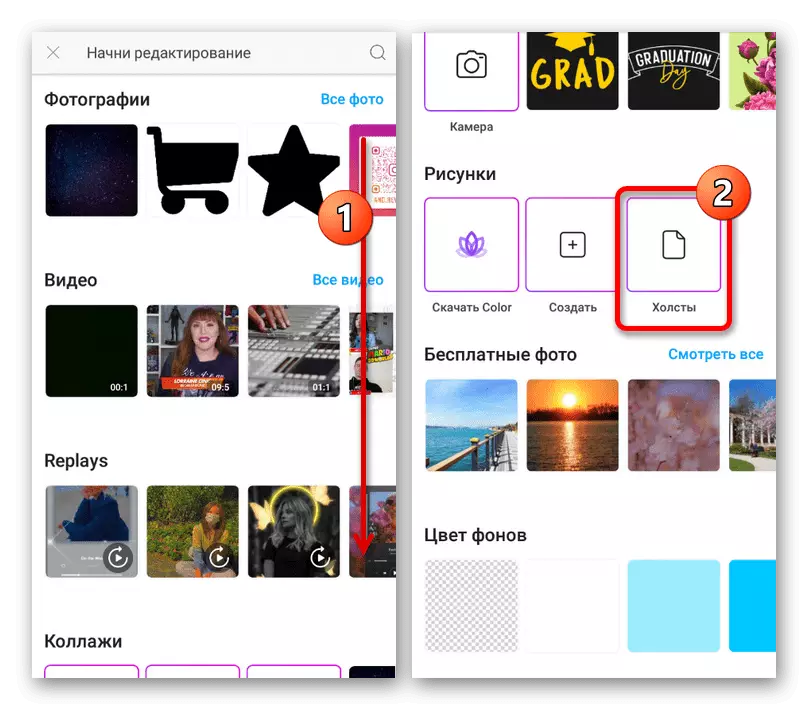
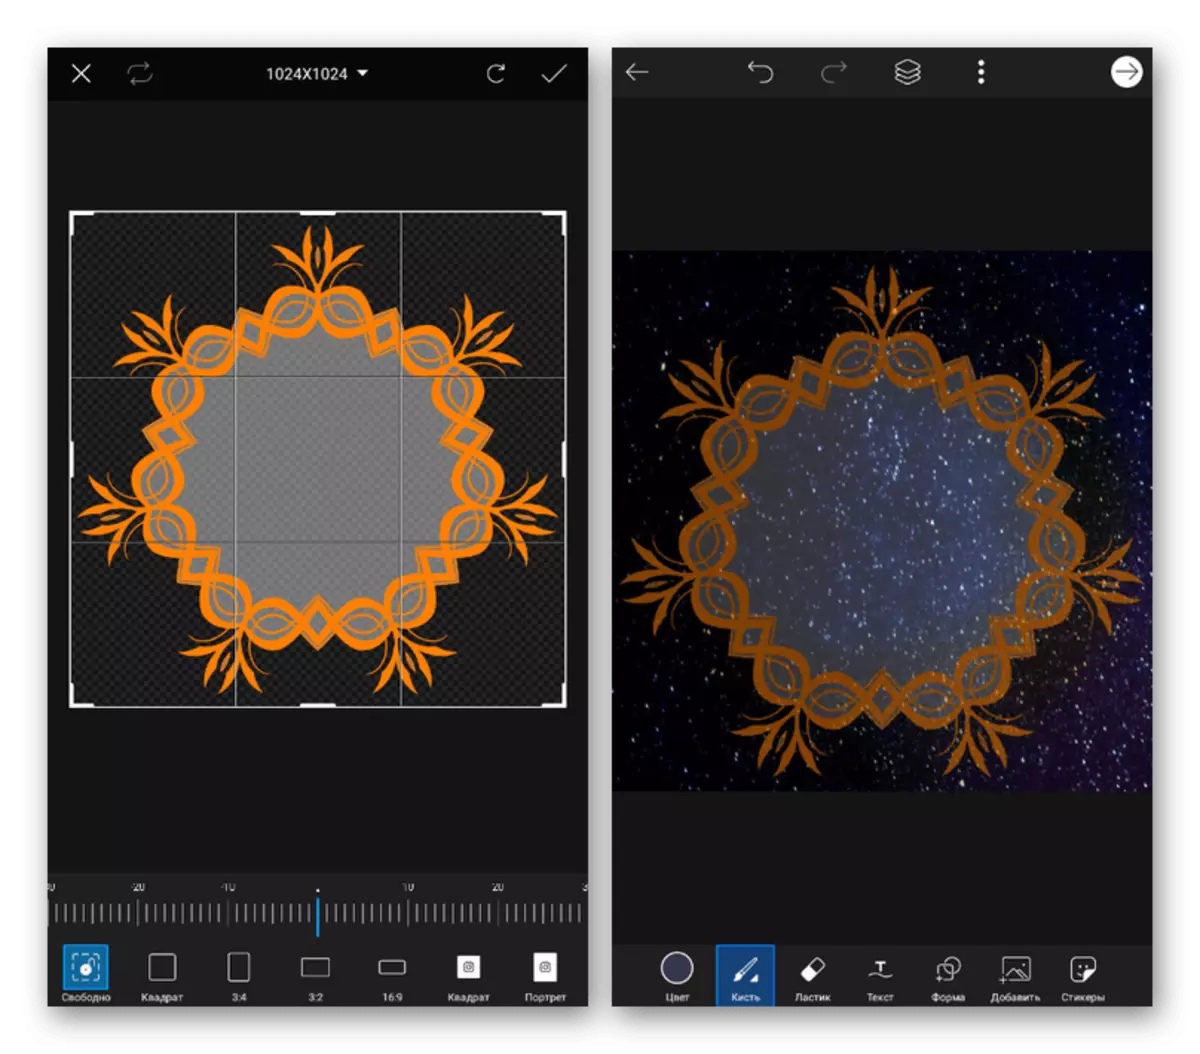
To create a new image, click on the "+" icon on the bottom panel and select the appropriate template. It is best to use the "Canvas" option with the subsequent selection of square shape, as it will allow you to set up with great convenience and subsequently set the cover for the current one.
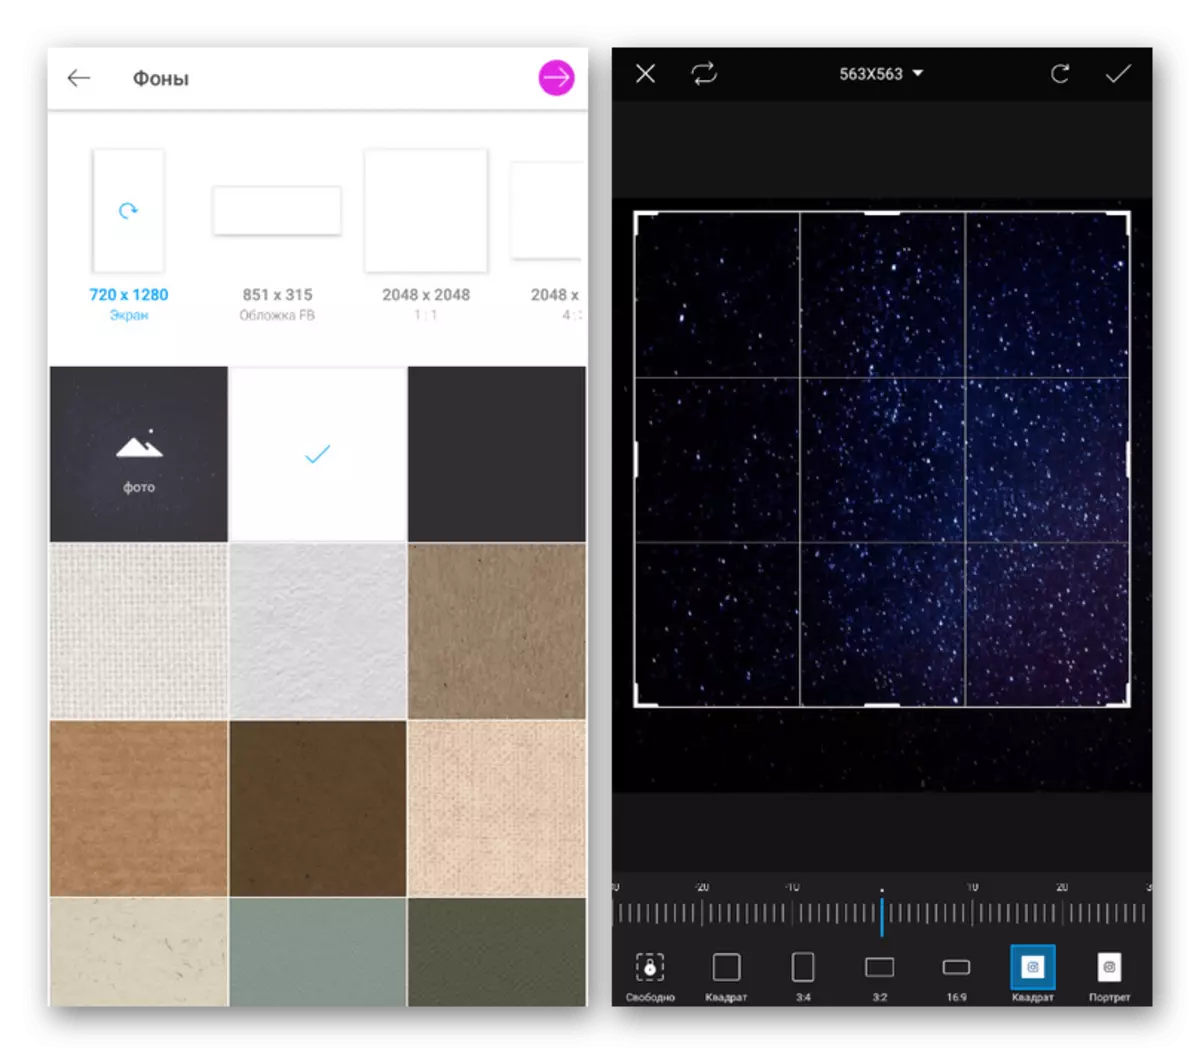
- During the choice of background you can use standard, including completely free options, or add an image from the gallery. When loading your own pictures, a number of settings will be available, allowing you to scale and proportions at your discretion.
- Being on the main page of the editor, use internal functions to add and align the various design items clearly in the center. It is important to remember that the round picture is always put as the cover.
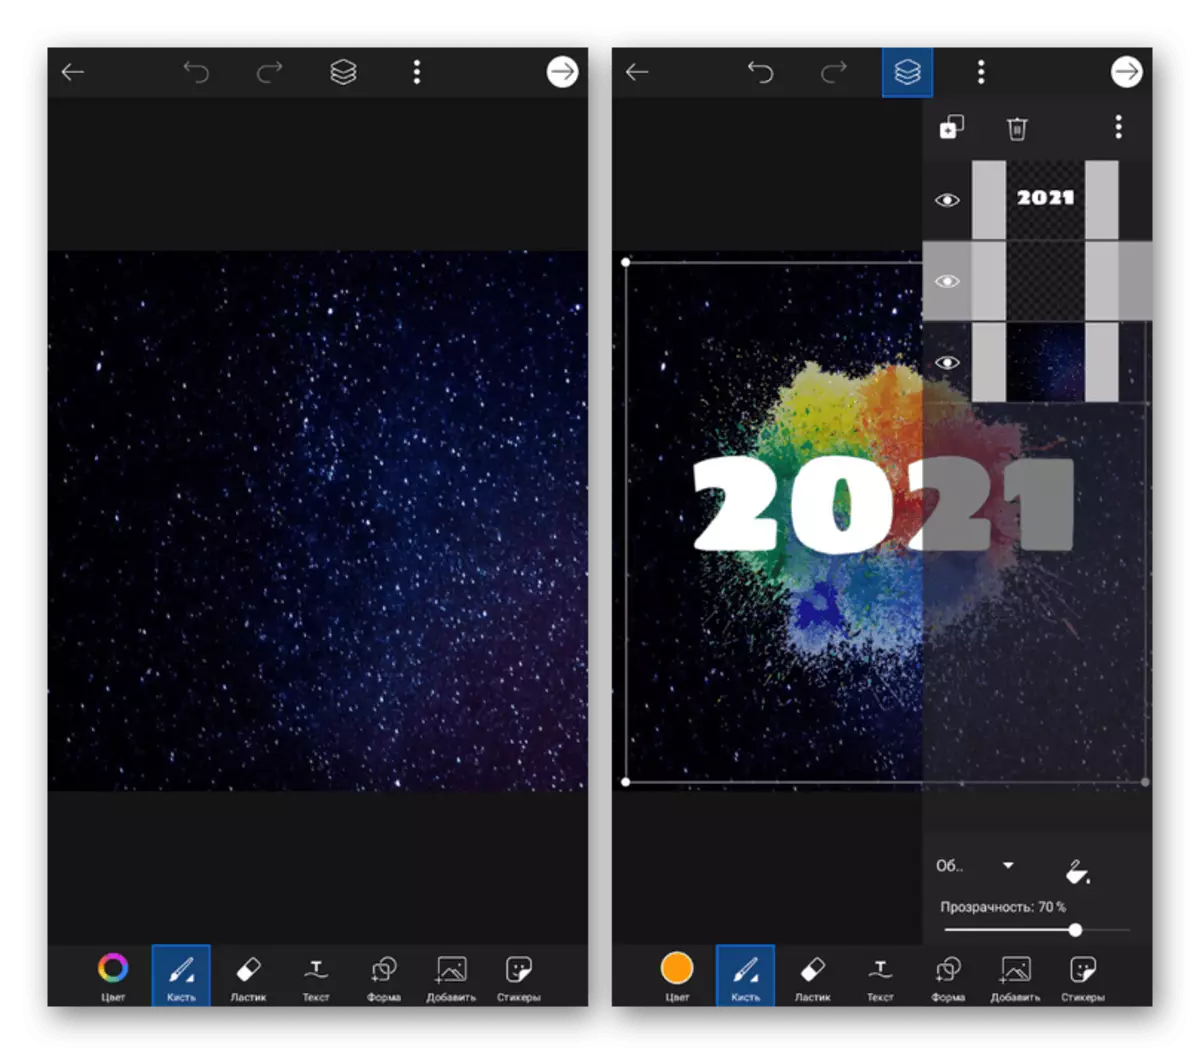
It is possible to achieve the best result not only using the standard editor tools, which sometimes it is difficult to apply, but also by loading your own PNG images. This allows you to create both a colorful framework, which can later be used for each cover, and work with end files.
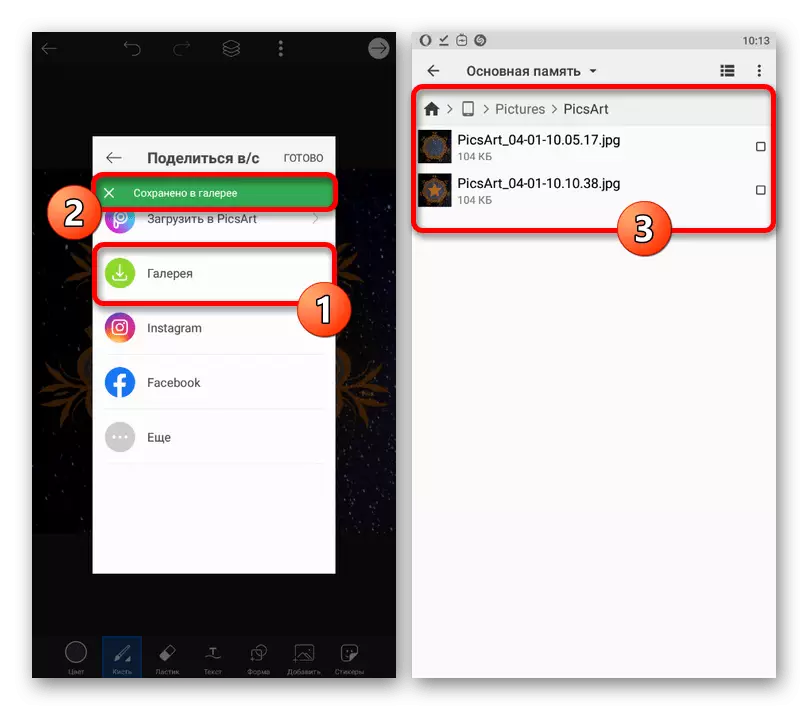
- After completing the edit, click on the arrow icon in the upper right corner of the screen and in the pop-up window, use the "Save and Share" option. Please note that after saving until the "Finish" button is pressed, you will have the opportunity to continue editing, for example, to quickly create multiple icons in a common style.
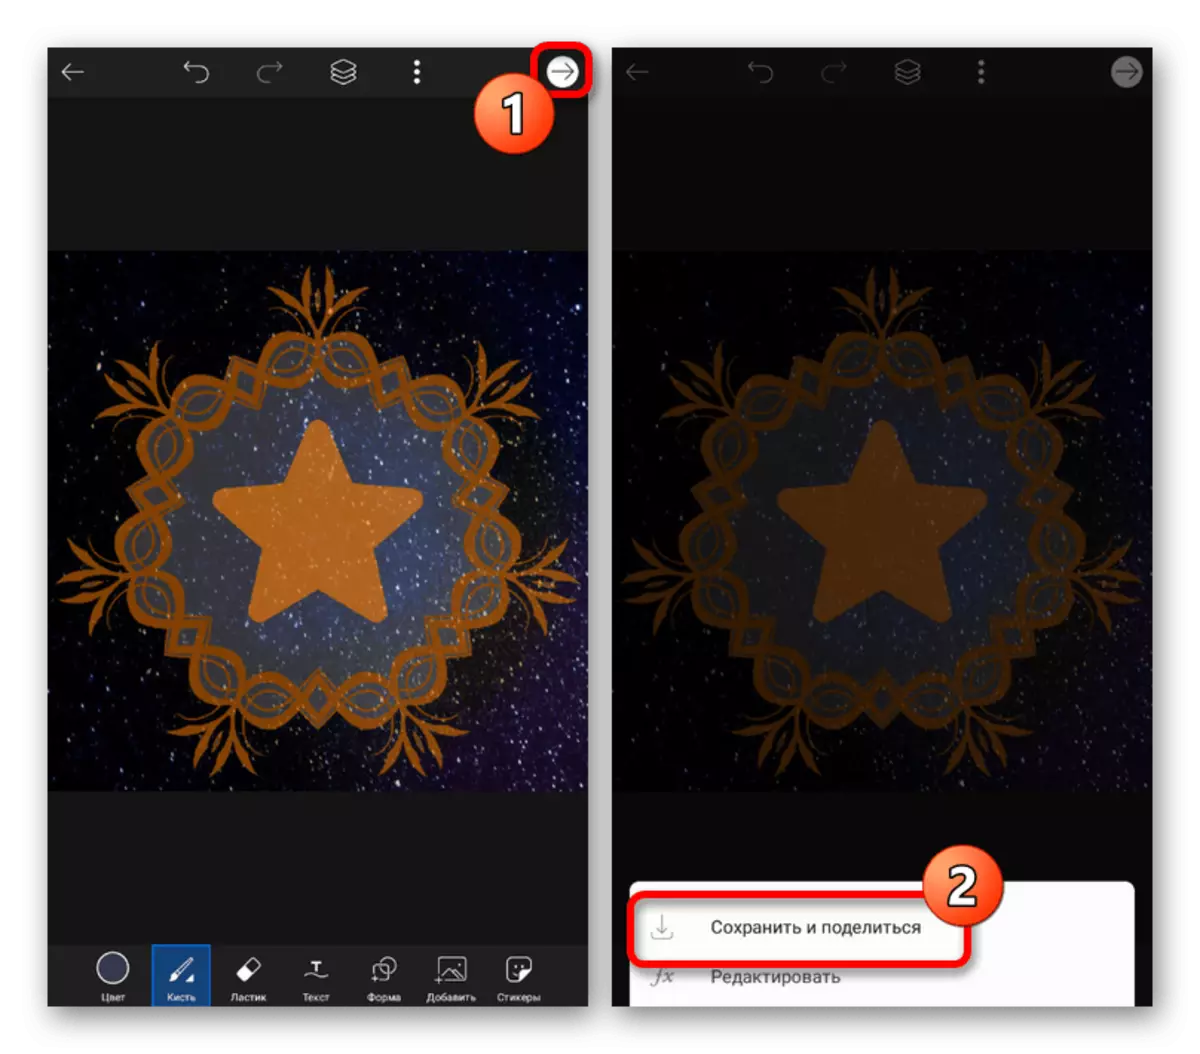
From the "Share V / C" list, you must select the "gallery", since in the case of Instagram, placement occurs as a publication, and not the covers for the current one. You can find the destination file in the JPG format in the "PICSART" folder within the "Pictures" system directory.
As you can see, especially after personal use, each editors are suitable in certain situations. Moreover, to obtain truly colorful results, it may require a more complex program that allows you to change colors and other parameters on source files.
Option 3: Online services
In addition to mobile editors, there are online services with similar capabilities, including providing tools for creating covers. We will focus on the consideration of one such website from the computer, whereas you can use a smartphone if you wish.
Online service canva
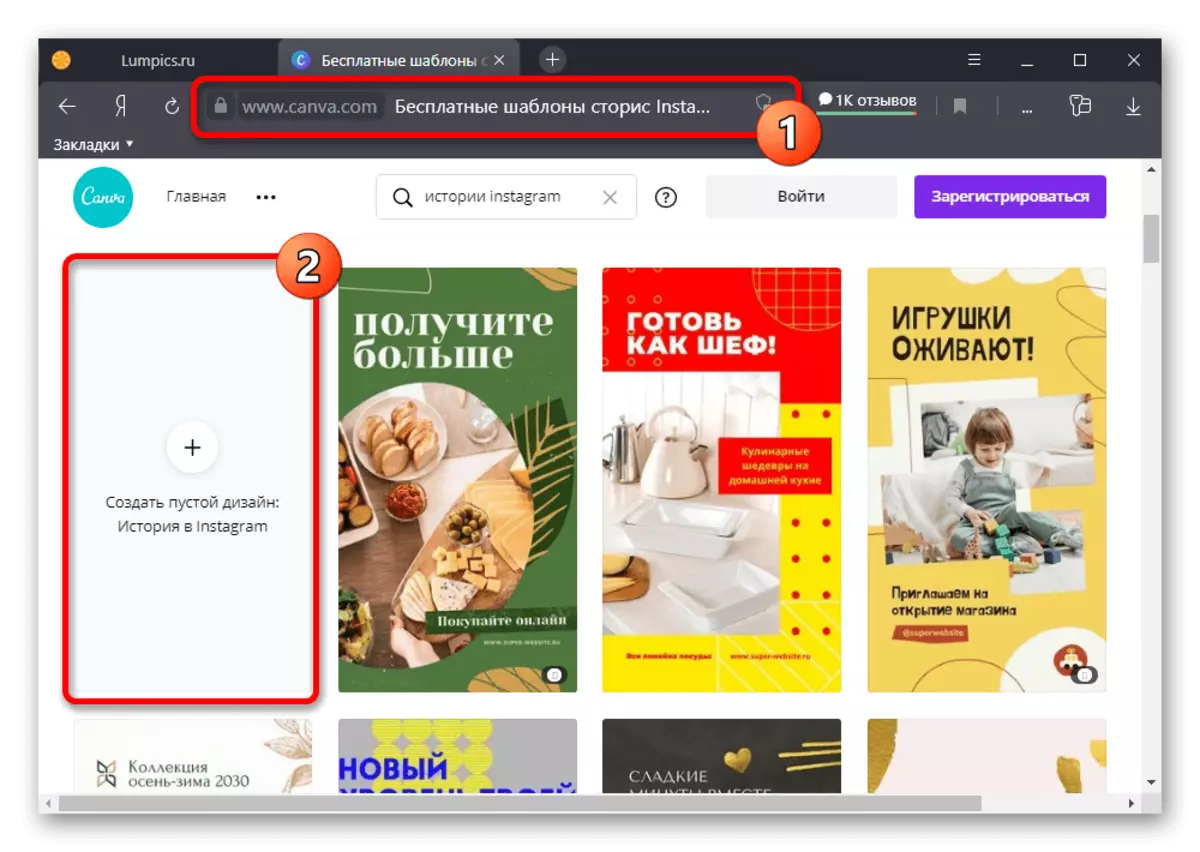
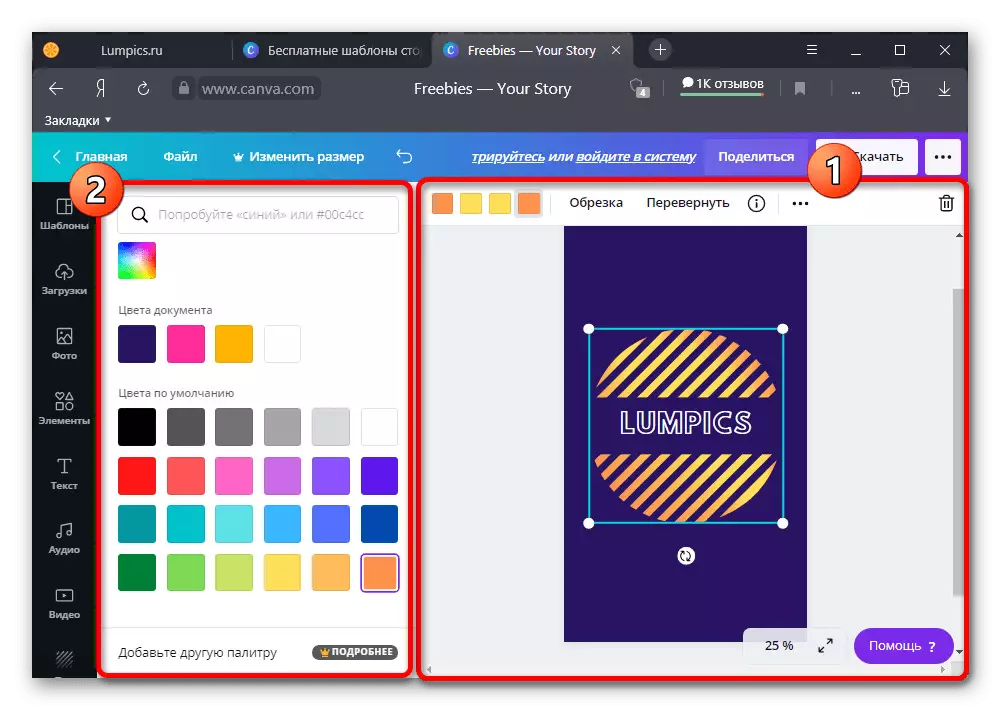
- Go to the Stores Editor on the website of the service under consideration on the link presented above and select Design for the Future Cover Basics. You can also use the "Create Empty Design" button to work from scratch.
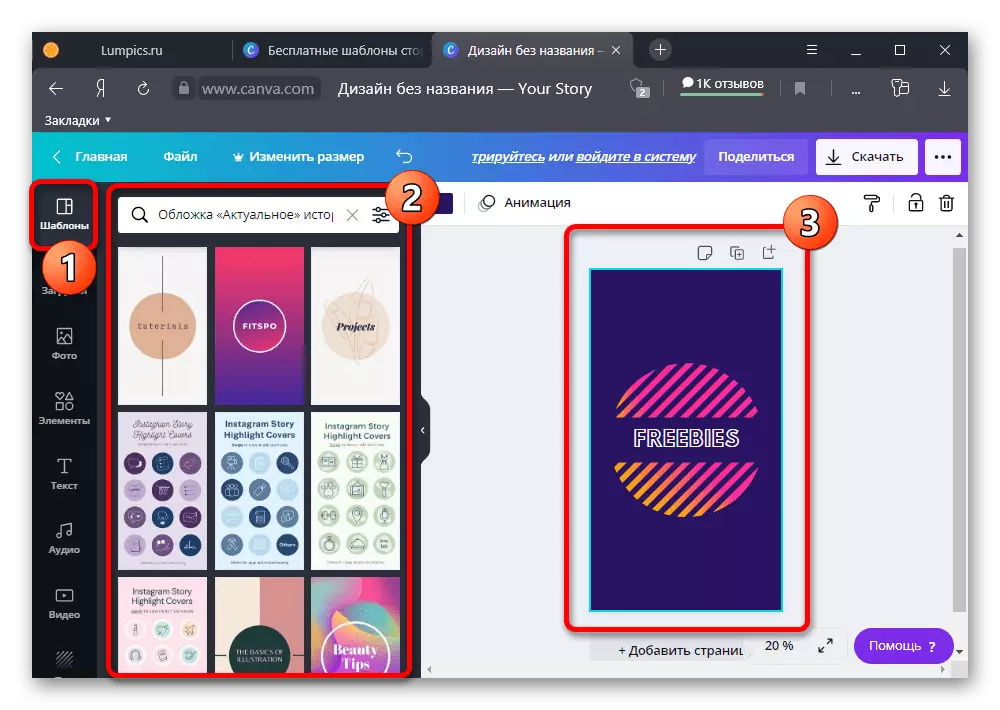
- Using the sidebar, go to the "Templates" tab and find the subsection with the references for current stories. Here will be presented a set of designs with different icons that can be a good basis for your work.
- Each design element can be edited on the top of the editor on the right side of the page. We will not describe all the functions, since it is better to figure it out independently, but we note that this tool allows you to implement almost any ideas.
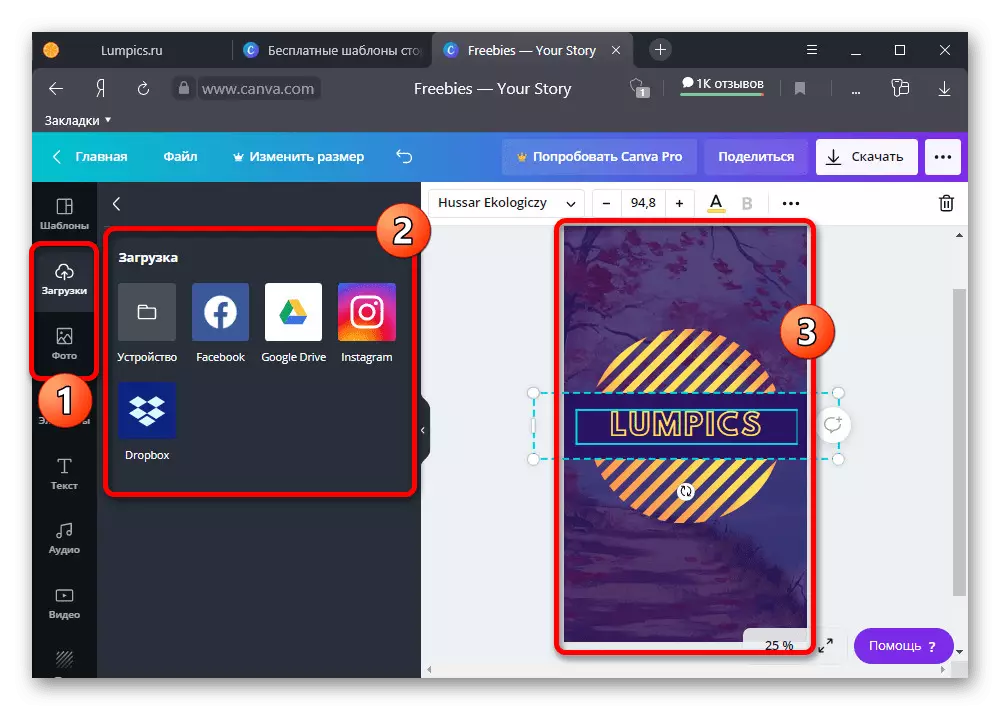
- The "Photo" tab contains standard backgrounds, whereas you can add your own media files from different sources through "downloads", including the device's memory. In addition, there is an Instagram here, which allows you to transfer, for example, an existing history for use as a background.
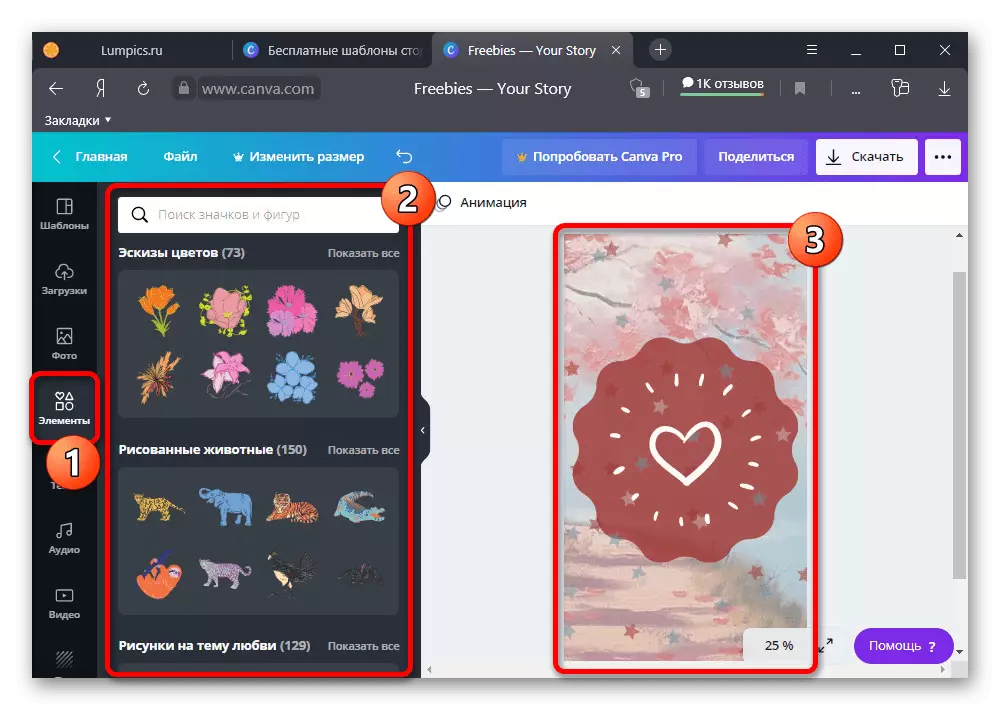
- To add vector icons, use the "Elements" subsection. A huge number of different pictures are available here, each of which can be edited and combined with other options.
- The last one is worth paying attention to, this "Text" tab, designed to create inscriptions. During the addition, you can use standard templates or create your own version of the text with a font to choose from.
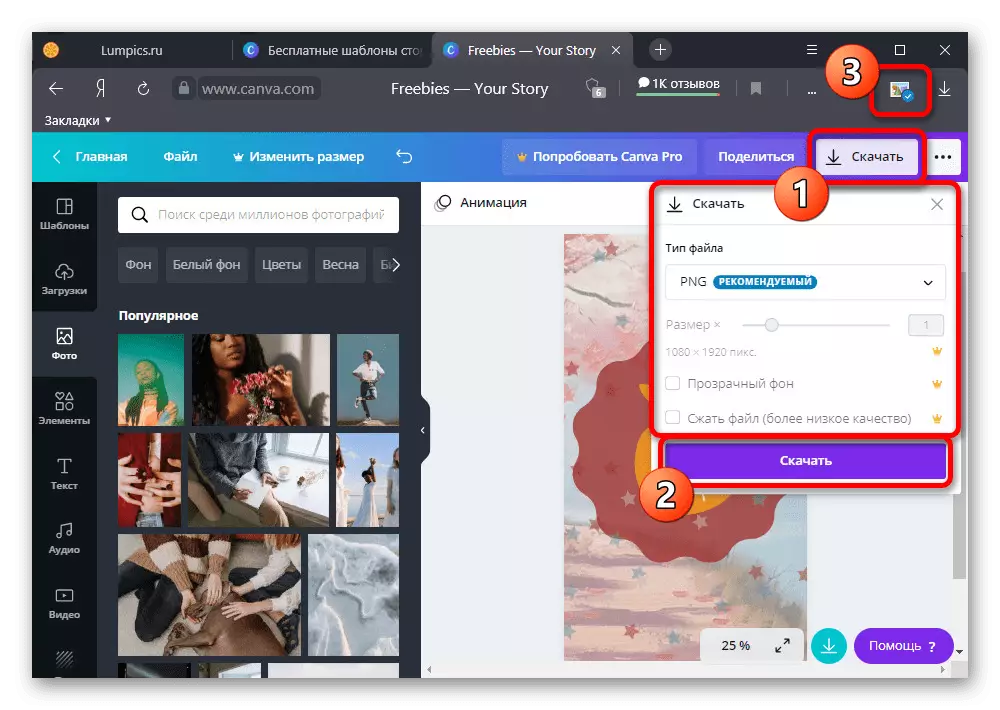
- After completing the cover creation, on the top panel, click the "Download" button, in the pop-up window, select the format from the drop-down list and confirm the save. Unfortunately, get a file in greater quality than 1080 × 1920 pixels will not work without buying a premium account.

The end image is stored in the installed format on the computer disk or in the device's memory. Subsequently, the file can be used when working with relevant.
Step 2: Loading Covers for Actual
After the cover for the actual will be prepared, it is necessary to download and configure the graphic file internal means of social network. Please note that despite the ability to view topical stories on different platforms, including a PC, an application is required to implement the task in any case.
Read more: Creating albums for stories in Instagram
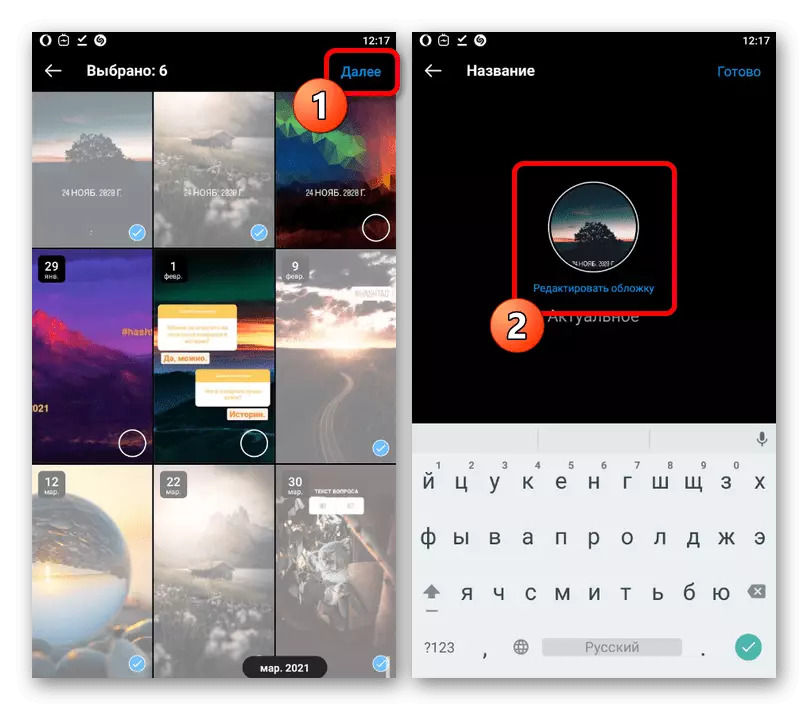
- Using the bottom panel of the Mobile Client, open a tab with an account information and in the block with current stories, click on the "+" icon. After that, you need to select stories, click "Next" in the corner of the screen and use the link "Edit Cover".
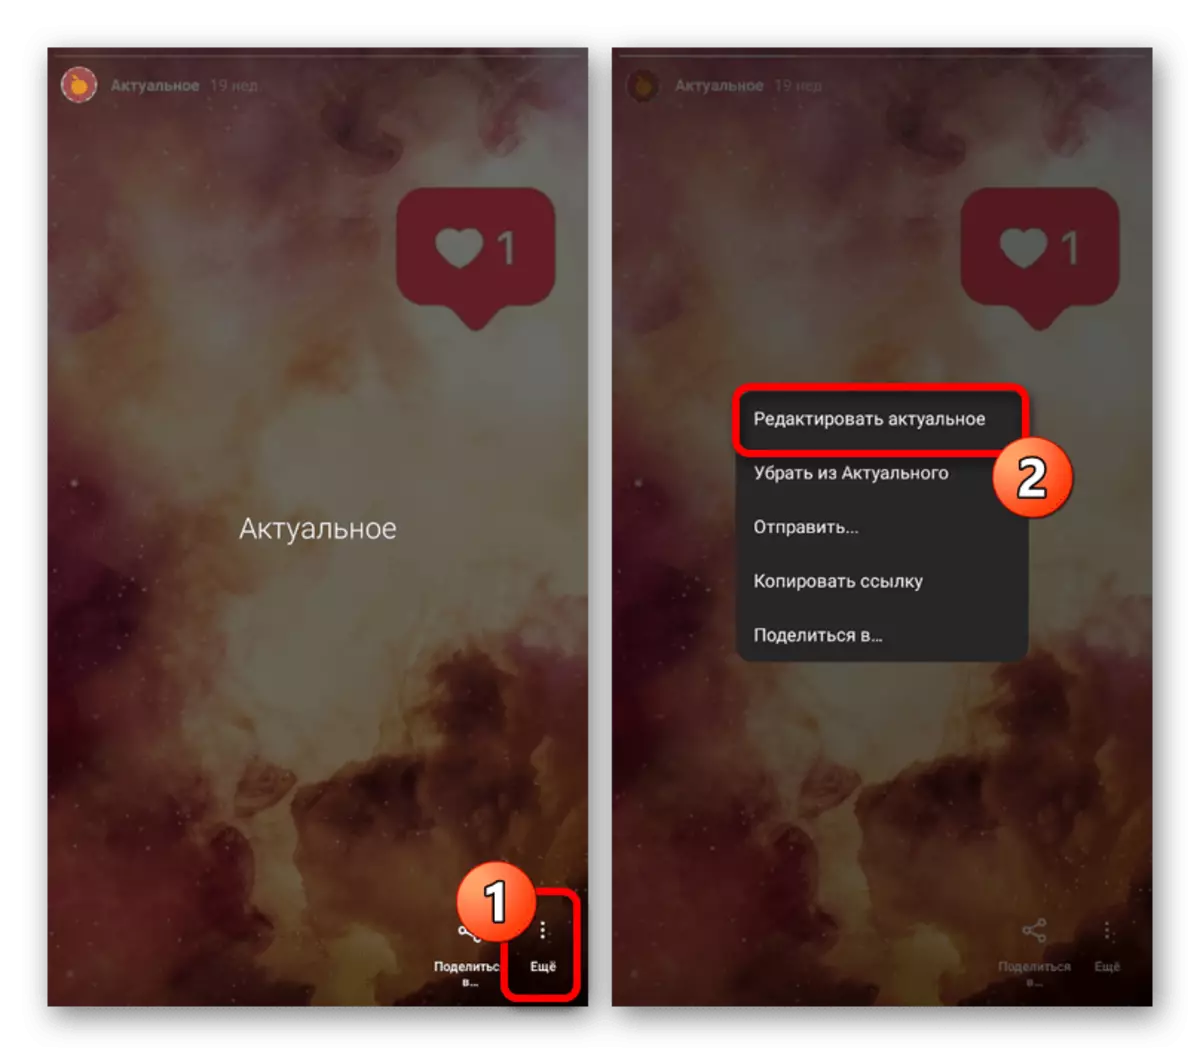
Except when creating a new folder, you can open an existing album, click "More" in the right bottom area and select the "Edit Actual" option in the pop-up window. Subsequently, it will also be necessary to touch the similar reference.
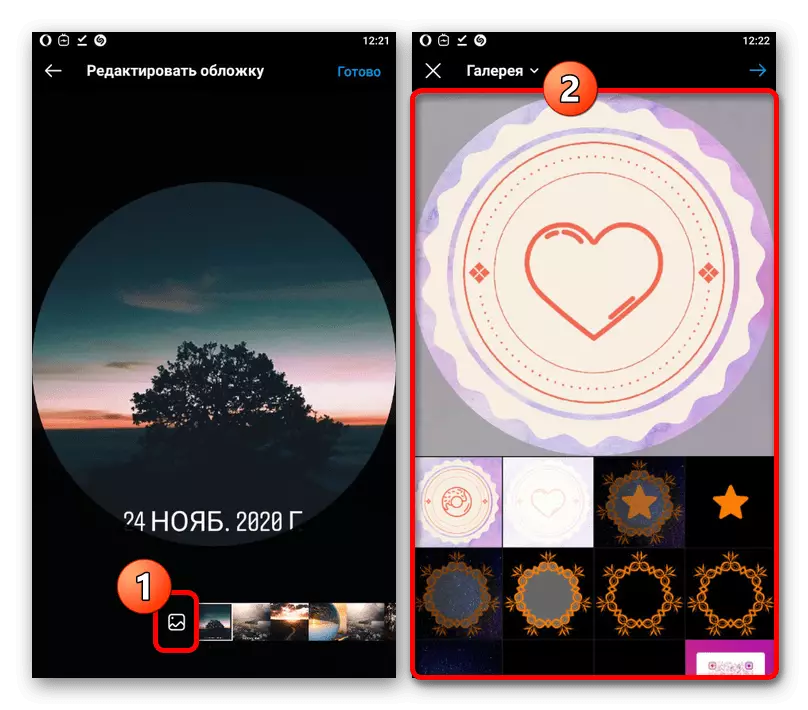
- To install a newly created cover during editing, click on the image icon on the bottom panel and select the desired file from the device gallery. Due to the fact that Instagram automatically spends the sorting in the order of the last change, the pictures should be somewhere at the beginning of the list.
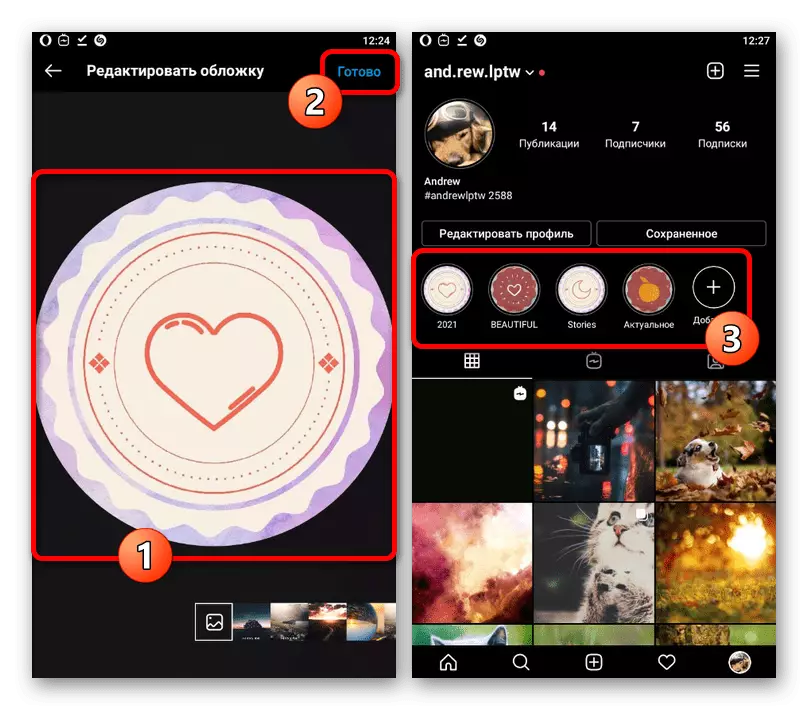
- Deciding with the choice, you can move and exhaust the image so that within the preview, extra elements are not displayed. When the procedure is completed, click the "Finish" button on the top panel and save the "current".
Viewing a full amount is inaccessible, and therefore none of the audience will be able to see unwanted details, if any. Otherwise, do not forget about the preservation of a single style, especially in the promoted business account.