

SSH (Secure Shell) technology allows you to safely remotely manage your computer through a secure connection. SSH produces encrypted all transmitted files, including passwords, and also transmits a completely any network protocol. To work correctly, it must not only be installed, but also configured. It would be about the product of the main configuration that we would like to talk under this article, taking the latest version of the Ubuntu operating system for an example, which will be located the server.
Configure SSH in Ubuntu
If you have not yet completed the installation to the server and client PC, it should be done initially, the benefit of the whole procedure is quite simple and will not take much time. With a detailed manual on this topic Meet another article on the following link. It also shows the procedure for editing the configuration file and testing SSH, so today we will focus a little on other tasks.Read more: Installing SSH-Server in Ubuntu
Creating a pair of RSA keys
In the newly installed SSH, there are no more specified keys to connect from the server to the client and vice versa. All these parameters need to be set manually immediately after adding all components of the protocol. A pair of keys is working using the RSA algorithm (reduction from the names of the Rivest, Shamir and Adleman developers). Thanks to this cryptosystem, the keys are encrypted through special algorithms. To create a pair of open keys, you only need to enter the appropriate commands in the console and follow the instructions that appear.
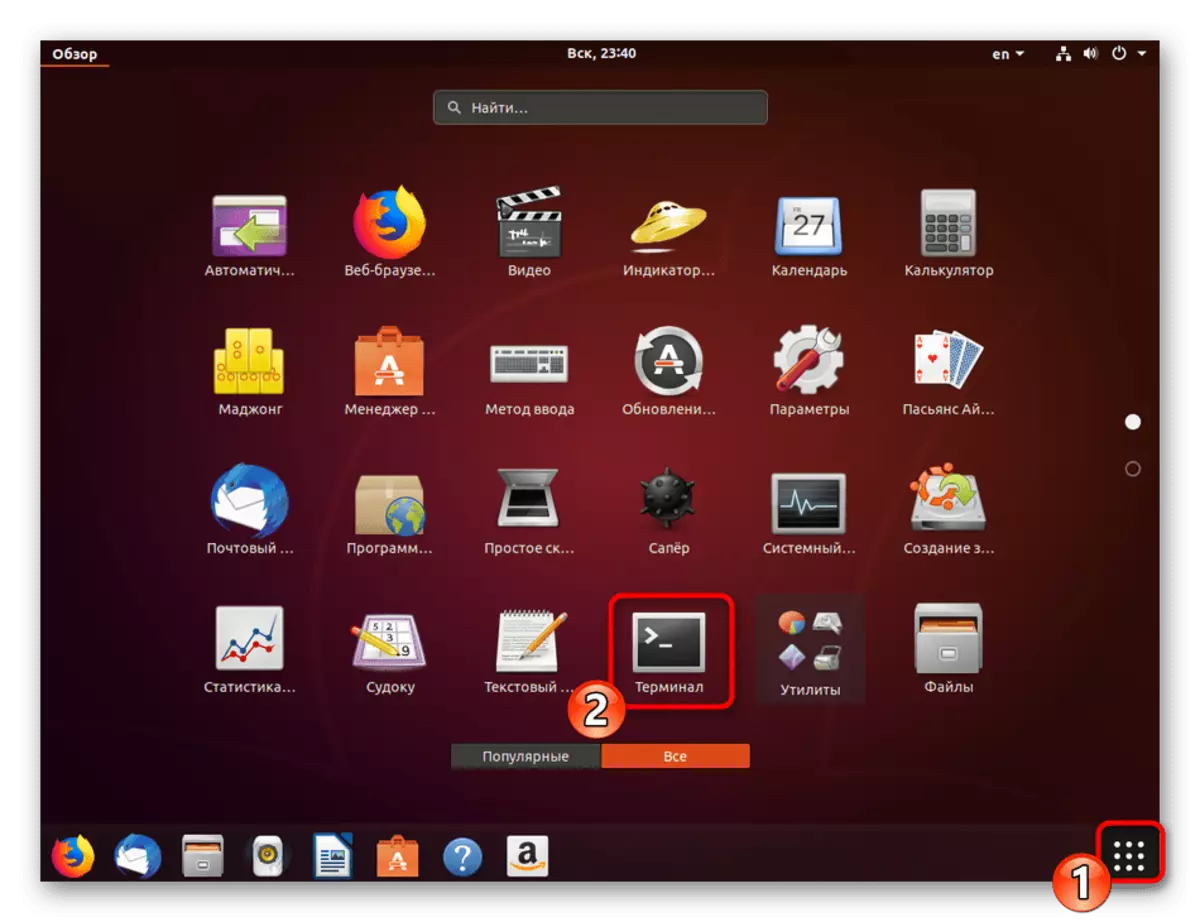
- Go to work with the "terminal" by any convenient method, for example, by opening it through the menu or the key combination Ctrl + Alt + T.
- Enter the SSH-Keygen command, and then click the ENTER key.
- It will be proposed to create a file where the keys will be saved. If you want to leave them in the location selected by default, simply click on ENTER.
- The public key can be protected by a code phrase. If you want to use this option, write a password in the appeared string. Insertion characters will not be displayed. In the new line will need to repeat it.
- Next, you will see a notice that the key has been saved, and you can also familiarize yourself with its random graphic image.


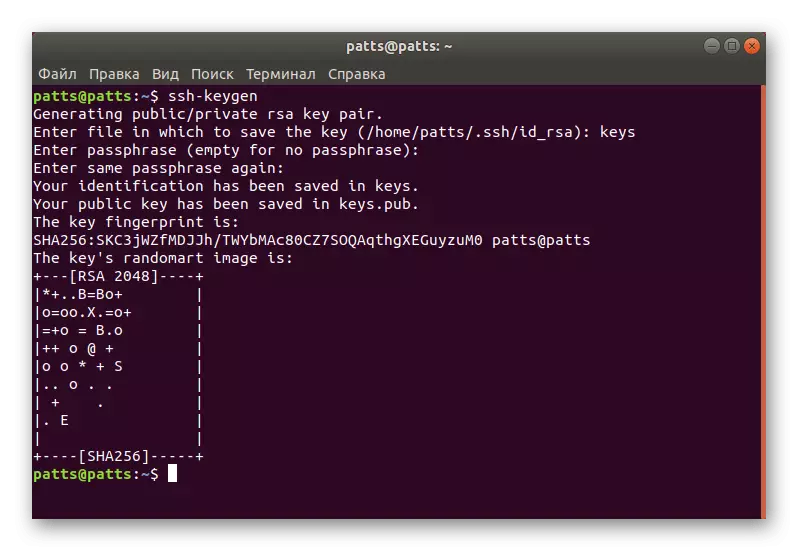
Now there is a customer pair - secret and open to be used to further connect between computers. You just need to put the key to the server so that the SSH authentication is successful.
Copy open key to server
There are three key copying methods. Each of them will be the most optimal in various situations when, for example, one of the ways does not work or is not suitable for a specific user. We propose to consider all three options by starting from the simplest and effective.
Option 1: SSH-Copy-ID command
The SSH-Copy-ID command is built into the operating system, so it does not need to install any additional components for its execution. Observe a simple syntax to copy the key. In the Terminal, you must enter the SSH-Copy-ID username @ remote_host, where the username @ remote_host is the name of the remote computer.

When you first connect, you will receive a notification with the text:
The Authenticity of Host '203.0.113.1 (203.0.113.1)' CAN't Be Established.
ECDSA KEY FINGERPRINT IS FD: FD: D4: F9: 77: FE: 73: 84: E1: 55: 00: AD: D6: 6D: 22: FE.
Are you Sure You Want to Continue Connecting (YES / NO)? Yes
You must specify the option yes to continue the connection. After that, the utility will independently search the key as id_rsa.pub file, which was previously created. During successful detection, this result will be displayed:
USR / BIN / SSH-COPY-ID: info: attempting to log in with the new key (s), to filter out Any That Are Aready Installed
/ USR / BIN / SSH-Copy-ID: info: 1 Key (s) Remain to Be Installed - if you are prompted now it is to install the new keys
[email protected]'s password:
Specify the password from the remote host so that the utility can enter it. The tool will copy the data from the public key file ~ / .ssh / id_rsa.pub, and then a message will appear on the screen:
Number Of Key (S) Added: 1
Now try logging INTO THE MACHINE, WITH: "SSH '[email protected]'"
And check to make sure that Only The Key (s) You Wanted Were Added.
The appearance of such a text means that the key has been successfully loaded on a remote computer, and no longer any problems with the connection will arise.
Option 2: Copying an open key through SSH
If you can not use the above utility, but there is a password to enter the remote SSH server, you can upload your user key manually, thereby providing further stable authentication when connected. It is used for this CAT command that will read the data from the file, and then they will be sent to the server. In the console, you will need to enter a string.
Cat ~ / .ssh / id_rsa.pub | SSH UserName @ Remote_Host "mkdir -p ~ / .ssh && touch ~ / .ssh / authorized_keys && chmod -r go = ~ / .ssh && Cat >> ~ / .ssh / authorized_keys."

When the message appears
The Authenticity of Host '203.0.113.1 (203.0.113.1)' CAN't Be Established.
ECDSA KEY FINGERPRINT IS FD: FD: D4: F9: 77: FE: 73: 84: E1: 55: 00: AD: D6: 6D: 22: FE.
Are you Sure You Want to Continue Connecting (YES / NO)? Yes
Continue the connection and enter the password to enter the server. After that, the public key will be automatically copied to the end of the authorized_keys configuration file.
Option 3: Manual open key copying
In the absence of access to a remote computer via a SSH server, all the actions described above are manually executed. To do this, first find out information about the key on the server PC via the CAT ~ / .ssh / id_rsa.pub command.

The screen will be displayed approximately such a string: SSH-RSA + key as a set of characters == Demo @ Test. After that, go to work on a remote device where you create a new directory via MKDIR -P ~ / .ssh. It additionally creates the Authorized_keys file. Next, insert the key there that you learned earlier via Echo + row of a public key >> ~ / .ssh / authorized_keys. After that, you can try to carry out authentication with the server without using passwords.
Authentication on the server through the created key
In the previous section, you learned about three methods for copying a remote computer key to the server. Such actions will allow you to connect without the password. This procedure is performed via the command line by entering SHH SSH UserName @ Remote_Host, where the username @ remote_host is the username and host computer name. When you first connect, you will be notified of an unfamiliar connection and you can continue by selecting the YES option.

Connection will automatically happen if the key phrase (passphrase) was not specified during the creation of a pair of keys. Otherwise, you will first have to introduce it to continue working with SSH.
Disable password authentication
Successful setting up key copying is considered in that situation when you can enter the server without using the password. However, the ability to authenticate thus allows attackers to use tools for selecting a password and crack the protected connection. Mustoke yourself from such cases will allow a full-fledged password input in the SSH configuration file. This will require:
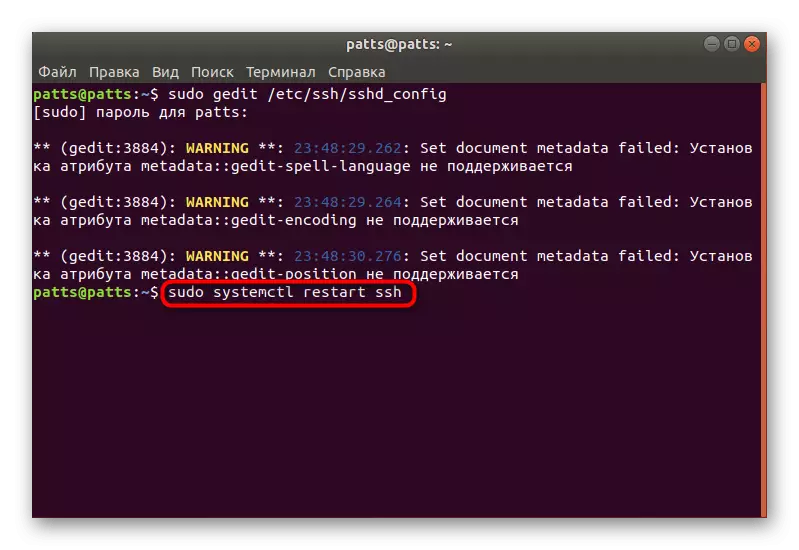
- In the Terminal, open the configuration file via the editor using the Sudo GEGDIT / ETC / SSH / SSHD_CONFIG command.
- Find the PasswordAuthentication line and remove the # sign in the beginning to rass the parameter.
- Change the value to NO and save the current configuration.
- Close the editor and restart the Sudo SystemCTL Restart SSH server.


The password authentication will turn off, and enter the server can only be used using the keys specially created for this with the RSA algorithm.
Setting up standard firewall
In Ubuntu, the default firewall is the Uncomplicated Firewall (UFW) firewall. It allows you to solve connections for selected services. Each application creates its own profile in this tool, and UFW controls them, allowing or bothering the connection. Setting the SSH profile by adding it to the list is carried out like this:
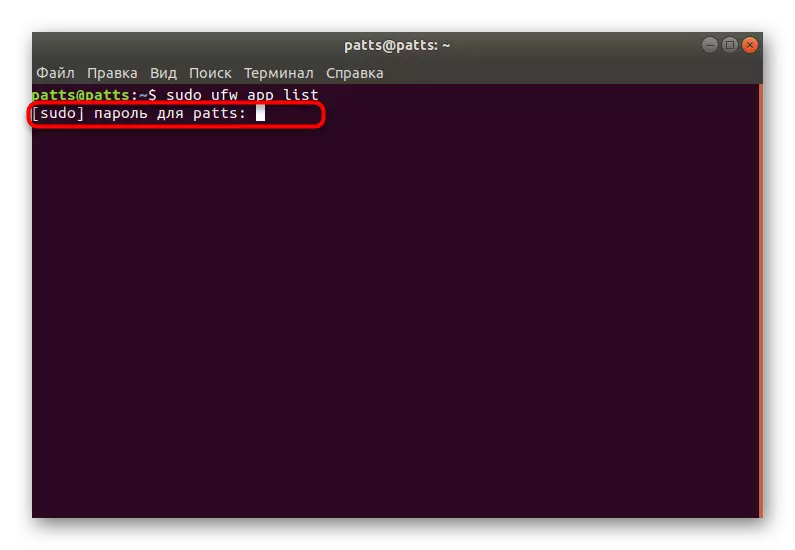
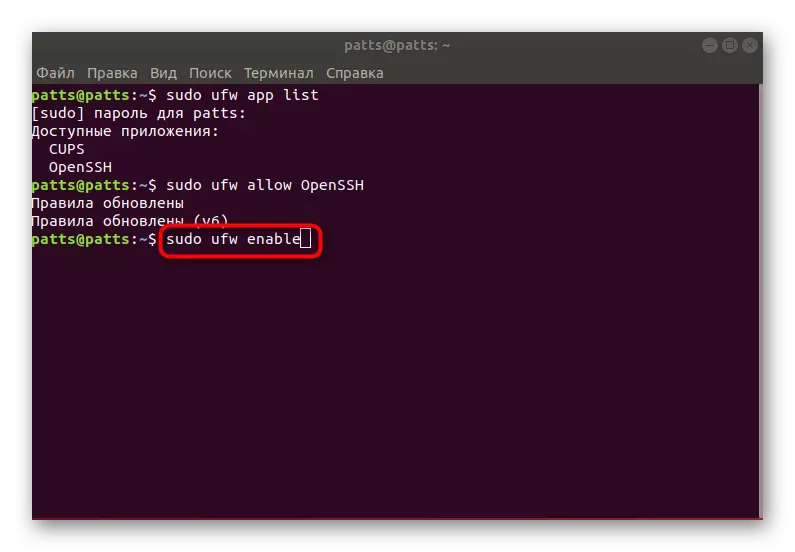
- Open the Firewall profile list through the Sudo UFW App List command.
- Enter the password from the account to display information.
- You will see a sheet of available applications, there must be OpenSSH among them.
- Now you should resolve connections via SSH. To do this, add it to the list of allowed profiles using Sudo UFW Allow OpenSSH.
- Turn on the Firewall by updating the rules, sudo ufw enable.
- For beliefs are that the connections are allowed, Sudo UFW Status should be prescribed, after which you will see the status of the network.


On this, our SSH configuration instructions in Ubuntu are completed. Further settings for the configuration file and other parameters are personally carried out by each user under its requests. You can get acquainted with the action of all components of SSH in the official documentation of the Protocol.