
In recent years, the question of the protection of personal data is becoming increasingly relevant, and he worrieses those users whoever earlier. To ensure maximum data protection, it is not enough to simply clear Windows from the following components, set TOR or I2P. The most protected at the moment is the Tails OS based on Debian Linux. Today we will tell how to record it on the USB flash drive.
Creating a flash drive with tails installed
Like many other Linux based operating systems, Tales supports installation on a flash drive. There are two ways to create such a carrier - the official recommended Tails developers, and alternative, created and proven by users themselves.Before proceeding with any of the proposed options, download the ISO image of Tails from the official site.
Use other sources is undesirable because the versions laid out there may be outdated!
You will also need 2 flash drives with a volume of at least 4 GB: the image from which the system will be installed on the second will be recorded. Another requirement is the FAT32 file system, so we advise you to pre-format the drives that are going to use.
Read more: Instructions for changing the file system on the flash drive
Method 1: Record with Universal USB Installer (Official)
Tails project authors recommend using the Universal USB Installer utility, as the most appropriate to install the distribution of this OS.
Upload Universal USB Installer
- Download and install Universal USB Installer on the computer.
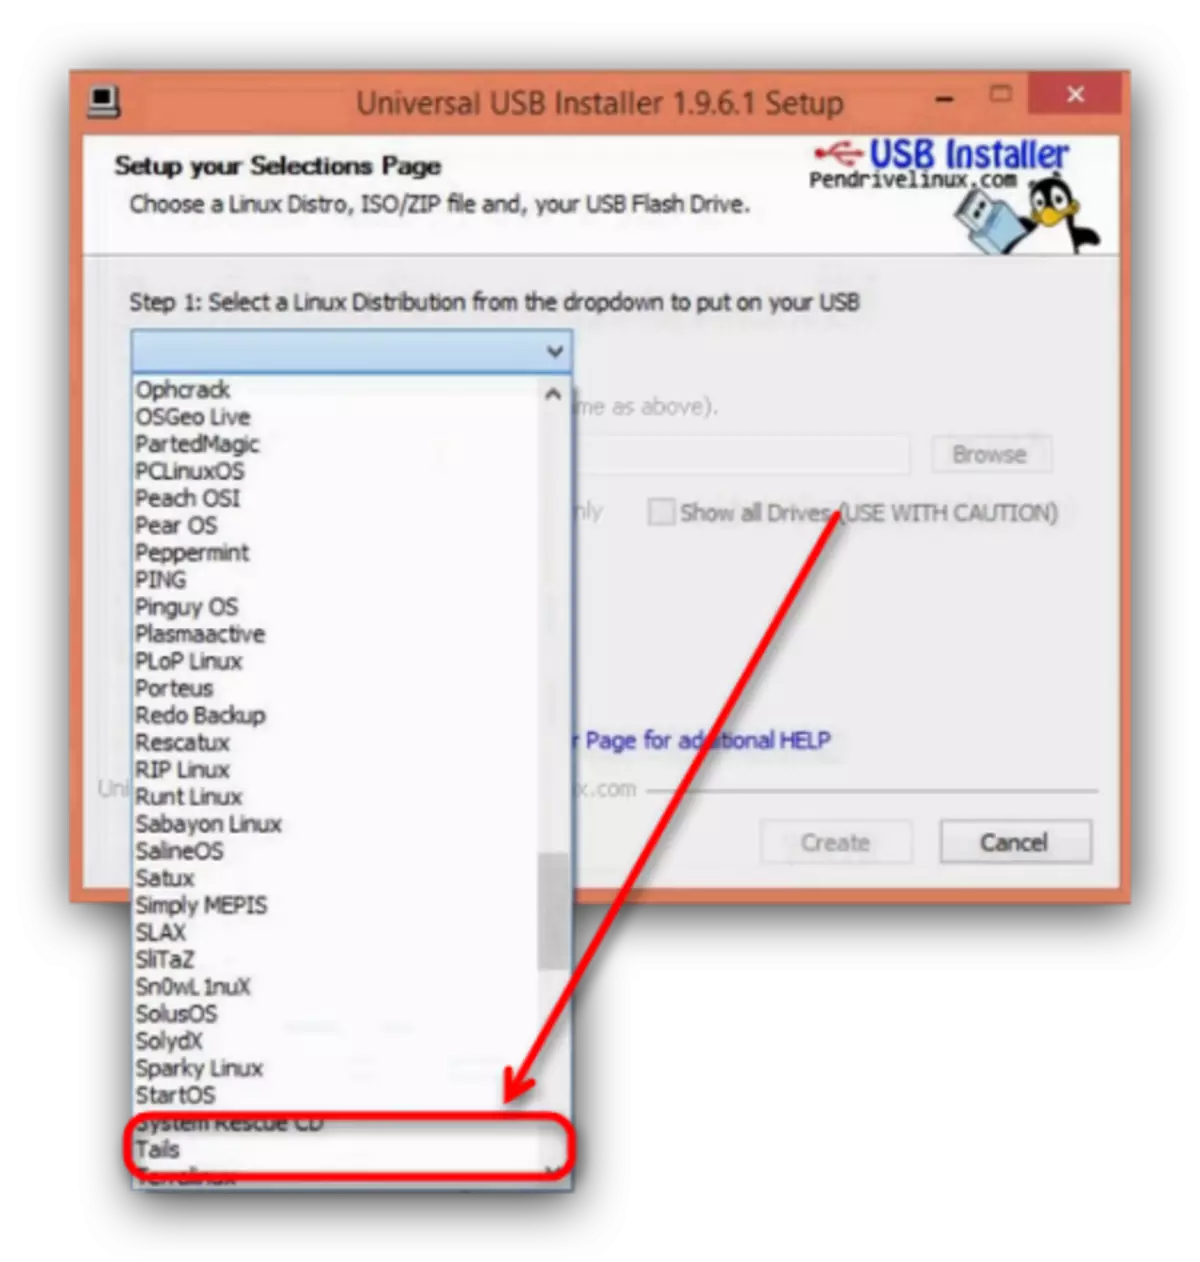
- Connect the first of two flash drives to the computer, then start the UNIQUE installer. In the drop-down menu on the left, select "Tails" - it is located almost at the bottom of the list.
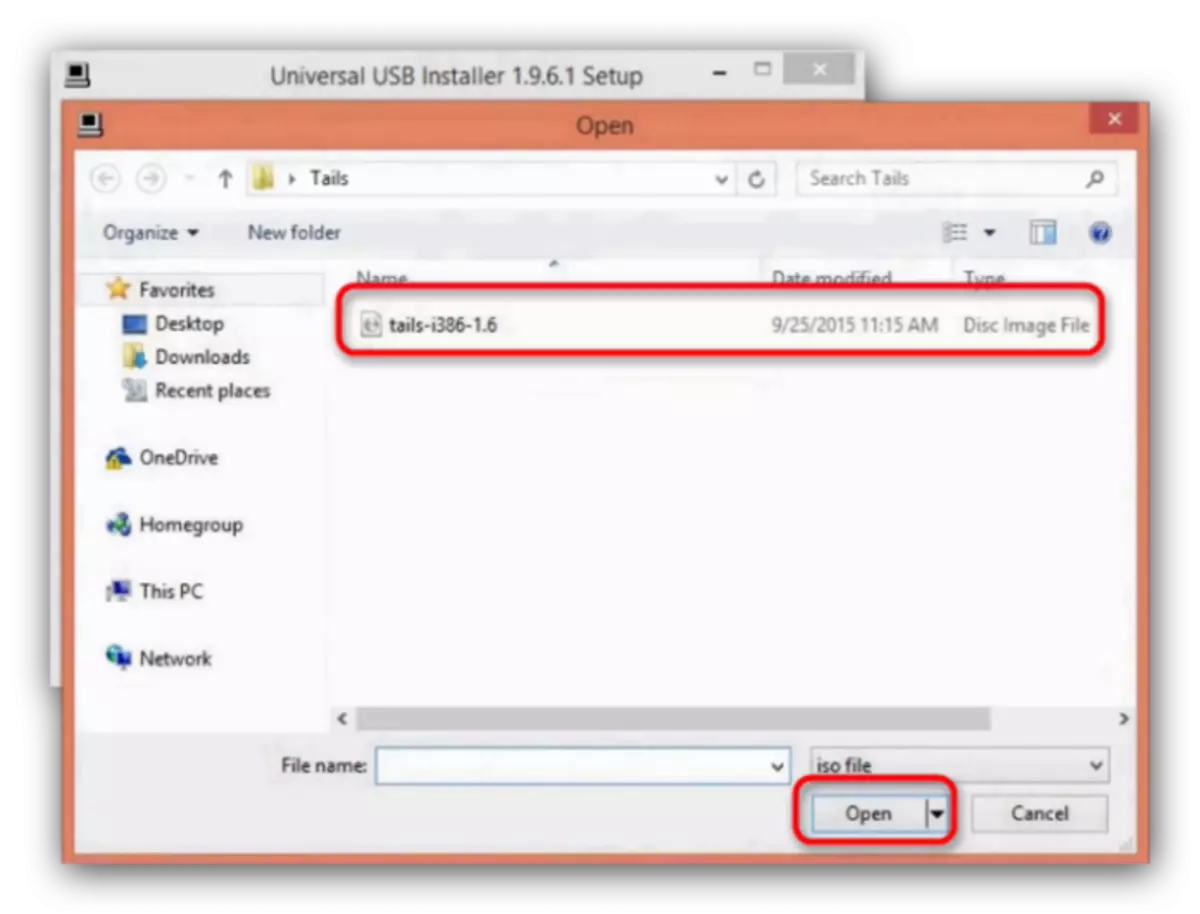
- In paragraph 2, click "Browse" to select your image with a writable OS.
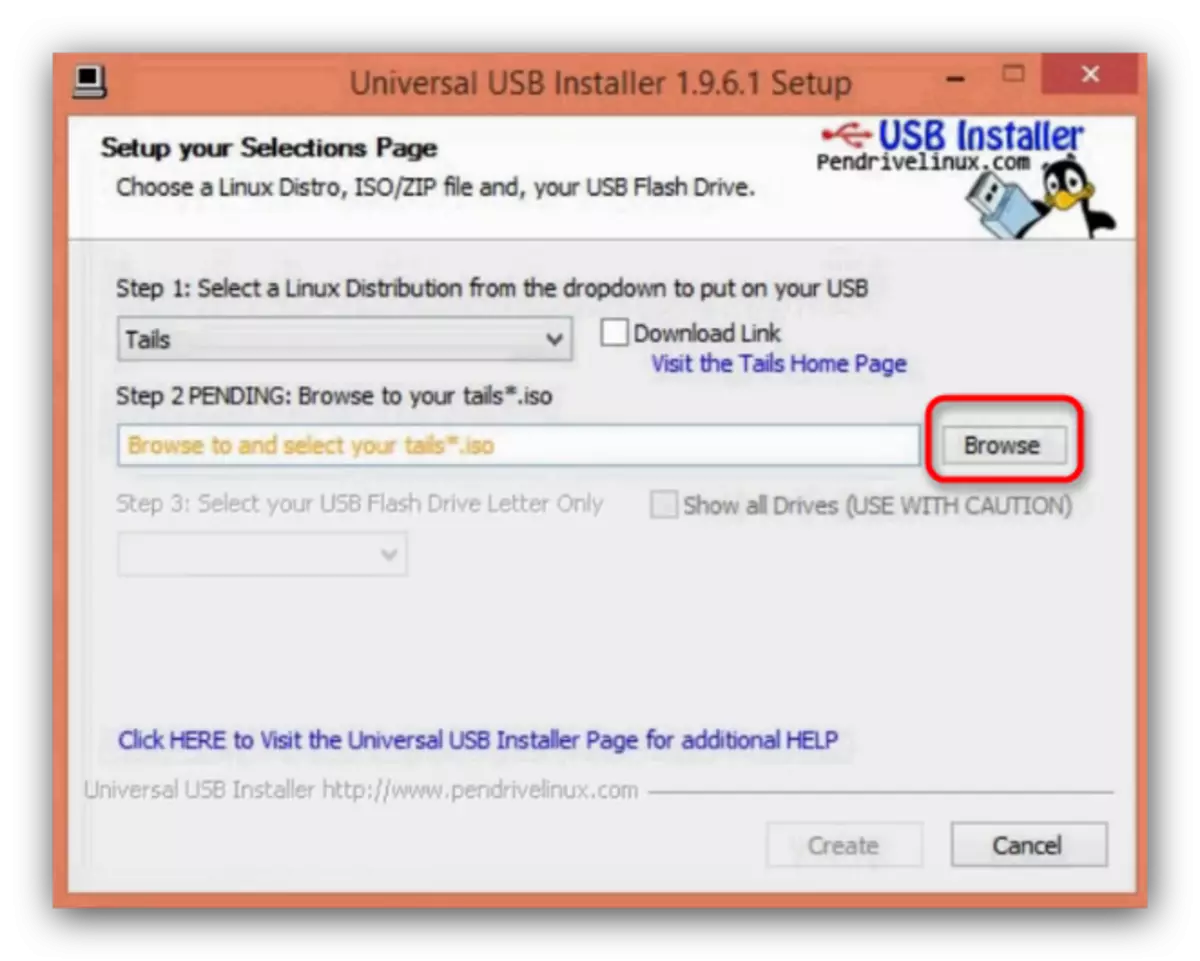
As in the case of RUFUS, proceed to the folder, select the file in the ISO format and click Open.
- The next step is the choice of flash drive. Select the previously connected Flash drive in the drop-down list.
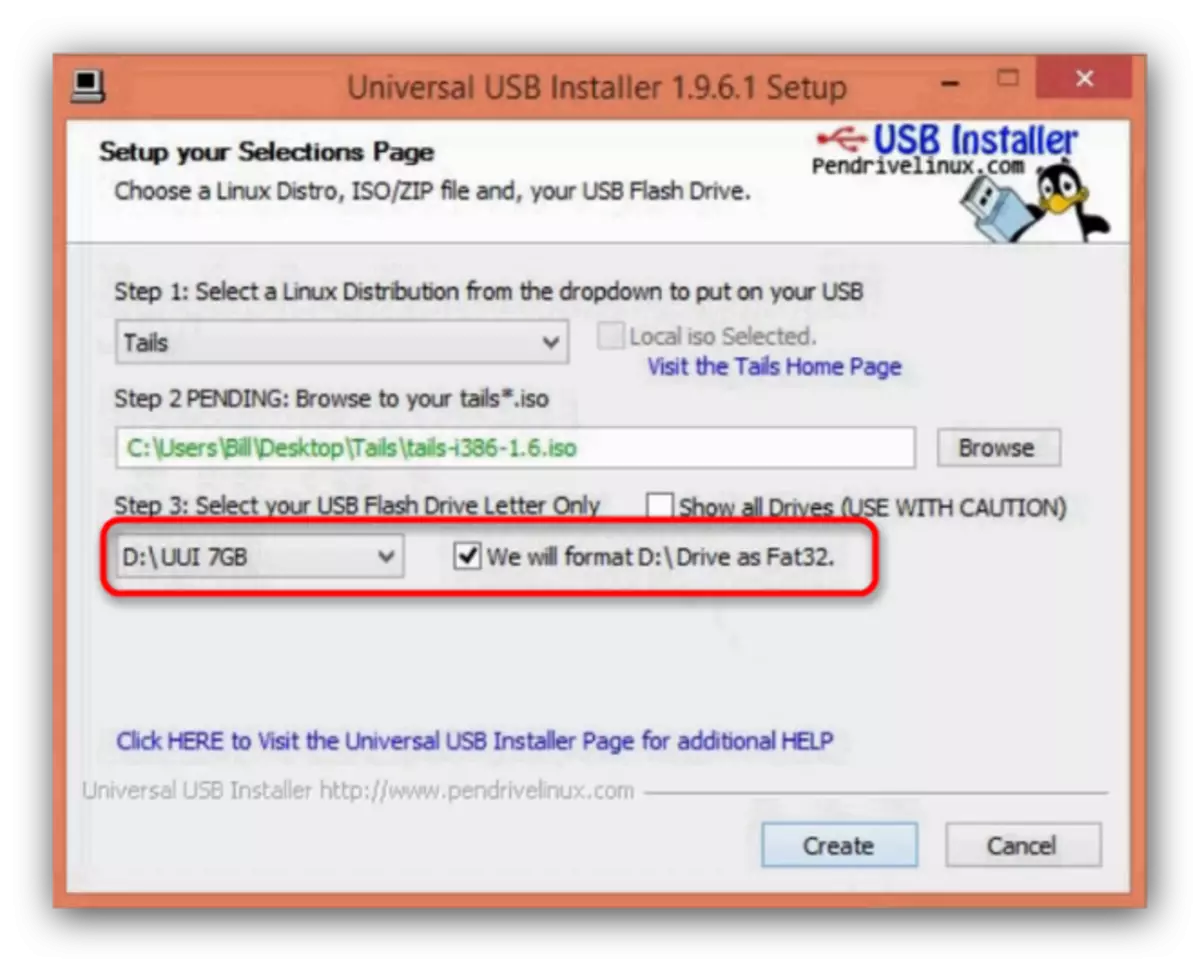
Mark the item "We Will Format ... As Fat32".
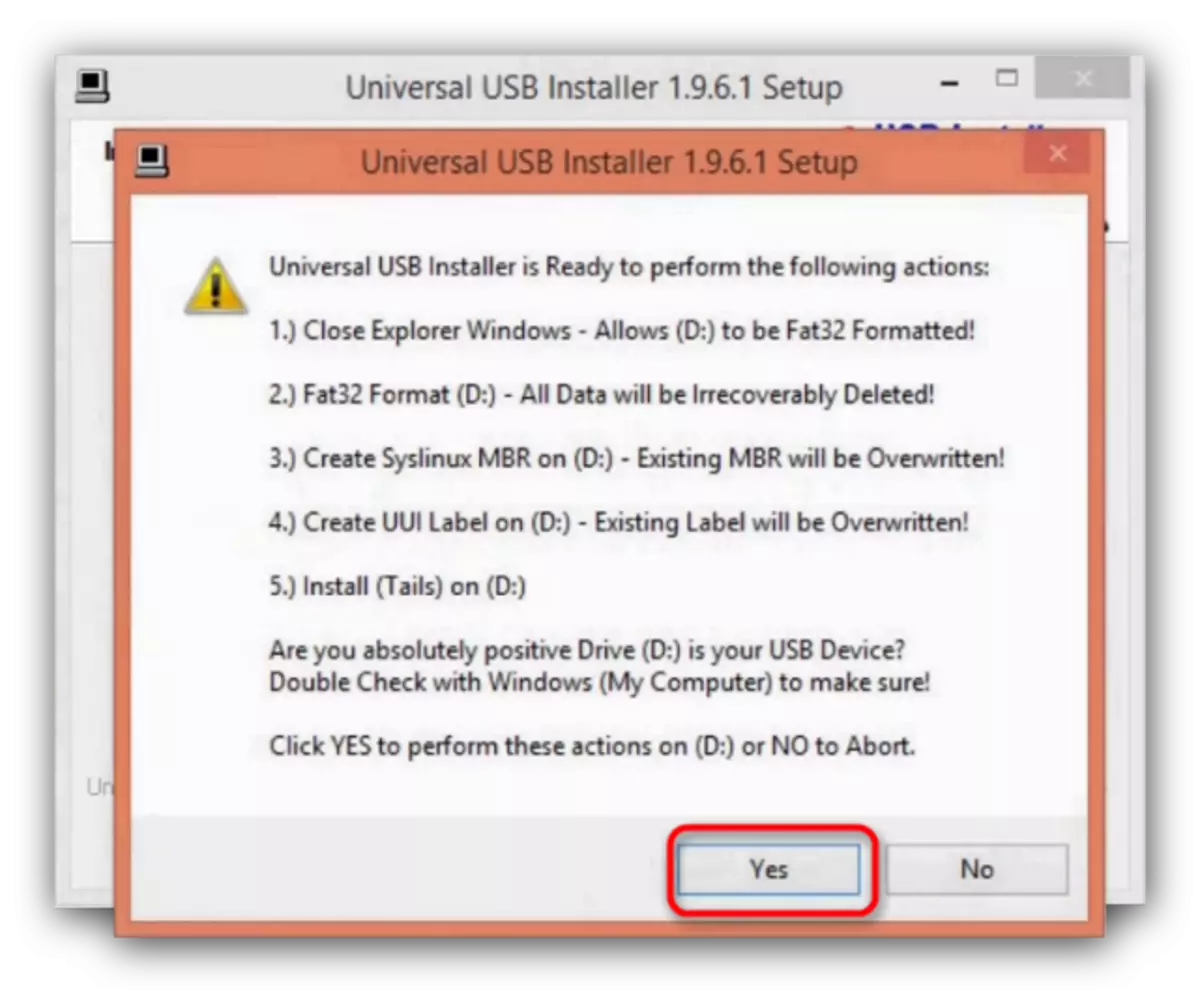
- Press "CREATE" to start recording process.
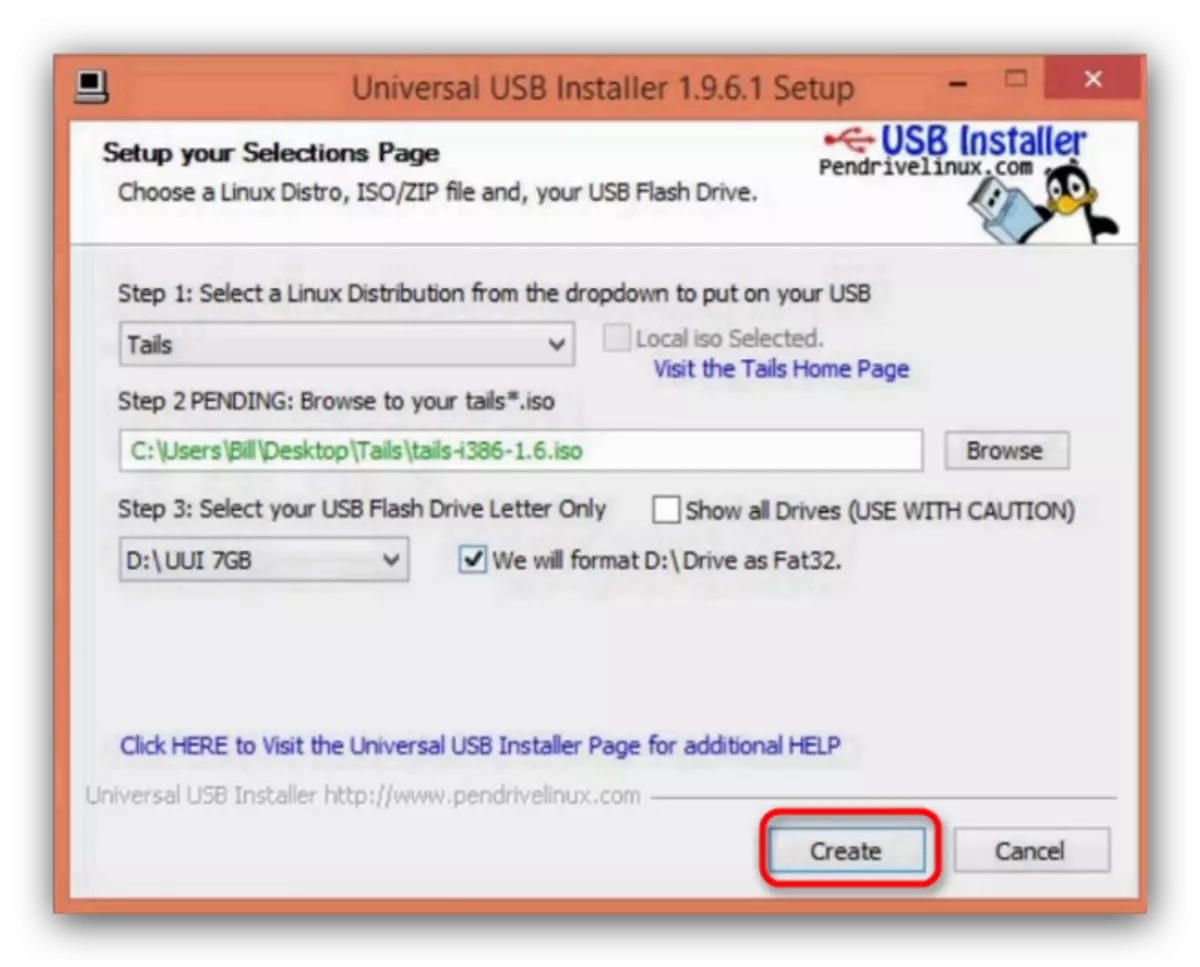
In the warning window that appears, press "YES".
- The process of writing an image can take a long time, so be ready for it. When the process is completed, you will see such a message.
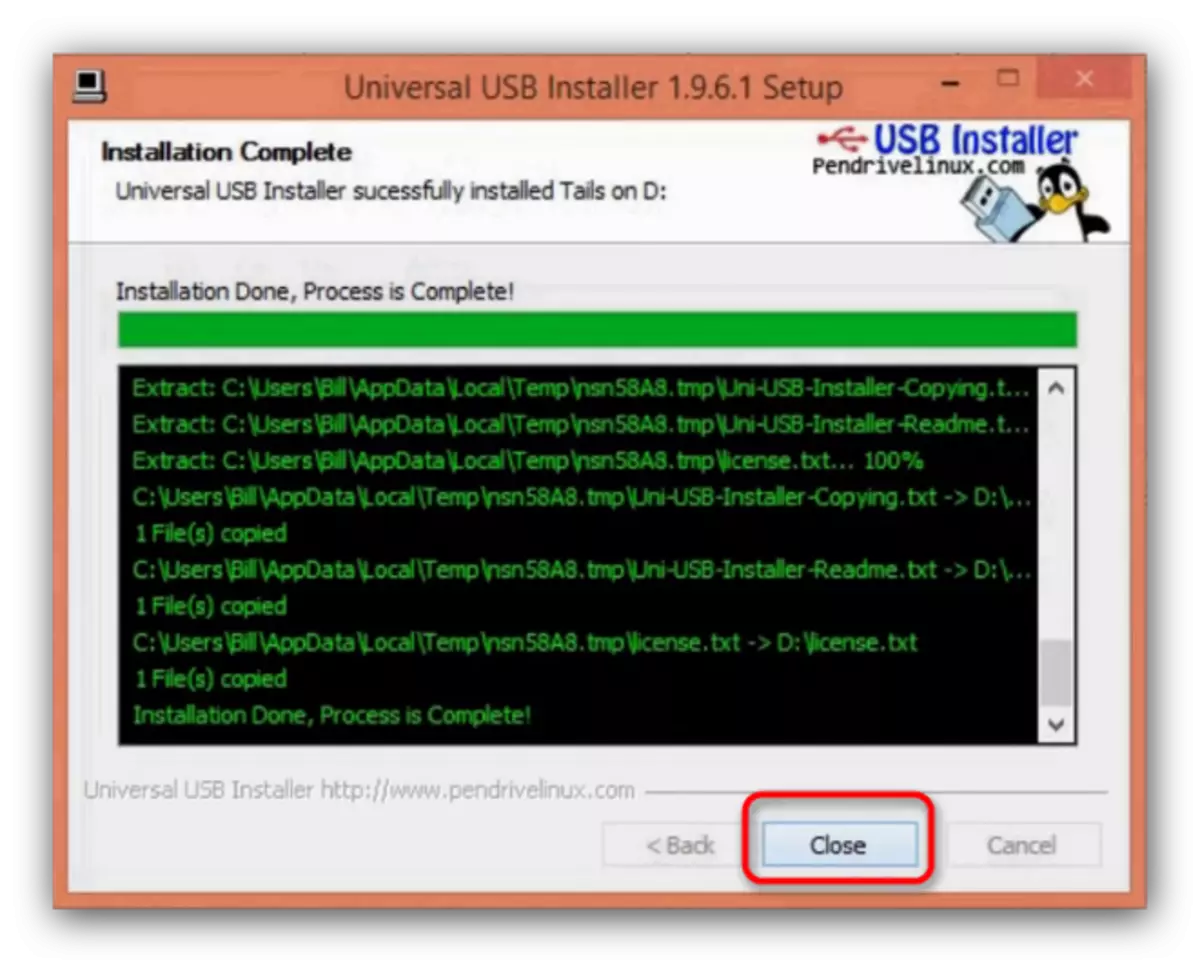
Universal USB Installer can be closed.
- Turn off the computer with the connected drive to which you installed Tails. Now this device must be selected as a bootable - you can use the appropriate instruction.
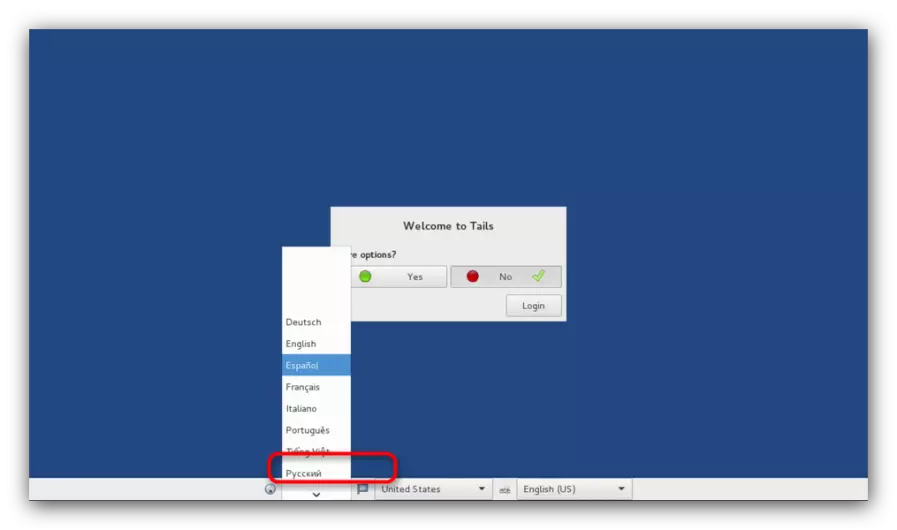
- Wait a few minutes while the Live version of Tayls is downloaded. In the settings window, select Language and keyboard layouts - the most convenient to choose "Russian".
- Connect the second USB flash drive to the computer to which the main system will be installed.
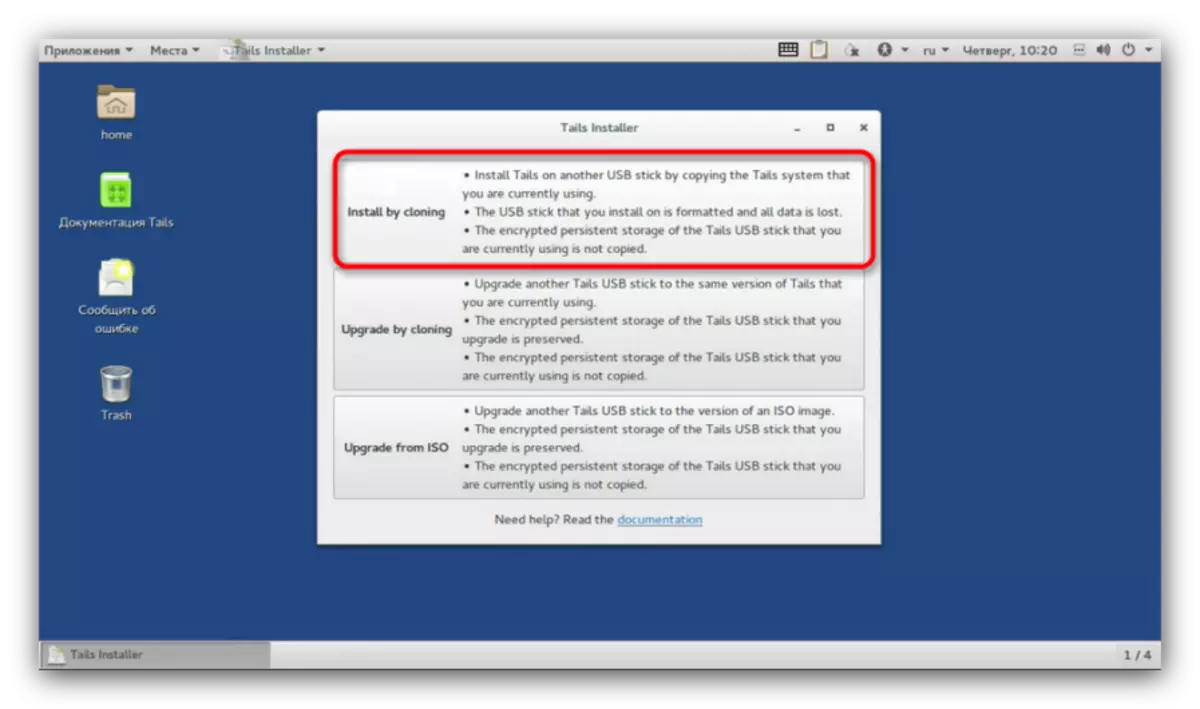
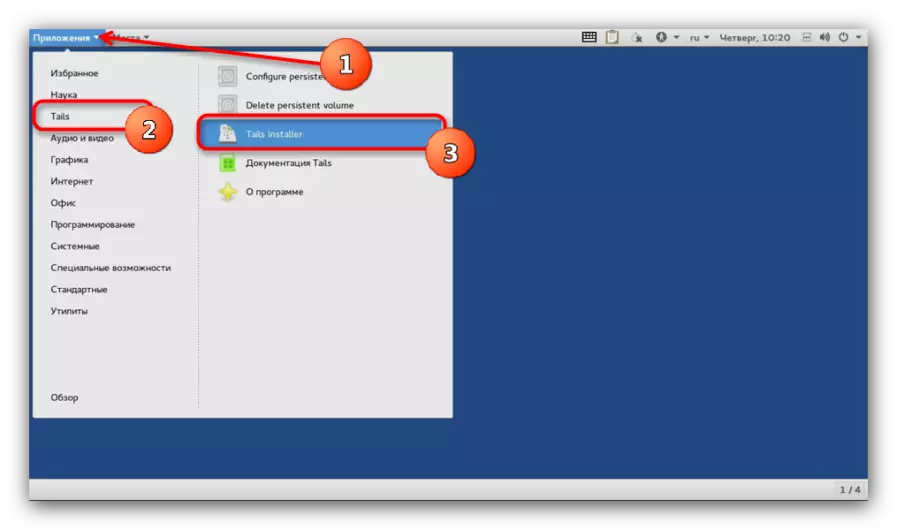
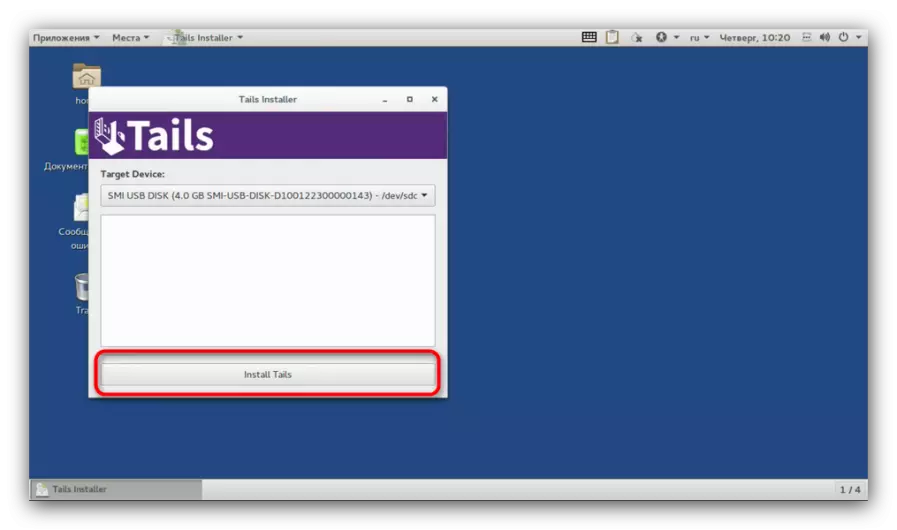
- When finished with a pretreatment, in the upper left corner of the desktop, find the menu "Applications". There, select the "Tails" submenu, and in it "Tails Installer".
- In the application you need to select "Install by Cloning".
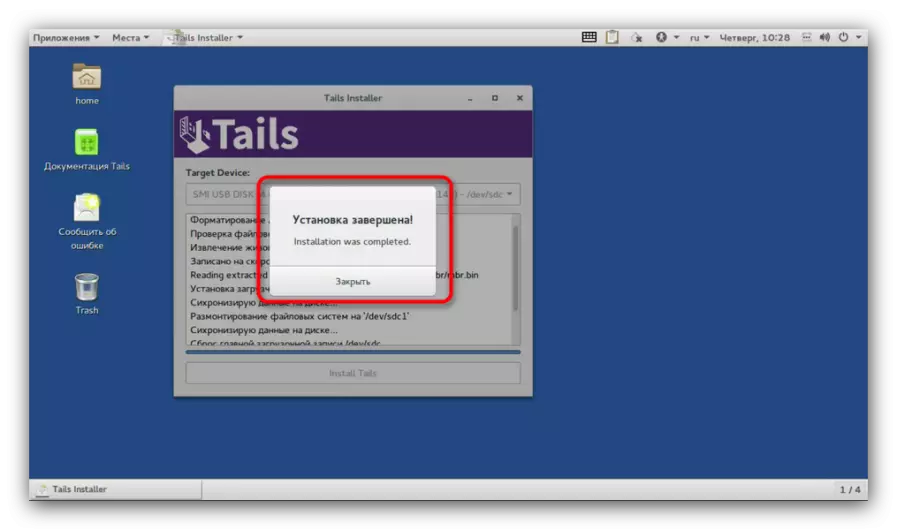
In the next window, select your USB flash drive from the drop-down list. In the utility, the installer is built-in protection against a random choice of not the media, so the probability of the error is low. By selecting the desired storage device, click "Install Tails".
- At the end of the process, close the installer window and turn off the PC.
Pull out the first USB flash drive (it can be formatted and used for everyday needs). On the second there is already a ready-made tails, from which you can download on any supported computers.
Pay attention - the image of Tails can sign up for the first flash drive with errors! In this case, use the method 2 of this article or use other programs to create boot flash drives!
Method 2: Creating an installation flash drive using RUFUS (Alternative)
The RUFUS utility has proven itself as a simple and reliable tool for creating installation USB drives, it will also serve as a good alternative to Universal USB Installer.
Upload rufus.
- Download Rufus. As in the method 1, we connect the first drive to the PC and run the utility. In it, select the storage device to which the installation image will be recorded.
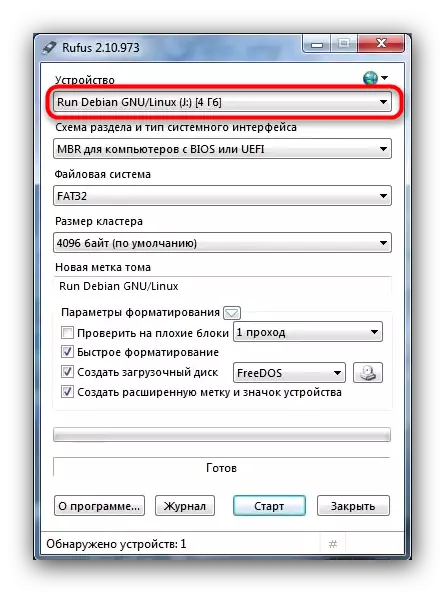
Once again we remind you that you need flash drives with a capacity of at least 4 GB!
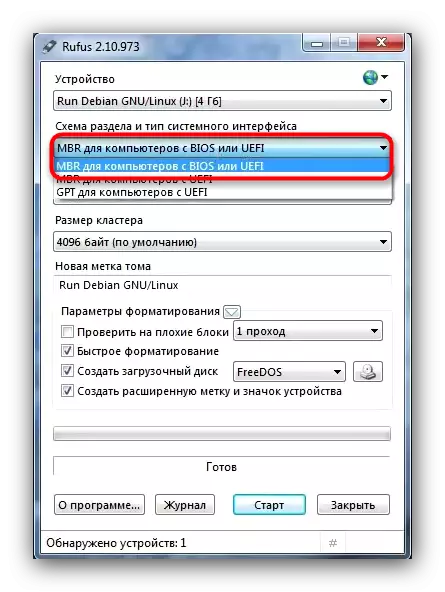
- Next, select the section scheme. By default, "MBR for computers with BIOS or UEFI" is installed - it is necessary for us, so we leave as it is.
- The file system is only "FAT32", as for all flash drives designed to install the OS.
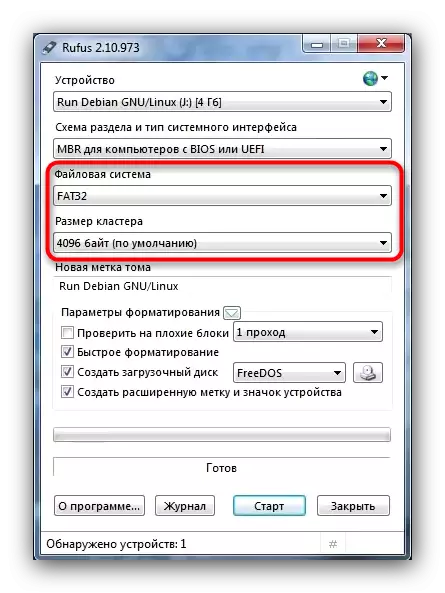
The size of the cluster does not change, the Tom label is optional.
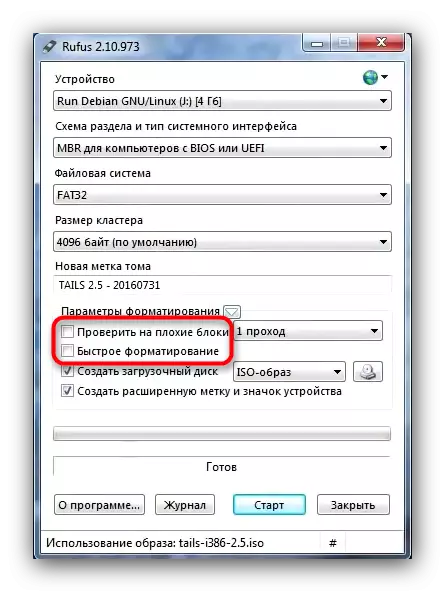
- Go to the most important. The first two points in the "Formatting parameters" block (Checkboxes "Check on bad blocks" and "Fast formatting") must be deleted, so you remove the checkboxes from them.
- We mark the "boot disk" item, and in the list to the right of it select the "ISO image" option.
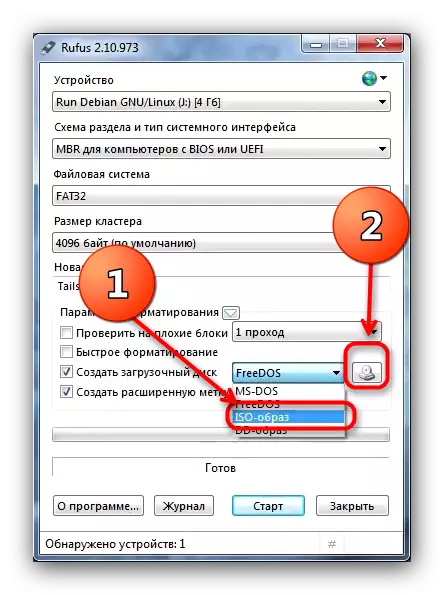
Then click on the button with the image of the drive drive. This action will call the "Explorer" window, in which you want to select an image with Tails.
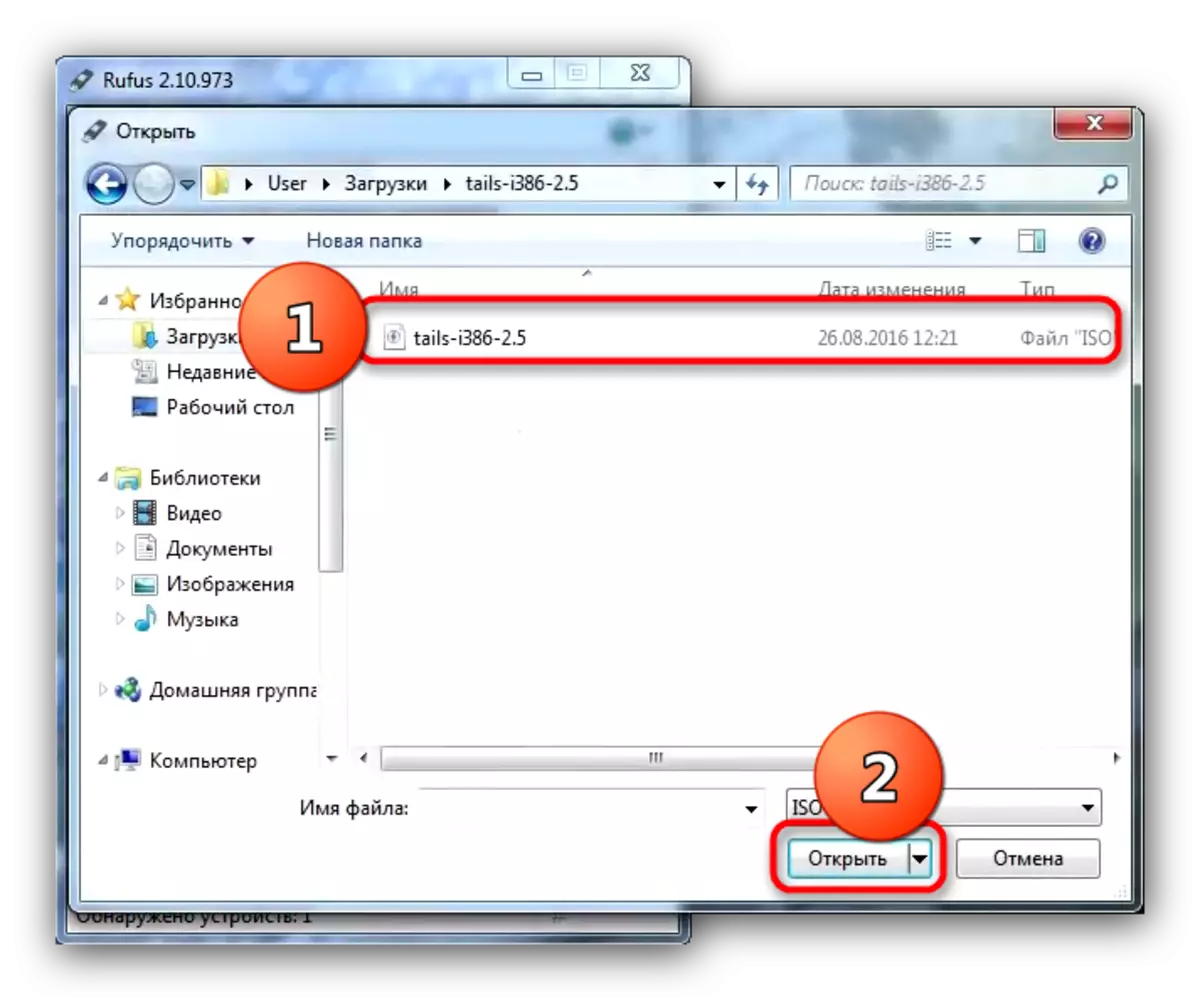
To select an image, highlight it and click Open.
- The option "Create an extended volume label and device icon" is better left marked.
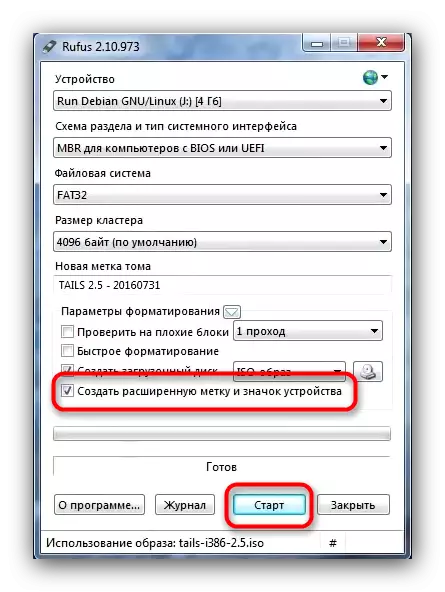
Check out the correctness of the parameter selection and click "Start".
- Perhaps, when starting the recording procedure, this is the message.
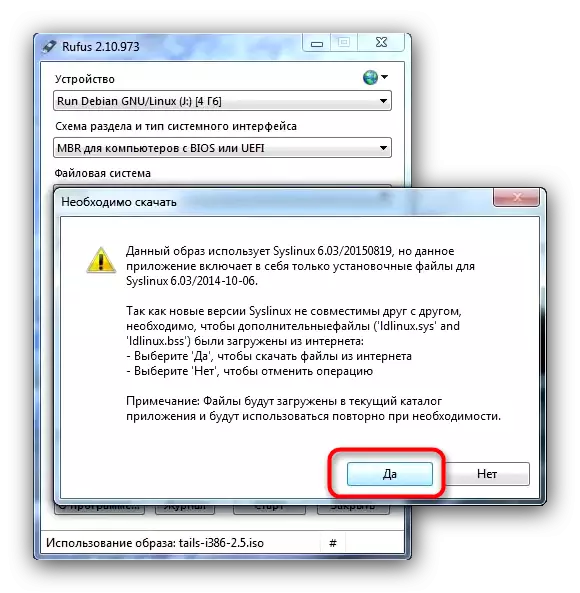
You must click "Yes." Before that, make sure your computer or laptop is connected to the Internet.
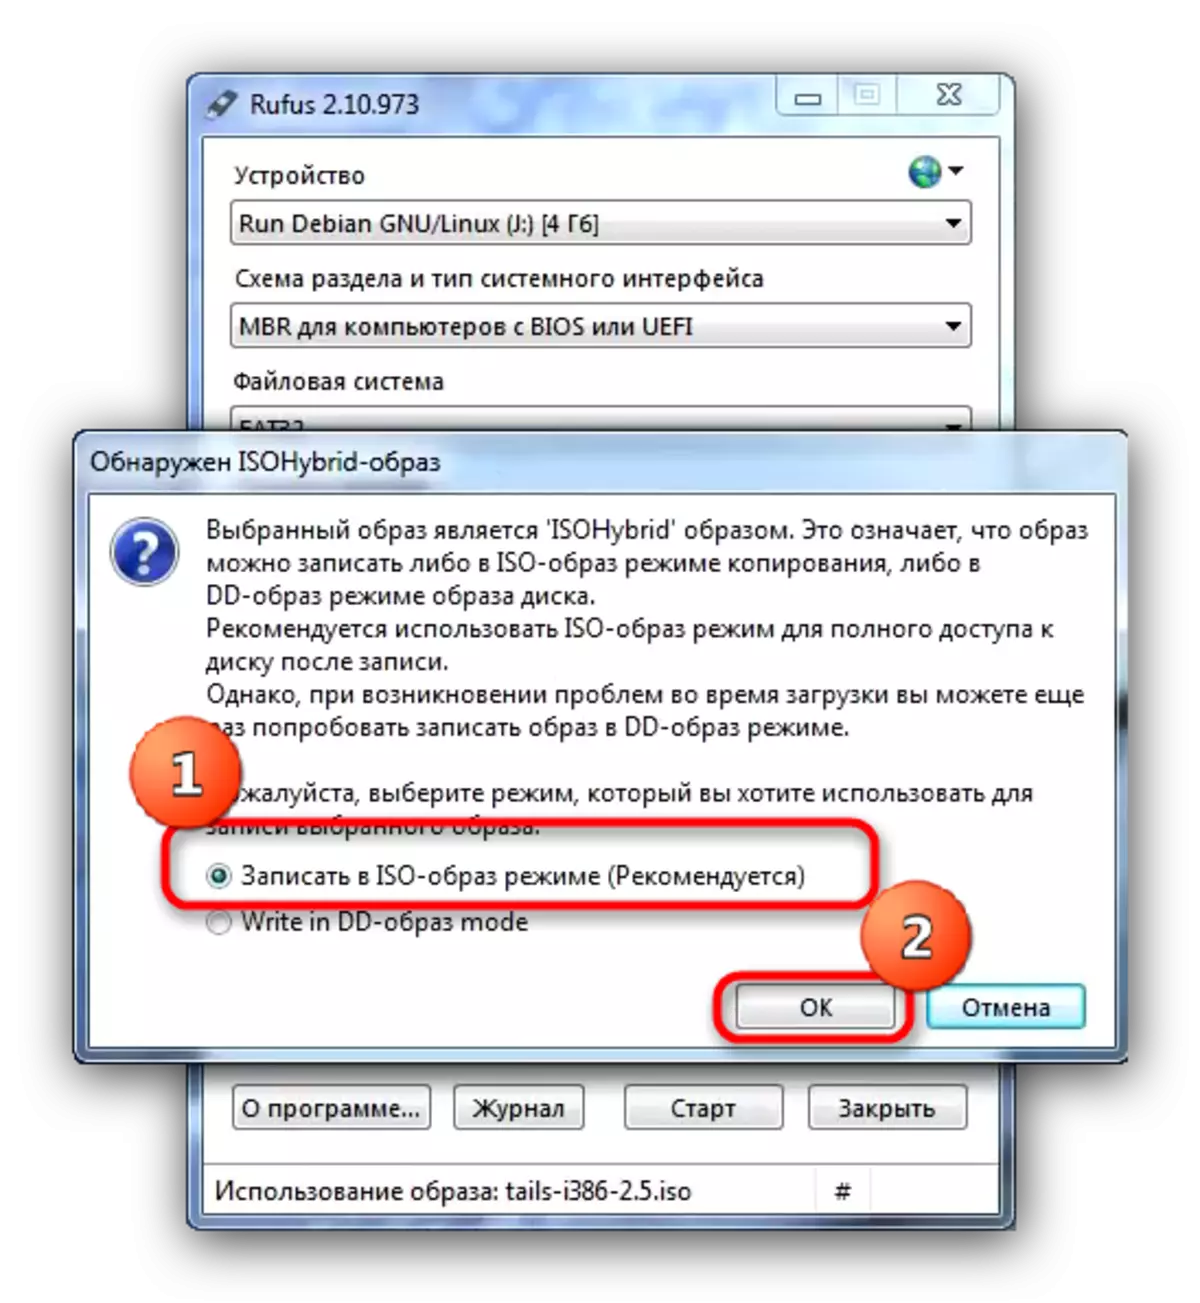
- The following message concerns the type of writing to the flash drive. By default, the option "Write in ISO mode" is selected, it should be left.
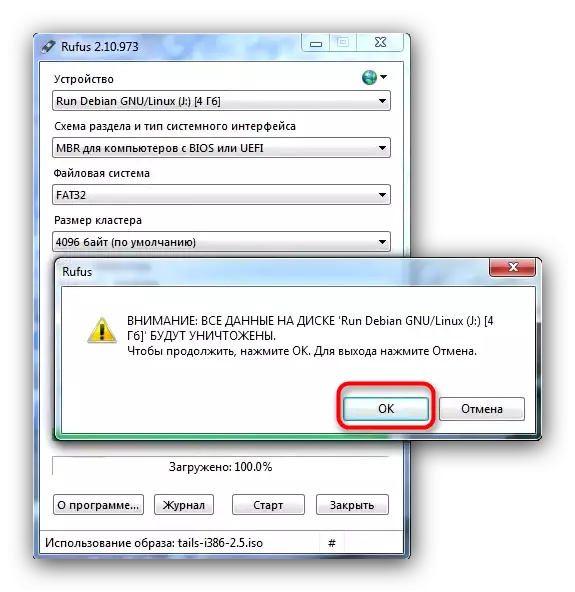
- Confirm the consent to the formatting of the drive.
Expect the end of the procedure. When finished, close RUFUS. To continue installing the OS on the USB flash drive, repeat steps 7-12 of the method 1.
As the outcome, we want to remind you that the first security security is their own attentiveness.