
The video surveillance system may be needed at a variety of reasons for both the company and a private person. The last category is very profitable to choose IP cameras: there is such an equipment inexpensively and it is possible to use it without any specific skills. As practice shows, the difficulties of users are tested during the initial configuration of the device, in particular when using the router as a communication tool with a computer. Therefore, in today's article we want to tell how to connect the IP camera to the network router.
Features of the connection of IP cameras and router
Before we turn to the description of the connection procedure, we note that a computer with an active Internet connection will be needed to configure the camera and the router. Actually, the operation setting operation of the surveillance device and the router consists of two steps - the camera settings and the router settings, and exactly in this order.Step 1: Setting the IP Camera
Each chambers of the considered species have a fixed IP address, thanks to which access to observation is provided. However, no such device will work "out of the box" - the fact is that the address assigned by the manufacturer is most likely not coincided with the address space of your local network. How to solve this problem? Very simple - the address must be changed to the appropriate.
Before starting manipulation, you should find out the address space of the LAN-network. Oh there, as is done, told in the following material.
Read more: Connecting and configuring a local network on Windows 7
Next, you need to know the address of the camera. This information is in the documentation of the device, as well as on the sticker placed on its enclosure.

In addition, the device supplied delivery must be present an installation disk on which in addition to drivers also goes a configuration utility - in most of them you can find out the exact IP address of the surveillance camera. With the help of the same utility, you can change the address, however, there are many species of such software, therefore a description of how to do this operation, deserves a separate article. Instead of utilities, we will use a more versatile option - change the required parameter via the web interface. This is done as follows:
- Connect the device to the computer - insert one end of the network cable to the port on the device, and the other is to the corresponding PC or laptop network card connector. For wireless cameras, it is enough to make sure that the device is recognized by the Wi-Fi network and connects to it without problems.
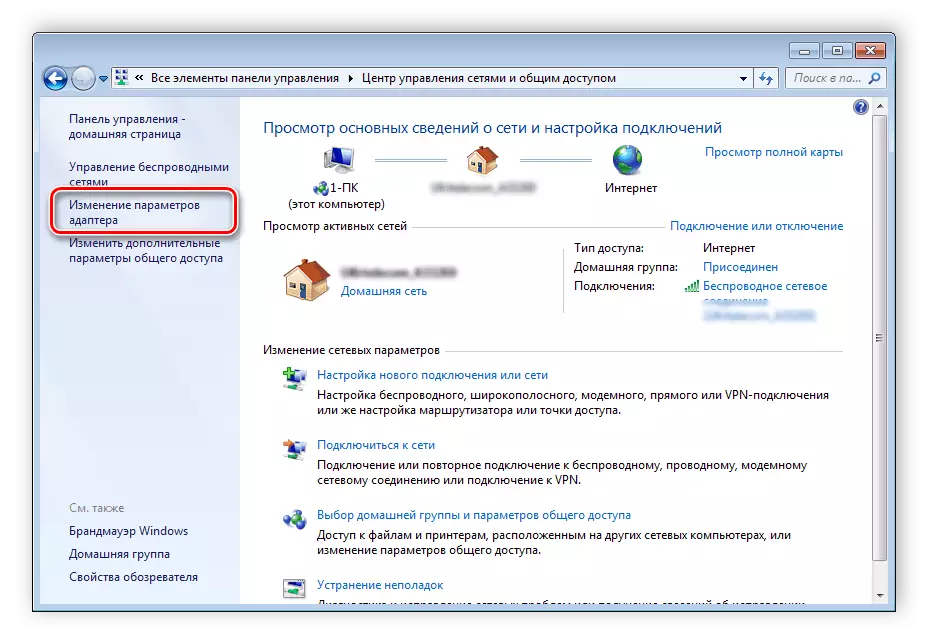
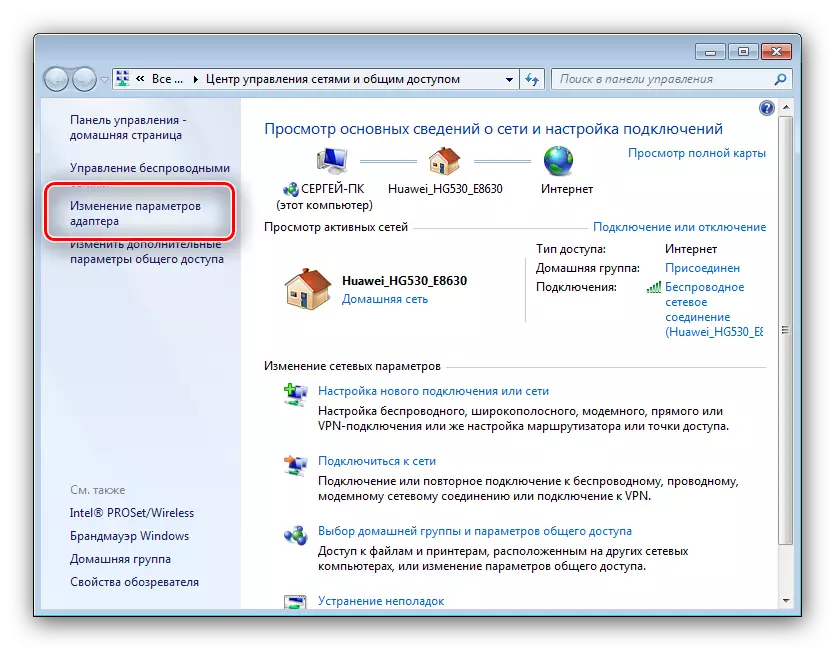
- Access to the camera's web interface is not available by default due to the differences between the LAN-connection subnets and the device addresses. To enter the subnet configuration tool should be made the same. To achieve this, open the "Network and Shared Access Control Center". After clicking on the option "Changing the Adapter Settings".
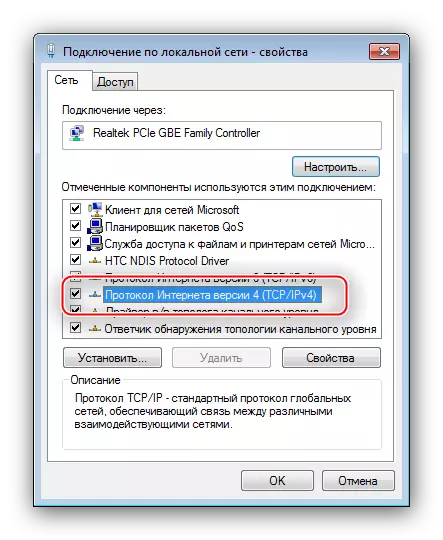
Next locate the "Local Network Connection" item and click on it by PCM. In the context menu, select "Properties".

In the properties window, select "TCP / IPv4" and double-click on it with the left mouse button.
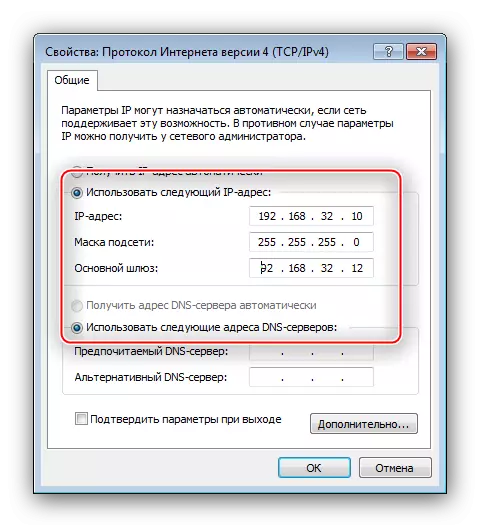
- Contact the address of the camera, which previously learned - for example, it has a view of 192.168.32.12. The penultimate pair of numbers and is the camera's work subnet. The computer to which you connected the device is likely to have address 192.168.1.2, therefore, in this case, "1" must be replaced by "32". Of course, your device can have a completely different subnet number, and should be entered. The latest digit of the computer is also needed to be 2 less than a similar value of the camera address - for example, if the latter has a view of 192.168.32.12, the address of the computer should be installed as 192.168.32.10. The "Main Gateway" item should be located the address of the custom cameras. Do not forget to save the settings.
- Now enter the Camera Configuration Interface - Open any browser, enter the device address in the line and press ENTER. A window will appear asking you to enter the username and password, the data you need can be found in the camera documentation. Enter them and enter the web application.
- Further actions depend on whether you need to view the image from the device via the Internet, or there will be a fairly local network. In the latter case, in the settings of the network, mark the option "DCHP" (or "Dynamic IP").

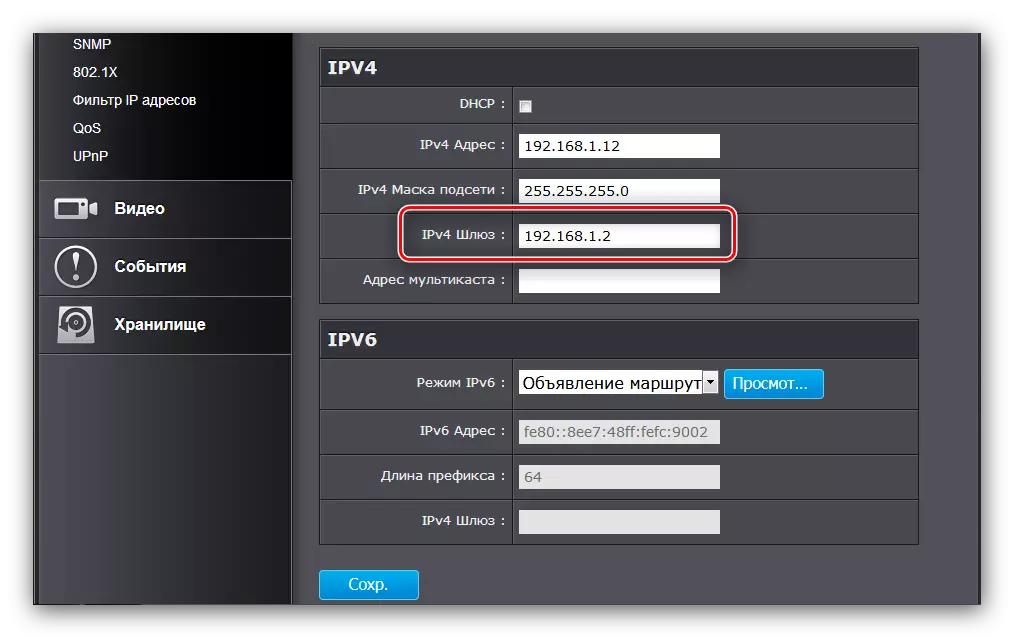
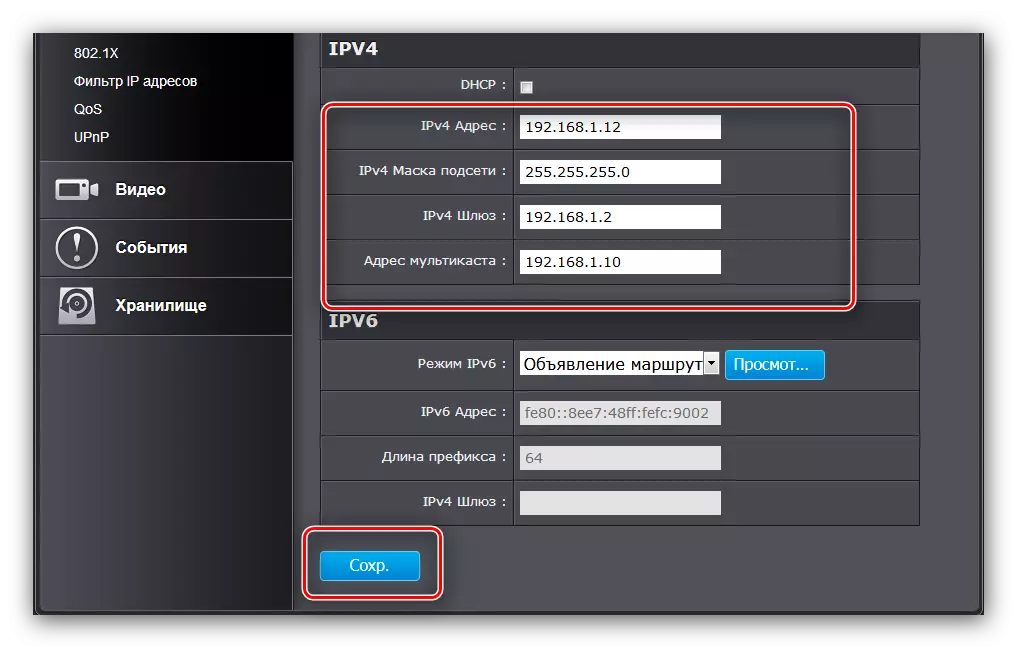
For a viewing option via the Internet, you will need to set the following settings in the same section.
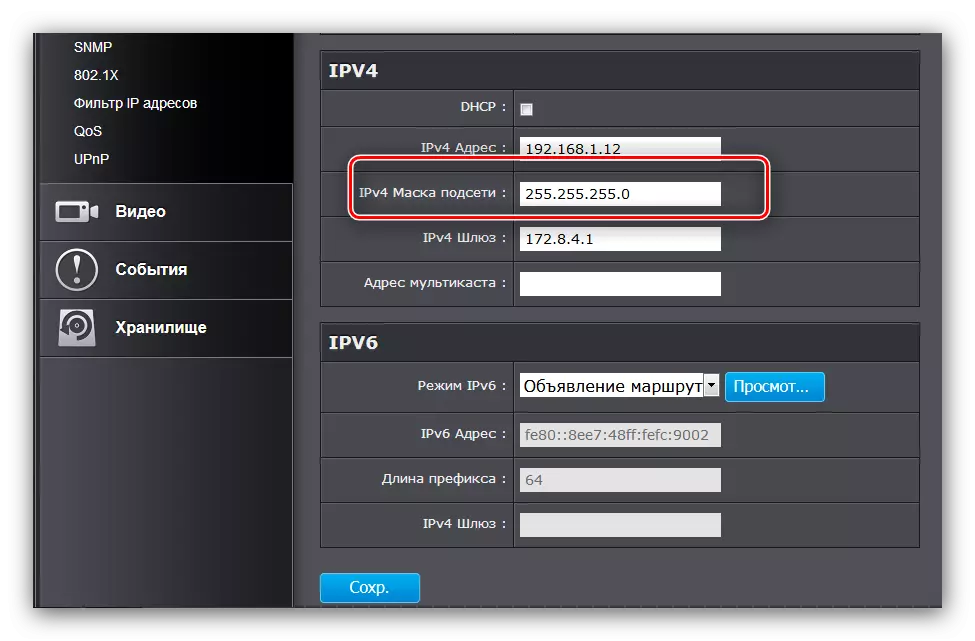
- The IP address is the main option. You need to enter the address of the camera with the value of the main subnet of the LAN connections - for example, if the built-in IP device is viewed as 192.168.32.12, then in the "IP address" line you need to be brought already on 192.168.1.12;
- Subnet mask - just enter the default parameter 255.255.255.0;
- Gateway - Here insert the IP address of the router. If you do not know it, take advantage of the following manual:
Read more: learn the IP address of the router
- DNS server - here you need to enter the address of the computer.


Do not forget to save the settings.
- In the camera's web interface you need to assign a connection port. As a rule, such options are located in the extended network settings. In the "HTTP port" line, enter any value other than the default installed, which is "80" - for example, 8080.
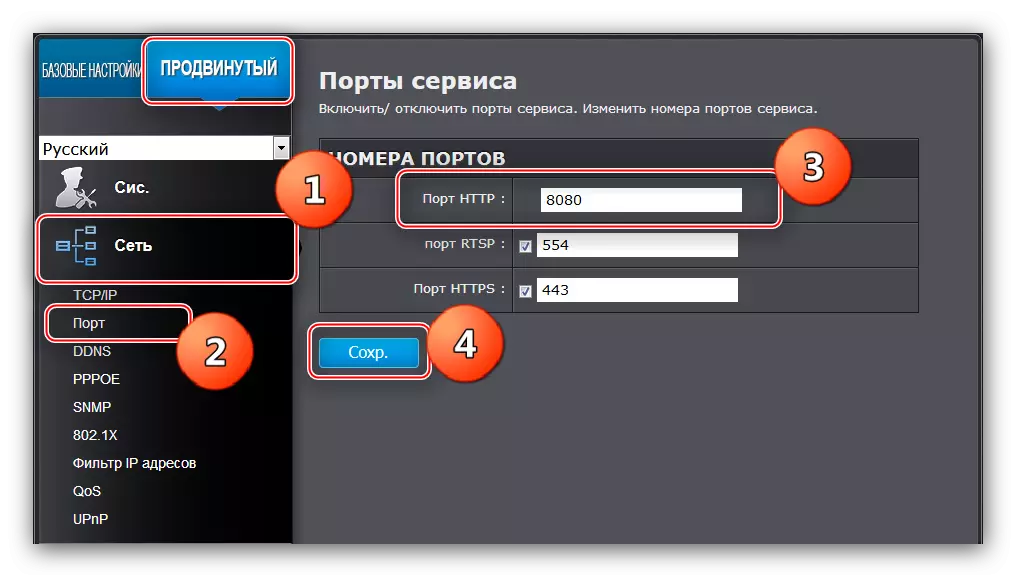
Note! If you cannot find the appropriate options in the configuration utility, the ability to change the port of your camera is not supported, and this step will have to skip.
- Disconnect the device from the computer and connect to the router. Then go back to the "General Access and Network Management Center", open the "Local Connection" properties and set the IP and DNS parameters as "automatic".


On this, the configuration of the equipment for observation is completed - go to configuring the router. If you have several cameras, then the procedure described above will need to be repeated for each with one difference - the values of the address and port for each must be per unit greater than that of the first configured device.
Step 2: Routher Setup
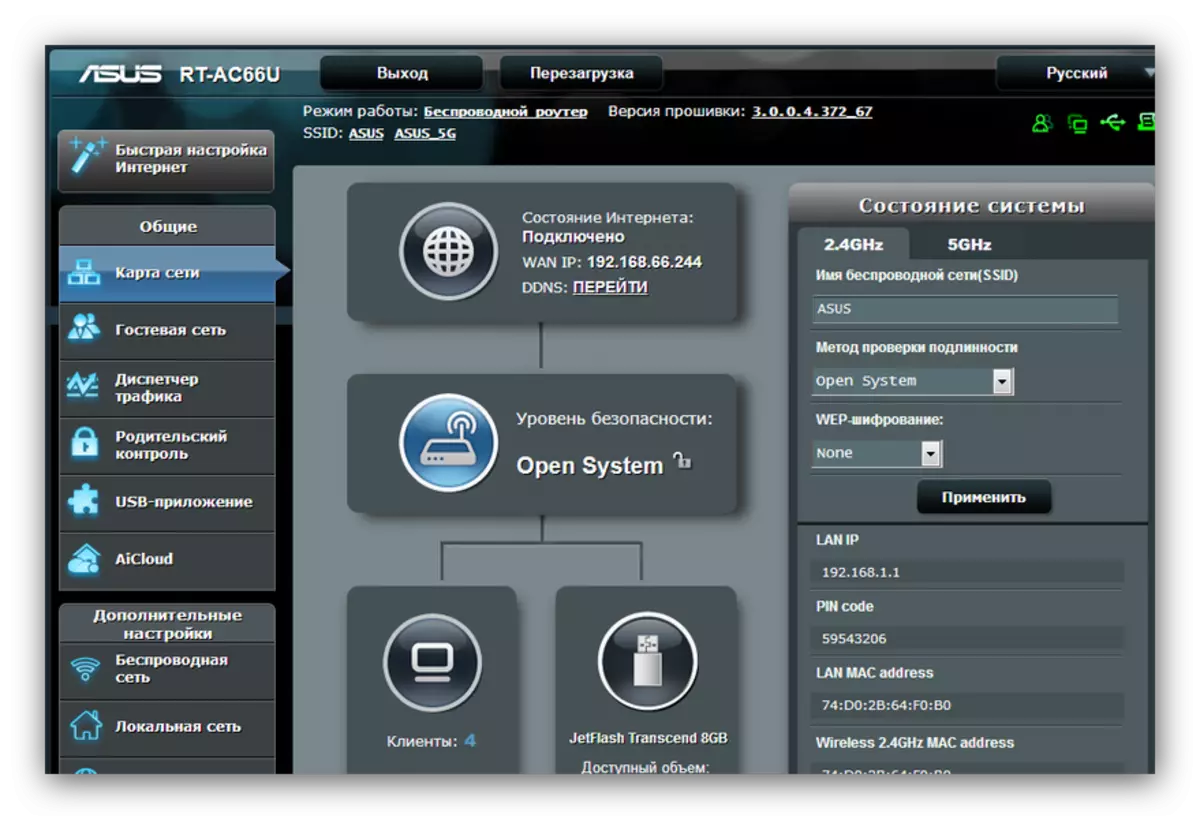
The router setting for the operability of the IP camera is somewhat simpler. First, make sure that the router is connected to the computer and access to the Internet. Naturally, you will also need to enter the router setting interface - you will find links to the instructions below.
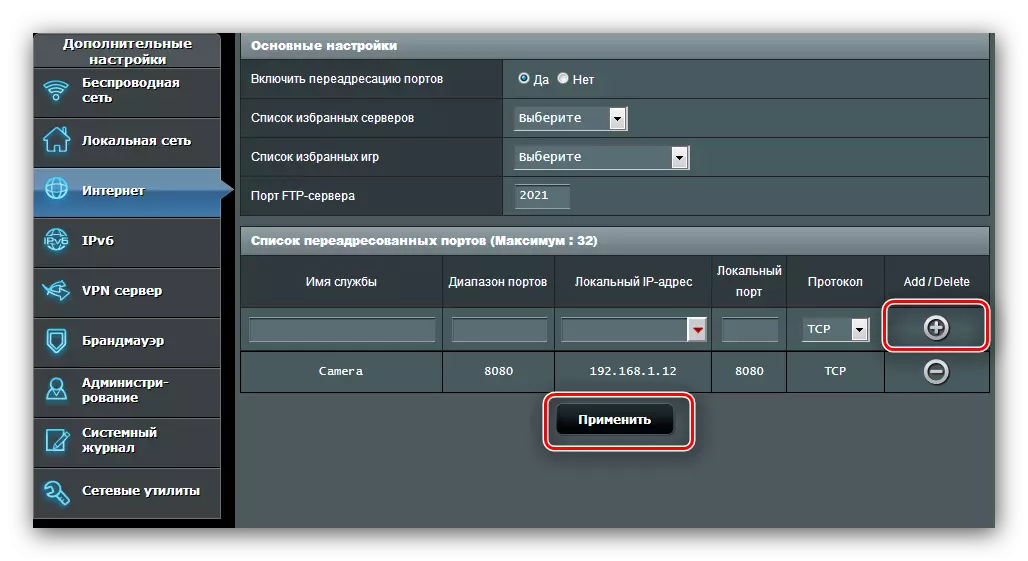
For a plurality of connected cameras, repeat the manipulation, meaning the need for different IP addresses and ports for each of the devices.
For a few words, let's say the same about connecting to the camera from any Internet site. For such a possibility, the static IP addresses of the router and / or computer are used, or, more often, the option "DynamicDNS". Most modern routers are equipped with this opportunity.
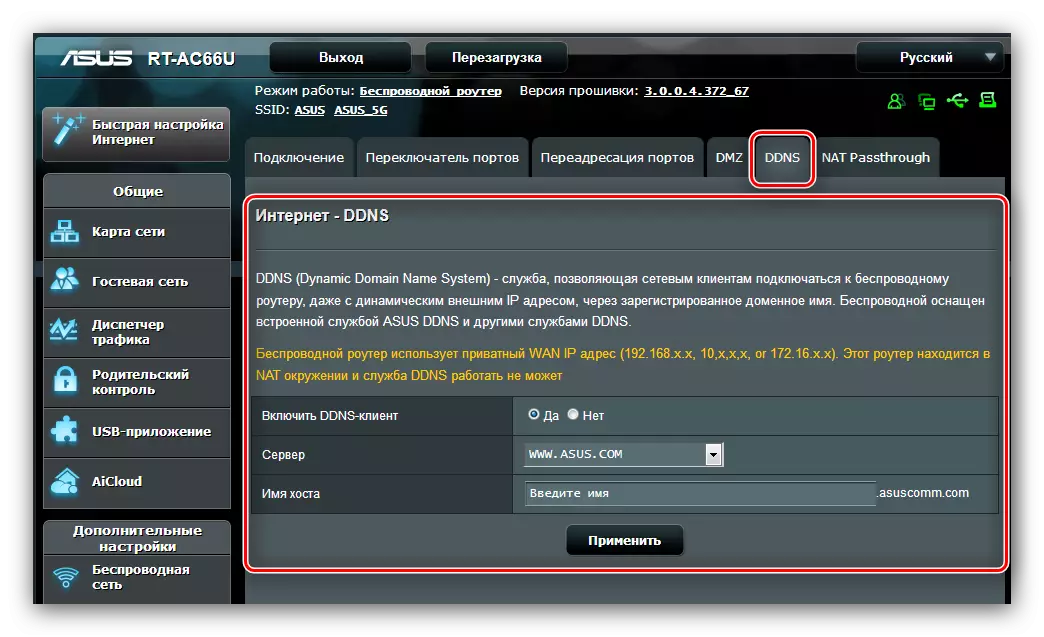
The procedure is to register a personal domain in a special DDNS service, with the result that you will have a link of the type HTTP: / CERTY-DENUM. Pressprovider-DDNS. The domain name must be entered in the router settings and in the same place to enter the host host. After that, on the specified link, you can access the camera interface from any device connected to the Internet - whether it is a computer, laptop or even a smartphone. A detailed instruction deserves a separate description, therefore it will not stop in detail on it.
Conclusion
That's all that we wanted to tell you about the procedure for connecting IP cameras to the router. As you can see, it is quite time-consuming, but there is nothing archent in it - it is only enough to carefully follow the proposed leadership.