
In the assortment of ASUS products, the network equipment is occupied. Presented both budget solutions and more advanced options. The RT-N14U router refers to the last category: In addition to the necessary functionality of the base router, there are the ability to connect to the USB-modem Internet, the options for remote access to the local disk and cloud storage are. It goes without saying that all the functions of the router must be configured, which we will tell you now.
Placement and connection of the router
You need to start working with the router from selecting and subsequently connecting the device to a computer.
- The location of the device must be selected by the following criteria: ensuring the maximum coverage area; lack of interference sources in the form of bluetooth devices and radio readeries; Lack of metal barriers.
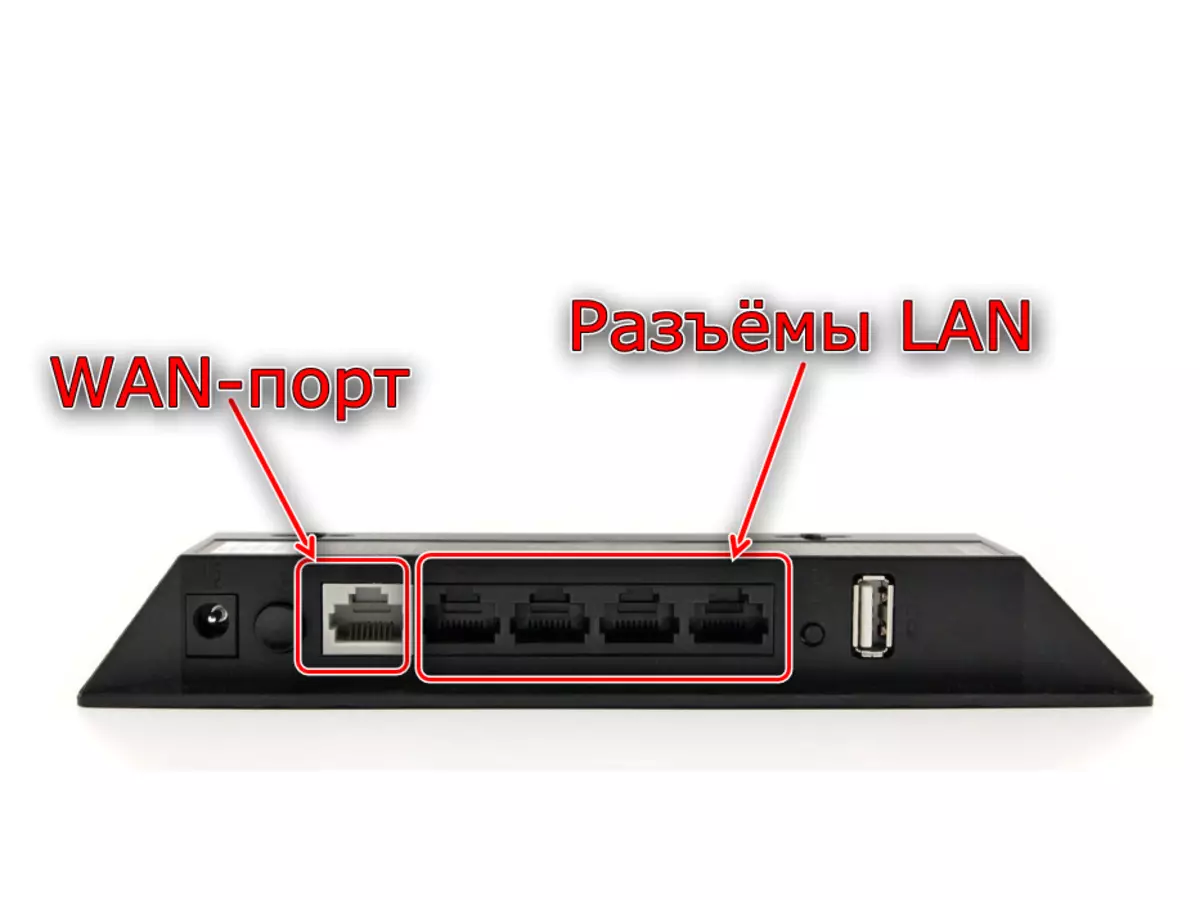
- Having understood with the location, connect the device to the power supply. Then connect to the WAN connector cable from the provider, then connect the router and the Ethernet cord computer. All ports are signed and marked, because you will definitely confuse anything.
- It will also be necessary to prepare a computer. Go to Connect Settings, find the connection on the local network there and call it properties. In properties, open the "TCP / IPv4" option, where you enable addresses in automatic mode.
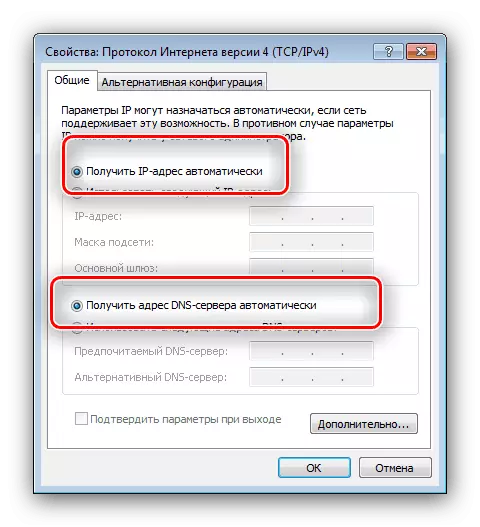
Read more: How to configure a local connection on Windows 7
Ending with these procedures, go to the adjustment of the router.
Setting up ASUS RT-N14U
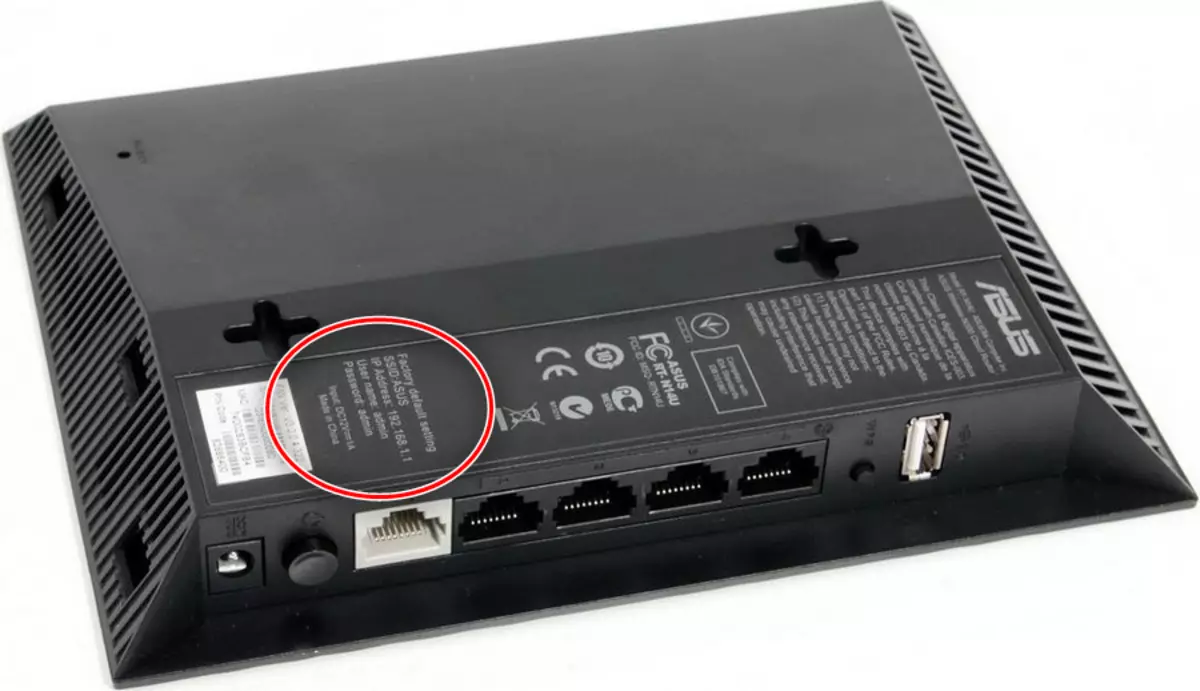
All without exception, network devices are configured by changing the parameters in the firmware web utility. Open this application follows through the appropriate Internet browser: write in line address 192.168.1.1 and press ENTER or the OK button, and when the password input window appears, enter the word Admin in both graphs.
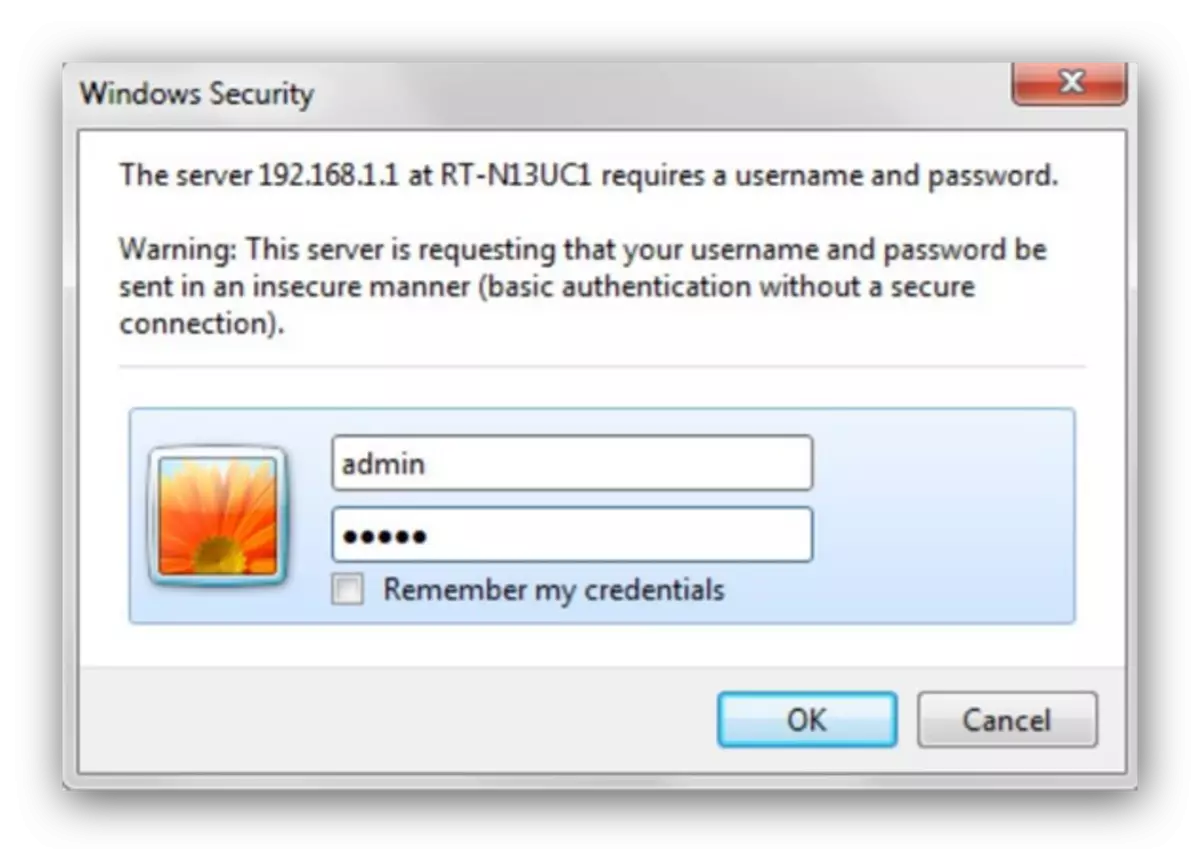
Please note that above we have led the default parameters - in some audits of the model, authorization data may differ. Correct login and password can be found on the sticker pasted on the rear of the router.
The router under consideration works under the control of the latest firmware version known as AsusWrt. This interface allows you to configure the parameters in automatic or manual mode. We describe both.
Utility quick customization
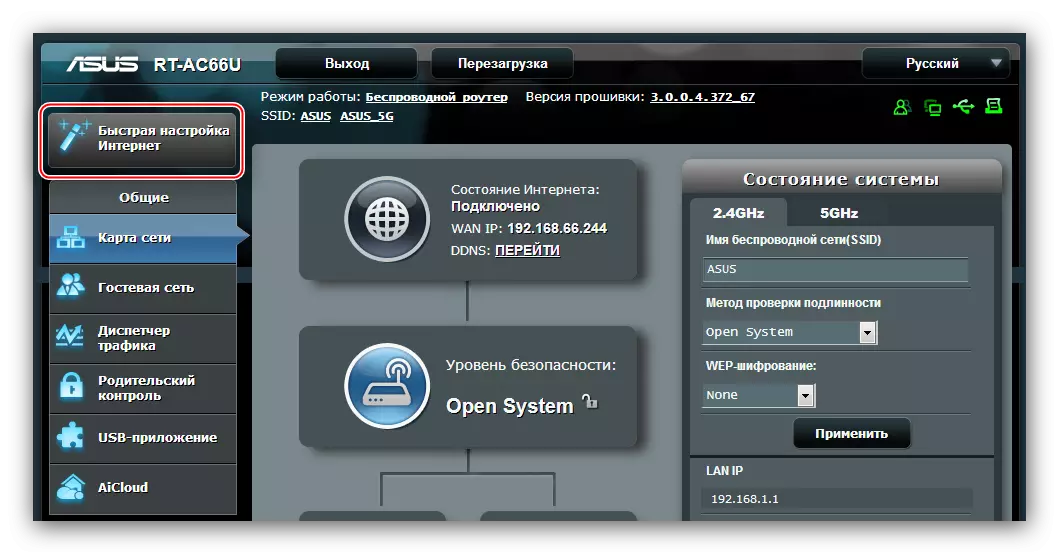
When you first connect the device to a computer, the fast setting will start automatically. Access to this utility can also be obtained from the main menu.
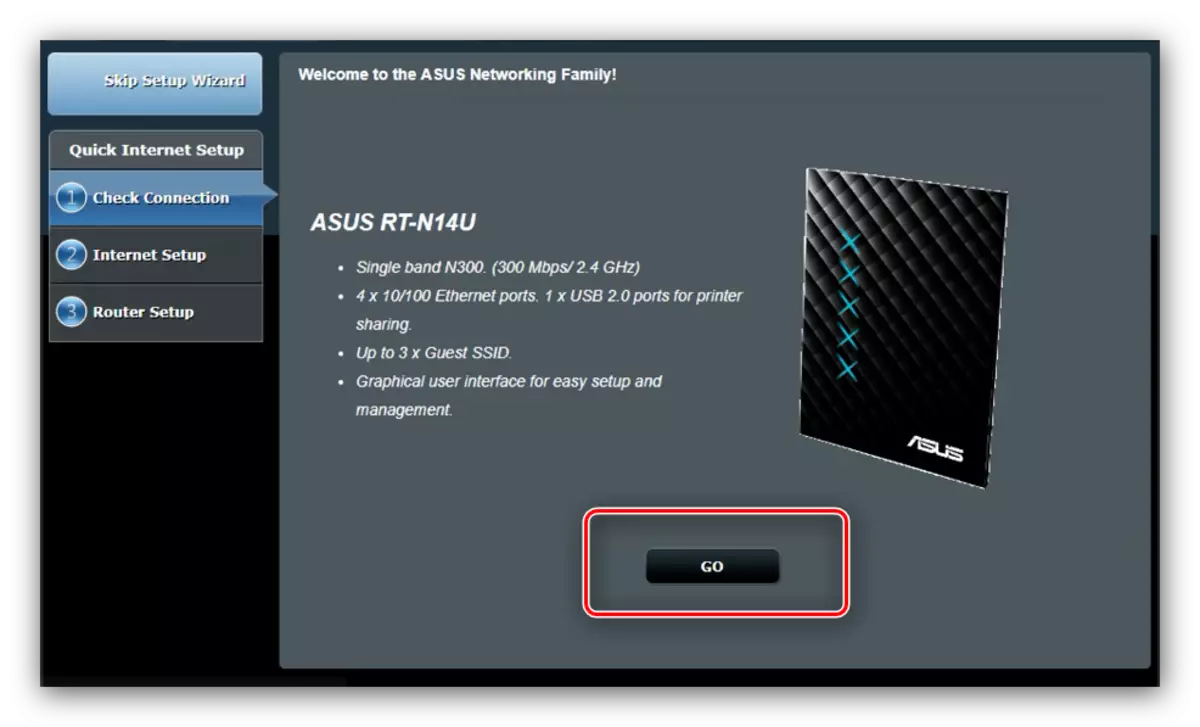
- In the welcome window, click "Go".
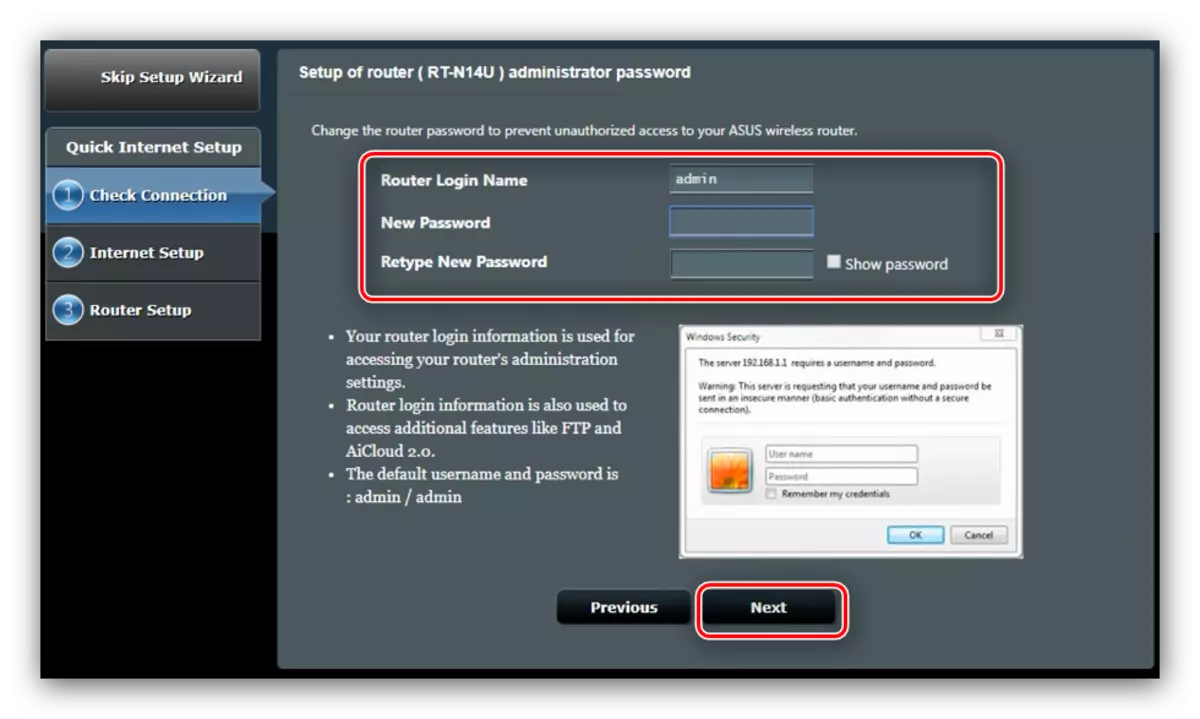
- At the current stage, you should change the entrance data to the utility. Password It is advisable to use more important: at least 10 characters in the form of numbers, Latin letters and punctuation marks. If you have difficulty inventing a combination, you can use the password generator on our website. Repeat the coded combination, then press "Next".
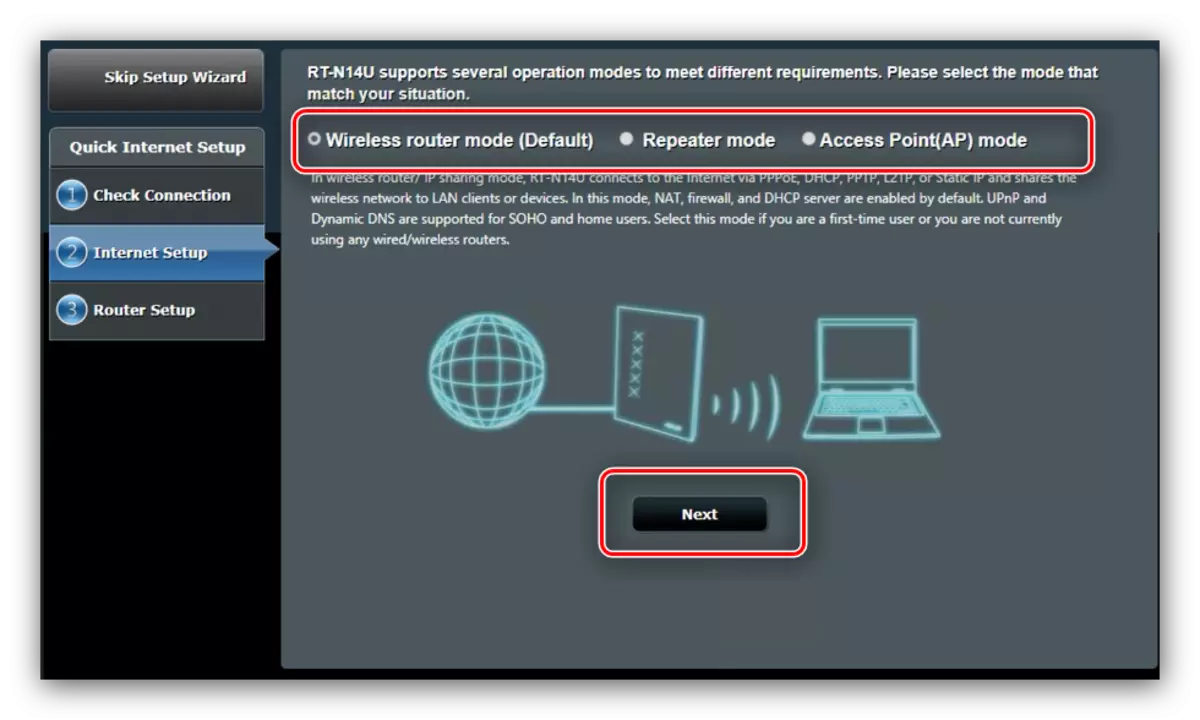
- It will take to choose the mode of operation of the device. In most cases, it is necessary to note the option "Wireless Router Mode".
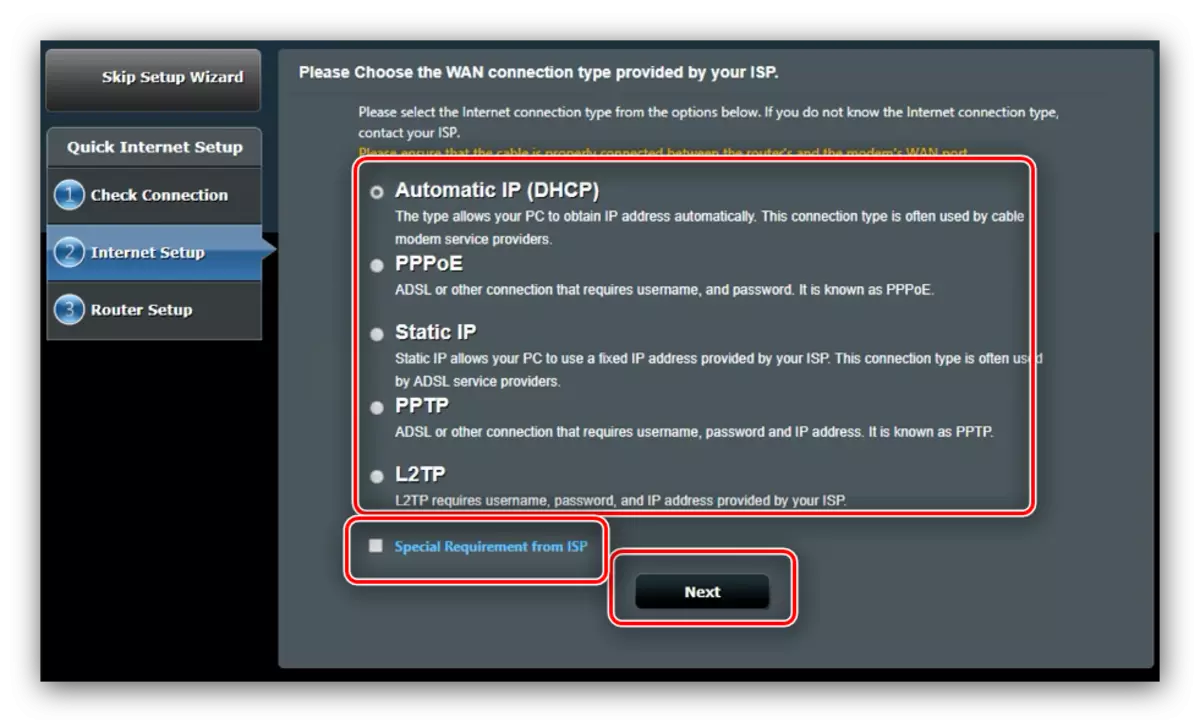
- Here, select the connection type that your provider provides. It may also be needed to enter some specific parameters in the "Special Requirements" section.
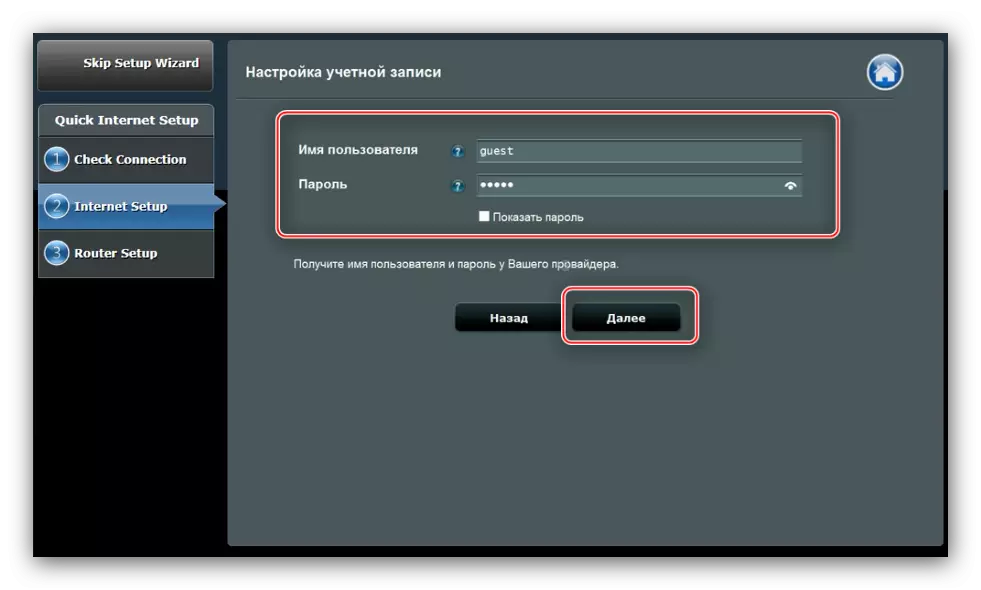
- Set the data to connect to the provider.
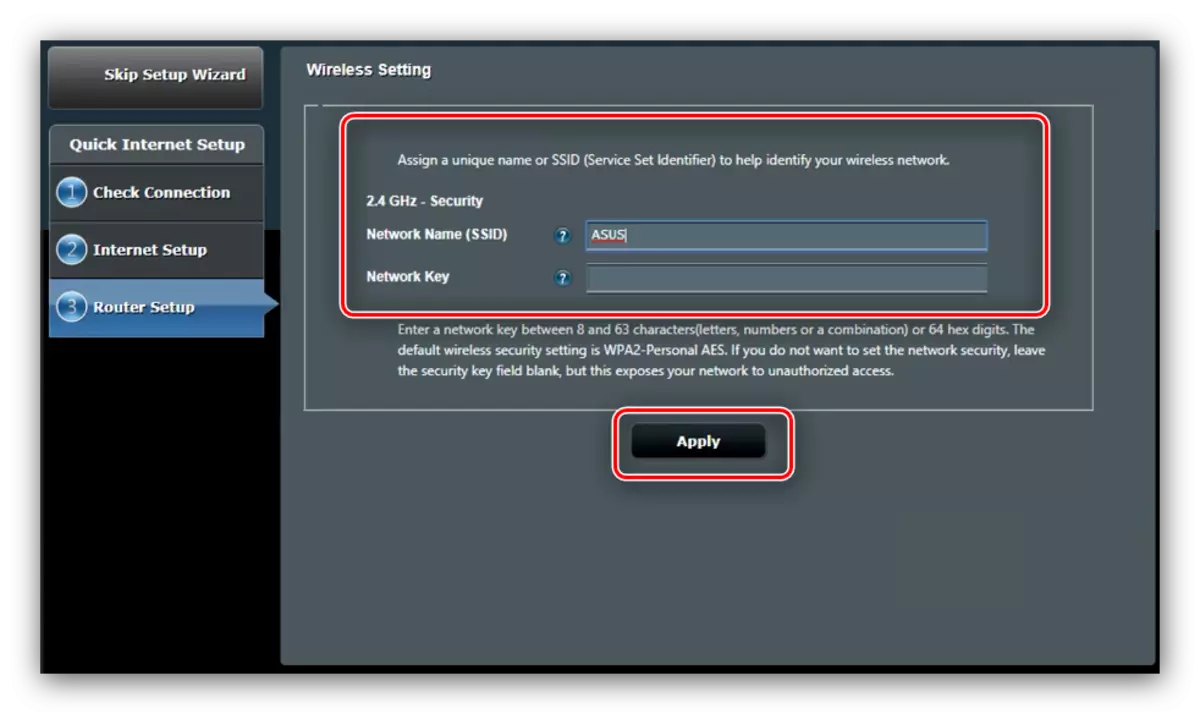
- Select the name of the wireless network, as well as a password for connecting to it.
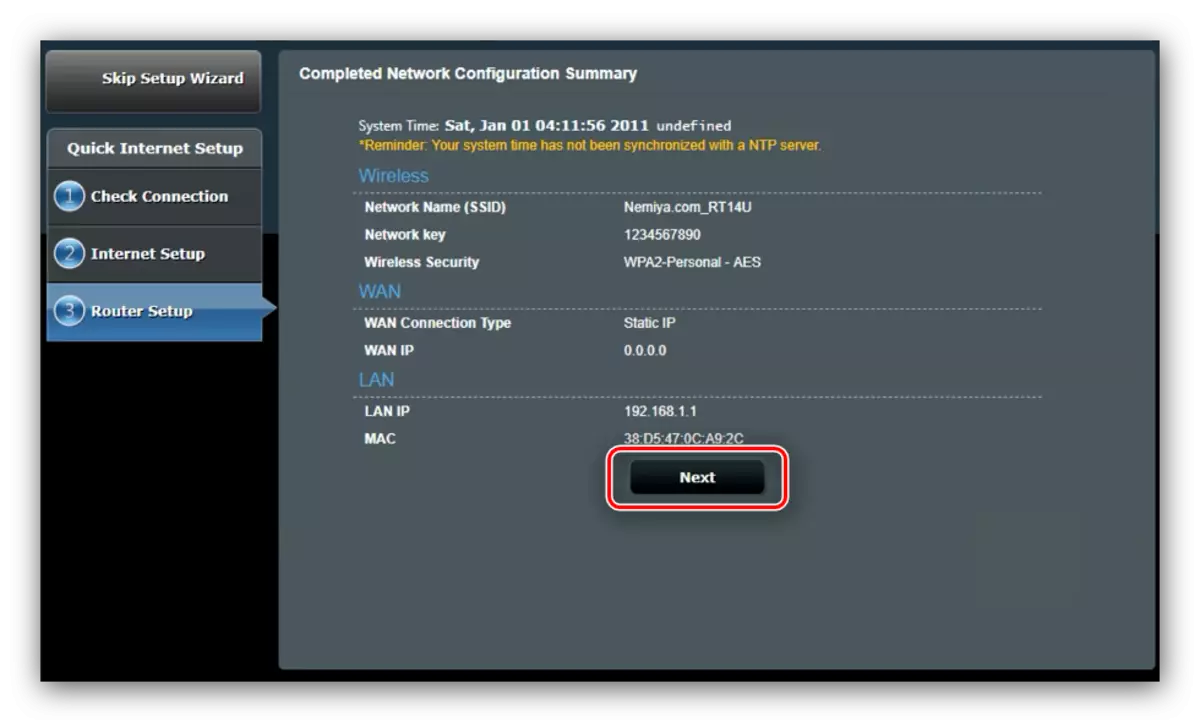
- To finish working with a utility, click "Save" and wait until the router reboots.
Quick settings will be sufficient to bring the main functions of the router.
Manual change of parameters
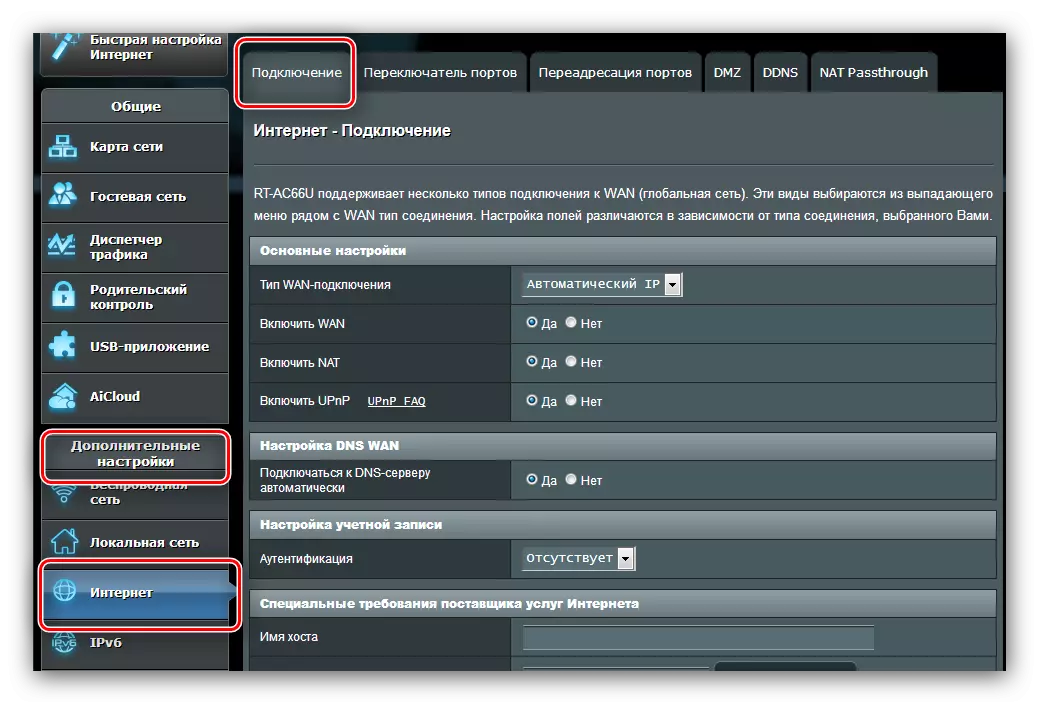
For some types of connections, the setting will still have to manually adjust, since the automatic configuration mode is still sufficiently rude. Access to Internet parameters is carried out through the Main Menu - click on the "Internet" button.
We will give examples of settings of all popular connection options in the CIS: PPPOE, L2TP and PPTP.
PPPoe
Setting this version of the connection is true:
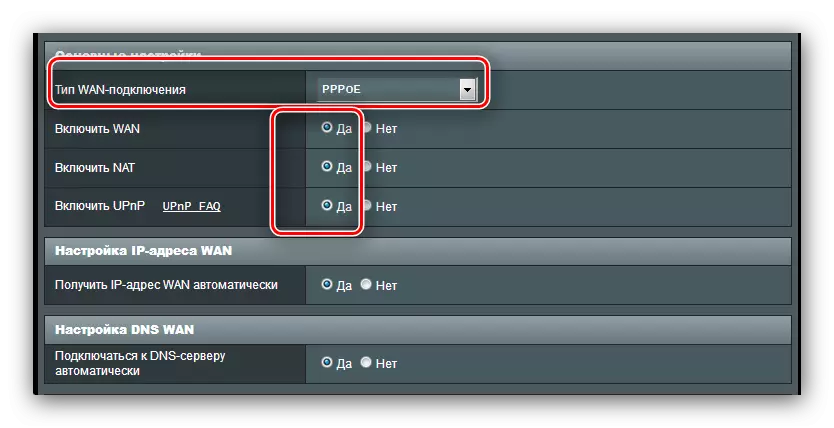
- Open the Settings section and select the PPPOE connection type. Make sure all the options in the "Basic Settings" section are in the "Yes" position.
- Most providers use dynamic options for obtaining an address and a DNS server, therefore the corresponding parameters must also be in the "Yes" position.
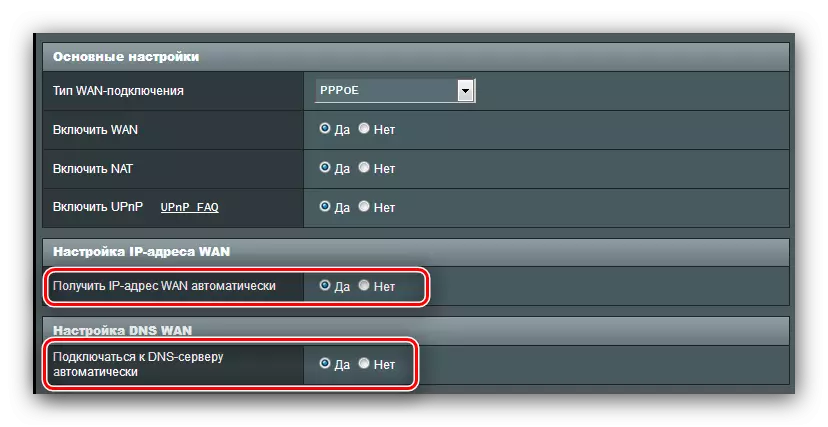
If your operator uses static options, activate "No" and enter the necessary values.
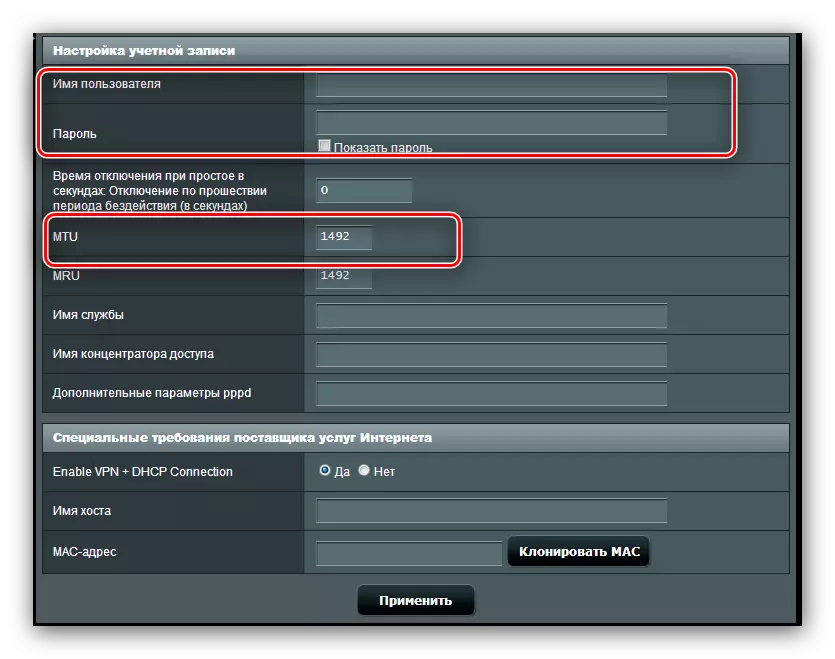
- Next, write the login and password received from the supplier in the "Account Setup" block. In the same way, enter the desired number "MTU" if it differs from the default installed.
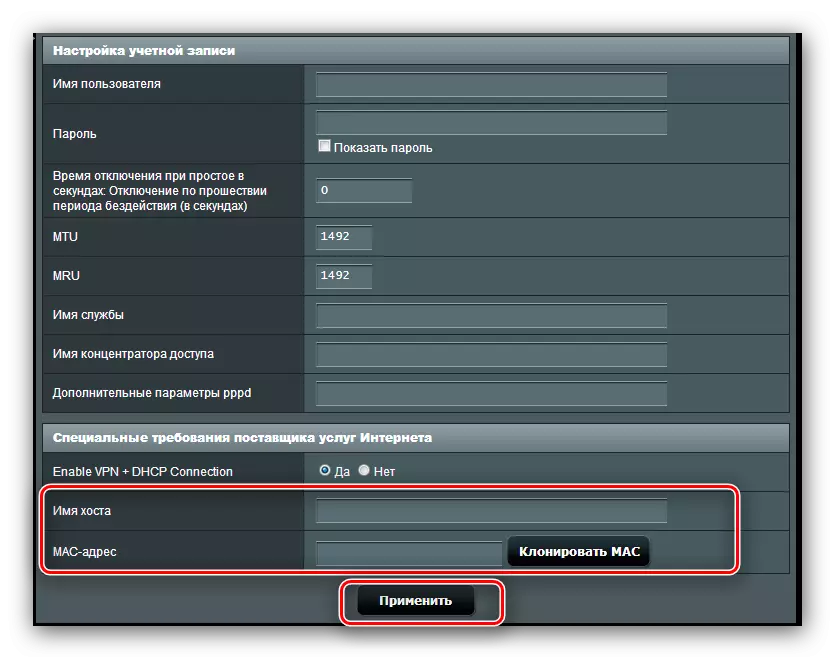
- Finally, specify the host name (this requires that firmware). Some providers are asked to cloning the MAC address - this feature is available by pressing the same button. To end the work, click "Apply".
It remains only to wait for the reboot of the router and use the Internet.
PPTP.
The PPTP connection is a type of VPN connection, therefore is configured differently than the usual PPPoE.
If, after these manipulations, the Internet does not appear, do the procedure again: probably one of the parameters is entered incorrectly.
L2TP
Another popular VD-type connections that actively uses the Russian Beeline Provider.
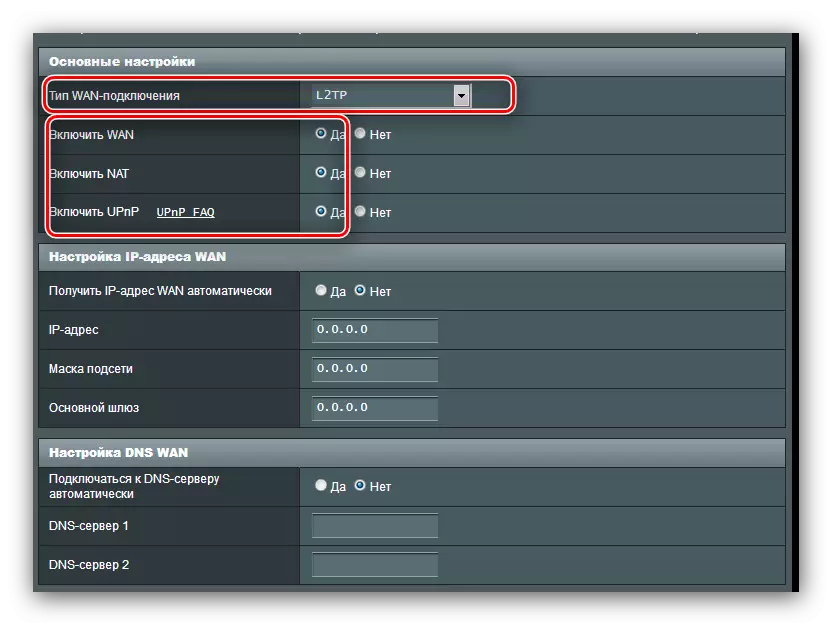
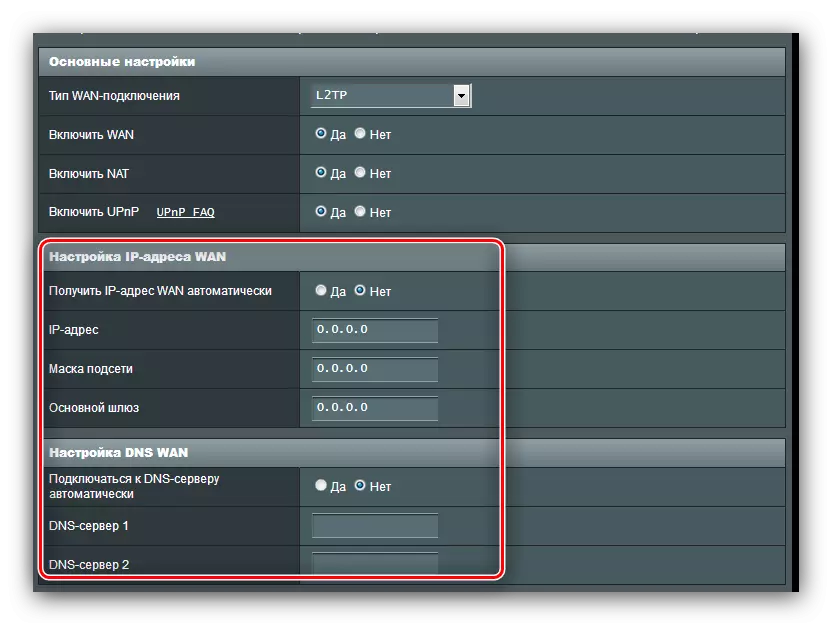
- Open the Internet Configuration page and select "L2TP Connection Type". Make sure the other options for "main settings" are in the "Yes" position: it is necessary for the correct operation of IPTV.
- With such a type of connection, the IP address and location of the DNS server can be both dynamic and static, so in the first case, put "yes" and go to the next step, while in the second install "no" and configure the parameters according to the operator requirements.
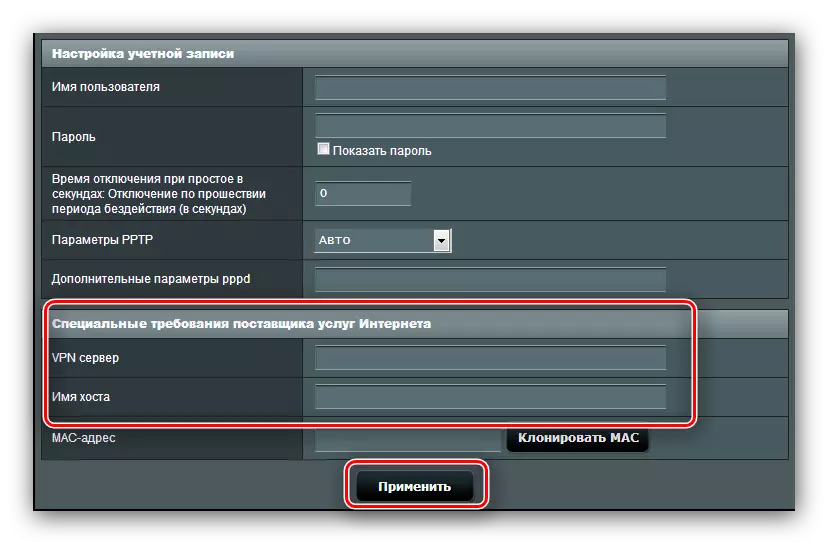
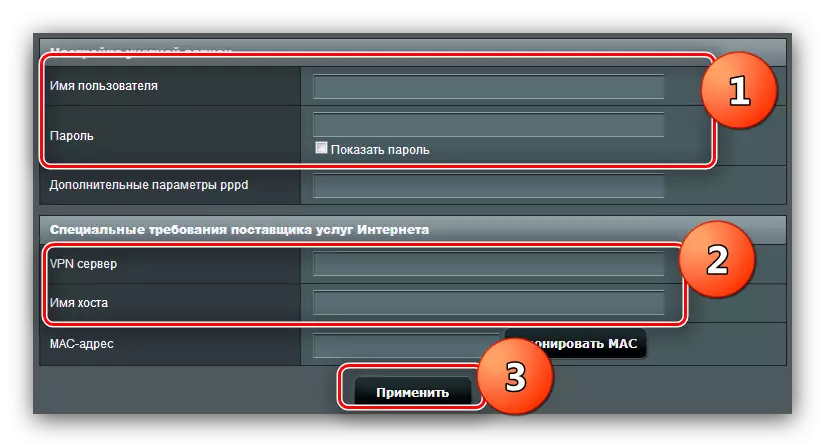
- At this stage, we write the authorization data and the address of the provider's server. The name of the host with this type of connection must have the type of operator name. Having done this, use the settings.
Having finished with the Internet settings, go to configuring Wi-Fi.
Wi-Fi parameters
Wireless network settings are located at "Advanced Settings" - "Wireless Network" - "General".
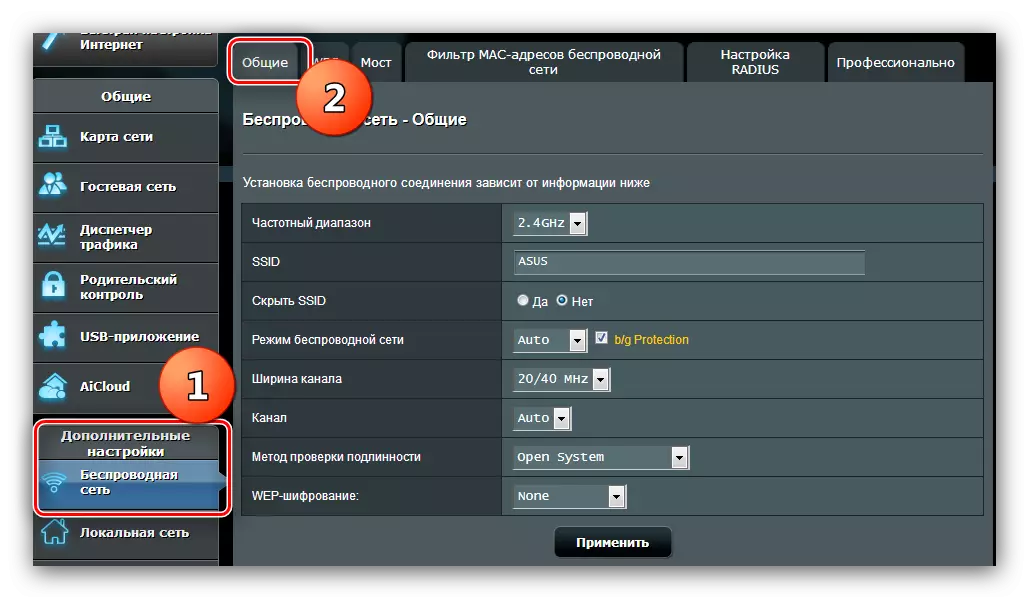
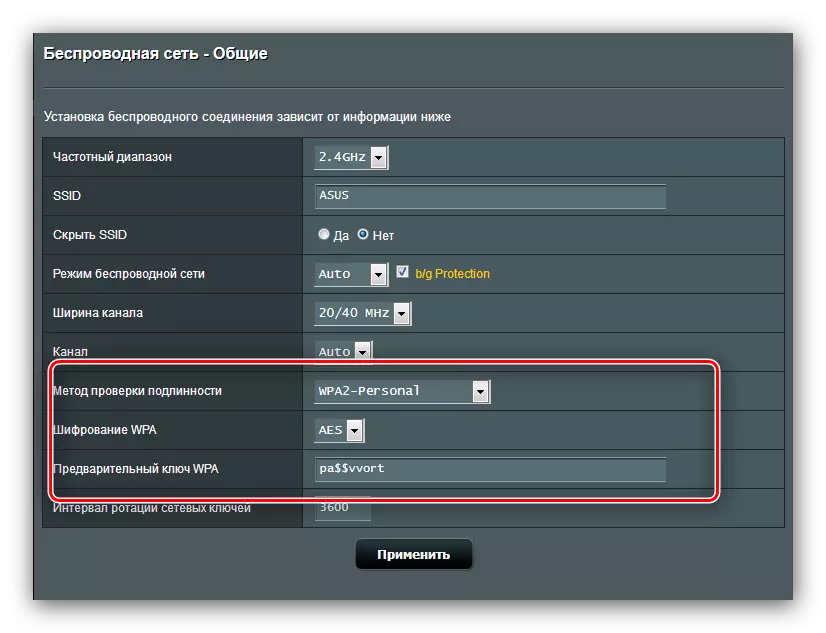
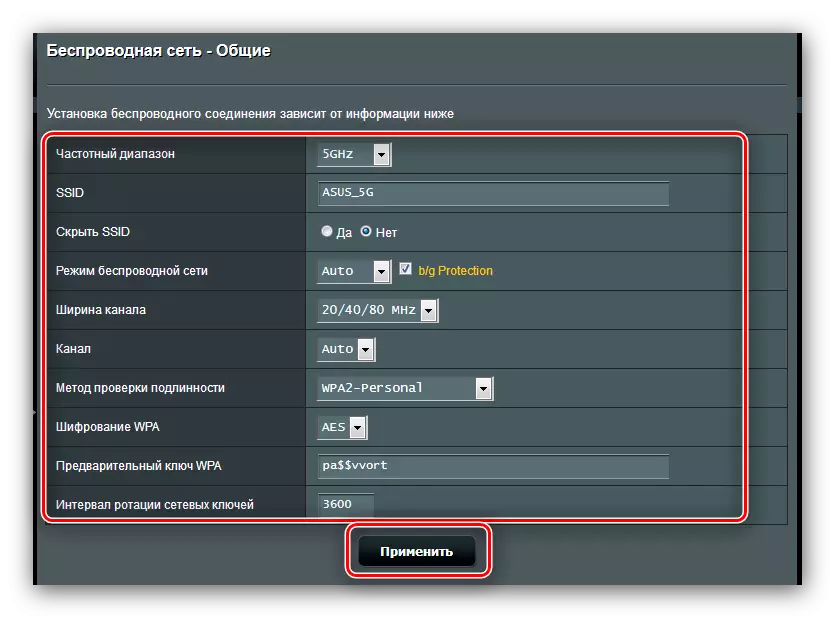
The router under consideration has two frequency ranges - 2.4 GHz and 5 GHz. For each frequency, Wi-Fi needs to be configured separately, but the procedure for both modes is identical. Below we show the setting on the example of 2.4 GHz mode.
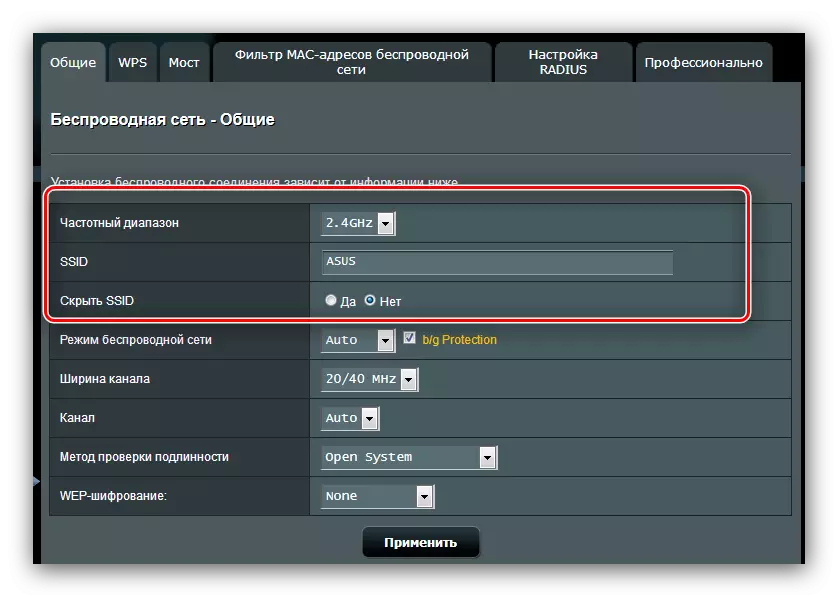
- Call Wi-Fi settings. Select a custom frequency, then name the network. The "Hide SSID" option Save in the no position.
- Skip several options and go to the "Authentication Method" menu. Leave the option "Open System" can not be in any way: while anyone can easily connect to your Wi Fai. We recommend installing the WPA2-Personal protection method, the best solution available for this router. Come up with a suitable password (at least 8 characters), and enter it in the WPA Preview key.
- Repeat steps 1-2 for the second mode, if required, then press "Apply".
So we configured the base functional of the router.
Additional features
At the beginning of the article, we mentioned some additional features of ASUS RT-N14U, and now we will tell about them in more detail and show them how to configure them.Connecting a USB modem
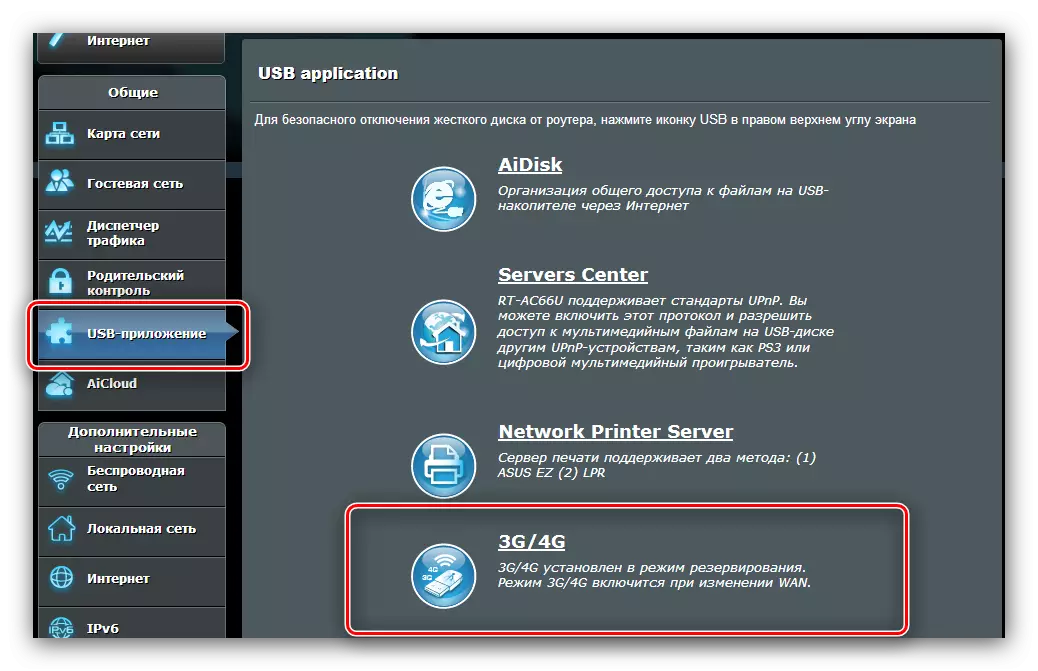
The router in question is able to receive an Internet connection not only on a WAN cable, but also through a USB port when connecting the corresponding modem. Control and configuration of this option are located in the "USB Application" paragraph, the option "3G / 4G".
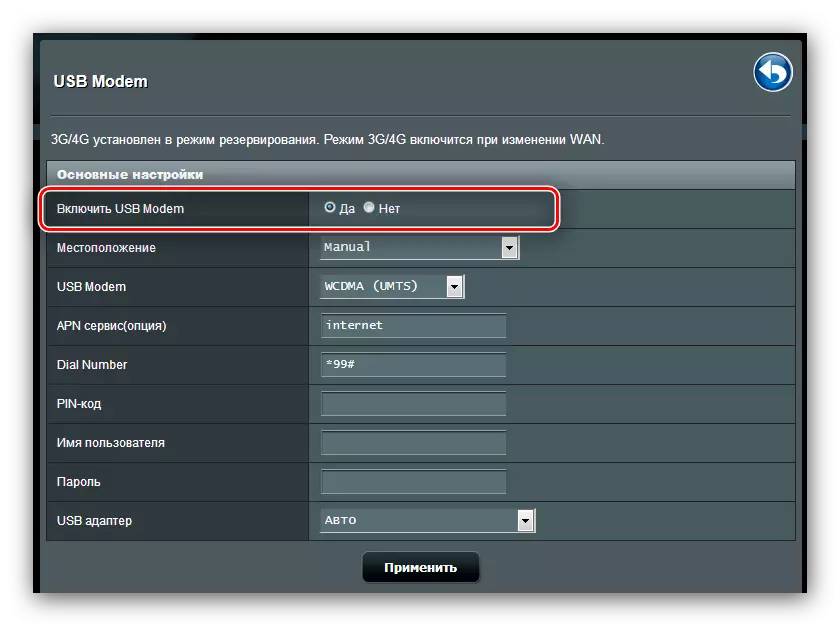
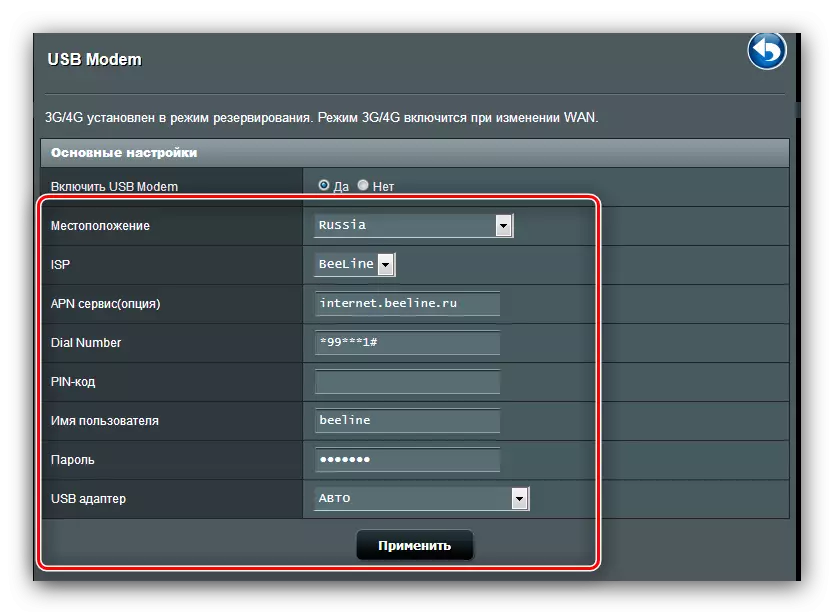
- There are quite a lot of settings, therefore let's stop at the most important. Turn on the mode of operation with the modem can be switched to the "Yes" option.
- The main parameter is "location". The list contains several countries, as well as the manual input mode of the parameters "MANUAL". When choosing a country, select the provider from the "ISP" menu, enter the Modem card PIN code and find its model in the USB adapter list. After that, you can apply settings and use the Internet.
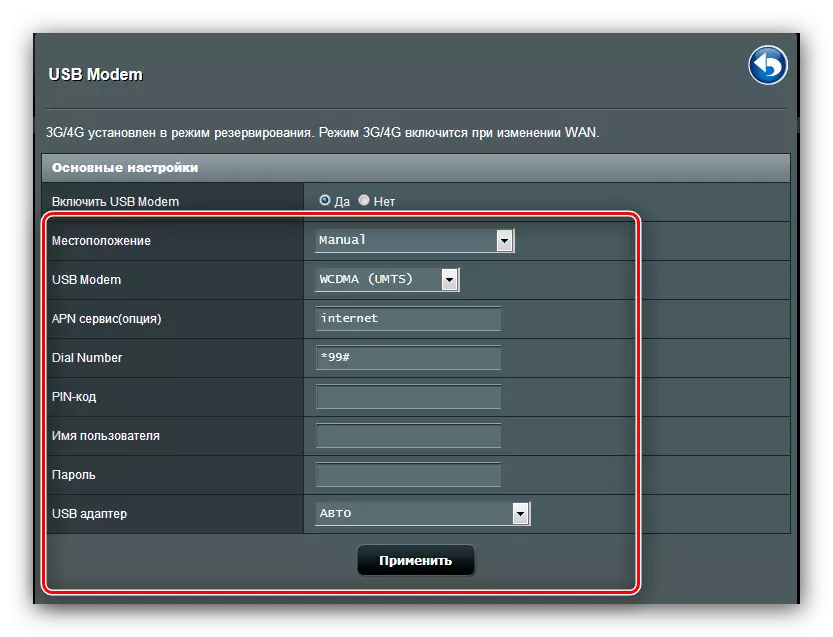
- In manual mode, all parameters will have to make themselves - starting on the type of network and ending with the model of the connected device.
In general, a fairly pleasant opportunity, especially for residents of the private sector, where the DSL line or telephone cable has not yet been held.
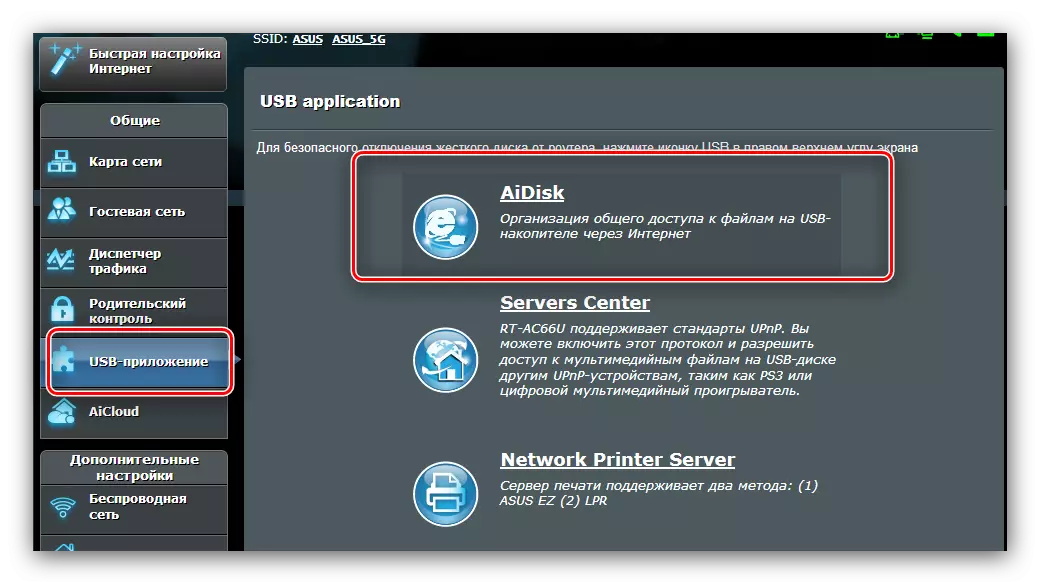
Aidisk
In the newest ASUS routers, there is a curious option for remote access to the hard disk, which is connected to the USB port of the device - Aidisk. This option is managed in the "USB Applications" section.
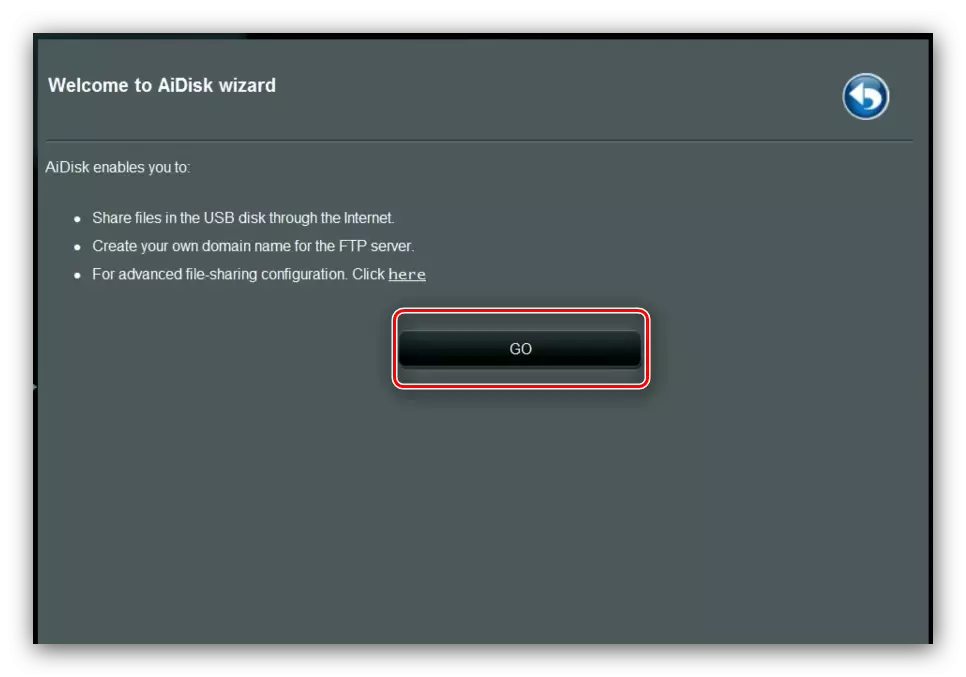
- Open the application and click "Start" in the first window.
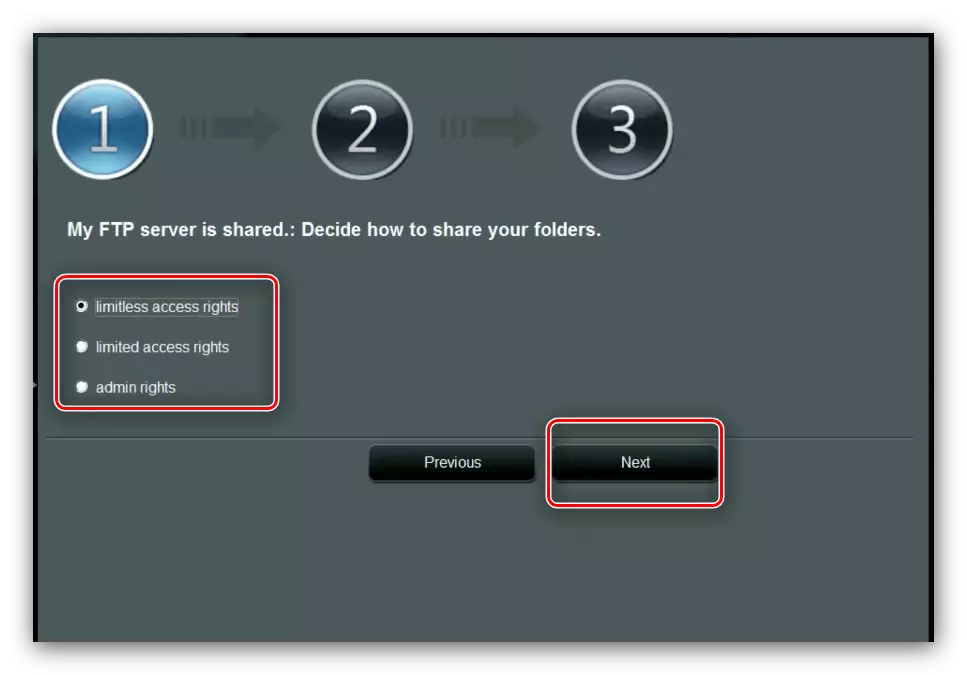
- Set the access rights to the disk. It is advisable to choose the option "limited" - this will allow you to set a password and thus protect the storage from foreign one.
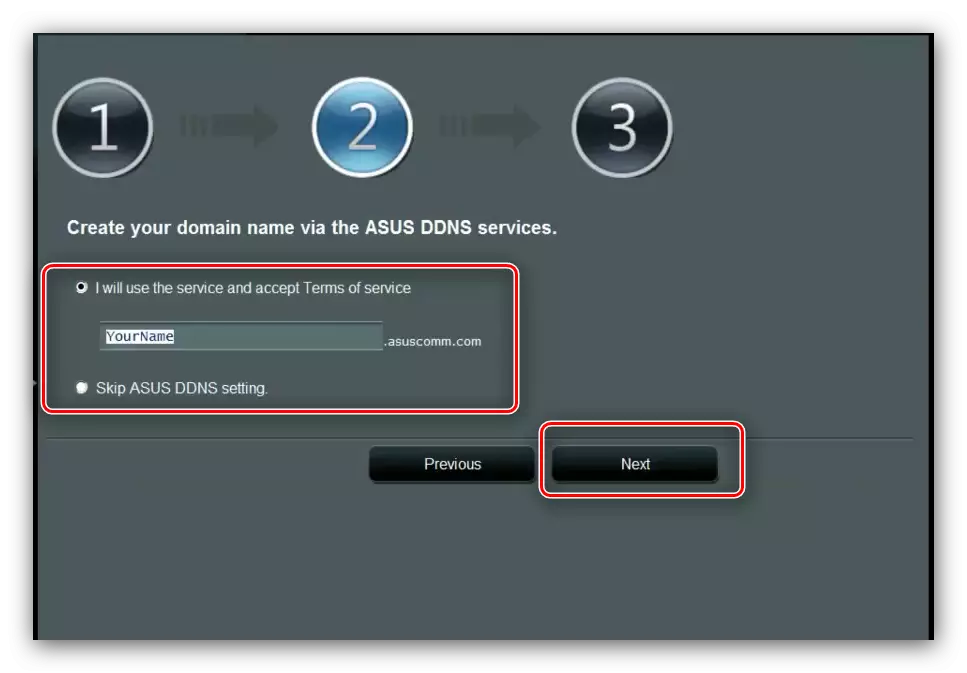
- If you want to connect to the disk from anywhere, you will need to register a domain on the manufacturer's DDNS server. The operation is completely free, so do not worry about this. If the repository is intended for use on the local network, check the "Skip" option and click Next.
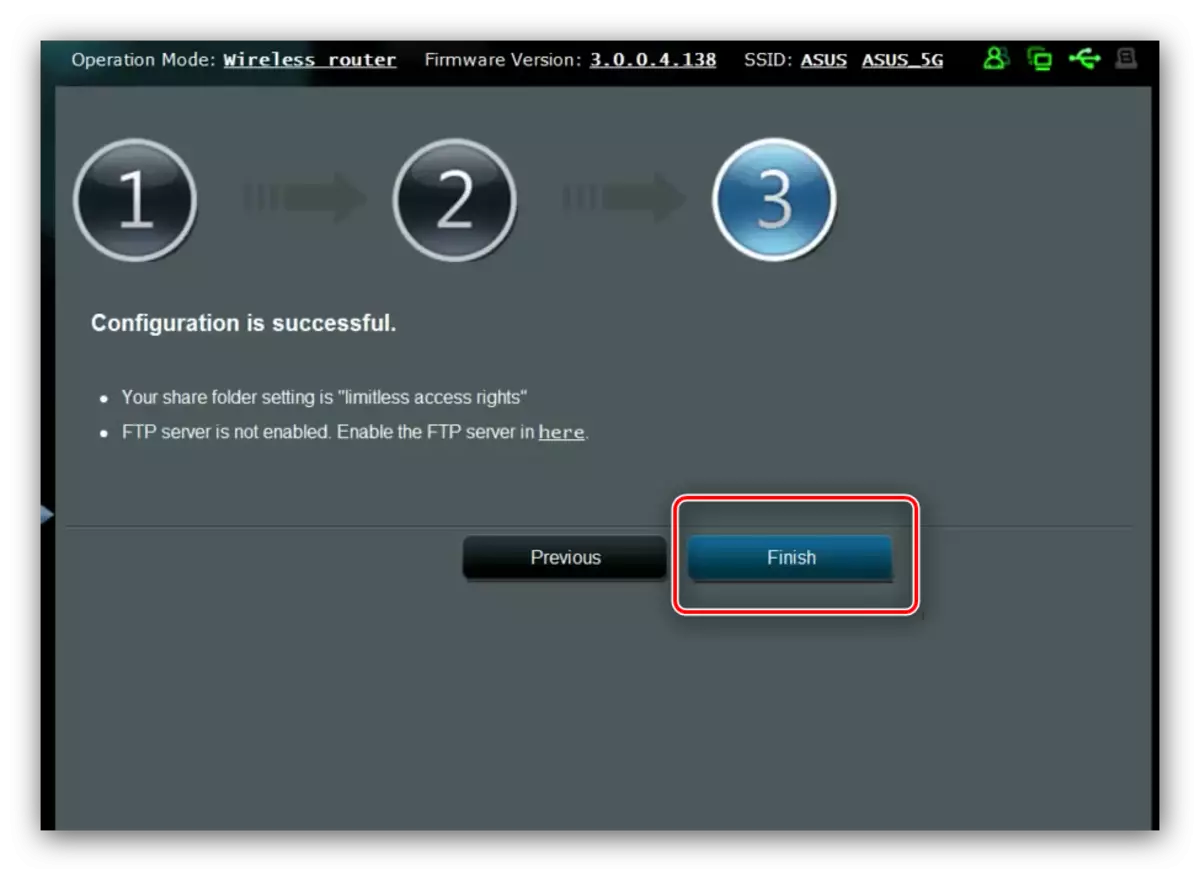
- Click "Finish" to complete the setting.
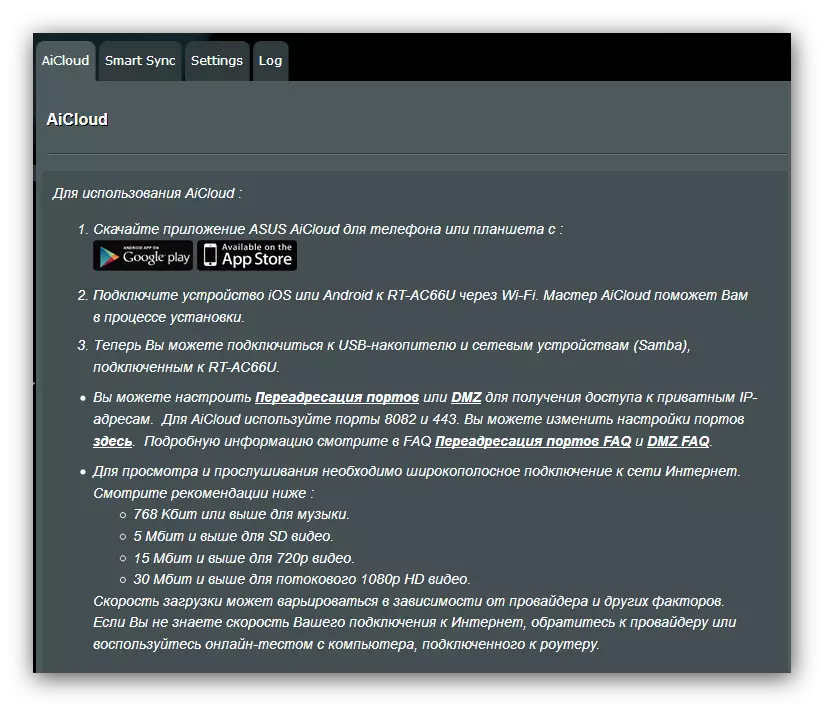
Aicloud.
Asus also offers its users rather advanced cloud technologies called as Aicloud. Under this option allocated a whole section of the main configurator menu.
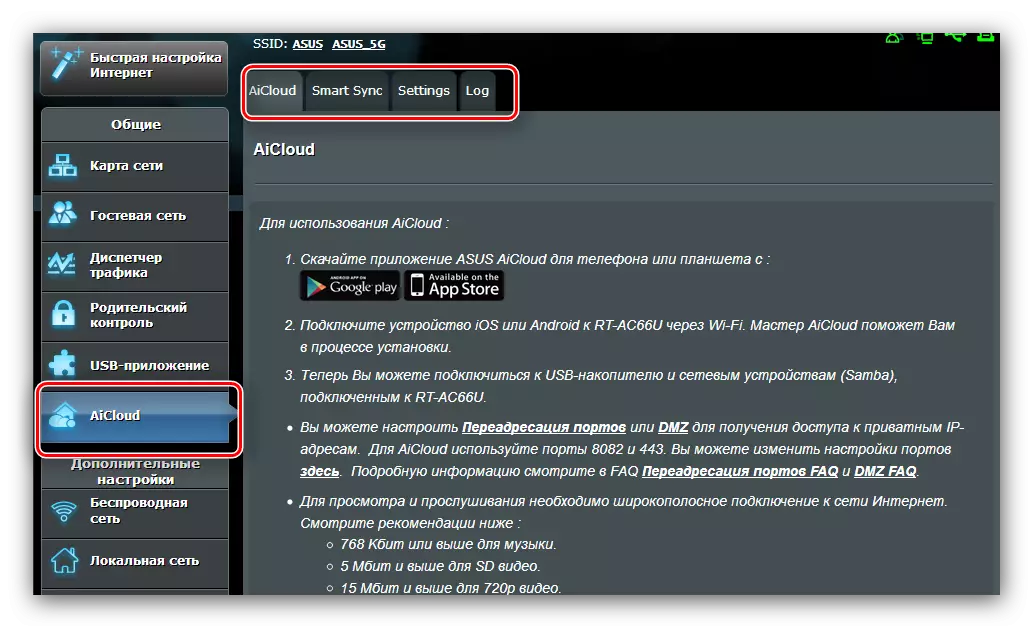
The settings and features of this feature have a lot - enough material on a separate article - so we will dwell only on the most remarkable.
- The main tab is a detailed instruction on using the option, as well as quick access to some possibilities.
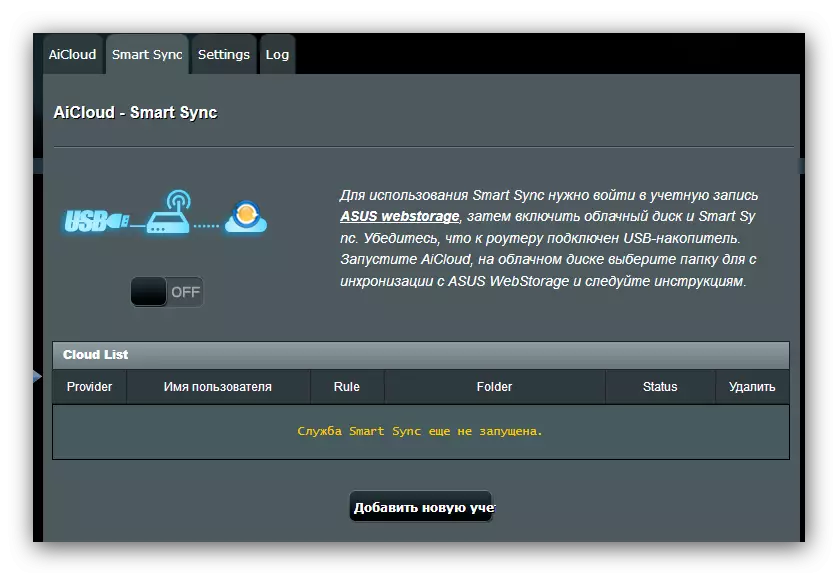
- "SmartSync" function and is a cloud storage - connect a flash drive to the router or an external hard disk to the router, and using this option you can use it as a file storage.
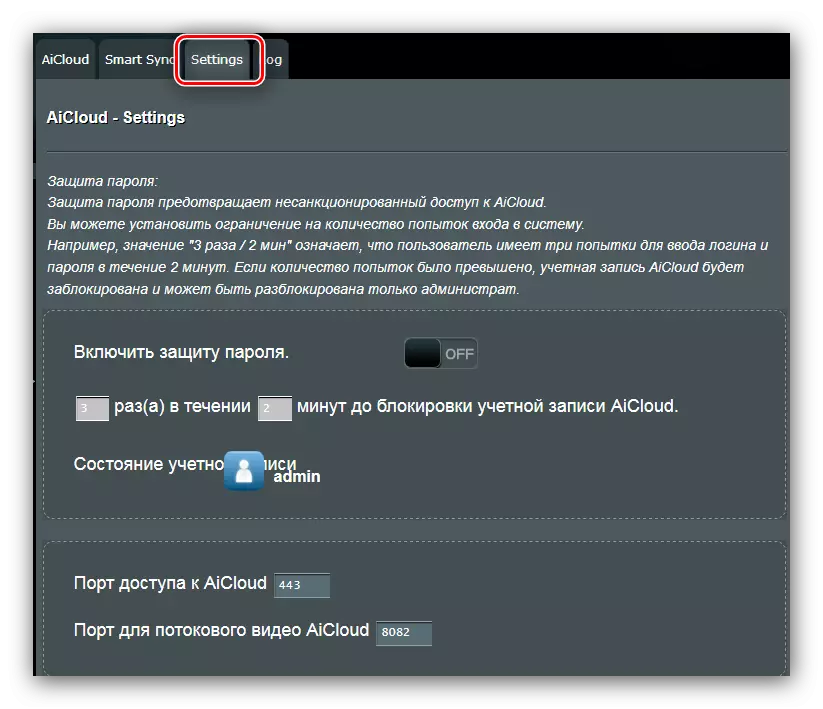
- On the Settings tab, mode settings are located. Most parameters are set automatically, it is impossible to change their manual method, so a bit of available settings.
- The last section placed the use of the option.

As you can see, the function is quite useful, and it is worth paying attention to it.
Conclusion
On this, our Guide to setting the ASUS RT-N14U router approached the end. If you have some questions, you can ask them in the comments.