

In the MacOS operating system there is a very useful tool - the Time Machine program, the purpose of which is to create backup copies of user data. Today we want to introduce you to the features of the work of this fund.
We use Time Machine
The default means under consideration performs an hourly backup copying of all user data to an external drive - a hard disk or SSD, connected via cable or wireless way. Of course, the default values can be changed, what we will talk below.Read more: Pure MacOS installation
Setup and inclusion
Before using the program, you should prepare an external drive - connect it to your Mac, after which you open the disk utility application and format the future backup storage.
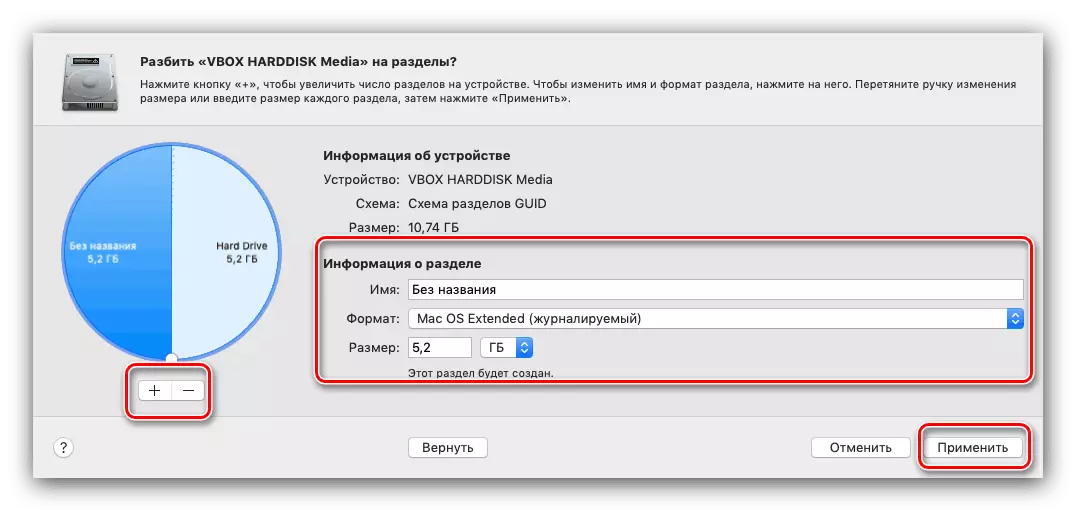
Lesson: "Disk Utility" in MacOS
Next, go to setting up the application.
- You can run Time Machine from "System Settings" - use the Apple menu in which you select the appropriate item.

Open Time Machine.
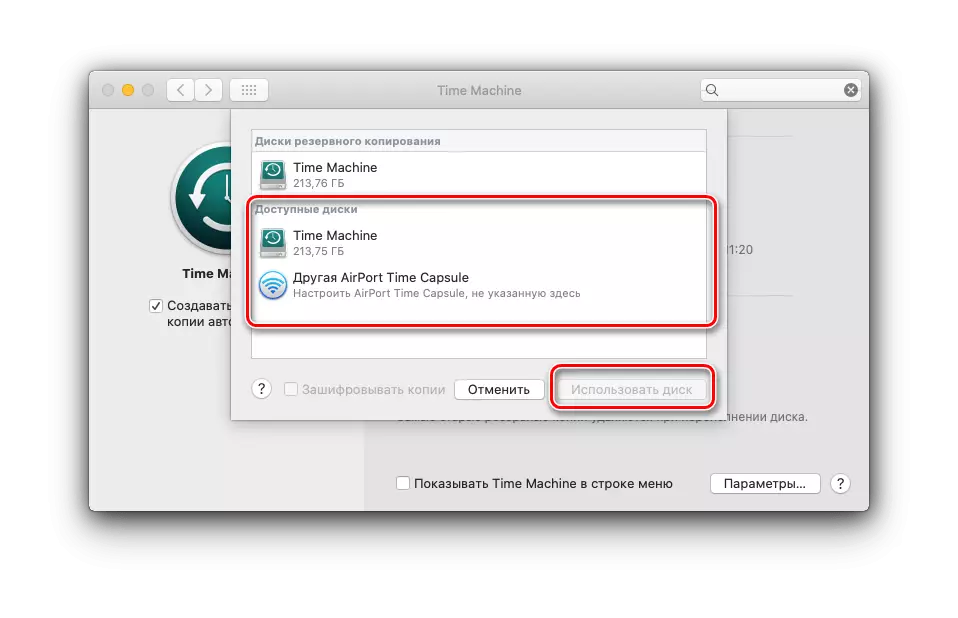
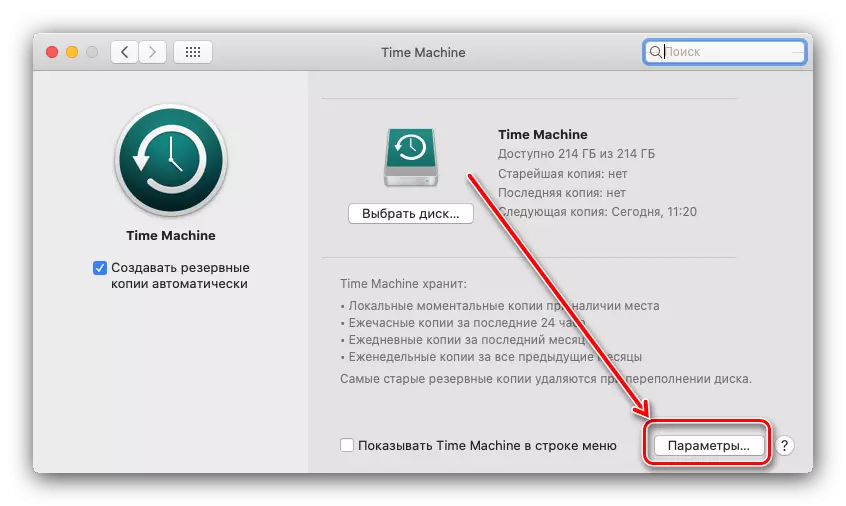
- The program manager window will start, click on it on the "Select Disk" item.
- Specify the desired. Most likely, the tool will require another drive formatting procedure, now it is already purely for backup copies, agree with this.

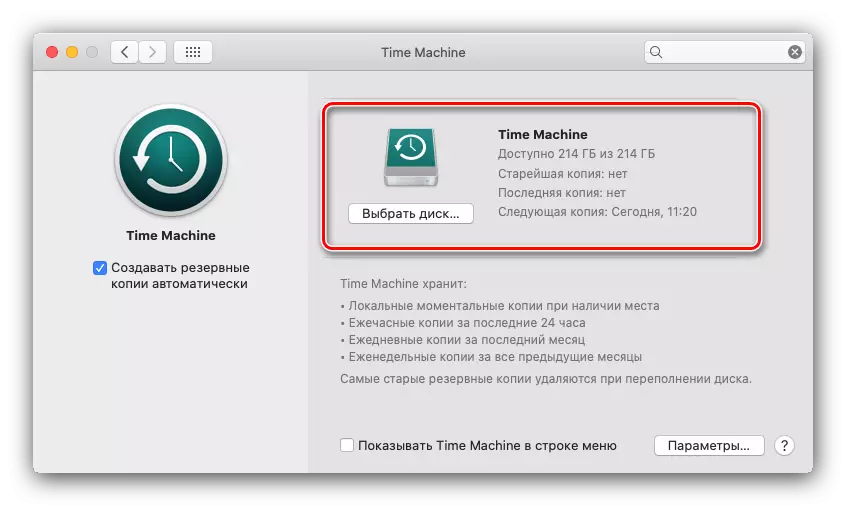
Finish - the application will work automatically in accordance with the default parameters.
Restore from backup
The recovery procedure is also very simple.
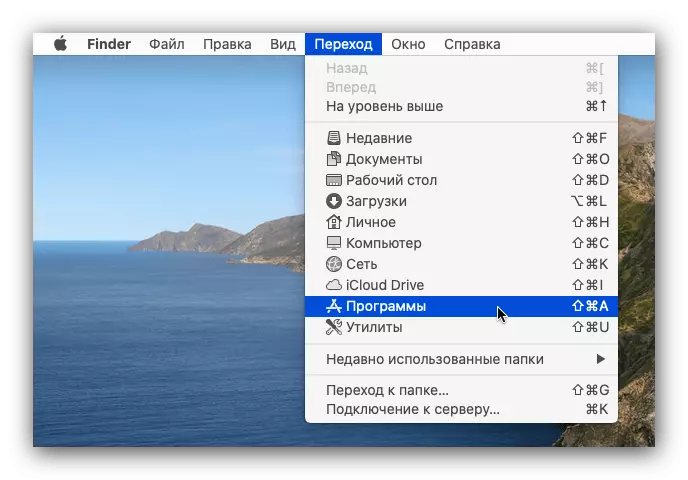
- Open "programs" by any convenient way - for example, through the "Transition" menu of the Finder file manager.
- Next, run Time Machine.
- An interface-wheel will open, each item that denotes the hourly backup. Scroll through the wheel until you want to start recovery (use the screen arrows).
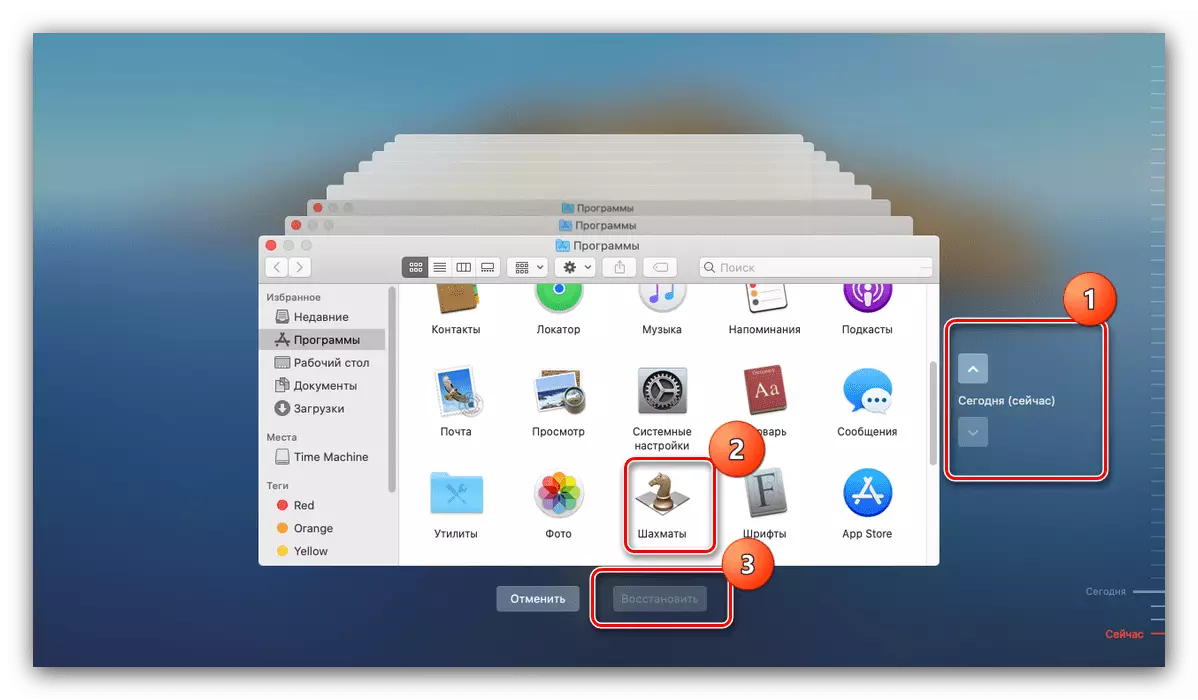
Next, move to the directory where the data you need are located, select them and click "Restore".

Wait for the end of the procedure.
Reducing backups
The default time time parameters may not arrange some users, especially if the external drive is also required for other needs, except for creating backups.
- Let's start with a decrease in the occupied place. You can achieve this in two ways: creating a separate partition on an external drive or through the exclusion of certain directories from the backup schedule. The first method is to use the "disk utility", for details, refer to the "Settings and Enable" section.
- For the second method, open the Time Machine manager and click on the "Parameters" button.
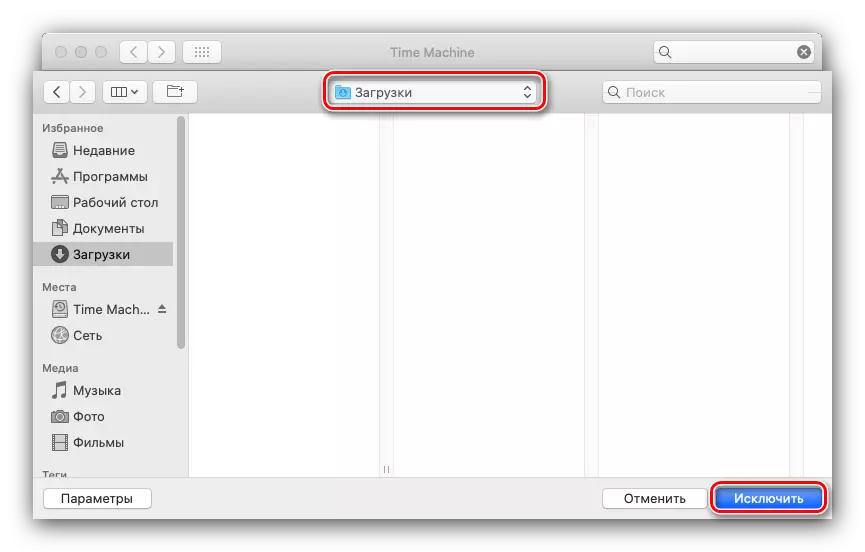
- Pay attention to the list with the name "Do not create backups for the following objects." To add a folder to exceptions, click on the "+" button.

Next, using Finder, select the directory you want to exclude - for example, "downloads".
- After adding, click "Save".
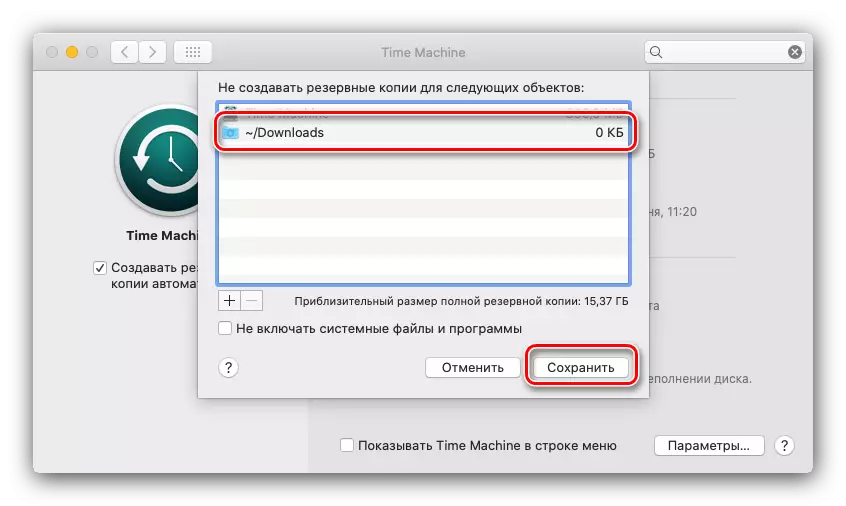
Files from the folder entered in the exception list will no longer be copied to the Time Machine drive.
Disable backup
If you no longer need the function of creating backups, you can disable it in the same manager - remove the mark from the "Create backup automatically" item.

Thus, we will turn off the backup, but there is also a method of disconnecting local copies, after which the backup will be created exclusively when the suitable external drive is connected.
- Open the "Terminal", for example, finding it through the Spotlight tool.
- Next, enter the command:
Sudo Tmutil DisableLocal

You will need to specify the administrator password.
- Now the local backup will be completely disabled. To enable it, use the following command:
Sudo Tmutil Enablelocal


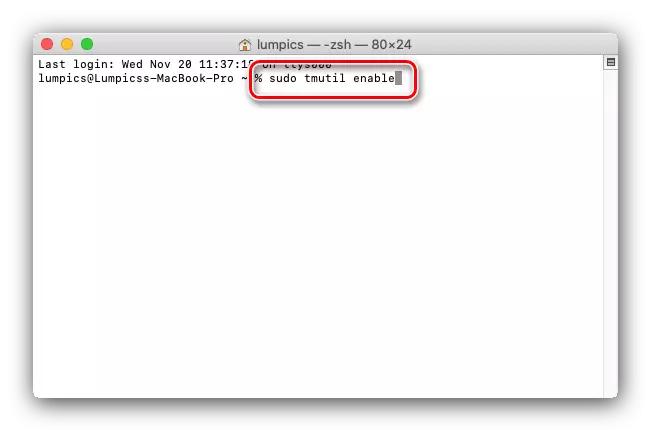
Alas, but this method will work only in the MacOS Mojave version and below.
Conclusion
Time Machine is a powerful user data backup tool that is able to rescue in cases of the main drive or accidental deletion of an important file.