
How to find out which of the channels it is better to choose and find a free I wrote in two articles: how to find free channels using Android application, search for free Wi-Fi channels in Inssider (PC program). In this instruction I will describe how to change the channel on the example of popular routers: ASUS, D-Link and TP-LINK.
Channel change is easy
All that is needed to change the router channel is to go to the web interface of its settings, open the Wi-Fi basic settings page and pay attention to the Channel item (Channel), after which you set the desired value and do not forget to save the settings . I note that when changing the wireless settings, if you are connected via Wi-Fi, the connection for a short time will break.Very detailed about entering the web interface of various wireless routers, you can read in the article how to go to the router settings.
How to change the channel on the D-Link DIR-300, 615, 620 router and other
In order to go to the D-Link router settings, enter the address 192.168.0.1 in the address bar, and enter Admin and Admin to the login and password request (if you did not change the login password). Information on the standard parameters to enter the settings is on the sticker from the reverse side of the device (not only on D-Link, but also on other brands).
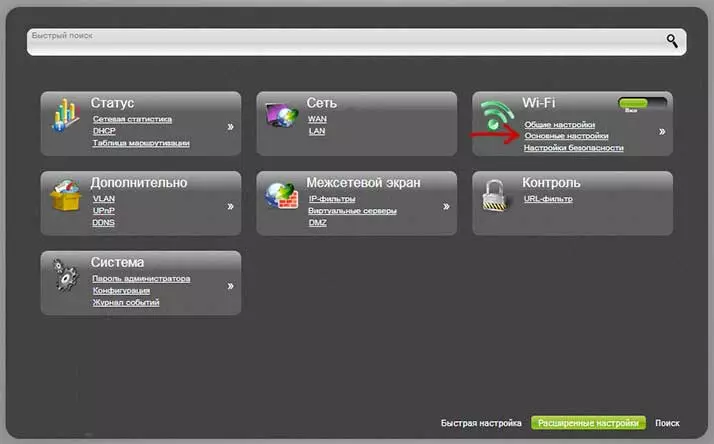
A web interface will open, press the "Advanced Settings" below, after which item "Wi-Fi" select "Basic Settings".
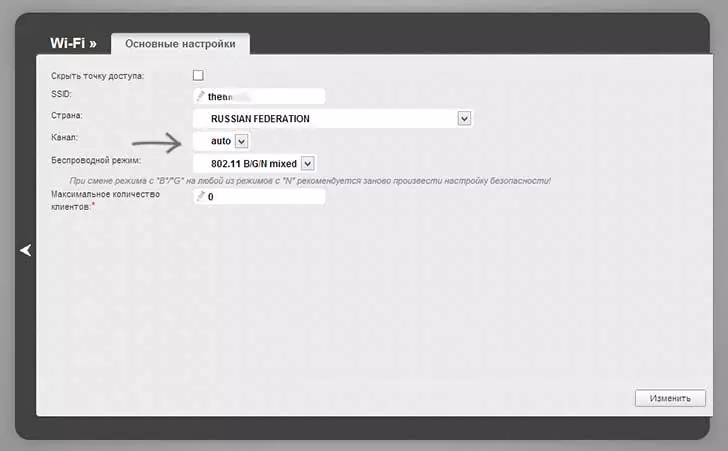
In the "Channel" field, set the desired value, and then click the Edit button. After that, the connection with the router is likely to temporarily break. If this happens, go back to the settings again and pay attention to the indicator at the top of the page, use it to finally save the changes made.

Channel change on ASUS Wi-Faircuit
The input to the settings interface of most ASUS routers (RT-G32, RT-N10, RT-N12) is carried out at 192.168.1.1, standard login and password - admin (but still, it is better to check with a sticker that is back by the router). After logging in, you will see one of the interface options presented in the picture below.
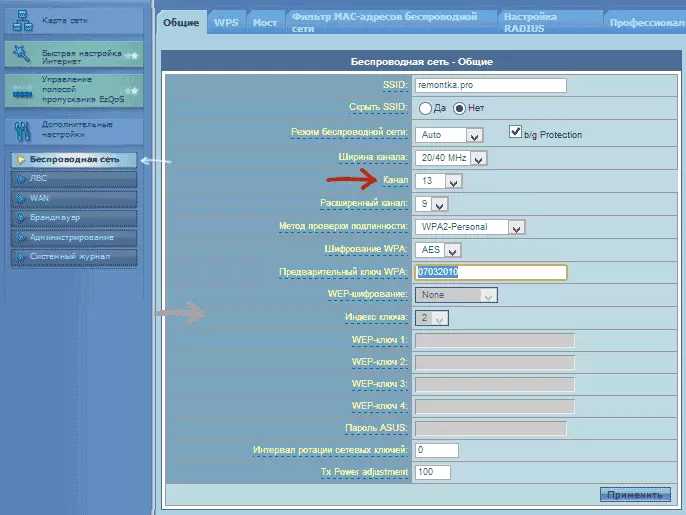
Changing the Wi-Fi ASUS channel on the old firmware
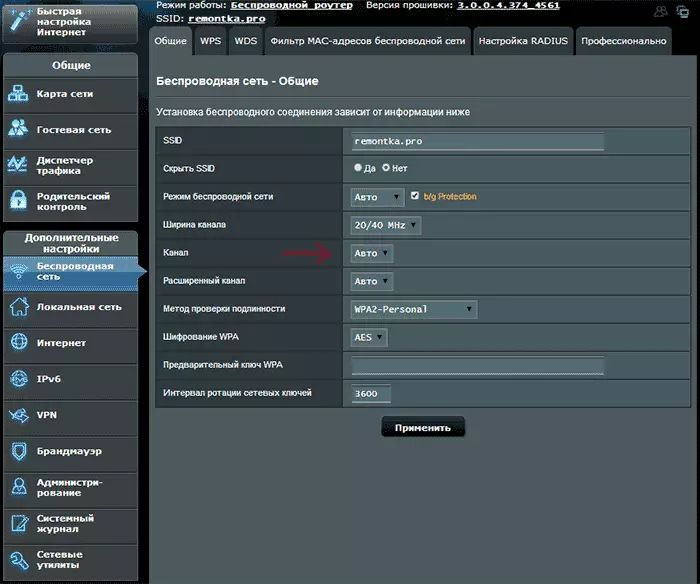
How to change the channel on the new ASUS firmware
In both cases, open the left menu item "Wireless Network", install the desired channel number on the page, and click "Apply" - this is sufficient.
Change the channel on TP-LINK
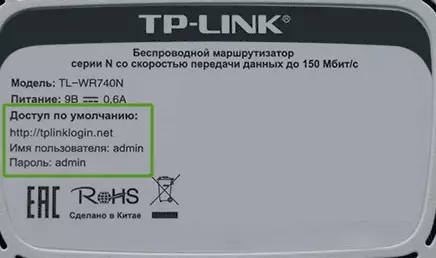
In order to change the Wi-Fi channel on the TP-Link router, also go to its settings: usually, this is the address 192.168.0.1, and the username and password - admin. This information can be viewed on the sticker on the router itself. Please note that when the Internet is connected, the TPLinkLogin.NET address specified there may not work, use the number consisting of numbers.
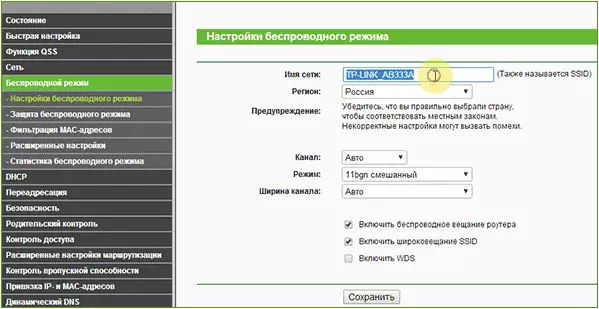
In the router interface menu, select "Wireless Mode" - "Wireless Mode Settings". On the page that appears, you will see the basic settings of the wireless network, including here you can choose a free channel for your network. Do not forget to save the settings.
On devices of other brands, everything is completely similar: it is enough to get into the admin and proceed to the wireless network parameters, there you will find the ability to select a channel.