
Over time, the iPad stops working quickly and is forgotten by unnecessary files and data. To clean the tablet and reduce the load on the system, you can use methods from the submitted article.
Cleaning cache on iPad
Often deleting unnecessary files (videos, photos, applications) is not enough to exemplate space. In this case, you can clear the cache of the device in whole or in part, which can add from several hundred megabytes to a gigabyte pair. However, it should always be borne in mind that the cache eventually begins to increase again, so it makes no sense to constantly clean it - it is relevant to remove completely old temporary files that will never be used to the tablet.Method 1: Partial Cleaning
This method is most often used by the owners of the ipads and iPhones, since it does not imply a complete loss of all data and creates a backup in case of failure in the cleaning process.
It should be noted several important items that relate to this type of cache removal:
- All important data will be saved, only unnecessary files are deleted;
- After successful cleaning, you do not need to re-enter passwords in applications;
- Takes from 5 to 30 minutes, depending on the number of software on the tablet and the selected option;
- As a result, it may be free from 500 MB to 4 GB of memory.
Option 1: iTunes
In this case, the user will need a computer installed iTunes program and a USB cord to connect the tablet.
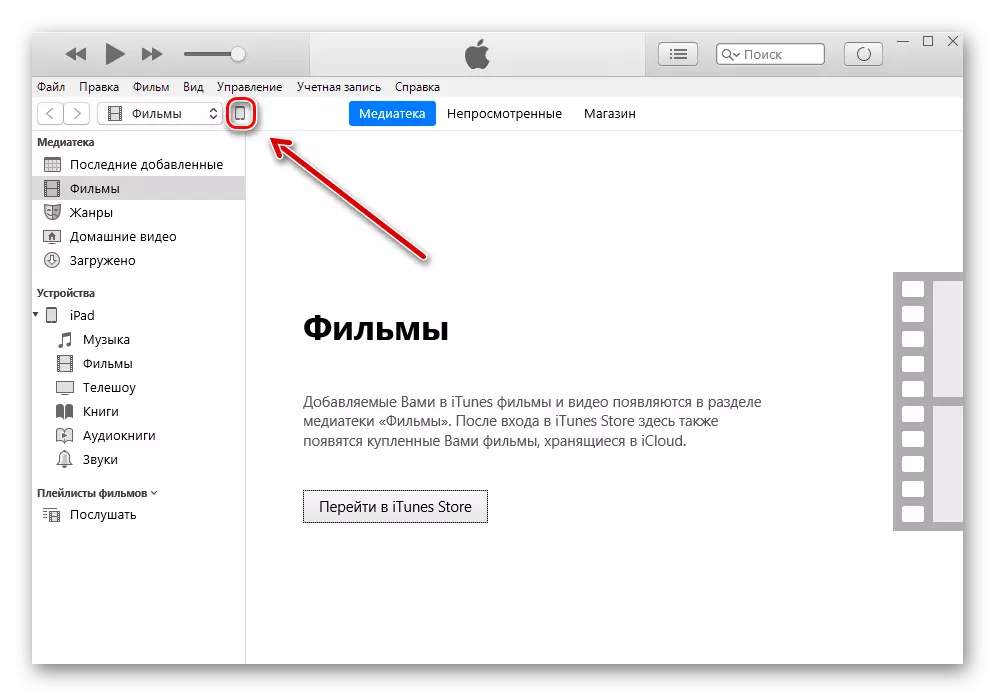
- Connect the iPad to the PC, open iTunes. If necessary, confirm confidence in this PC by pressing the appropriate button on the device in the pop-up window. Click on the iPad icon in the top menu of the program.
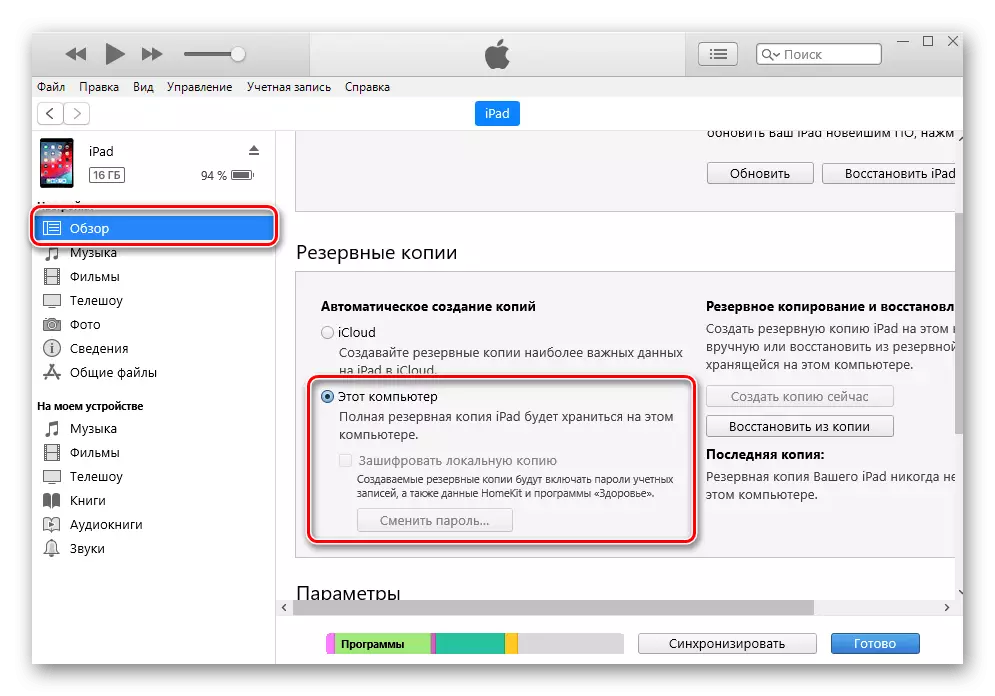
- Go to "Overview" - "Backups". Click "This Computer" and check the box next to the "Enchant Local Copy". The program is asked to come up with and enter a password for a backup for its further use.
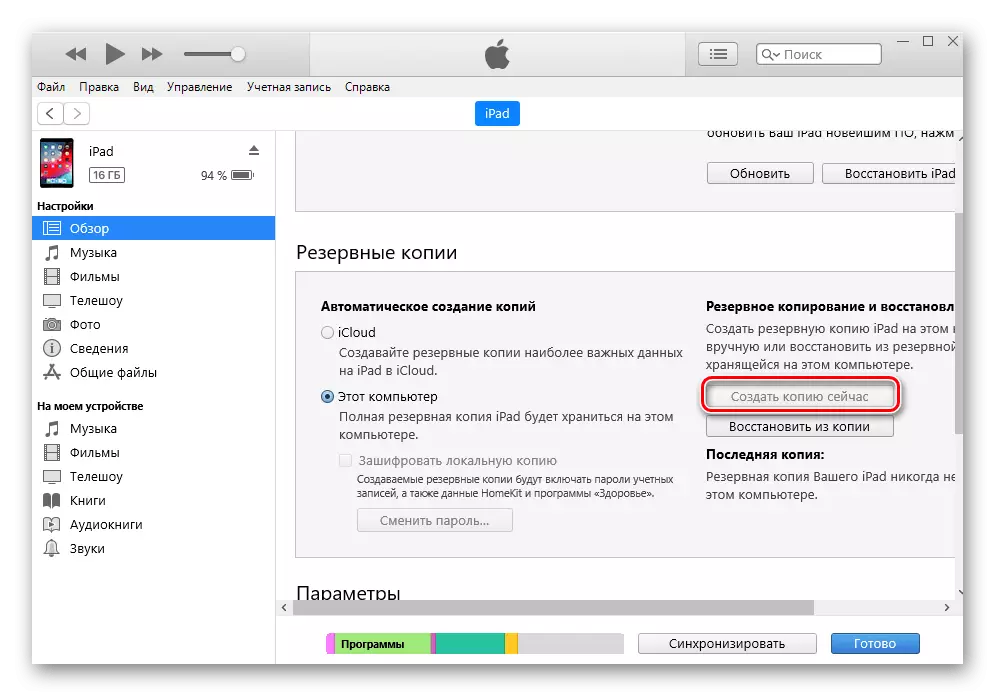
- Click "Create a copy now" and wait for the end of the process and leave the program open.
After that, we need to restore the iPad using the previously created copy. However, before that, you need to turn off the "Find iPhone" function in the device settings or on the site. We talked about this in our article.
Read more: How to disable the "Find iPhone" function
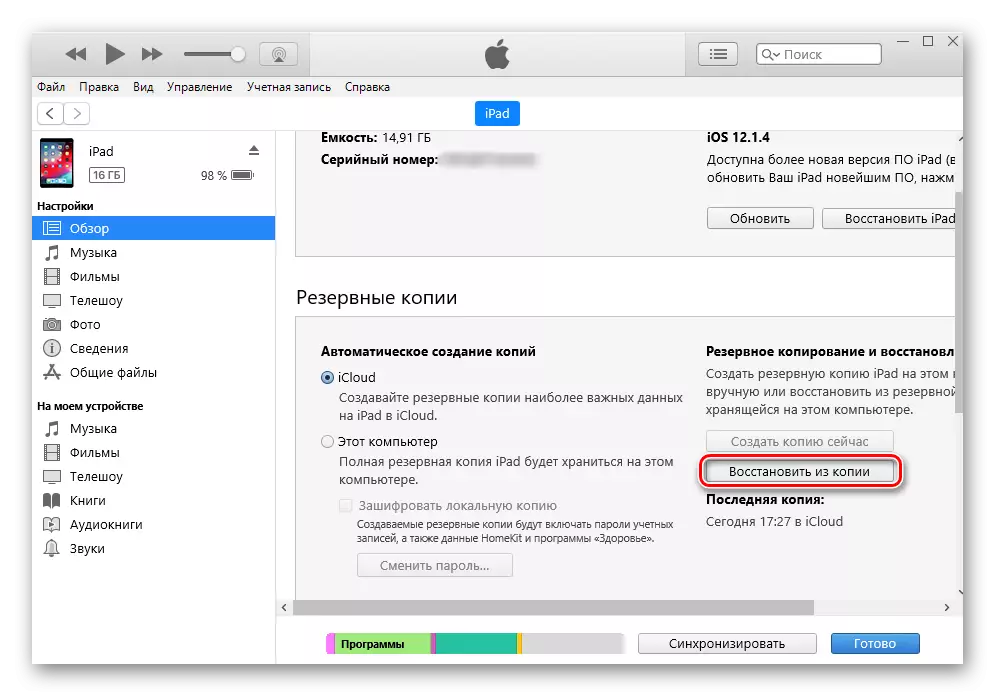
- Go to the iTunes program window and click "Restore from the copy" and enter the previously created password.
- Wait until the recovery process is completed without turning off the tablet from the computer. At the end, the iPad icon must reappear in the top menu of the program.
- When the tablet is turned on, the user will only need to re-enter the password from its Apple ID account and wait for the installation of all applications. After that, you can see in iTunes, how much memory has been freed from data of manipulations.
Option 2: Application Cache
The previous way removes unnecessary files for the system, but leaves everything important to the user, including data from messengers, social networks, etc. However, often cache applications are not valuable and its removal will not harm, so you can resort to it to remove it point through the settings.
- Open the "Settings" of Apad.
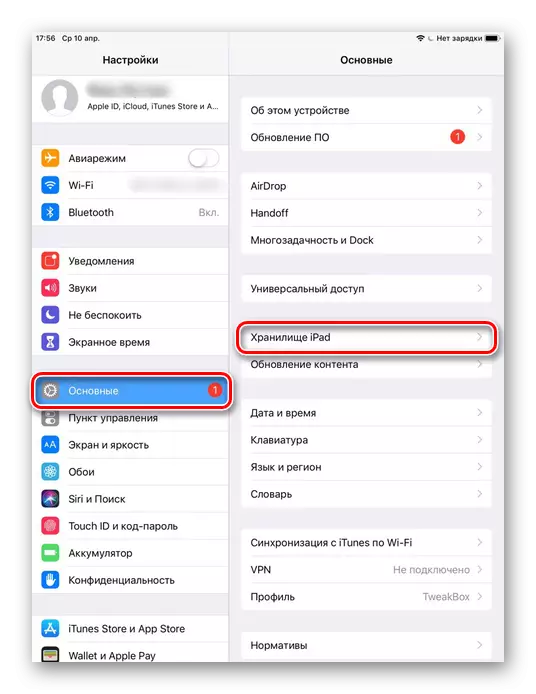
- Go to the "Basic" section - "iPad Storage".
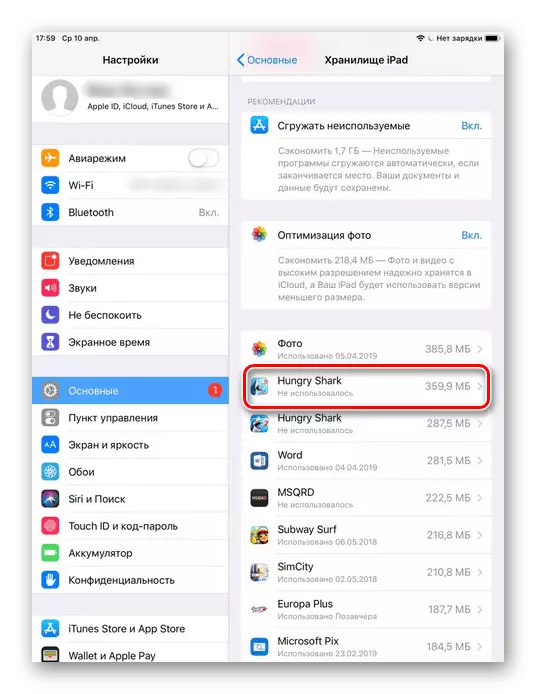
- After the entire list of applications boot, find the desired and click on it. Please note that the sorting is based on the number of space occupied, that is, at the very top of the list there are the most "heavy" programs on the device.
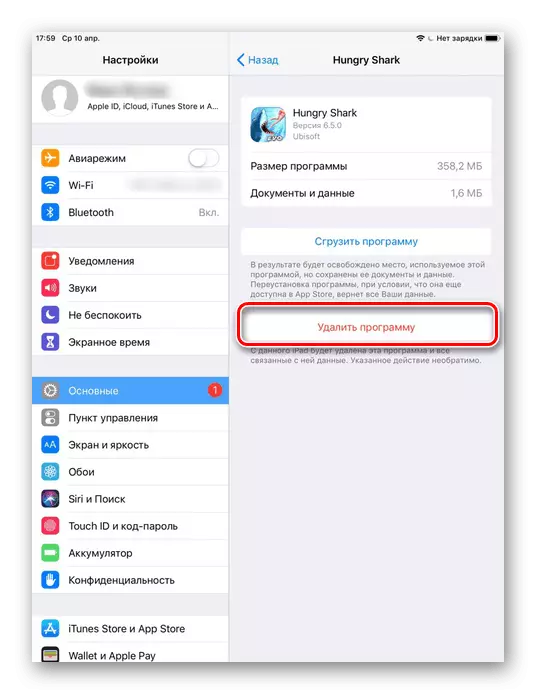
- How many cache has accumulated, indicated in the "Documents and Data" item. Tap "Delete Program" and confirm the action by selecting "Delete".
- After these actions, it is necessary to re-install a remote application from the App Store store, while all important data (for example, pumping levels obtained by the achievements) will remain and appear at the next input.
A simpler way to remove cache from applications, including once, Apple has not yet invented. Therefore, users have to manually work with the cache of each and engage in reinstalling.
Option 3: Special applications
If it is impossible to use iTunes for this operation, you can use third-party solutions from the App Store. However, due to the fact that iOS is a closed system, access to some files is limited to such applications. Because of this, cache is removed and unnecessary data they are only partially.
We will analyze how to remove the cache from Apad using the Battery Saver program.
Download Battery Saver from App Store
- Download and open the Battery Saver on the iPad.
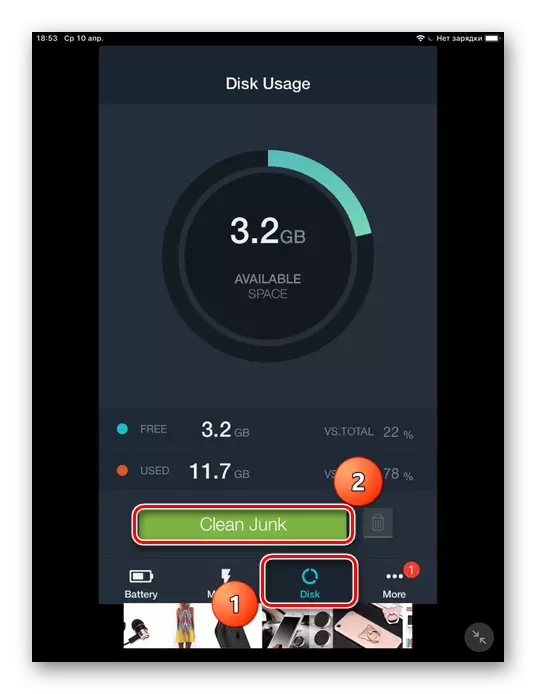
- Go to the "Disk" section on the bottom panel. This screen shows how much memory is occupied, and how much free. Click "Clean Junk" and "OK" to confirm.
It is worth noting that such applications help slightly for Apple devices, since they do not have full access to the system. We recommend using other ways to more efficiently work with the cache.
Method 2: Full cleaning
No program, including iTunes, as well as the creation of a backup will not help completely get rid of the entire cache. If the task is to maximize the place in the internal repository, only the full reset of iOS is relevant.With this cleaning, the full deletion of all data from the iPad occurs. Therefore, before the procedure, create a backup copy of ICloud or iTunes so as not to lose important files. About how to do it, we told in Method 1. , as well as in the next article on our website.
After rebooting the tablet, the system will offer to restore important data from a backup or configure iPad as new. Cache does not appear.
Remove the Safari browser cache on iPad
Usually half of the cache that accumulates on the device is cache Safari, and it takes a lot of space. Its regular cleaning will help prevent hanging both the browser itself and the system as a whole. For this, Apple has created a special feature in the settings.
Clearing the Safari browser involves full removal of visits history, cookies and other viewing data. The story will be deleted on all devices on which the login is logged in to the iCloud account.
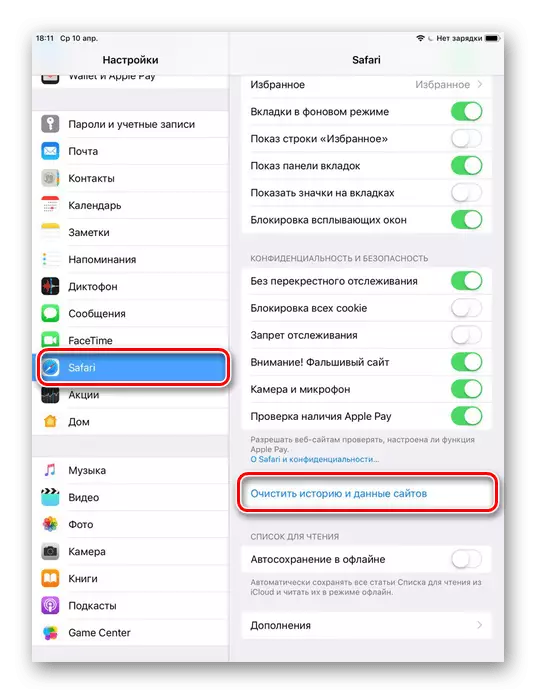
- Open the "Settings" of Apad.
- Go to "Safari" section, Soloing the list is slightly lower. Click "Clear History and Site Data". Re-click "Clear" to end the process.
We disassembled methods of partial and complete cache cleaning with iPad. This can use both standard system tools and third-party applications and PC programs.