
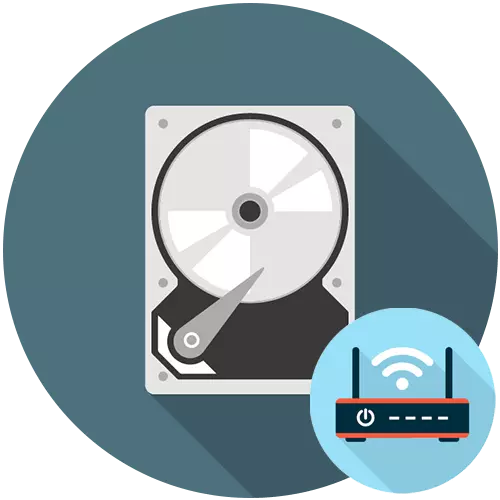
The need for a network storage may occur from any user or circle of users who consume a lot of media system and / or have the need to use common files. To meet these needs, you can purchase a special device, and you can make it on the basis of a conventional router. In today's article, we will look at how to connect a hard disk to the router.
Connecting the drive to the router
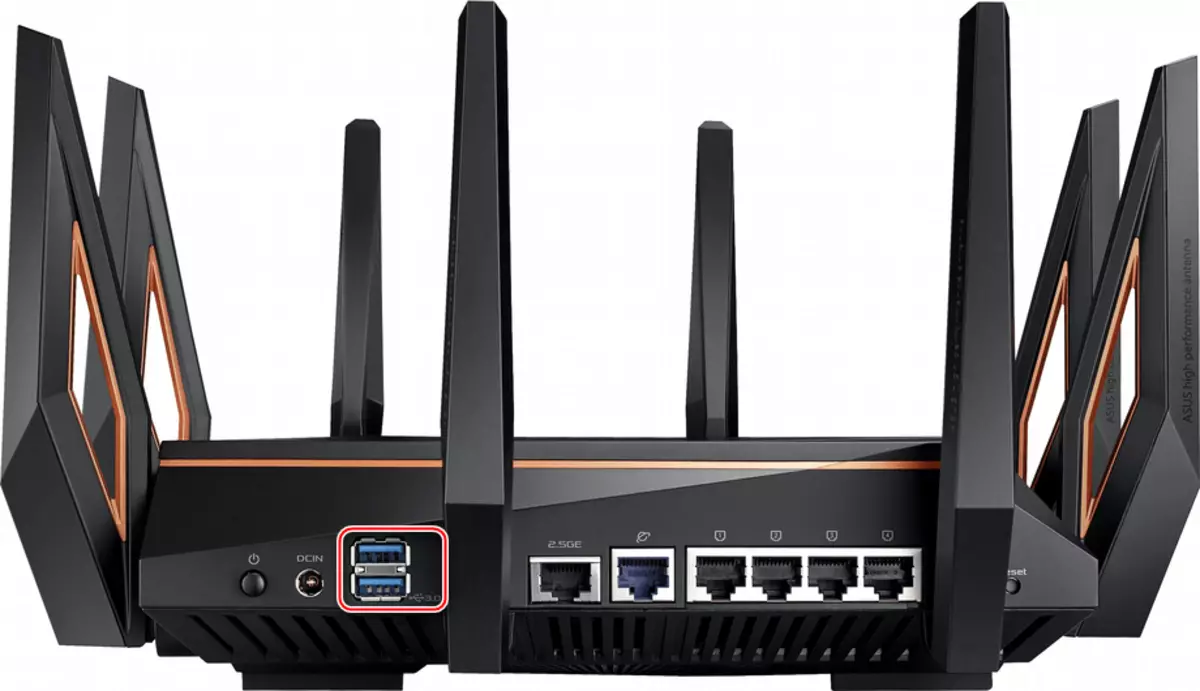
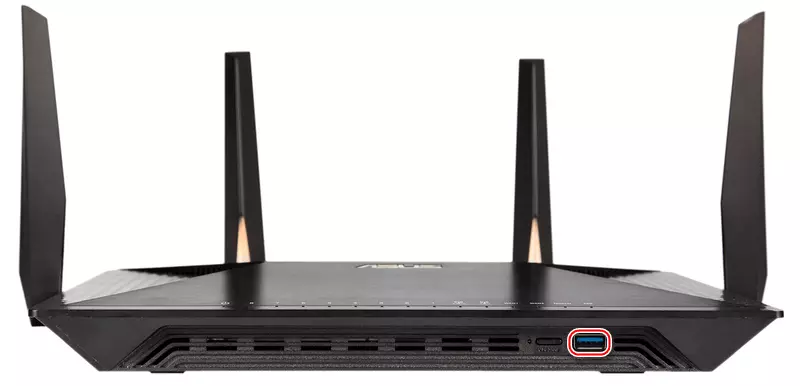
Strictly speaking, for connecting the Wi-Fi and HDD router, you do not need anything other than the cable with which the connection will be accomplished. Of course, an important condition will have the presence of a USB connector itself, otherwise the devices will not be connected, or it will be unreasonably difficult.
Speed Note: Keep in mind that the higher the version of the USB porter ports, cable and hard disk connector (if you are going to use external), then the better for you. Of course, documents can be transmitted and used on version 1.0, but for a comfortable media view, the use of a USB 2.0 version that provides smooth image transmission is highly recommended.
At the preparatory stage, you should decide with the internal or external hard drive you want to associate your router, if necessary, purchase the SATA-USB adapter and format the drive under the NTFS file system. About how to formatting, read the article on the link below. When you have everything you need, you can start directly to the root disk procedure.
Read more: Proper hard disk formatting
Stage 1: Physical connection
It is primarily necessary to carry out a router connector and the drive using the appropriate cable and connector, and when necessary - adapter.
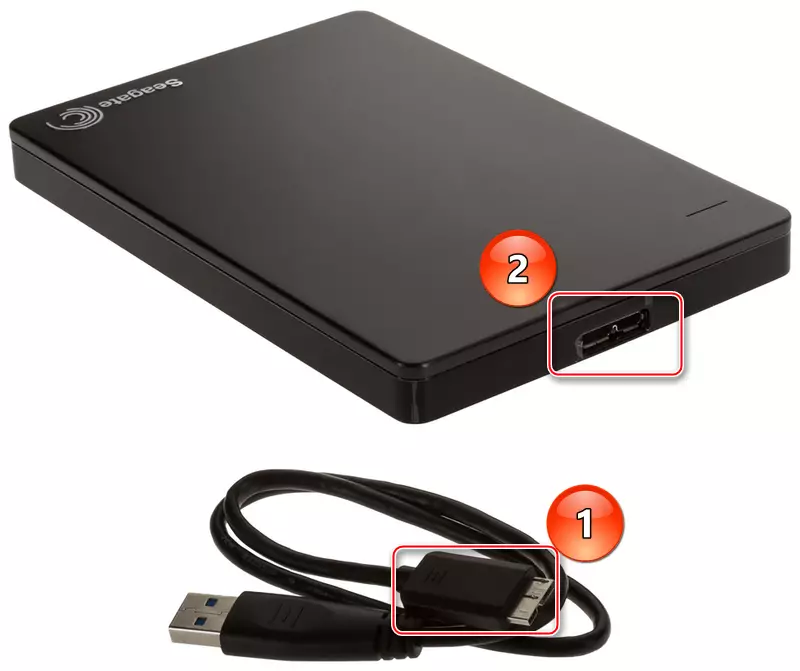
External hard drive
To connect an external HDD, you must perform several simple movements:
- Connect the USB cable, which is complete with the desired plug to the disk.
- Connect the other side of the cable to the USB port of the router.
As you can see, nothing complicated, purely mechanical operations.
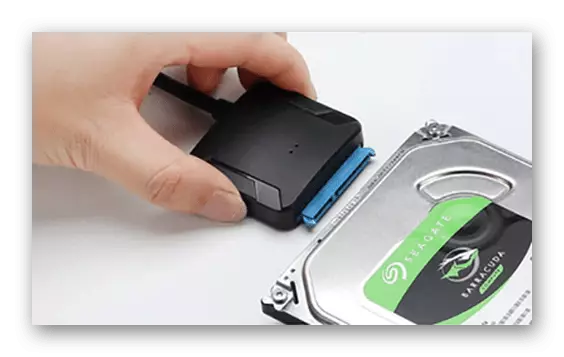
Internal hard drive
To connect an internal drive, a special USB-SATA adapter is required, which is equipped with a special connector for power.
- Connect the SATA-plug adapter with a hard disk connector.
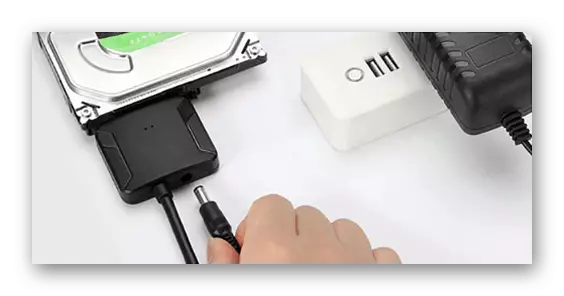
- Insert the power plug into the adapter if you use HDD form factor 3.5 ".
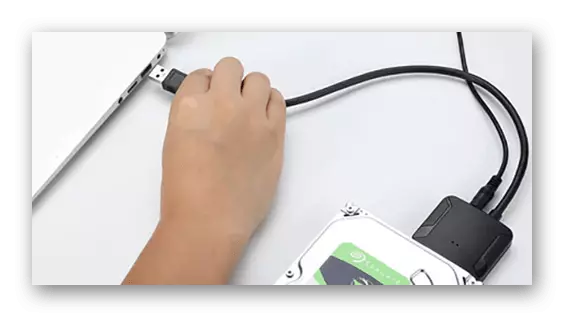
- Connect the hard disk to the router by inserting the adapter's USB plug to the corresponding router connector.
As you can see, the HDD connection procedure itself is not very complex to the router. All you need is a cable or adapter, as well as the availability of a free USB port on the router. After all the actions described above were performed, it should be proceeded to the next step, by turning to the level of software.
Stage 2: Software Bunch
When the router and HDD are connected hardware, it is time to context them programmatically. We describe the connection option on the example of the router from TP-LINK. Before starting the procedure, restart your router, de-energized it for 5-10 seconds - this will give it correctly to start, "Seeing" the connected device. For topical models of routers from TP-LINK, the storage connections are automatically connected. To look into the disk, there are several ways:
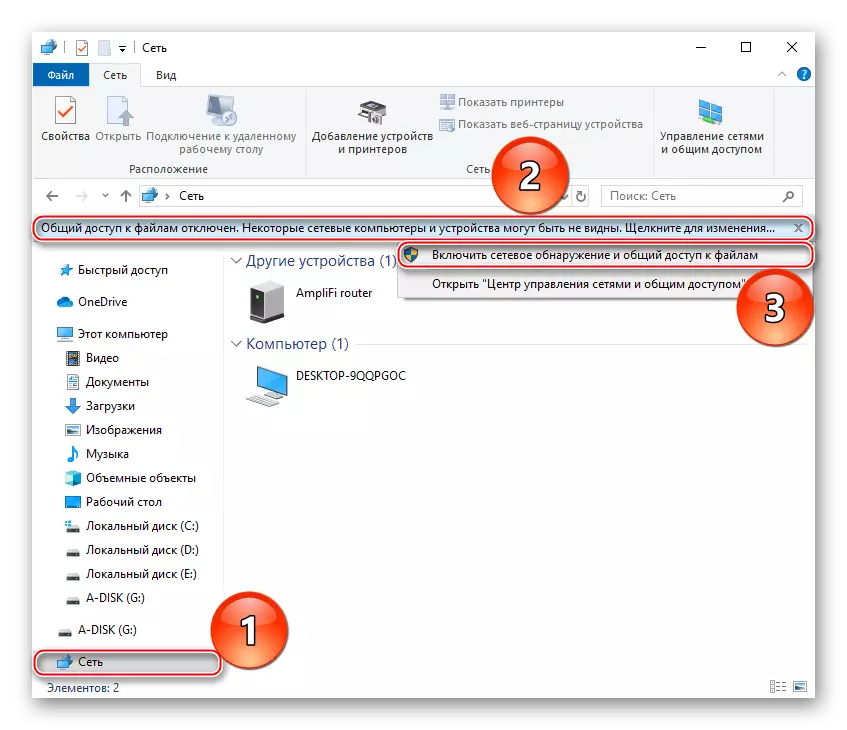
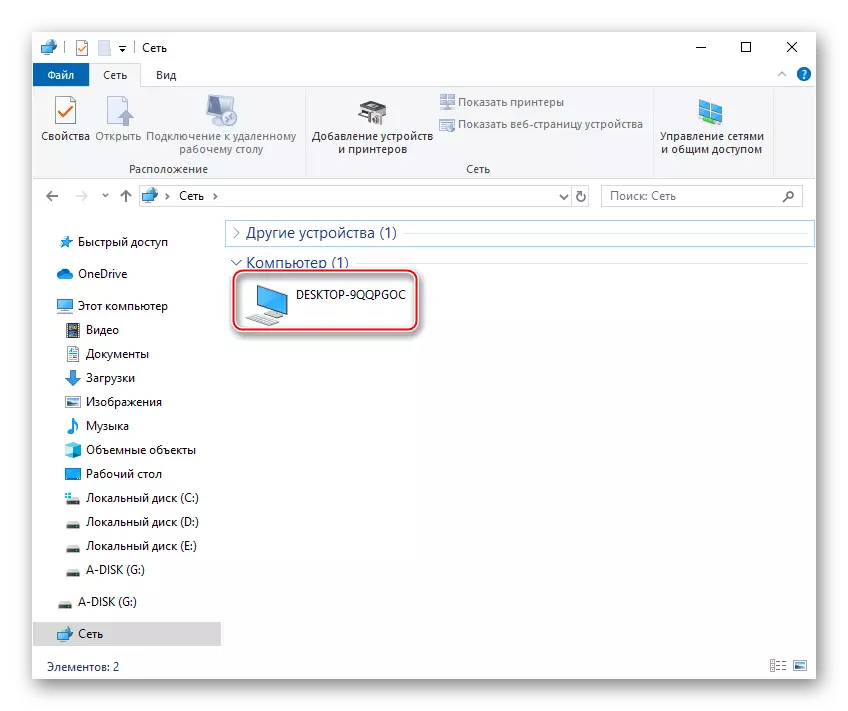
- In the "Windows Explorer", go to the "Network", then click on the line "Sharing files is disabled. Some network components and devices may not be visible. Click to change ... "and click" Enable Network Detection and Sharing Files ". If you have not jumped like a similar line, then the necessary setting is already included.
- After entering the settings and / or update the "Network" page, a new device should be displayed: Your already network, the drive, the default is called (in our example) in the network environment "TP-Share", but accessible to rename. Log in to it using the "Enter" key or a double click of the left mouse button.
- As an alternative way, you can enter the network storage with its technical address \\ tplinkwifi.net or ftp://tplinkwifi.net, which you want to enter into the address string "Explorer".
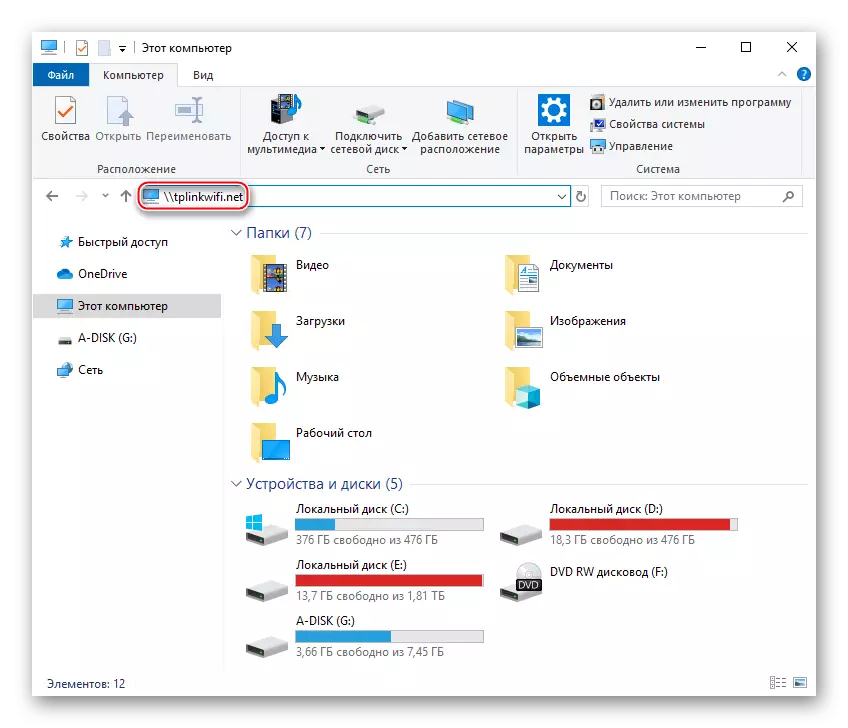
Keep in mind that this technical address refers only to TP-LINK, and current models. Such addresses in the devices of other manufacturers are worth searching in the instructions for a specific model, most likely, in the section "Connecting drives" or similar, as well as on the official website.
In the event that you have no hard disk displayed automatically, it is worth seeing if the router settings picked up. For this:
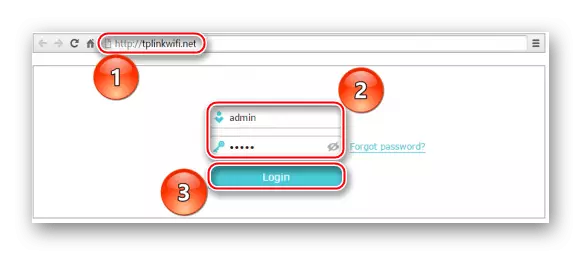
- Enter the web interface of the router, driven into the address bar of your Browser IP router, usually 192.168.1.1 or 192.168.0.1, but you can also use a special link http://tplinkwifi.net. After that enter your username and password and click "Login".
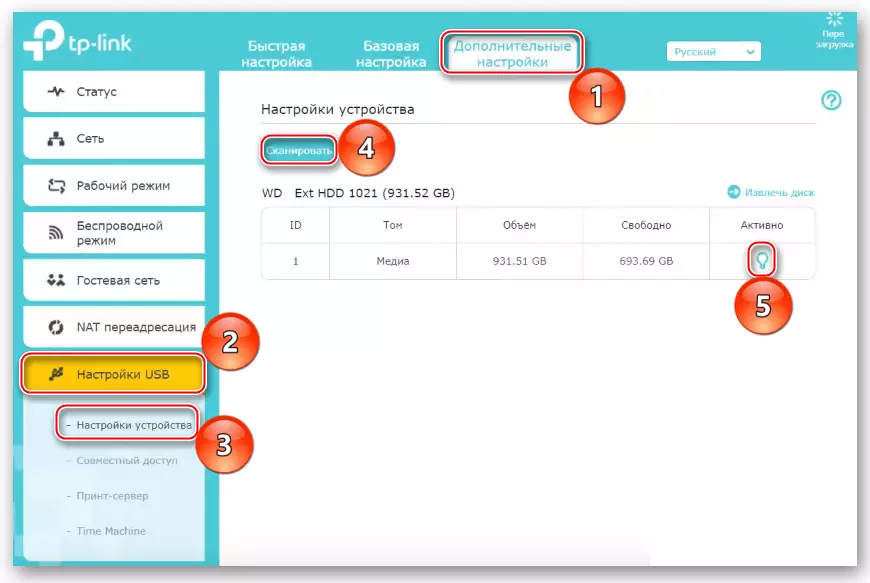
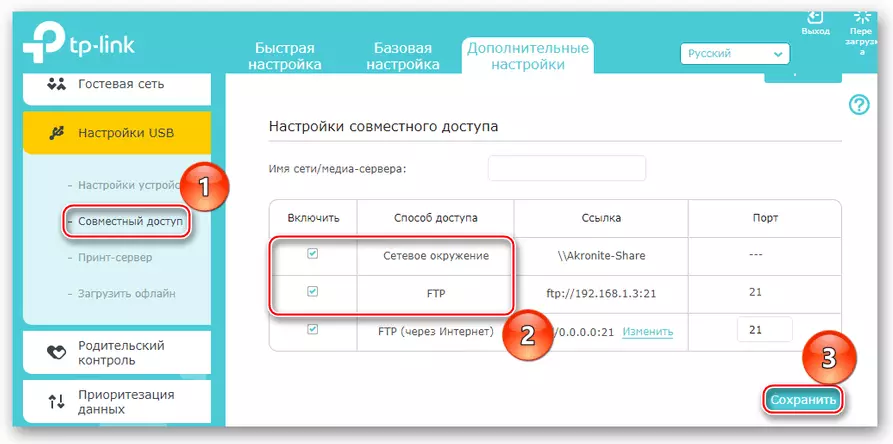
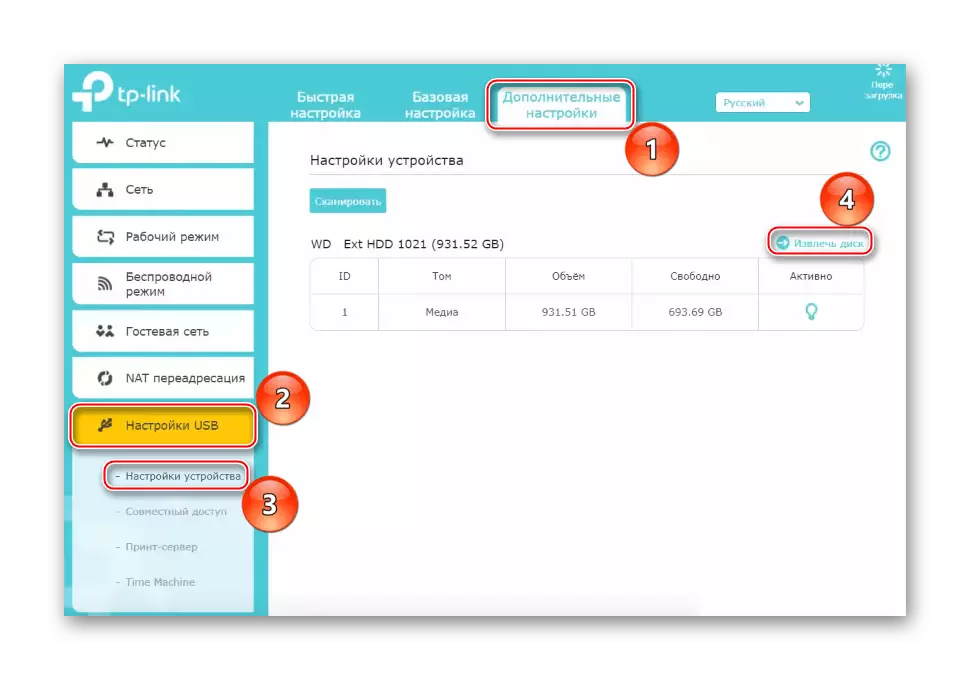
- Click the "Advanced Settings" tab, the mouse click the "USB settings" settings, and then select the Device Settings string. If the panel is empty and does not show detected discs, click on "scan", after which the connected HDD should show itself below. Make sure it is active (the light bulb icon appears), if not, click on the icon to appear the light bulb.
- Select the "Shared Access" category, check the checkboxes to the "Network Surroundings" and "FTP" (if available). Click on "Save".
The above-mentioned actions are most often enough to bundle a router with a drive. If you still can't detect it, you should check all components from the disk to the router USB controller.
See also:
Check hard disk for performance
How to check the hard disk on the broken sectors
If you want to disconnect the hard drive from the router, initiate a secure extraction to prevent data loss. In TP-Link, for this consistently go to sections "Additional settings" Next click by "USB Settings" and then select "Device Settings" and press "Safe extraction".
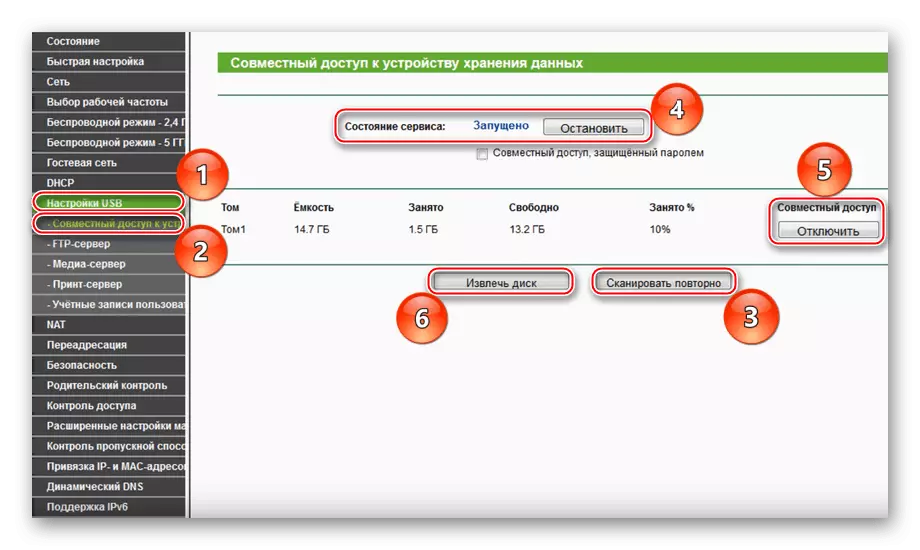
For the old version of the TP-LINK web interface almost the same algorithm. Click the left mouse button on the "USB settings" line, then select "Share access to the storage device". If the router does not display that he sees the wheels at all - click "Scan Repeated", make sure that the "Service Status" is in the "Run" position, and if not, then click next to the "Run" button. And also make sure that "sharing" to the device is enabled, otherwise, click "Enable". Well, to disconnect the HDD, use the "Extract Disk" button.
After executing the above actions, the connection to the router must be completed. By a similar algorithm, a drive has been performed with routers of other manufacturers. New models can safely connect automatic, and you will need to work with the old ones through the web interface.
In the stated material, we looked at how to connect an HDD to a router. There is nothing complicated here, you only need to have the necessary cables and / or adapters, correctly connecting the devices hardware, and then rejoice in the automatic definition or to help the router through its web interface.