

The virtual office package from Google, integrated into their cloud storage, is quite popular among users in view of its free and ease of use. It includes such web applications such as presentations, forms, documents, tables. About working with the latter, both in the browser on the PC and on mobile devices, will be told in this article.
Fix the strings in the Google Table
Google tables are largely inferior to a similar solution from Microsoft - the Excel Table Processor. So, to secure the lines in the product of the search giant, which may be required to create a table or header cap, is available only one way. At the same time there are two options for its implementation.Web version
It is most convenient to use Google tables in the browser, especially if working with the web service is carried out through the company's company product - Google Chrome, affordable on computers with Windows, MacOS and Linux.
Option 1: fixing one line
Google's developers have placed the function you need almost almost an unlikely place, so many users are faced with difficulties. And yet, to fix the string in the table, just a few clicks.
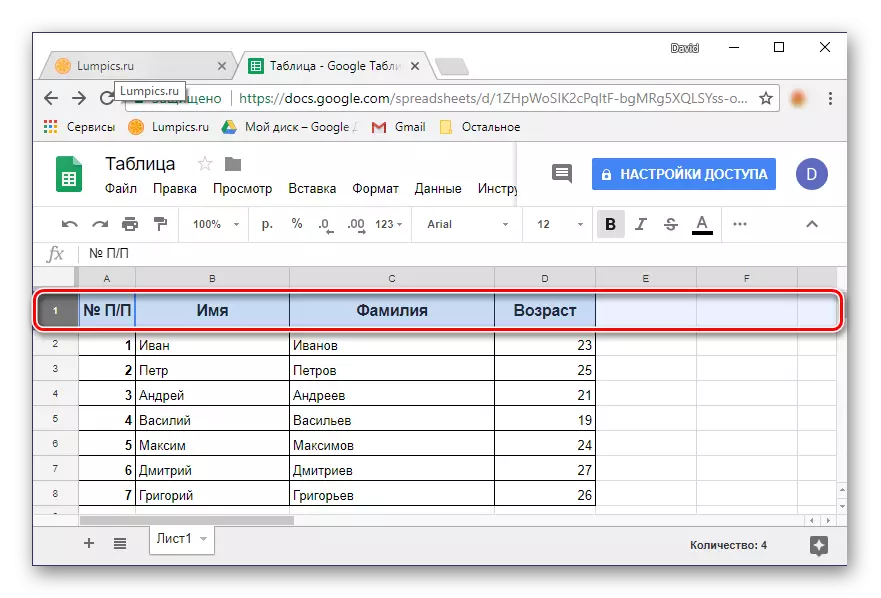
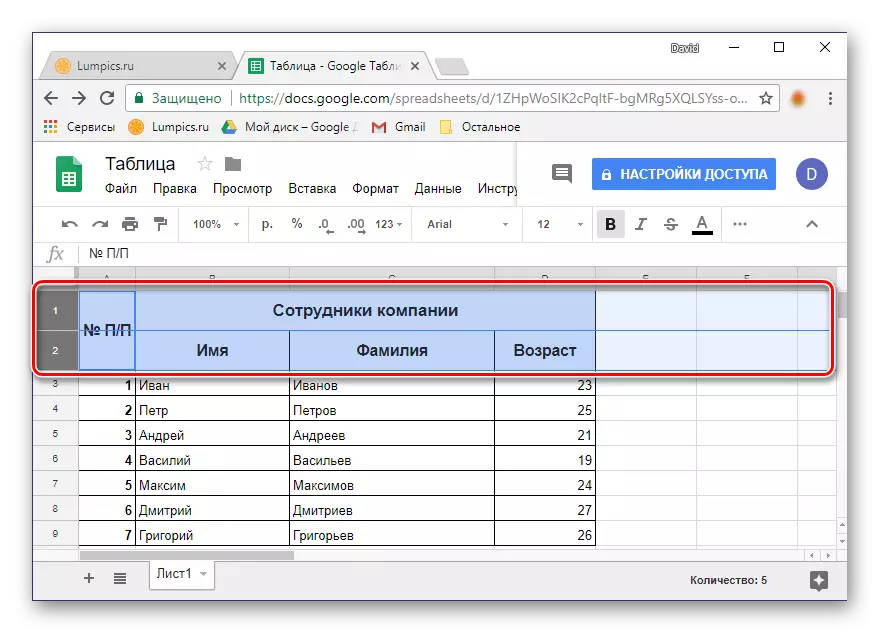
- Using the mouse, select the line in the table that you want to fix. Instead of manual selection, you can simply click on its sequence number on the coordinate panel.
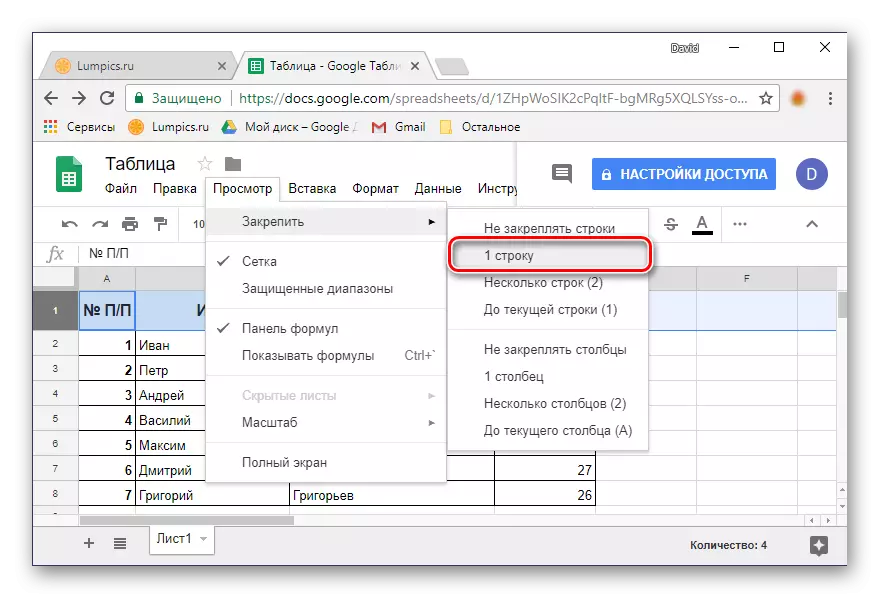
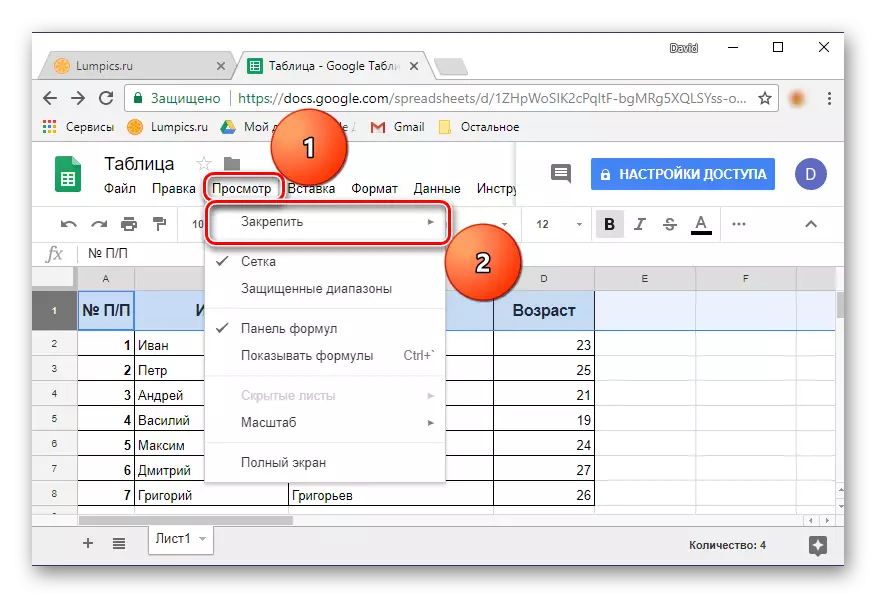
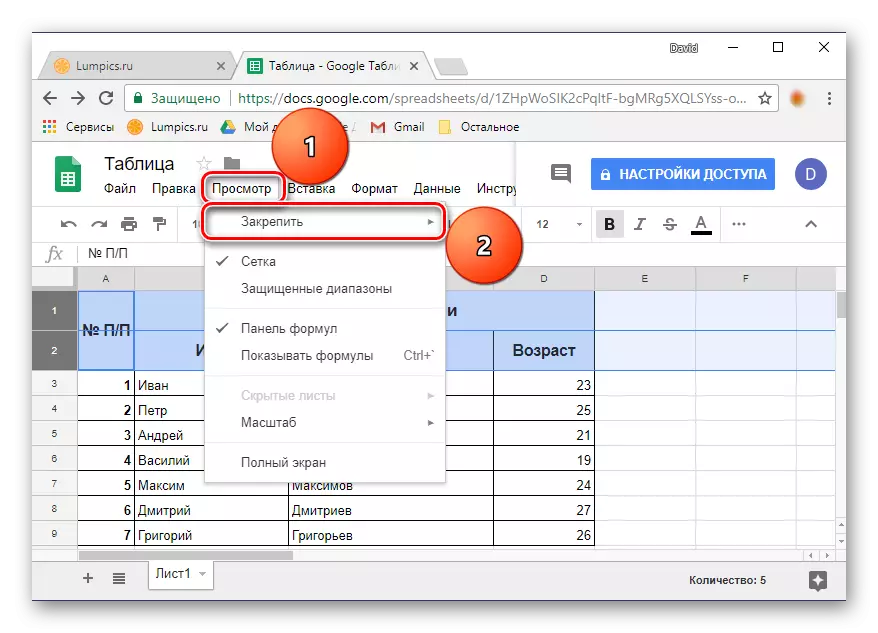
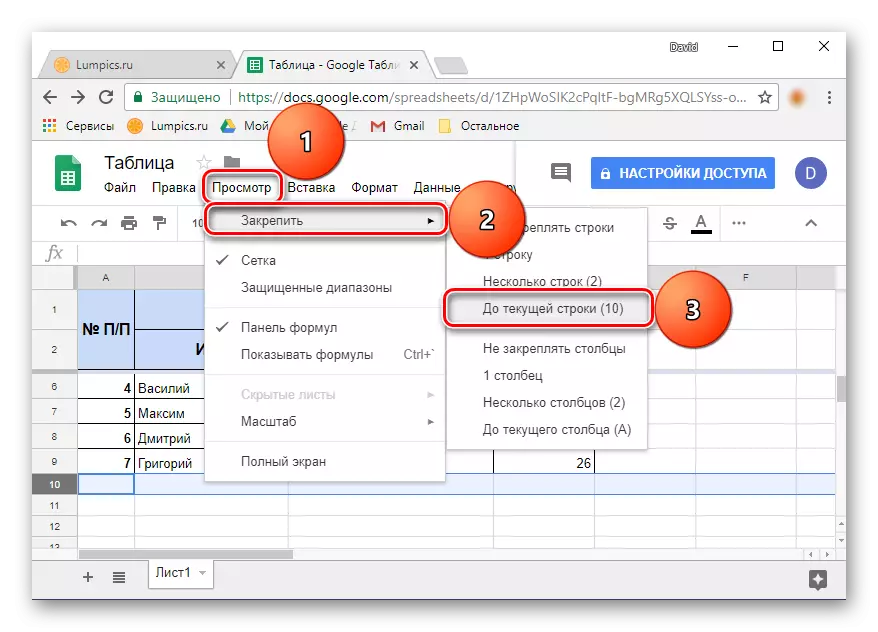
- Over the above navigation panel, find the View tab. Clicking on it, in the drop-down menu, select "Fasten".
- In the submenu that appears, select "1 string".
The line you highlight will be fixed - when scrolling the table, it will always stay in place.
Note: Recently, the View tab is called "View", so that you need to open it for accessing the menu of interest to us.
As you can see, there is nothing complicated in fixing one string. If you need to do it immediately with several horizontal rows, read further.
Option 2: Range fixing
Not always the cap of the spreadsheet includes only one row, there may be two, three and even more. Using a web application from Google, you can fix the unlimited number of rows containing any data.
- On the digital coordinate panel with the mouse, select the required range of the lines that you plan to convert to the attached table of the table.
- Repeat the steps described in the previous version: click on the View tab - "Fasten".
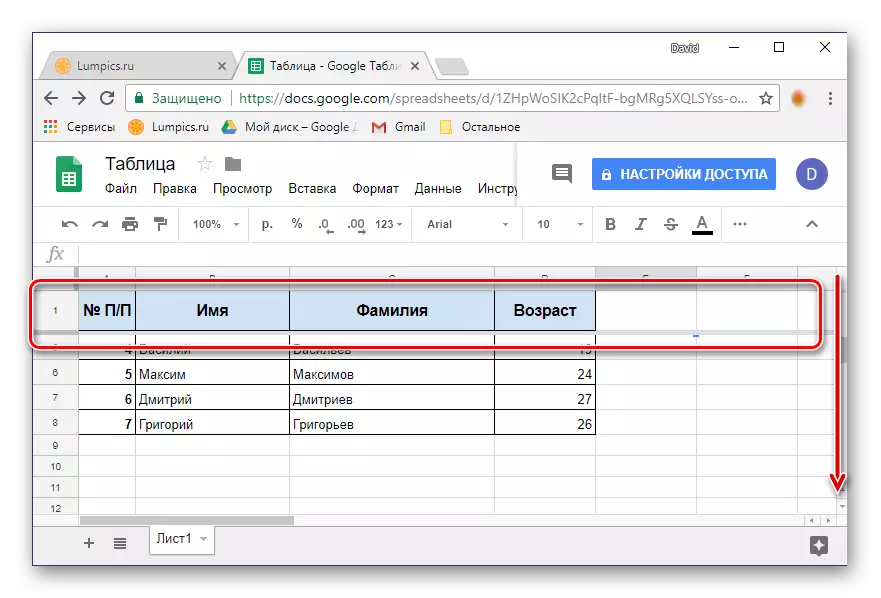
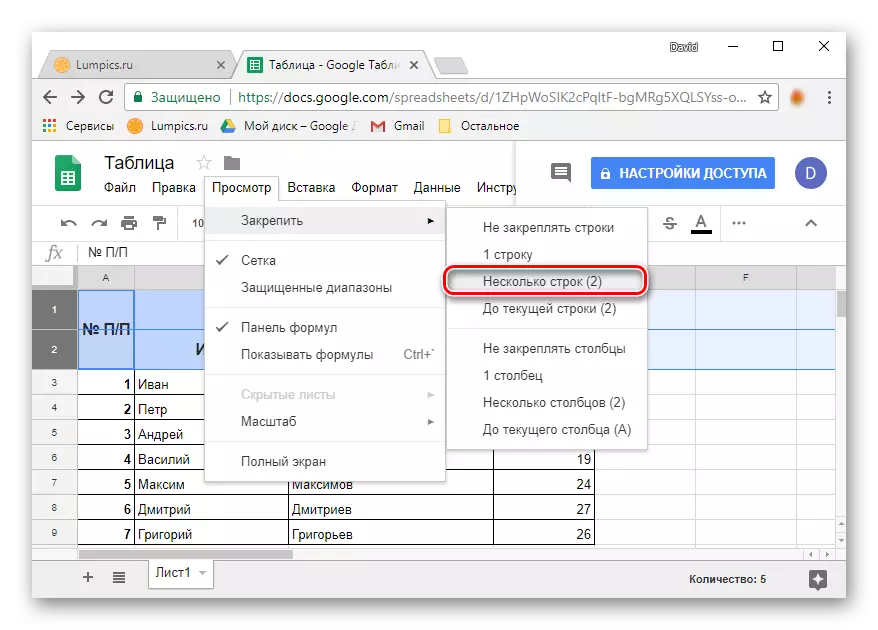
- Select "Multiple Lines (N)", where instead of "n" in brackets will indicate the number of the series you have selected.
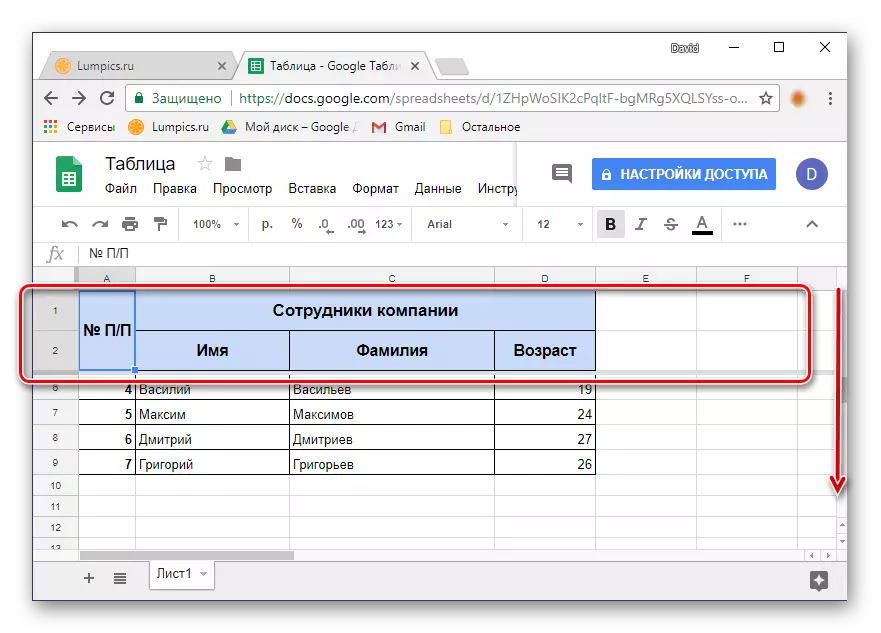
- You highlighted the horizontal tabular range will be fixed.
Tip: Instead of highlighting the mouse, you can simply click on the number of the first line from the band, and then holding the "SHIFT" key on the keyboard, click on the last number. The range you need will be captured.
Pay attention to the subparagraph "to the current line (N)" - it allows you to fix all the lines of the tables in which the data is contained, up to the last empty line (not inclusive).
This is how easily you can fix a few rows or a whole horizontal range in Google tables.
Disinteging rows in the table
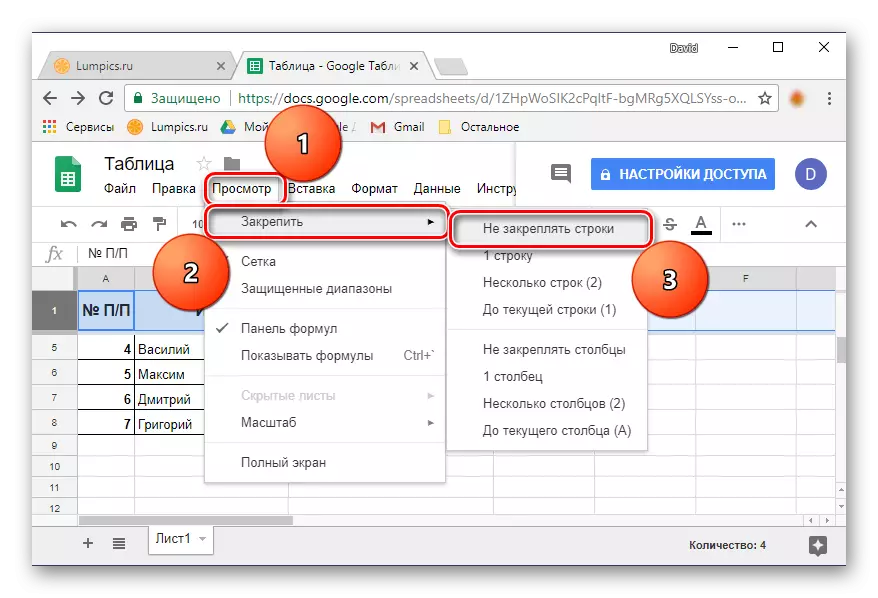
If the need for fixing the lines will disappear, simply click on the View tab, select the "Stop" item, and then the first version of the list is "not fixing strings". The fixation of the previously dedicated range will be canceled.
Option 2: Row Range
The consolidation of two or more rows in Google tables is carried out on the same algorithm as in the case of just one. But, again, here, too, there is one at all intuitive nuance, and it consists in the problem of allocating two rows and / or specifying the range - it is not possible to immediately understand how it is done.
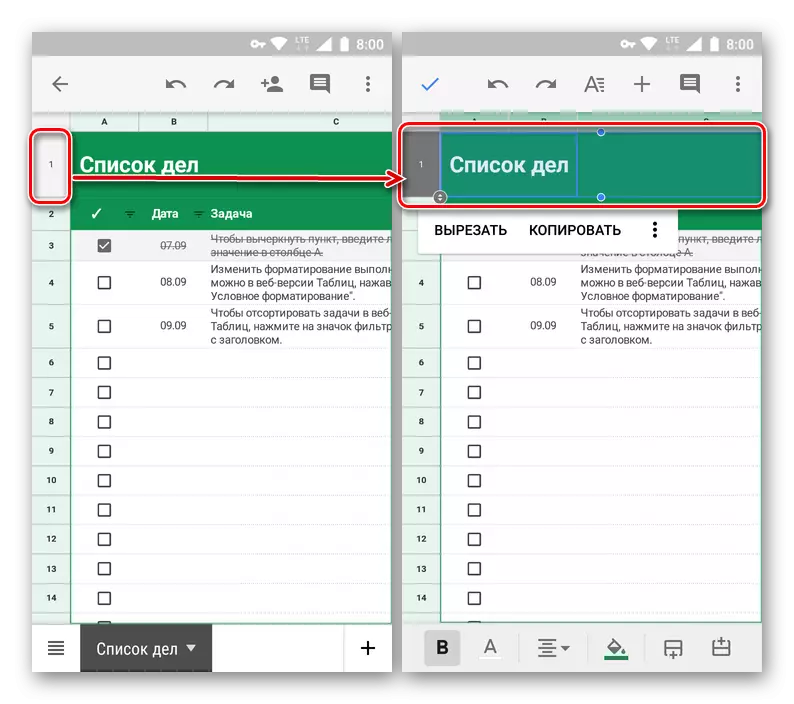
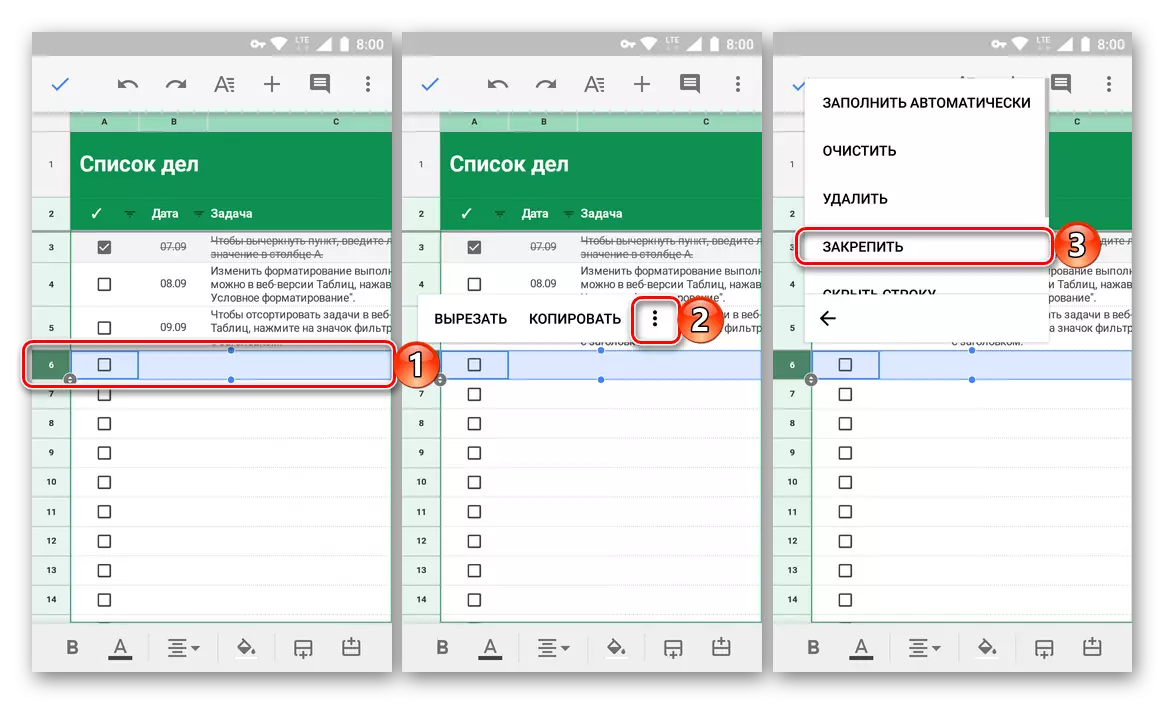
- If one line has already been fixed, click on its sequence number. Actually, it is necessary to press and subject to the absence of a cap in the table.
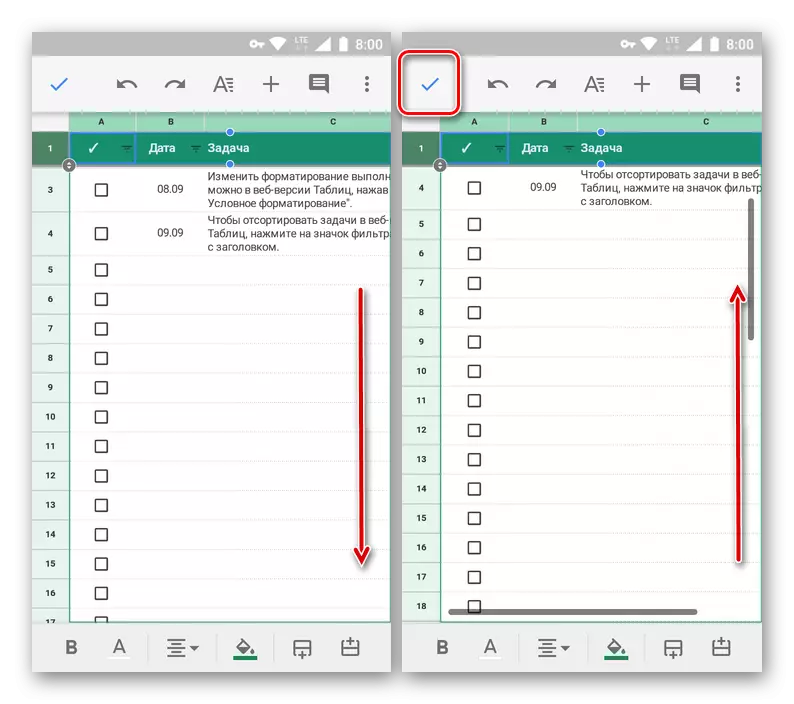
- As soon as the selection area becomes active, that is, a blue frame with dots will appear, pull it down up to the last line, which will enter a fixed range (in our example it is the second).
Note: It is necessary to pull at a blue point located in the cells area, and not for a circle with pointers near the line number).
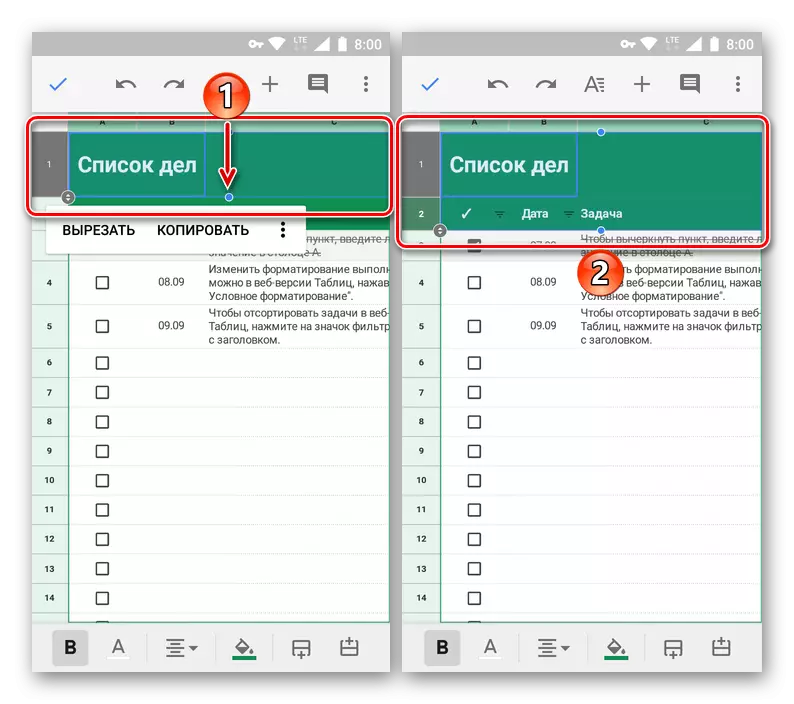
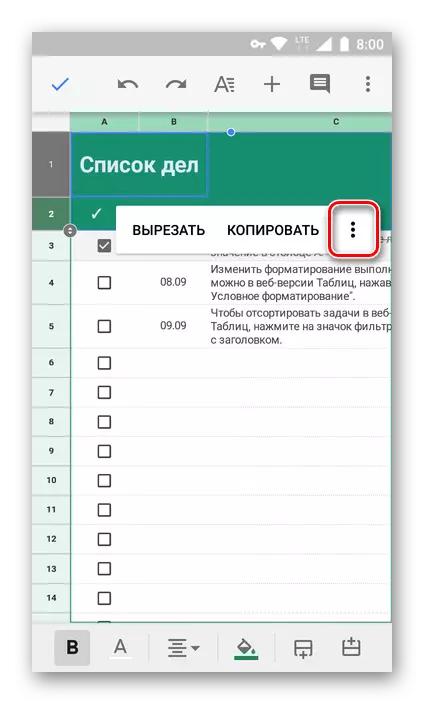
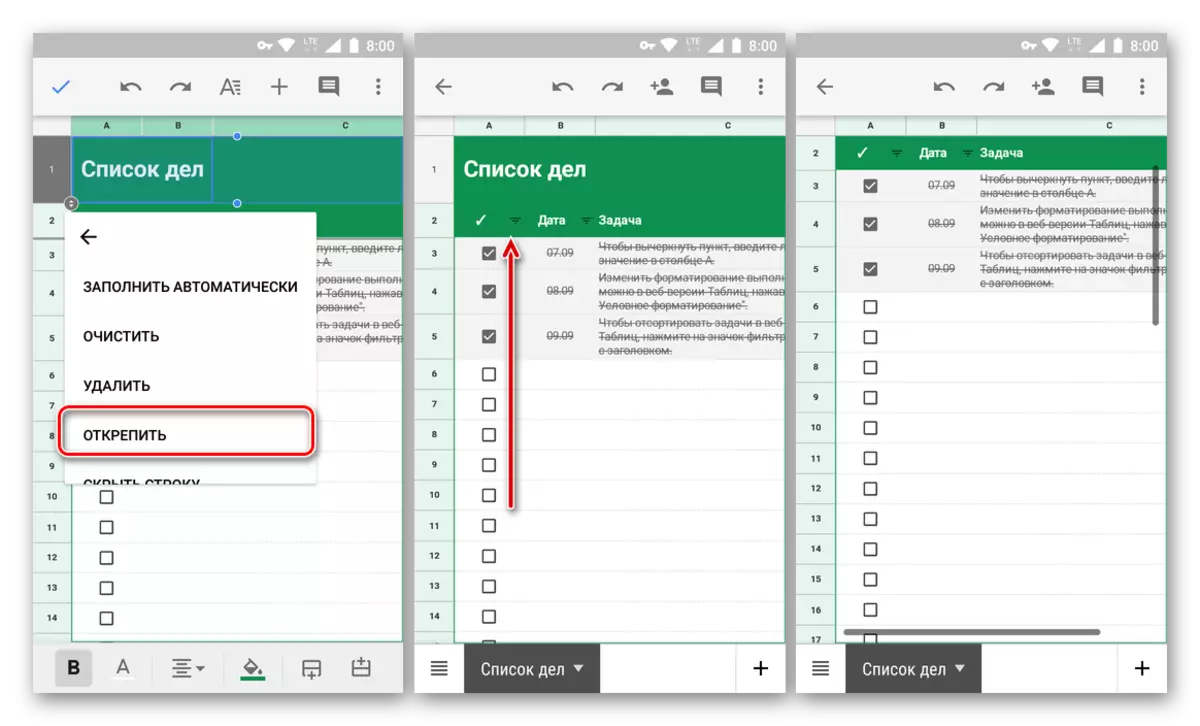
- Hold your finger on the selected area, and after the menu appears with the commands, tap for a three-way.
- Select the "Secure" option from the list of available options, and confirm your actions by pressing the tick. Scroll through the table and make sure that the lines are successfully binding, and therefore the creation of the header.

- This method is good in the case when literally several nearby lines are required. But what to do if the range is quite wide? Do not pull your finger across the entire table, trying to get along the desired line. In fact, everything is much easier.
- It does not matter whether you have rows or not, select that one of them, which will be the last of the recorded range.
- Hold your finger on the selection area, and after the small menu appears, click on three vertical points. From the drop-down list, select "Stop".
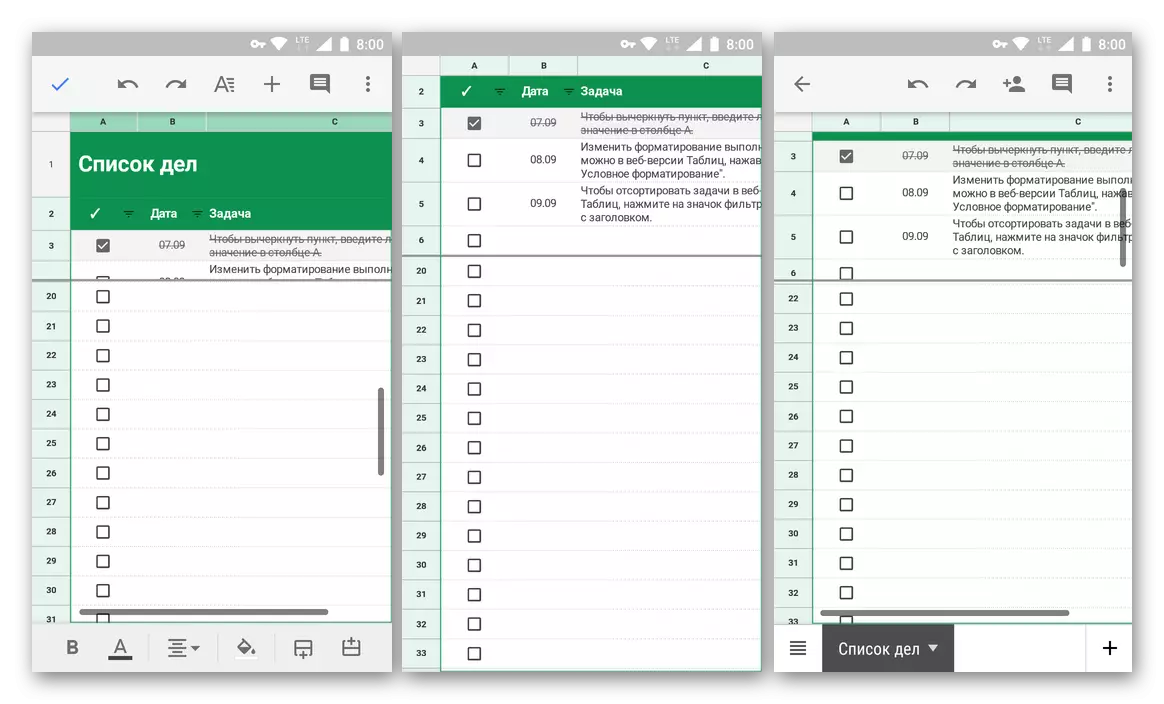
- After confirming the execution of the operation by pressing the check mark from the first to the last marked, you will be tied to the table header, which you can make sure that it is shedding from top to bottom, and then back.
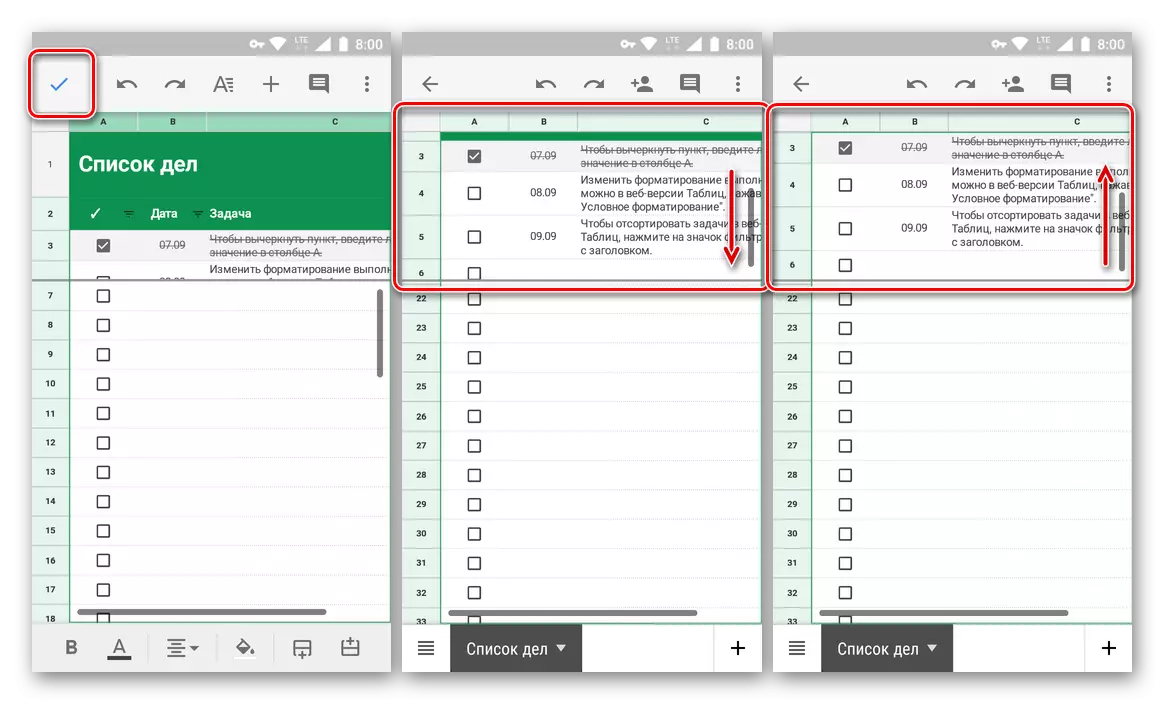
Note: If the range of fixed rows is too wide, it will only be partially displayed on the screen. This is necessary for the convenience of navigation and work with the rest of the table. Directly cap in this case can be scribble in any convenient direction.
Now you know how to create a header in Google tables, securing one or more lines and even their wider range. It is enough to do this just a few times to remember not the most visual and understandable location of the necessary menu items.
Split string
Cancel the binding of rows in a mobile Google table can be exactly the same way as we performed their fixation.
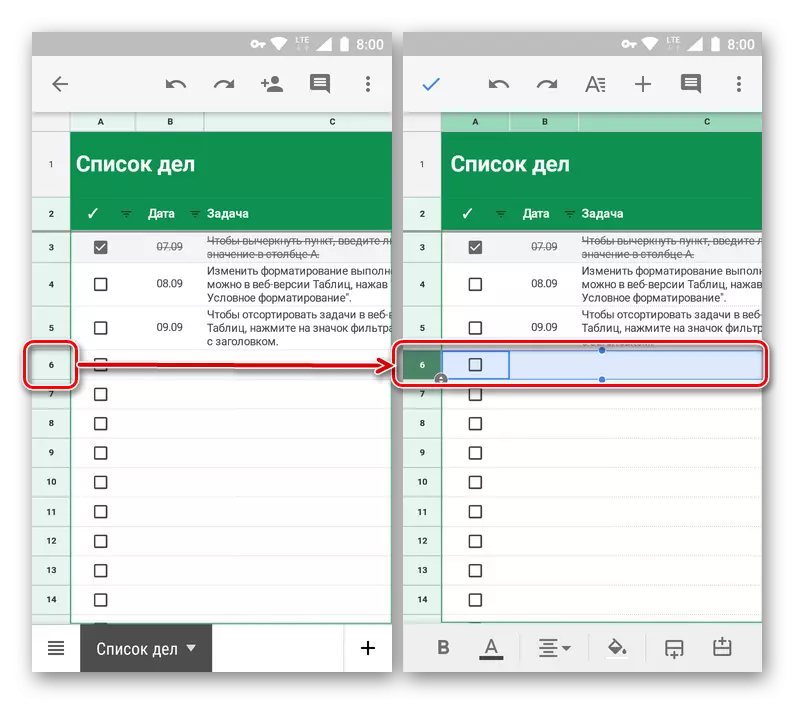
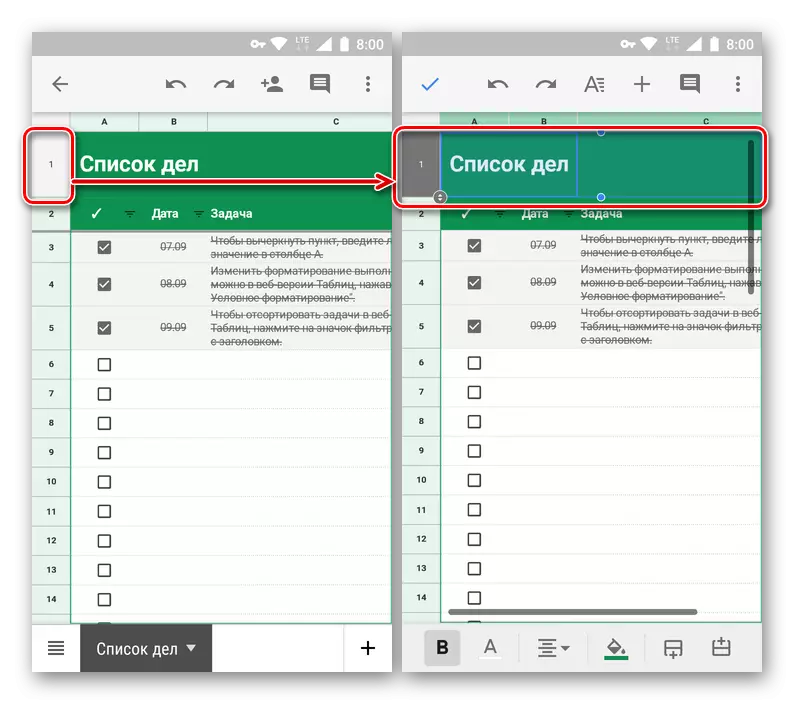
- Highlight the first string of the table (even if the range is fixed), tapping at its number.
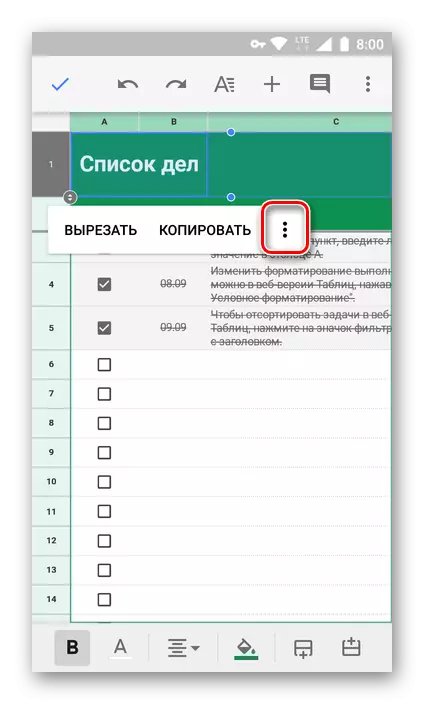
- Hold your finger on the selected area before the pop-up menu appears. Click it in three vertical points.
- In the list of action list, select "Obtain", after which the binding of strings (s) in the table will be canceled.
Conclusion
From this small article, you learned about solving such a simple task as creating a cap by fixing the lines in Google tables. Despite the fact that the algorithm for performing this procedure in a web and mobile application is significantly different, you will not definitely call it. The main thing is to remember the location of the necessary options and menu items. By the way, in just the same way, you can fix the columns - just select the appropriate item in the View tab menu (previously - "View") on the desktop or open the command menu on your smartphone or tablet.