

Sometimes users working with various drawings in the AutoCAD program are faced with the need to calculate the area of individual or several elements. This can be done using two built-in tools, each of which works according to a special algorithm and is suitable in different situations. Today we want to demonstrate examples of interaction with each of these two functions so that you can choose the optimal option for yourself and use it with the need to fulfill the calculations.
We consider the square in AutoCAD
Regardless which calculation method is selected, the result will always appear the same one, while you can be sure that it will always be correct. Additionally, it should be borne in mind that millimeters perform a standard unit of measurement in the autocades, and the number will be shown in this magnitude. Therefore, it is important to note and the conversion of the received number, which will also be discussed further.Method 1: Properties of the Object
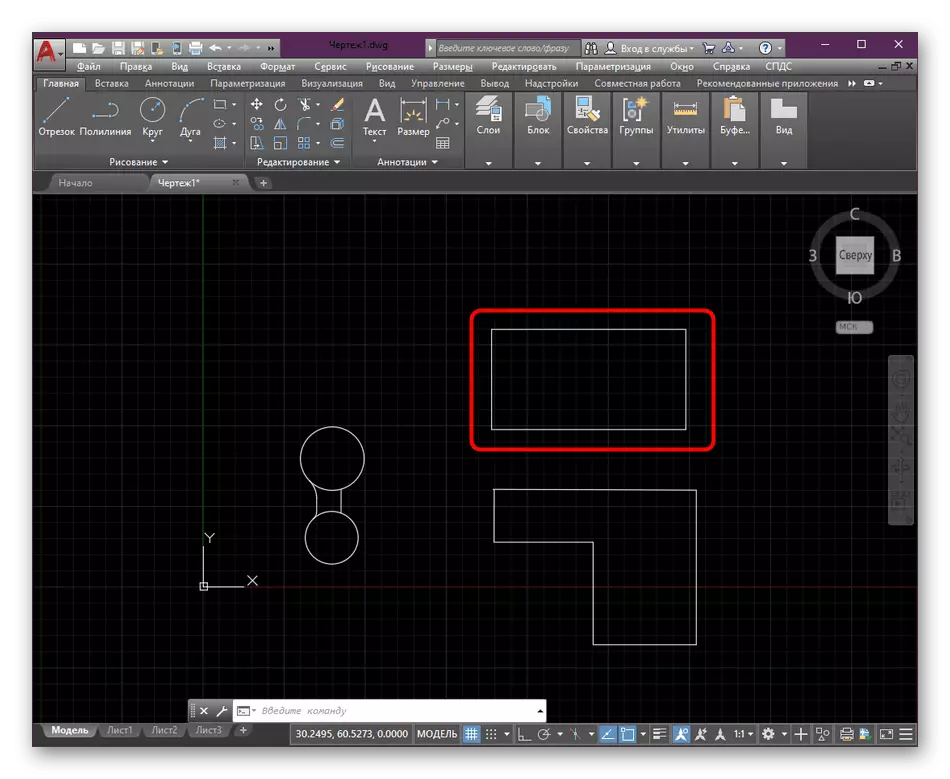
First, let's consider the easiest option. You have one primitive object consisting of polyline, for example, a rectangle or an arbitrary figure. This object acts as one element, so its area is always displayed in properties. Its viewing is as follows:
- Lay the object in the Model module.
- Highlight it with the left mouse click so that it will shine in blue.
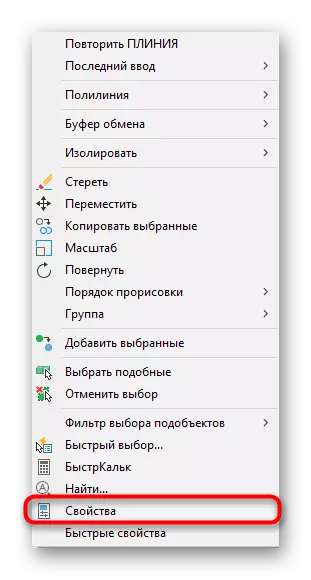
- Then click on the PCM and in the context menu, select the option "Properties".
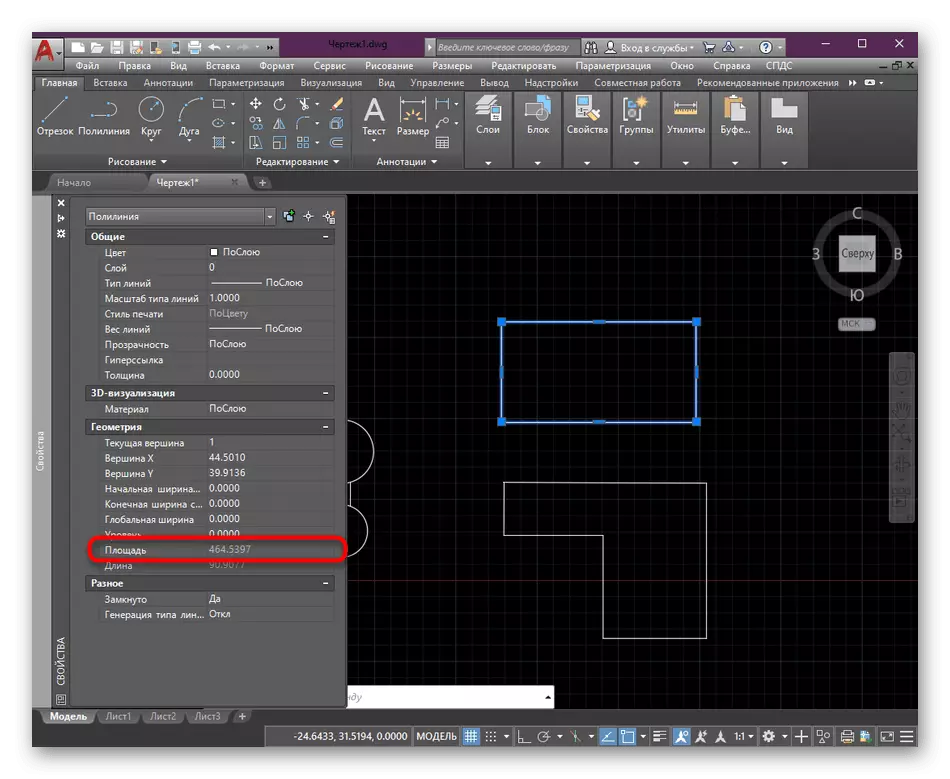
- On the left, an additional panel is displayed, where the basic properties of a primitive or other object are indicated. Here in the "Geometry" section, look at the value of the area "Square".
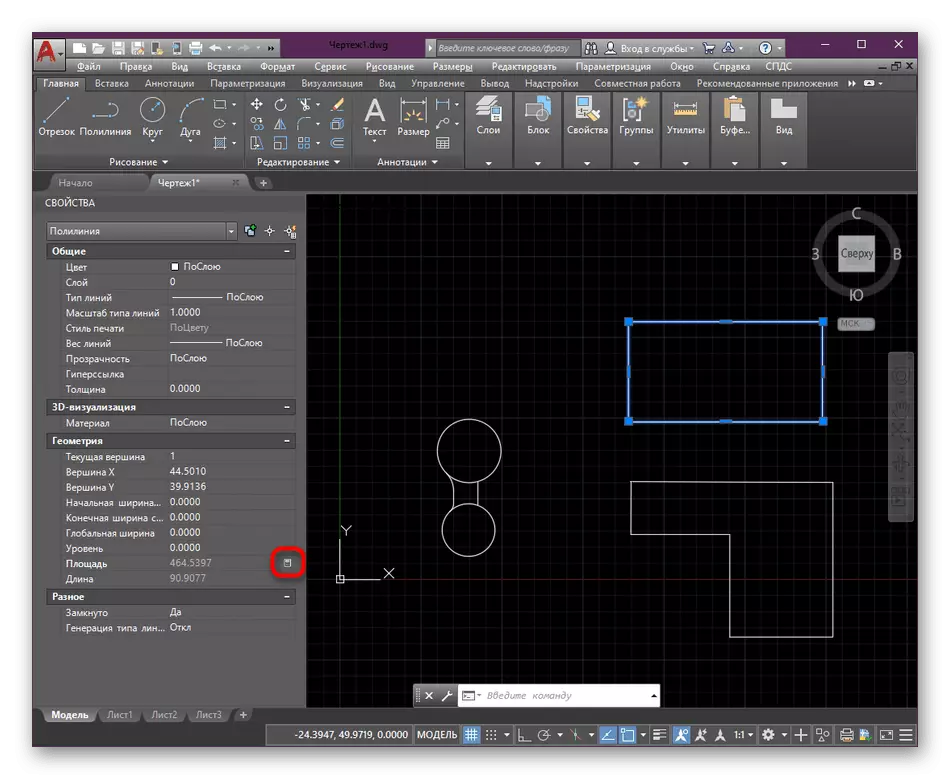
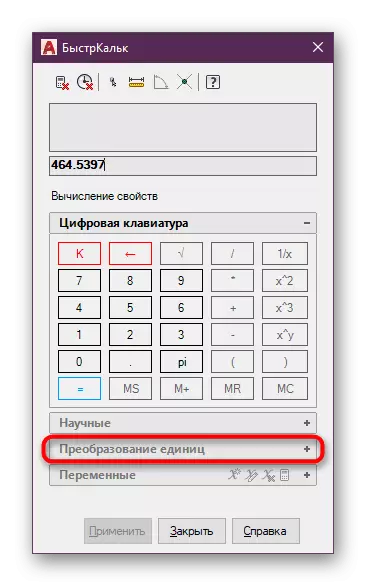
- If you need to translate millimeters to another value, click on the value, and then the calculator icon that appears.
- In the window that opens, expand the Additional section "Units".
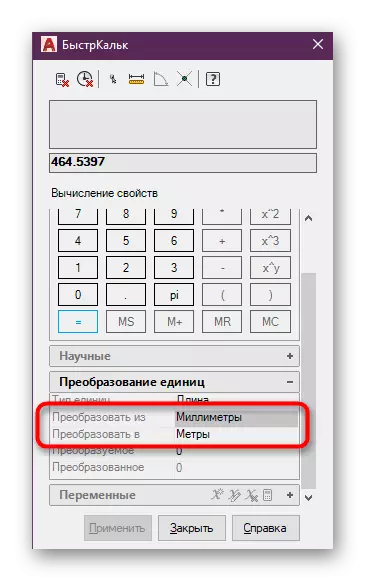
- Set the conversion parameters by specifying the corresponding values.
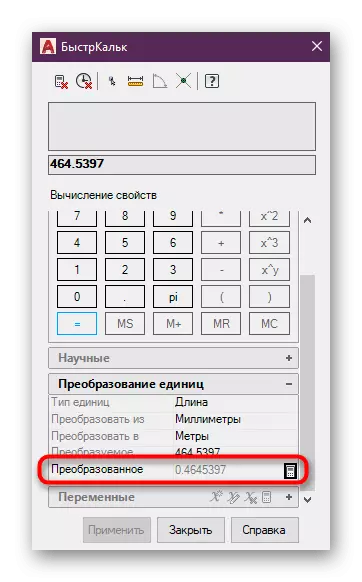
- Check out the result.

If this calculation is required to produce with an object consisting of several simple elements, for example, from polyline and multilia, it is better to know the hatching area, which will correspond to the recognizable parameter. Calculations occur in the same way, but at the same time the hatching is chosen, and we recommend that it is recommended to read in another material on our website on the link below.
Read more: Creating hatching in AutoCAD
Method 2: Tool "Measure"
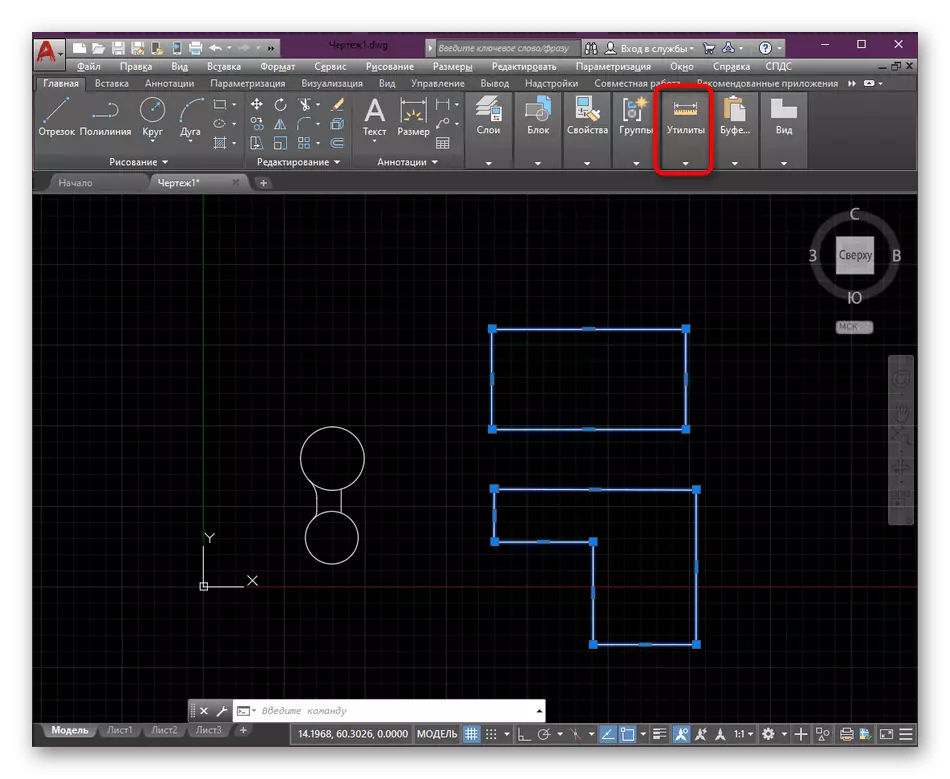
Sometimes you need to calculate the area at once several objects, however, when you go to properties, you can notice that the desired value is not displayed. In this case, the best option will be the use of another auxiliary tool located in the "Utilities" section.
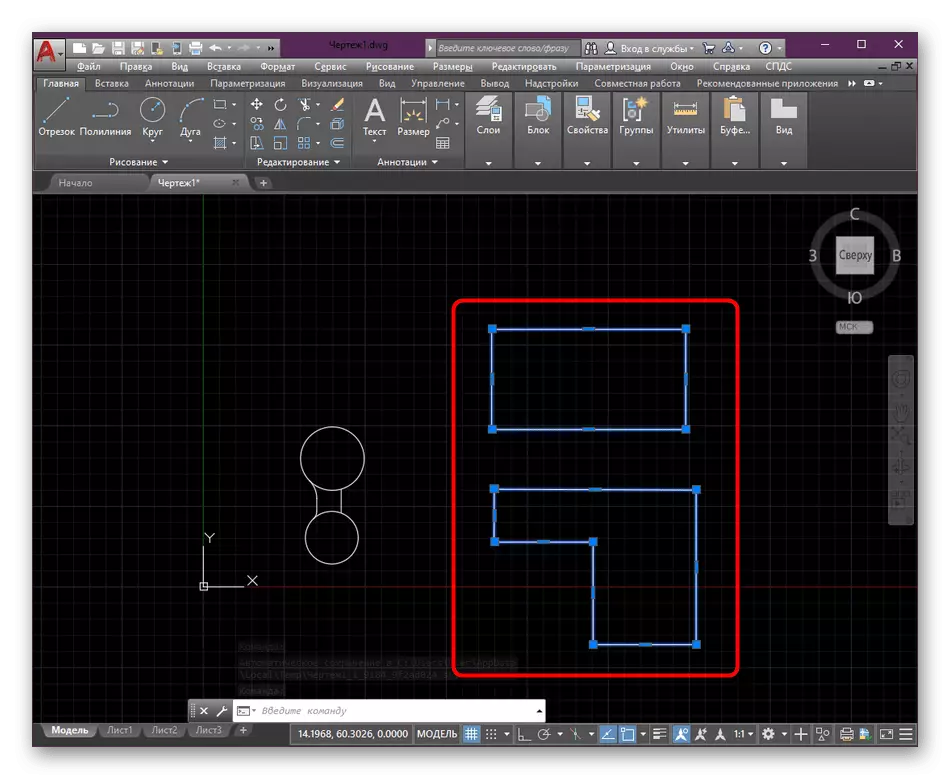
- Highlight all the necessary items so that they are highlighted in blue.
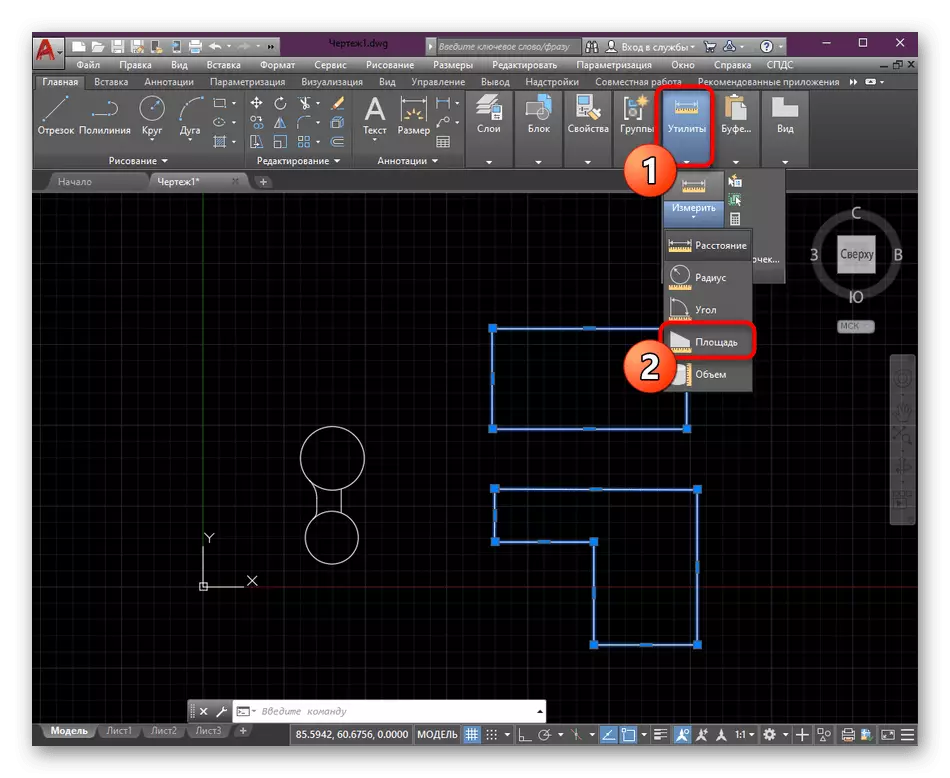
- Then in the tape Expand the "Tools" section.
- Here in the category "Measure" select the option "Square".
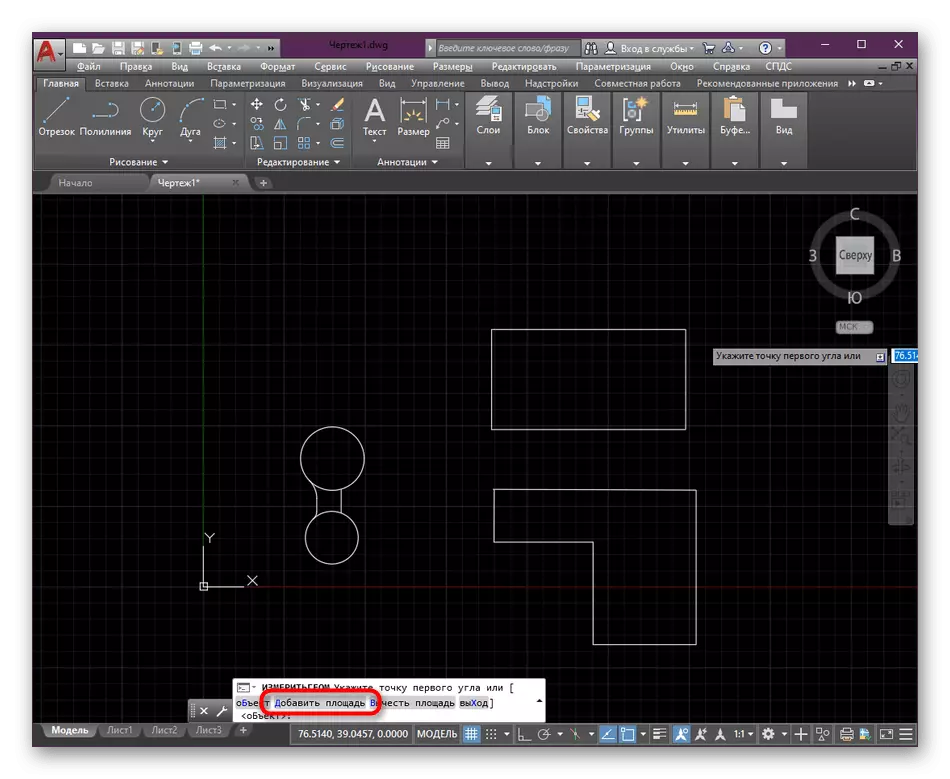
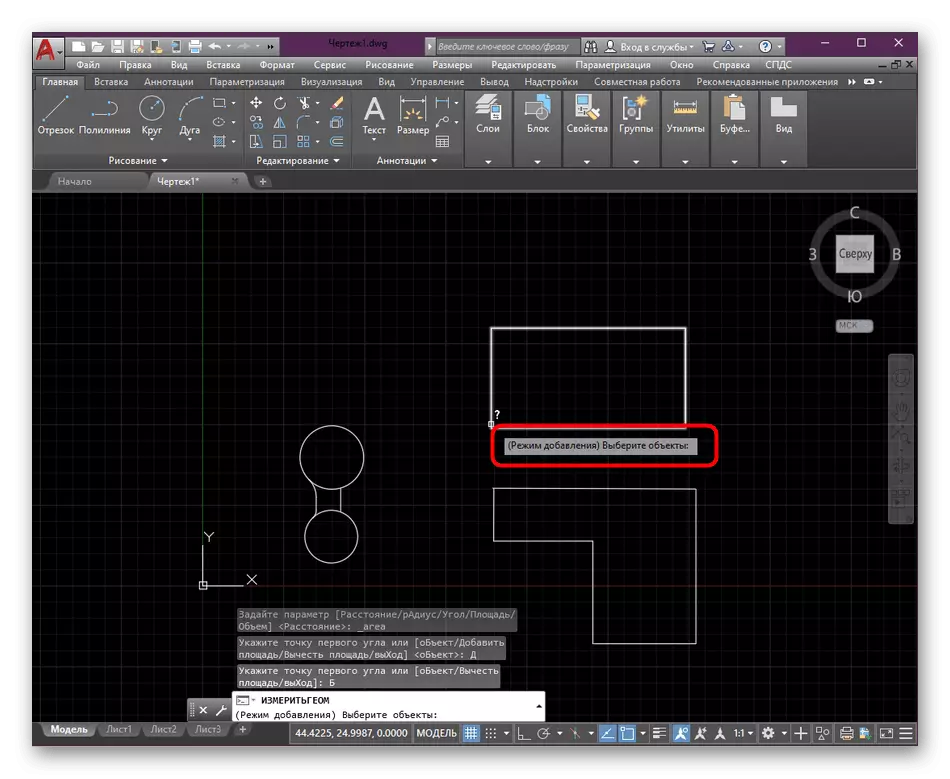
- Pay attention to the command line. Now there will be a measurement parameters. First of all, you will need to select "Add Square".
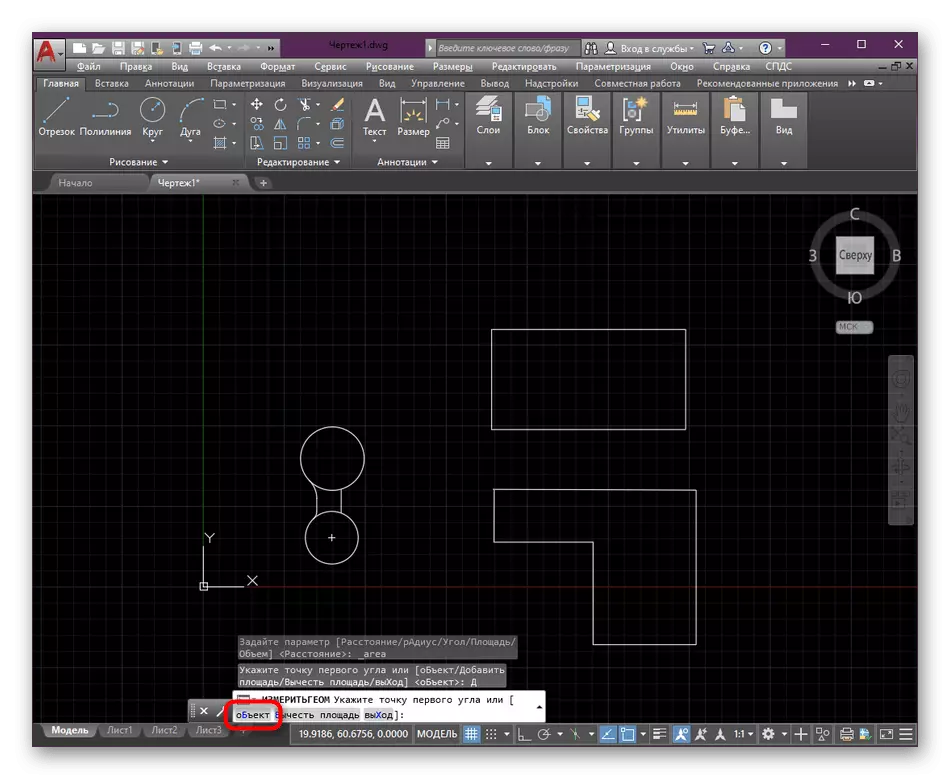
- Next, specify the object "Object".
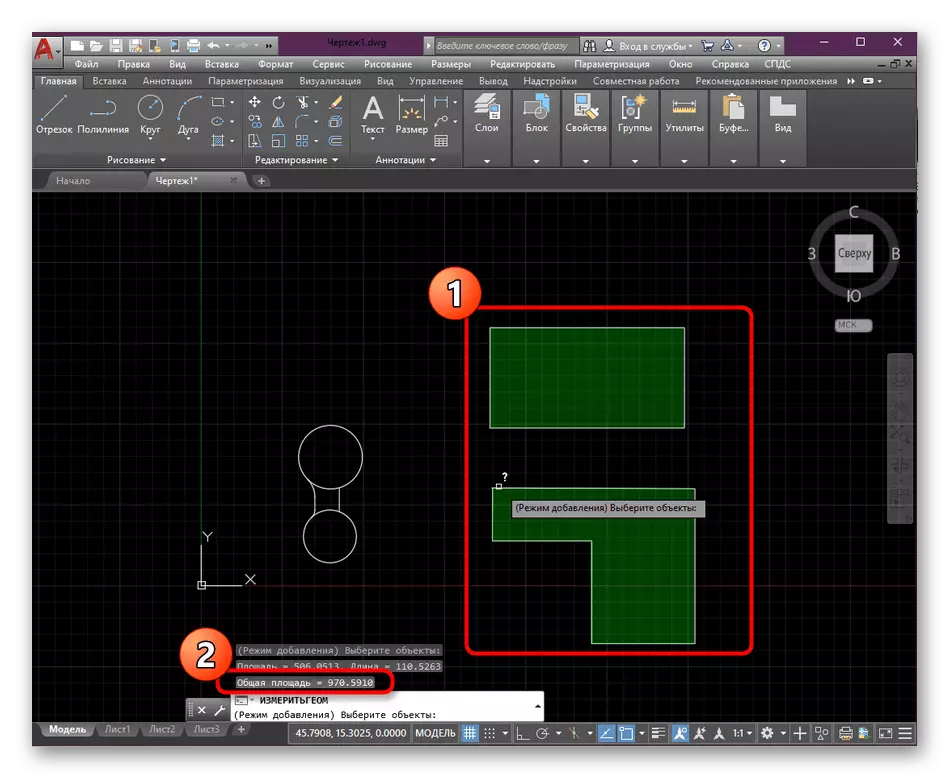
- With the help of the left click of the mouse, specify all objects whose total area will be calculated.
- Just above the command line, the value of the total area in millimeters will now be displayed. If necessary, it can be quite simple to convert to meters or centimeters using the fission function in any calculator.
Such simple ways will allow you to quickly measure the area of one or more drawing objects in AutoCAD. If you are just starting to develop this software and are interested in receiving training materials on other topics, we recommend you to familiarize yourself with the individual common material on our website by clicking on the link below.
Read more: Using AutoCAD Program