

For a laptop, you can find a lot of different applications. You can play your favorite games, watch movies and TV shows, as well as use as a working tool. But no matter how you use a laptop, it is mandatory to install all the drivers for it. Thus, you not only increase it with its performance, but also allow all laptop devices correctly interact with each other. And this, in turn, will help to avoid various mistakes and problems. This article will be useful to Lenovo laptop owners. In this lesson, it will be about the model Z580. We will tell you in detail about the methods that will allow you to install all the drivers for the specified model.
Lenovo Z580 Laptop Installation Methods
When it comes to installing the driver for a laptop, refers to the process of searching and installing software for all its components. Starting from USB ports and ending with a graphics adapter. We bring to your attention a few ways to help you cope with this difficult at first glance.Method 1: Official Source
If you are looking for a driver for a laptop, not necessarily Lenovo Z580, you first need to look at the official website of the manufacturer. It is there that often you can find a rare software that is very necessary for stable operation of the device. Let's analyze in detail the actions that need to be performed in the case of Lenovo Z580 laptop.
- We go to the official resource of Lenovo.
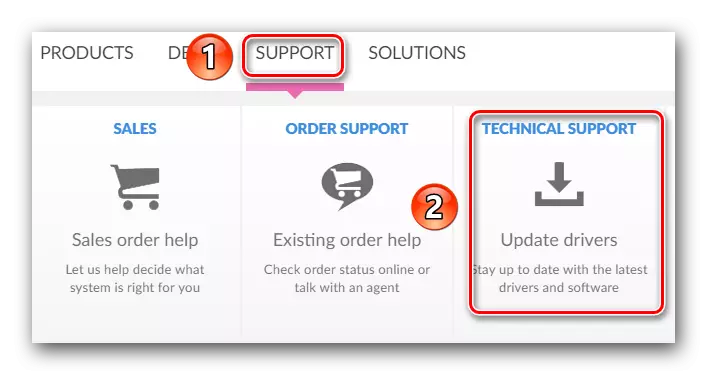
- At the very top of the site, you will see four sections. By the way, they will not disappear, even if you scroll down the page down, as the hat from the site is fixed. We will need a section "Support". Just click on its name.
- As a result, the context menu appears slightly below. It will contain auxiliary sections and links to pages with frequently asked questions. From the general list you need to press the left mouse button on the section called "Update Drivers".
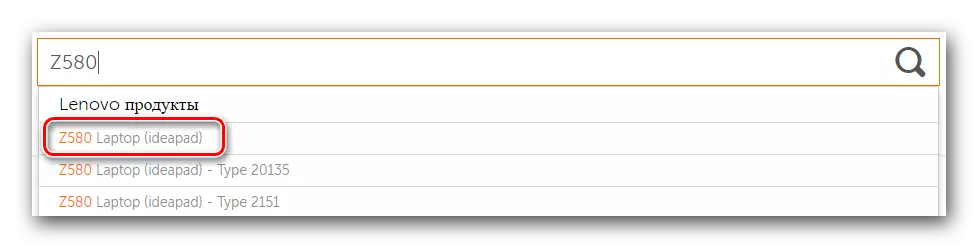
- In the center of the next page you will see the site searching. In this field you need to enter the Lenovo product model. In this case, we enter the model of the laptop - Z580. After that, the drop-down menu will appear below the search string. There will immediately display the results of the search query. From the list of products offered, choose the very first line, as noted in the image below. To do this, just click on the name.
- Next, you will find yourself on the Lenovo Z580 product support page. Here you can find various information relating to the laptop: documentation, manuals, instructions, answers to questions and so on. But we are not interested in this. You need to go to the "Drivers and Software" section.
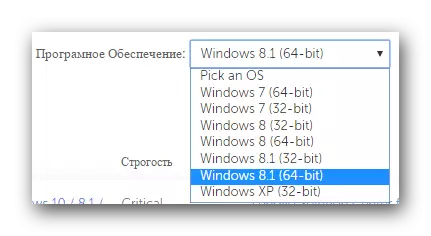
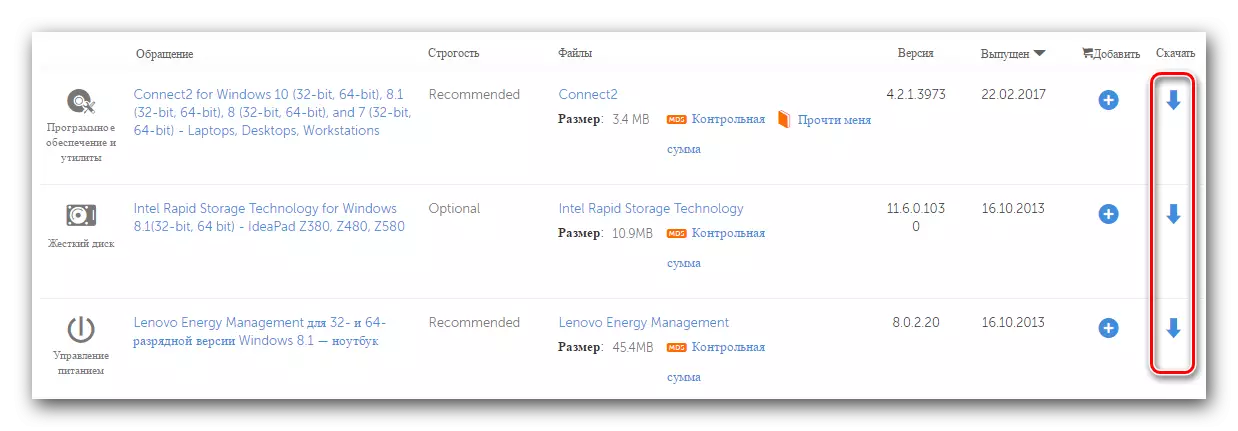
- Now the list of all drivers that are suitable for your laptop will appear. There will immediately be the total number of found by. You can pre-select from the list of the operating system, which is installed on the laptop. This will slightly reduce the list of available software. You can select OS from a special drop-down window, the button is located above the driver list itself.
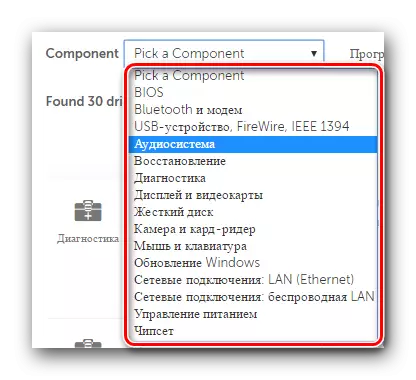
- In addition, you can also narrow the range of software search for the device group (video card, audio, display, and so on). It is also done in a separate drop-down list, which is located before the list of drivers themselves.
- If the category of the device you will not specify, you will see a list of all available software. It is convenient to some extent. In the list, you will see the category to which the software belongs, its name, size, version and date of release. If you have found the desired driver, you need to click on the button with the image of the blue arrow directional.
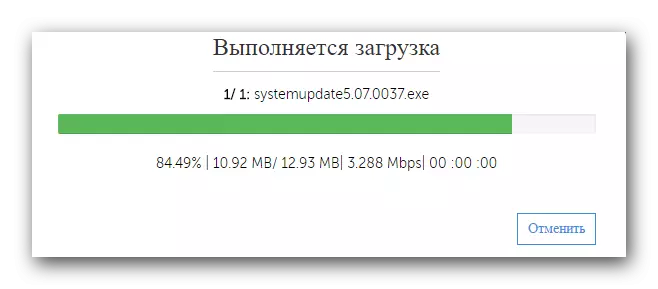
- These actions will allow you to download the installation file of the software to the laptop. You will need to just wait until the file is downloaded, then run it.
- After that, you need to follow the prompts and instructions of the installer, which will help you install the selected software. Similarly, you need to go with all the drivers that lack on the laptop.
- Having done such simple actions, you set the drivers for all laptop devices, and you can begin to be fully used.

Method 2: Automatic check on the site Lenovo
The method described below will help you find only those drivers that are actually absent on the laptop. You do not have to determine the missing software or re-install software. On the website of the company Lenovo has a special service that we will tell.
- Under the link below, go to the z580 laptop loading page.
- In the top area of the page you will find a small rectangular section with reference to automatic scanning. In this section, you need to click on the "Start Scan" or "Start Scan" button.
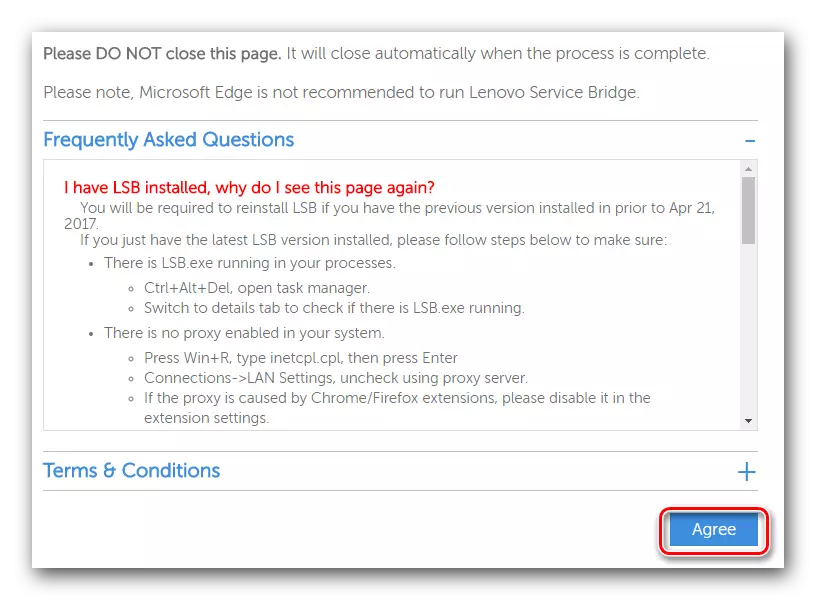
- Preliminary verification will start for the presence of special components. One of these components is the Lenovo Service Bridge utility. It is necessary for the correct scan of your laptop service Lenovo. If during the check it turns out that you do not have the utility, you will see the next window shown below. In such a window you need to click on the "Agree" button.
- This will allow you to upload the utility file to the computer. When he will be downloaded, launch it.
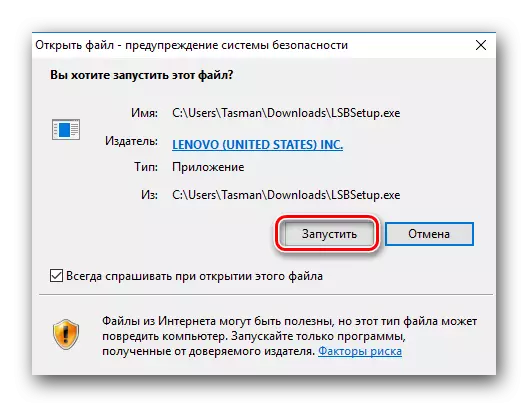
- Before installation, you can see the Security System System. This is the standard procedure and there is nothing terrible in it. Just press the "Run" or "Run" button in a similar window.
- The process of installing Lenovo Service Bridge is extremely simple. In total, you will see three windows - the welcome window, the window with the installation process and the window with the end of the process. Therefore, we will not stop at this stage in detail.
- When Lenovo Service Bridge is installed, update the page, which we gave the link at the beginning of the method. After the update, re-press the "Start scanning" button.
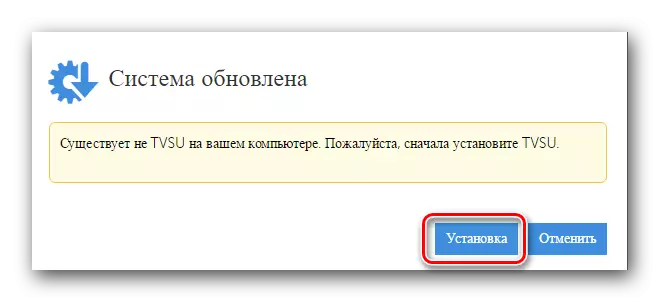
- During the re-scanning, you can see the following message in the window that appears.
- Abbreviation TVSU means ThinkVantage System Update. This is the second component that is needed for the correct scanning of the laptop through the Lenovo site. The message shown in the image means that the ThinkVantage System Update utility is missing on a laptop. It must be installed by clicking on the "Installation" button.
- Next will follow the automatic download of the required files. You will need to see the corresponding window.
- When the laptop reboots, go on the link to the download page and click the check button already familiar to you. If everything was successful, you will see the string of the progress of the scan of your laptop on this place.
- When it is completed, you will see below the list of software that you are recommended to install. The appearance of the software will be the same as described in the first method. You will need to simultaneously download it and install it.
- This described method will be completed. If it seems to you too complicated, we recommend using any other proposed method.

Please note that, as they say on Lenovo, for this method it is not recommended to use the EDGE browser, which is present in Windows 10.
Please note that after downloading data files, the installation will start automatically in the background. This means that you will not see any pop-ups on the screen. Upon completion of the installation, the system will independently restart without prior warning. Therefore, we recommend that you keep all the necessary information before this step to avoid loss.

Method 3: Program for Shared Loading
For this method you will need to install one of the special programs on the laptop. Such software is becoming more and more popular among users of computer equipment, and this is not surprising. Such software independently diagnoses your system and detects those devices that are outdated or there are no drivers. Therefore, this method is very versatile and at the same time is very easy to use. We did a review of the mentioned programs in one of our special articles. In it, you will find a description of the best representatives of such software, and also learn about their shortcomings and virtues.Read more: The best programs for installing drivers
What kind of program to choose is to solve only you. But we recommend looking at the DRIVERPACK Solution software. This is perhaps the most popular program for searching and installing drivers. This is due to the fact that this software is constantly growing its own base of software and supported equipment. In addition, there is both an online version and offline application, which is not necessarily active connection to the Internet. If you stop your choice on this program, our training lesson can be useful for you to help without any problems with it.
Lesson: How to update drivers on a computer using DriverPack Solution
Method 4: Using device identifier
Unfortunately, this method is not as global as the two previous ones. Nevertheless, he has its advantages. For example, using this method, you can easily find and install software for unidentified equipment. This helps in situations when similar items remain in the "Device Manager". Not always they manage to identify. The main tool in the described method is the device identifier or ID. How to find out his meaning and what to do with this meaning next, we told in detail in a separate lesson. In order not to repeat already voiced information, we just advise just go to the link below, and familiarize yourself with it. In it, you will find full information about this search and loading method.
Lesson: Search for Drivers by Equipment ID
Method 5: Standard Windows driver search tool
In this case, you will need to refer to the Device Dispatcher. With the help of it, you can not only watch the list of equipment, but also carry out some manipulations with him. Let's all in order.
- On the desktop we find the "My Computer" icon and click on it the right mouse button.
- In the list of actions we find the "Management" string and click on it.
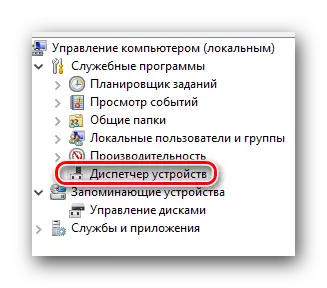
- In the left part of the window that opens, you will see the "Device Manager" string. Go through this link.
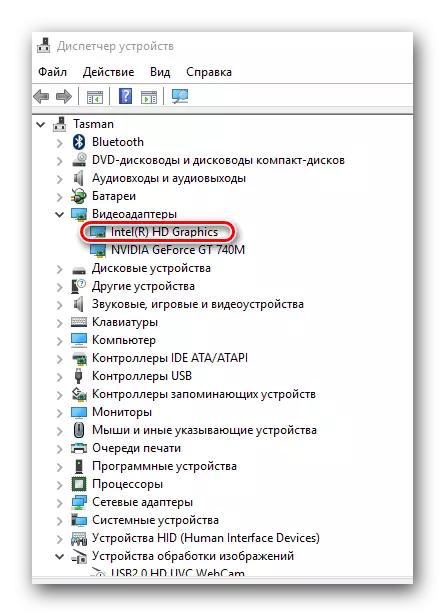
- You will see a list of all the equipment that is connected to the laptop. All it is divided into groups and is in separate branches. You should open the desired branch and on a specific device right-click.
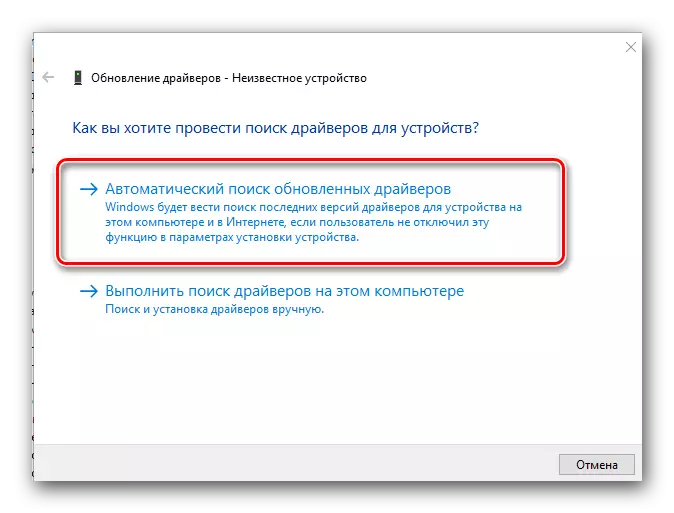
- In the context menu, select the "Update Drivers" item.
- As a result, the driver search tool will be launched, which is integrated into the Windows system. The choice will be two search modes in "automatic" and "manual". In the first case, the OS will try to find drivers and components on the Internet independently. If you select "manual" search, then you will need to specify the path to the folder in which the driver files are stored. "Manual" Search is used extremely rare for very conflict devices. In most cases, there is enough "automatic".
- By specifying the search type, in this case "automatic", you will see the software search process. As a rule, it does not take much time and lasts literally a few minutes.
- Please note that this method has its drawback. Not in all cases manage to find the software in this way.
- At the very end, you will see the final window in which the result of this method will be displayed.
On this we will finish our article. We hope one of the described methods will help you without any particular problems install the software for your Lenovo Z580. If any questions occur - write in the comments. We will try to give them the most detailed answer.