

Asus came to the post-Soviet market with the WL series routers. Now in the product range there are more modern and perfect devices, but WL routers are still in the course of many users. Despite the relatively poor functionality, such routers still require configuration, and we will tell you how to make it.
Preparation of ASUS WL-520GC to configuration
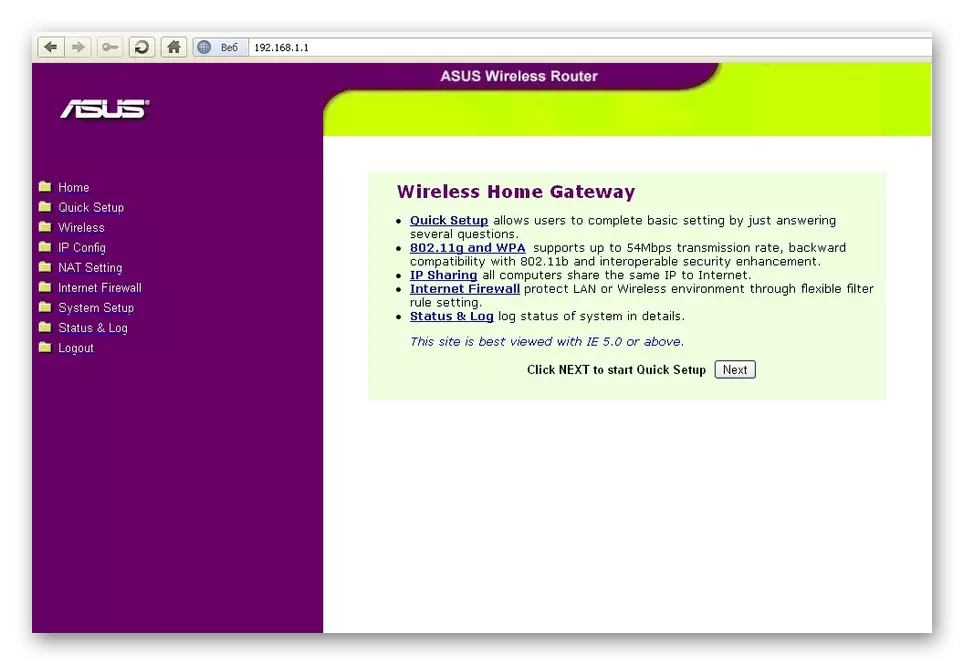
It is worth keeping in mind the following fact: The WL series has two types of firmware - an old version and new, which are distinguished by the design and location of some parameters. The old version corresponds to the firmware of versions 1.xxxx and 2.xxxx, and it looks like this:
New option, 3.xxxx firmware exactly repeats outdated versions for RT routers - known to users of the Blue interface.
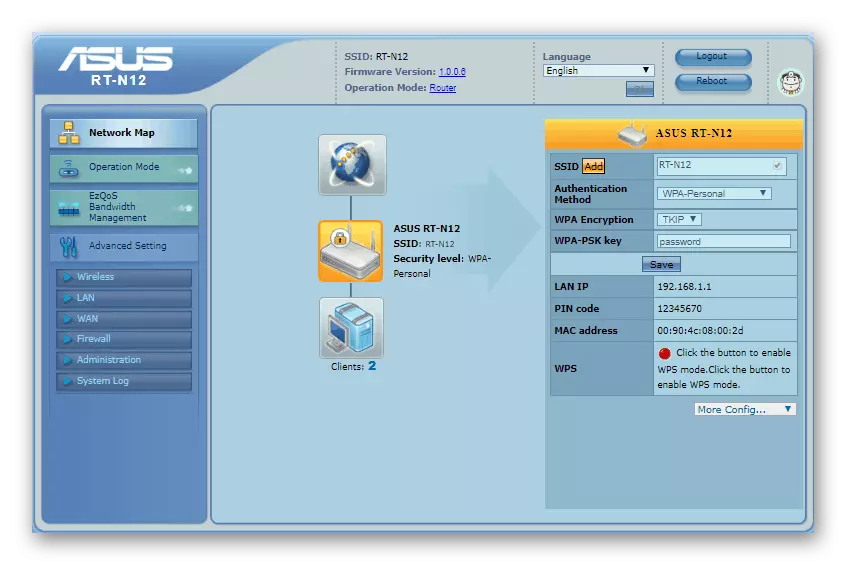
Before starting the procedures, the router is recommended to be updated to the latest version of Firmware, which corresponds to a new type of interface, so all further instructions will result in its example. Key items, however, on both types look the same, because the leadership will come in handy and those who are satisfied with the old view of the software.
Read more: Setting up a local network on Windows 7
After these manipulations, you can proceed to configuring ASUS WL-520GC.
Installing ASUS WL-520GC Parameters
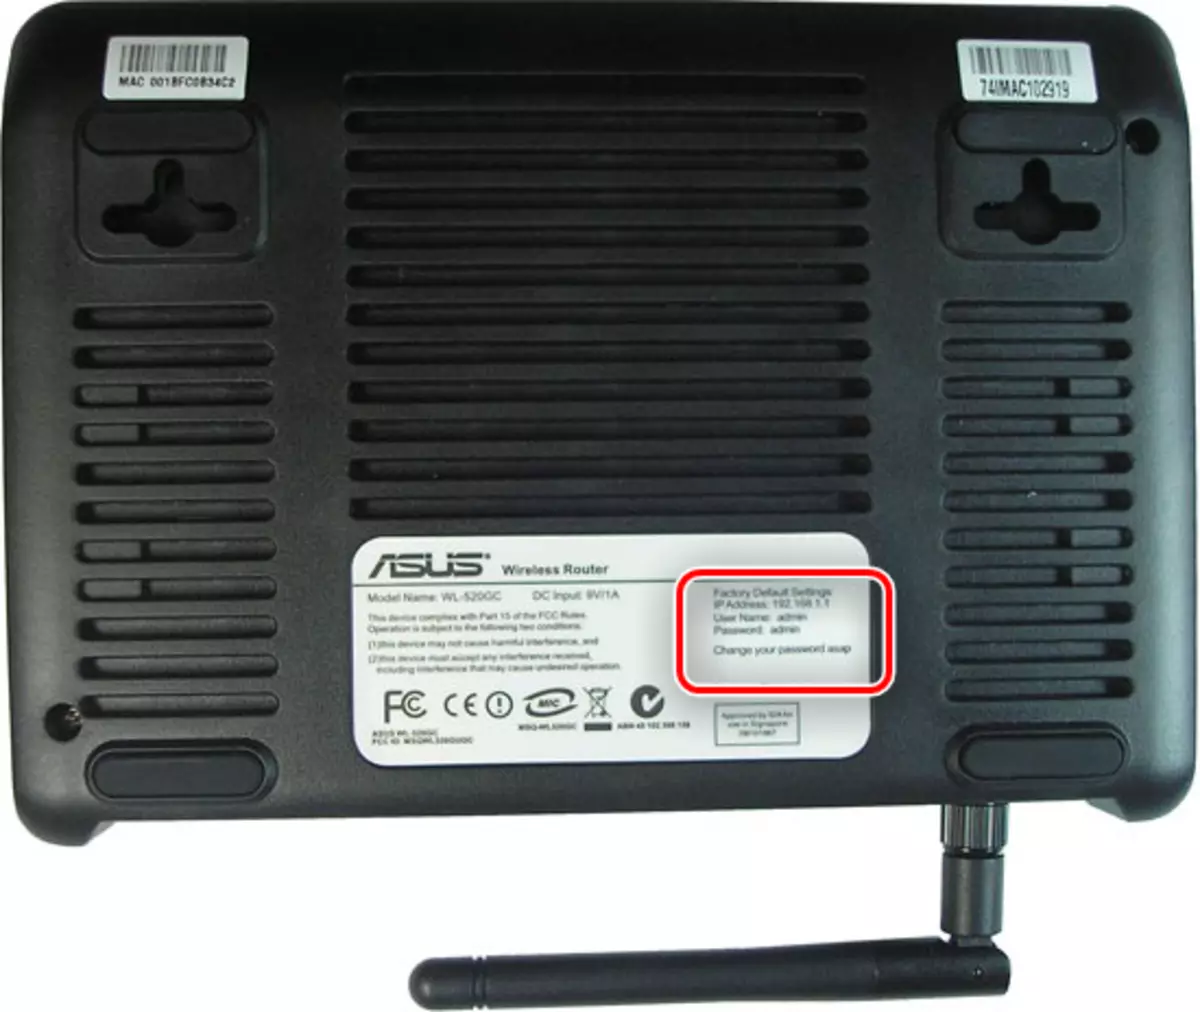
To access the configuration web interface, go to the browser to the page with the address 192.168.1.1. In the authorization window, you need to enter the word Admin in both fields and click "OK". However, the address and combination for the entrance may differ, especially if the router was already adjusted by someone earlier. In this case, it is recommended to reset the device settings to the factory and take a look at the bottom of its enclosure: the sticker shows the data to enter the default configurator.
One way or another will open the main page of the configurator. We note an important nuance - the newest version of the ASUS WL-520GC firmware has a built-in quick setup utility, but it often works with failures, so we will not bring this configuration method, and we will move immediately to the manual method.
An independent configuration of the device includes stages of Internet connection, Wi-Fi and some additional features. Consider all the steps in order.
Configuring Internet connection
This router supports connections via PPPOE, L2TP, PPTP, Dynamic IP and Static IP. The most common on the CIS's expanses is PPPoe, so we will start with it.
PPPoe
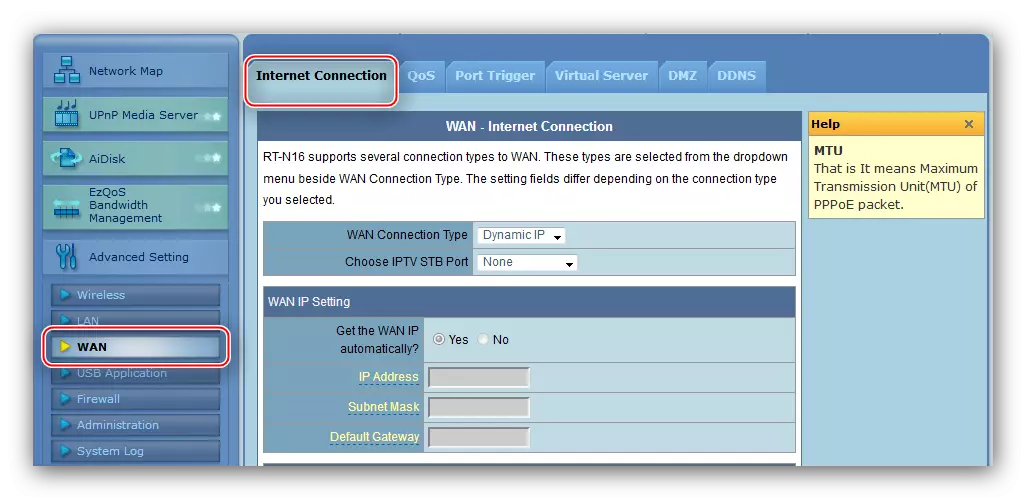
- First, open the manual adjustment of the router - the "Advanced Settings" section, the WAN item, the Internet connection tab.
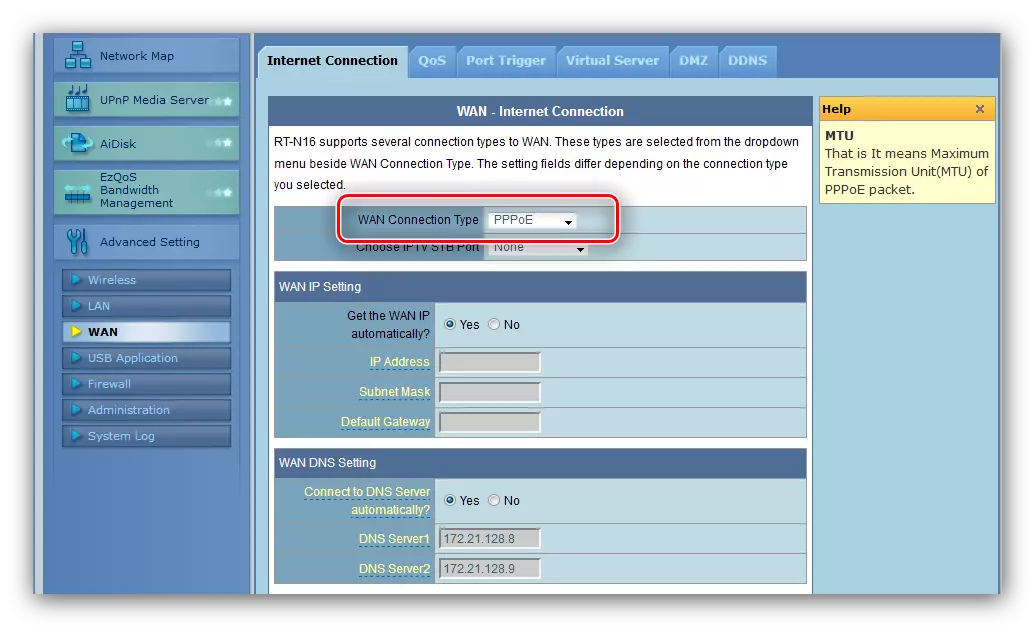
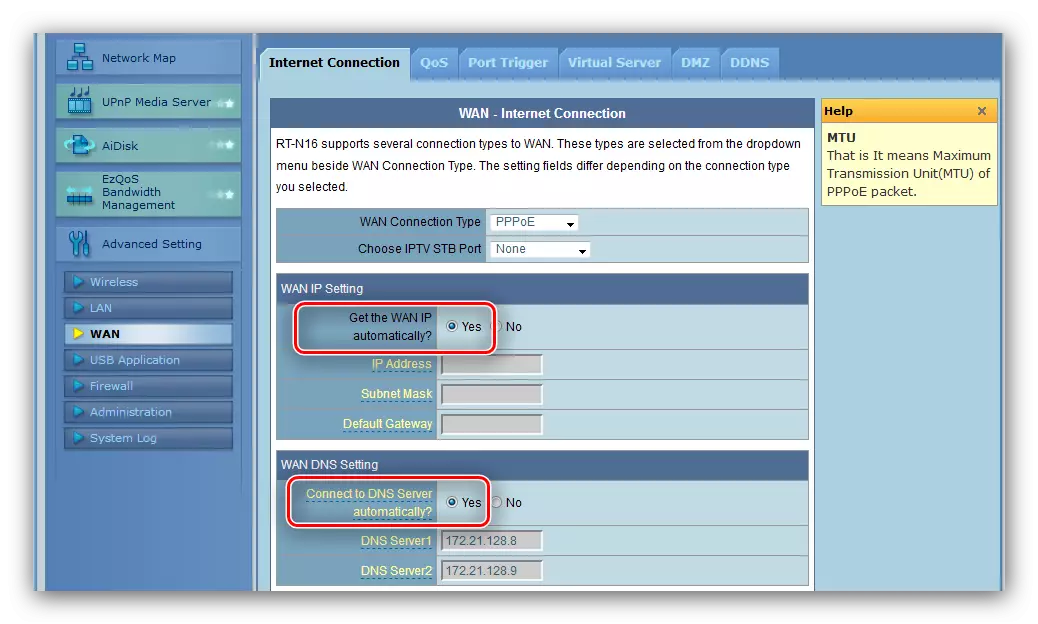
- Use the list "Connection Type WAN", in which click on "PPPOE".
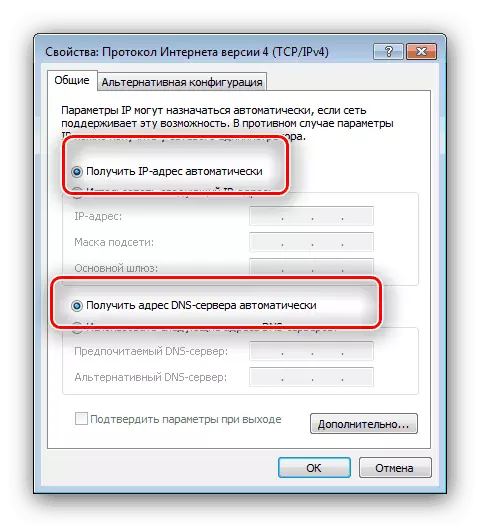
- With such a type of connection, the assignment of the address of the provider is most often used, because the DNS and IP settings set as "receive automatically".
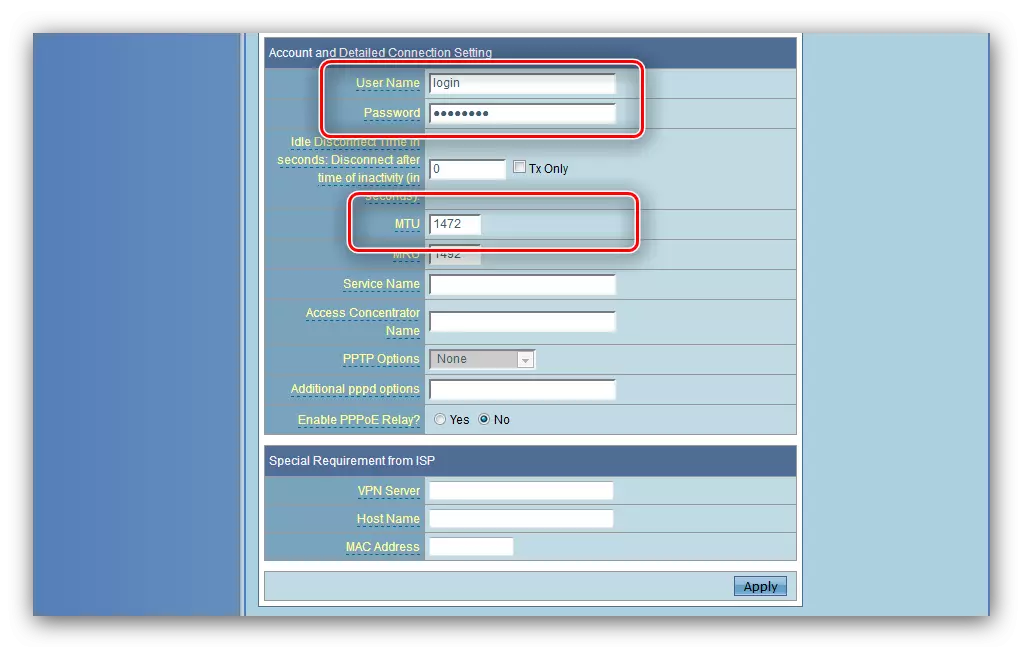
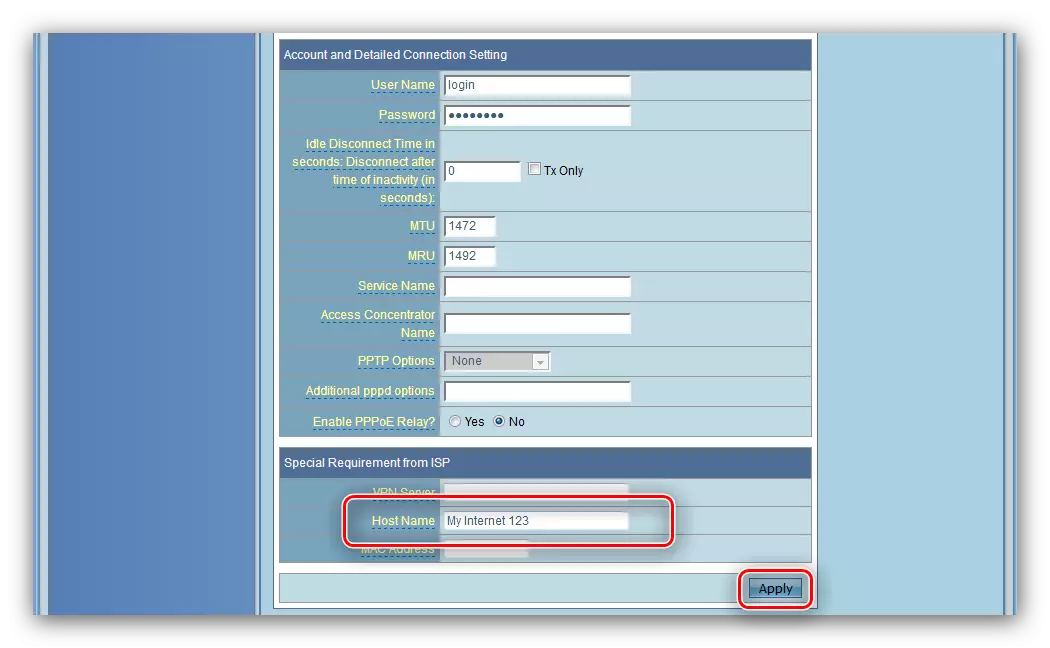
- Next, enter the username and password for connecting. This data can be found in the contract document or receive the provider in the technical support. Some of them also use MTU values other than default, so it may be necessary to change this parameter - just enter the desired number in the field.
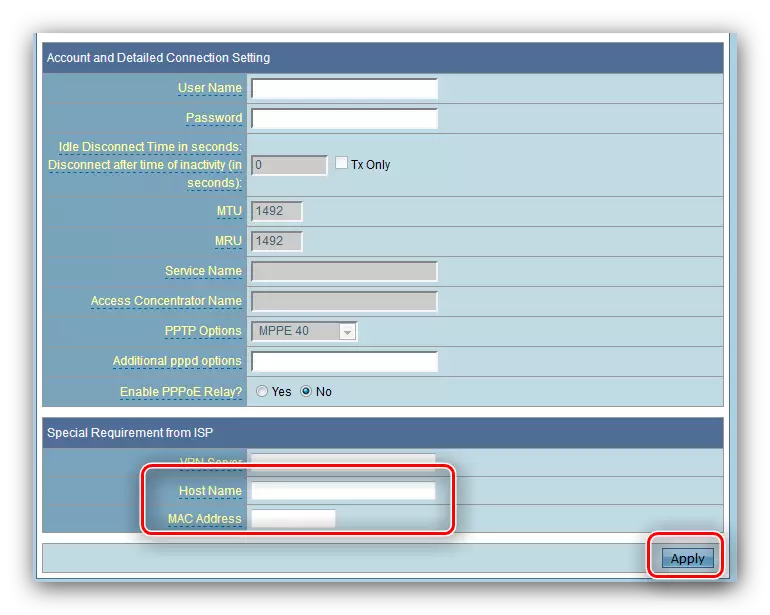
- In the provider settings block, set the host name (firmware feature), and click "Accept" to complete the configuration.
L2TP and PPTP.
These two options are configured in a similar way. Need to do the following:
- WAN Connection Type Set as "L2TP" or "PPTP".
- These protocols most often use static WAN IP, so select this option in the appropriate unit and suck all the necessary parameters in the field below.
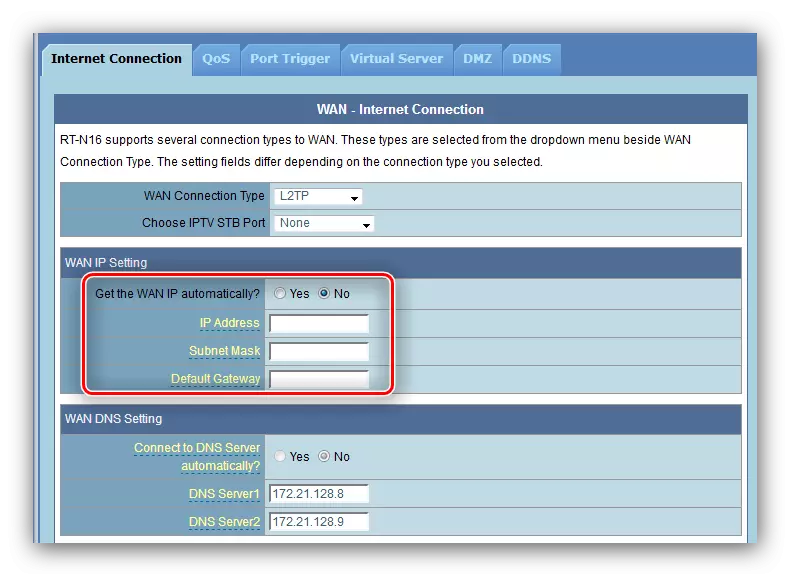
For a dynamic type, simply mark the option "No" and go to the next step.
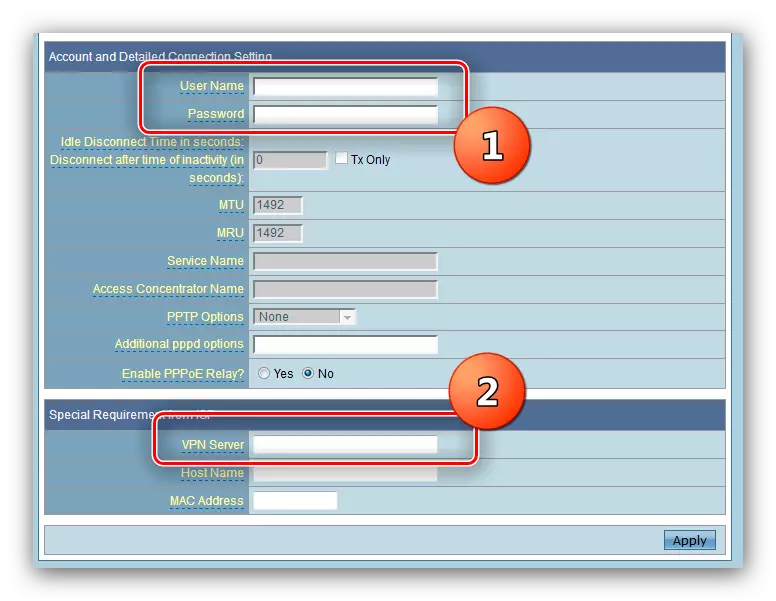
- Next, enter the authorization data and the provider server.
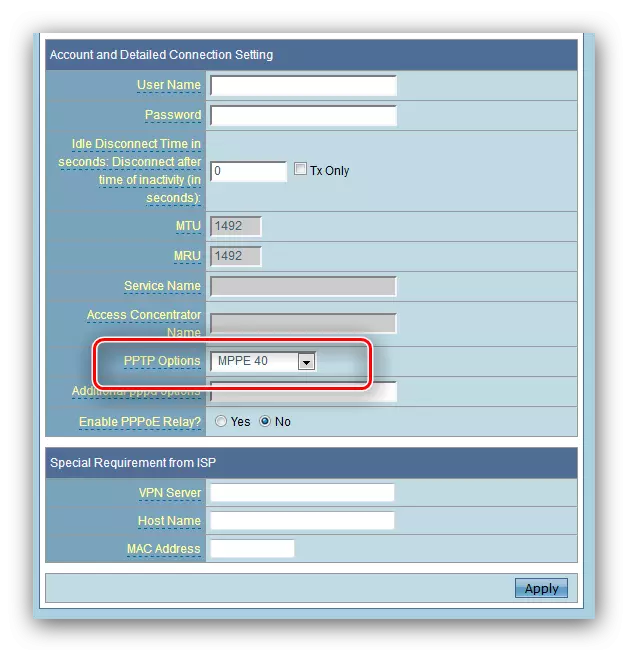
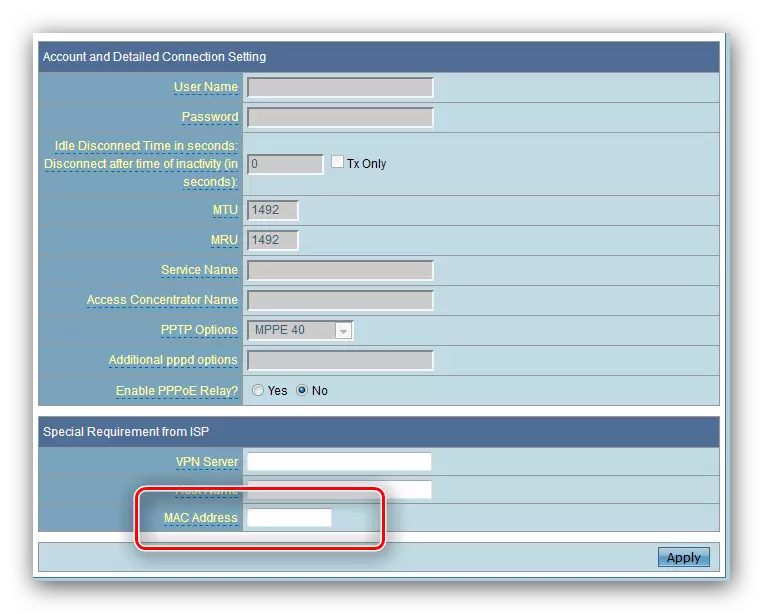
For PPTP connection, you may need to select the encryption type - the list is called "PPTP options".
- The last step is to enter the host name, optionally the MAC address (if the operator requires), and complete the configuration you need to click on the "Accept" button.

Dynamic and static IP
The configuration of the connection of such types is also similar to each other, and happens like this:
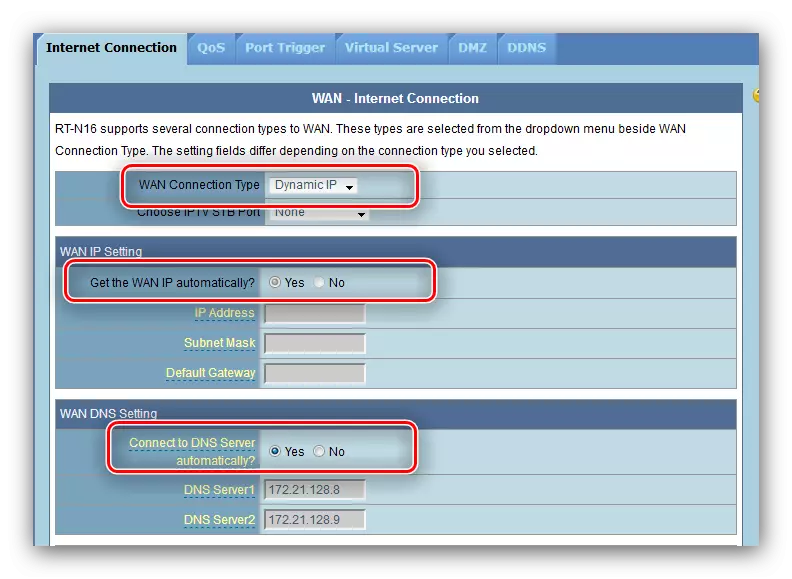
- For DHCP connection, it is enough to select "Dynamic IP" from the list of connection options and make sure that the options for obtaining addresses are set to automatic mode.
- To connect to a fixed address, select "Static IP" in the list, after which fill the IP fields, subnet masks, gateway and DNS servers to the values received from the service provider.
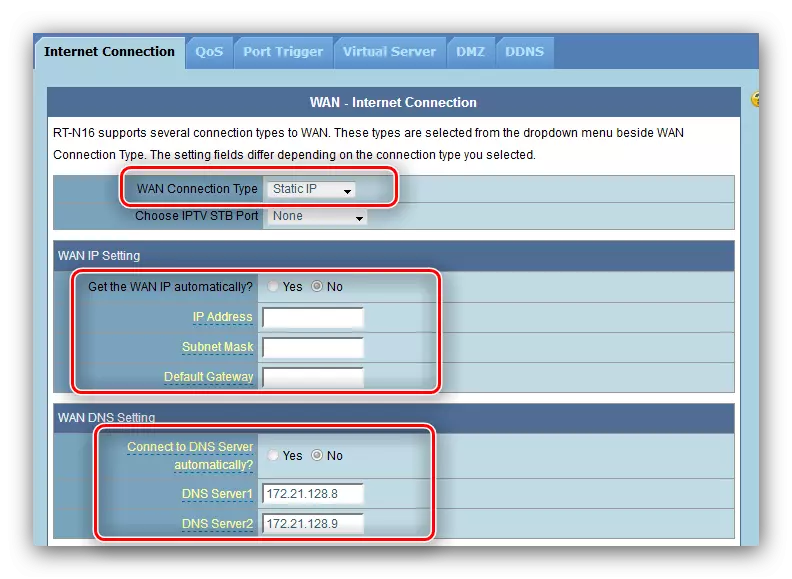
Often, the MAC network card is used as the authorization data at a fixed address, so suck it in the same column.
- Click "Accept" and restart the router.
After restarting, go to the installation of the wireless network parameters.
Setting Wi-Fi parameters
The Wi-Faya settings in the router under consideration are located on the "Main" tab of the "Wireless Mode" section of additional settings.
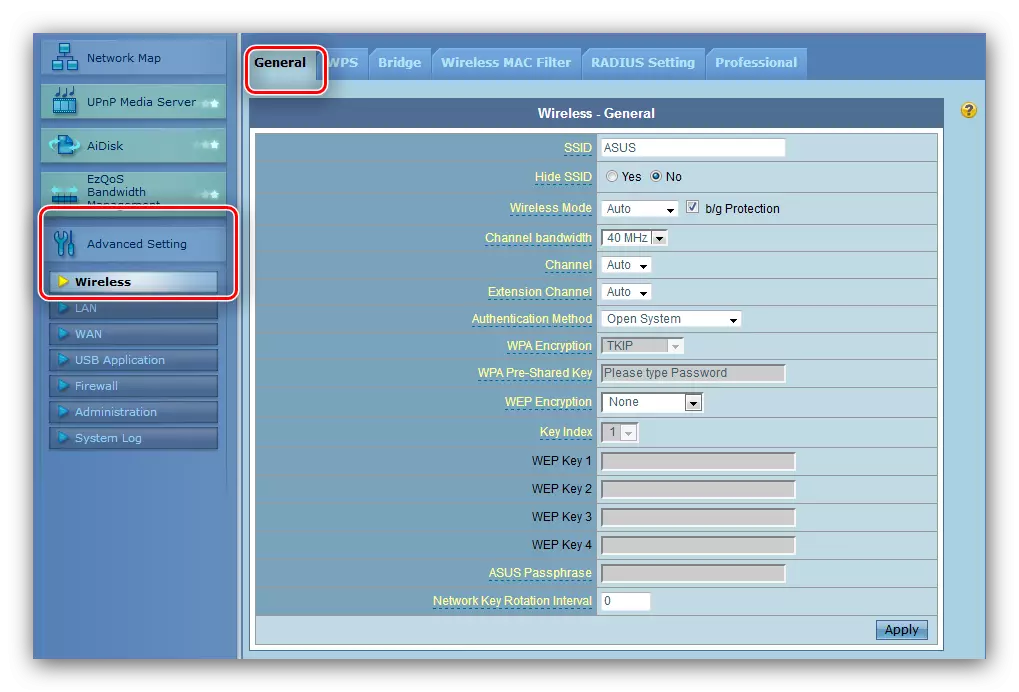
Navigate to it and follow the steps below.
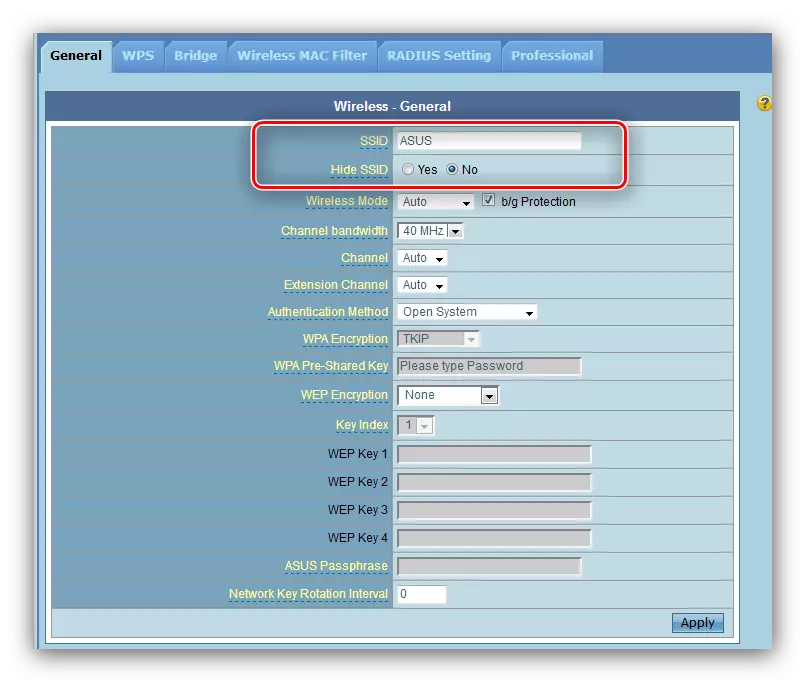
- Set the name of your network in the SSID string. Do not change the "Hide SSID" option.
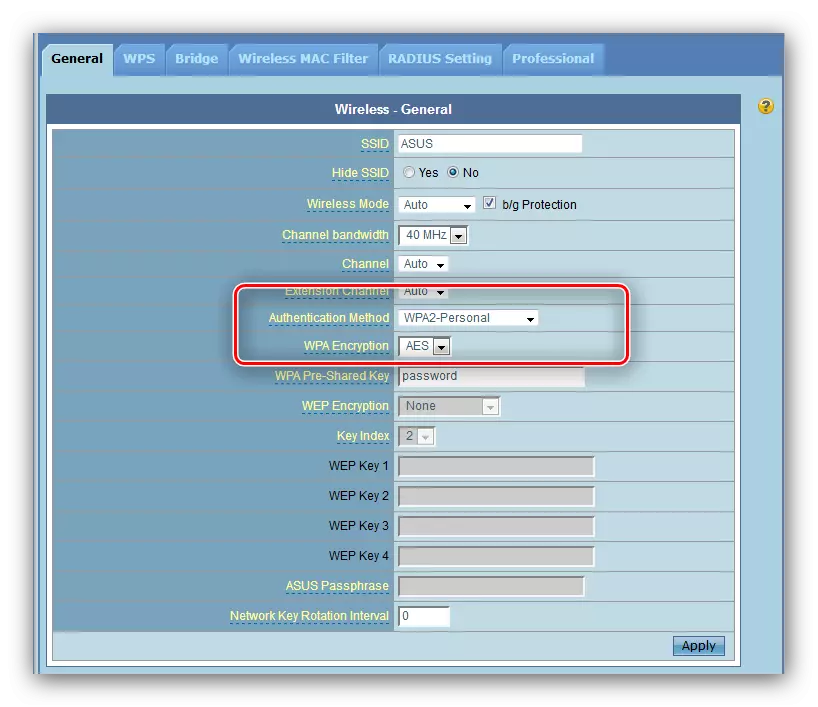
- Method of authentication and encryption type Set as "WPA2-PERSONAL" and "AES", respectively.
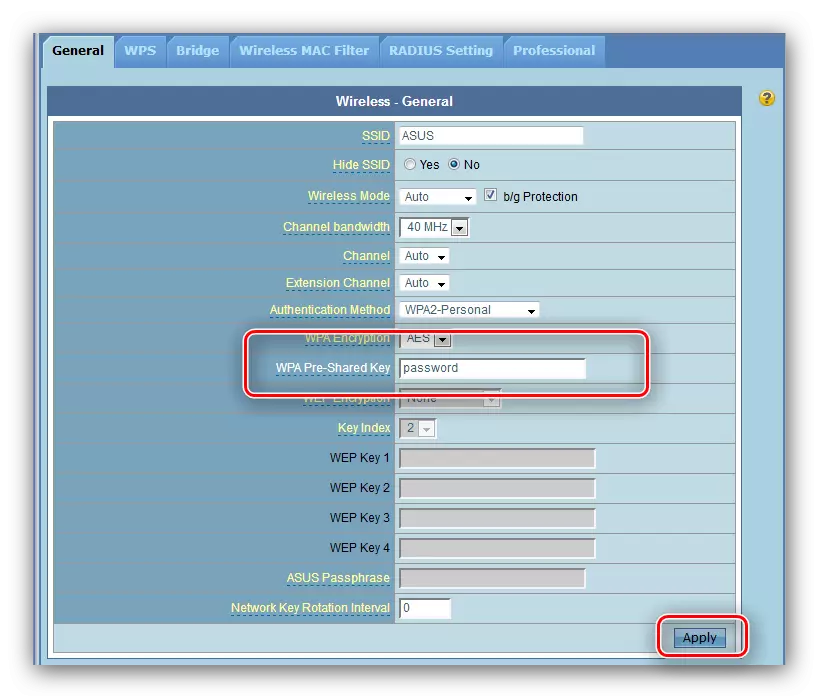
- The WPA Preliminary Wrench option is responsible for the password to be entered to connect to Wi Fai. Set the appropriate combination (you can use the password generator on our website) and click "Accept", after which you reboot the router.
Now you can connect to the wireless network.
Security Settings
We recommend changing the password to access the router to more reliable than the standard Admin: After this operation, you can be sure that the extraneous will not get access to the web interface and will not be able to change the parameters without your permission.
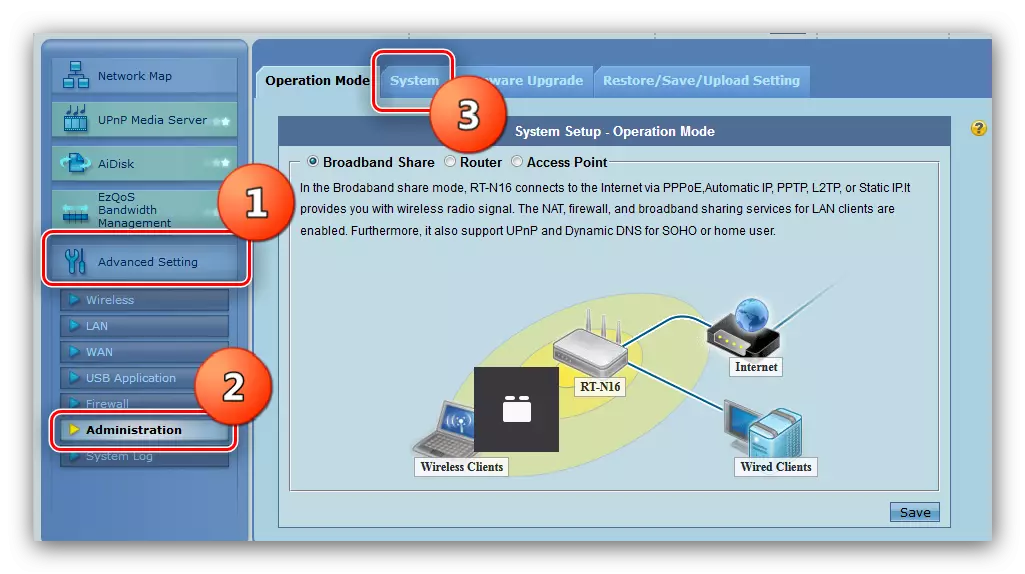
- Find "Administration" in the Advanced Settings section and click on it. Next, go to the "System" tab.
- The block you are interested in is called the "System Password Change". Come up with a new code phrase and write it twice in the appropriate fields, then click "Accept" and restart the device.
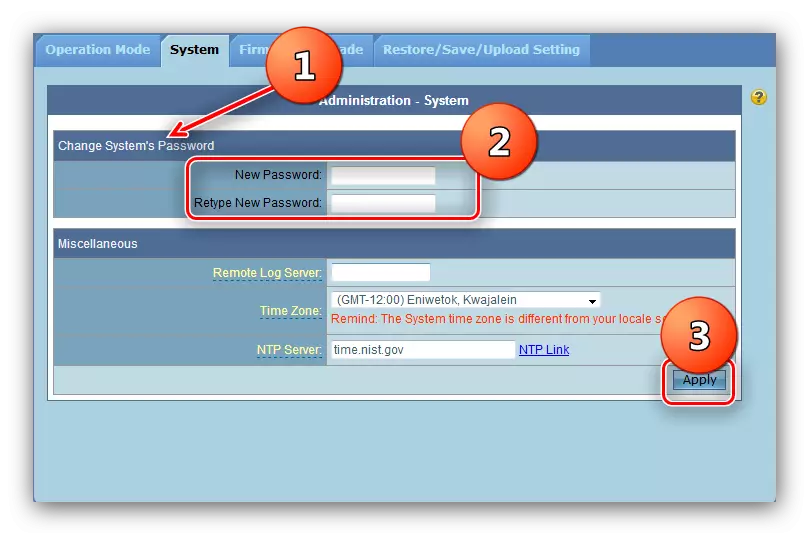
In the next login in the admin, the system will request a new password.
Conclusion
On this our leadership came to an end. Summing up, we remind - it is extremely important to update the firmware of the router in time: it not only expands the functionality of the device, but also makes it use more secure.