

Various documents, depending on their type, are intended for opening in certain programs - according to such a principle, there is an association of files in the WINDOVS family, including seven. If applications suitable for opening a document set several, confusion may occur. You can avoid this by self-changeing file associations.
Change file associations
You can achieve a goal using third-party resources or exclusively by system instruments. Consider all possible, and the choice of suitable will leave for the user.Method 1: File Association Fixer
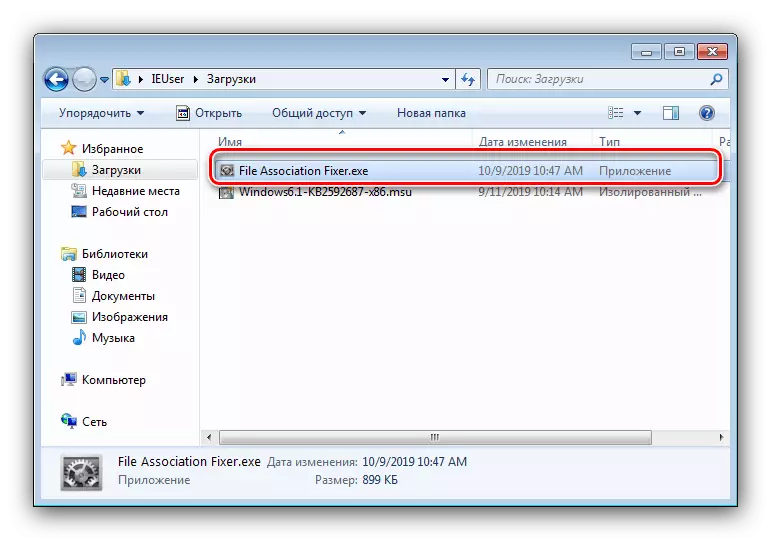
The first third-party decision that we want to consider is the File Association Fixer application.
Download File Association Fixer from the Official Site
- The utility does not require installation, so it starts with the opening of the EXE file.
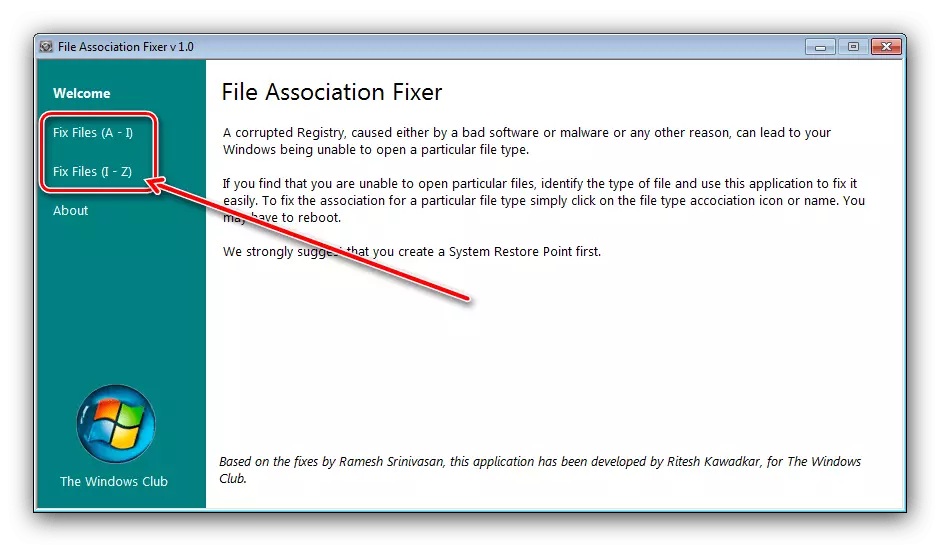
- Available types of documents are sorted by the Latin alphabet - open the list by clicking on the appropriate link in the menu on the left.
- For example, we will change the JPEG photo association - the desired type is under the link "Fix Files (I-Z)". Next, click on the icon of the required file.
- We receive a message that the installed association is reset to the default state (it matches the embedded application "View photos"). Click in OK message and restart the computer.


As you can see, using File Association Fixer is extremely simple. However, the application has shortcomings - a small number of supported document types and the lack of a user choosing a preferred program for the Association.
Method 2: Unassoc
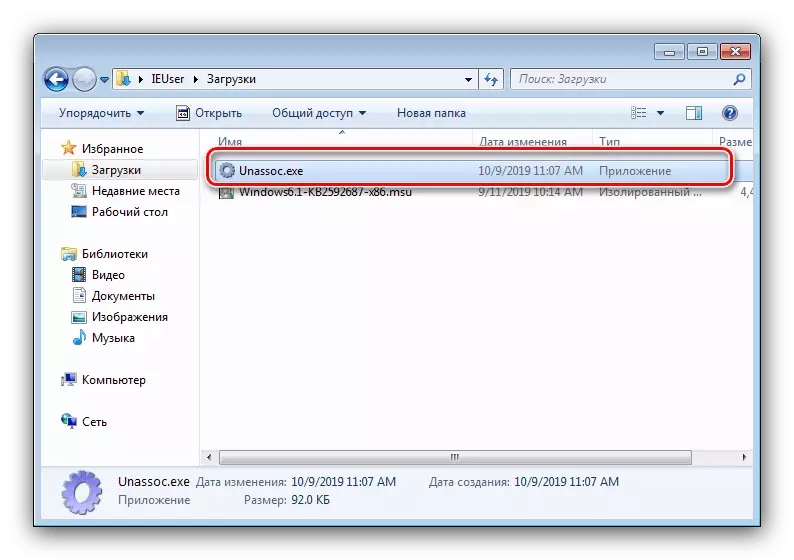
The second third-party solution by which you can solve the task set today - the Unassoc application.
Download unassoc from the official site
- As well as the File Association Fixer mentioned above, the Unassoc program works in portable mode without requiring installation.
- In the main window of the left, there is a list of file extensions for which associations are assigned, and the elements of the association control are prescribed. Using the list, select the desired document, then use one of the two buttons:
- "Remove File Association (User)" - Reset the Custom Association to the default value;
- DELETE FILE TYPE - a full reset of the system association.
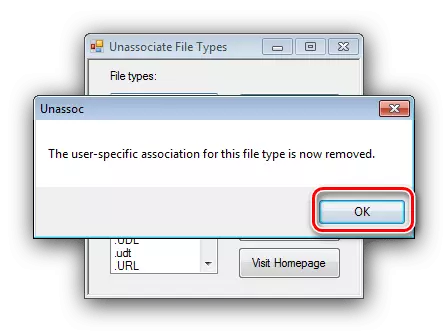
- Pressing the first button will lead to a successful deletion notification - click "OK" and restart the computer.
The second option will display a warning - to continue the work, select "Yes."

Attention! Second options use at your own risk!
- Close the tool and reboot.

As we see, the considered utility is a slightly more functional tool than File Association Fixer, but suffers from the same shortcomings.
Method 3: System Tools
Finally, changing the associations of files can be without using third-party solutions. Two system options are available: through the context menu item or the control panel.
Context menu
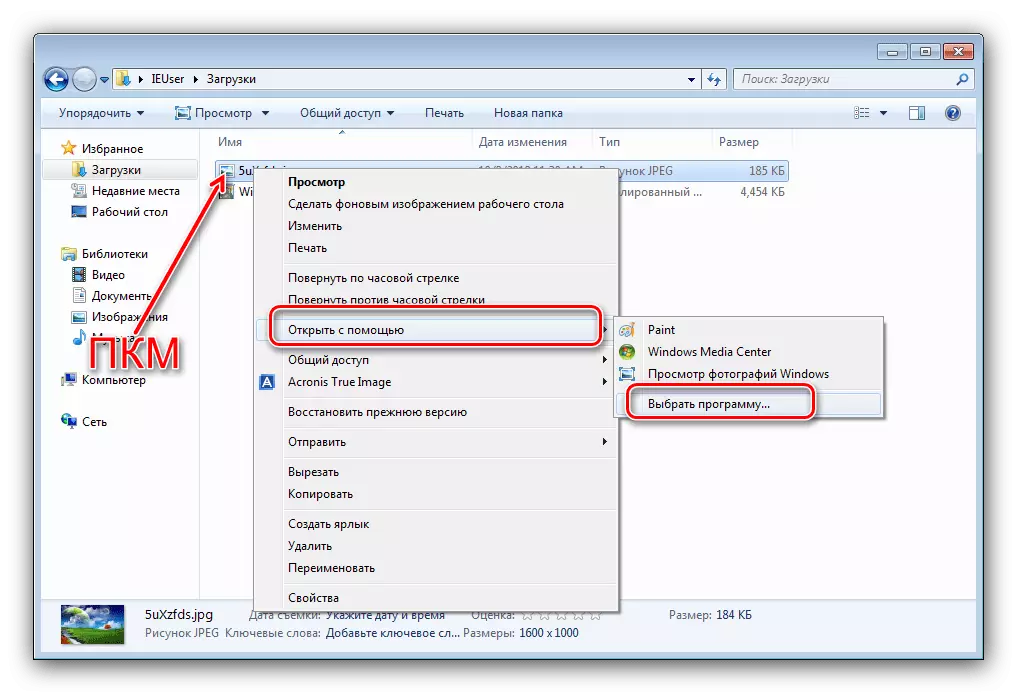
The easiest option is to assign a suitable program from the context menu.
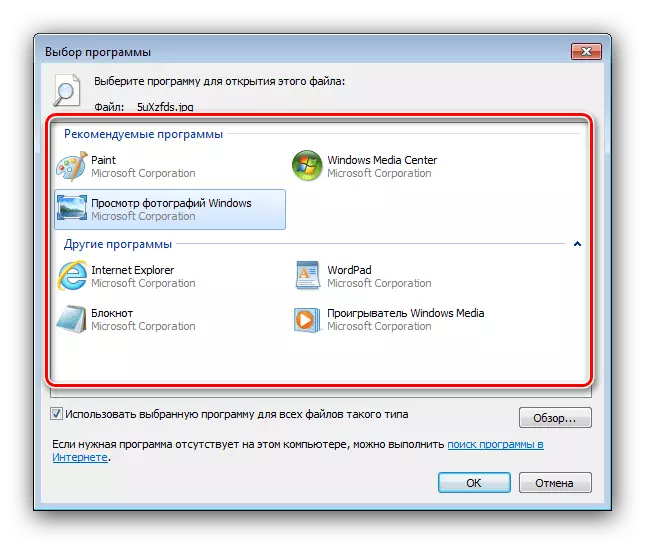
- Find a type of document, whose association you want to change, highlight it and press the right mouse button. In the menu, use items "Open with" - "Select the program ...".
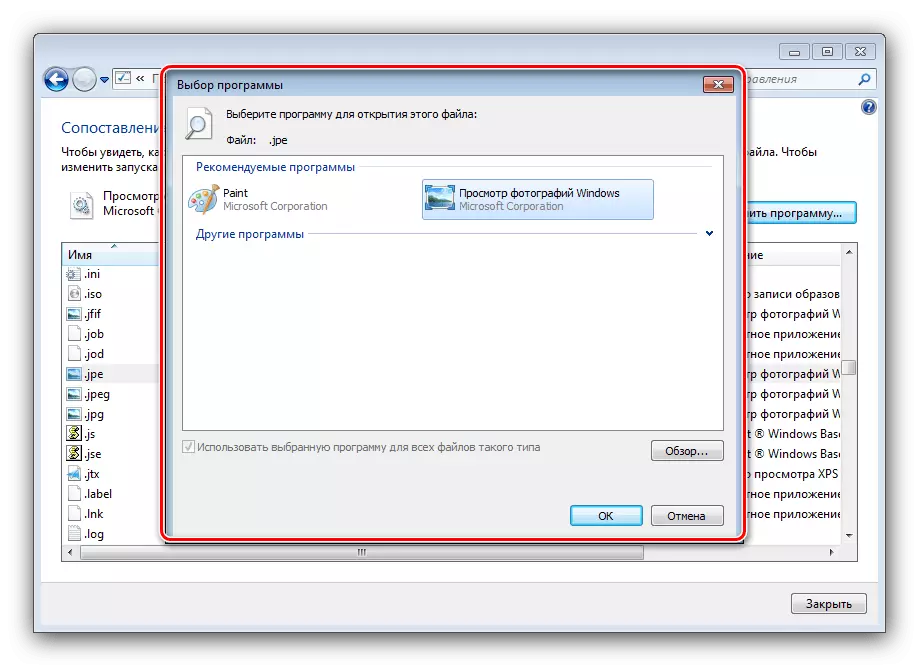
- Next there are two options for action. The first is to select applications from the "Recommended" or "Other Programs" blocks, for which it is enough just to click on the icon of the required software.
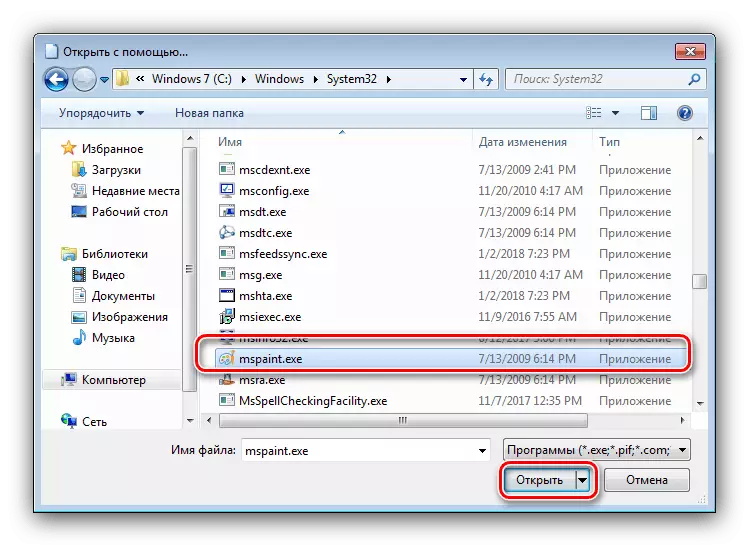
The second option is to use the "Overview" button,
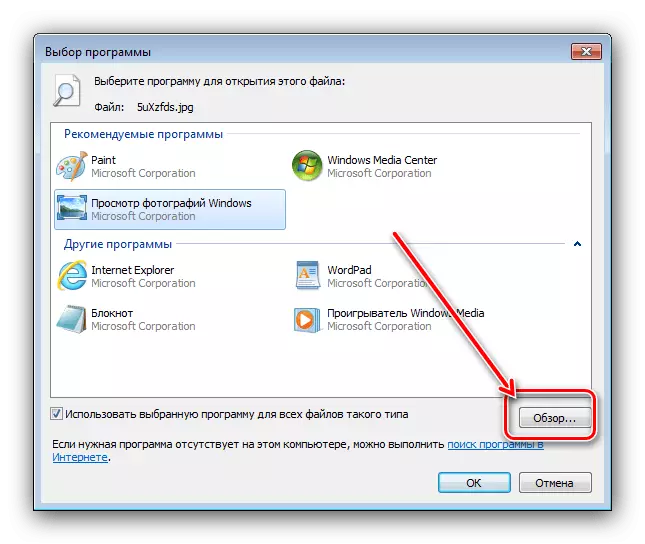
After that, the "Explorer" will open, by which you need to find and select the executable file of the required program.
- At the end of the manipulation, all files of this type will now be opened through the selected software.
"Control Panel"
A little more complicated, but also more reliable option - using the "control panel".
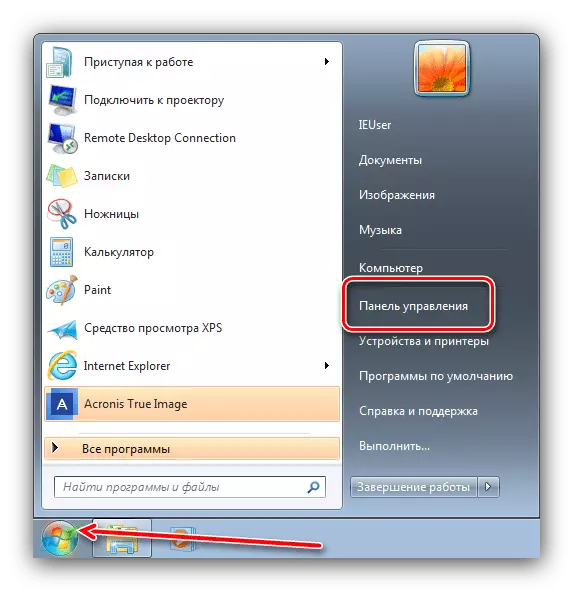
- Open the snap-in any available method, for example, through the Start menu item.
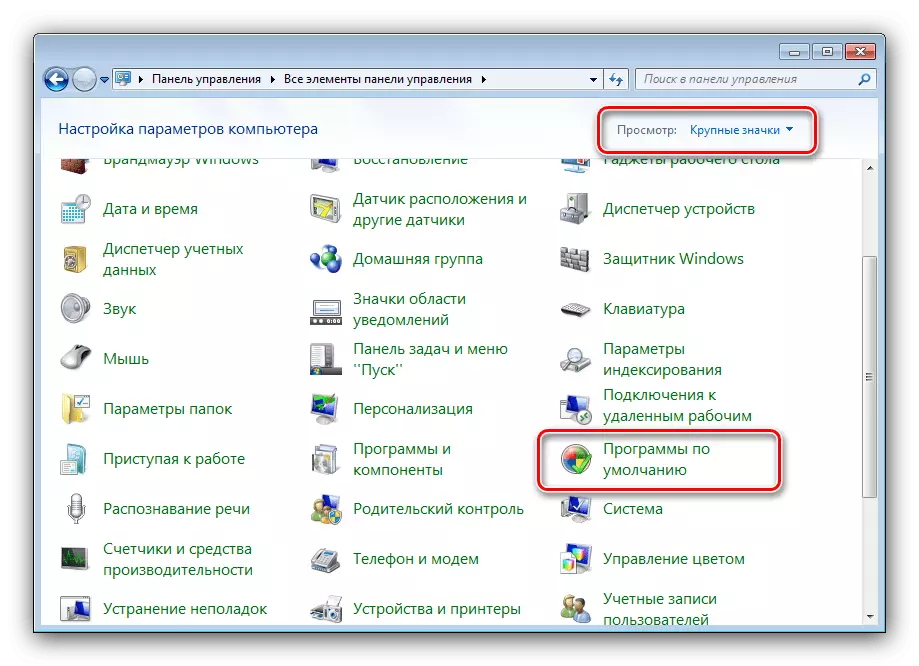
- In the "Control Panel", switch to the display of large icons, then go to the "Default Program" block.
- The option we need is called "Mapping File Types or Protocols to Specific Programs" - click on the link of the same name.
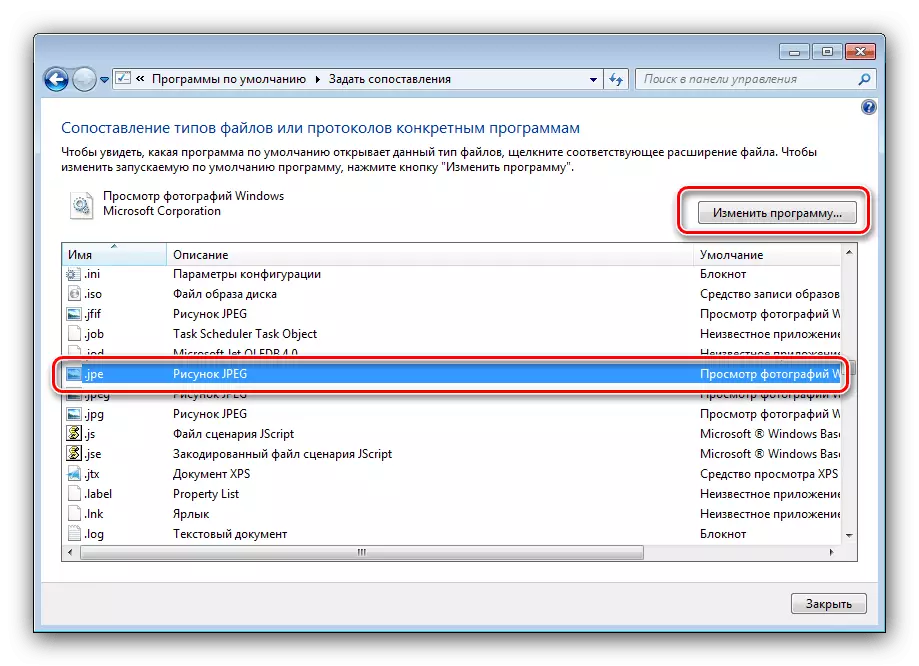
- Wait until the system loads the list of recognized formats, then use it to select the desired type: Highlight it, then click "Change Program ...".
- Further actions are similar to step 2 options with the context menu.

Systems provide more opportunities than third-party solutions, but they are somewhat more complicated to use them.
Conclusion
Thus, we reviewed the methods of changing file associations in Windows 7. Summing up, recall - similar manipulations with the system should be made only in acute need.