
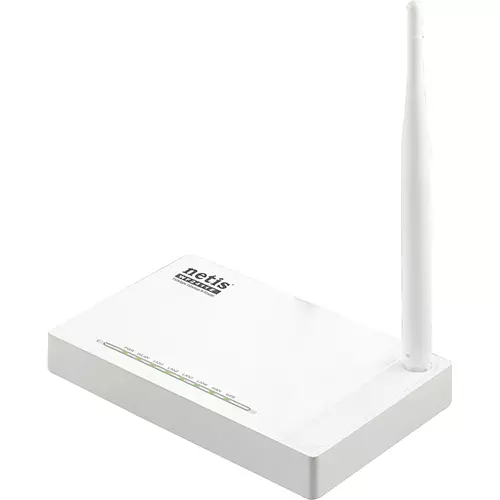
The Netis WF2411E router, like any other similar device, the first connection must be configured properly to receive a stable Internet from the provider in accordance with all its requirements and wishes of the user itself. Especially for this, the developers of routers creates a software part called the web interface. It is from there that the entire configuration process is produced, but before it began to deal with the preparatory actions.
Preliminary work
Every time, with the analysis of such articles, we are talking about the fact that an important task is to choose the future location of the device. In the case of Netis WF2411E, I would also like to note this aspect before moving to the main stage. Make sure that the Wi-Fi coating will reach all points of the apartment or at home and thick walls will not be an obstacle to pass the signal. Try not to place the router next to the actively working electrical devices by type of microwave, and also make sure that the wires running from the provider will be able to be connected to the device without having to lay them on the floor and walls.
Now, when the place was successfully selected, connect the router itself to a computer and running from the Internet service provider. To do this, you will have to pay attention to the rear panel of the Netis WF2411E, where all the necessary connectors are located. In this model, all LANs do not have a special yellow color, and Wan itself is painted in blue. This will help not to confuse ports when connected. Consider that all LANs have their own number. This information can be useful during device configuration.

Read more: Connecting a router to a computer
After successfully connected, turn on the router, but do not rush to run the browser to go to the web interface. First, it will take a little time to set up the operating system. You only need to make sure that the IP address and DNS are automatically obtained. Especially relevant this procedure becomes for those users who provider provides a static IP or a connection takes place by PPPoE type. Read more about changing the Windows network settings below.
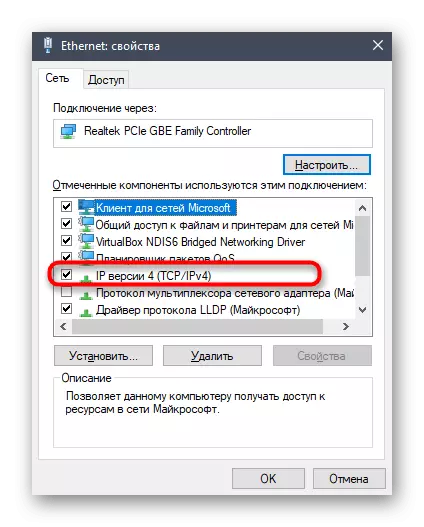
Read more: Windows network settings
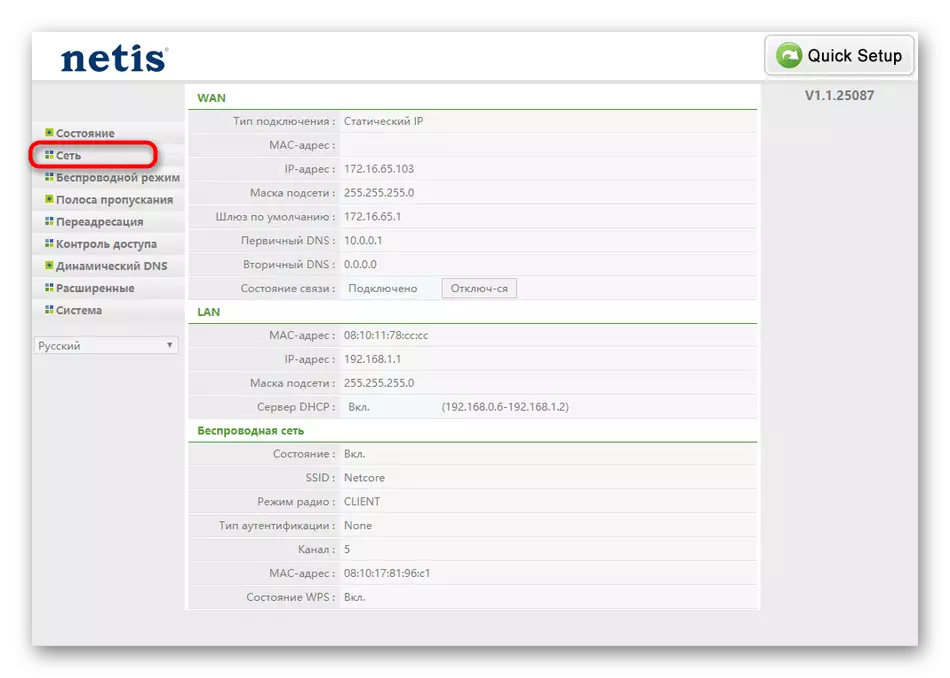
Login to the web interface
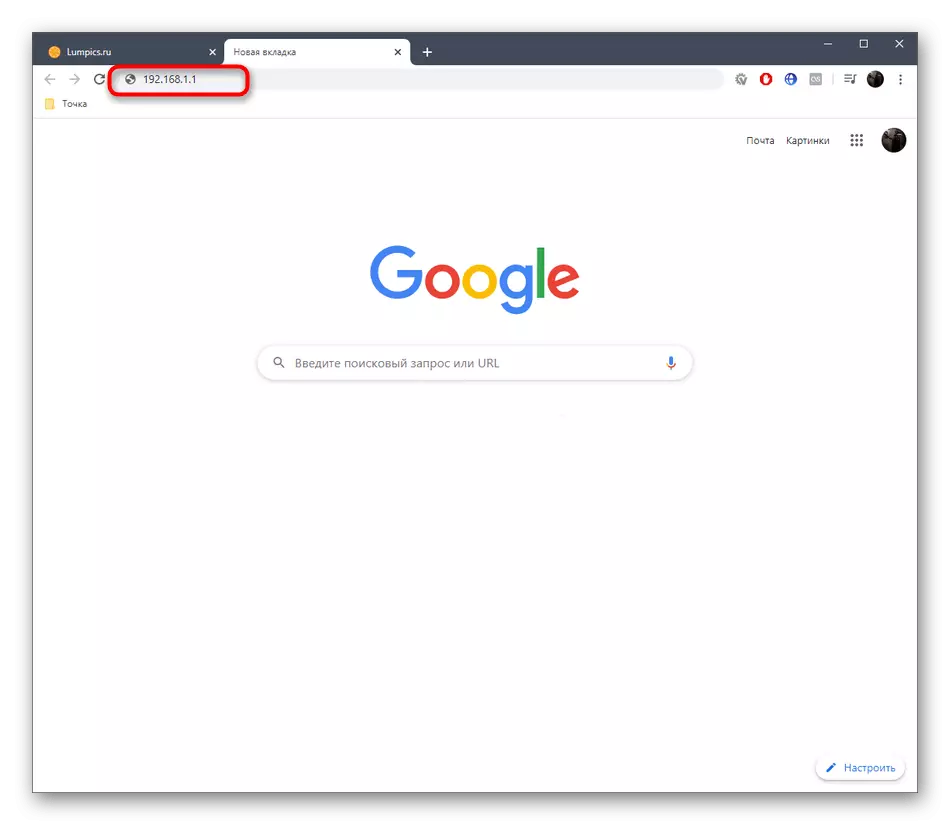
Netis is a practically the only company that does not assign a standard password and login models to enter the Internet center, including today's Netis WF2411E product, that is, after switching to the browser at 192.168.1.1, the web interface is immediately displayed, where You can start settings. However, in the future, with the release of new specifications of this model, this situation may change, so then we will leave a reference to a separate instruction on how quickly using the available methods to find out the desired login and password for authorization.
Read more: Definition of login and password to enter the router settings
Fast setting
Many users do not want to manually set the parameters of the router and understand all the intricacies. They are interested in banal provision of correct operation so that you can connect to the network both through the LAN cable and using a wireless access point. Netis granted the needs of such users by adding a section on rapid configuration of the router. It is about him that we want to talk first of all, disaching each action.
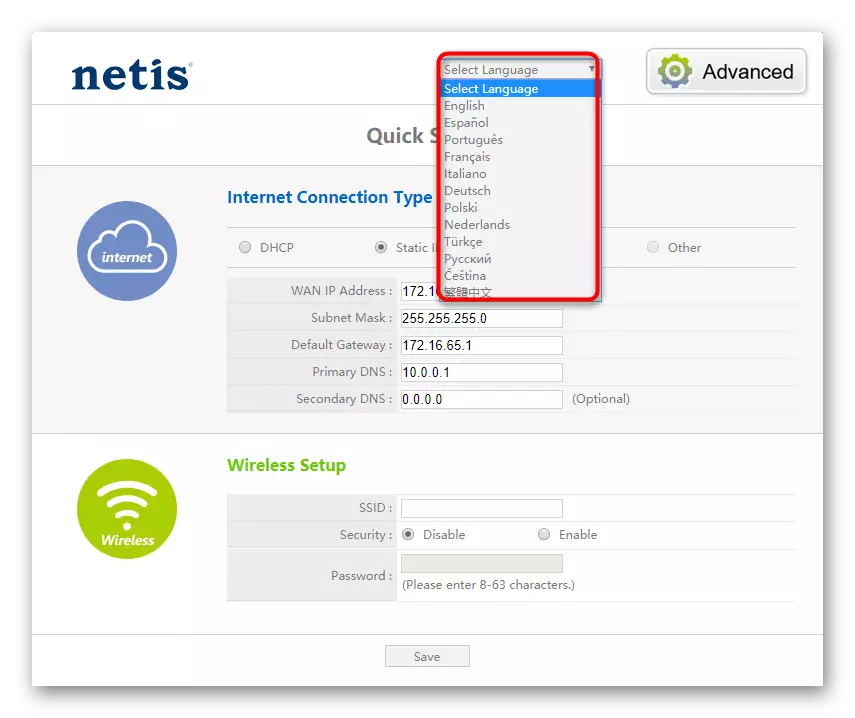
- After switching to the address in the browser, the main quick setup window will open. Here we advise in the corresponding pop-up menu to change the language of the interface into Russian so that there are no problems in the future with the understanding of the parameter names.
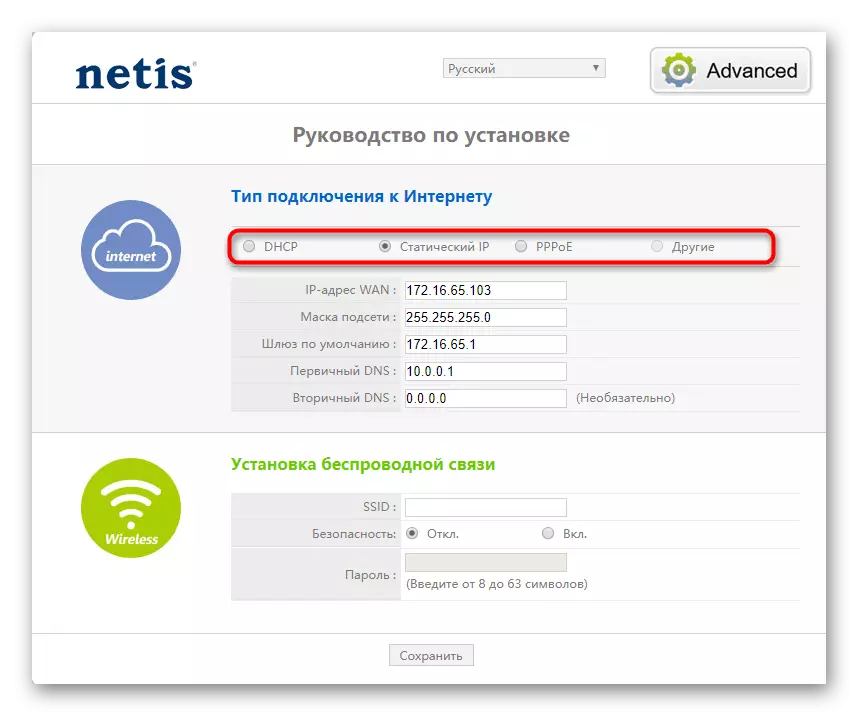
- Next, in the "Type of Internet Connection Type" section, mark the paragraph item that is responsible for the Provider provided by the Provider. If you do not know which type of connection to select, refer to the contract, the official documentation, or directly ask a question to the Internet service provider.
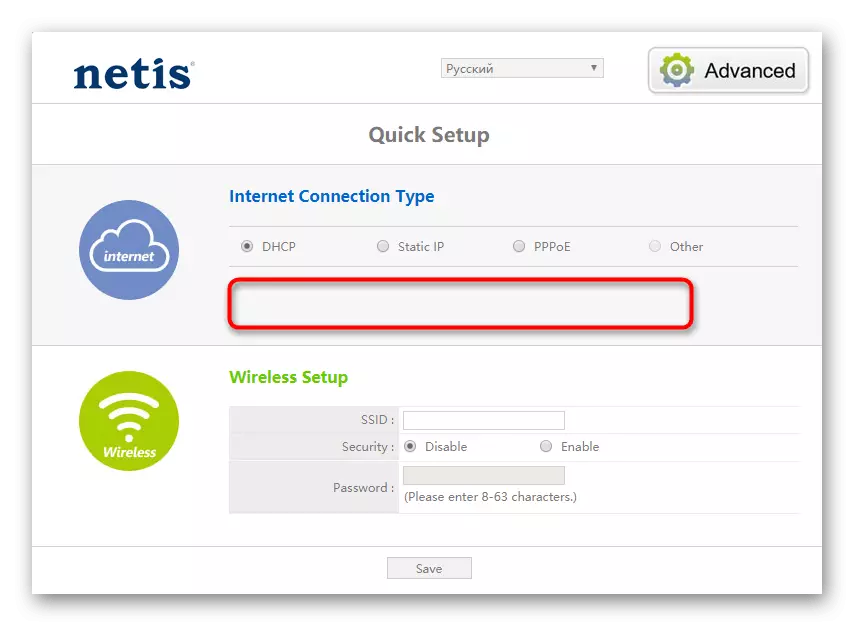
- Briefly consider each configuration option. The first type of connection "DHCP" implies automatic receipt of the IP address and all other parameters, so in the Quick Setup section you will not find any additional items that it would be necessary to edit yourself. In this case, just celebrate this item and go to the marker.
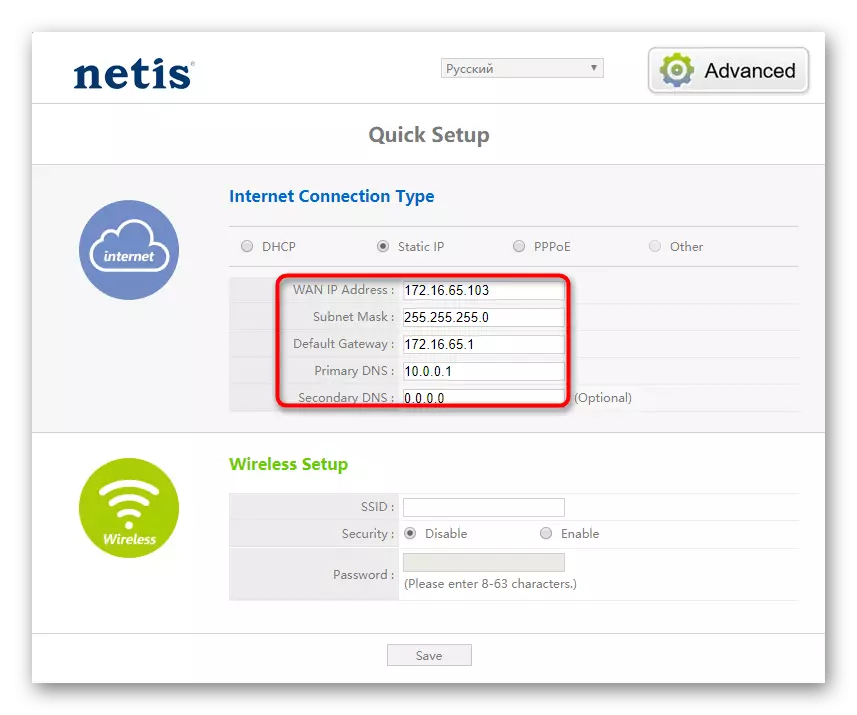
- The owners of the static IP address will be needed to enter it in "Wan IP Address", after that make sure that the selected subnet mask in "Subnet Mask" and select the addresses to receive DNS, which must also provide the provider.
- Already an outdated PPPoE mode requires a username and password from the user to provide access to the network by receiving settings from the provider. These data are unique and issued at the stage of concluding a contract.
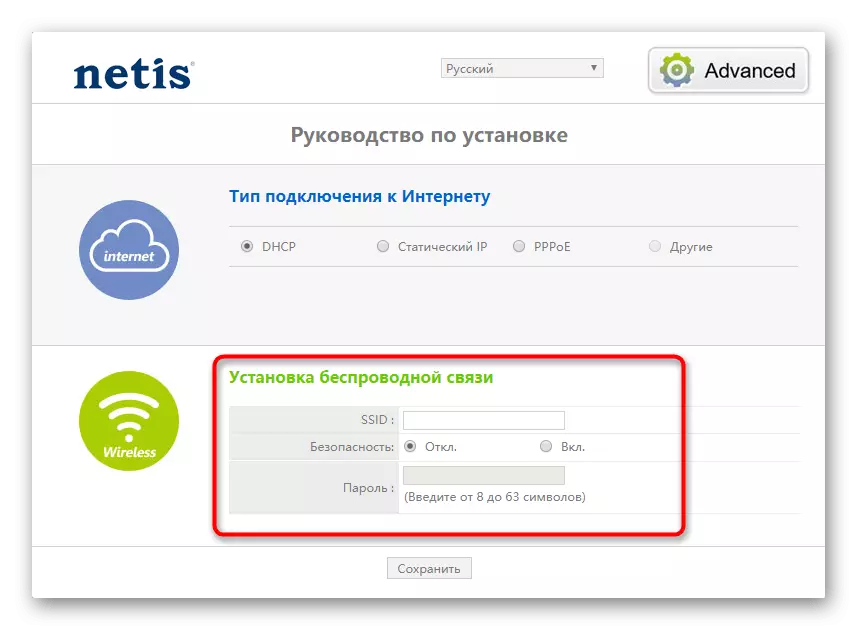
- In the Wireless Installation unit, select a name for your access point with which it will be displayed in the list of available networks, and then select the latest security protocol and set the appropriate password with a minimum length of at least eight characters.

Upon completion, do not forget to click on "Save" to reboot the router and all changes have entered into force. As you just saw, in a quick setup mode, only three different types of WAN connections are available for selection, so the owners of other protocols will have to manually set the appropriate parameters, which is done only in Advanced mode. About all its components and will be discussed below.
Manual Setup Netis WF2411E
In manual mode, the user falls into the global menu of the web interface and with inappropriate can be confused in the abundance of different sections, categories and items. We will break the entire configuration process to steps to simplify this task.Step 1: WAN Parameters
Consider everything in order, starting from the most important stage, which is associated with the installations of WAN parameters. It is here that the provider's protocol is selected and the optional settings are selected, which ensures the correct signal receipt with the possibility of its further transmission through the LAN cable or wireless access point.
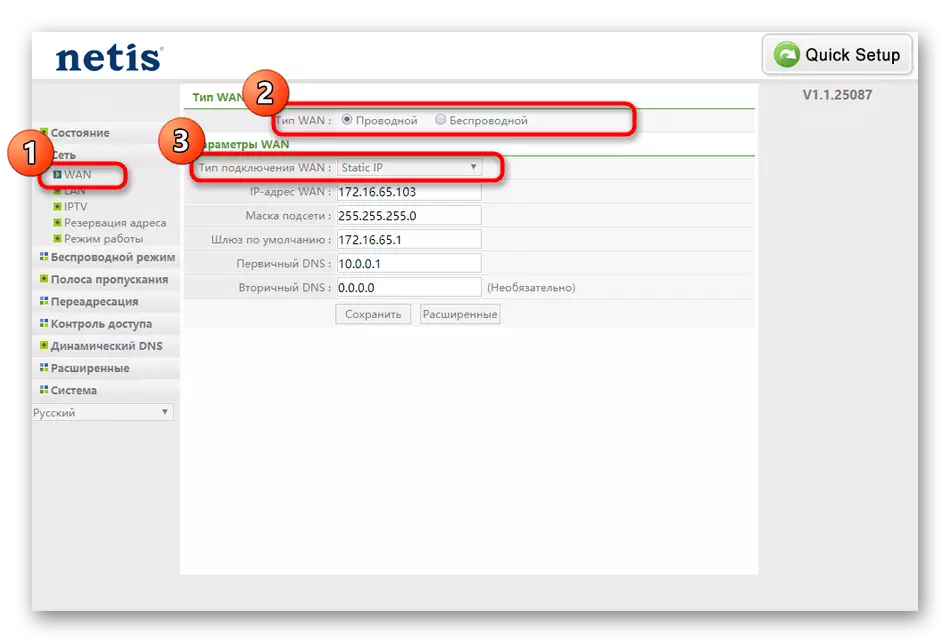
- After moving from the quick setup mode to "Advanced", use the left menu to open the "Network" list.
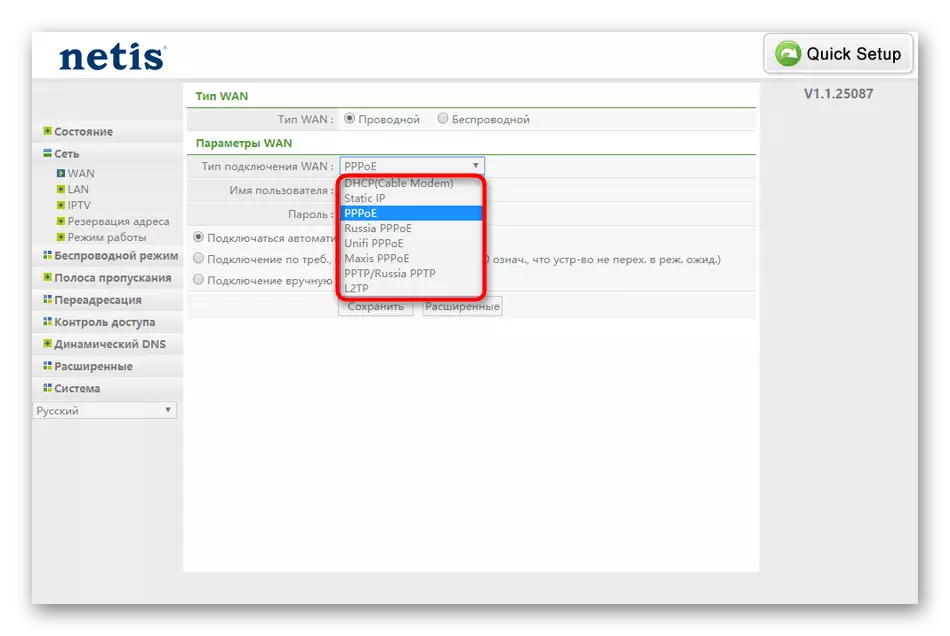
- Here, select the first category "WAN" and set the "wired" parameter. After that, you will need to select the connection type by deploying the appropriate list.
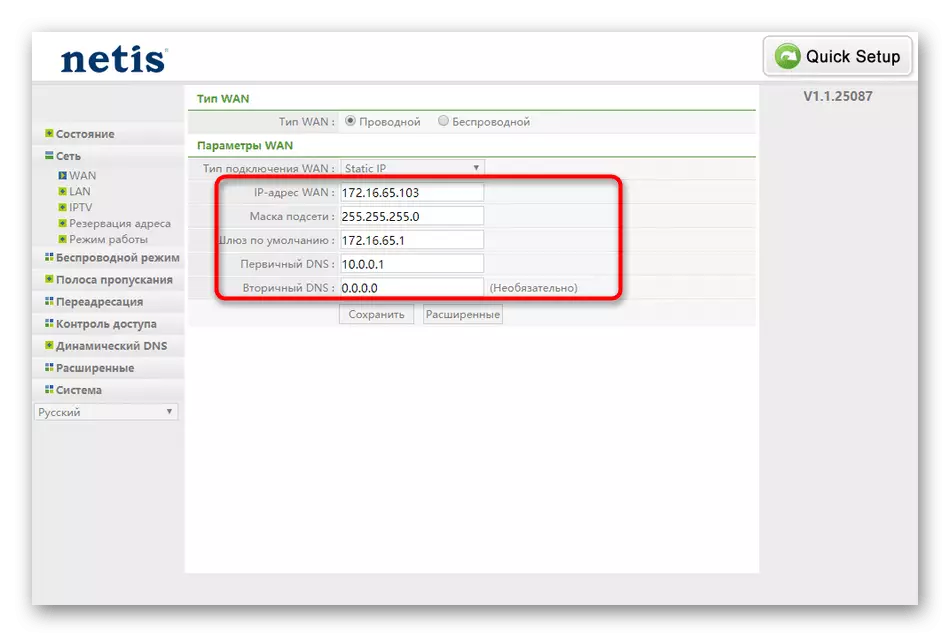
- With a static IP, all the same data about which we talked about the dissemination of the quick configuration mode are filled.
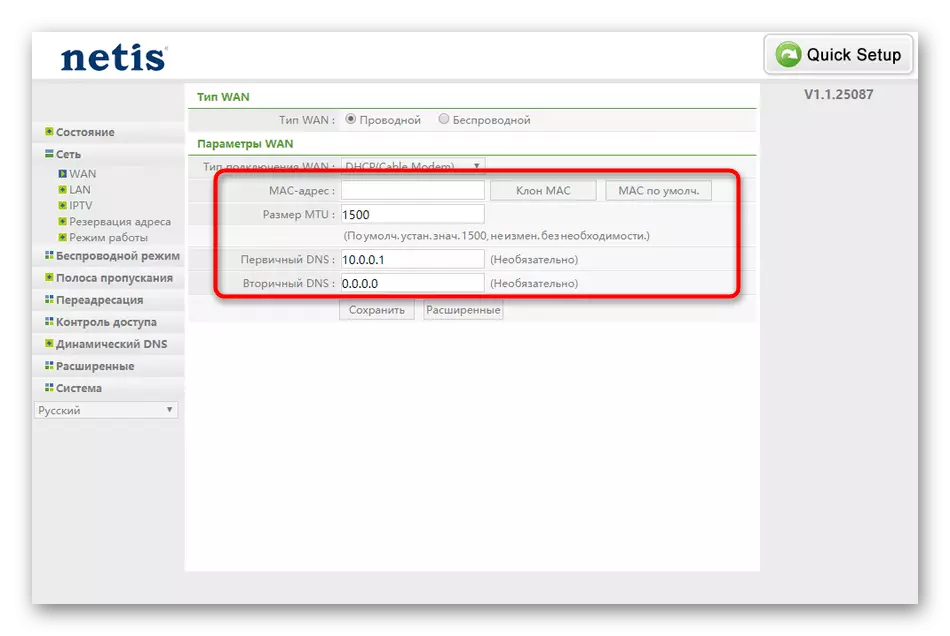
- If your tariff has a DHCP protocol, it does not need to fill any fields, but there is an "extended" button.
- When you click on it opens a menu, allowing you to independently specify the source of DNS getting and cloning the MAC address, if provided for by the provider.
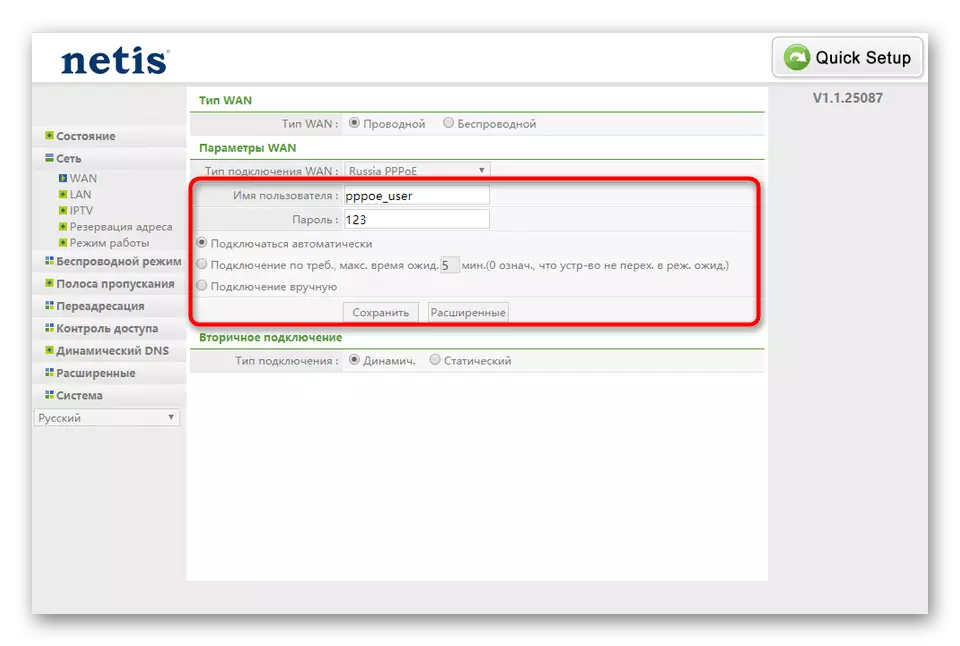
- The PPPoE protocol has several different subtypes that are associated with a provider country and certain network features. The contract must be written about the type of connection used, and if the standard PPoe is specified, then it is necessary to select it in the drop-down list.
- For the protocol mentioned, the username and password is optional, and it is recommended to mark the "Connect automatically" to the marker, after which it remains only to save these settings.

Right now you can check the wired connection by opening any browser and go, for example, in YouTube. If the site has opened and normally functions, go to the next step. In the event of any problems, we recommend that you recover the settings and, if necessary, contact the technical support of the provider, since it is possible until access to the network has not yet been provided.
Step 2: Local Network Settings
If you know that more than one device will be connected to the router using a cable via the LAN port, the standard settings of the local network should be checked. In most cases, the default parameters are correct, but they could not be moved or not to be exhibited.
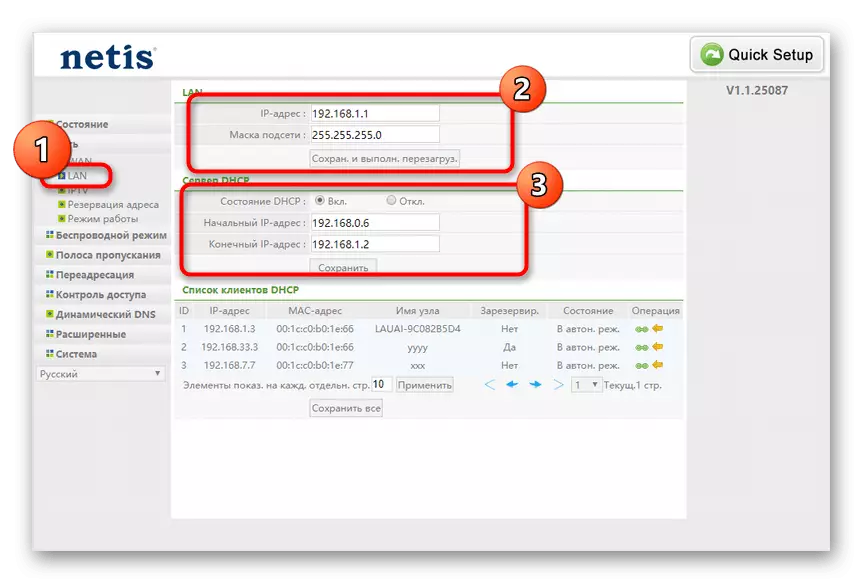
- Move to the category "LAN", which is also in the "Network" section. Make sure the standard IP address is 192.168.1.1, and the subnet mask is 255.2555.255.0. Make sure the DHCP server is also in active mode. This is necessary so that each individual device receives its IP and has no internal conflict. To do this, it is best to set the range of numbers yourself, indicating as an initial address 192.168.1.2, and as a finite - 192.168.1.64. Then save the changes and go further.
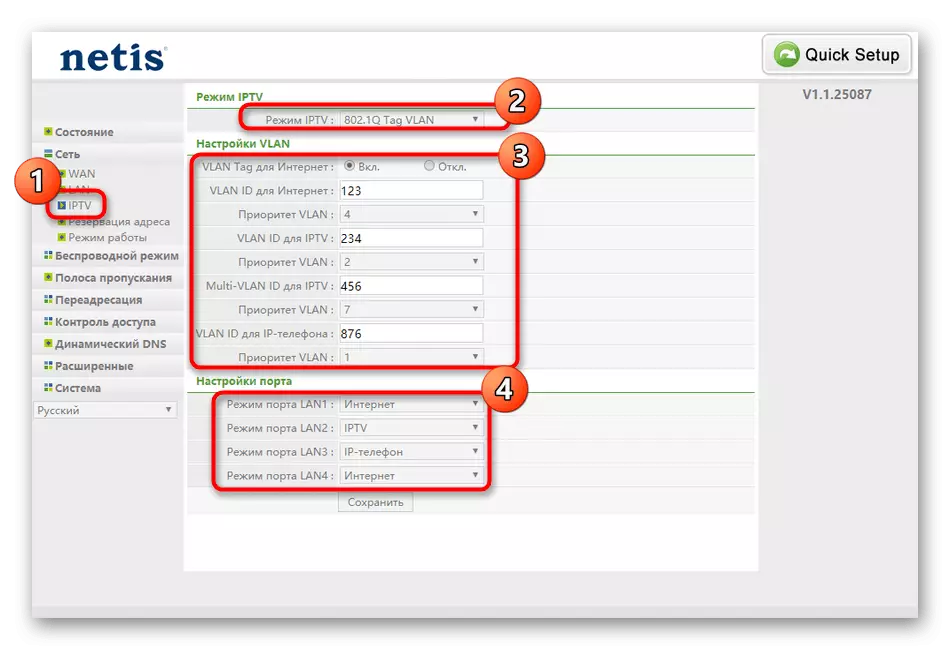
- When connecting the TV to the router via the LAN-wire, you must additionally check the IPTV parameters. Usually, standard values will be suitable, but if the provider issued certain parameters, they will have to be changed manually. Additionally, look at the "Port Settings" block. Here you can independently choose which connector from all available to highlight for the TV to ensure reliable routing.
- Regular users are rarely needed to switch to the "Address Reservation" menu, however, we still want to briefly stay at this point. Here you can specify a certain device static IP and assign it this address forever so that, for example, to ensure the traffic filtering or the permanent IP change has not shot down other settings. The list of reserved addresses is displayed in a separate table. They can be both edited and completely removed.
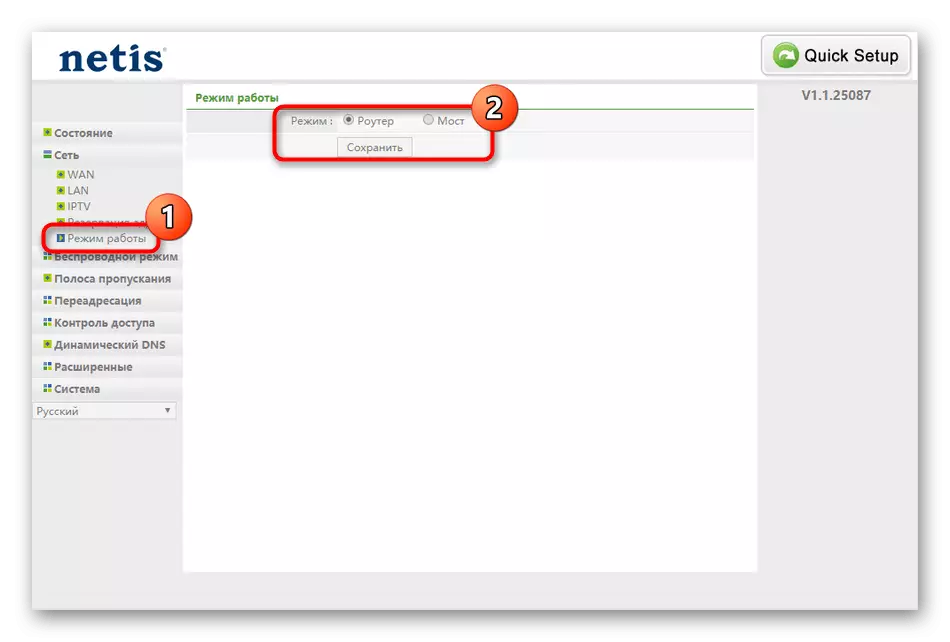
- In the "Work Mode" category there are only two parameters. If you are going to use a router to distribute the Internet to computers and other devices via LAN or Wi-Fi, check the "Router" marker, and in a situation where another router will be connected to the Netis WF2411E, you will need to select the "Bridge" item and save the changes.

These were all the parameters of the local network available in the Netis WF2411E web interface. After their change, check the performance of the LAN ports, and also turn on the TV and switch multiple channels if this device is connected to the router.
Step 3: Wireless Mode
Special attention should be done with wireless connection mode, since many users use Wi-Fi to connect to the Internet on their laptop, smartphone or tablet. In addition, Wi-Fi PC adapters are also popularly popular, so the next instruction is not worthwhile.
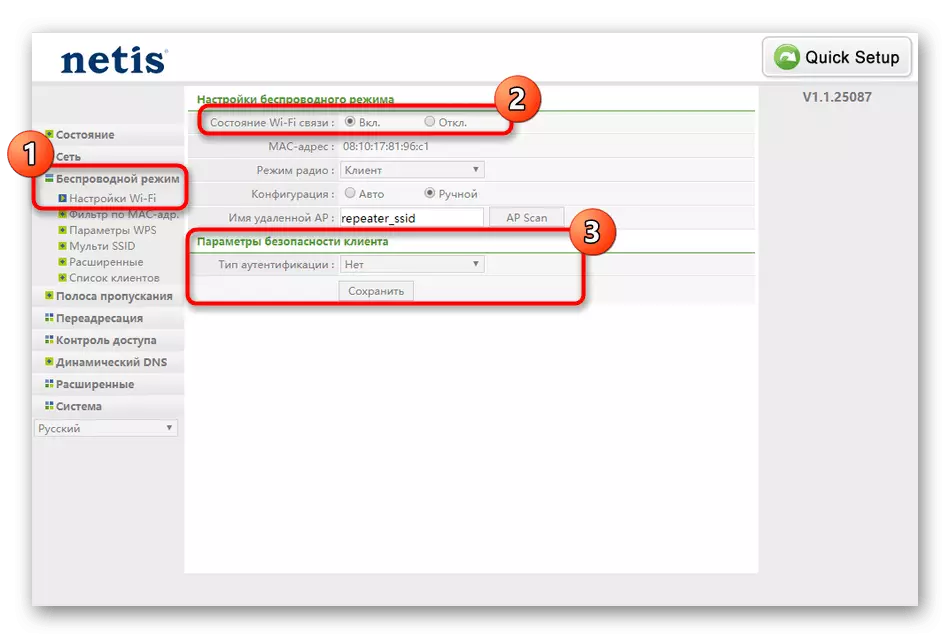
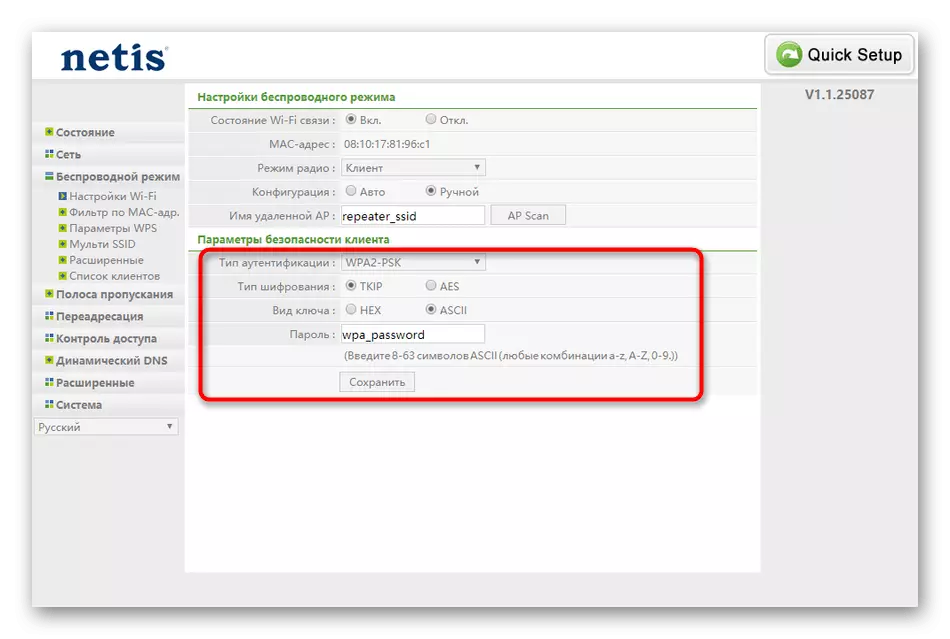
- Open the "Wireless Mode" section and select the first Wi-Fi setup item. Here, enable the wireless access point, set it the name and be sure to select the last protocol from the pop-up list for the type of authentication.
- After displaying additional protection parameters, simply enter any convenient password consisting of a minimum of eight characters.
- Next, we will move to the "Filter by MAC addresses". This is a kind of protective tool that allows you to limit or resolve the connection of certain devices to a wireless access point. From the user only to enable the rule itself and install its behavior, and then add equipment to the list by applying their MAC address for this.
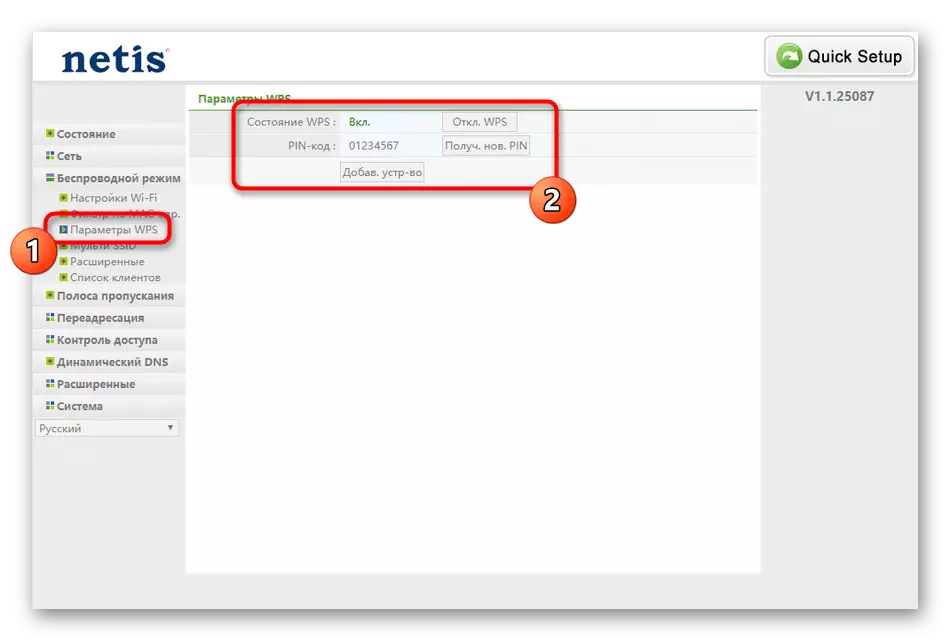
- In the "WPS parameters" should not be changed other than a PIN code if you do not want to limit the ability to quickly connect devices with a router by entering the key or pressing the "Add device" button.
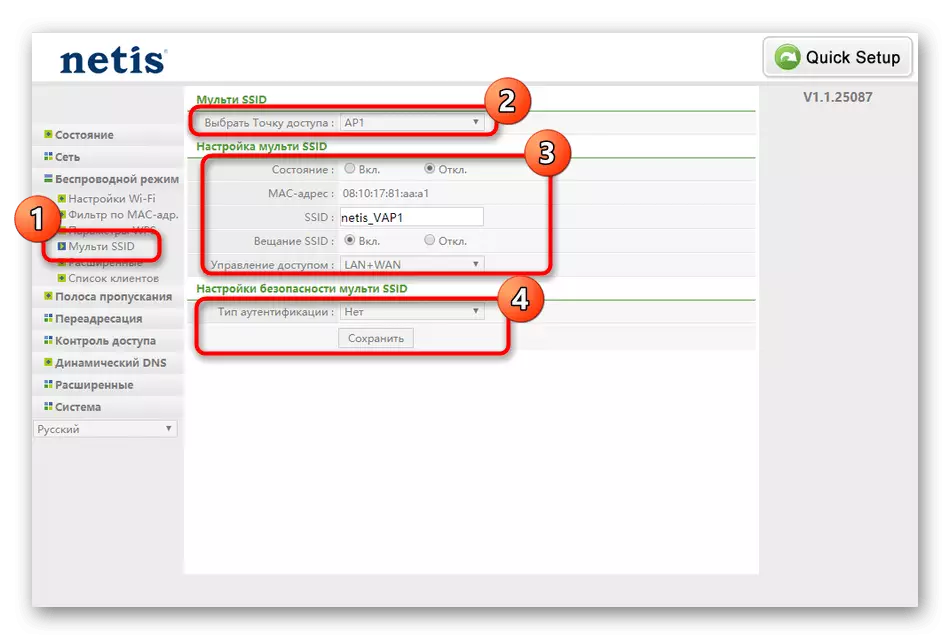
- Through the category "Multi SSID", the second point of access from the already created is configured. It is almost never necessary for the usual user, so we offer not to stop at this point, since even the parameters present here fully comply with those that we have already spoken when configuring the main SSID.
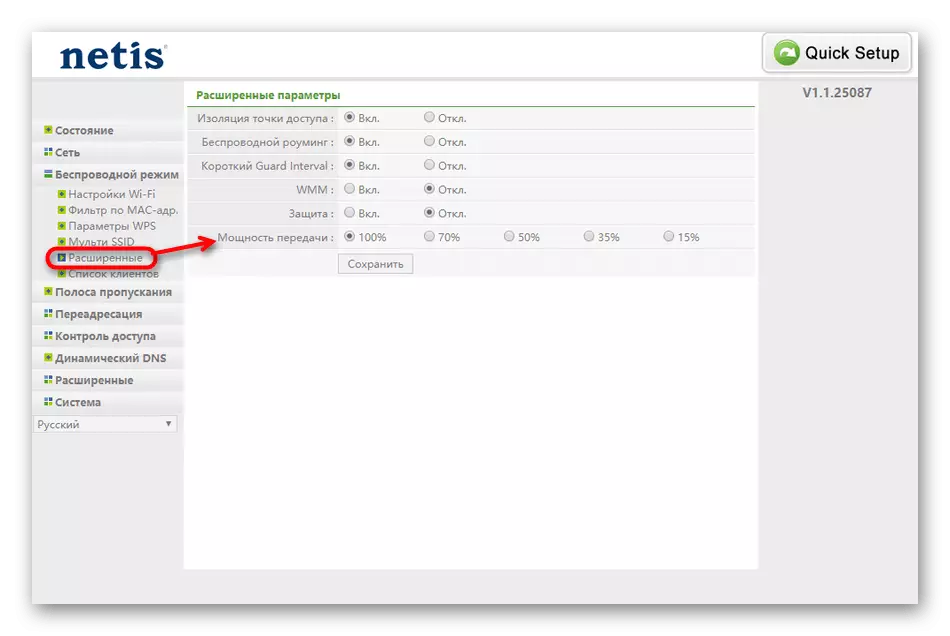
- In extended settings, we advise you to check only the "transmission power". Make sure that the maximum value is set here to make sure the wireless network signal.

Be sure to periodically save all changes, and upon completion of this stage, check the quality of the wireless network, connecting any convenient smartphone, laptop or tablet to Wi-Fi.
Step 4: Additional Parameters
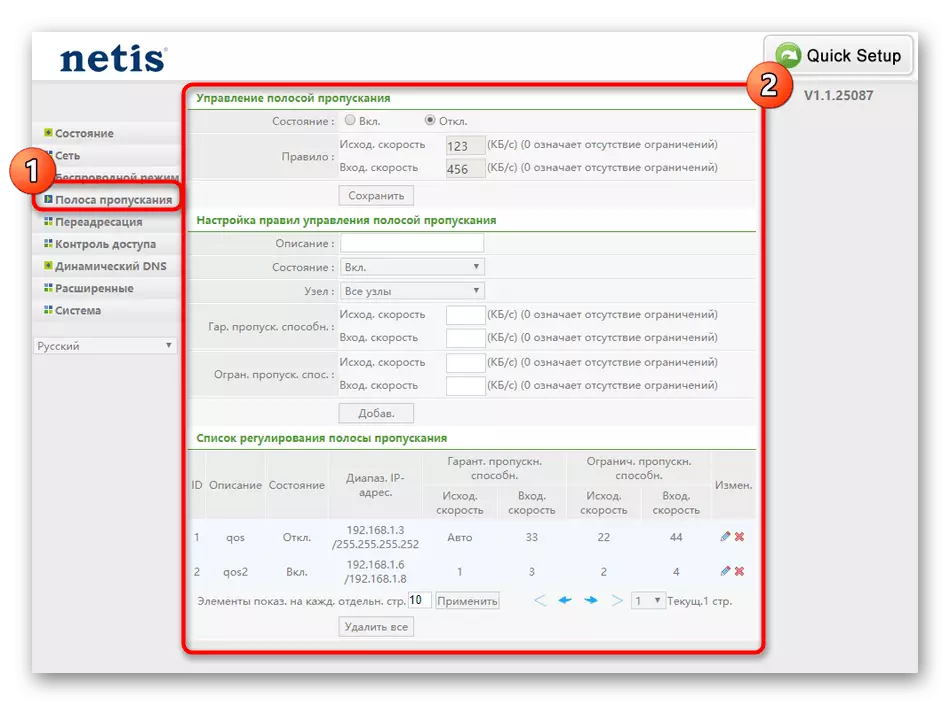
Certain parameters, which we also want to talk, do not belong to the sections discussed above, and are also not so important, but still deserve attention. We decided to allocate them in a separate stage of the article in order to tell more detail about each setup. First go to the "bandwidth" category. Here you can adjust the speed of outgoing and incoming signals that enter the router. This will allow you to set restrictions for connected devices if required. The user will simply simply include the rule and indicate what speed is maximum. After saving the configuration immediately comes into effect.
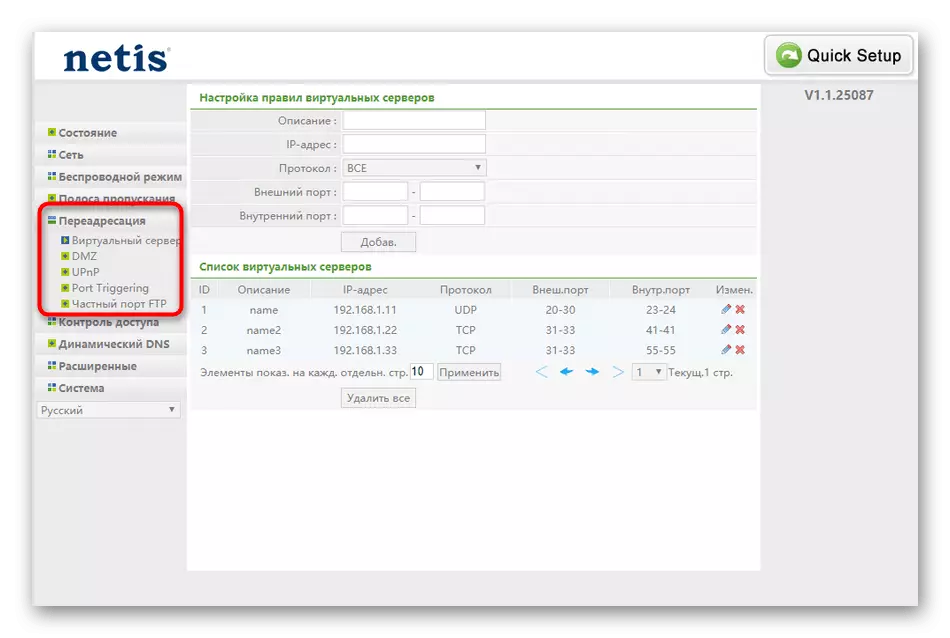
To the "Forwarding" section, you should urge only those users who use virtual servers. Consequently, each of these users already knows the purpose of such technologies and the way that the available parameters are configured in the router. Therefore, we decided not to dwell at this moment, since this is hardly useful to the usual user. We only clarify that the owners of virtual servers will find all the familiar parameters to configure the correct transmission of packets in the Netis WF2411E web interface.
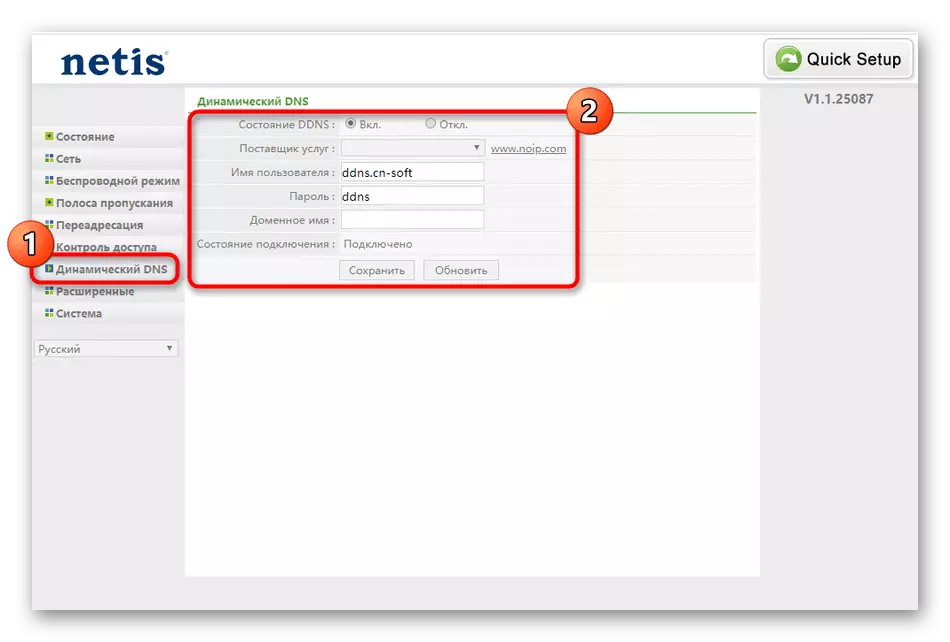
The third section that deserves attention is called "Dynamic DNS". Only those users who purchased an account on the appropriate web server that provide such functions appear. When using the technology of dynamic DNS addresses are updated in real time. Often the DDNS is involved when assigning a constant domain name to a computer with a dynamic IP address. Holders of this option will have to pass authorization through the section in question to connect to the web service.
Step 5: Access Control
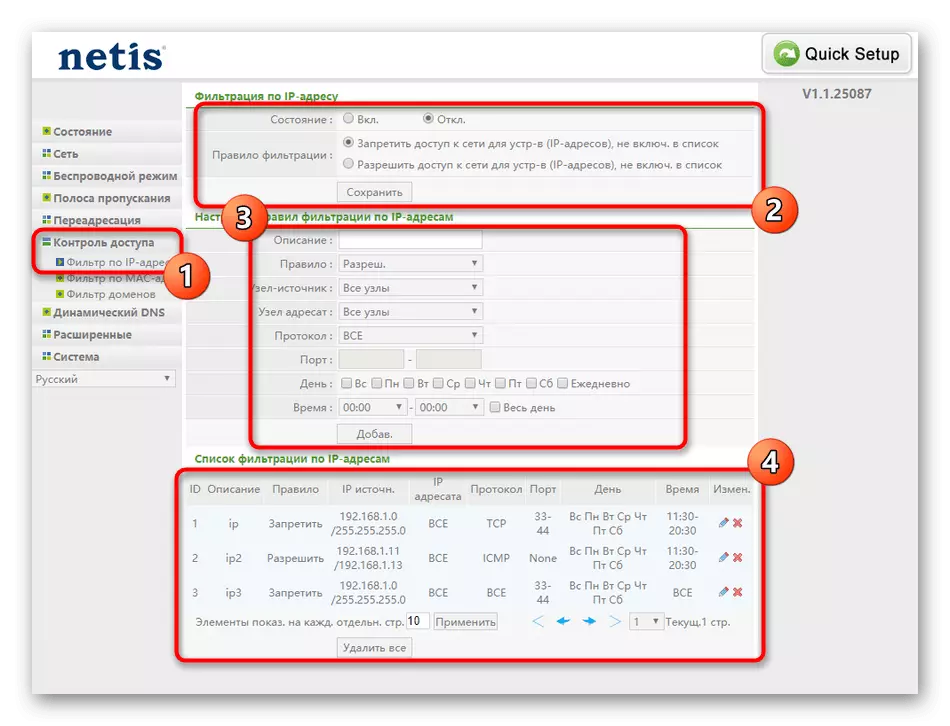
The penultimate stage of today's material will be devoted to the access control parameters that are responsible for overall security and allow you to set custom rules of the firewall. Many users simply miss this step because they are not interested in choosing special network protection settings, but if you need to filter on IP or MAC addresses, as well as restrict access to specific sites, we advise you to look at the next instruction.
- Open the Access Control menu and select the first category called "Filter by IP addresses". If you need to use any rule, mark the paragraph "On" Near the string "Status". After that, it remains only to specify addresses for blocking by filling out the appropriate form. There is also an option that allows you to configure the rules schedule. All added sources will be displayed in a specially designated page, where you can edit them or delete.
- Next, move to the "Filter by MAC addresses". The principle of creating and setting up the rules here is identical to those discussed above, so now we will not stop in detail in this process, but let's say that for blocking or permissions it will be necessary to specify the exact MAC address of the source, which can be defined in the Netis WF2411E web interface through the " Status "where all data on connected devices are present.
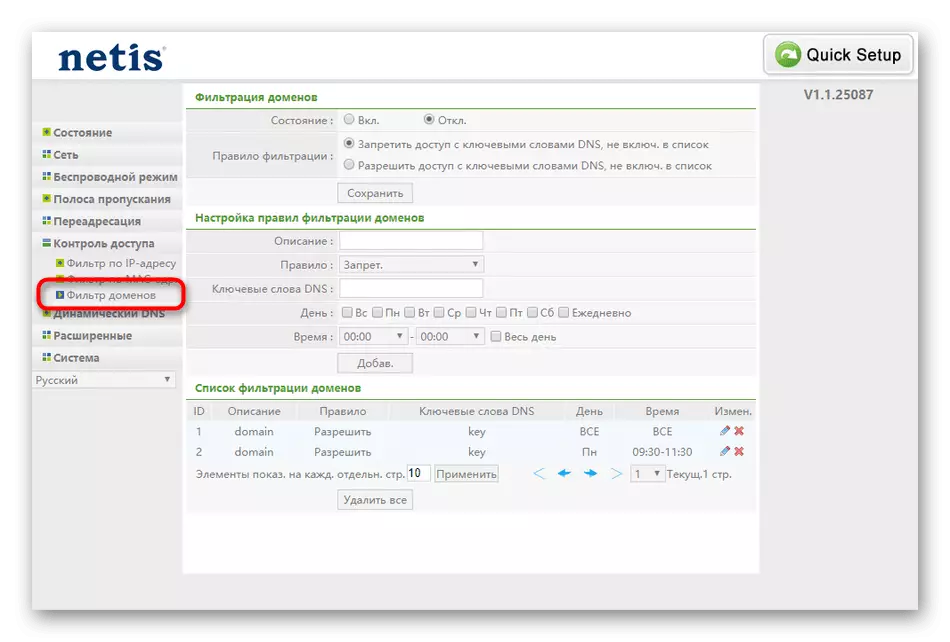
- In the latest category "Domain Filter", the principle of filling the rules is no different from other parameters, but here instead of IP or MAC addresses it is required to specify the exact address of the site or the Keywords of the DNS, along which the sources fall into it will be automatically blocked. This option can be useful to parents who wish to limit stay on the network for their children or block unwanted content. The rules can be added an unlimited quantity, and they all appear in the table.

Do not forget that all changes will be applied only after clicking on the "Save" button, and even it will even be better to restart the router to ensure that all parameters are correct.
Step 6: System
Finally, refer to the "System" section, where there are several important items related to the configuration of the router. From here, the Netis WF2411E reboot will be carried out upon completion of the setting.
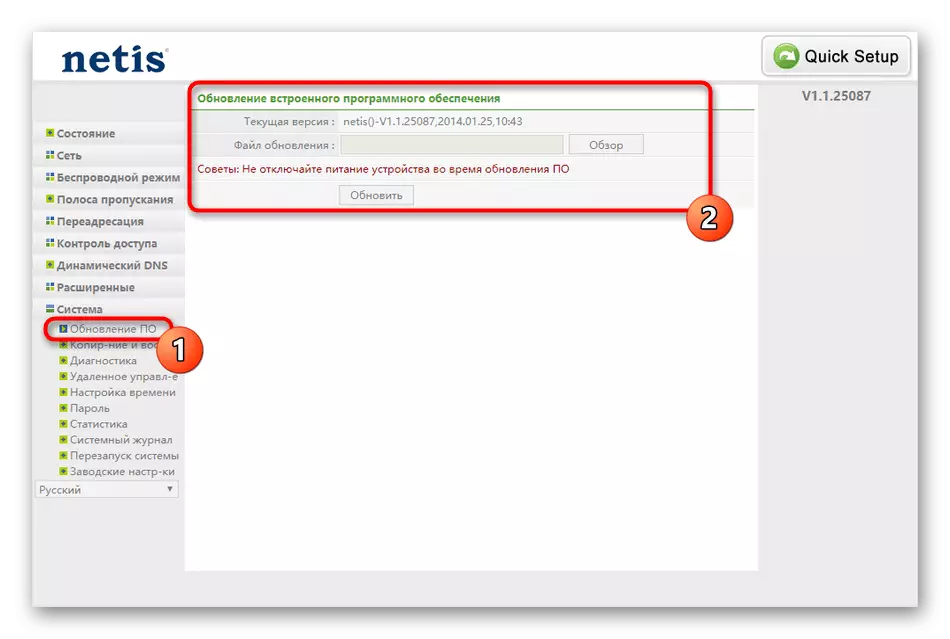
- Open the menu and select the "Update software" category. From here there is an update of the firmware of the router, if suddenly it will be needed. However, this is more recommendation for the future, because immediately after unpacking the device, install any updates are unlikely to have. If such a need originated, download the firmware files from the official site, then add them through this menu and click on the Update button.
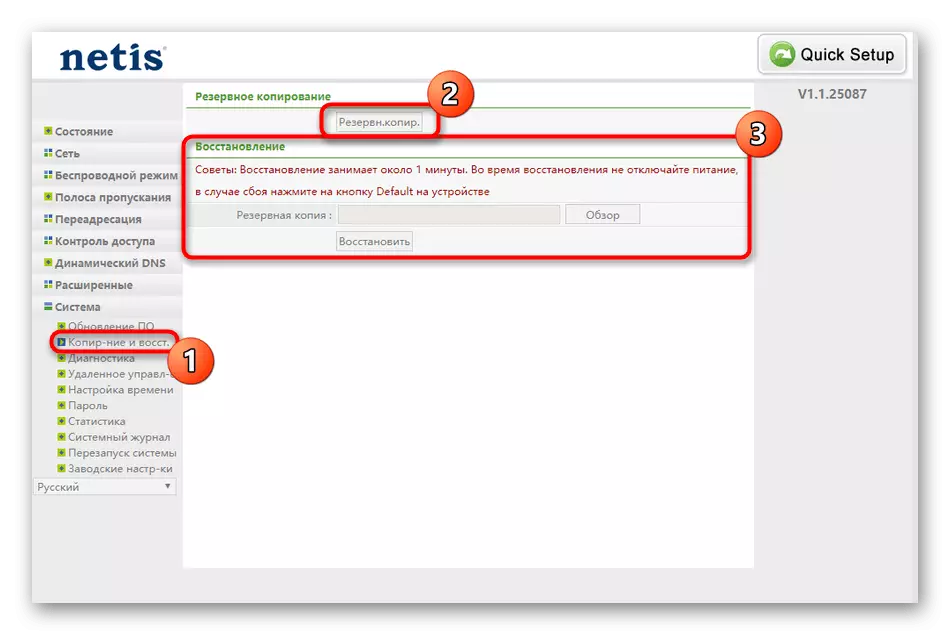
- Next comes "copying and recovery". If you independently set many parameters for the behavior of the router earlier, for example, creating a huge number of rules of the firewall, it will reasonably click on "Backup" to save the configuration in one file and, if necessary, restore it through the same category, spending just a few minutes of its time. . So you will be confident that even after resetting the settings you can quickly return the former condition of the equipment.
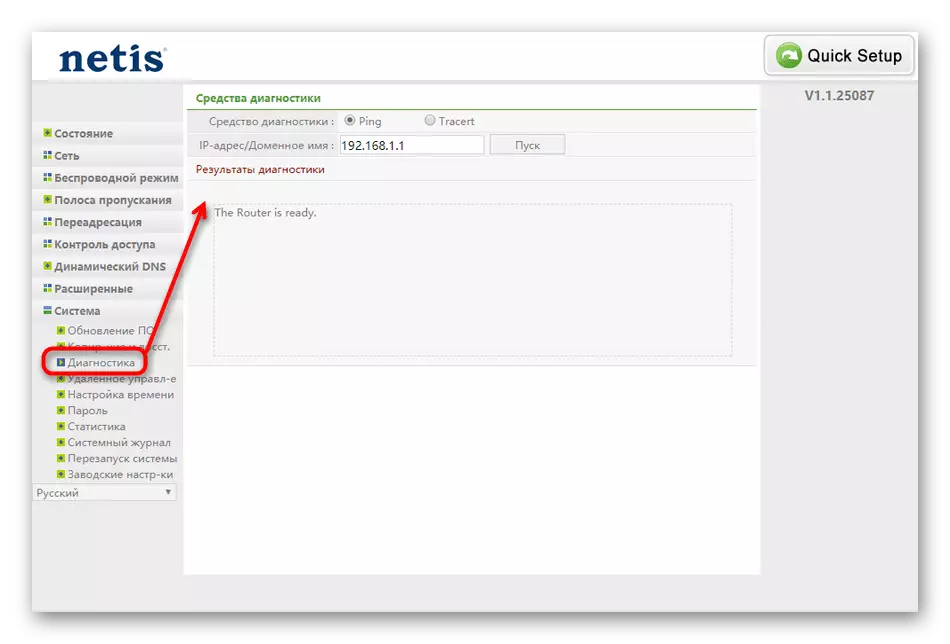
- Netis WF2411E health check is carried out both through a browser, moving to any sites and through "Diagnostics". Here there is a plugging of a particular address, and at its end, general information is displayed.
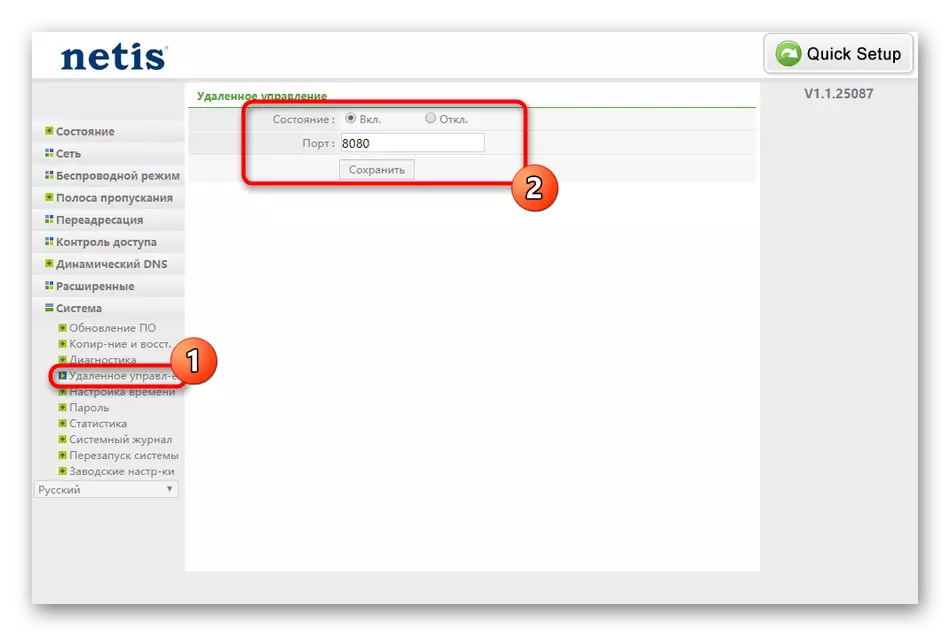
- If you need a remote connection to the web interface through a computer that is not included in the local network, you will need to enable this parameter through "Remote Control" by specifying any free port. At the same time, the port of target equipment itself must be opened to ensure correct departure and acceptance of packages.
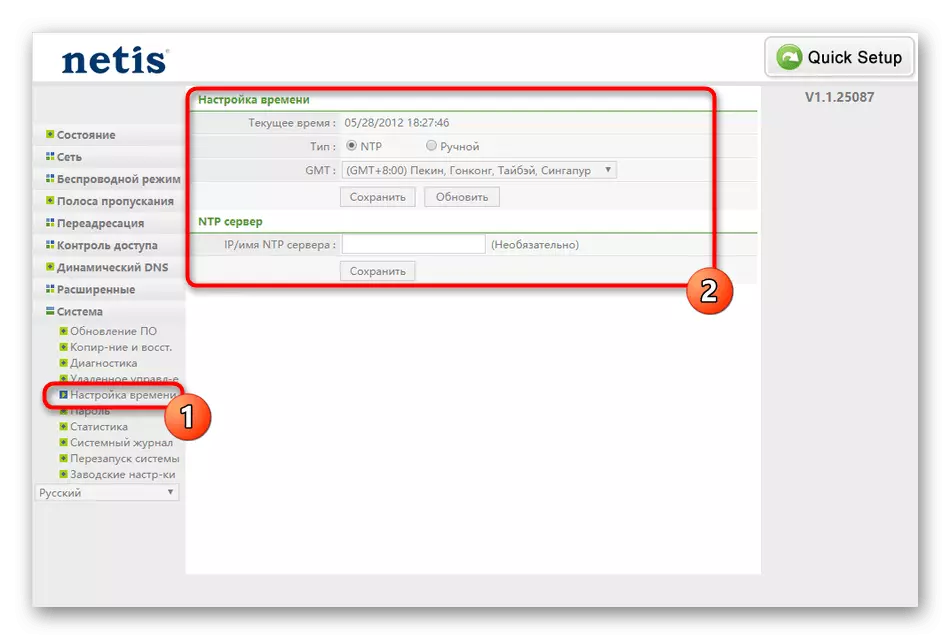
- In the "Time Setup", make sure that the date corresponds to the current one. These parameters do not affect the overall performance of the device, but when it is properly configured, it will be possible to follow the statistics of the network, obtaining accurate time indicators.
- Before going out of the web interface, we strongly recommend changing the username and password to access this component so that the random user cannot go to the Internet center and change any parameters here.
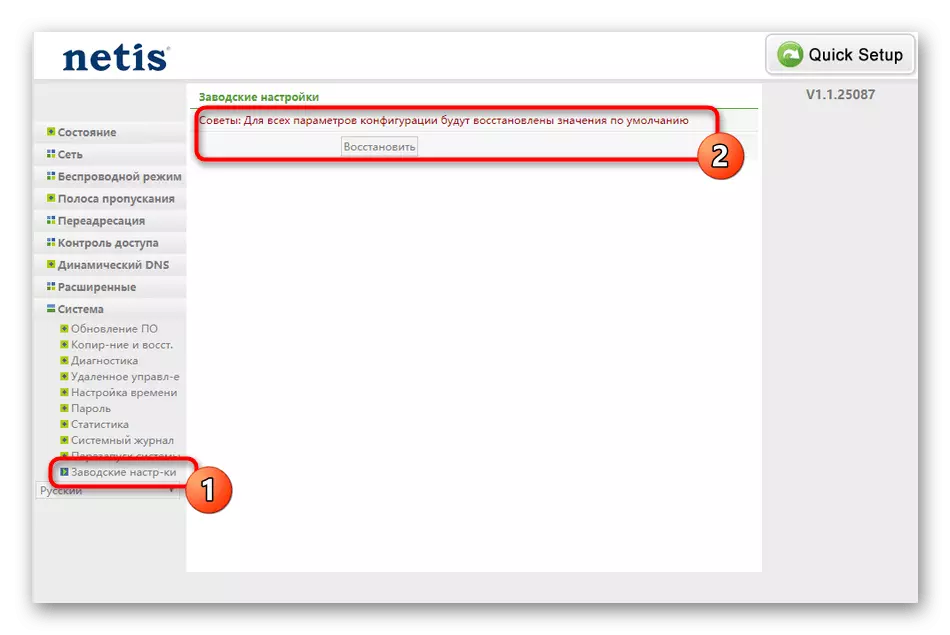
- Reset to factory settings should be performed in those situations when the device is incorrect after the settings. To do this, on the Netis WF2411E router there is a specially designated button, as well as recovery is performed through the appropriate section in the web interface.
- Now it remains only to send a reboot device through the "restart system". After that, all changes will come into force and you can proceed to normal interaction with the network and a wireless access point.


It was all information about configuring Netis WF2411E. As you can see, the user has a choice between the fast and advanced setting mode, so everyone will have to choose the optimal option and ensure the stable performance of the device.