
In this manual details how to download the download from the physical USB flash drive in VirtualBox for Legacy and UEFI downloads on the Windows, Linux and Mac OS host. Consider that it is not always the download occurs without failures and works stable (at the same time, if you have no problems loaded with the usual ISO).
Configuring download from USB drive in VirtualBox (on Windows host system)
In order to implement the conceived, we need to use the VirtualBox function, which allows you to "arouse" a physical drive into a virtual machine.
In our case, it will be a USB flash drive or an external hard drive, and the steps for implementation are as follows:
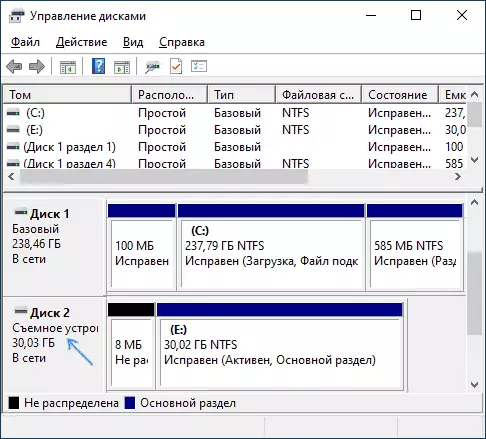
- Click Win + R. Enter diskmgmt.msc. And find out the disk number you want to connect to the virtual machine. In my example is a disc 2.
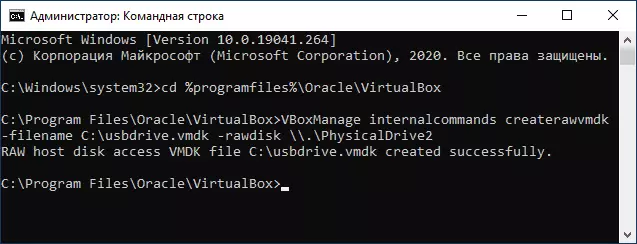
- Run the command prompt on behalf of the administrator and enter the following two commands in order. In the second command, the last letter n replace the number of the disk from the 1st step, and the path to the virtual disk, which in fact will be a link to the USB flash drive (C: \ USBFrive.vmdk) can specify any - the file will be saved in the location you specify: CD % ProgramFiles% \ Oracle \ VirtualBox VBOXMANAGE INTERNALCOMMANDS CREATERAWVMDK -FILENAME C: \ USBDRIVE.VMDK -REWDisk \\. \ PhysicalDriven
- Close the command line and Run VirtualBox on behalf of the administrator (it is necessary). Starting on behalf of the administrator can be performed through the context menu on the right click on the label.
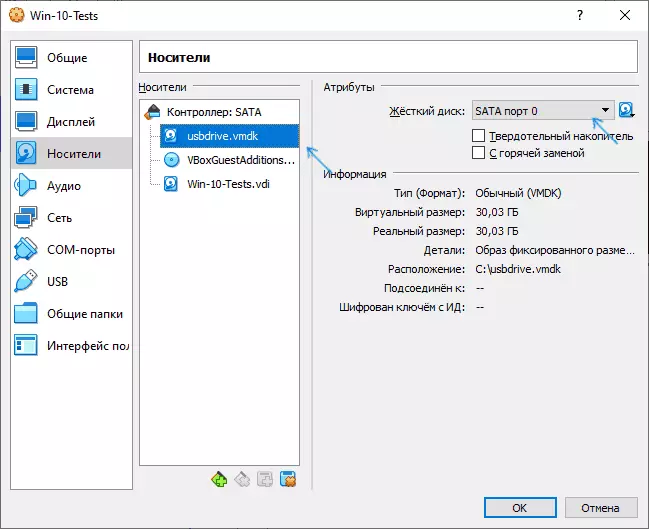
- Create a new one or use the available VirtualBox virtual machine and go to the "Media" tab. Select the current controller and click on the Add New Device button, select "Hard Disk" (ATTENTION: If you create a new virtual machine, you can simply select the connection of the available virtual hard disk and specify the path to the file created on the 2nd step).
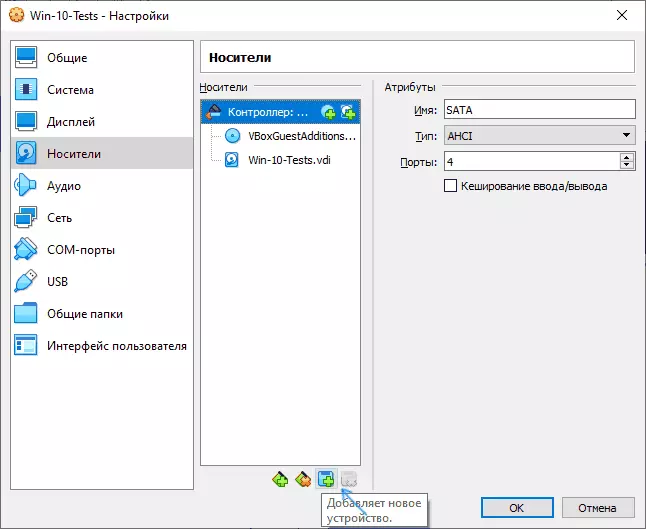
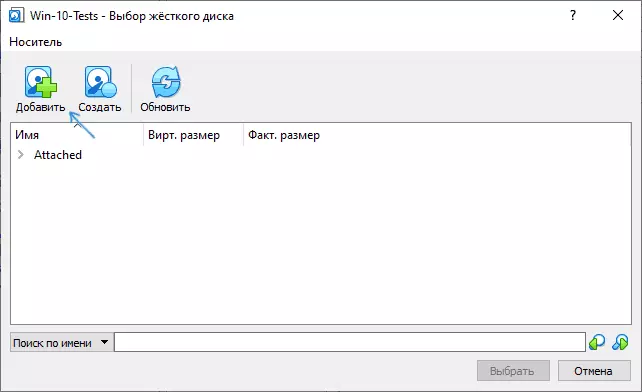
- In the next window, click "Add" and specify the path to the virtual disk file, in my case - C: \ USBDRIVE.VMDK, it will be added to the list, select it and click the Select button.
- By default, the connected disk will be the last in the list of connected, that is, the download of the virtual machine will not be made from it. To change the sequence, change the SATA port number in the media settings.
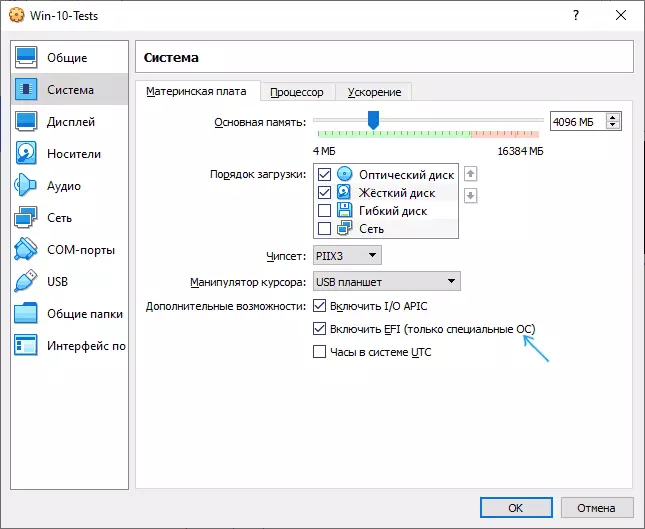
- Ready, now the virtual machine can boot from the physical USB drive. If the boot flash drive assumes the download in the UEFI mode, go to the "System" section in the Virtual Machine Settings and check the "Enable EFI" item.
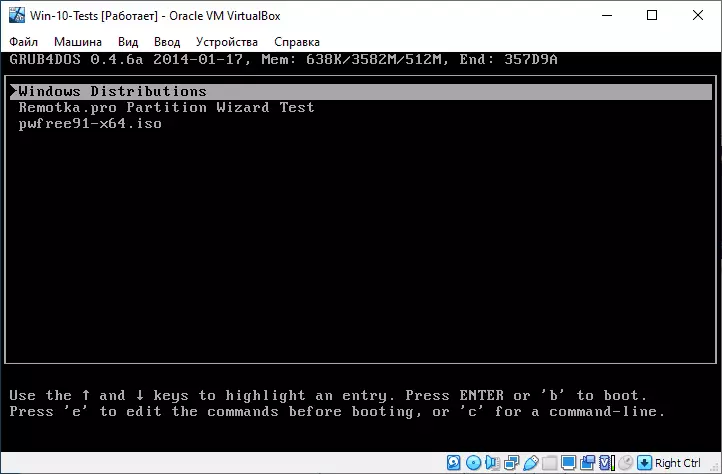
And the result: on the screenshot below - the menu when loading a virtual machine with a physical multi-load flash drive.
Loading from a flash drive in VirtualBox on Linux and Mac OS hosts
Check work on Linux and Mac OS I had no opportunity, but the logic is as follows. Suppose a physical flash drive - Dev / SDB drive in Linux and / dev / disk2s1 in Mac OS, then in Linux:
DF VBOXMANAGE INTERNALCOMMANDS CREATERAWVMDK -FILENAME ~ / .VIRTUALBOX / HARDDISKS / USB.VMDK -REWDisk / Dev / SDB -Register Sudo Chmod 666 / DEV / SDB * sudo chown`In Mac OS:
DF Sudo Diskutil Unmount / Dev / Disk2S1 VboxManage InternalCommands CreateRewvmdk -Filename /Ussers/words >user/Desktop/USB.VMDK -REWDiskThe remaining steps will be the same as in Windows. In case Mac OS VirtualBox reports that it cannot access the disk, unmount it in Finder.
I hope everything turned out, and the instruction was useful for those goals with which you found it.