
Disks to install Linux on a PC or laptop almost no one uses. It is much easier to write an image on the USB flash drive and quickly install a new OS. At the same time, it is not necessary to mess with a drive, which may not be in general, and about the scratched disk also do not have to worry. Following the simple instruction, you can easily install Linux with a removable drive.
Installation Linux with flash drive
First of all, you will need a drive formatted in FAT32. Its volume should be at least 4 GB. Also, if you have no image of Linux, it will be by the way the Internet with good speed.Format carrier in FAT32 will help our instructions. It is about formatting in NTFS, but the procedures will be the same, only everywhere you need to choose the option "FAT32"
Lesson: How to format the USB flash drive in ntfs
Please note that when installing Linux on a laptop or tablet, this device must be connected to power (in the outlet).
Step 1: Distribution Loading
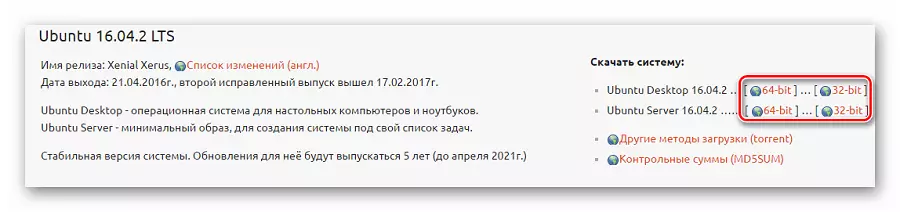
Download the image with Ubuntu is better from the official site. There you can always find an up-to-date version of the OS, without worrying about viruses. The ISO file weighs about 1.5 GB.
Ubuntu official website
See also: Instructions for restoring remote files on a flash drive
Step 2: Creating a bootable flash drive
It is not enough just to throw off the downloaded image on the USB flash drive, it needs to be correctly recorded. For these purposes, one of the special utilities can be used. As an example, take the UnetBootin program. To fulfill the task, do this:
- Insert the USB flash drive and run the program. Mark the "disk image", select "ISO Standard" and find the image on your computer. After that, specify the USB flash drive and click "OK".
- A window will appear with recording status. At the end, click "Exit". Now the Distribution files will appear on the flash drive.
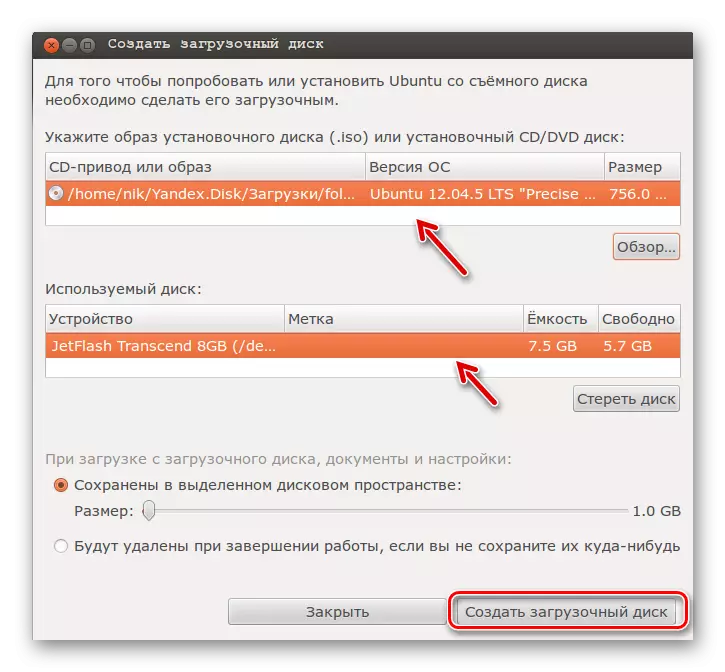
- If the loading flash drive is created on Linux, you can use the built-in utility. To do this, visit the application search request "Creating a boot disk" - the desired utility will be in the results.
- It needs to specify the image used by the USB flash drive and click the "Create boot disk" button.

For more information about creating a bootable media with Ubuntu, read our instructions.
Lesson: How to create a bootable USB flash drive with Ubuntu
Step 3: BIOS Setup
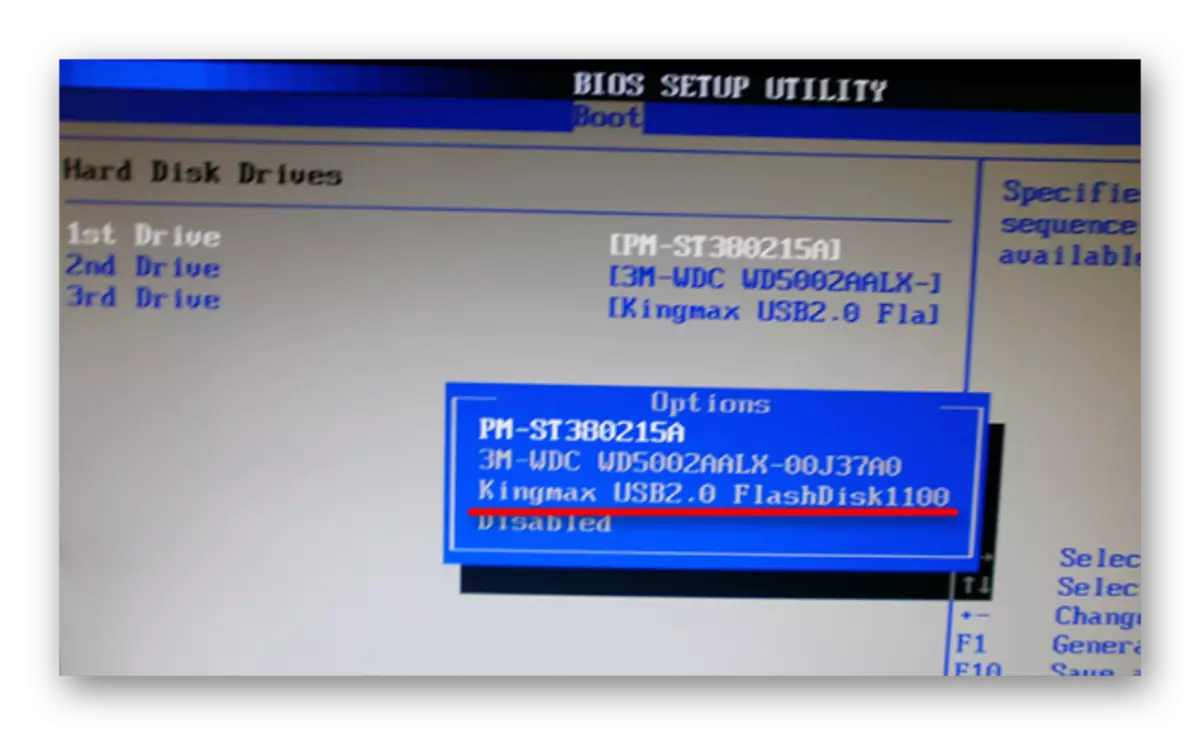
To make a computer when turned on, you will need to configure something in the BIOS. It can be reached by pressing "F2", "F10", "Delete" or "ESC". Further perform a number of simple actions:
- Open the Boot tab and go to Hard Disk Drives.
- Here, install a USB flash drive as a first media.
- Now go to "Boot Device Priority" and assign the priority of the first media.
- Save all changes.


This procedure is suitable for AMI BIOS, on other versions, it may differ, but the principle is the same. For more information about this procedure in our BIOS setup item.
Lesson: How to set the download from the flash drive in bios
Step 4: Preparation for installation
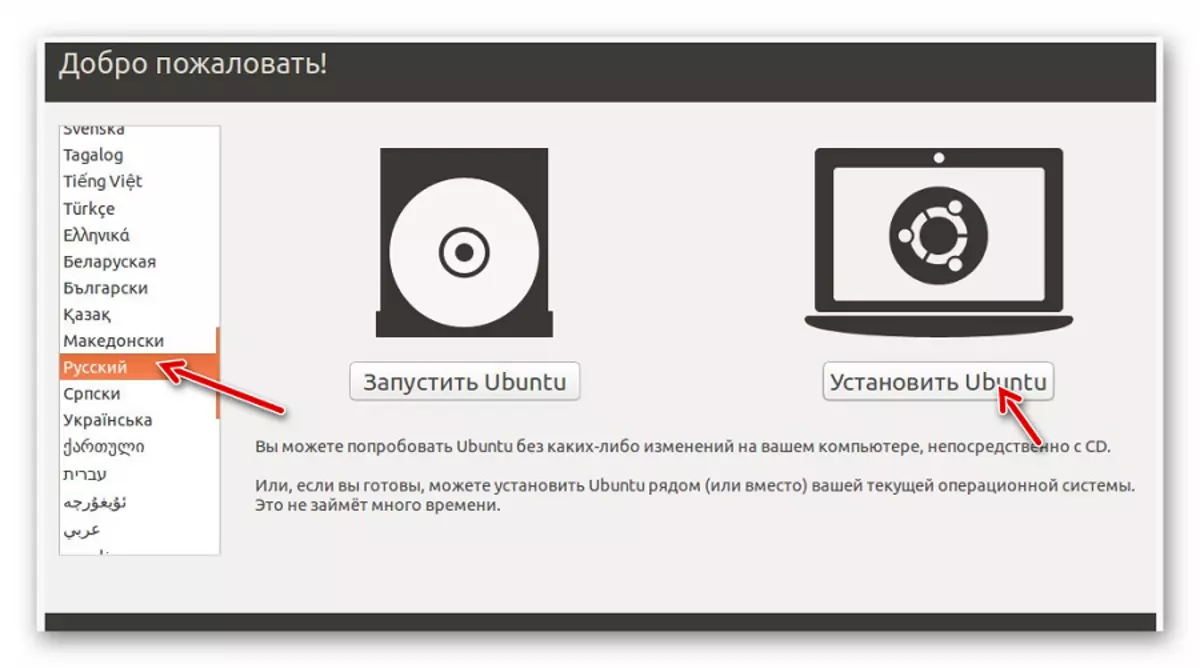
Upon the next PC restart, the boot flash drive will start and you will see a window with a language selection and OS boot mode. Next do the following:
- Select "Ubuntu Installation".
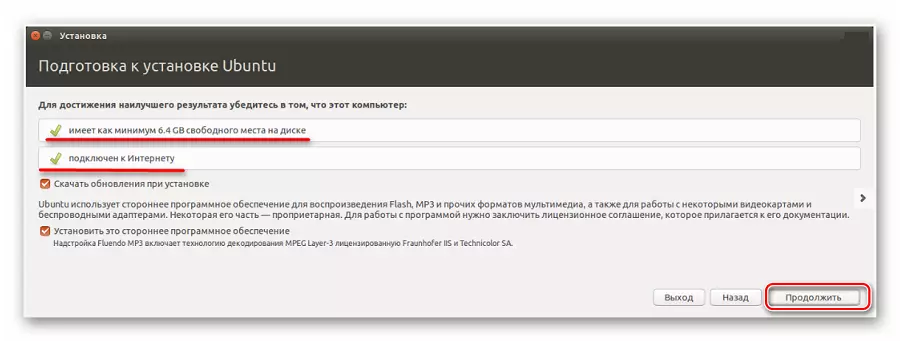
- In the next window, an estimate of the free disk is displayed and is there any connection to the Internet. You can also note downloading updates and installing software, but this can be done after installing Ubuntu. Click "Continue".
- Next, the installation type is selected:
- Install a new OS, leaving the old one;
- Install the new OS, replacing the old one;
- Marking the hard disk manually (for experienced).
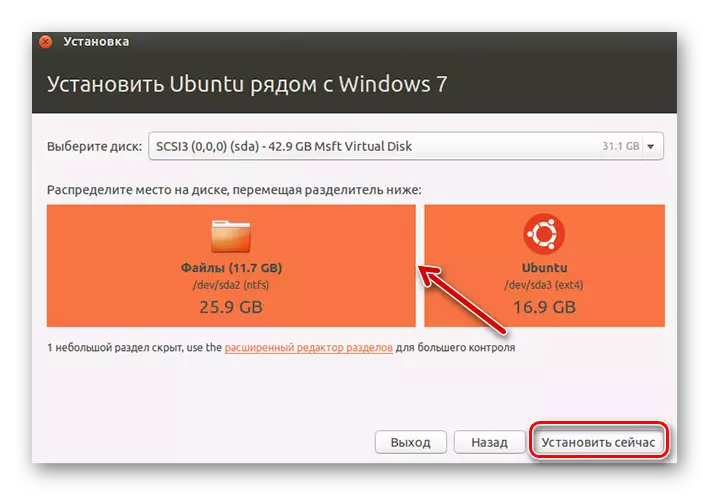
Mark an acceptable option. We will consider installing Ubuntu without deleting Windows. Click "Continue".

See also: How to save files if the flash drive does not open and asks to format
Step 5: Distribution of disk space
A window will appear where it is necessary to distribute the hard disk sections. This is done by moving the separator. On the left there is a space allotted under Windows on the right - Ubuntu. Click "Set Now".
Step 6: Completing the installation
You will need to select the time zone, keyboard layout and create a user account. Also, the installer can offer to import Windows Accounts.
At the end of the installation, you will need to restart the system. At the same time, the offer will appear to pull out the flash drive so that the autoload is not started again (if necessary, return the previous values in the BIOS).
In conclusion, I would like to say that following this instruction, you will write without any problems and install Ubuntu Linux from the flash drive.
See also: Phone or tablet does not see the flash drive: Causes and Solution