
A modern variety of software and other tools minimizes the complexity of the operating system installation independently, without the involvement of specialists. It saves time, money and allows the user to gain experience in the process of work.
In order to install or reinstall the operating system as quickly as possible, first need to create a boot disk using special software.
RUFUS is an incredibly simple, but a very powerful program for recording images for removable media. It will help literally in several clicks without errors to write the image of the operating system on the USB flash drive. Unfortunately, the multi-load flash drive does not work out, but it can write a simple image in full.
To create a boot flash drive, the user needs:
one. Computer with installed Windows XP or subsequent versions of the operating system.2. Download RUFUS program and run it.
3. Have a flash drive with memory sufficient to write an image.
4. The image of the Windows 7 operating system to be recorded on the USB flash drive.
How to create a bootable flash drive with Windows 7 operating system?
one. Download and run the RUFUS program, it does not require installation.
2. After starting the program, insert the required USB flash drive into the computer.
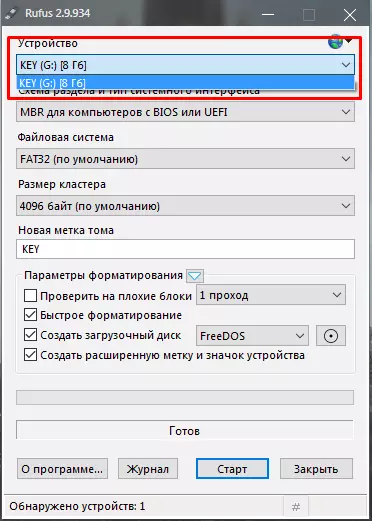
3. In RUFUS, in the drop-down removable media selection menu, find your flash drive (if it is not the only connected removable media.
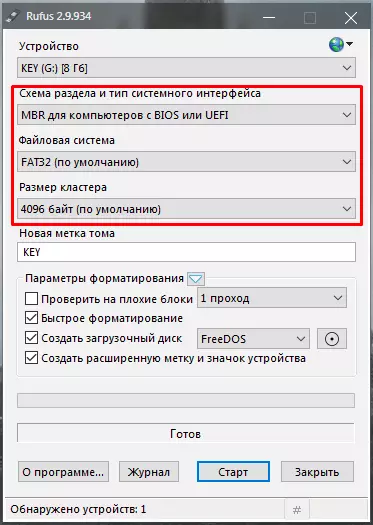
2. Three following parameters - Scheme section and type of system interface, File system and Cluster size We leave the default.
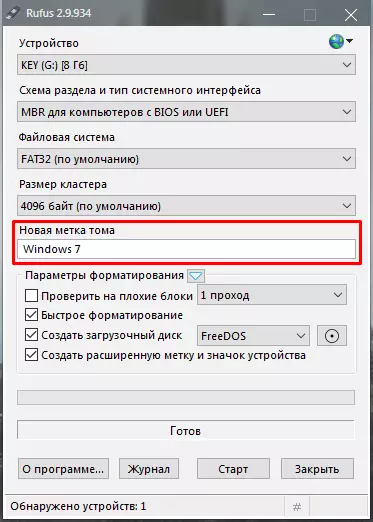
3. To avoid confusion between filled removable media, you can set the name of the media to which the operating system image will be recorded. The name can be chosen absolutely any.
4. The default settings in RUFUS fully provide the necessary functionality for writing the image, so in most cases it is not necessary to change anything below. These settings can be useful to more experienced users for fine configuration of the media formatting and image recording, however, it is enough to establish the basic settings.
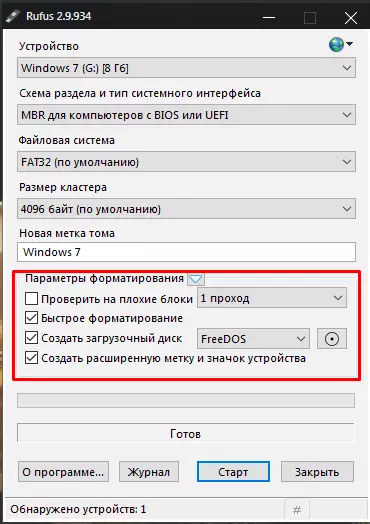
five. Using a special button, select the desired image. To do this, an ordinary guide will open, and the user simply indicates the location of the file and, in fact, the file itself.
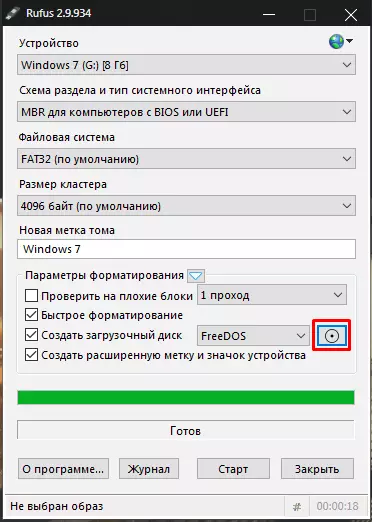
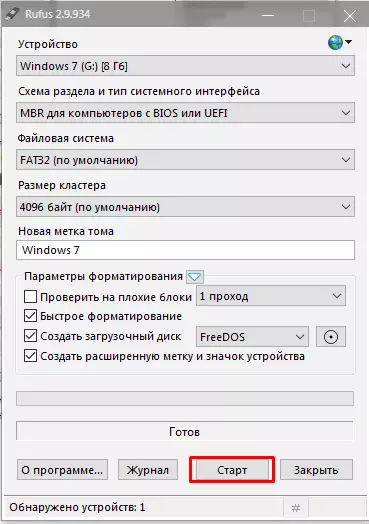
6. Setup completed. Now the user needs to click Start.
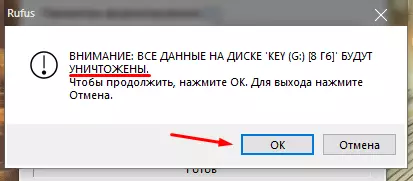
7. You need to confirm the full destruction of files on the removable media during formatting. Be careful not to use the media on which important and unique files are recorded.!
eight. After confirming, the media will be formatted, then recording the operating system image. The progress of real-time execution will notify a special indicator.
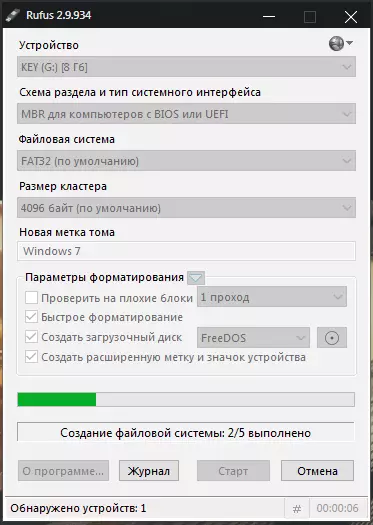
nine. Formatting and recording will take some time depending on the size of the image and the recording rate of the carrier. After graduating, the user will be notified by the appropriate inscription.
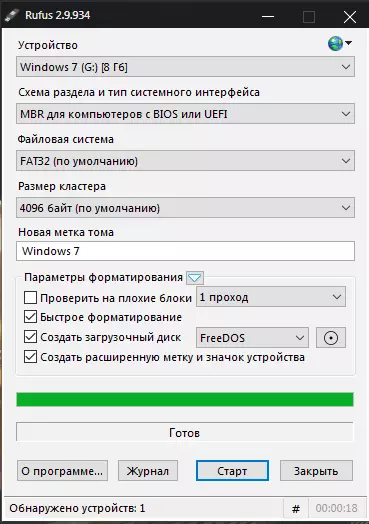
10. Immediately after the entry, the flash drive can be used to install the Windows 7 operating system.
RUFUS is a program for a very simple recording of an operating system image to removable media. It is very lightweight, easy to manage, completely Russified. Creating a loading flash drive in RUFUS takes a minimum of time, but gives a result of high quality.
Explore as well: Programs for creating boot flash drives
It is noteworthy that this method can be used to create loading flash drives of other operating systems. The difference is only in choosing the desired image.