

Some Mac users would like to try Windows 10. They have such an opportunity, thanks to the built-in Bootcamp program.
Install Windows 10 using BootCamp
Using Bootcamp, you do not lose performance. In addition, the installation process itself is light and has no risks. But note that you should have OS X at least 10.9.3, 30 GB of free space, free flash drive and image with Windows 10. Also remember to back up using Time Machine.
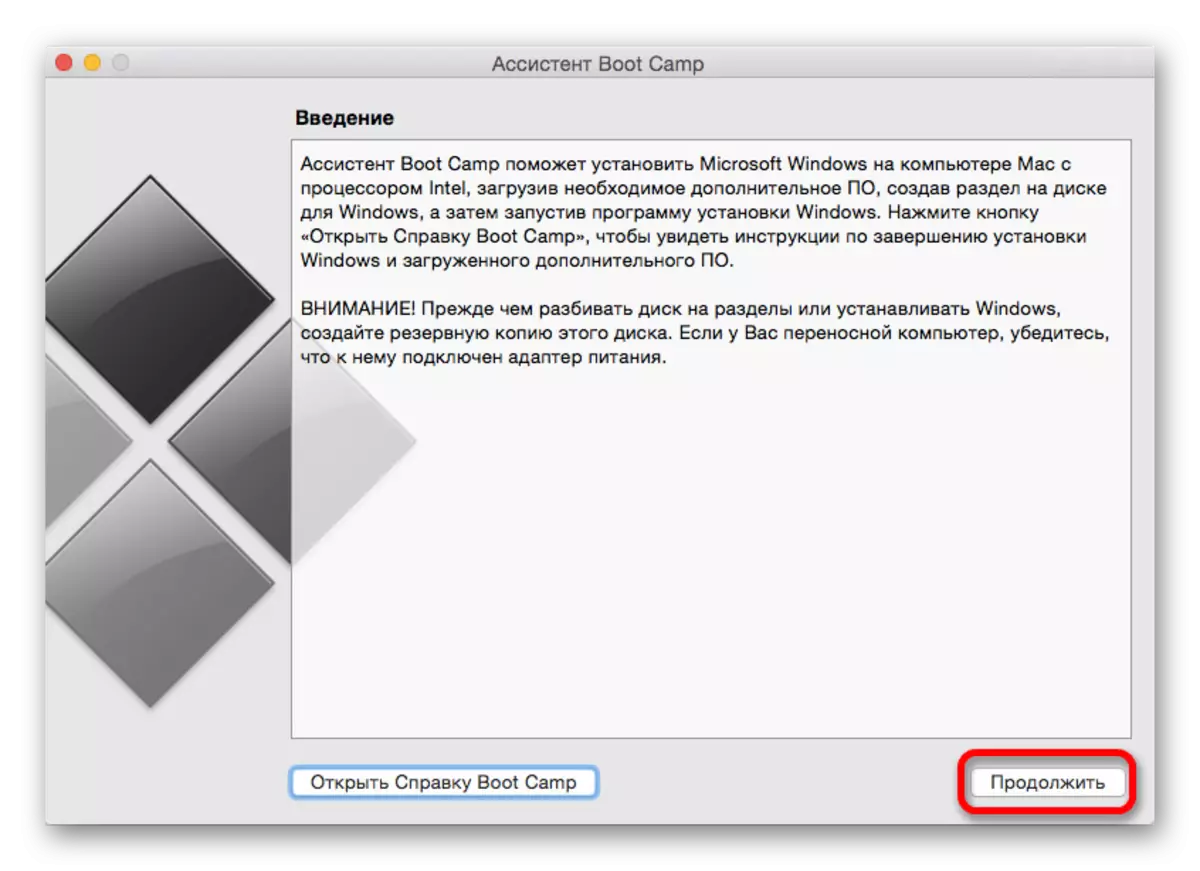
- Find the required system program in the Program Directory - "Utilities".
- Click "Continue" to go to the next step.
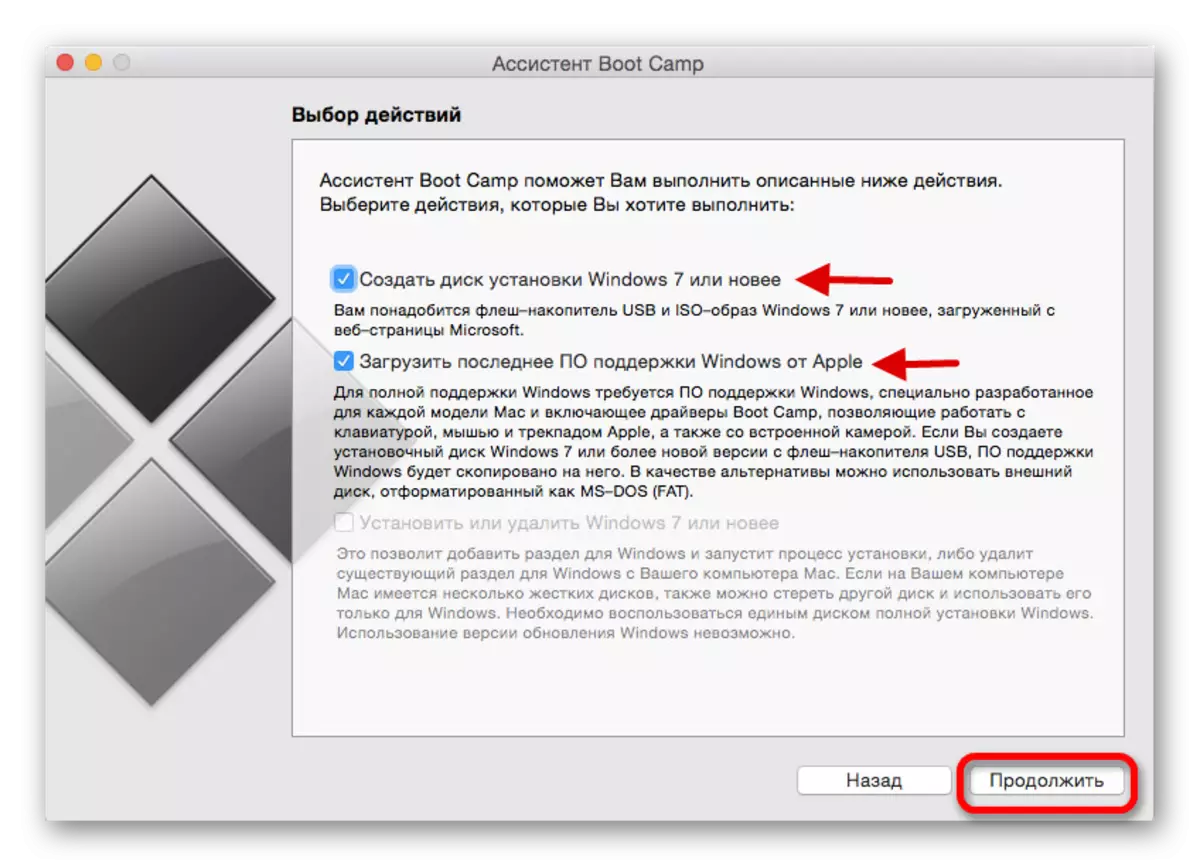
- Check the "Create Installation Disk ..." item. If you do not have drivers, then tick the item "Download Last By ...".
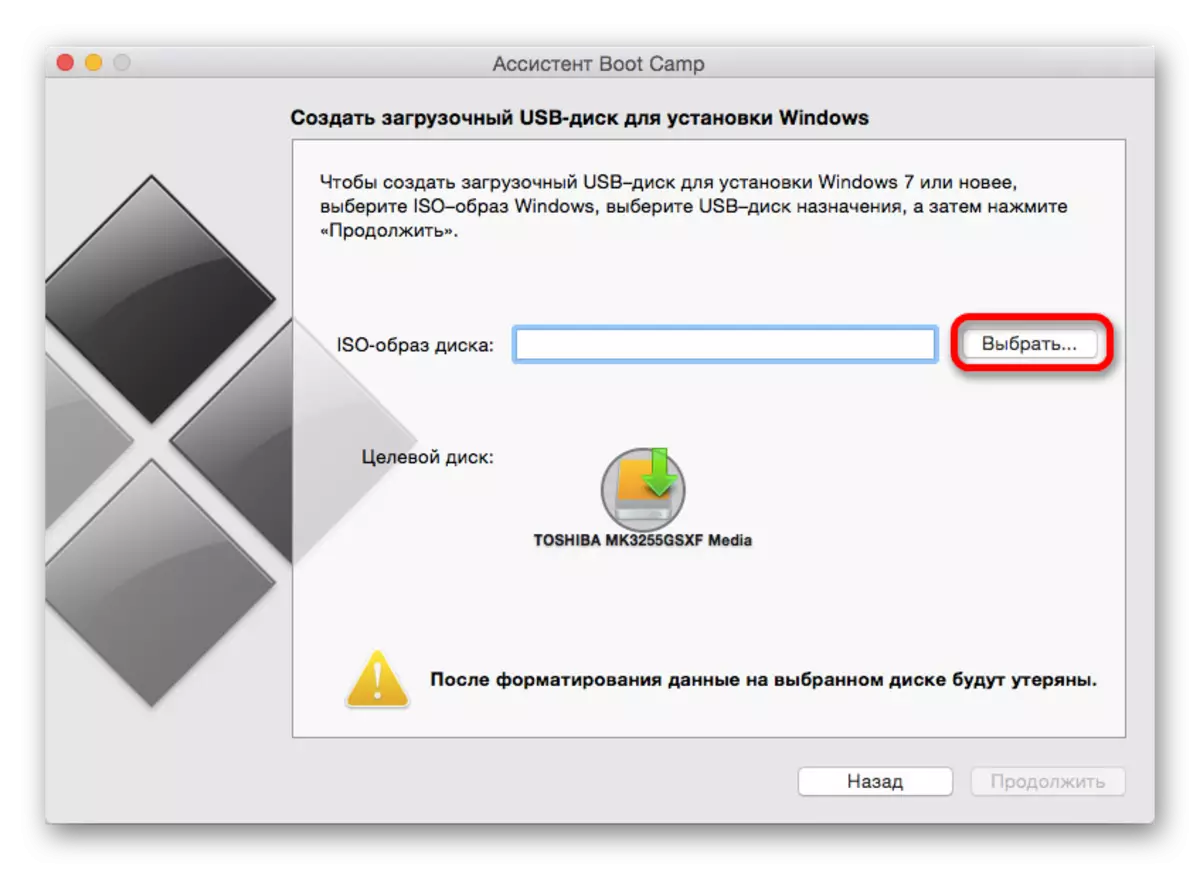
- Insert the flash drive, and select the image of the operating system.
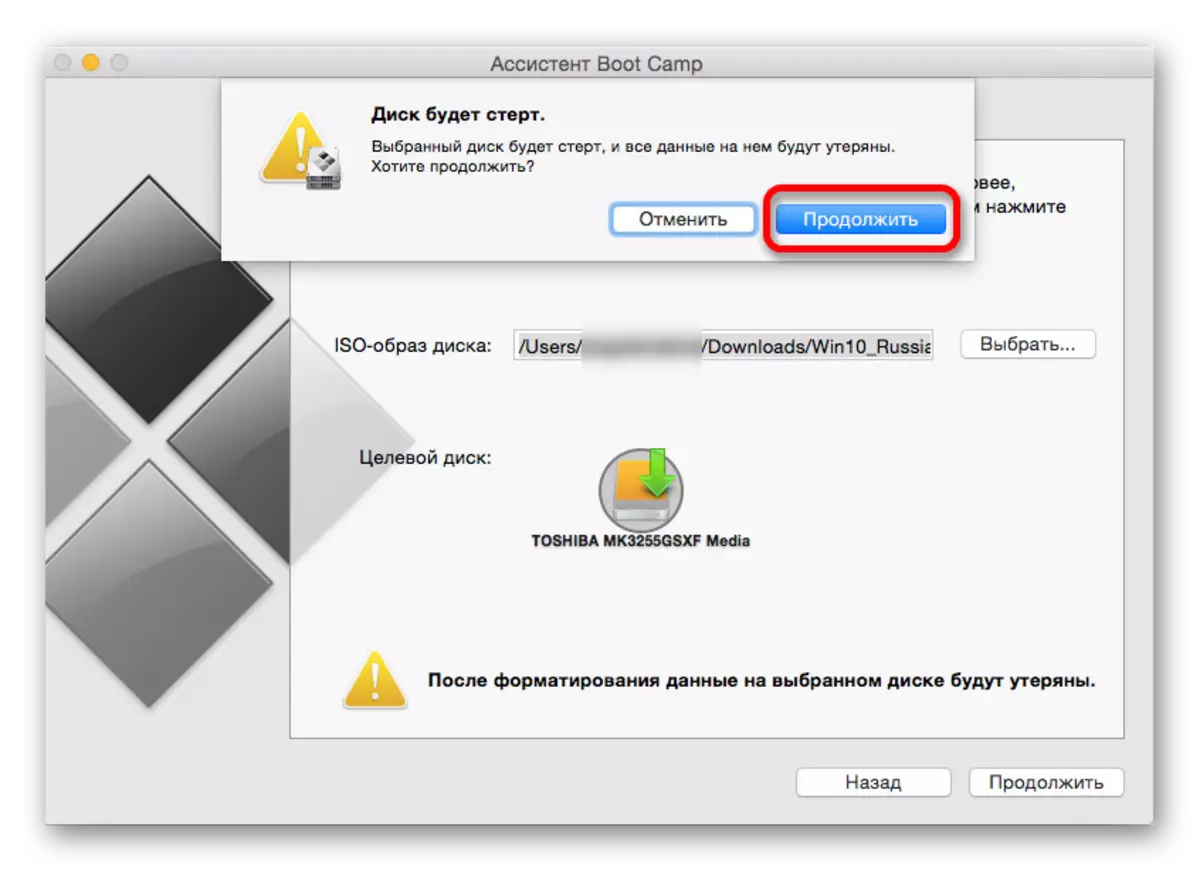
- Agree with formatting flash drive.
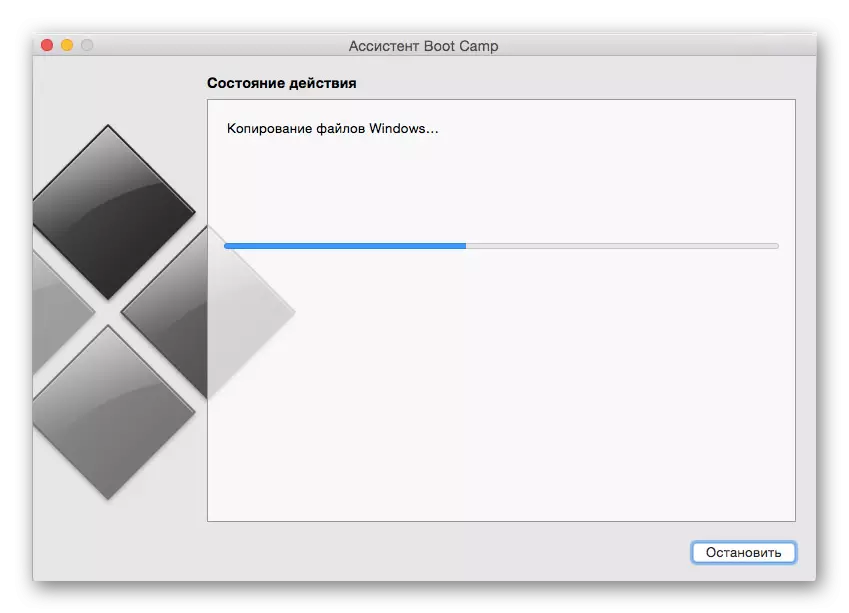
- Wait for the process to complete.
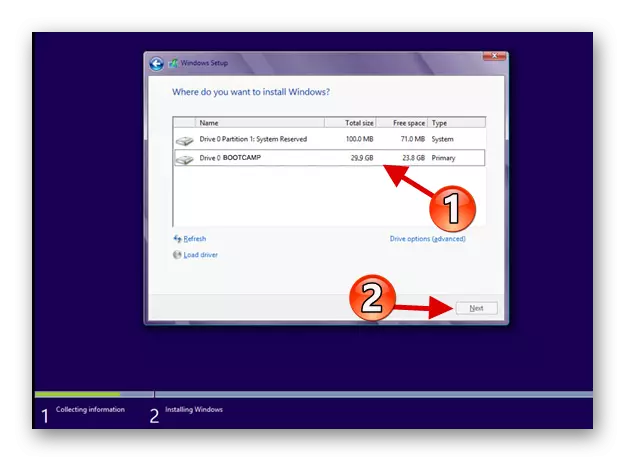
- Now you will be asked to create a section for Windows 10. To do this, highlight at least 30 gigabytes.
- Restart the device.
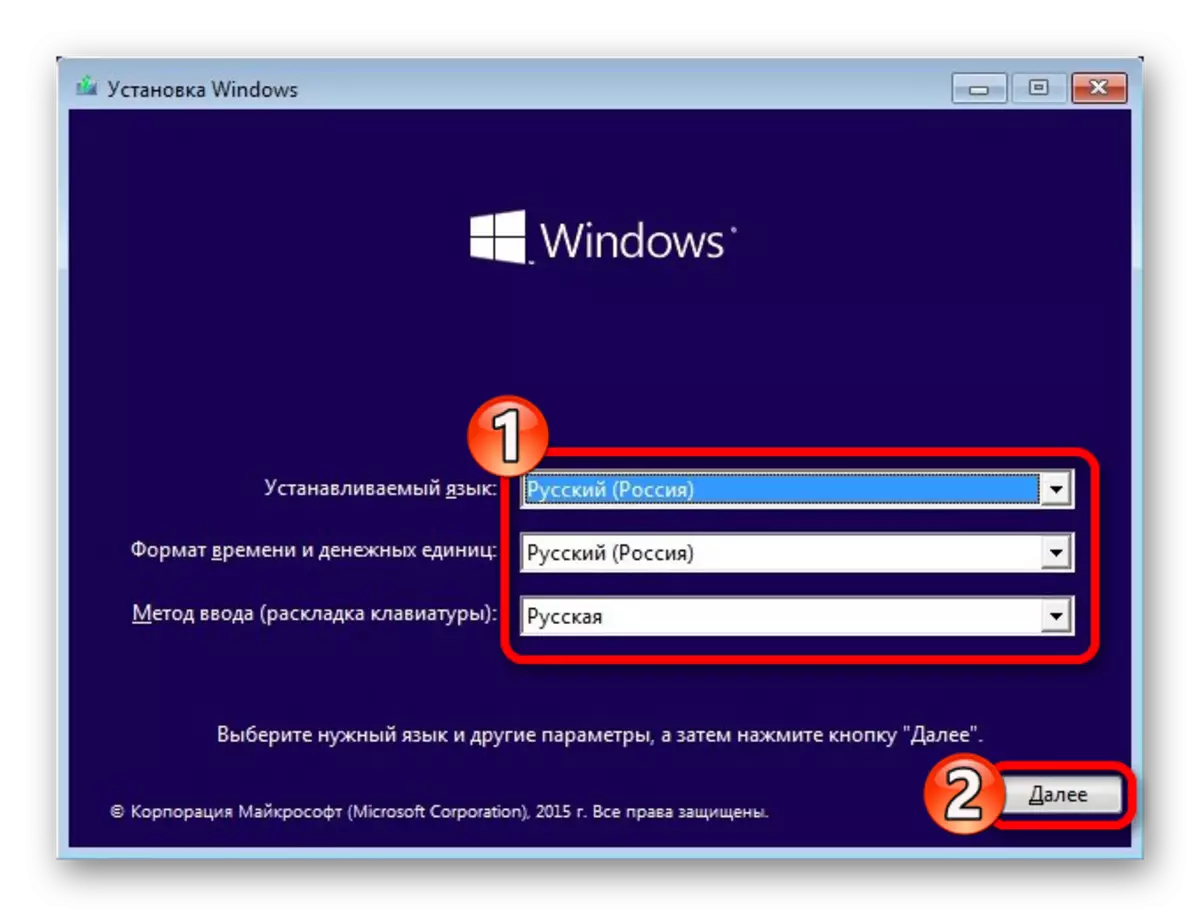
- Next, a window will appear in which you will need to set up the language, region, etc.
- Select the previously created section and continue.
- Wait for the installation.
- After rebooting, install the necessary drivers from the drive.
To invoke the system selection menu, clamp Alt (Option) on the keyboard.
Now you know that using Bootcamp you can easily install Windows 10 on Mac.