

Method 1: Select Place
If you need to select any place on Google maps and set the label, you can use standard tools available to each user. For these purposes, the official website and mobile application will equally suit, and at the same time the installed mark may well be sent to another user regardless of the platform used.Option 1: Website
- When using the web version of Google Maps, open the online service page and find the right place. To select, click on the left mouse button and confirm the setting of the label by clicking on the link with the coordinates in the pop-up hint at the bottom of the browser window.
- As a result, a label and a card appear on the map with a description of the nearest significant places, including the photo, the data on the region and the coordinate themselves. In addition, the scale will automatically be configured.

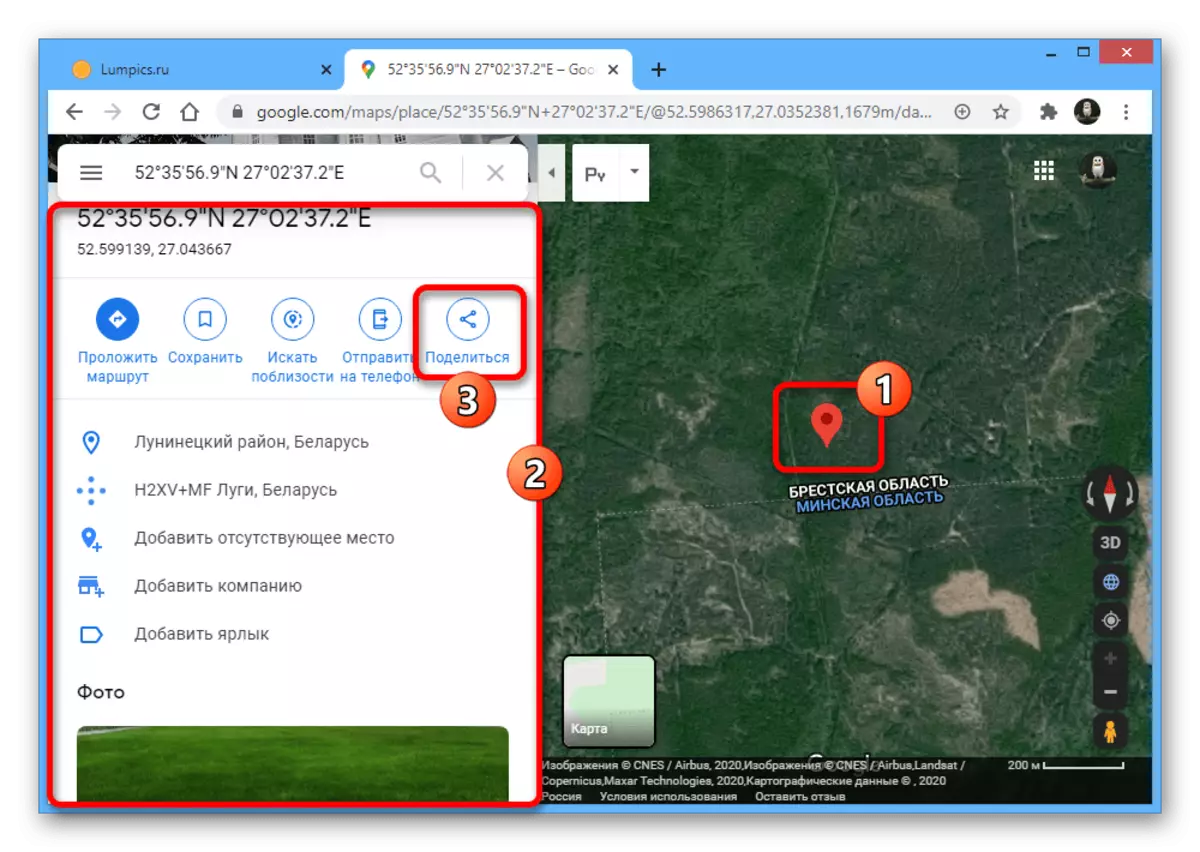
If necessary, using a block on the left side of the window, you can save a point in the account bookmarks, go to the route laying or adding a missing place. You can also use the "Send to your phone" or "Share" button to send information about the label to another user.
- When the "Share" pop-up window appears, use the "Copy Link" button to save the data to the clipboard and subsequently send the user to the desired. You can also automatically publish through some social networks.
- The created label can be integrated into your own website, using the "Embedding Card" tab by copying the code using the "Copy HTML" link and adding the received frame to the desired location. However, you do not have the values and other available settings.
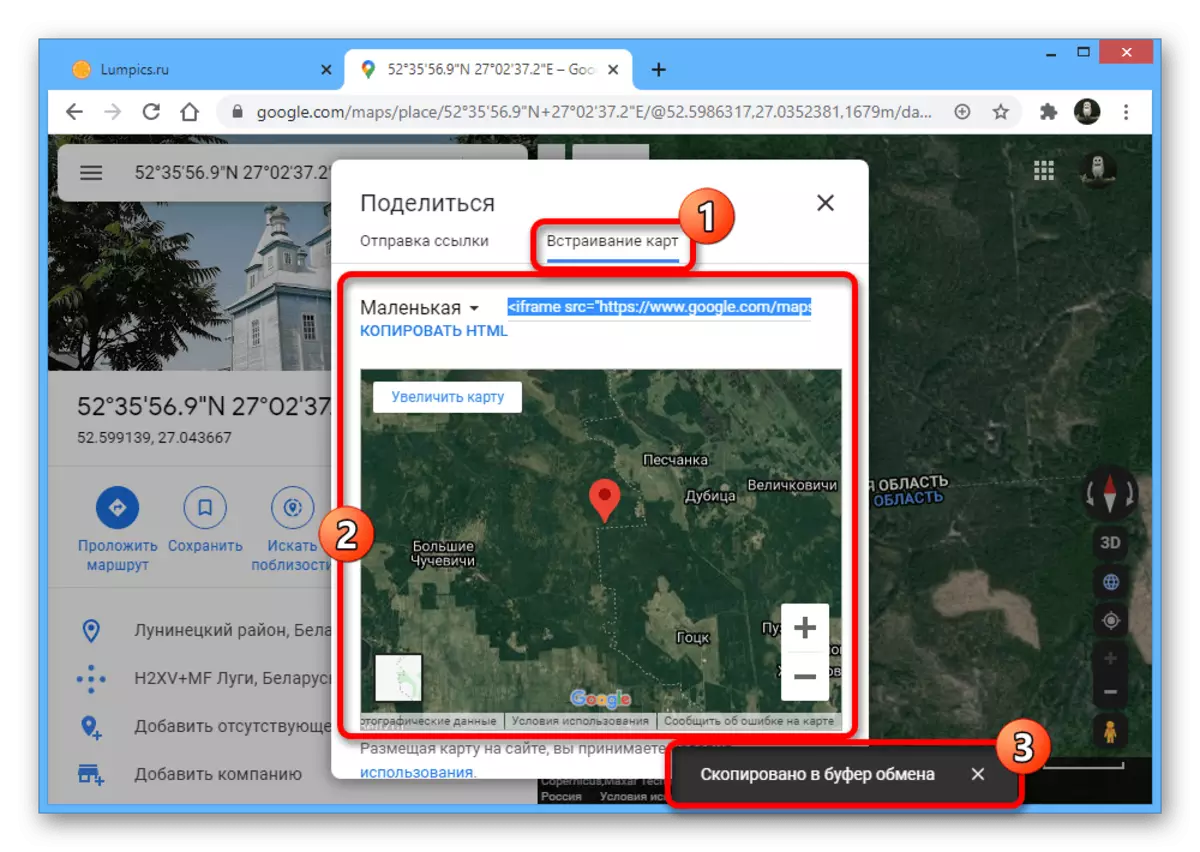
After embedding, the miniature version will be equally displayed for each user, providing some standard features of the Web Service.
- Separately, we note that you can share the label in another way, simply by copying the URL from the browser's address bar and sending it to the right place.


Option 2: Mobile application
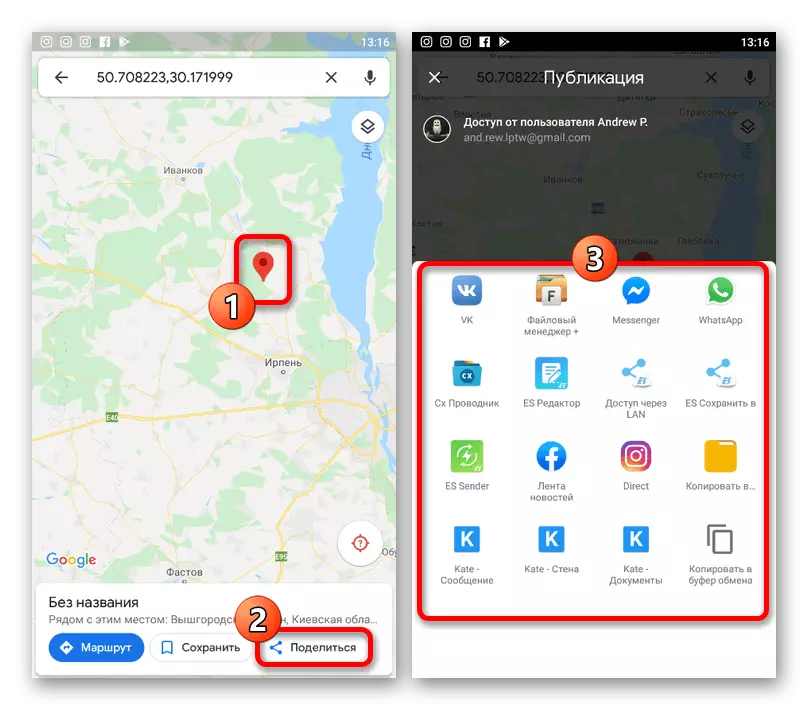
- The official MAPS mobile client for Android and iOS also allows you to set tags using standard tools. For these purposes, open the program, simply tap the desired point and hold for a few seconds before the marker appears.
- After that, information about the selected location will appear at the bottom of the screen. If you want to send a label position data, use the Share button by selecting one of the available options.
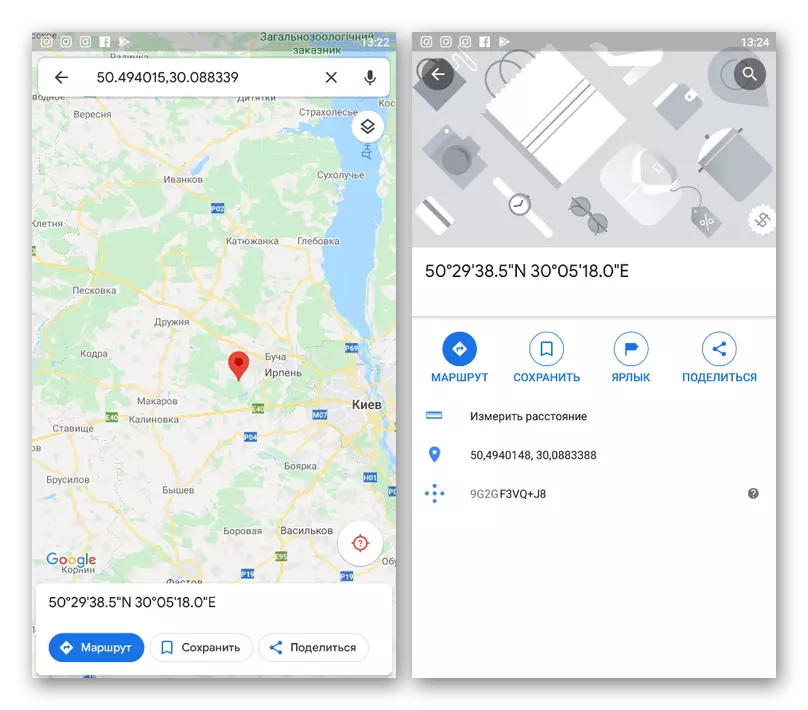
If necessary, you can easily touch the line with the coordinates to go to detailed information. Due to this, you can get much more data or perform some special actions like creating labels.

And although we will not consider the mobile version of the online service of Google Maps, it is worthwhile that this option also provides the ability to install the tag. For the most part, in this case, the instruction will be a similar website.
Method 2: Adding an organization
Google maps allow you to put not only temporary tags available exclusively by reference or by HTML code, but also add space on an ongoing basis. It can be useful if you are the owner of any company and want to simplify the search for the office for customers, referring to the place and specifying other data. In more detail, the process of adding the label was described separately.
Read more: Adding an organization on Google Map

Additionally, in addition to adding your own company, it also requires confirmation, you can click on the map and use the option "Add Missing Place". In this case, it is not necessary to confirm anything, as this will do the administration of the service, but also the likelihood of the advent of the desired tag is significantly reduced.
Method 3: Saving Place
On Google Maps there are special tools to quickly save their own places, which can later be browsed and even sent to other users to other users. This method is directly related to the first method described, but requires a few more action, at the same time providing the possibility of simultaneously browsing several points at once.Option 1: Website
- When using the website, open the main service page and select the desired location by setting the label in the same way as described in the first section of the instruction. Next, you must scroll through the block with detailed information and use the "Add Label" button.

Fill in the text box by specifying the name of the tag, and confirm the creation using the "Add Label" link in the same pop-up block. After that, the marker on the map will be repainted in blue.
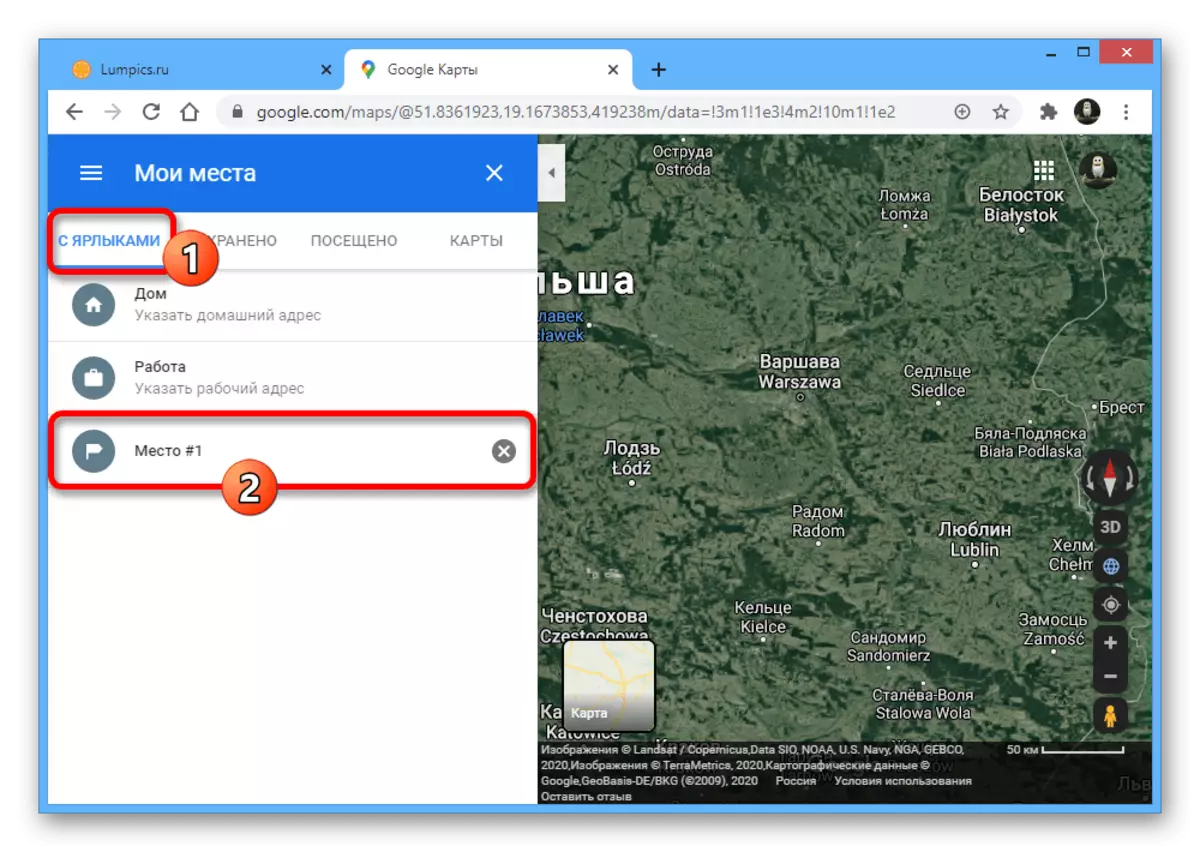
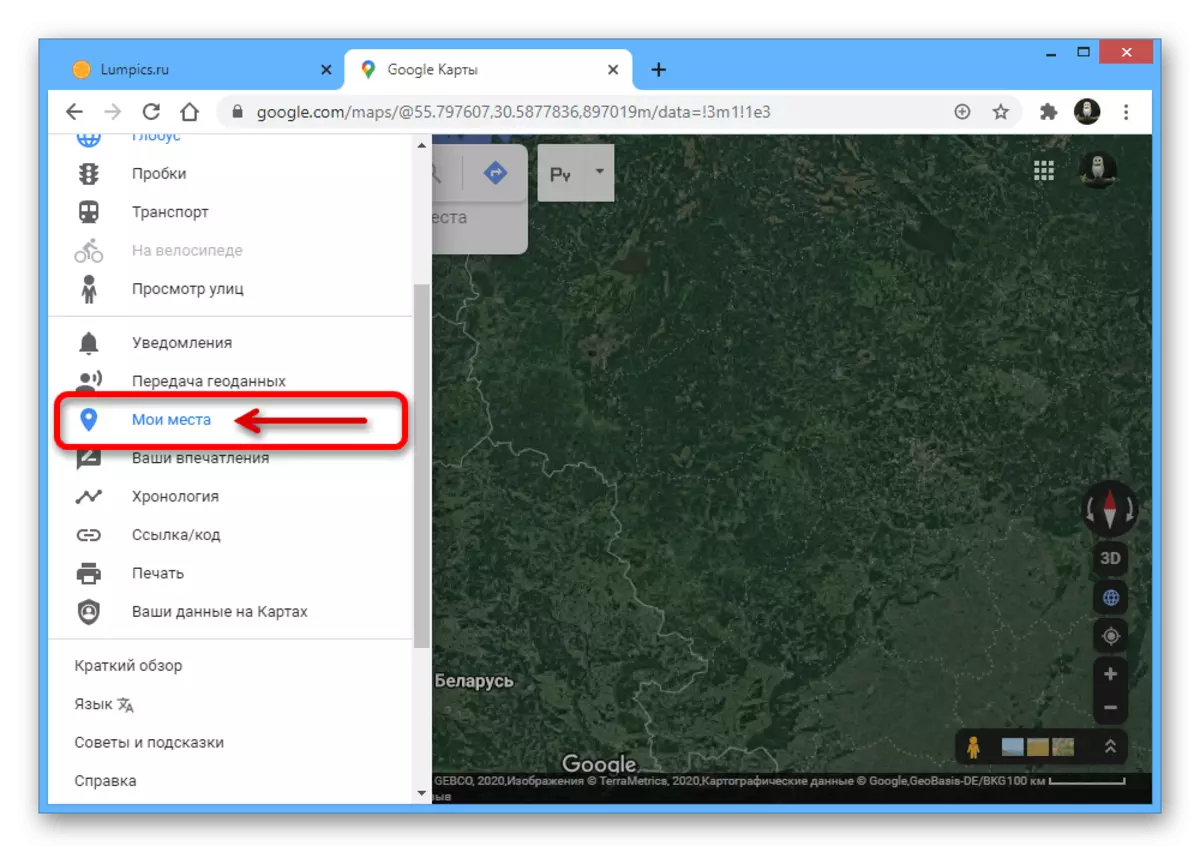
- Alternatively, as well as in order to add common access to a large number of labels, you can use another partition. To do this, click on the main menu icon in the upper left corner of the service and go to the "My Places" section.
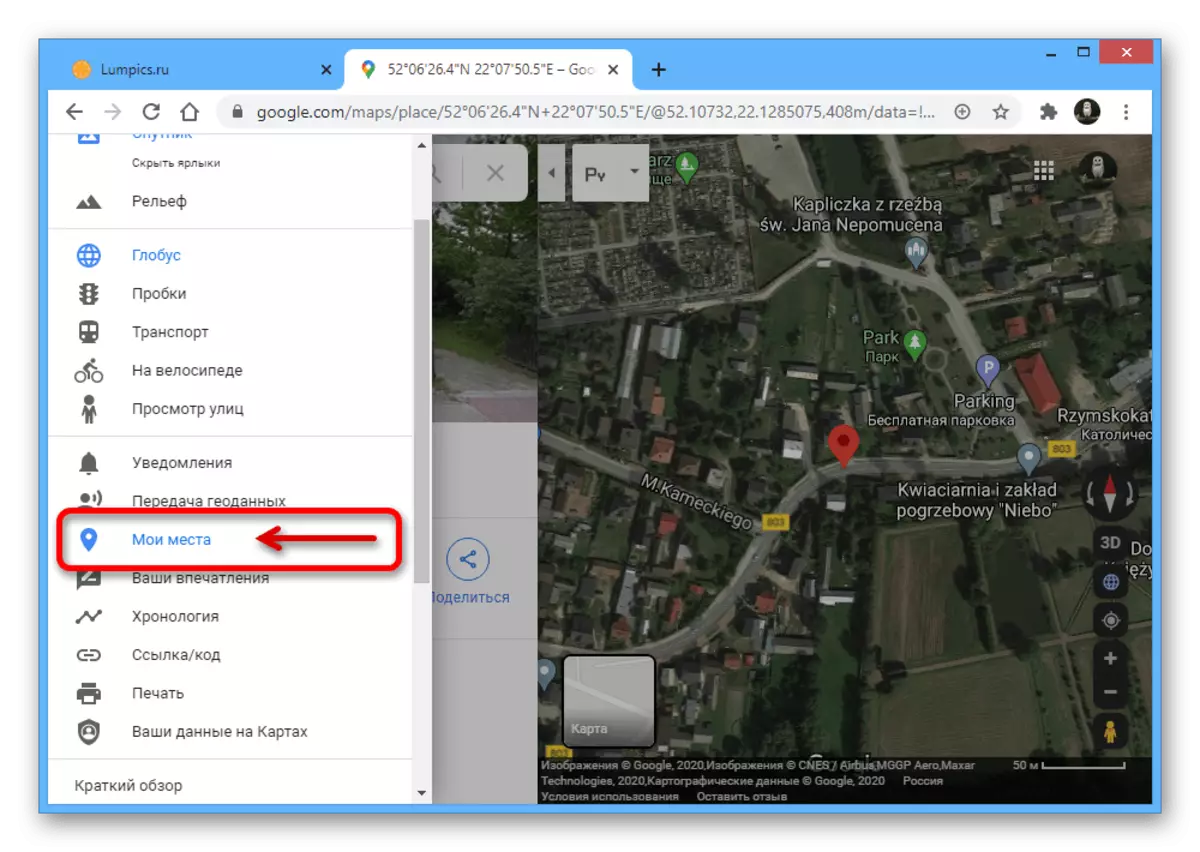
Here, on the starting tab, "with labels" there are all places added to the previously specified method.
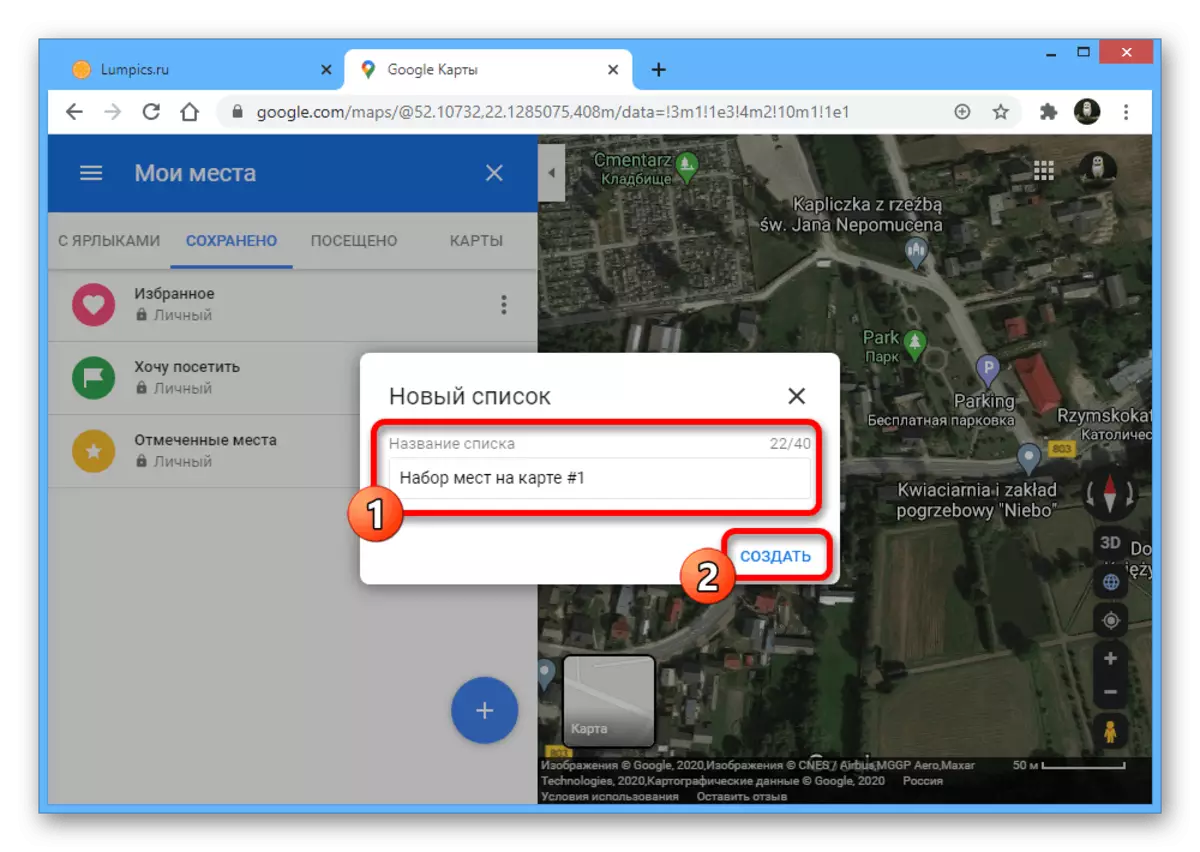
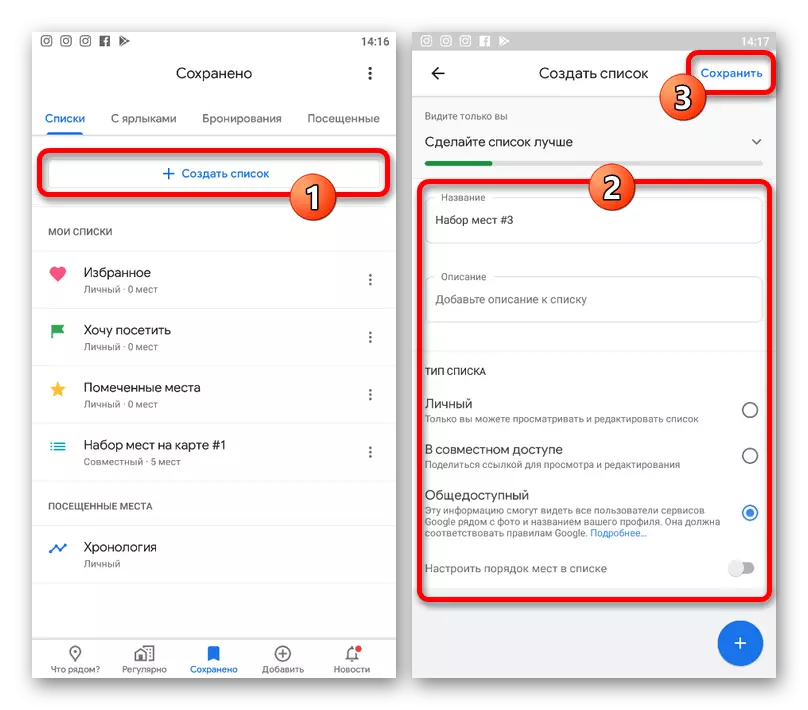
- Open the "Saved" tab and click on the "+" icon at the bottom of the list.
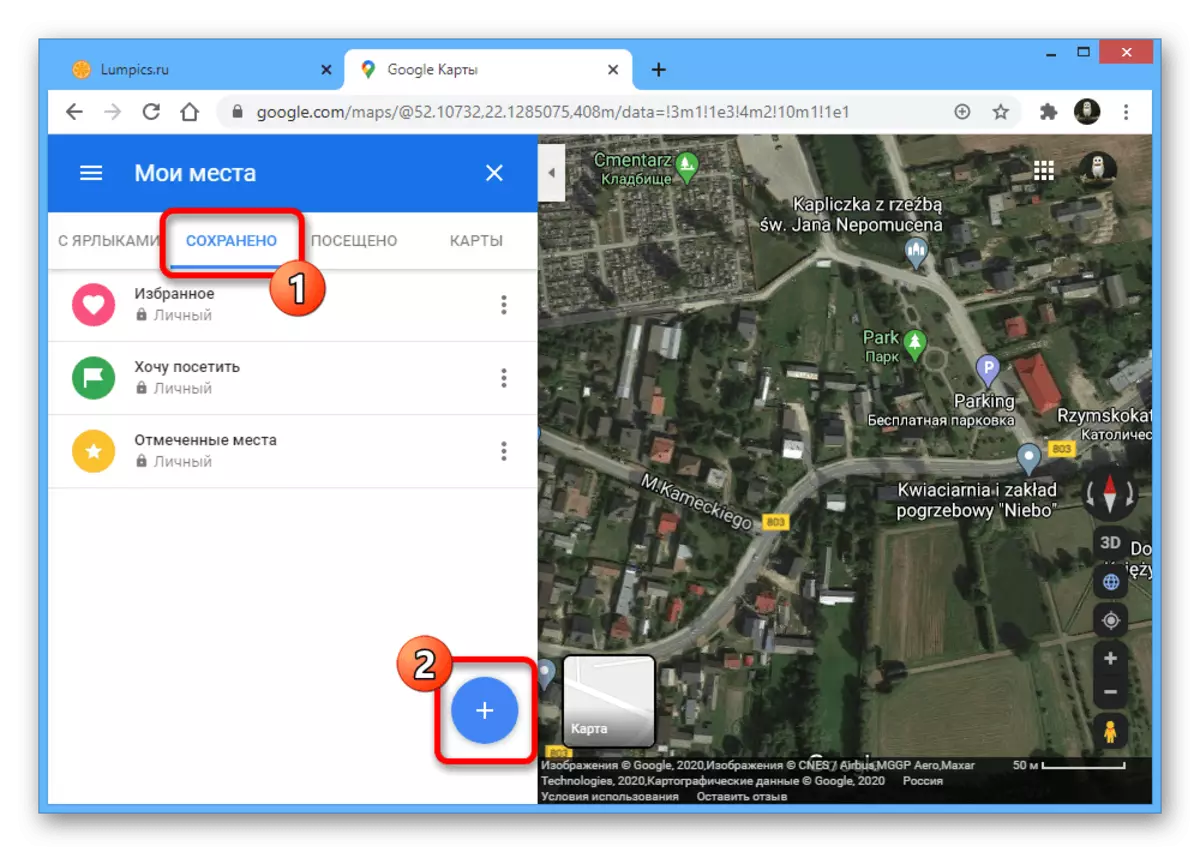
Specify any convenient name, given the restrictions in 40 characters, and click "Create".
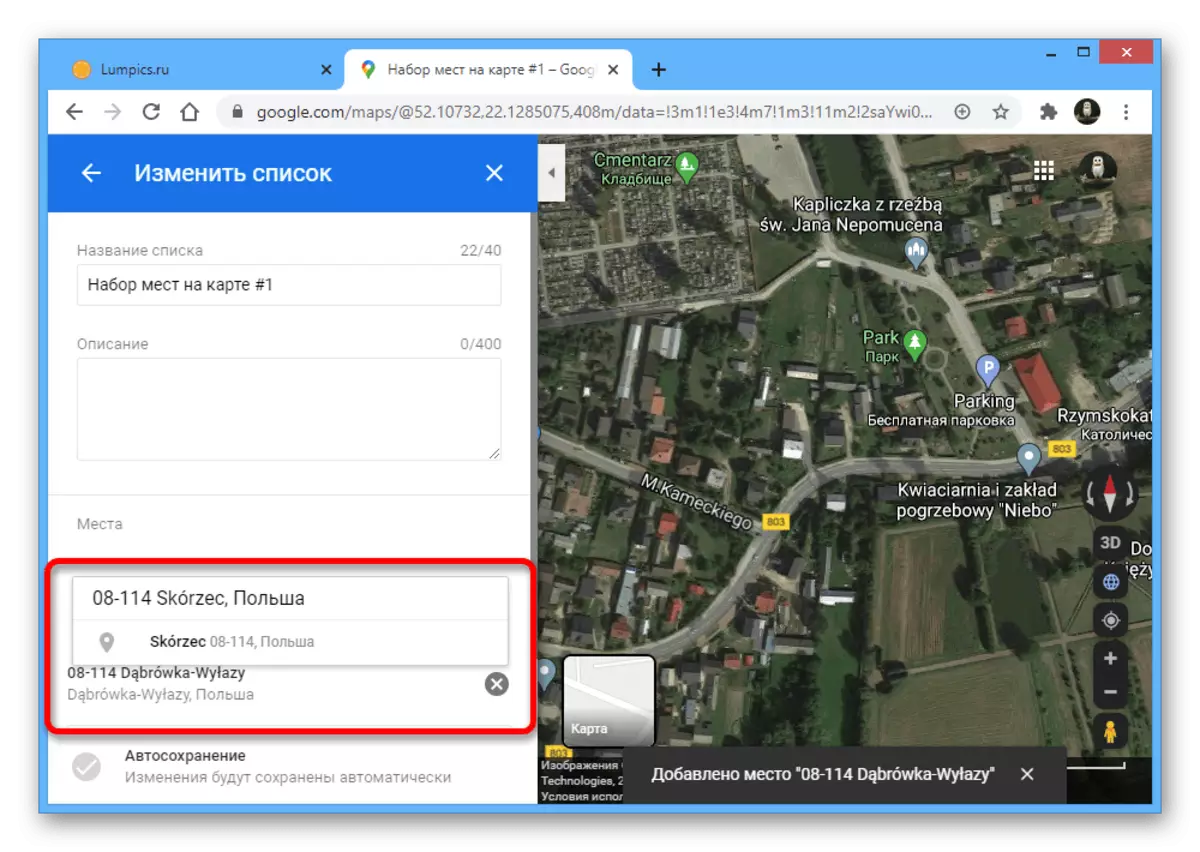
- After switching to the "Change list" section, in the "Place" block, click on the "Add place" link to go to the add.
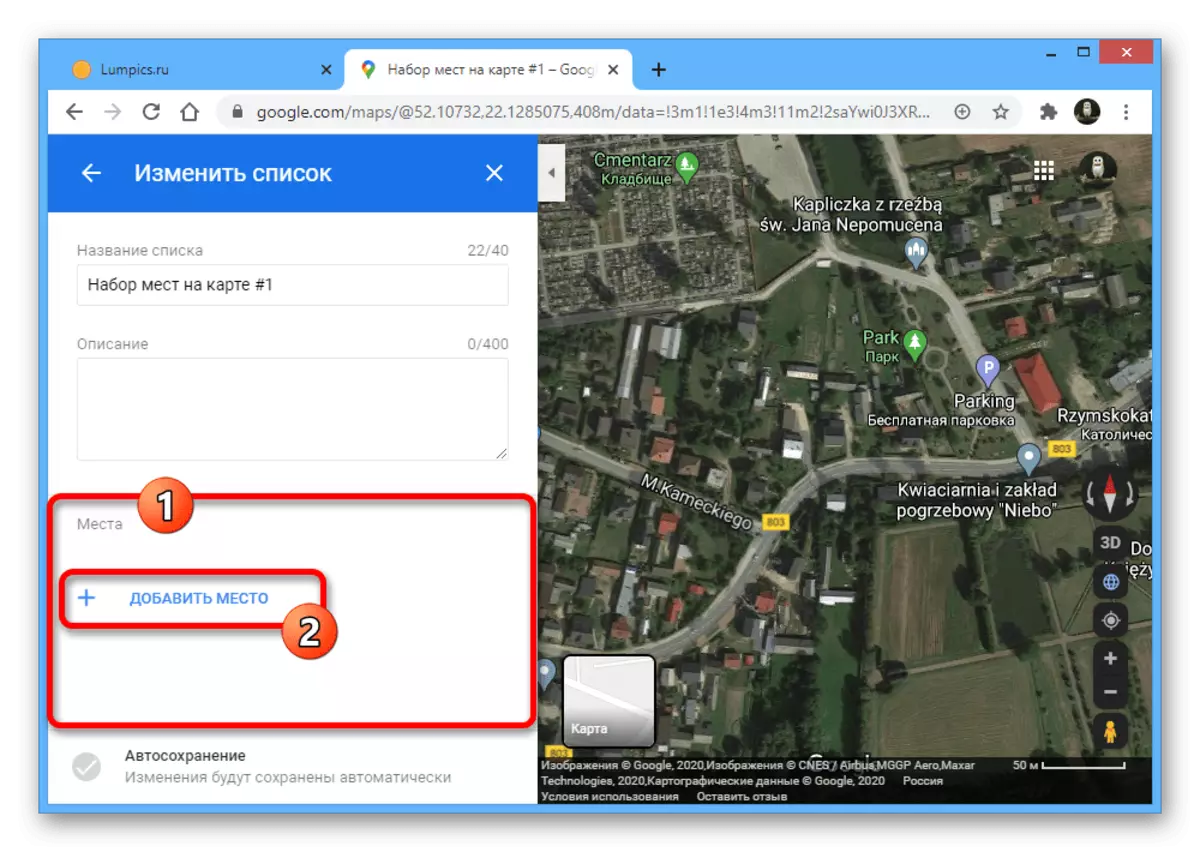
Fill in the presented field "Search for a place to add" in accordance with the requirements. You should use or accurate address, or coordinates from the Place Card.
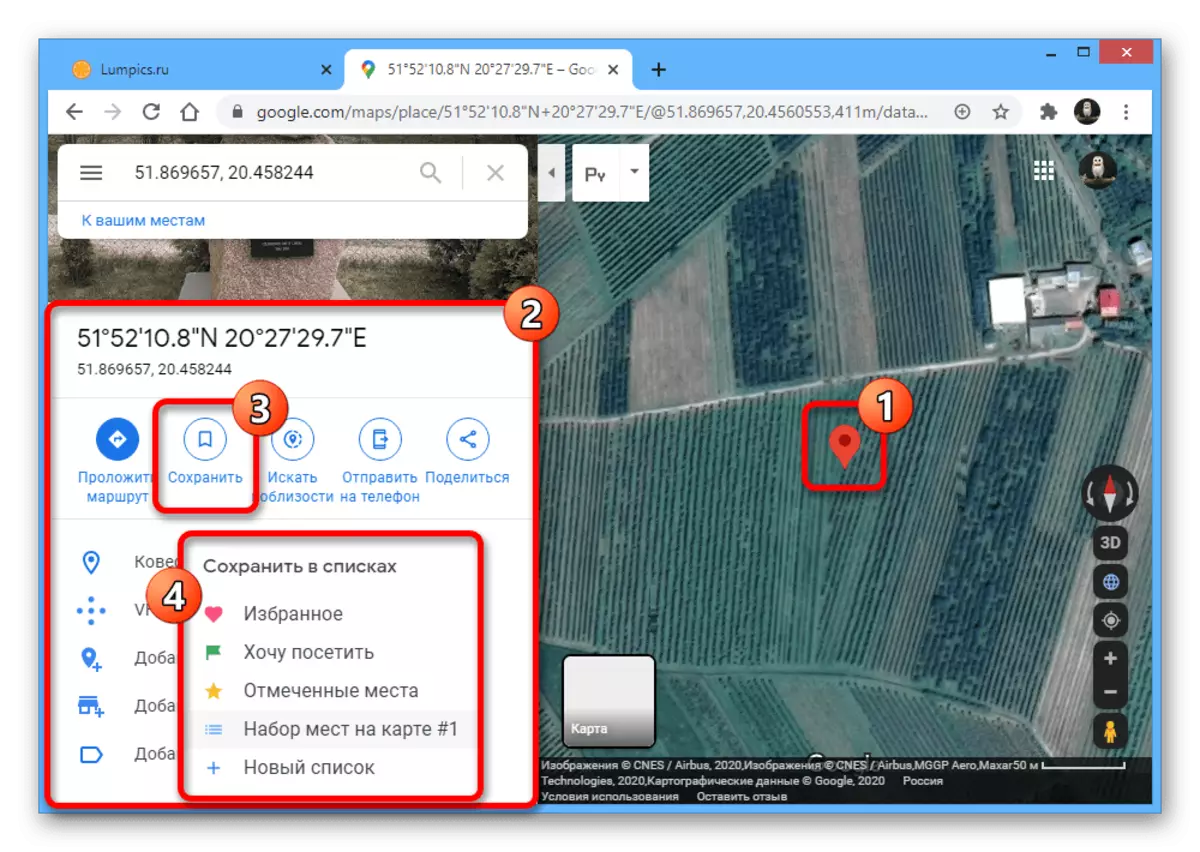
- Alternatively, if you cannot use the coordinates, set the label in the usual way, open the card with the description and click "Save". After that, it will be possible to add a point to one of the lists.
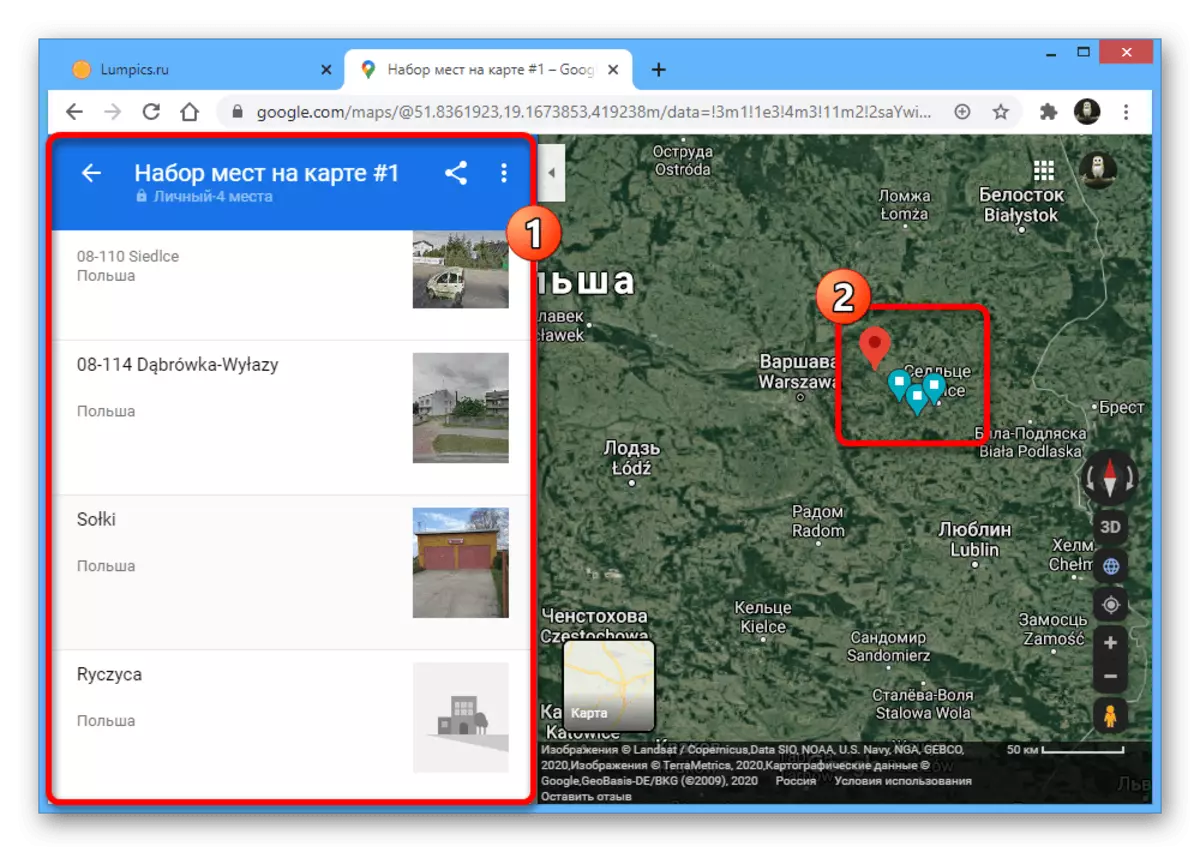
- When the necessary labels are installed, go back to the "My Places" list and select the list you have just. As a result, all points will be displayed on the map without changing scale.
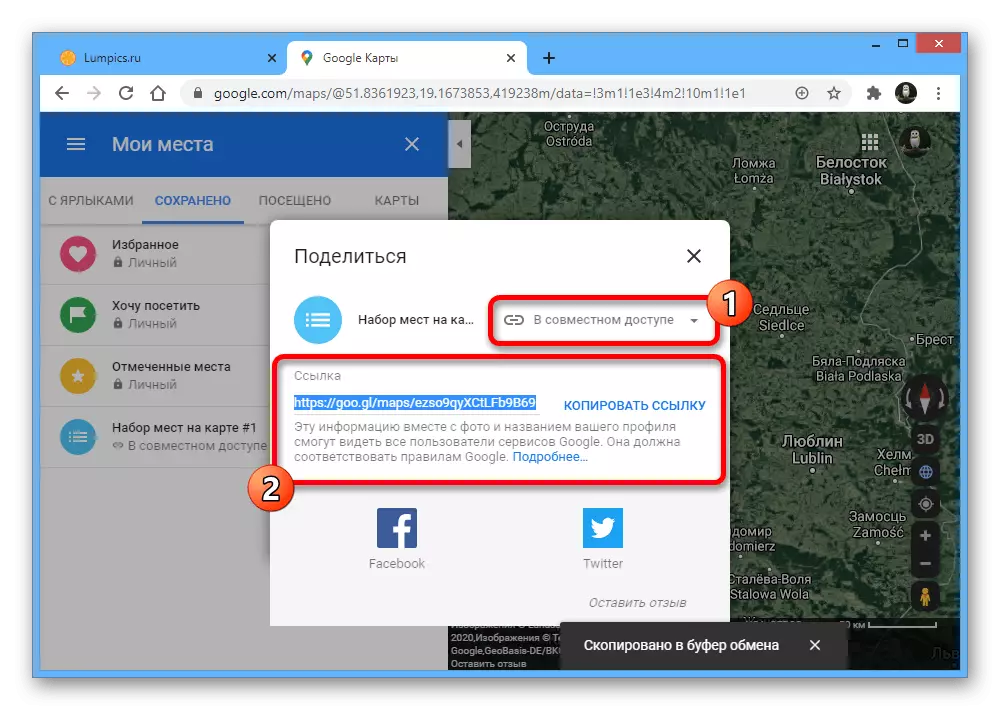
- To share the list, next to the set of places on the Saved tab, click on the three vertical points icon and select "Share the list". This parameter is available not only for new options, but also for the "Favorites" and "I want to visit."

Use the Create Link button to generate the address address and at the same time automatically enable sharing.

The end link can be sent and published in different places. When used, even if the user is not authorized to google maps, in any case the list with tags will be opened.

Option 2: Mobile application
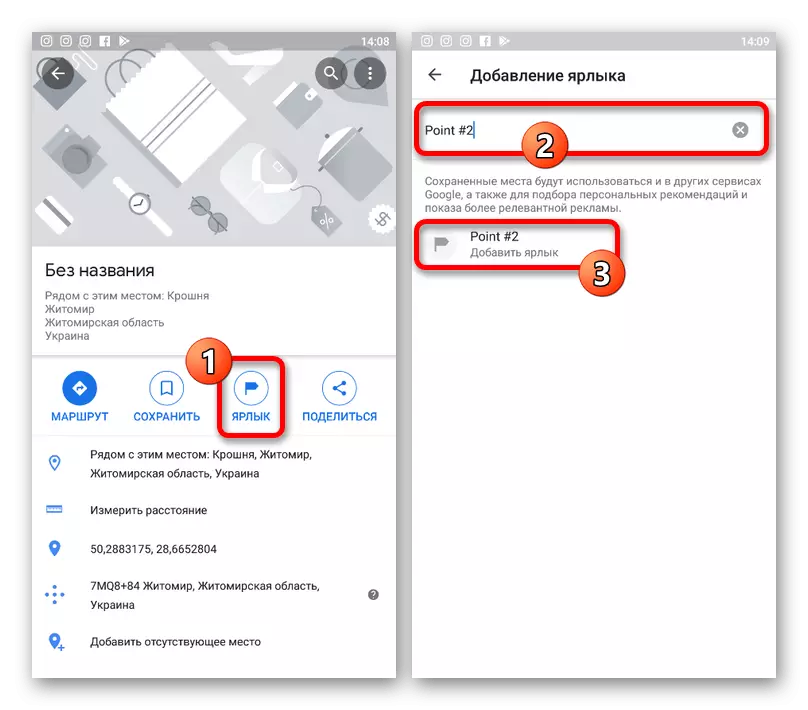
- Through the Mobile Maps Mobile Client, you can also save your own tags. First of all, open the application, install the marker by a long point clamping and tap the location on the bottom panel.

Use the Label button and on the page that opens, specify the desired name. After that, the corresponding blue label appears on the map.
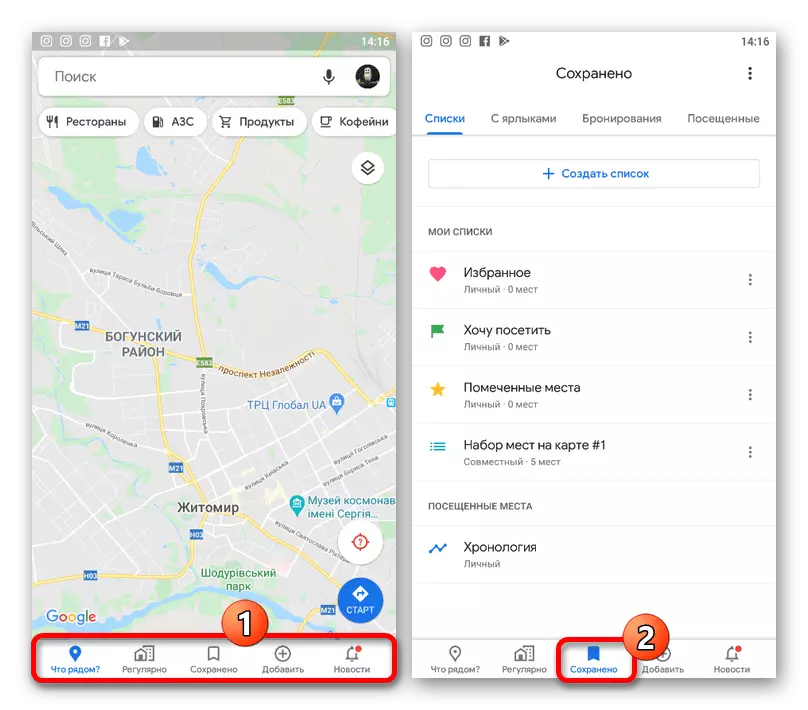
- With much more comfort, you can use another section of the application. To do this, through the Main Menu, click the "Saved" tab and go to the Lists page.
- To create a new list, for example, you can share without worrying about saving personal data, click Create List. Fill in the fields presented in accordance with the requirements, select Privacy Settings and click "Save" in the upper right corner.
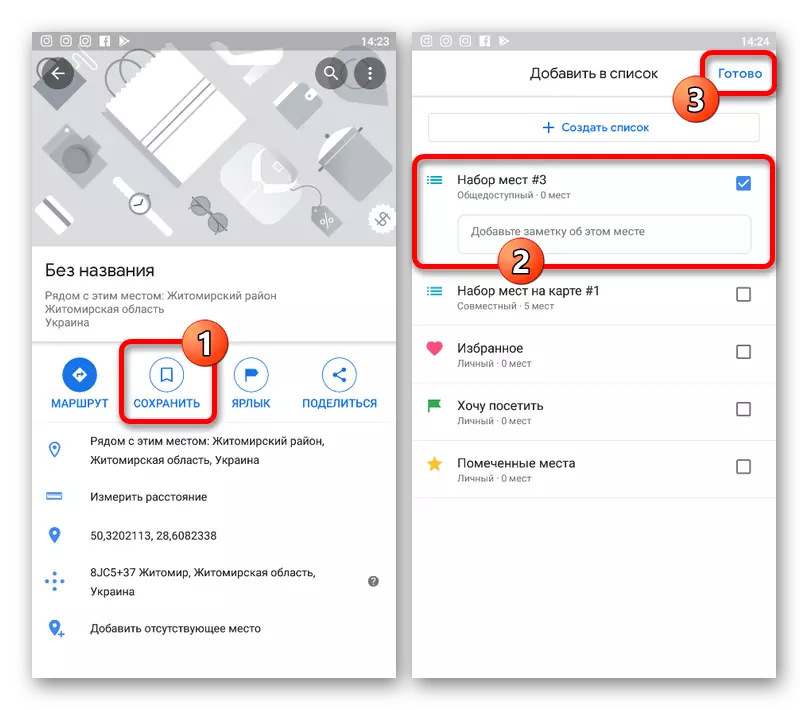
- To add new points, open the map and hold the place to make a sample. After that, tap the block called the region at the bottom of the screen.
- Use the "Save" button, in the list below, check the box next to the desired option and click Finish in the corner of the page. This action can be repeated an unlimited number of times from each of the necessary labels.
You can send a list of seats by opening the desired partition on the "Saved" page and clicking Share. At the same time, it is easy to view the labels to click "Open Map" on the same screen.


The mobile application in terms of management of labels is not very different from the website, but, as can be seen, provides a slightly more convenient interface. Of course, no matter how you choose options, places are saved in both version of the service.
Method 4: Tag in my maps
Except in Google Maps, the labels can be installed and saved for quick access using the additional service of my cards. This method has a lot of advantages over other, since the set sets are not limited to some places alone, but may contain measurements, routes and many other information.
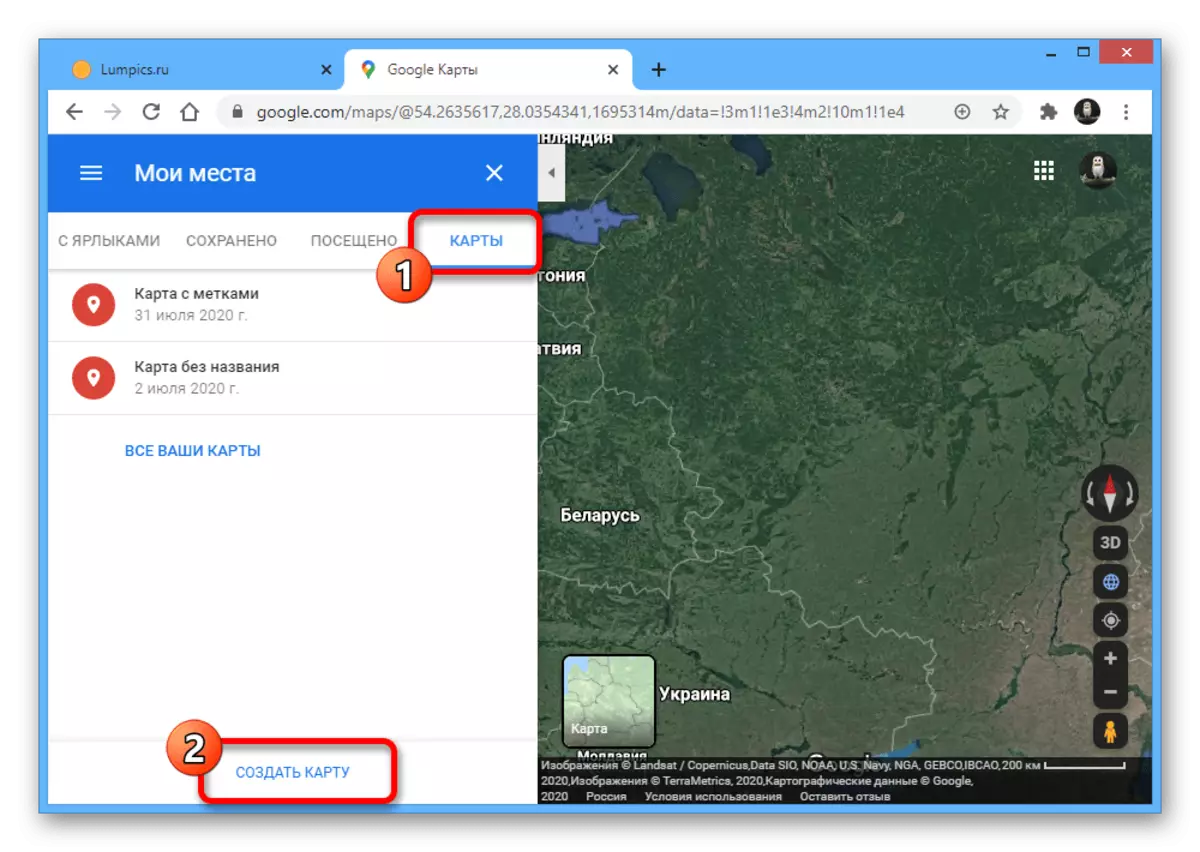
- Go to the service site, expand the main menu in the upper left corner and go to the "My Places" section.
- Click on the "Maps" tab and use the "Create Map" button at the bottom of the list.
Once upon a separate page, click on the Unit Map block and enter the name at your discretion.
- To add a label, increase the scale, click on the "Add marker" icon on the top of the toolbar and click the left mouse button in the right place.
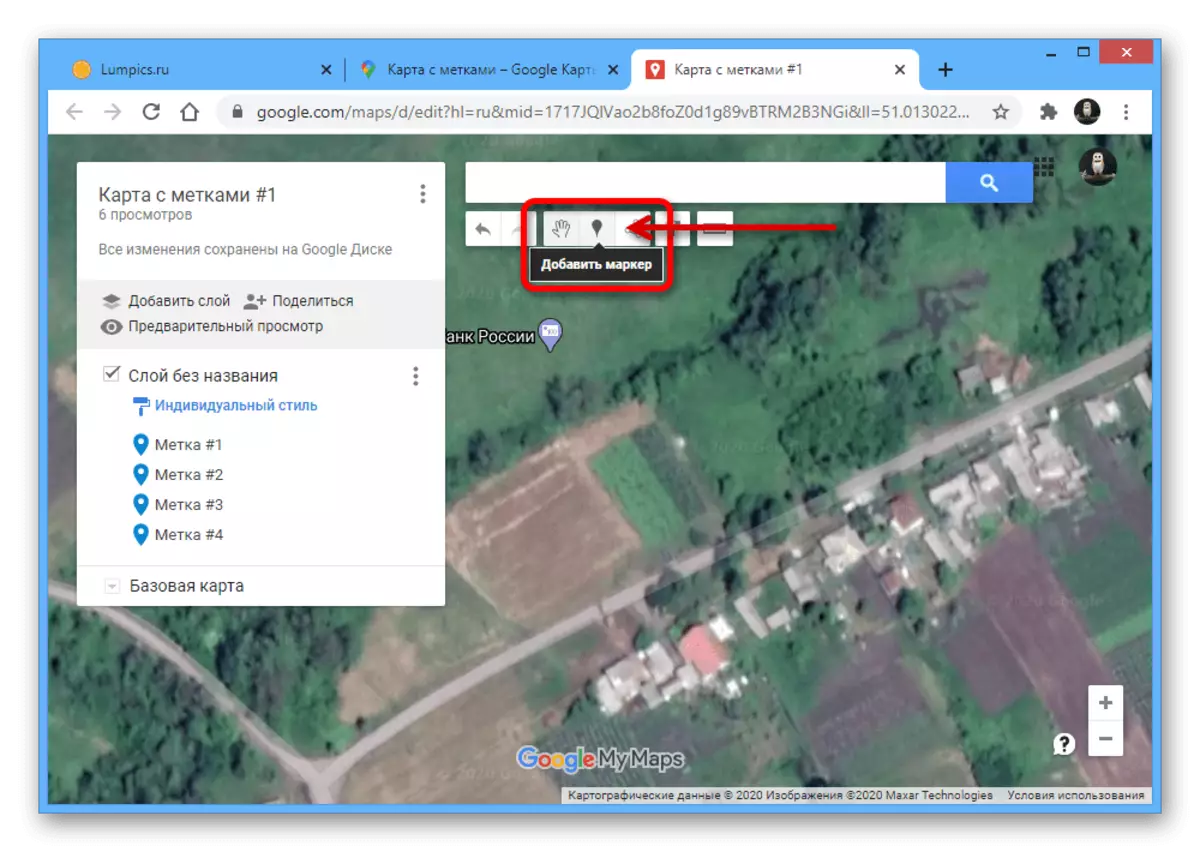
Fill in the following fields optionally, add additional information like photos, and click "Save". As a result, a new point will appear on the screen.
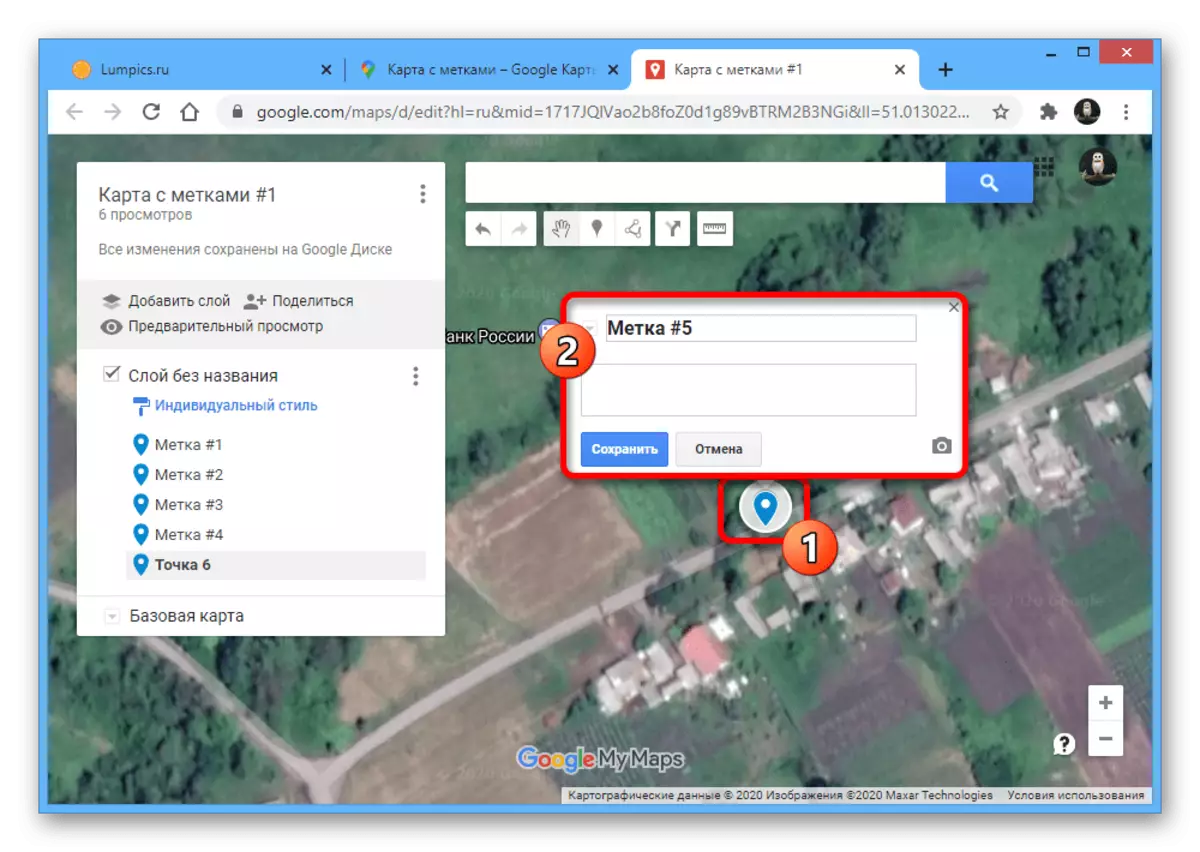
Using the list in the upper right block of service, you can customize tags. For example, you can change the color of individual points.
- After completing the label and add additional information, close the Service tab and update the Google Maps page. After that, go to "My Places" again through the main menu and open the Maps tab.
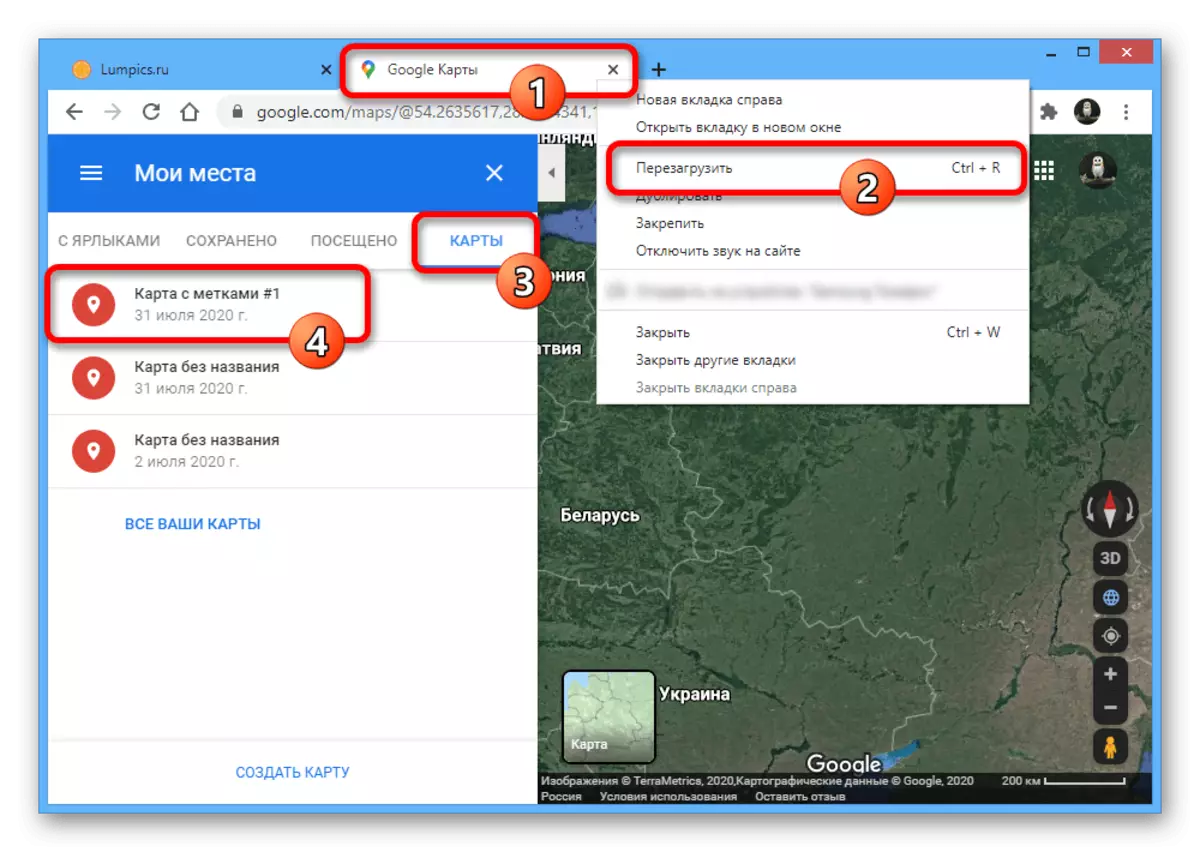
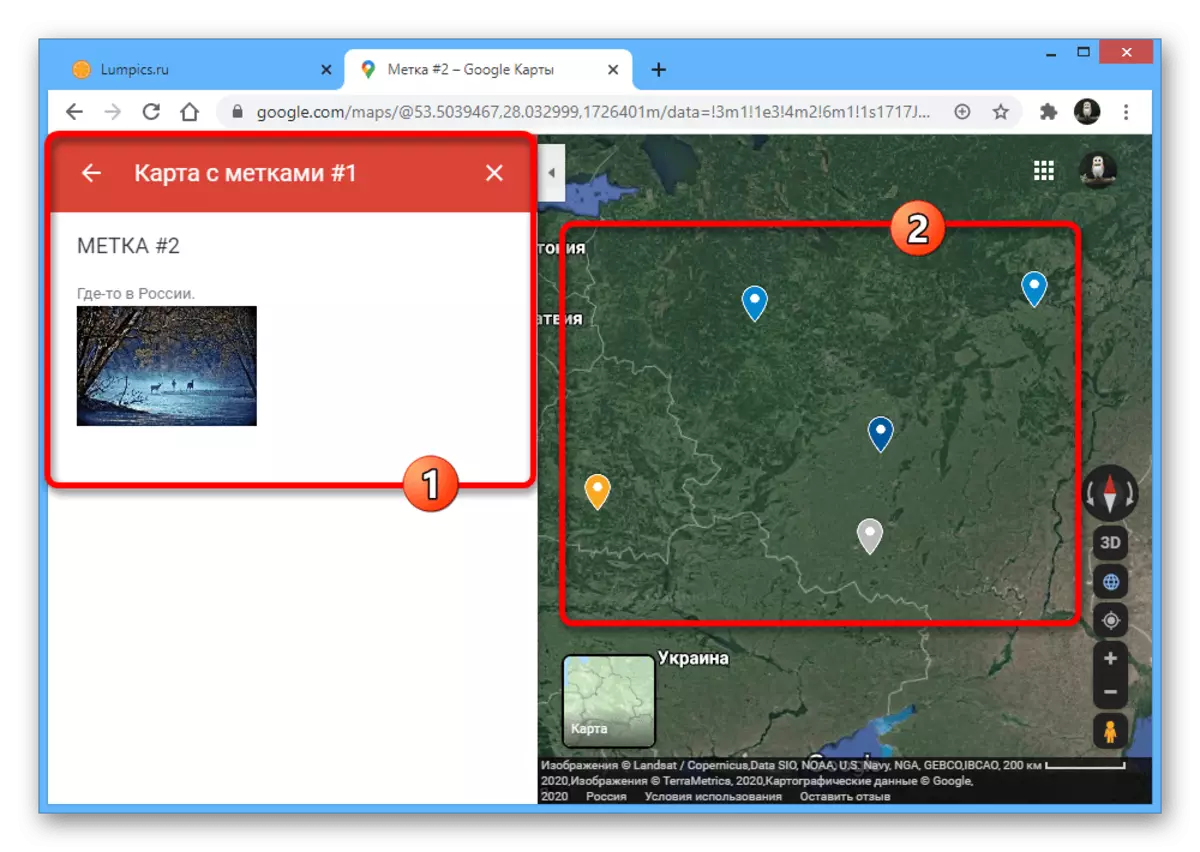
To display labels on the main map, click the desired option in the list below. As a result, detailed information appears with all your objects.


The presented method is not limited to the PC version, however, on the phone to use my cards, a separate application will be required, which is hardly connected with Google Maps. Because of this, the use of the method is strongly limited.