

For most modern users, the Internet access point is a computer, including running Windows 7, and today we will tell you how to configure an automatic Internet connection in this OS.
Configure automatic Internet connection in Windows 7
You can solve the set task with three ways: creating a job in the "task scheduler", setting the label to autoload or manipulation with the system registry. Let's start with the simplest option.Method 1: "Task Scheduler"
The task scheduler snap-in is little known to the ordinary user, however, is a powerful tool for automating various operations, including Internet connections.
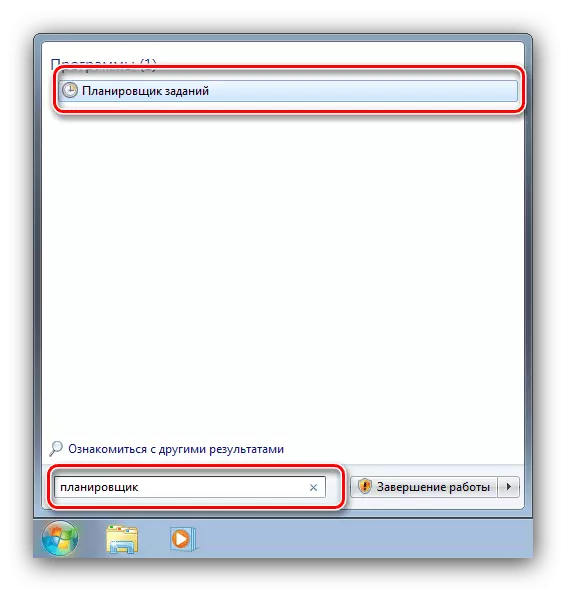
- Open the "Start" and type the word scheduler in the search bar. Then click on the result found.
- Wait until the snap-to-slip downloads all the necessary information, after which in the menu on the right, use the "Create a simple task" item.
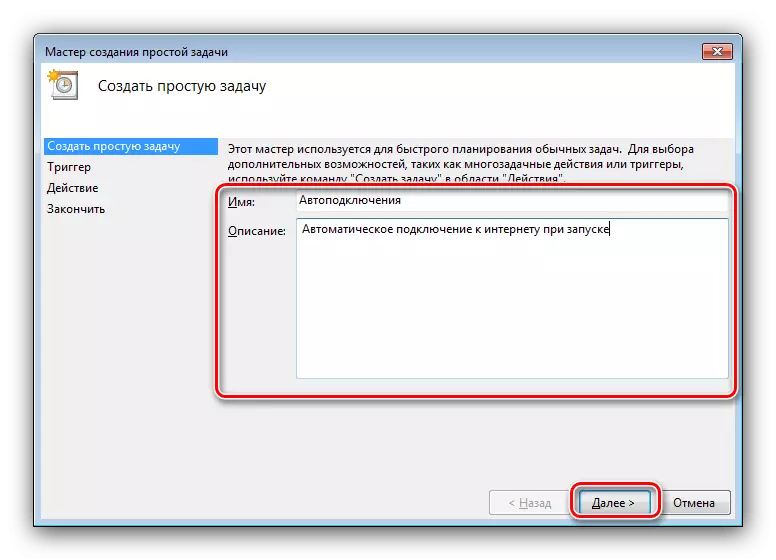
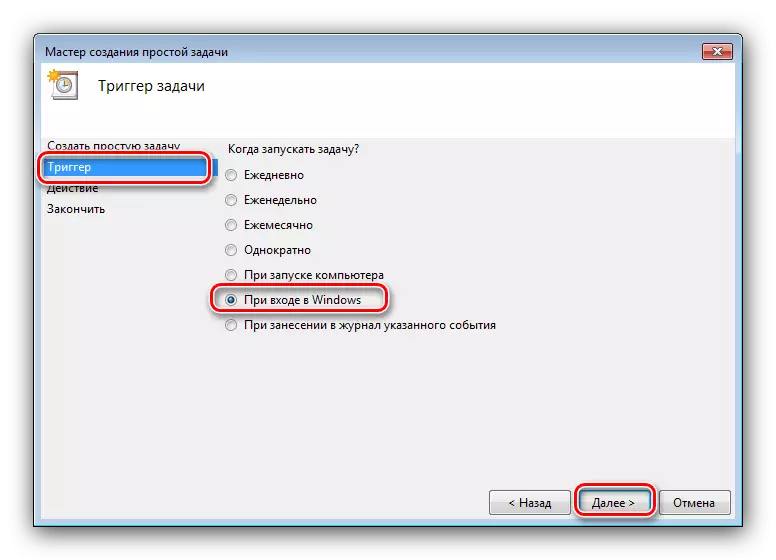
- Tools will start. Enter the name and description, if required, and click "Next".
- As a trigger, set the item "when entering Windows".
- The desired action will be "Starting the program", check this item.
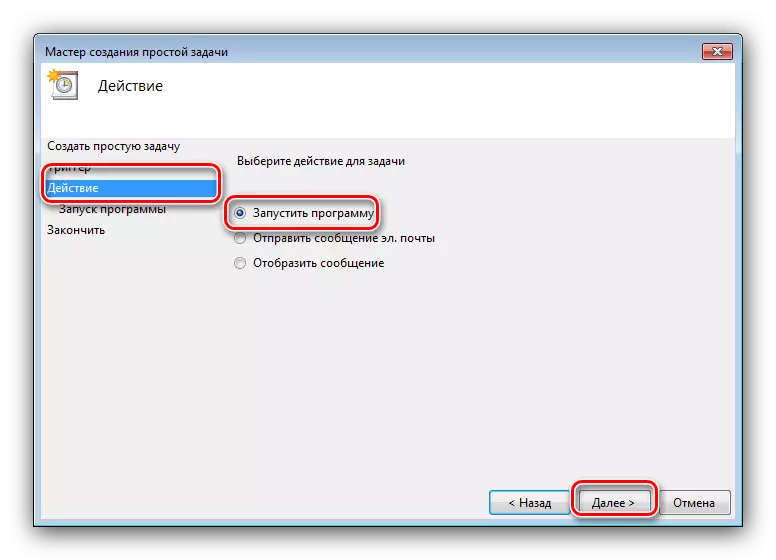
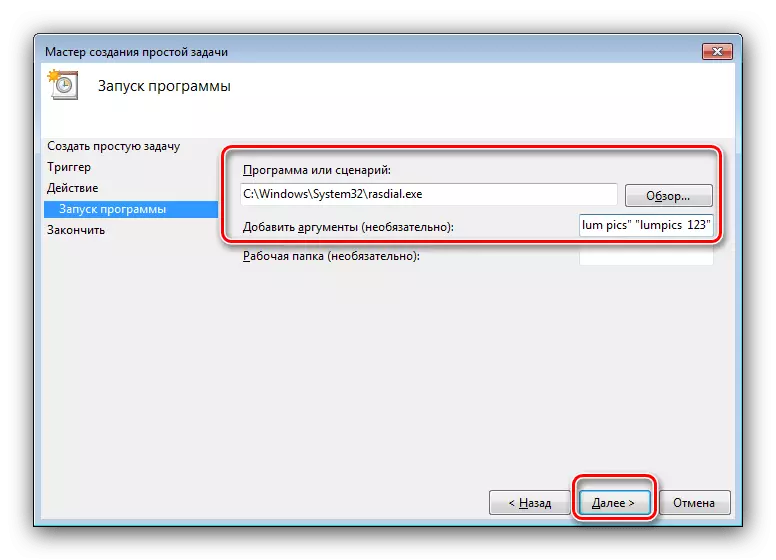
Next, you need to enter the path to the executable file.
For Windows 7 x32 - C: \ Windows \ System32 \ Rasdial.exe
For Windows 7 x64 - C: \ Windows \ syswow64 \ rasdial.exe
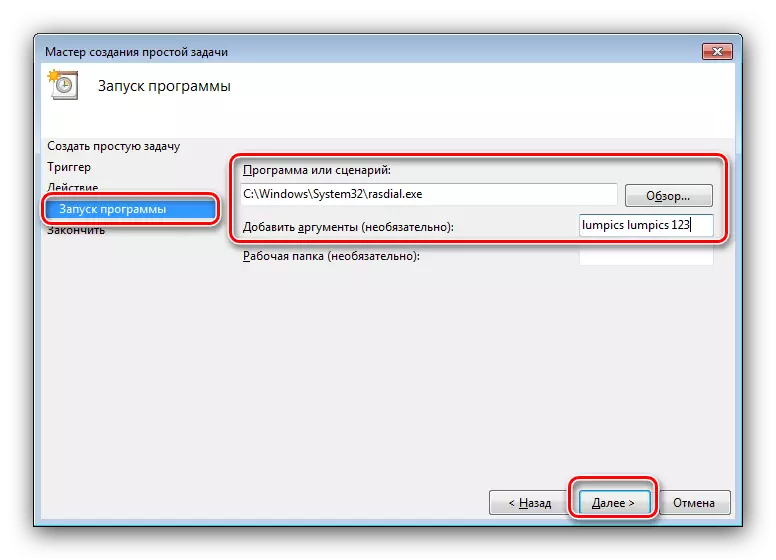
In the "Add Arguments" field, enter the login and password of the connections by the following scheme:
*Login: Password*
If a gap is present in the credentials, then the login or password should be taken in quotes. Example:
*"Login: Password*
*Login: Password"*
- At the end of the procedure, click Finish.

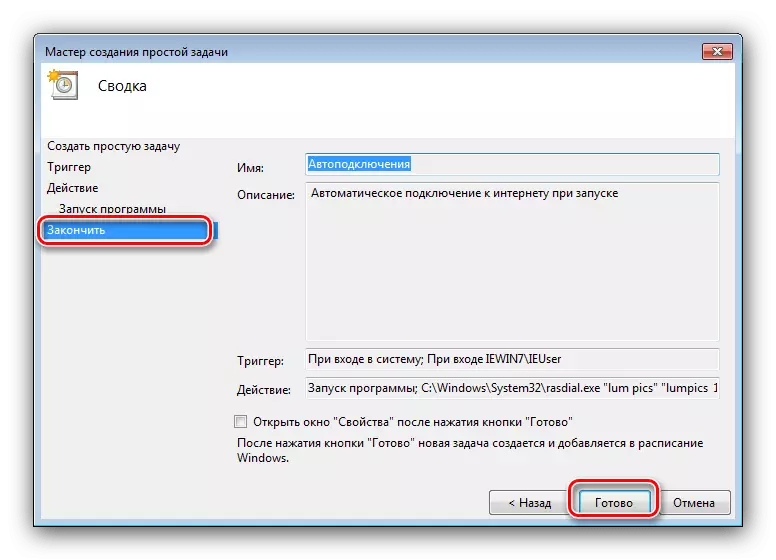
Now when you enable the computer, the Internet will be connected automatically. However, in some cases, the described method may not work, so we recommend familiarizing yourself with the rest.
Method 2: Adding a shortcut in autoload
An alternative to the "job scheduler" will be adding a connection shortcut to autoload. This happens according to the following algorithm:
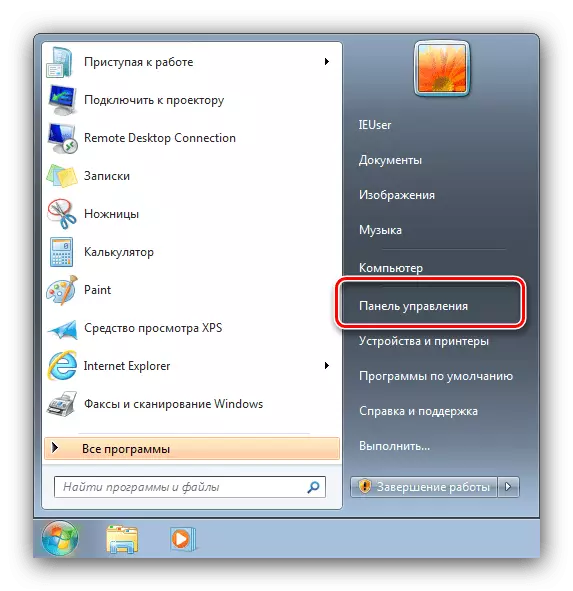
- Call the "Control Panel" in any available way - for example, through "Start".
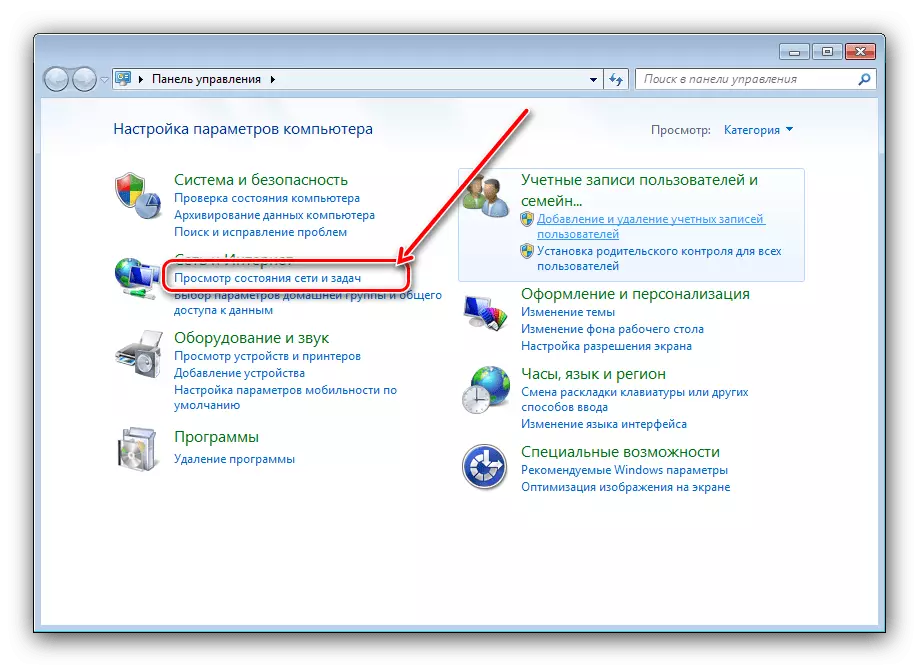
- In the "Control Panel", find the "Network and Internet" block - you need to click on the link "View network status and tasks".
- Next click on the "Changing Adapter Settings" in the Left menu.
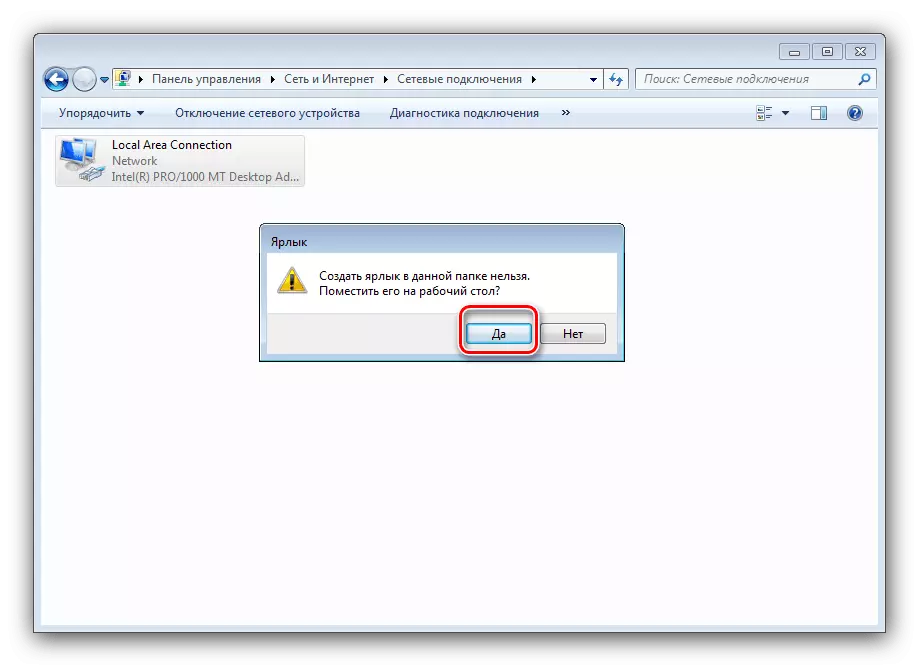
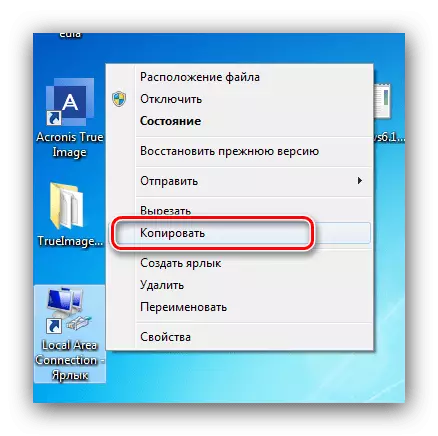
- In the list of adapters, find the one through which the Internet connection occurs, select and click PCM, then select the "Create Label" record.
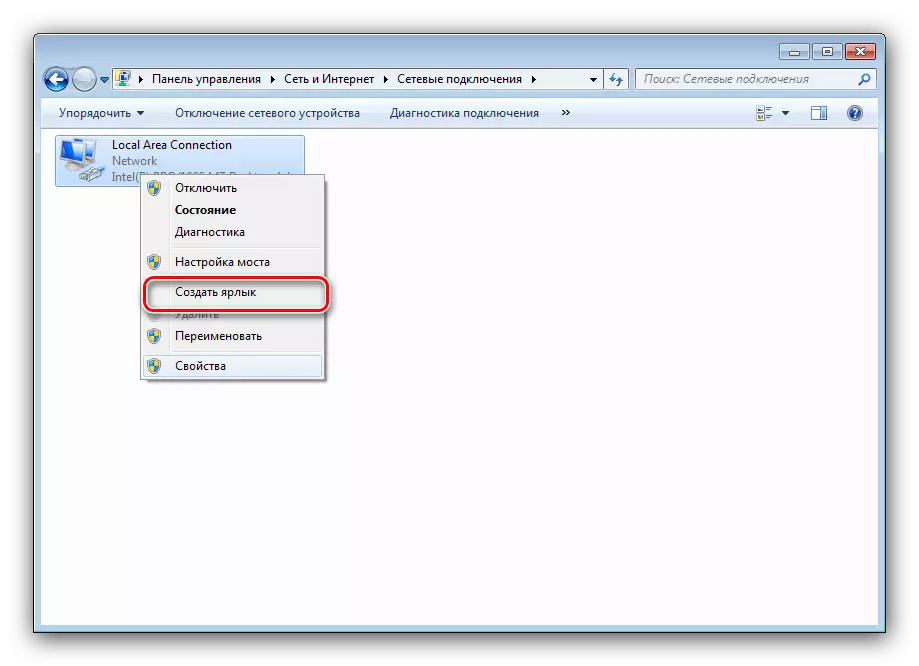
In a warning, click "Yes."
- The adapter label will appear on the "desktop". Highlight it and copy any convenient method - for example, by combining the Ctrl + C keys or through the context menu.
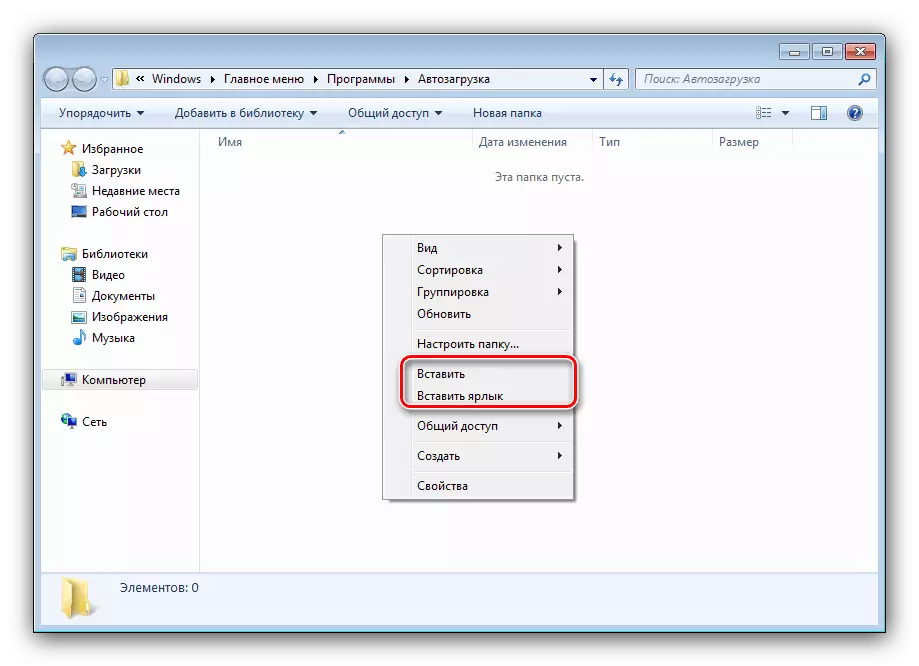
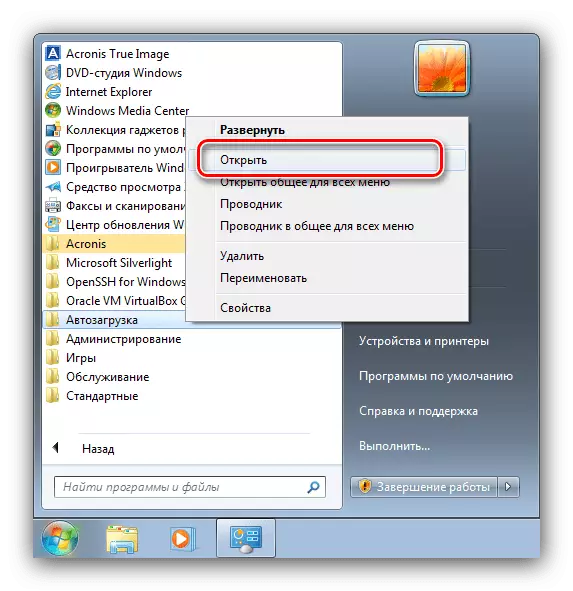
- Next, open the "Start", select the "All Programs" option and find the "Auto-loading" directory list. Click on it with right mouse button and select "Open".
- The autoloading directory will open in the "Explorer" - insert a shortcut copied earlier into it.
You can restart the computer and check whether the Internet will now be connected without your participation.

This method is more time-consuming than the previous one, but more efficiently.
Method 3: "Registry Editor"
The third method that will solve the problem under consideration - editing the system registry.
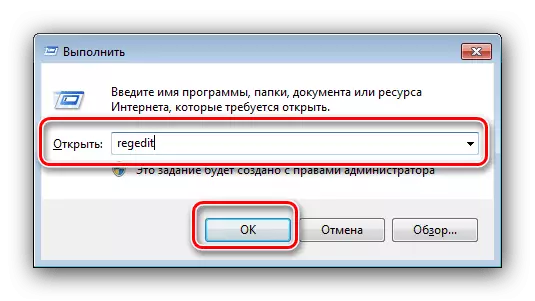
- Run the Registry Editor - for example, entering the REGEDIT command in the "Run" window.
Lesson: how to open the registry editor in Windows 7
- In the opened snap, go to the address:
HKEY_CURRENT_USER \ SOFTWARE \ Microsoft \ Windows \ CurrentVersion \ Run
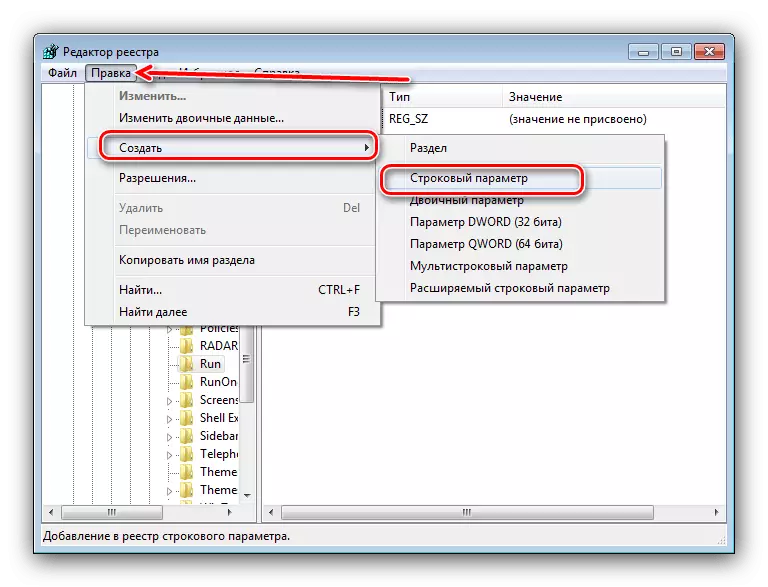
After the transition, use the "File" menu items - "Create" - "String Parameter".
- Set any name to the parameter.
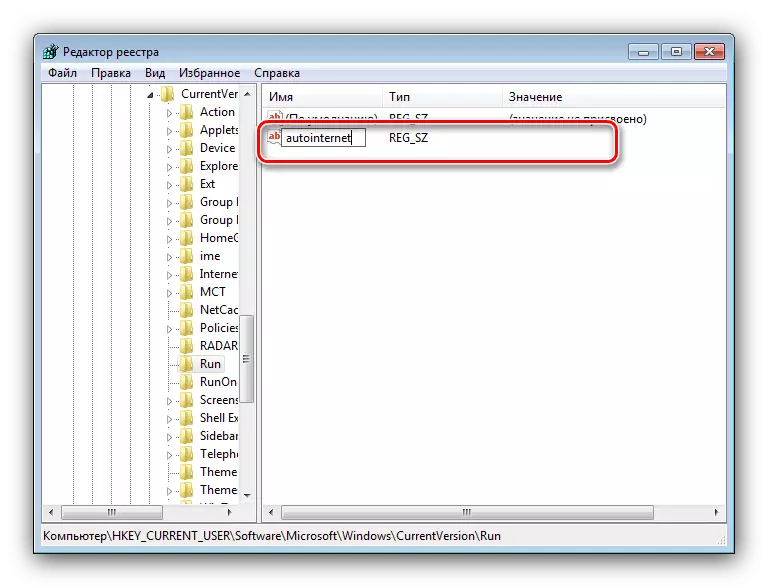
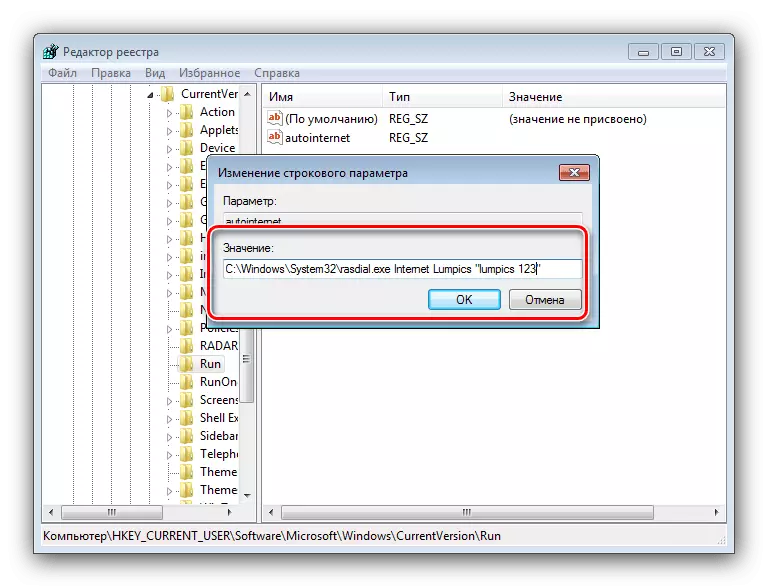
Next double click on it with the left mouse button. The edit window opens. In the "Meaning" field, enter:
C: \ Windows \ System32 \ RASDIAL.EXE Password Login Password
Instead of login password, enter the credentials received from the provider. Also remember the rule of spaces (see method 1). After entering all the necessary information, click "OK".
- Close the registry editor.
This method is a slightly different option to start the Internet through autoload.
Conclusion
This end the analysis of the methods by which you can configure automatic internet connection. As you can see, the procedure is quite simple, and does not require some special skills from the user.