
However, some users when trying to capture a screen in the program face a problem: black screen as the recording, as well as in the preview window OBS Studio. The problem is common, but it usually does not solve the difficult - this will be discussed later in the article.
- cause of the problem
- Correction of black screen in OBS
- Video instruction
cause of the problem
If a graphics card drivers, with both discrete and integrated (with two GPU) okay (if not - first of all fix it), a common cause of the problem - the choice program not to display adapter that is used to display images to monitor, with the problem often occurs on laptop computers, but also on the PC logic will be the same.Let me explain in more detail:
- If your laptop is equipped with, and discrete and integrated graphics card, for example, NVIDIA GeForce and Intel HD Graphics, physically connecting the laptop screen can be done through the integrated video interface (and that's OK: allows you to not use the GPU discrete, when it is not required).
- When you run the OBS Studio, a program usually used for more powerful graphics card.
- As a result, when capturing video from the screen, the image which is output from the integrated video in the preview window and in the recorded video we get a black screen.
Solving the problem of black screen when capturing screen OBS Studio
The following is an example of solutions for notebook graphics cards with Intel HD Graphics and NVIDIA GeForce, first - for Windows 10, and then - for the previous OS versions. By analogy, the problem can be solved in the case of a GPU from AMD:
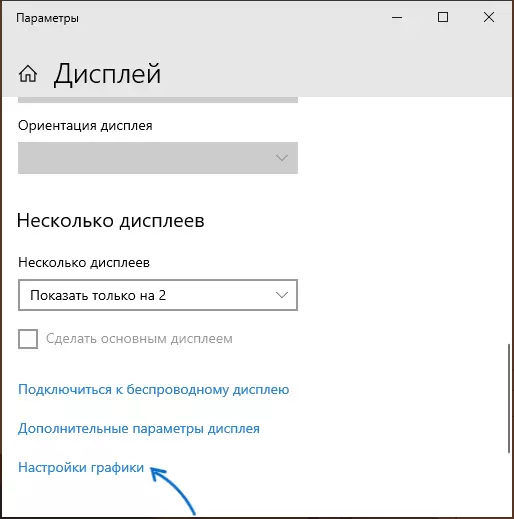
- In Windows 10, go to the settings for the display: press the right mouse button on the desktop and selecting the "Display Settings" or Start - Settings - System - Display. Open the item "Graphics Settings".
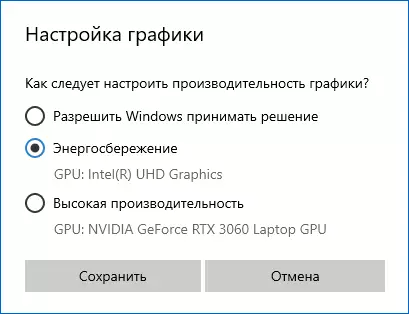
- In the "graphics performance settings" select "Classic Application", click "Browse" to specify the path to the executable file OBS.

- Enable the use of the correct card. If you are not sure what is 'right', you can try to work first with one, then - the other, not forgetting to restart OBS Studio after applying changes.
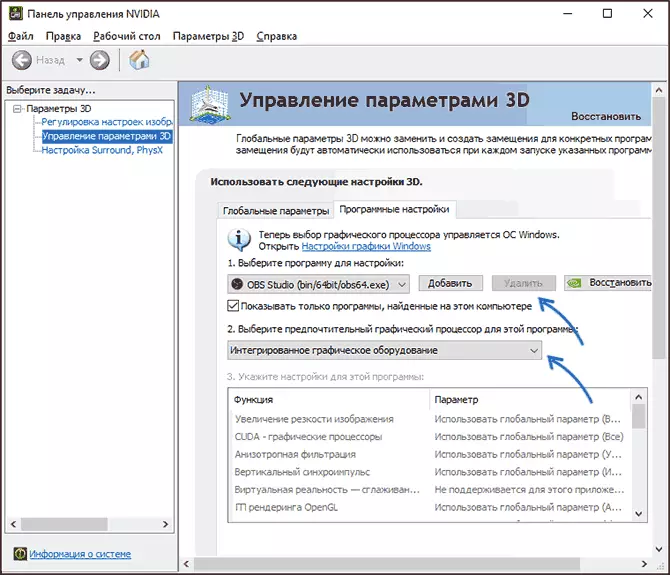
- In any latest version of Windows, you can go to the "NVIDIA control panel" (for example, through the context menu of the desktop), then in the 3D parameters section - "Manage 3D parameters" Open the "Software Settings" tab, set the use of the desired graphics adapter for OBS Studio (for example, "integrated graphic equipment") and apply settings. In the absence of a program in the list, click "Add" and specify the path to its executable file.
Immediately after that, it will be enough to restart OBS Studio (if the program is minimized in the system tray, close it and start it again) and the image should appear instead of the black screen.