

To perform certain tasks, the user sometimes needs to take a screen shot or screenshot. Let's figure out how to perform the specified operation on a computer or laptop running Windows 7.
Lesson:
How to make a screenshot in windows 8
We do a screenshot in Windows 10
Procedure for creating a screenshot
WINDOVS 7 has special tools in its arsenal to create screenshots. In addition, the screen snapshot in this operating system can be done by using third-party profile programs. Next, we consider various ways to solve the task for the specified OS.Method 1: Scissors utility
First, consider the actions algorithm for creating a script using the scissors utility.
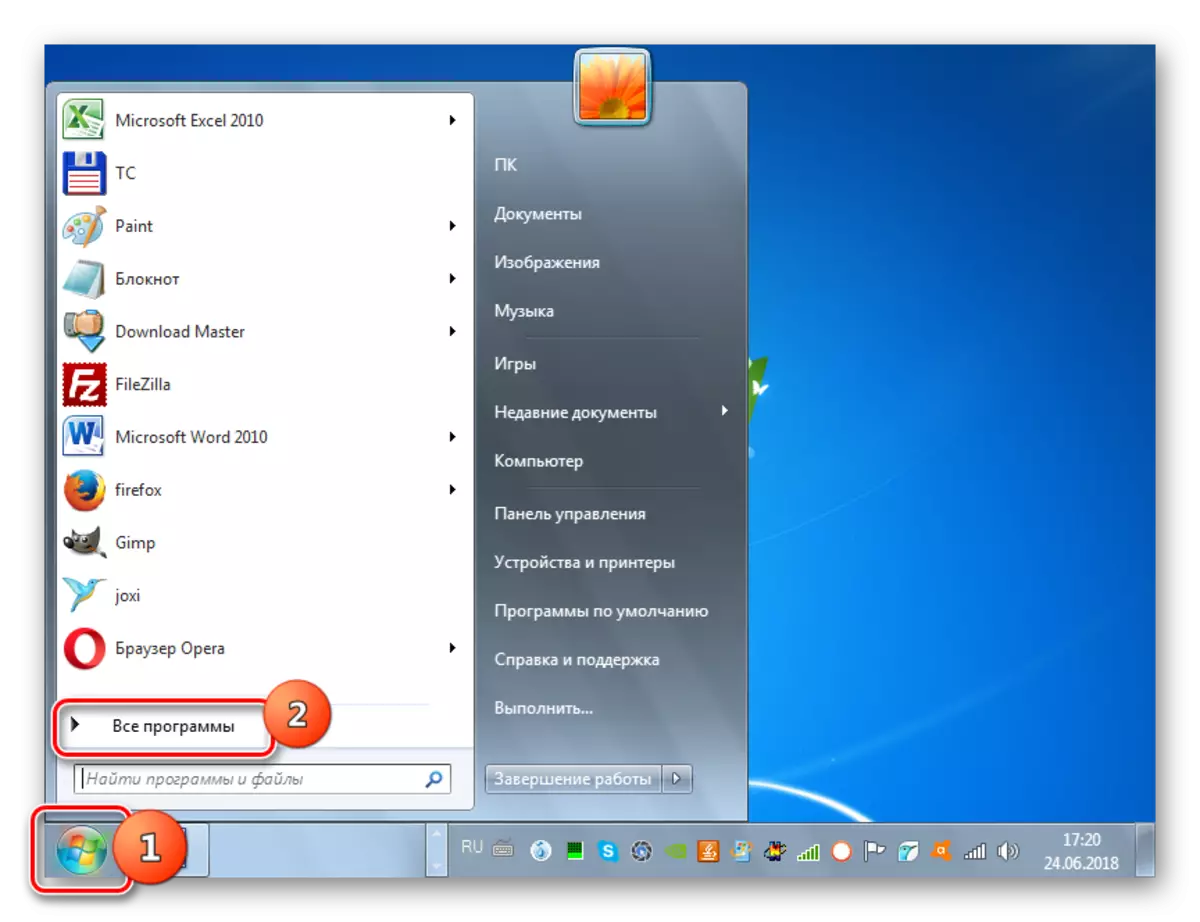
- Click "Start" and go to the "All Programs" section.
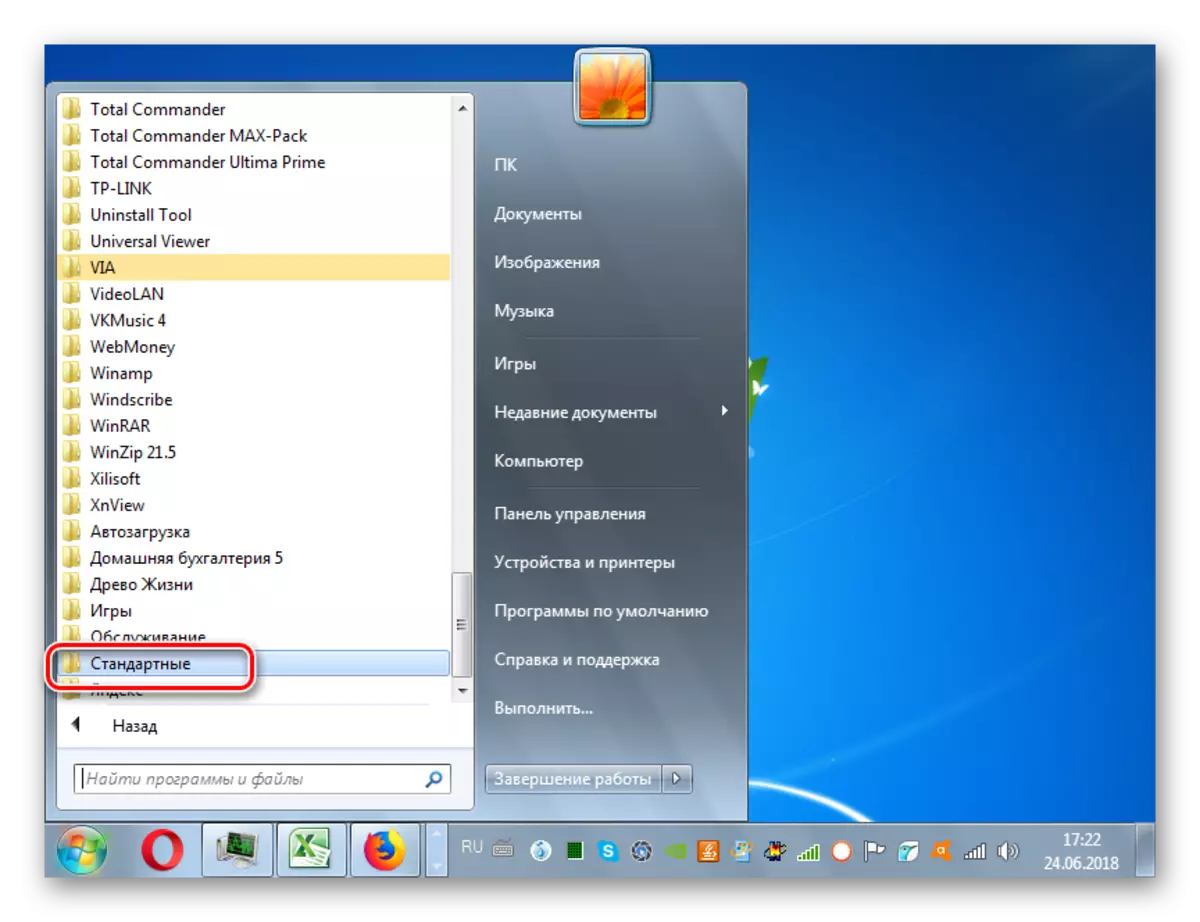
- Open the "Standard" directory.
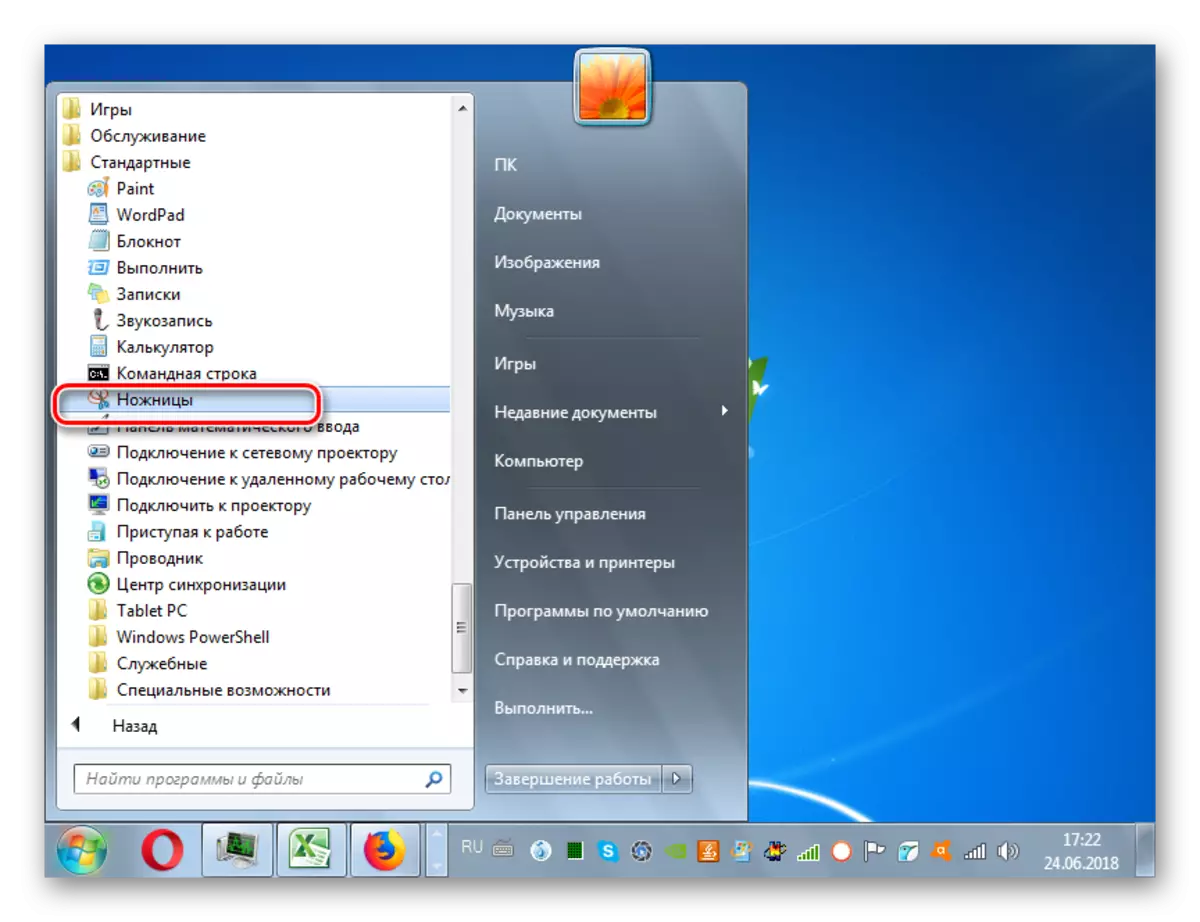
- In this folder, you will see a list of various system applications, among which the name "scissors" should be found. After you have found it, click on the name.
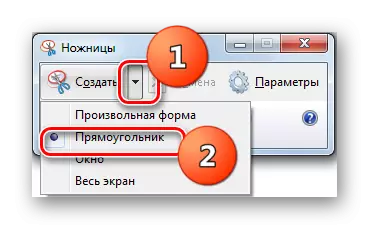
- The "scissors" utility interface will be launched, which is a small window. Click the triangle to the right of the "Create" button. The drop-down list will open, where you need to choose one of the four types of the screenshot created:
- An arbitrary form (in this case, the section will be captured for a snapshot of any shape, on the plane of the screen you highlight);
- Rectangle (the capture of any section of the rectangular shape is taken);
- Window (the active program window is captured);
- The whole screen (the screen of the entire screen of the monitor is made).
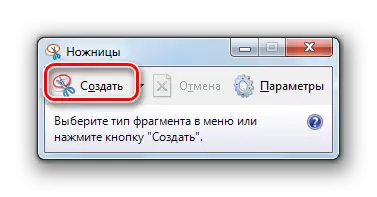
- After the choice is made, click on the "Create" button.
- After that, the entire screen will become matte. Hold the left mouse button and select the area of the monitor whose screenshot must be obtained. As soon as you release a button, the selected fragment will appear in the "Scissors" program window.
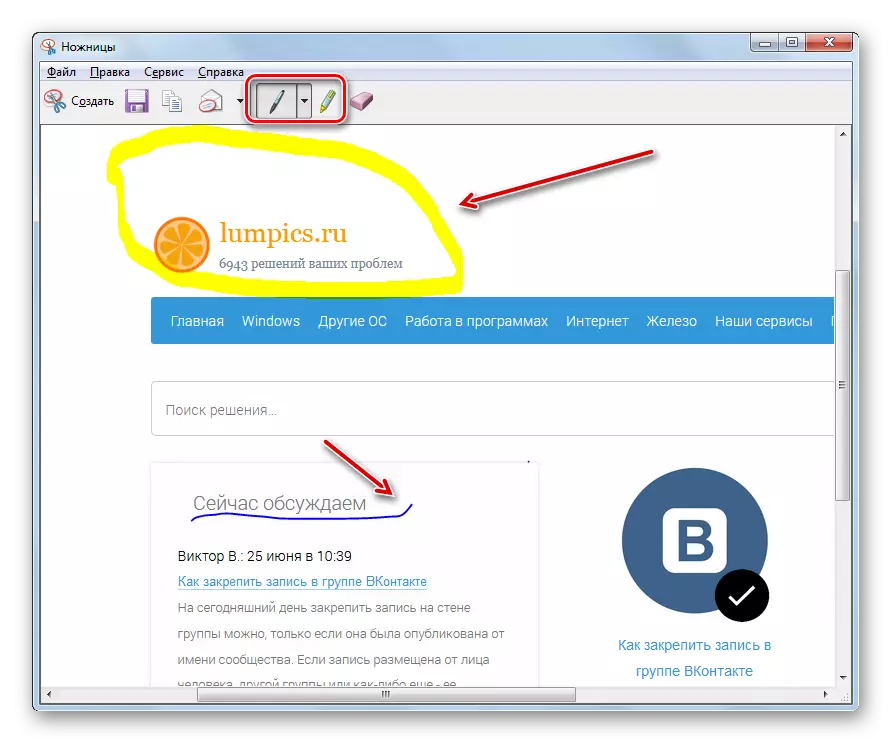
- Using elements on the panel, you can make primary editing a screenshot if necessary. Using the pen and "marker" tools, you can make inscriptions, paint different objects, draw pictures.
- If you decide to remove an undesirable element, an early created by the "marker" or "pen", then for this circle it using the "Rubber" tool, which is also on the panel.
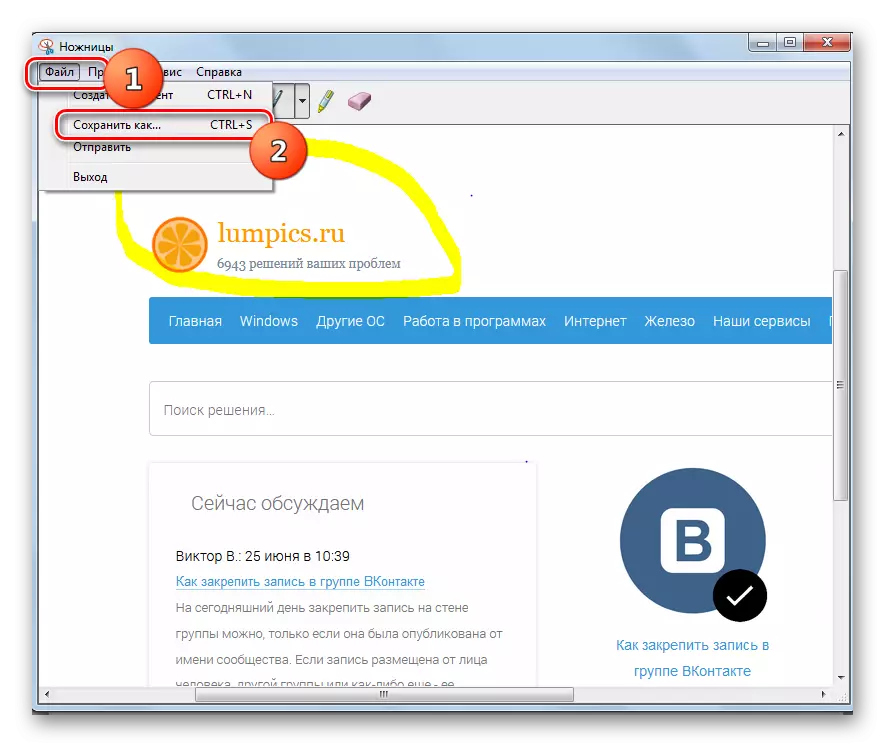
- After the necessary adjustments are made, you can save the resulting screenshot. To do this, click the File menu and select "Save As ..." or apply the Ctrl + S combination.
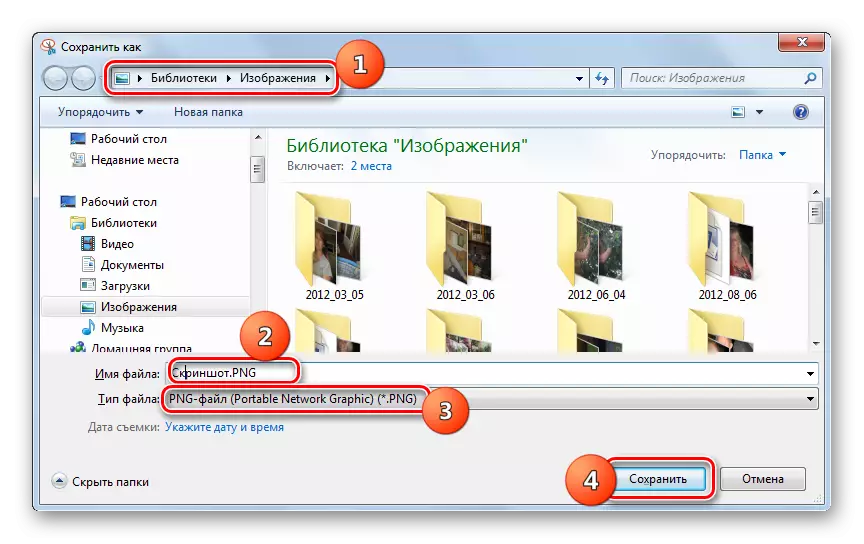
- Start the save window. Go to it to the directorization of the disk where you want to save the screen. In the "File Name" field, enter the name you want to assign it if you do not satisfy the default name. In the "File Type" field from the drop-down list, select one of the four formats in which you want to save the object:
- PNG (default);
- Gif;
- Jpg;
- MHT (web archive).
Next click "Save".
- After this, the snapshot will be saved in the selected directory in the specified format. Now you can open it using a viewer or image editor.


Method 2: Combination of keys and Paint
You can also create and save the threshold screenshot, as was done in Windows XP. This method involves using a key combination and built in Windows Editor Paint.
- To create a screenshot, apply the PRTSCR or ALT + PRTSCR key combination. The first option is used to capture the entire screen, and the second is only for the active window. After that, the snapshot will be placed in the clipboard, that is, in the PC RAM, but you can not see it yet.
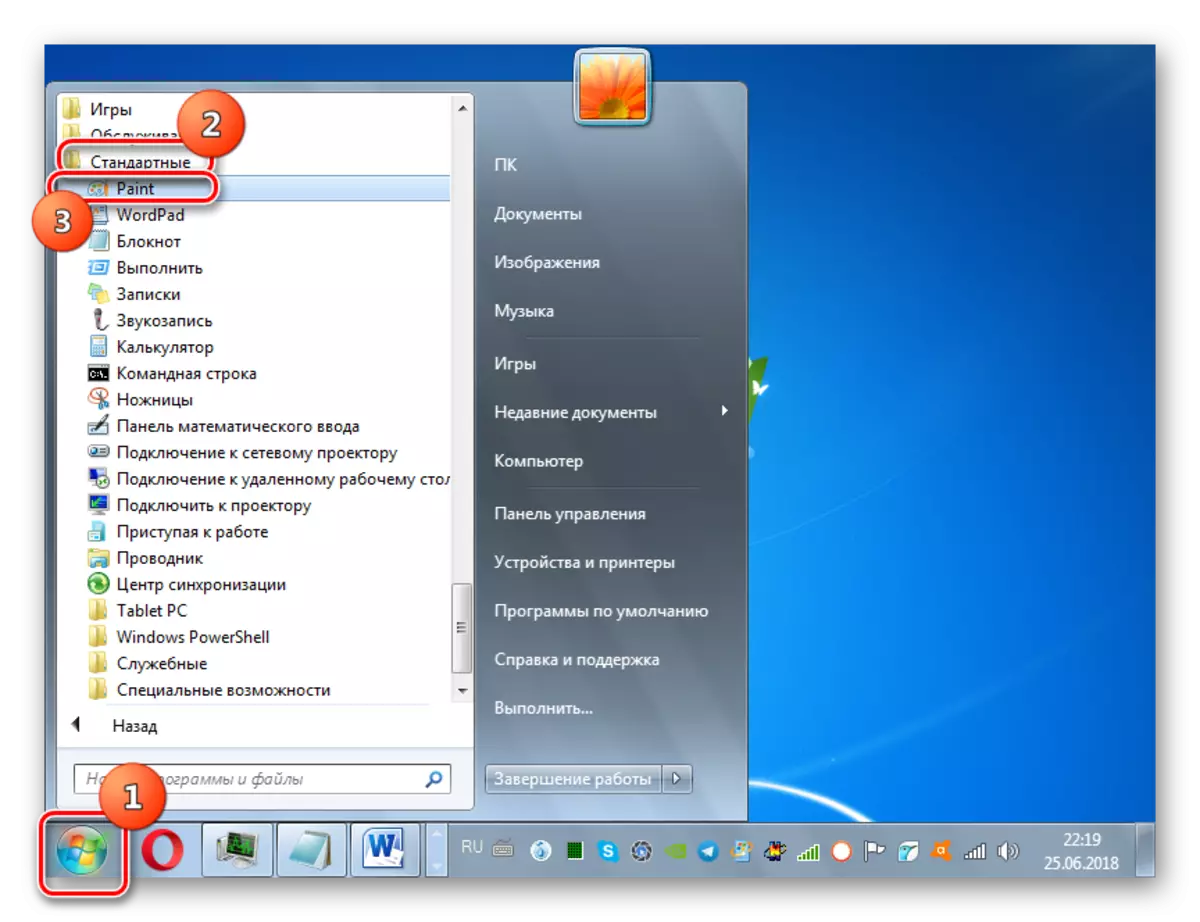
- To see the snapshot, edit and save, you need to open it in the Image Editor. We use the standard Windows program called Paint. As with the launch of the "scissors", press "Start" and open "all programs". Go to the "Standard" directory. In the list of applications, find the name "Paint" and click on it.
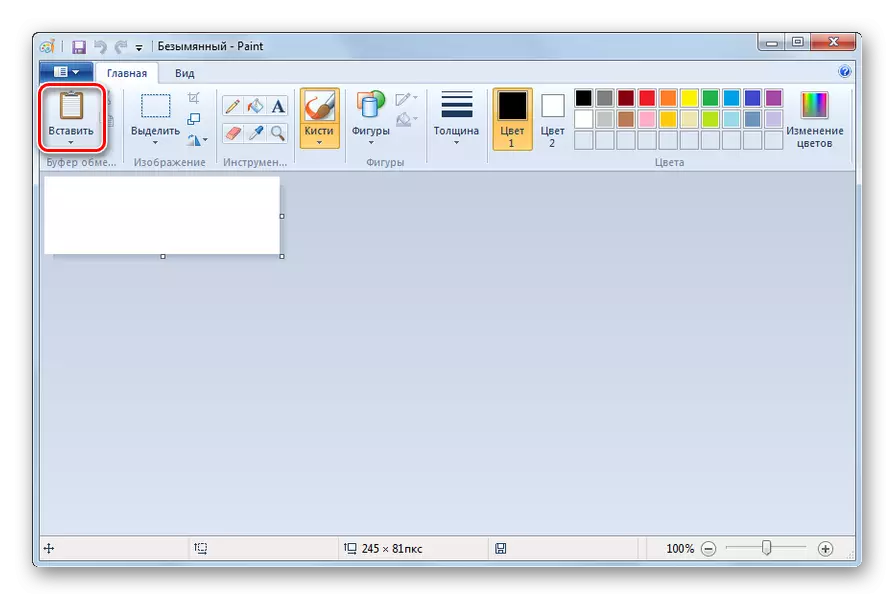
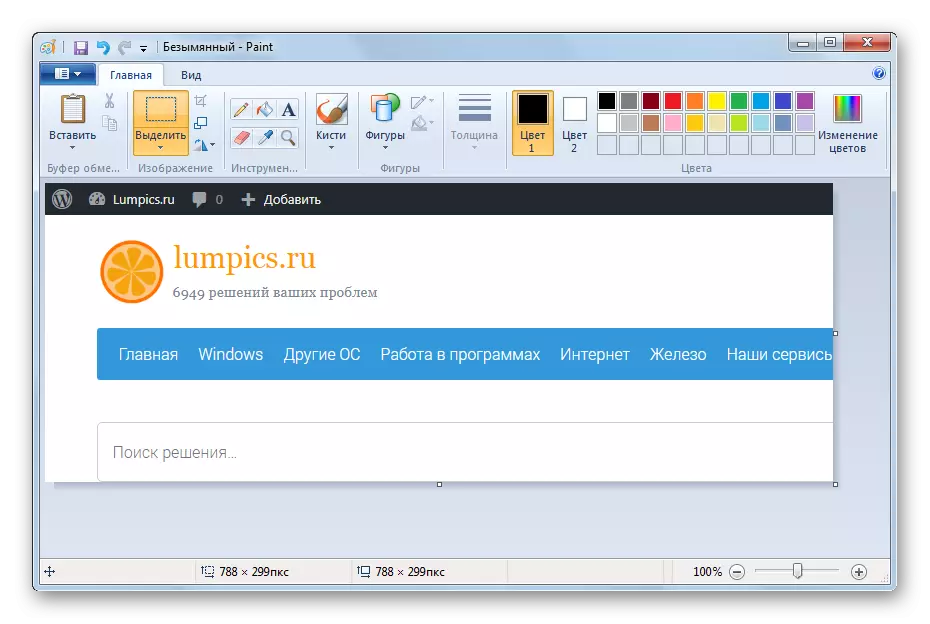
- The Paint interface opens. In order to insert a screenshot into it, use the "Insert" button in the clipboard block on the panel or set the cursor to the working plane and press the Ctrl + V keys.
- The fragment will be inserted into the graphics editor window.
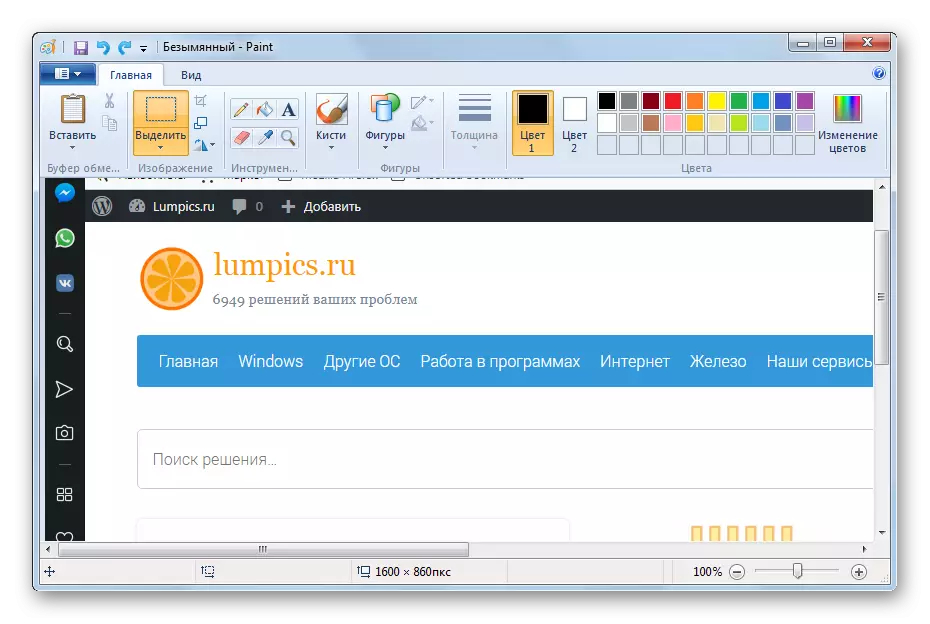
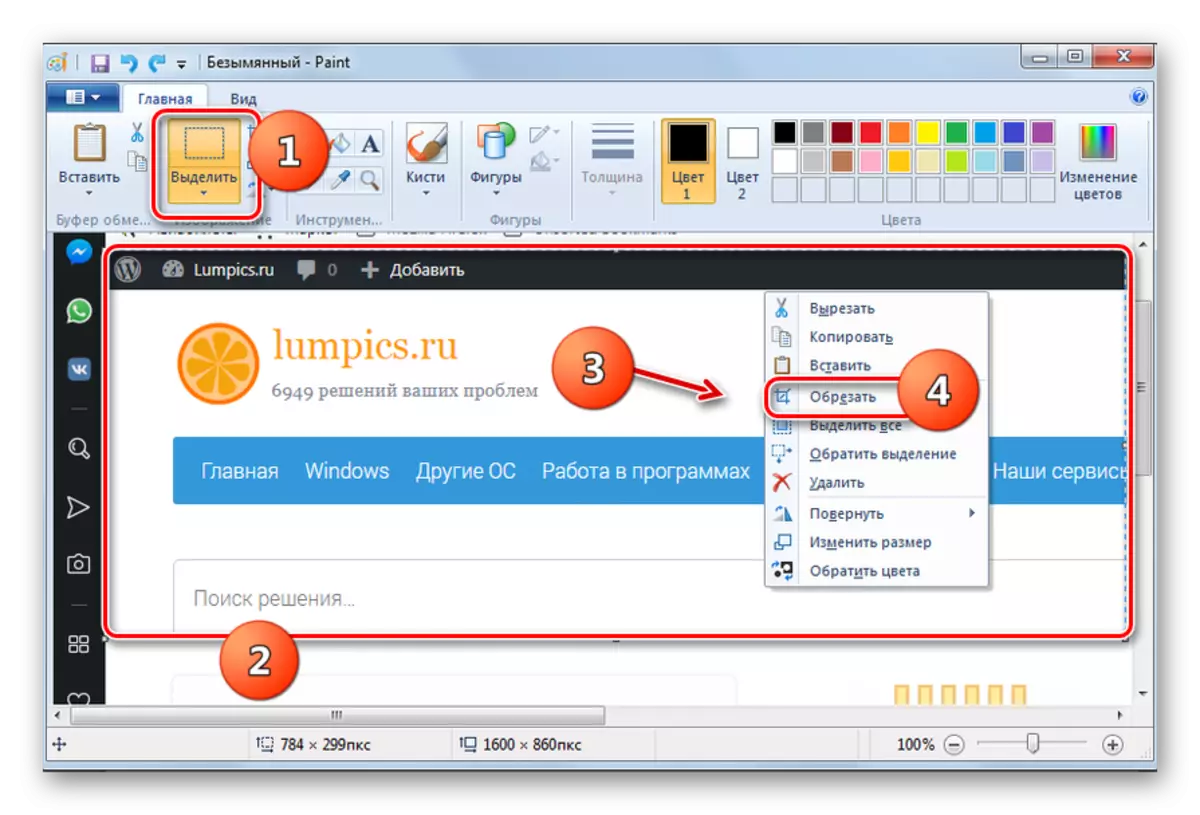
- Very often there is a need to make a screenshot of not the entire working window of the program or screen, but only certain fragments. But the capture when using hot keys is made common. In Paint, you can cut extra details. To do this, click the "Select" button, circle the fragment of the image you want to save, click on the right mouse button and select "Trim" in the context menu.
- The working window of the image editor will remain only the dedicated fragment, and everything else will be cropped.
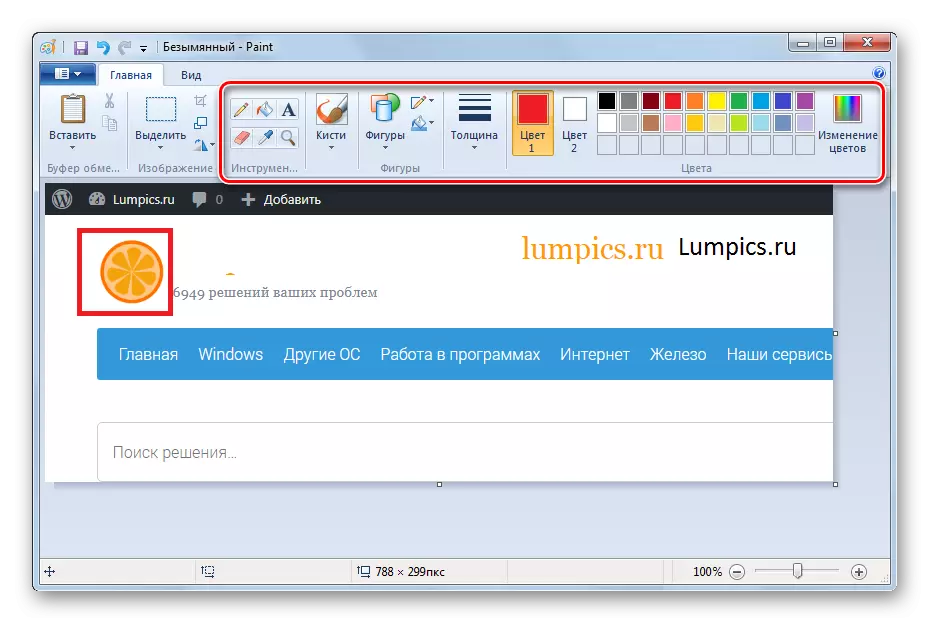
- In addition, using the tools located on the panel, you can make editing images. Moreover, the possibilities here for this is an order of magnitude more than provided the functionality of the program "Scissors". Editing can be performed using the following tools:
- Brushes;
- Figures;
- Fill;
- Text inscriptions, etc.
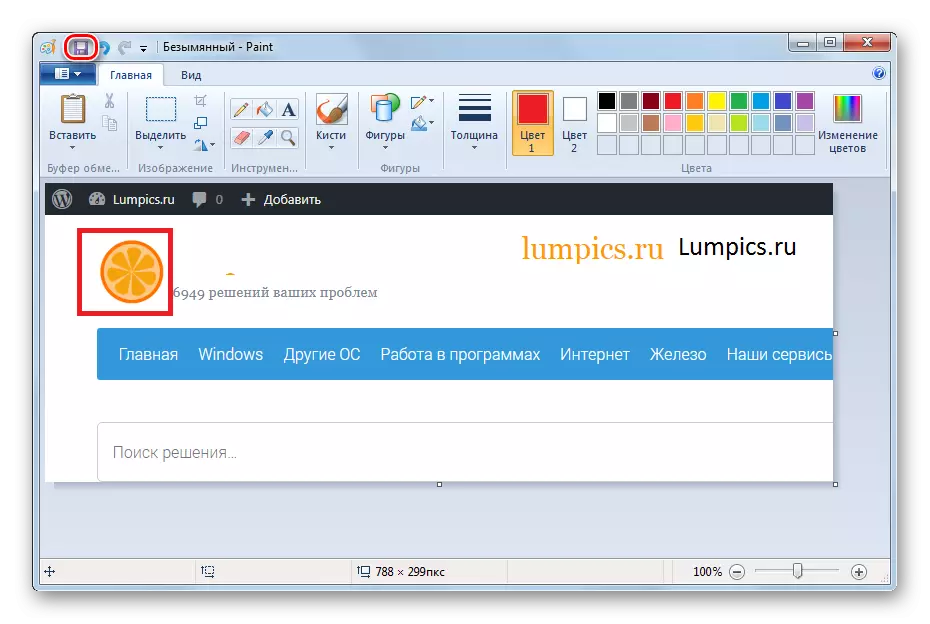
- After all the necessary changes are made, the screenshot can be saved. To do this, click the save icon in the form of a floppy disk.
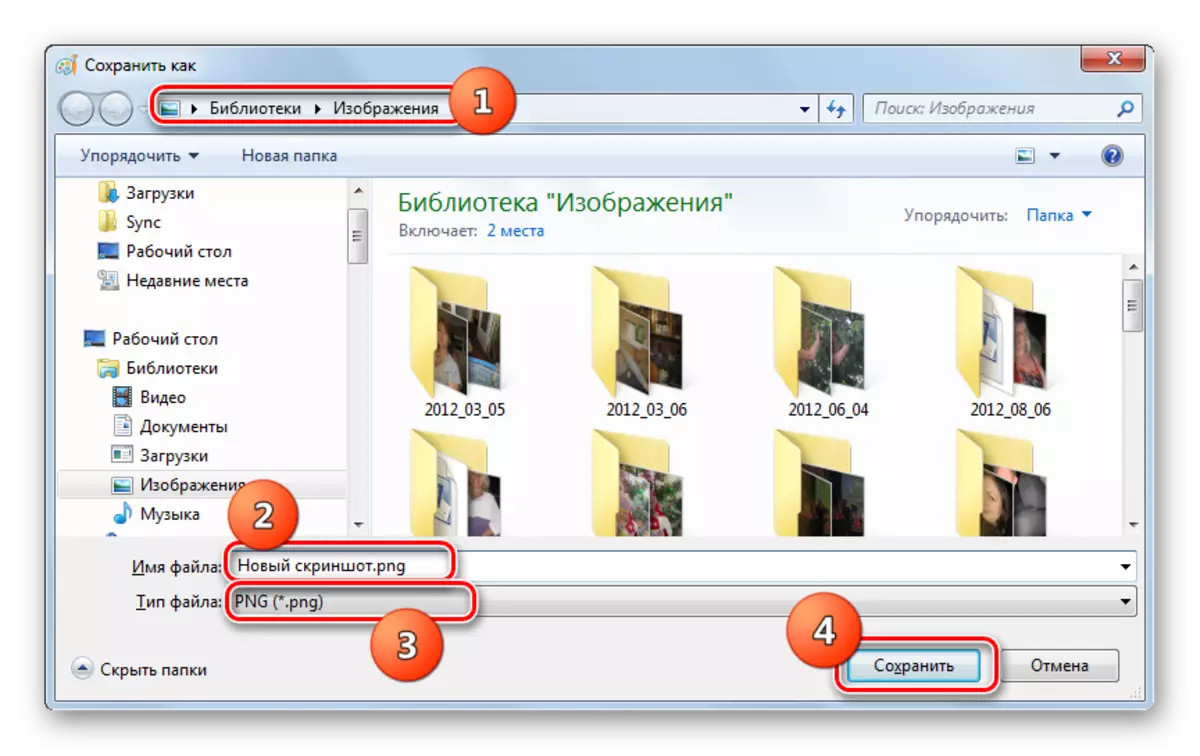
- Opens the save window. Move in it to the directory where you wish to export a picture. In the "File Name" field, we sushim the desired screen name. If this is not done, then it will be called "Unnamed." From the drop-down list "File Type", select one of the following graphic formats:
- PNG;
- TIFF;
- JPEG;
- BMP (several options);
- GIF.
After the choice of format and other settings are made, press "Save".
- The screen will be saved with the selected extension in the specified folder. After that, you can use the resulting image as you like: view, install instead of standard wallpaper, apply as screensaver, send, publish, etc.
READ ALSO: Where screenshots in Windows 7 are stored
Method 3: third-party programs
The screenshot in Windows 7 can also be made using third-party applications that are specifically designed for this purpose. The most popular of them are as follows:
- FASTSTONE CAPTURE;
- Joxi;
- Screenshoter;
- Clip2Net;
- WINSNAP;
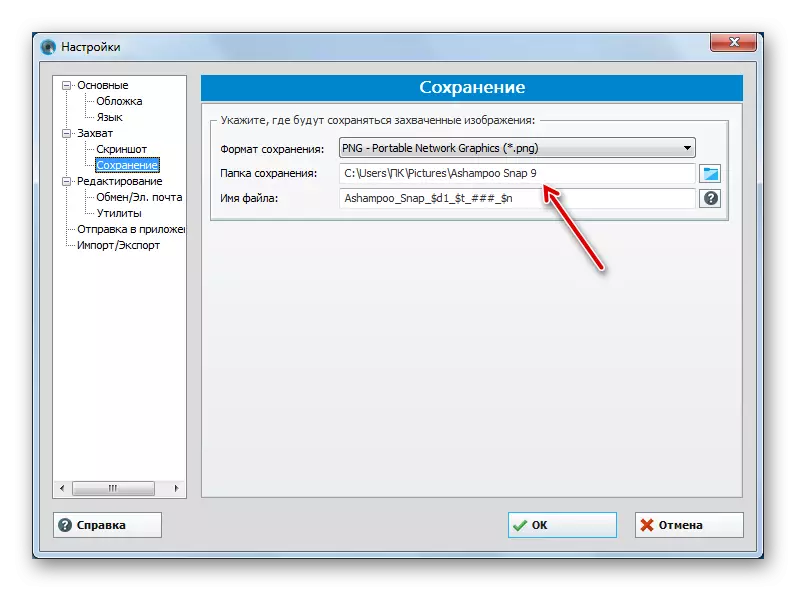
- Ashampoo Snap;
- QIP Shot;
- Lightshot.
As a rule, the principle of actions of these applications is based on the manipulation of the mouse, as in scissors, or on the use of "hot" keys.
Lesson: Applications for creating screenshots
Using standard Windows 7 tools, a screenshot can be made in two ways. To do this, it is required to either use the scissors utility, or apply the bundle of key combination and Paint image editor. In addition, it can be done using third-party programs. Each user can choose a more convenient way for itself. But if you need deep editing a picture, it is better to use the last two options.