
ASUS manufactures various devices, computer components and peripherals. Network equipment is present in the list and products. Each model of routers mentioned above the company is configured by the same principle through the web interface. Today we will focus on the RT-N12 model and tell in detail how to configure this router yourself.
Preparatory work
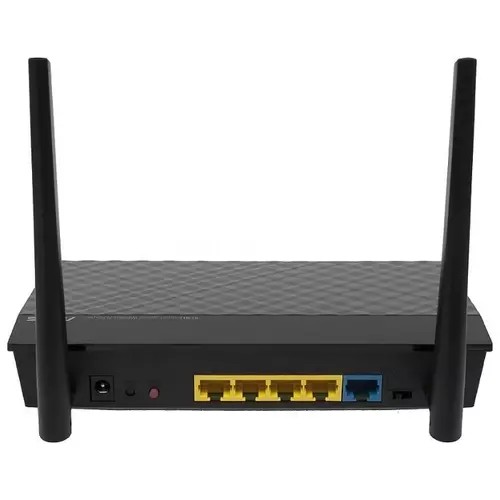
After unpacking, install the device at any convenient place, connect it to the network, connect the wire from the provider and the LAN cable to the computer. All the necessary connectors and buttons you will find on the rear panel of the router. They have their own marking, so it will be hard to confuse something.
Obtaining IP and DNS protocols is configured directly in the microprogram of equipment, but it is also important to check these parameters in the operating system itself so that there are no conflicts when trying to enter the Internet. IP and DNS must be received automatically, but on how to set this value, read the following link.
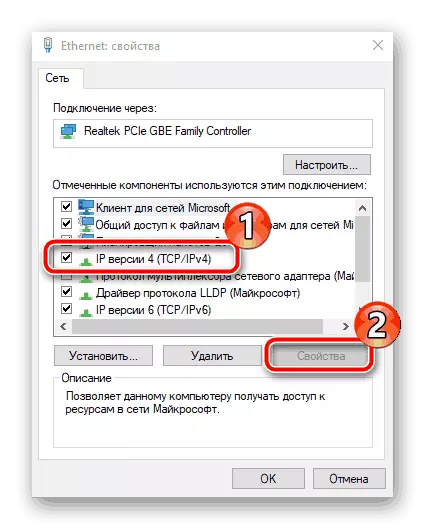
Read more: Windows 7 network settings
Setting up the ASUS RT-N12 router
As mentioned above, the adjustment of the device is carried out through a special web interface. Its appearance and functionality depend on the installed firmware. If you encountered that your menu is different from what you have seen on the screenshots in this article, just find the same items and set them according to our instructions. Regardless of the web interface version, the entrance to it is equally:
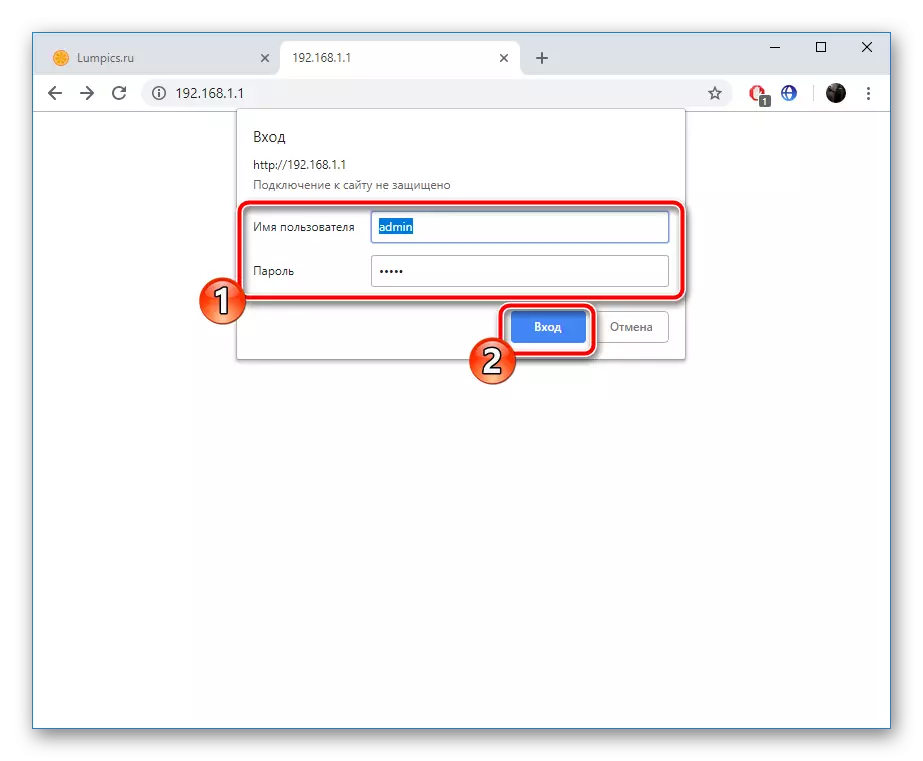
- Open the web browser and type in the address bar 192.168.1.1, then go to this path by clicking on ENTER.
- You will display a form to enter the menu. Fill out two rows with a login and password, specifying the Admin value in both.
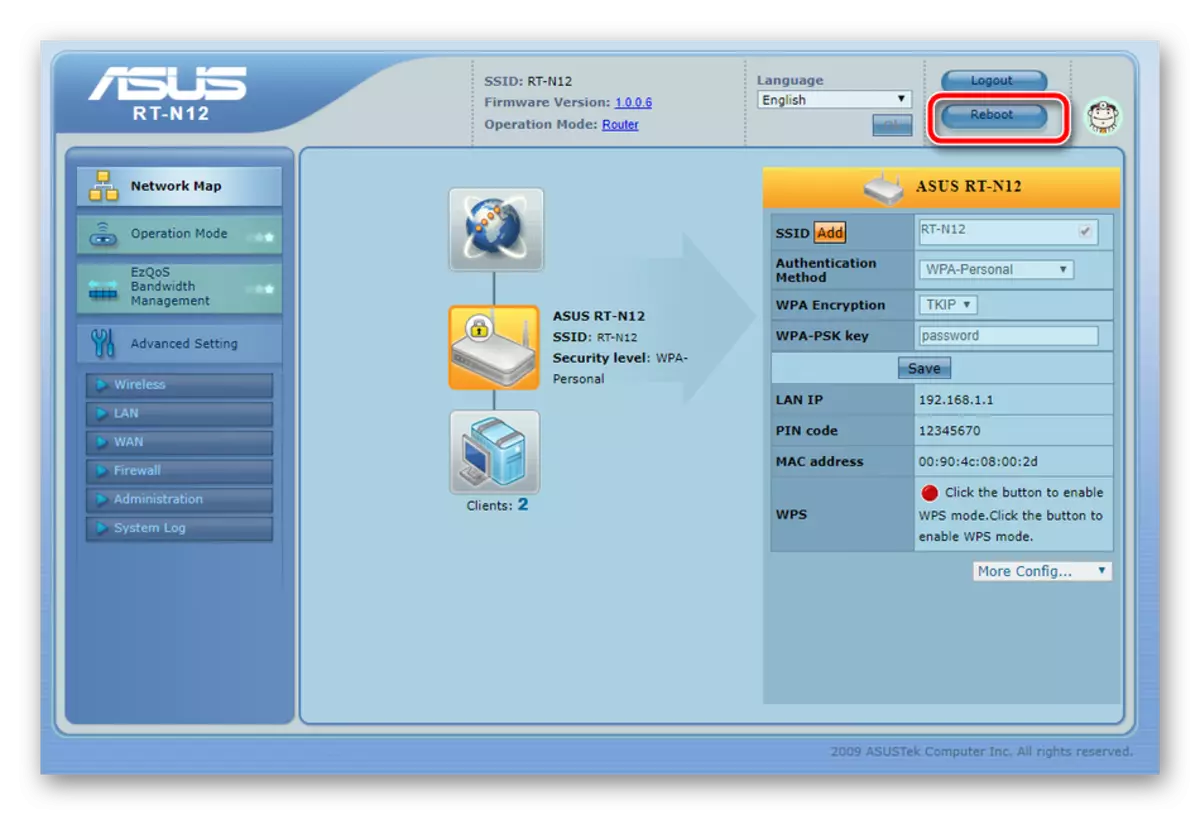
- You can immediately go to the category "Network Map", choose there one of the types of connection and proceed to its quick configuration. An additional window will open, where you should specify suitable parameters. The instructions given in it will help to deal with everything, and for information about the type of Internet connection, contact the documentation that was obtained when issuing a contract with the provider.

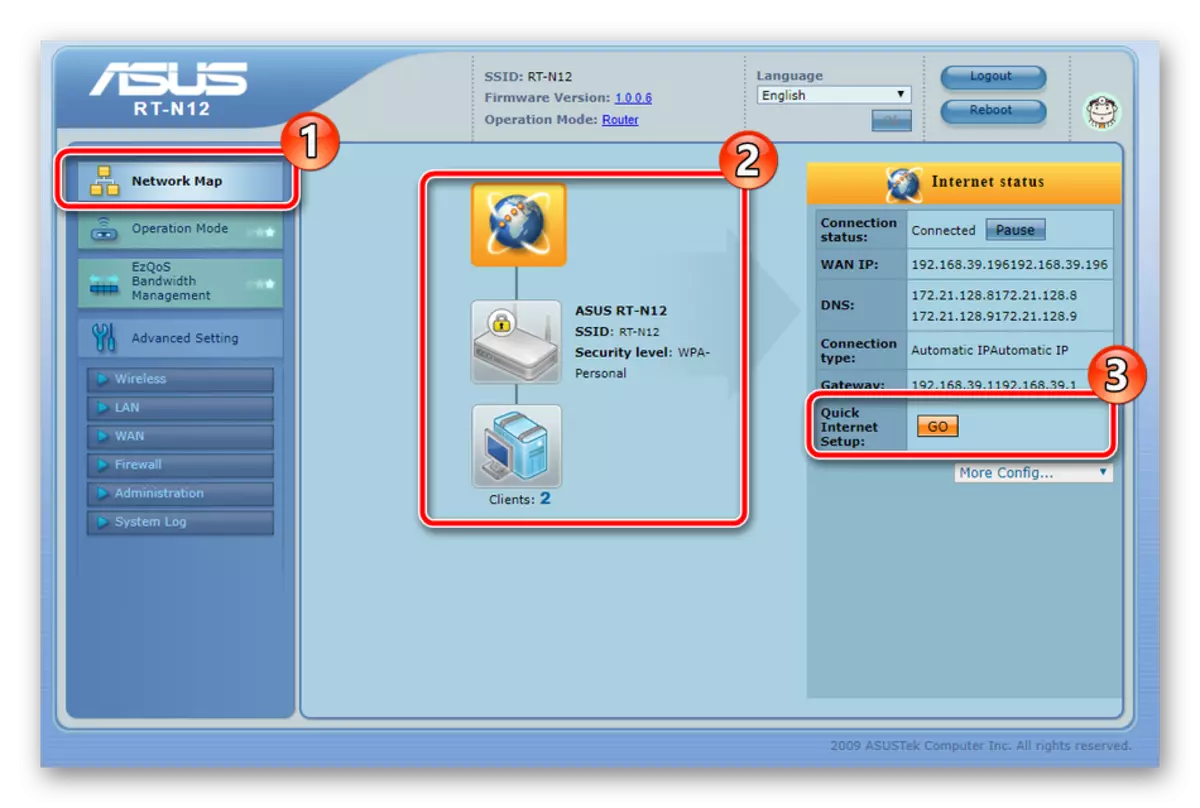
Setting up using the built-in master is suitable not to all users, so we decided to stop on the parameters of the manual configuration and tell you in detail everything in order.
Manual setting
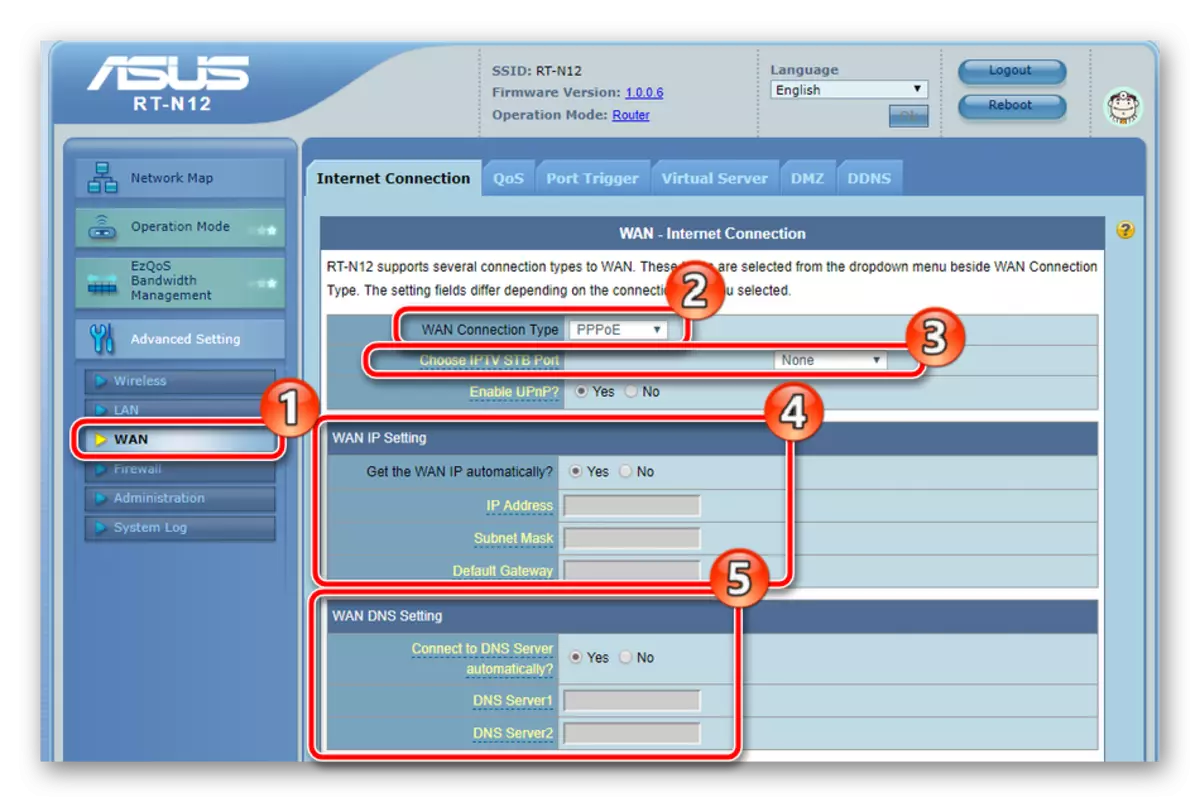
The advantage of manual adjustment of the router before quickly in the fact that this option allows you to create a more appropriate configuration, exhibiting and additional parameters that are often useful and ordinary users. We will start the editing procedure from the WAN connection:
- In the Advanced Setting category, select the "WAN" section. In it you need to first decide on the connection type, since further debugging depends on it. Refer to the official documentation from the provider to find out which connection it recommends use. If you have connected the IPTV service, be sure to specify the port to which the TV prefix will be connected. Getting the DNS and IP set to automatic, putting the "YES" markers opposite Get the Wan IP Automatically and Connect to DNS Server Automatically.
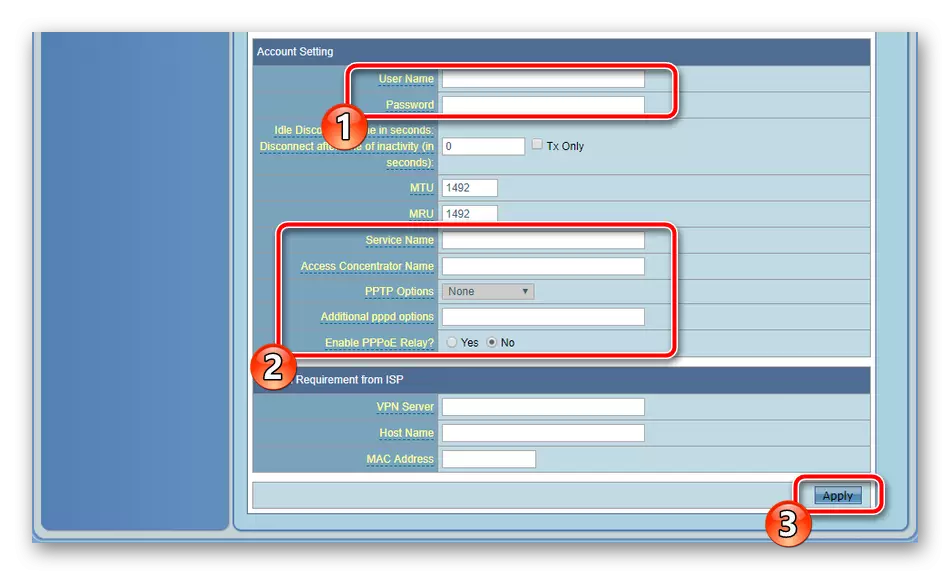
- Source slightly below the menu and find the sections where the information about the Internet user account is filled. Data is entered in accordance with those indicated in the contract. When the procedure is completed, click on "Apply", saving the changes.
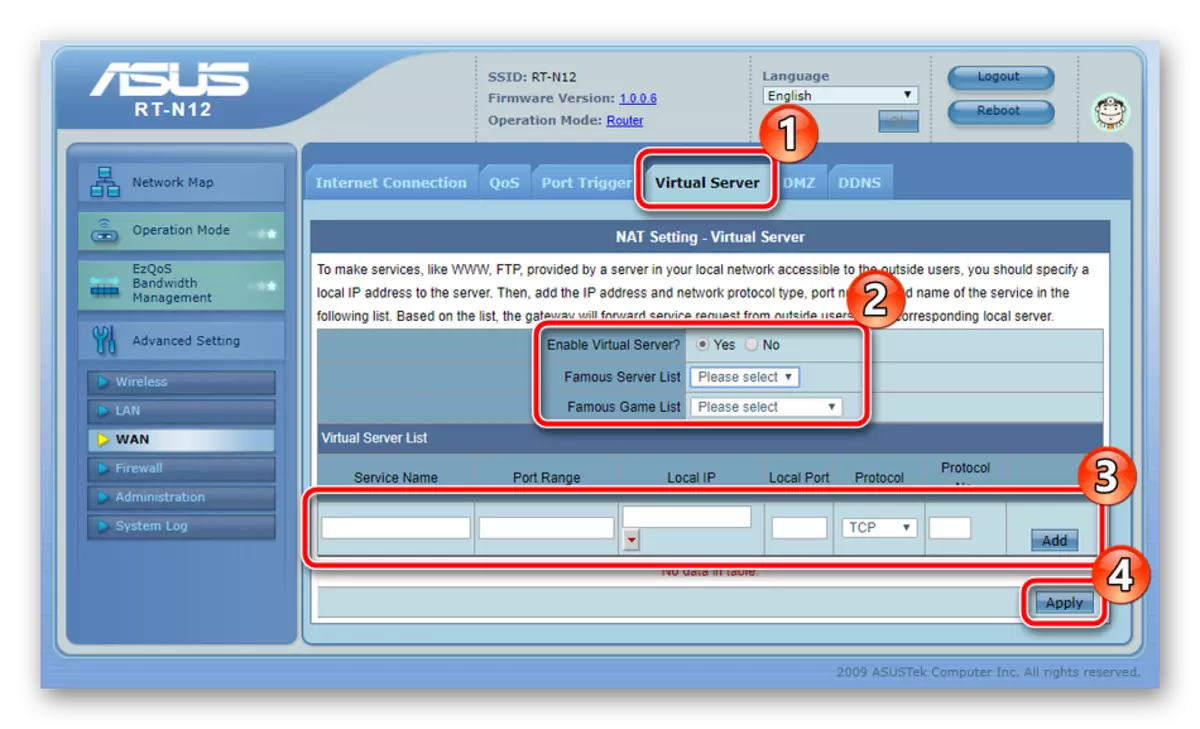
- Mark I want to "Virtual Server". Through the ports are not opened. The web interface includes a list of famous games and services, so it is possible to free yourself from manually input values. Details with the forwarding port process, read the other article on the link below.
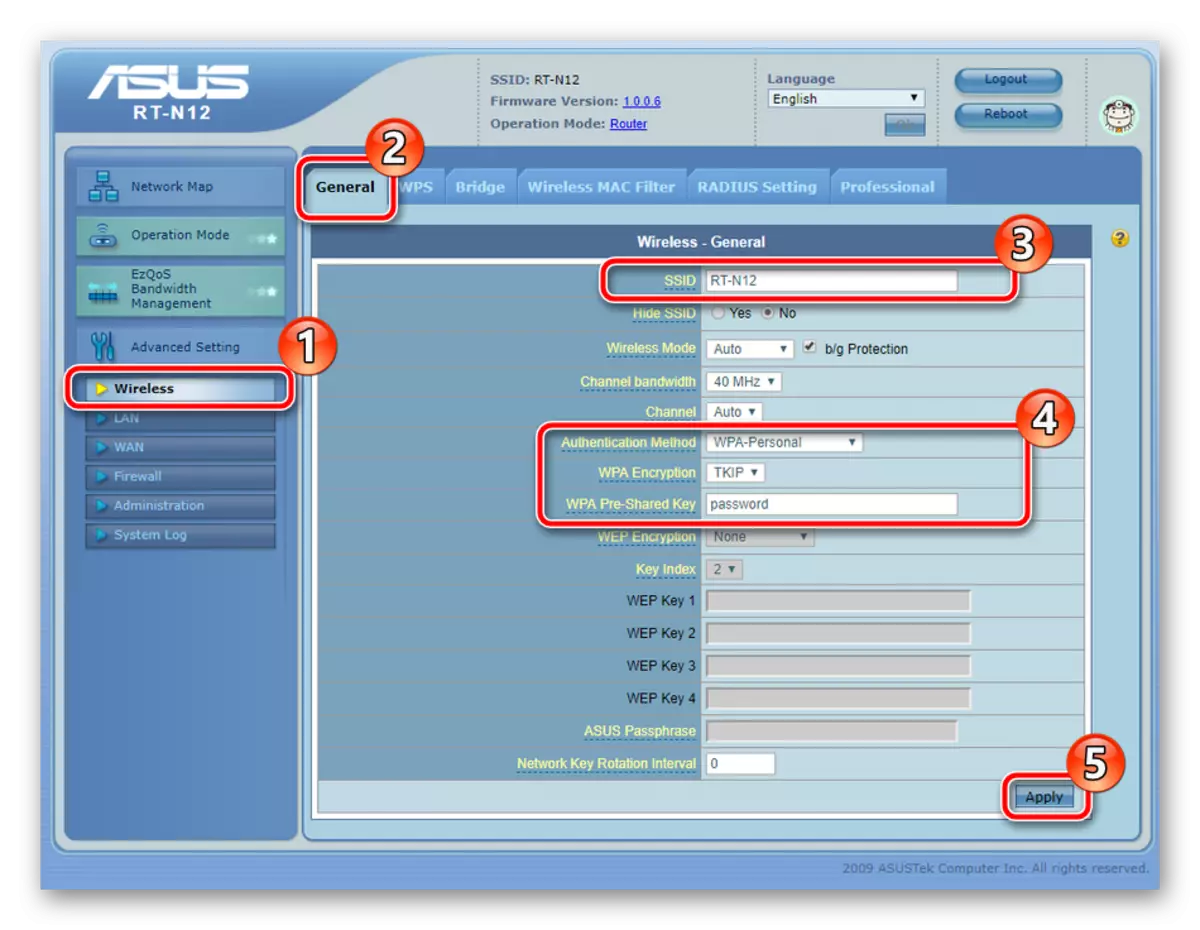
- Go to the "Wireless" section and make sure that you are in "General". Here, specify the name of your point in the "SSID" line. With it, it will be displayed in the list of available connections. Next, select Protection Option. The best protocol is WPA or WPA2, where the connection is carried out by entering the security key, which also changes in this menu.
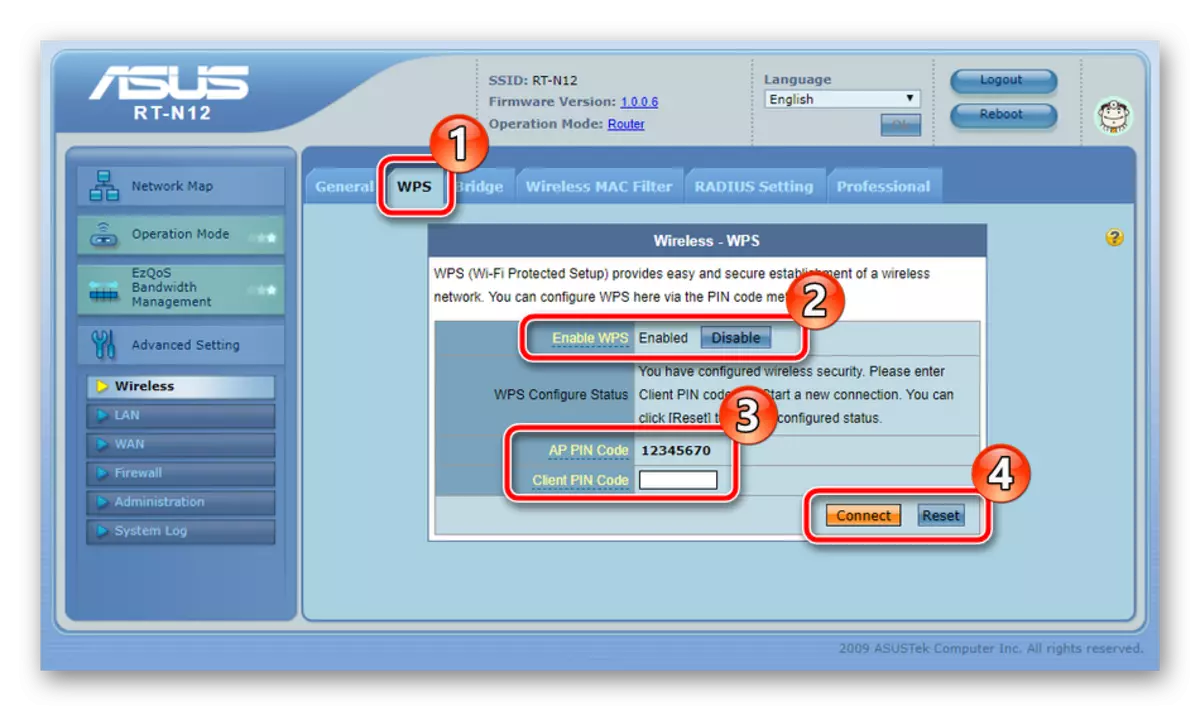
- In the WPS tab, this feature is configured. Here you can turn it off or activate, reset the settings to change the PIN code, or carry out fast authentication of the desired device. If you are interested in learn more information about the WPS tool, go to another material on the link below.
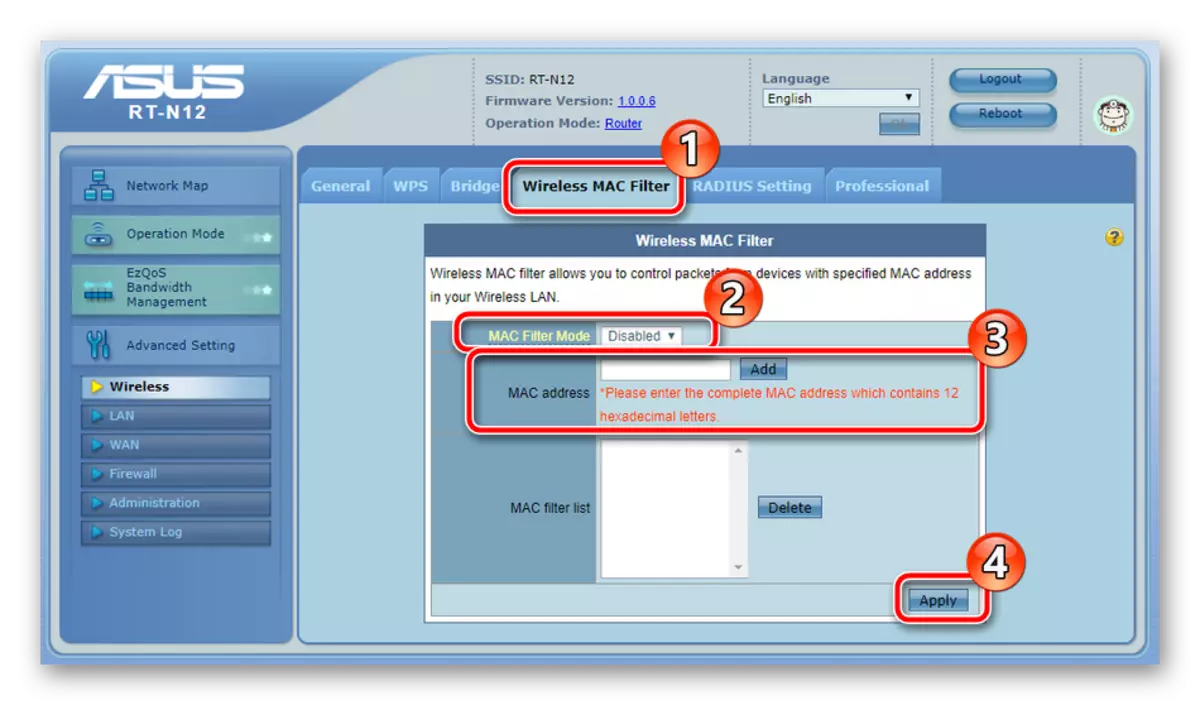
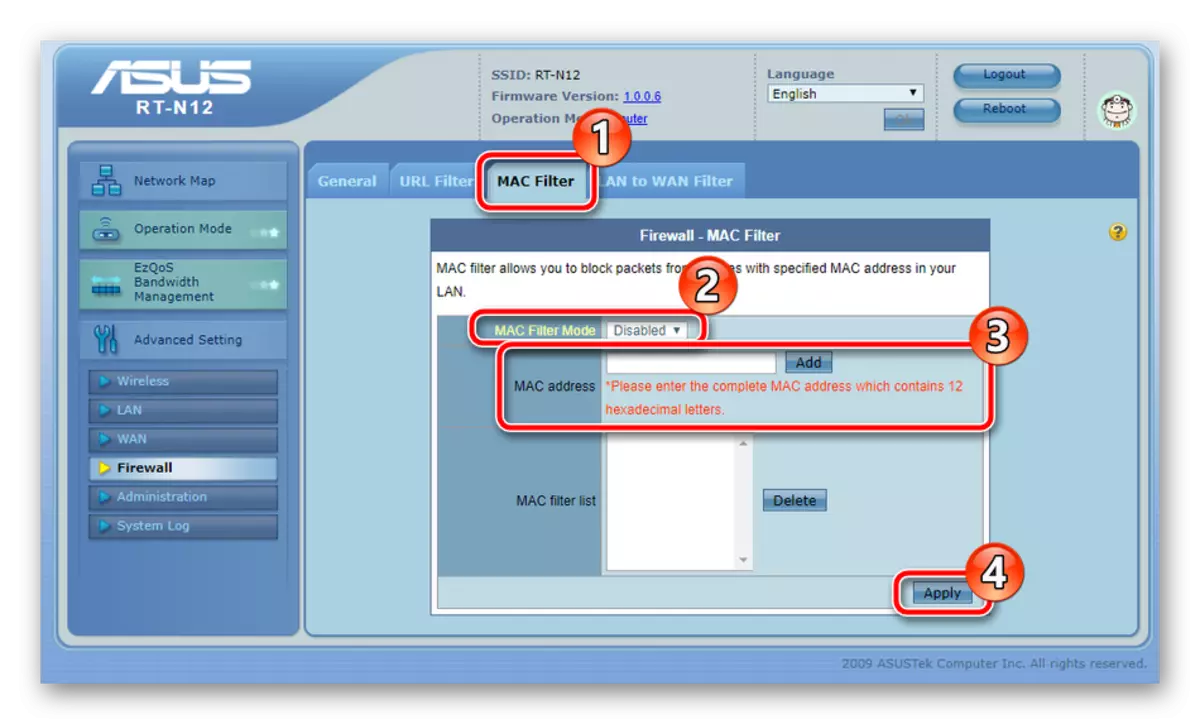
- You have access to filtering connections to your network. It is carried out by specifying MAC addresses. In the corresponding menu, activate the filter and add a list of addresses for which the blocking rule will be applied.
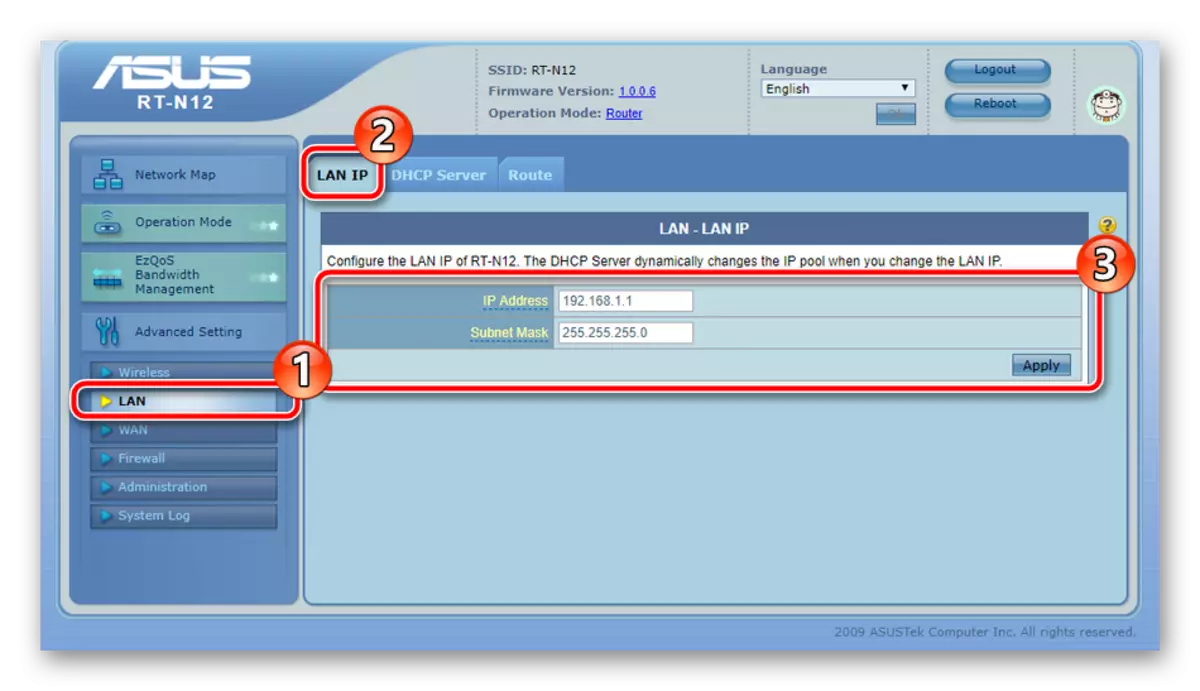
- Go to the "LAN" section and select the "LAN IP" tab. Here you have access to the IP address and network mask of your computer. It is required to make such a process in rare cases, but now you know where the LAN IP configuration is set.
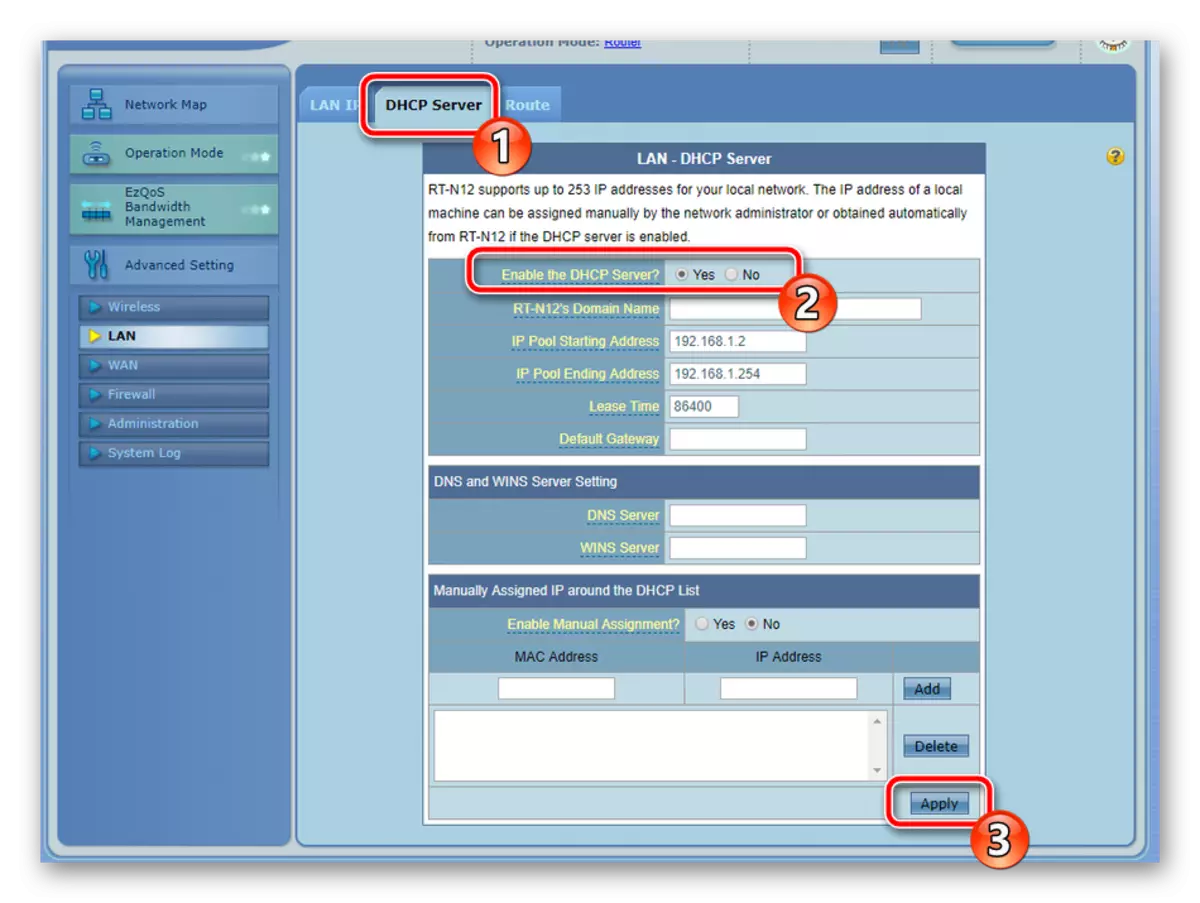
- Next, pay attention to the DHCP Server tab. The DHCP protocol allows you to automatically receive specific data within your local network. You do not need to change its settings, it is important to make sure that this tool is turned on, that is, the "YES" marker should stand opposite "Enable the DHCP Server".
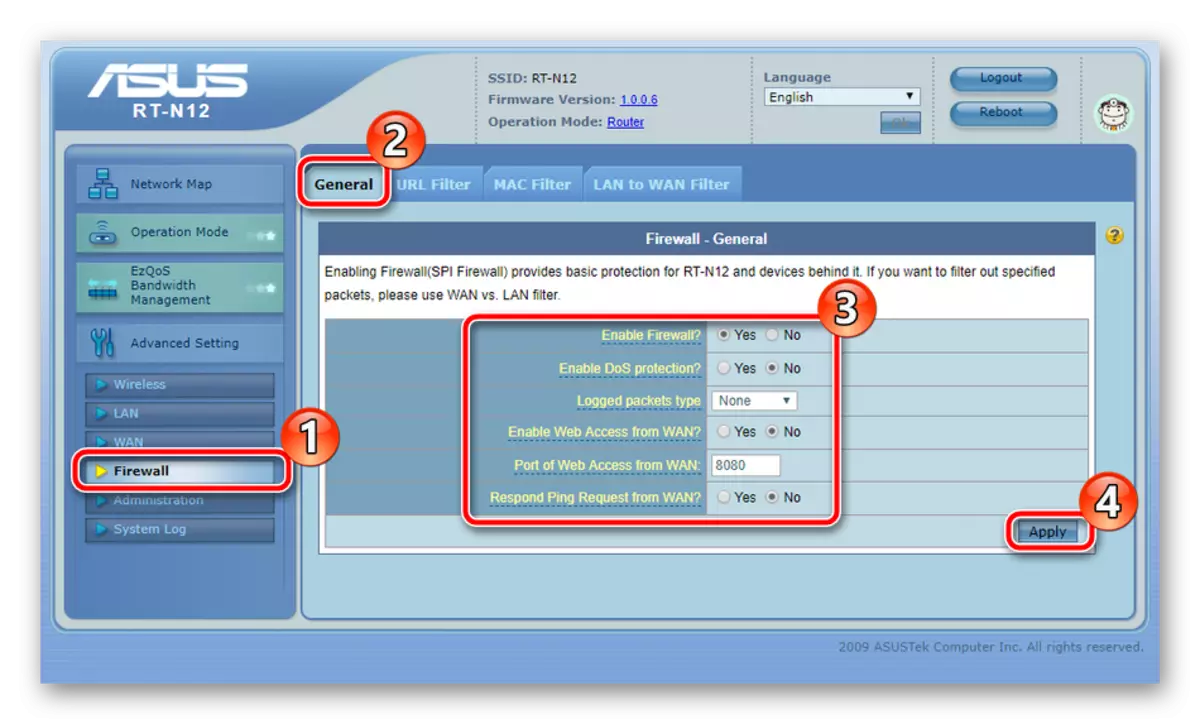
- Move to the "Firewall" section and select the "General" tab. Make sure the Firewall is turned on, and all other markers are marked in this order, as shown in the screenshot below.
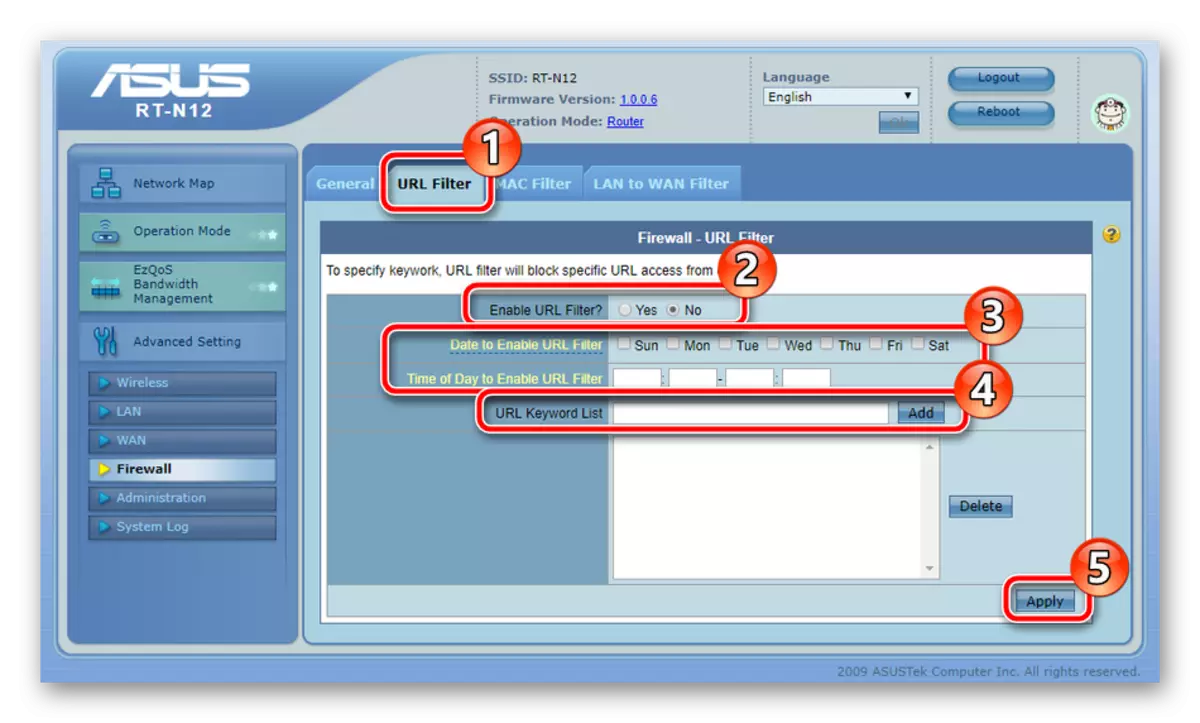
- Go to URL Filter. Here you can not only activate filtering by keywords in links, but also customize its time. Add a word to the list through a special string. After completing actions, click on "Apply", so there will be saved.
- Above, we have already talked about the MAC filter for Wi-Fi point, but there is still the same global tool. With it, it is limited to access to your network to those devices, MAC addresses that are added to the list.
Now that we are finished with a WAN connection, you can switch to creating a wireless point. It allows devices to connect to your router via Wi-Fi. Adjusting the wireless network is performed as follows:
Read more: What is what and why the WPS is needed on the router
The last item of the main setting will be the LAN interface. Editing its parameters is performed as follows:
You want to draw your attention to the section "Ezqos Bandwidth Management". It has four different types of applications. By clicking on the one, you give it to an active condition by providing priority. For example, you activated the item with video and music, which means that this type of applications will get more speed than the rest.

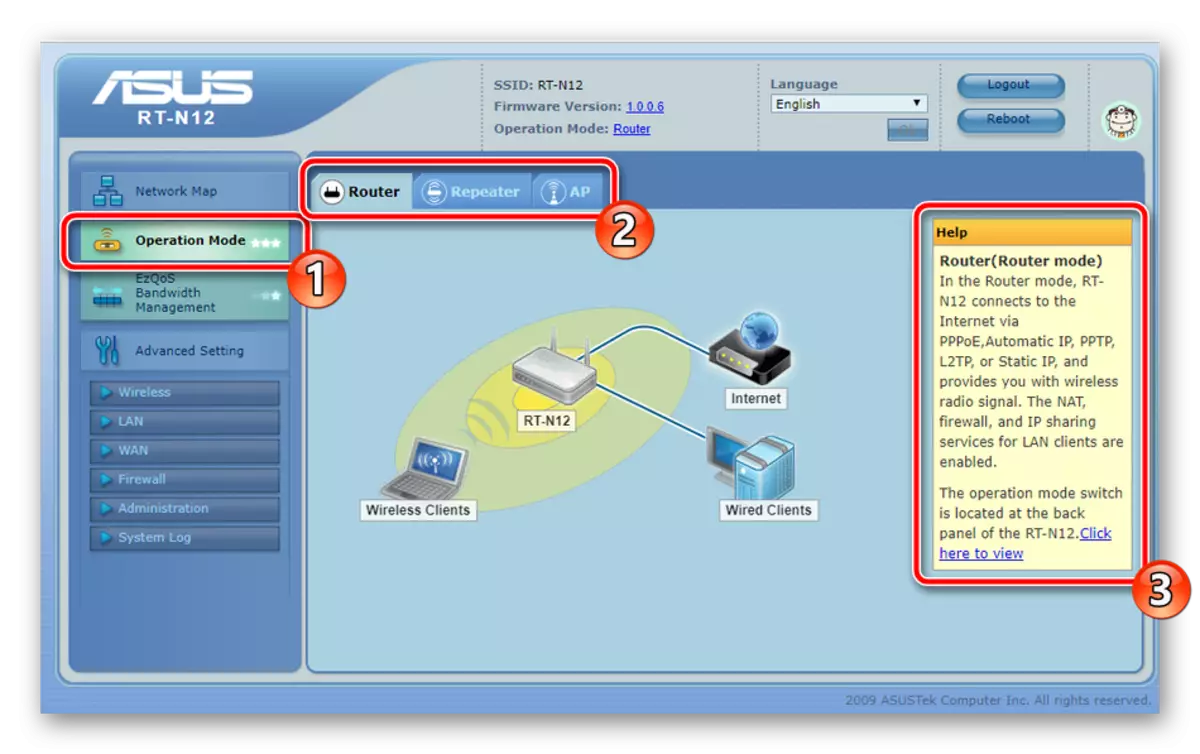
In the "Operation Mode" category, select one of the operating modes of the router. They differ slightly and are intended for different purposes. Move on tabs and read a detailed description of each mode, then select the most suitable for yourself.
This basic configuration is coming to an end. You now have a stable Internet connection by means of a network cable or Wi-Fi. Next, we will talk about how to secure your own network.
Security Setup
We will not dwell on all protection policies, but only consider the mains that can be useful to the ordinary user. Highlight would like the following:
Completion setting
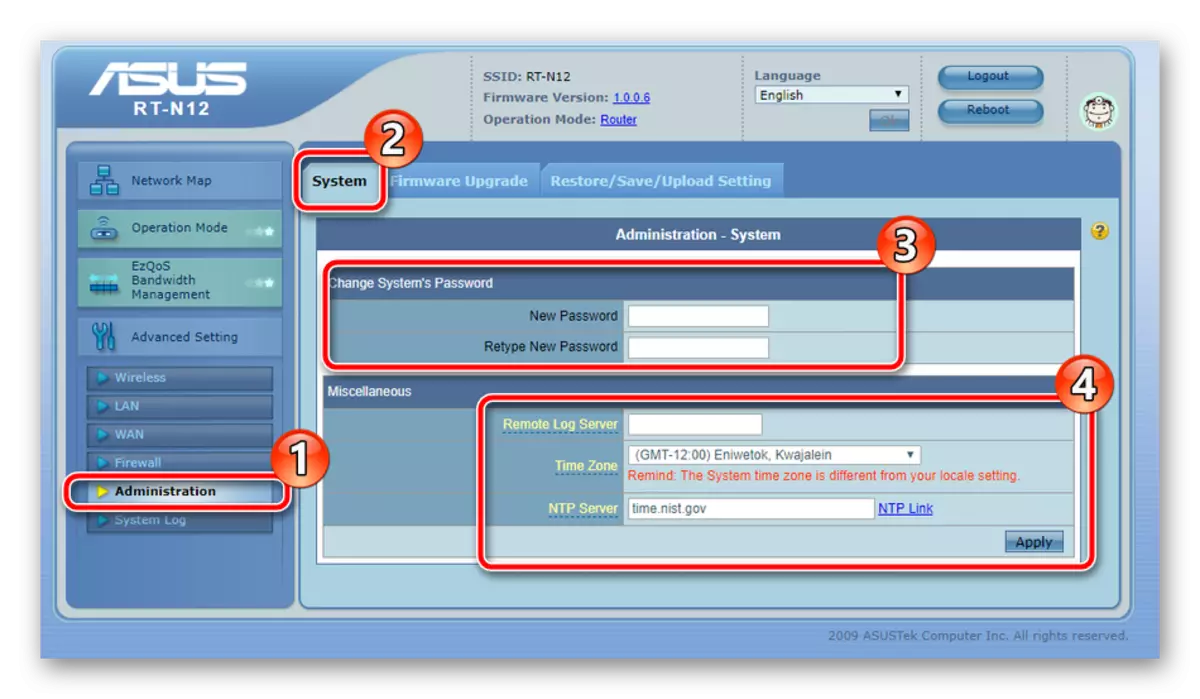
The completion step of the configuration of the ASUS RT-N12 router is editing administration parameters. First, move to the "Administration" section, where in the "System" tab, you can change the password to enter the web interface. In addition, it is important to determine the right time and the date that the schedule of security rules worked correctly.
Then open "Restore / Save / Upload Setting". Here you have access to the configuration and restore standard parameters.

Upon completion of the entire procedure, click on the "Reboot" button on the uppermost part of the menu to restart the device, then all changes will take effect.
As you can see, nothing complicated in the adjustment of the ASUS RT-N12 router. It is important only to set the parameters in accordance with the instructions and documentation from the Internet service provider, as well as to be attentive.