

Under the term "overclocking" most users imply precisely an increase in the performance of the central processor. In modern Motherboard models, this procedure can be carried out from under the operating system, but the most reliable and universal method is to configure via BIOS. It is about him today and we want to talk.
Accelerate CPU through BIOS
Before the description of the description, we will make some important comments.
- The processor overclocking is supported in special fees: designed for enthusiasts or gamers, therefore, in budget models "Mothers" such options are often absent, exactly as in the bios of laptops.
- Acceleration also increases the percentage of heat released, so before the procedure for increasing operating frequency and / or voltage is strictly recommended to install a serious cooling.
Award
- After entering the BIOS, go to the "MB Intelligent Tweaker" section and open it.
- As in the case of AMI BIOS, start acceleration costs from setting the multiplier, the item "CPU Clock Ratio" is responsible for it. The considered BIOS is more convenient to the fact that next to the multiplier indicates the actual frequency.
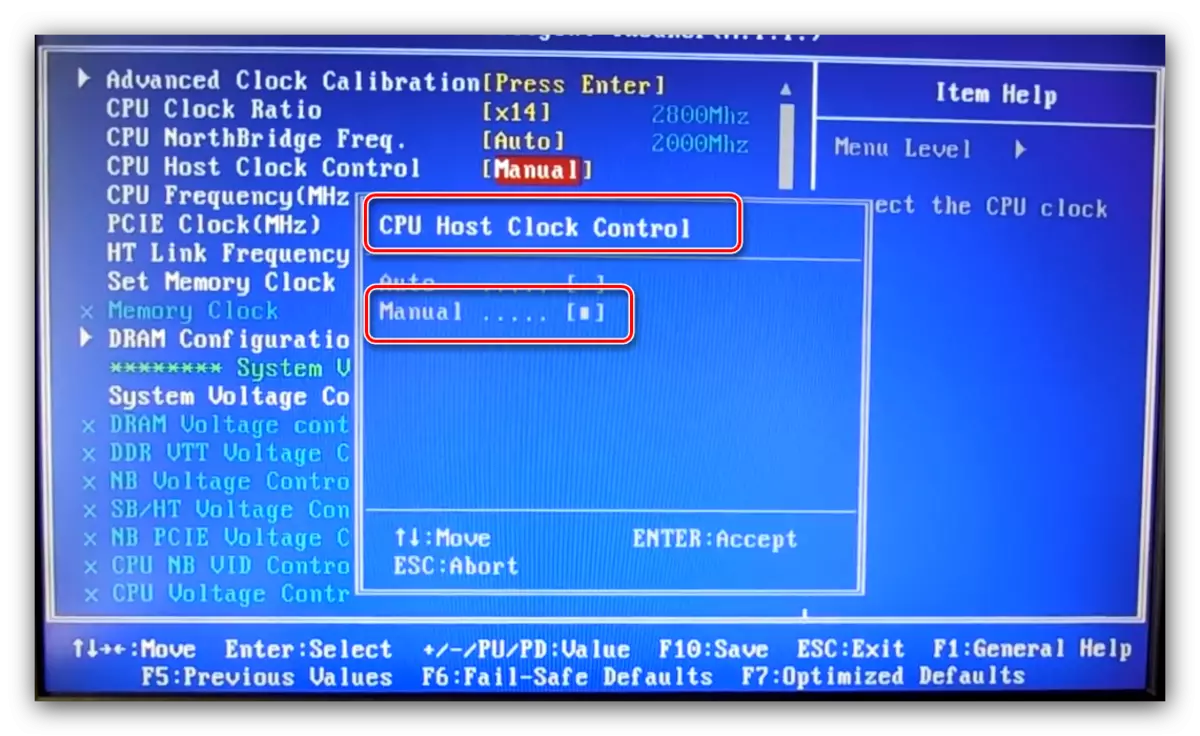
- To configure the location of the multiplier, switch the option "CPU HOST CLOCK CONTROL" to the "MANUAL" position.
Next, use the setting "CPU FREQUENCY (MHZ)" - select it and press ENTER.
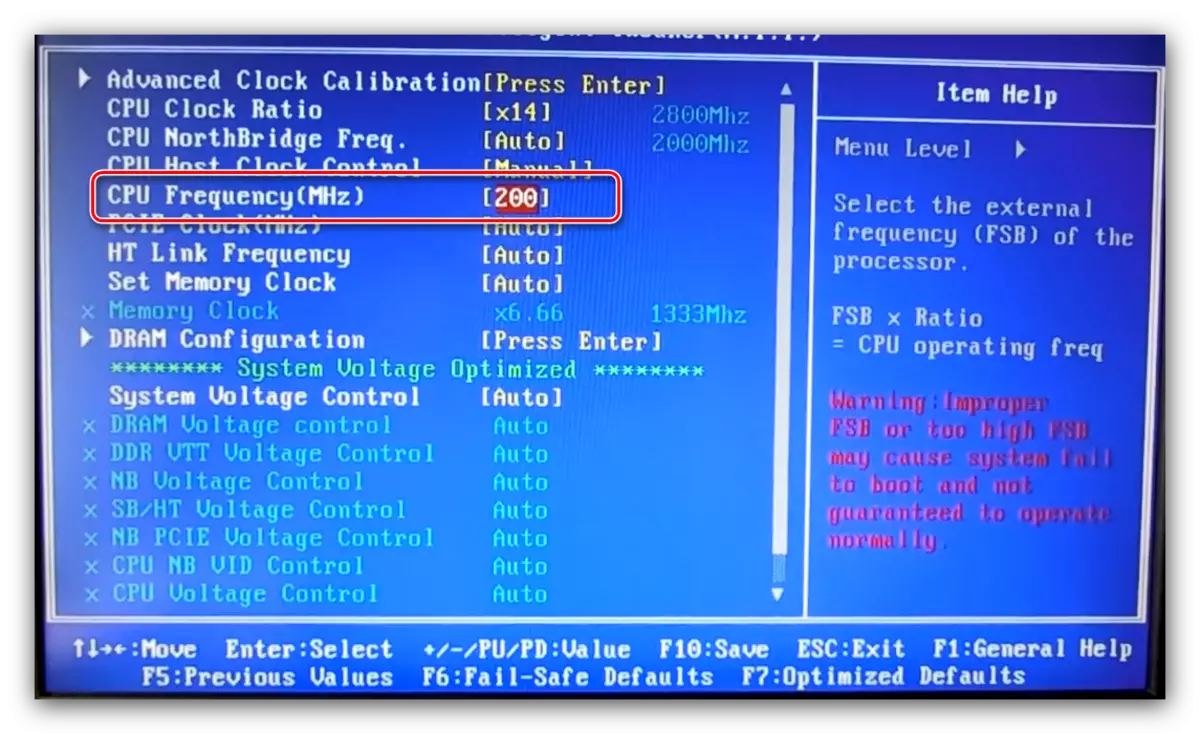
Put the desired start frequency. Again, it depends on the specifications of the processor and the capabilities of the motherboard.
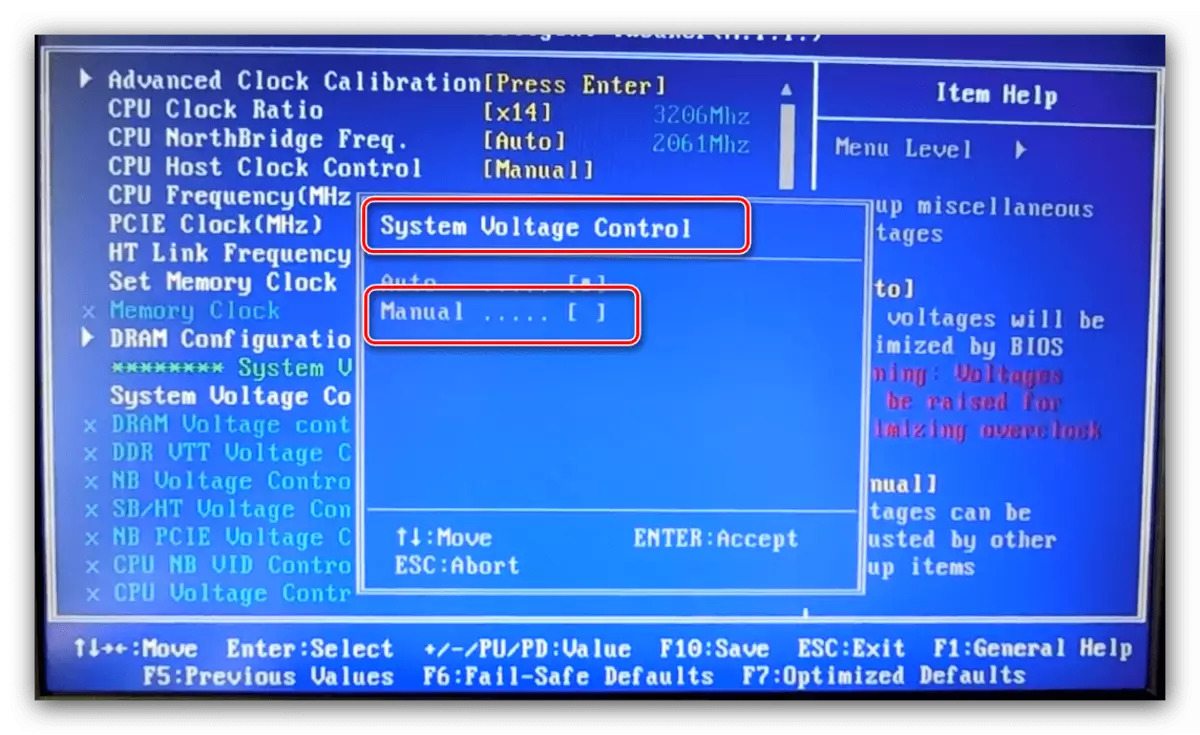
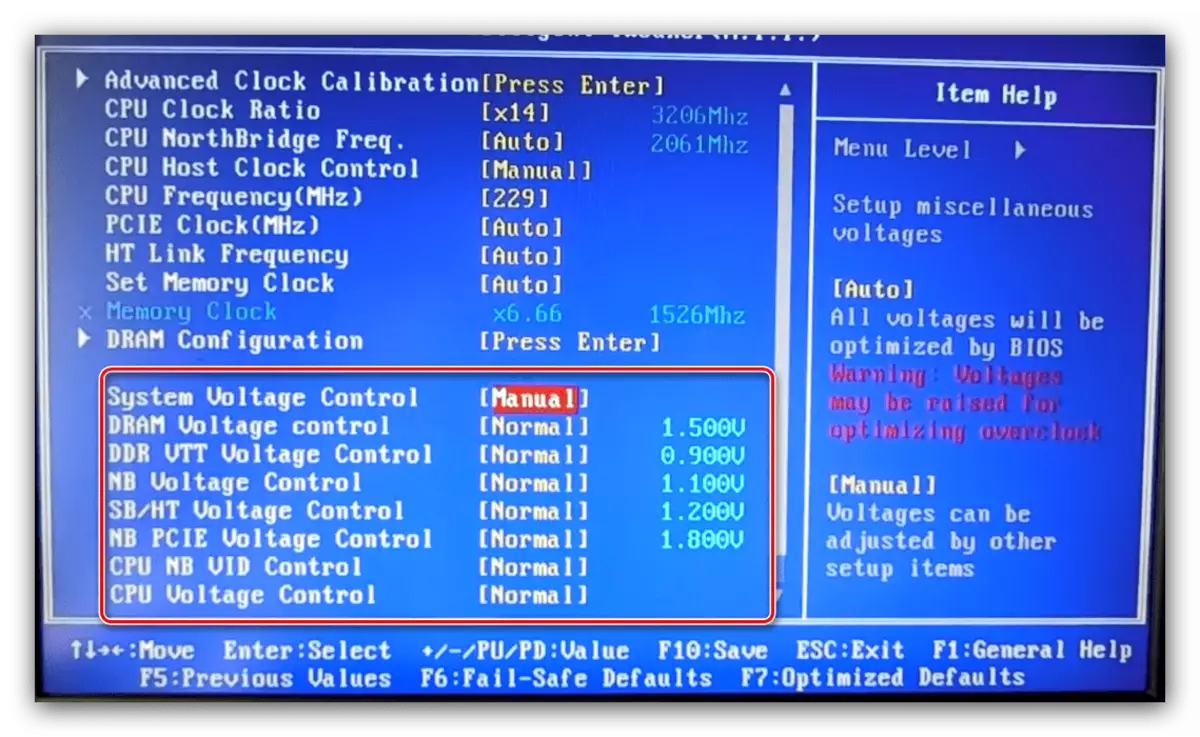
- An additional voltage configuration is usually not required, but if necessary, this parameter can also be configured. To unlock these options, switch "System Voltage Control" to the "Manual" position.
Set up a voltage separately for processor, memory and system tires.
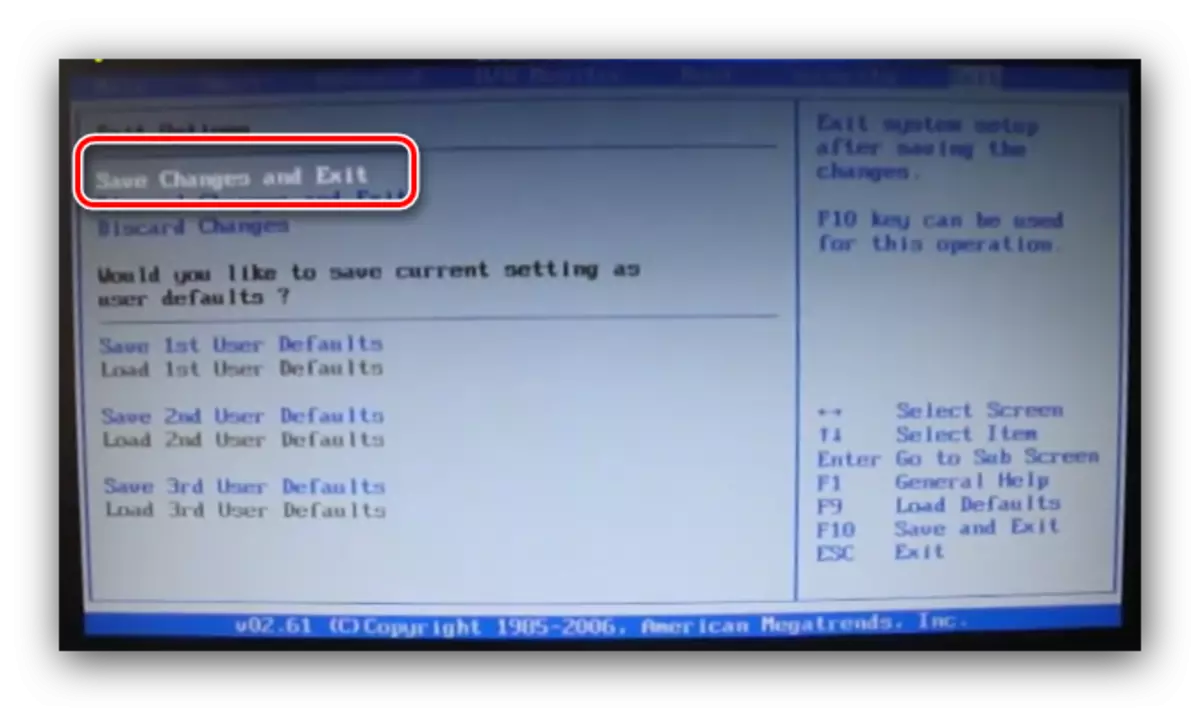
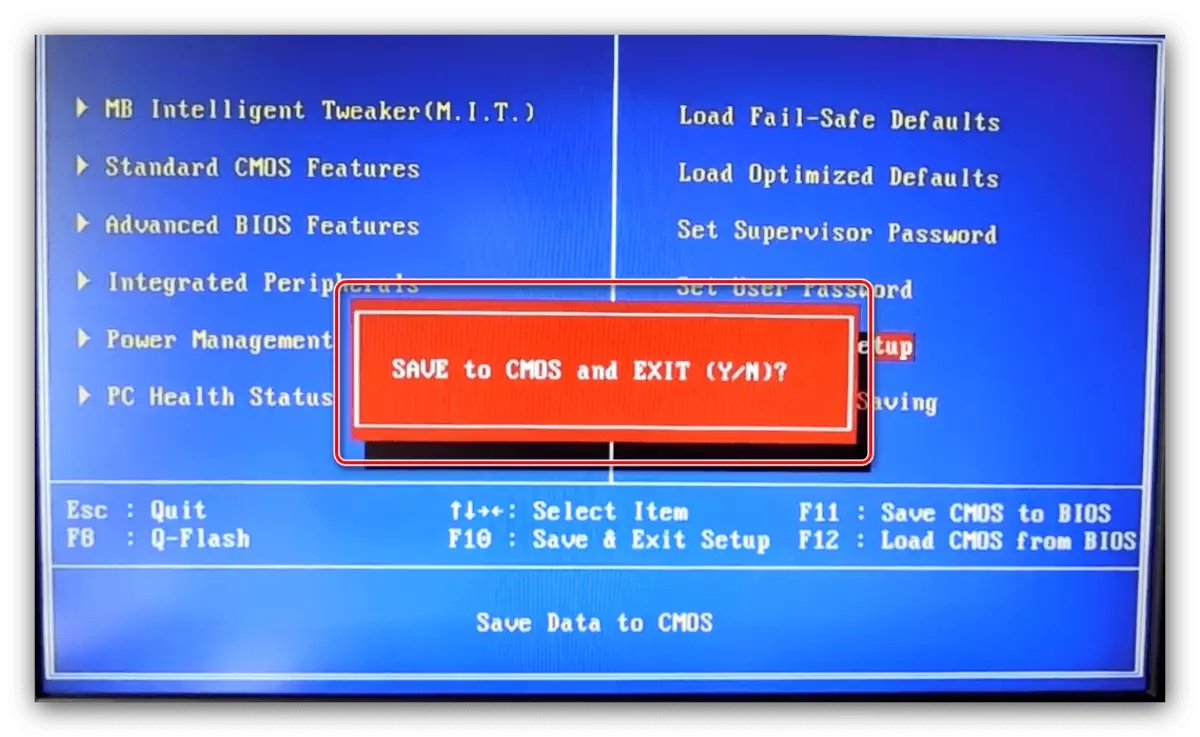
- After making changes, press the F10 key on the keyboard to call the saving dialog, then press Y to confirm.


Phoenix.
This type of firmware is most often found in the form of a Phoenix-Award, since for many years the Phoenix brand has been owned by Award. Therefore, the settings in this case are in many ways similar to the option mentioned above.
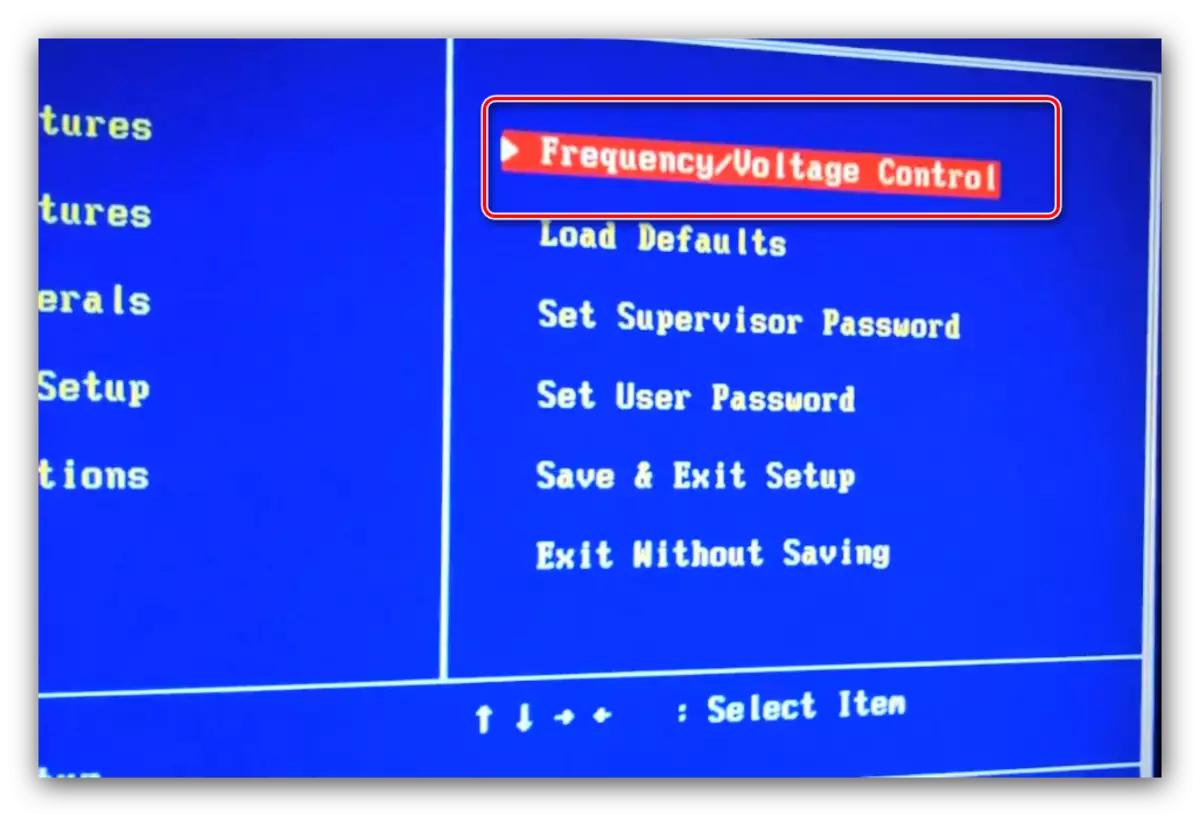
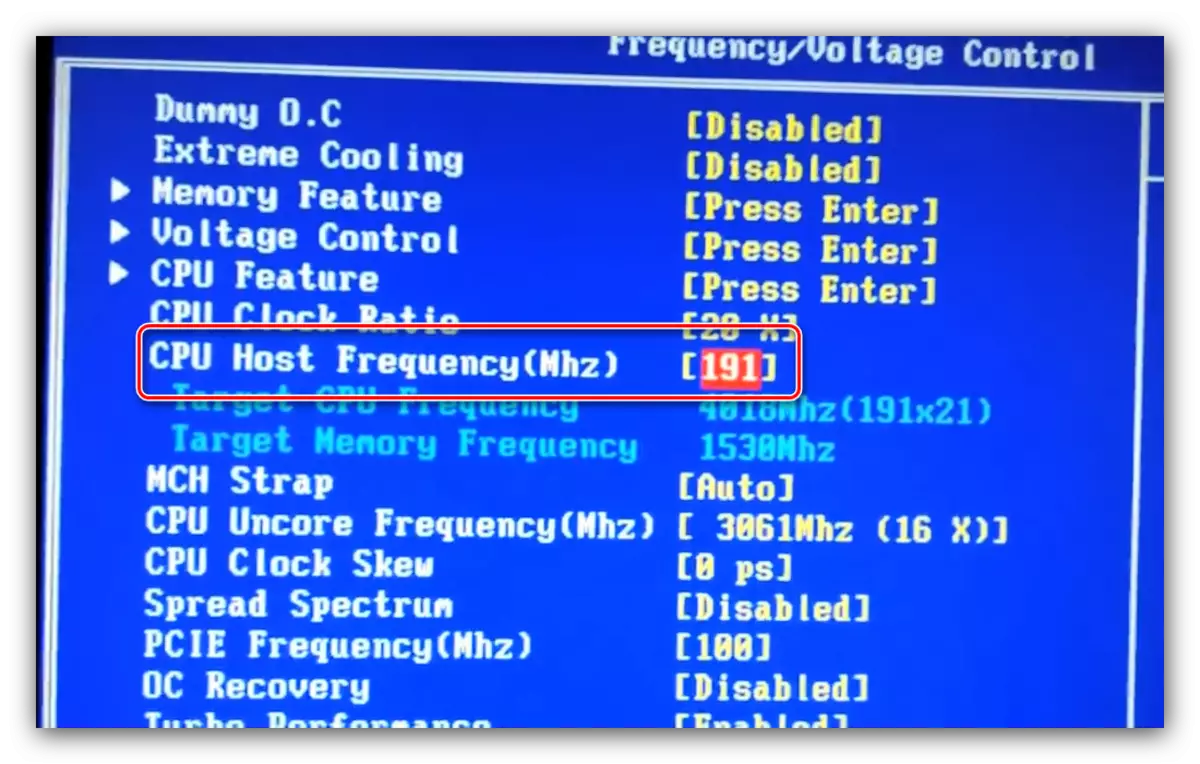
- When entering BIOS, use the "Frequency / Voltage Control" option.
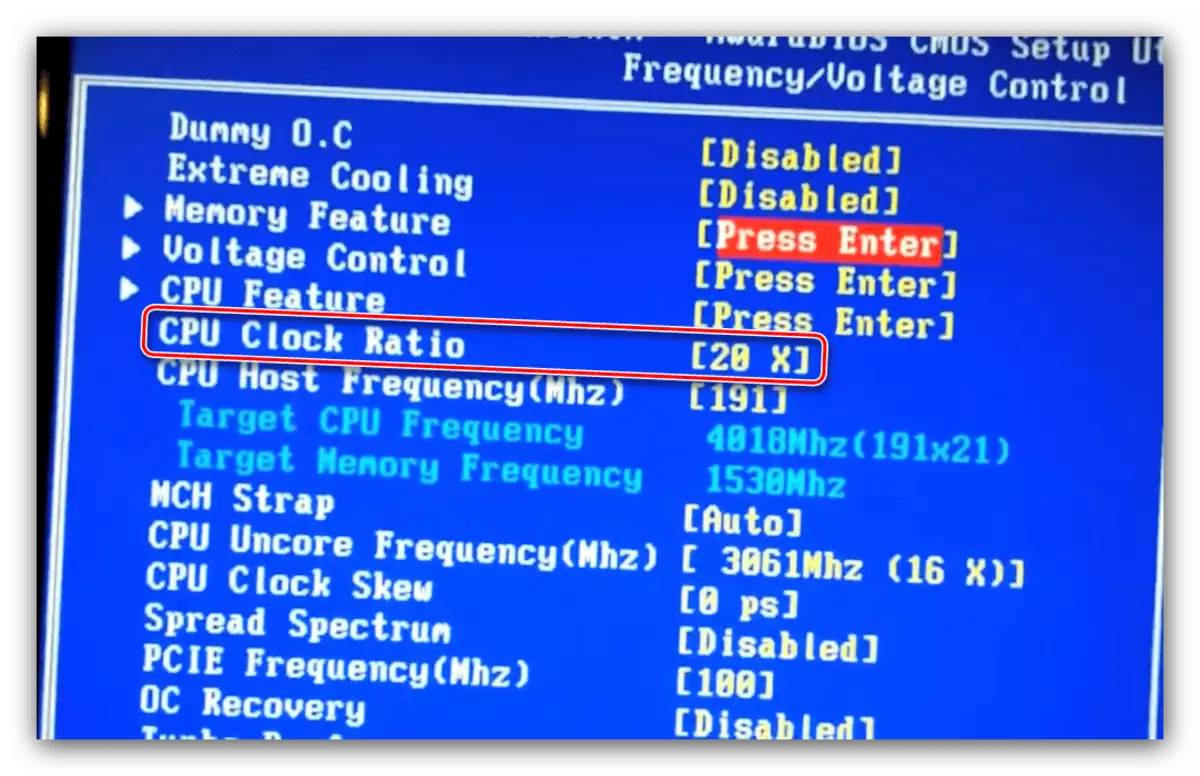
- First of all, set the desired multiplier (available values depend on the capabilities of the CPU).
- Next, specify the starting frequency by entering the desired value in the "CPU Host Frequency" option.
- If necessary, configure the voltage - settings are inside the "Voltage Control" submenu.
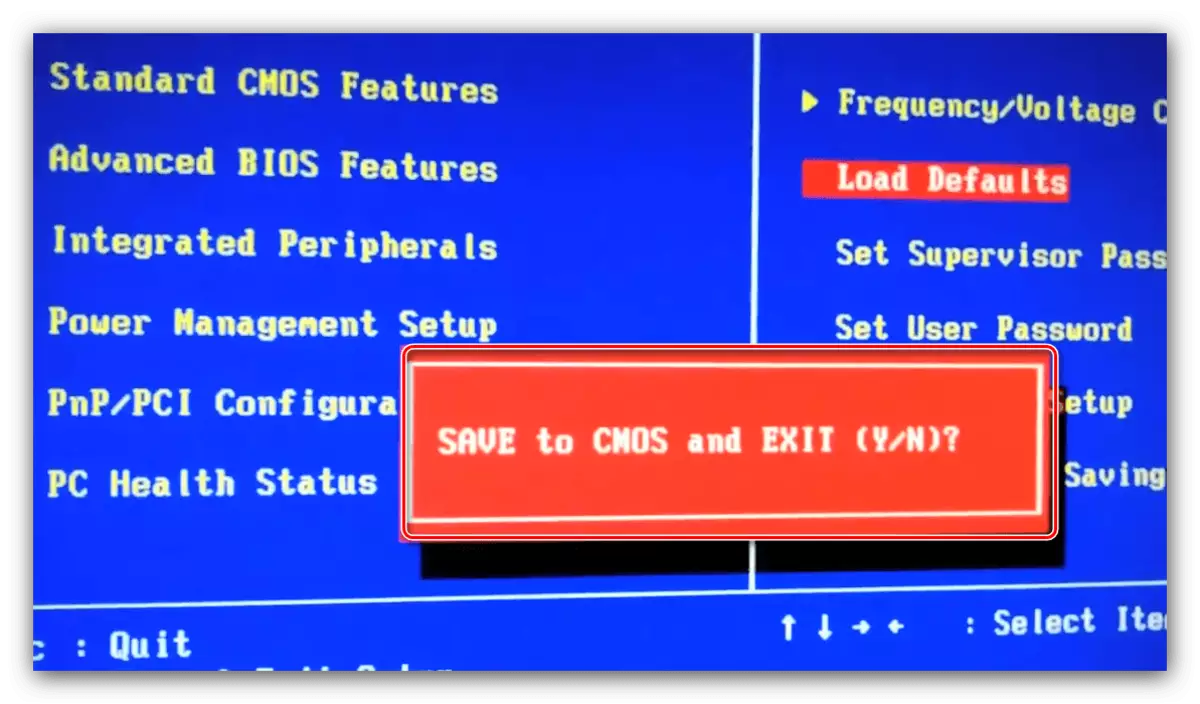
- After making the changes, leave the BIOS - press the F10 keys, then Y.

We draw your attention - often mentioned options may be in different places or to wear a different name - it depends on the manufacturer of the motherboard.
Graphic UEFI interfaces
A more modern and common option for the firmware shell is a graphical interface, interact with which can also be mouse.
ASRock
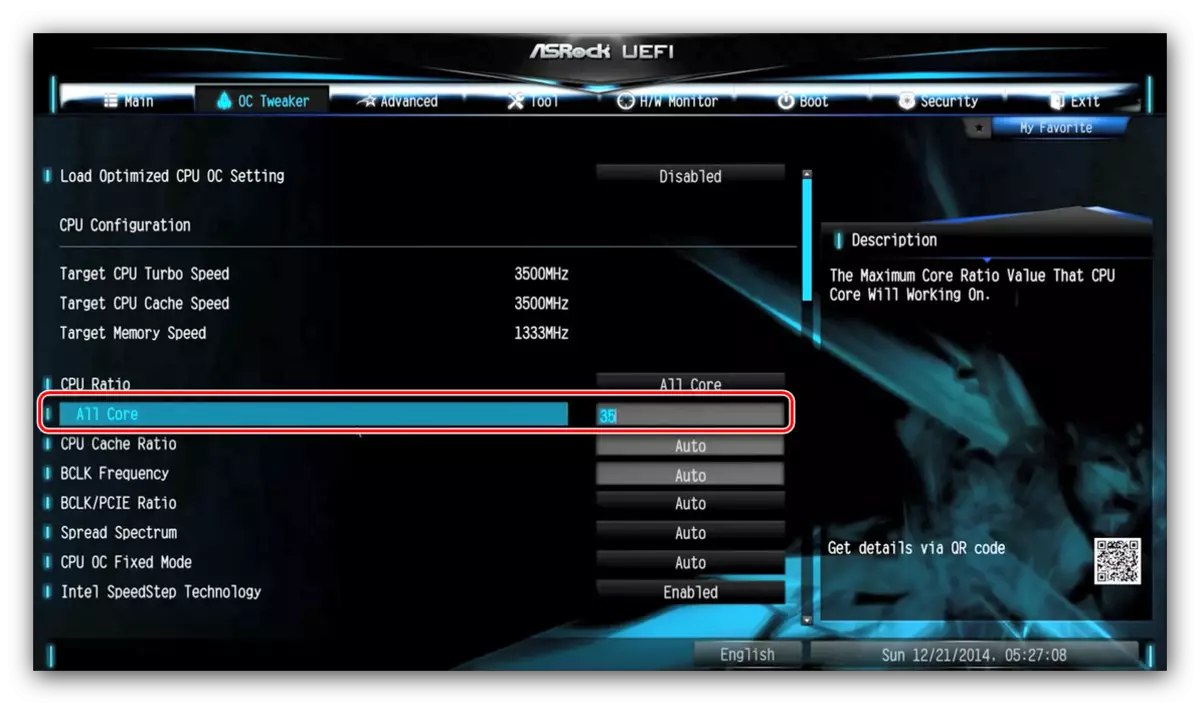
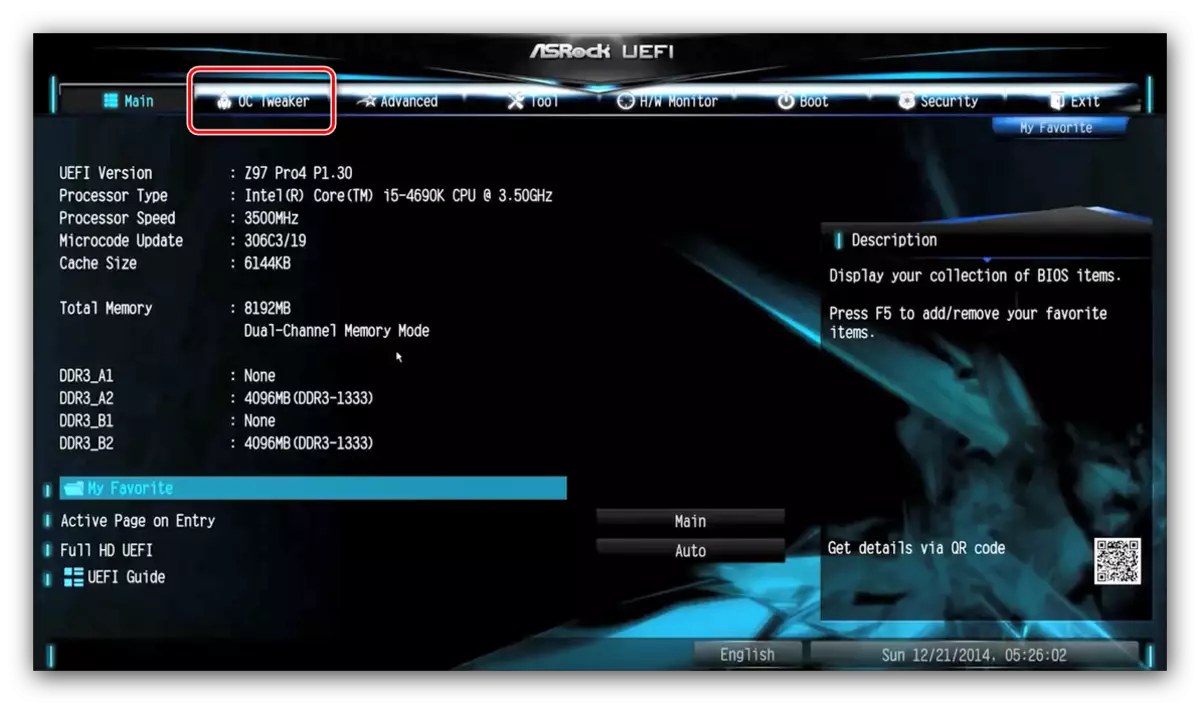
- Call the BIOS, then go to the OC TWEAKER tab.
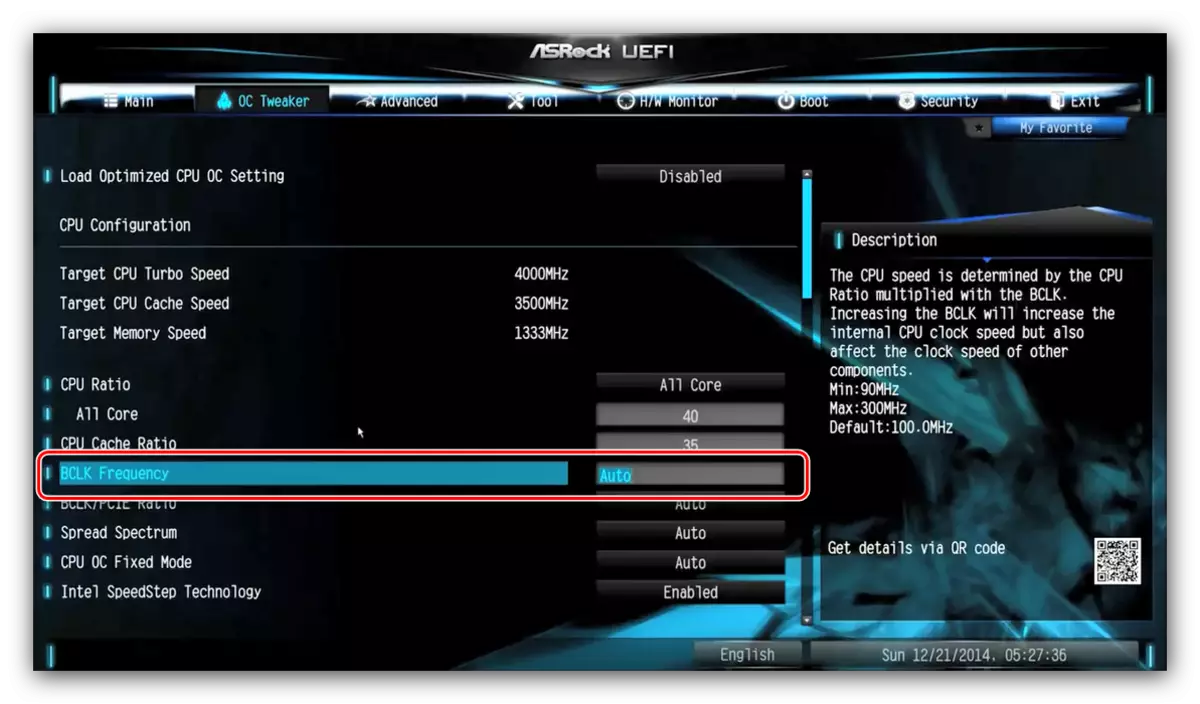
- Find the "CPU Ratio" parameter and switch it to the "All Core" mode.
- Then in the "All Core" field, enter the desired multiplier - the more the number entered, the greater the resulting frequency.
The "CPU Cache Ratio" parameter should be set by a multiple "All Core" value: for example 35, if the main value is 40.
- The basic frequency for the work of multipliers should be installed in the BCLK Frequency field.
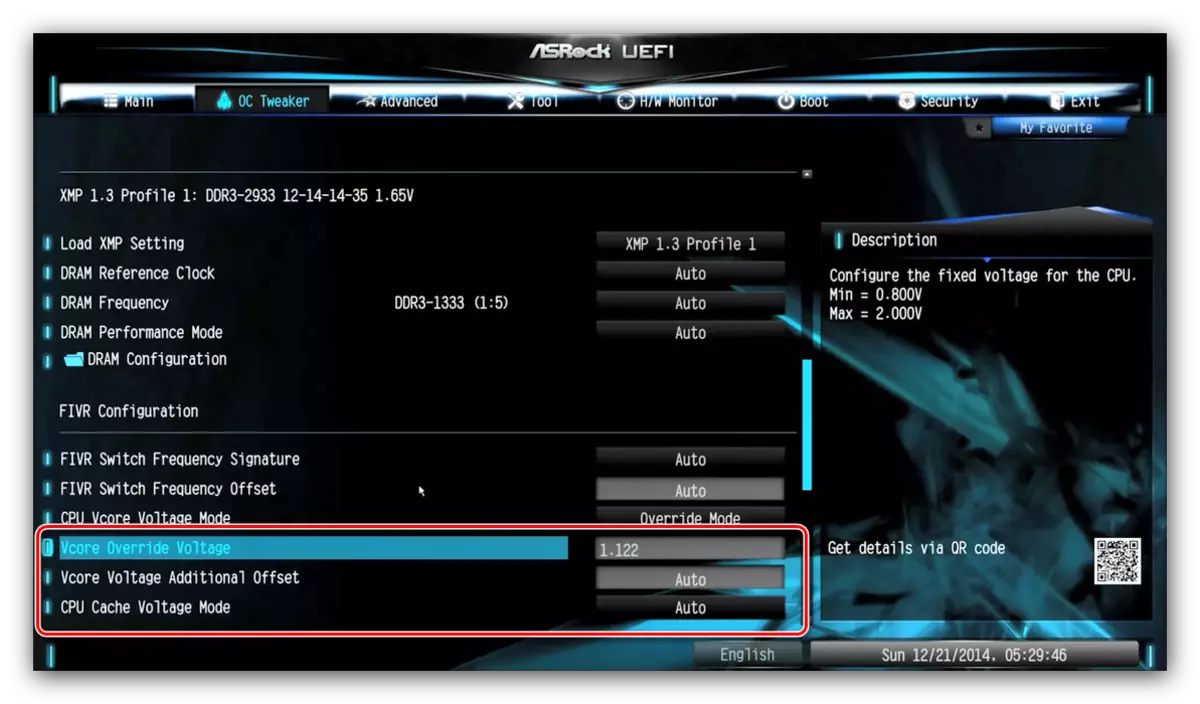
- To change the voltage, if necessary, scroll the parameter list before the "CPU Vcore Voltage Mode" option, which you want to switch to Override mode.
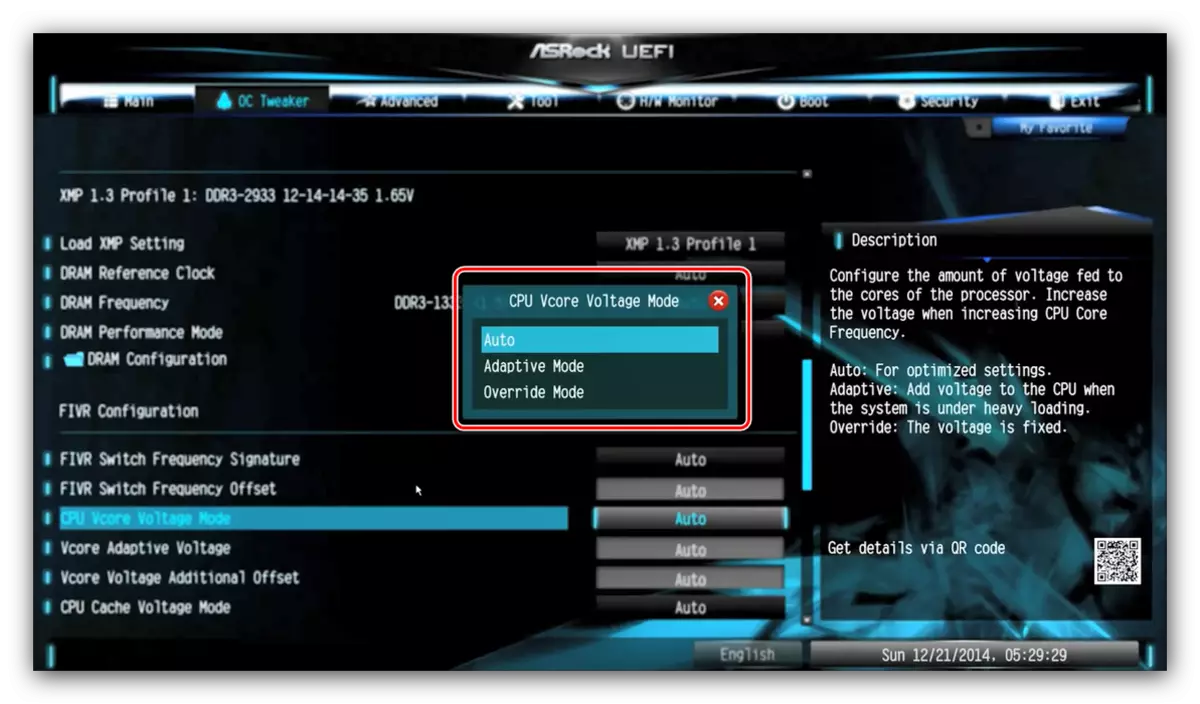
After this manipulation, custom processor consumption settings will be available.
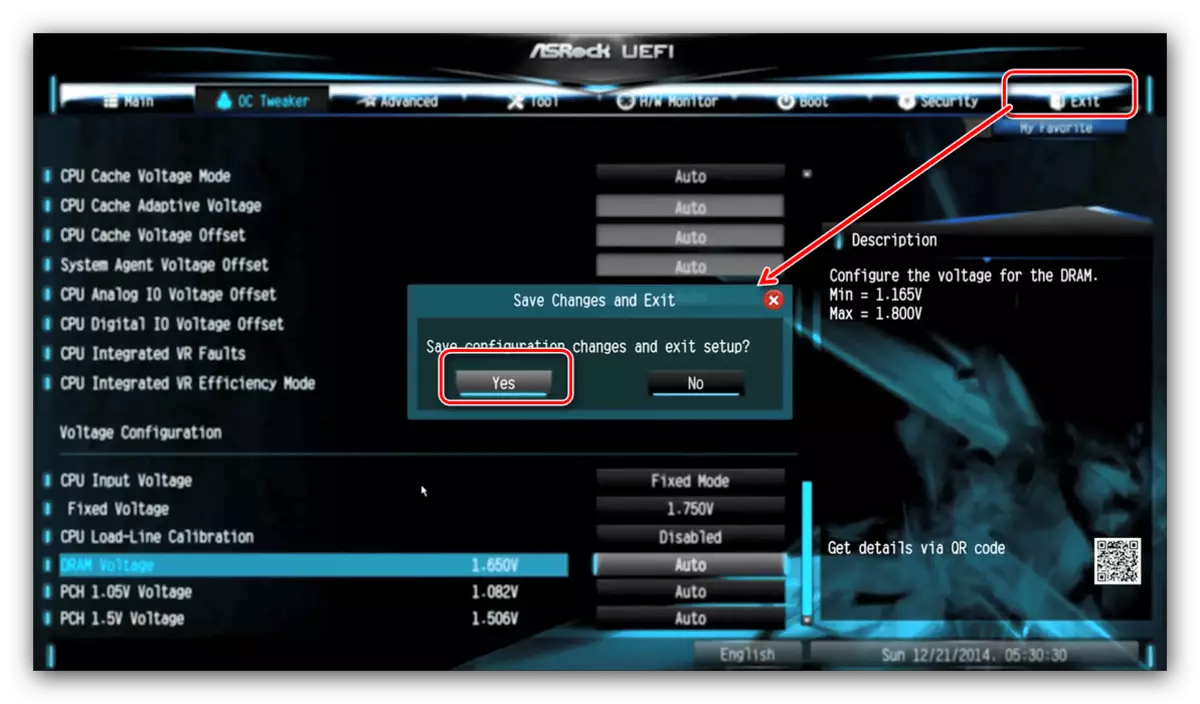
- Saving parameters Available when leaving the shell - you can do this either using the "EXIT" tab, or by pressing the F10 key.


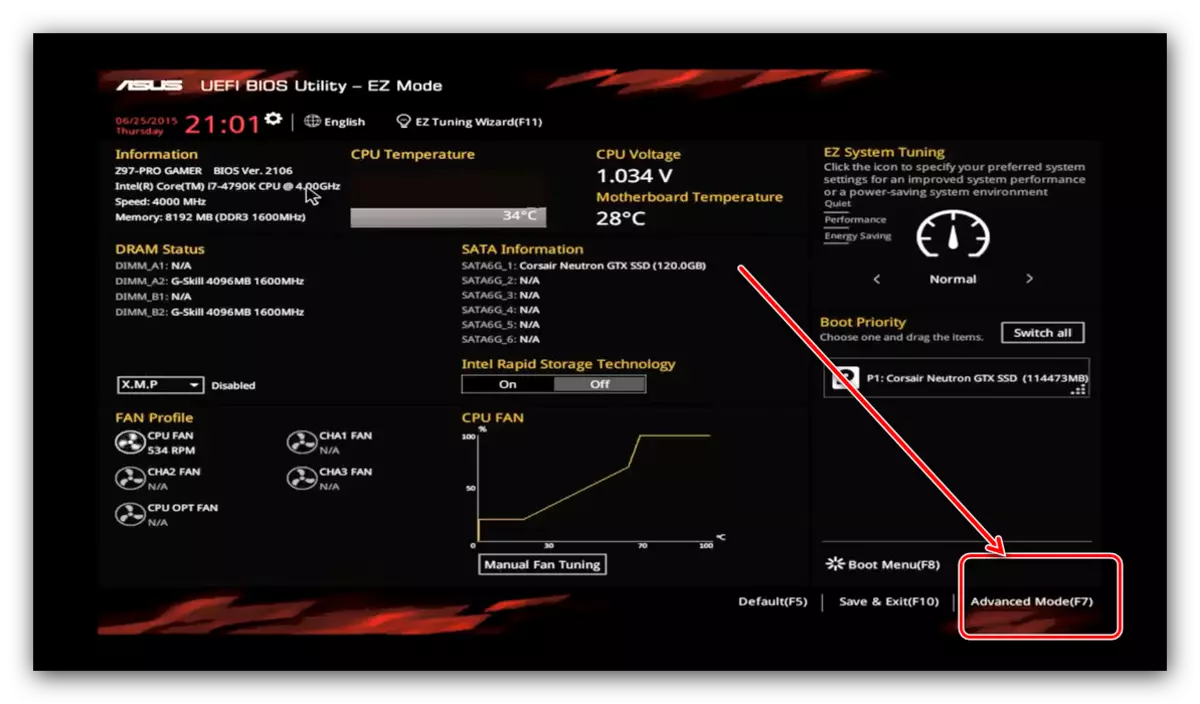
ASUS
- Overclock options are available only in advanced mode - switch to it using F7.
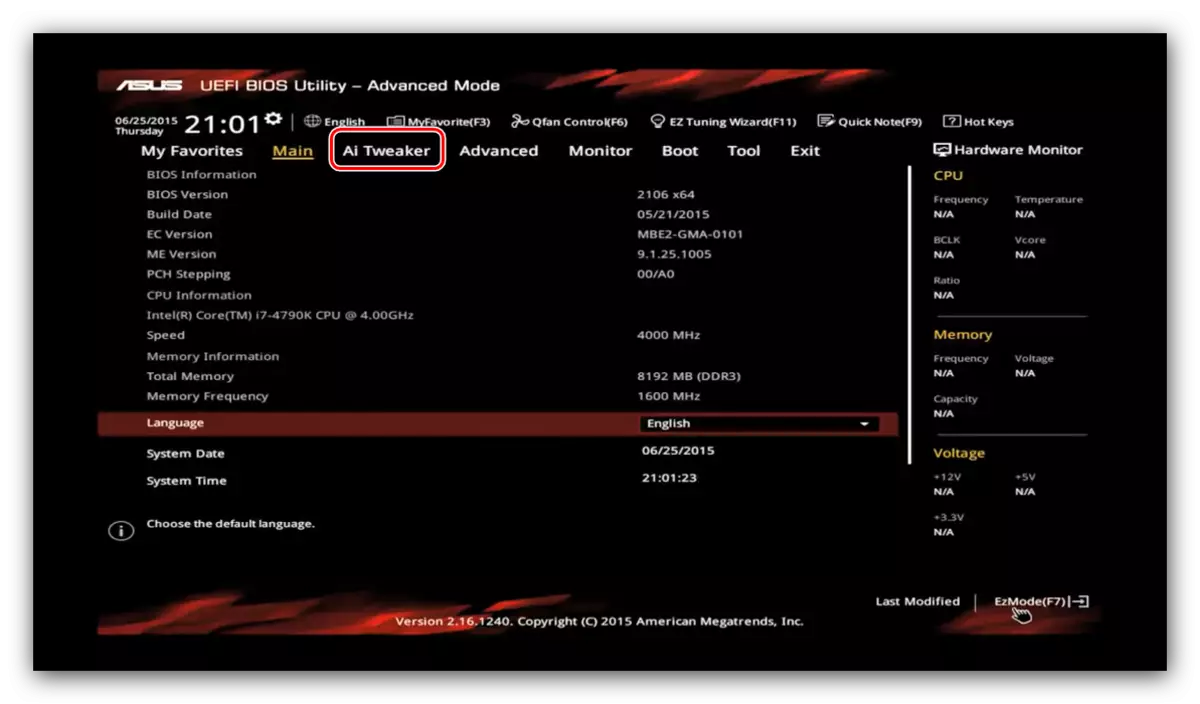
- Move into the "AI TWEAKER" tab.
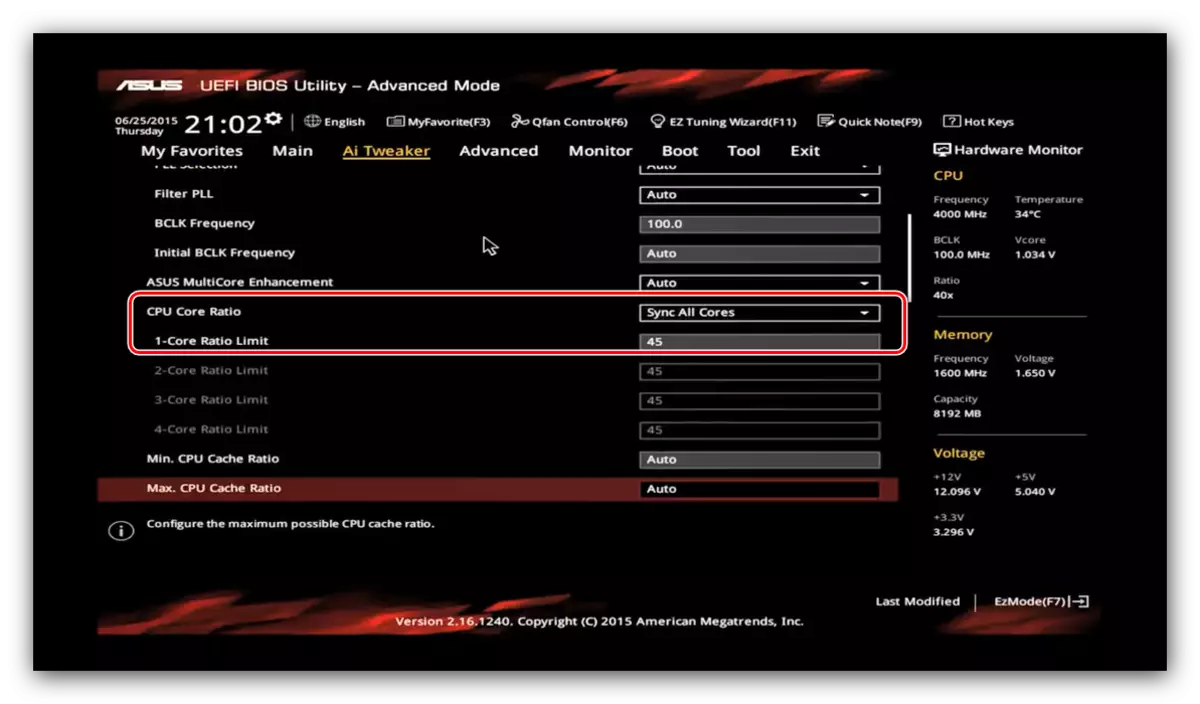
- Switch the "AI OverClock TUNER" parameter to XMP mode. Make sure the "CPU Core Ratio" feature is in the "Sync All Cores" position.
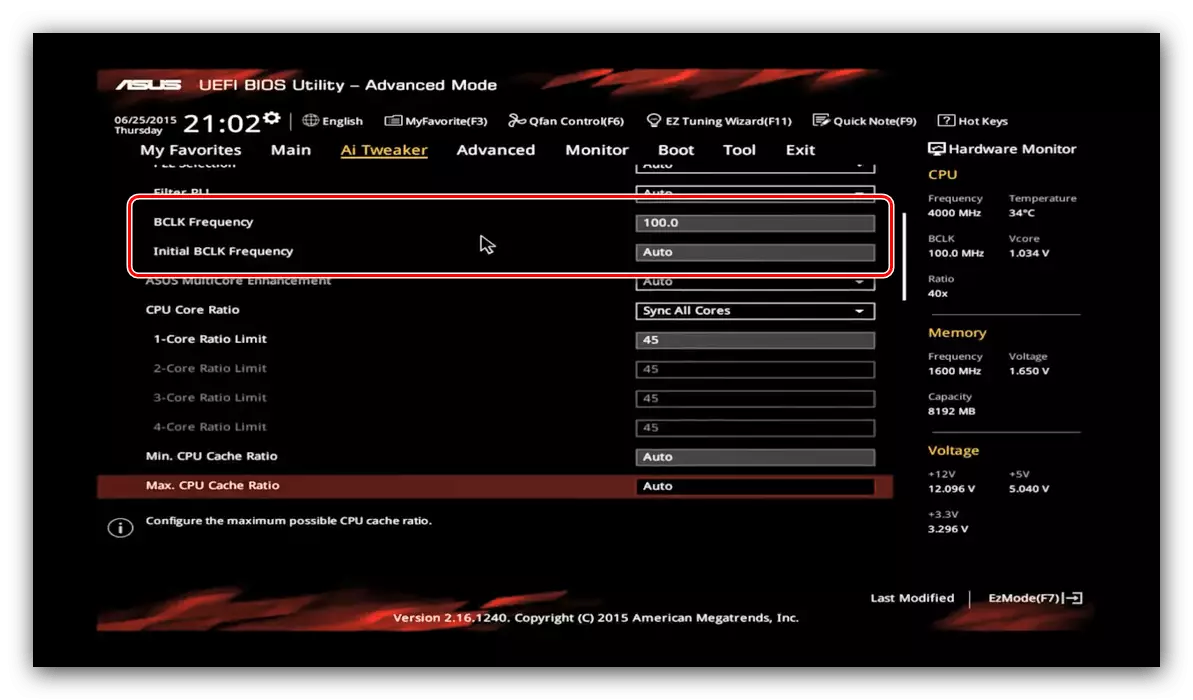
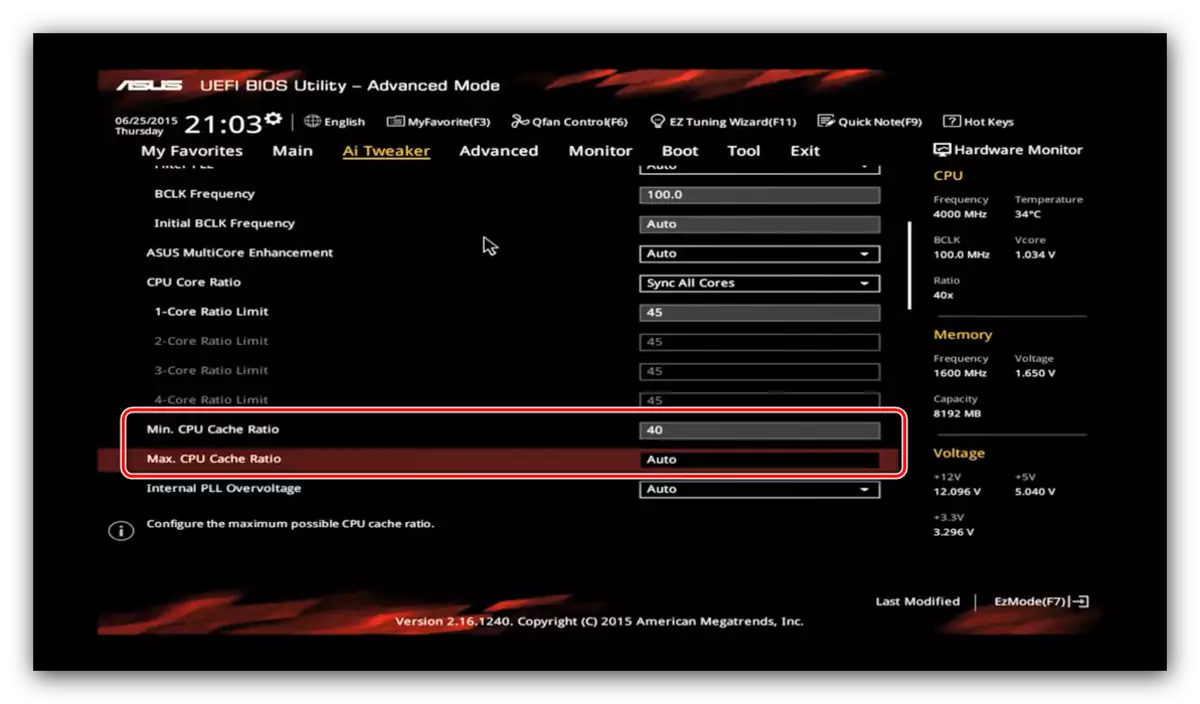
- Adjust the frequency multiplier in the 1-Core Ratio Limit string in accordance with the parameters of your processor. Start frequency is configured in the BCLK Frequency string.
- Also install the coefficient in the MIN. CPU Cache Ratio "- as a rule, it must be below the multiplier to the kernel.
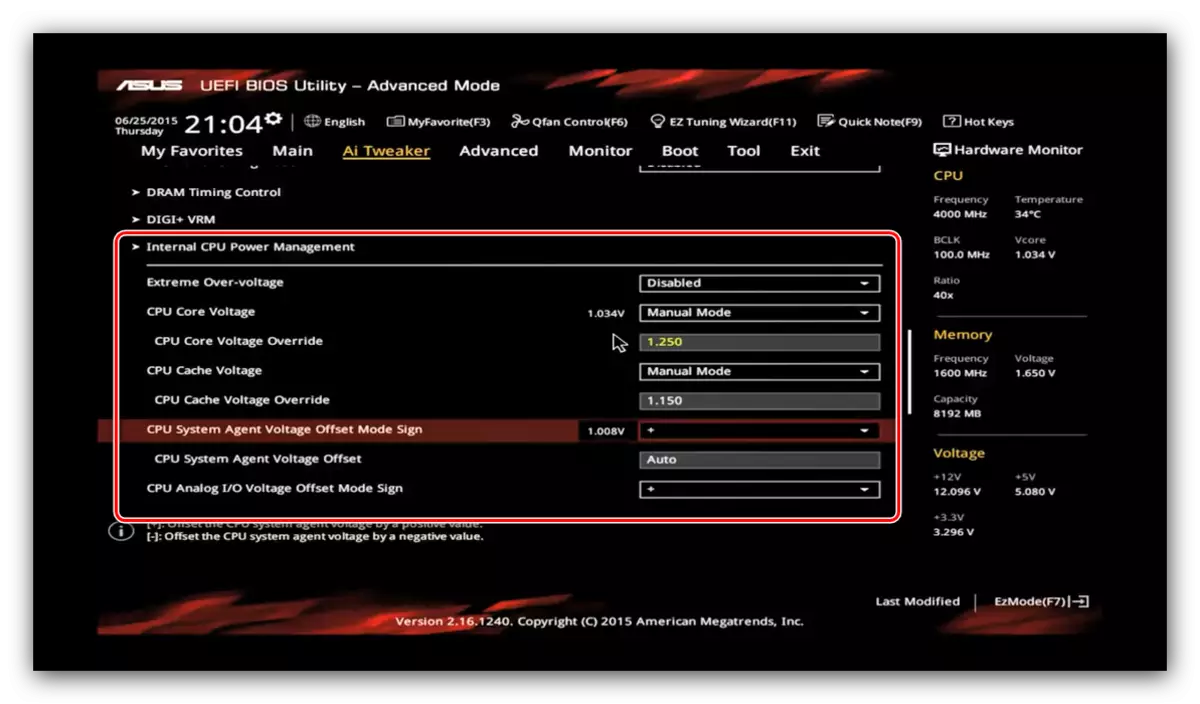
- The voltage settings are located in the "INTERNAL CPU POWER Management" submenu.
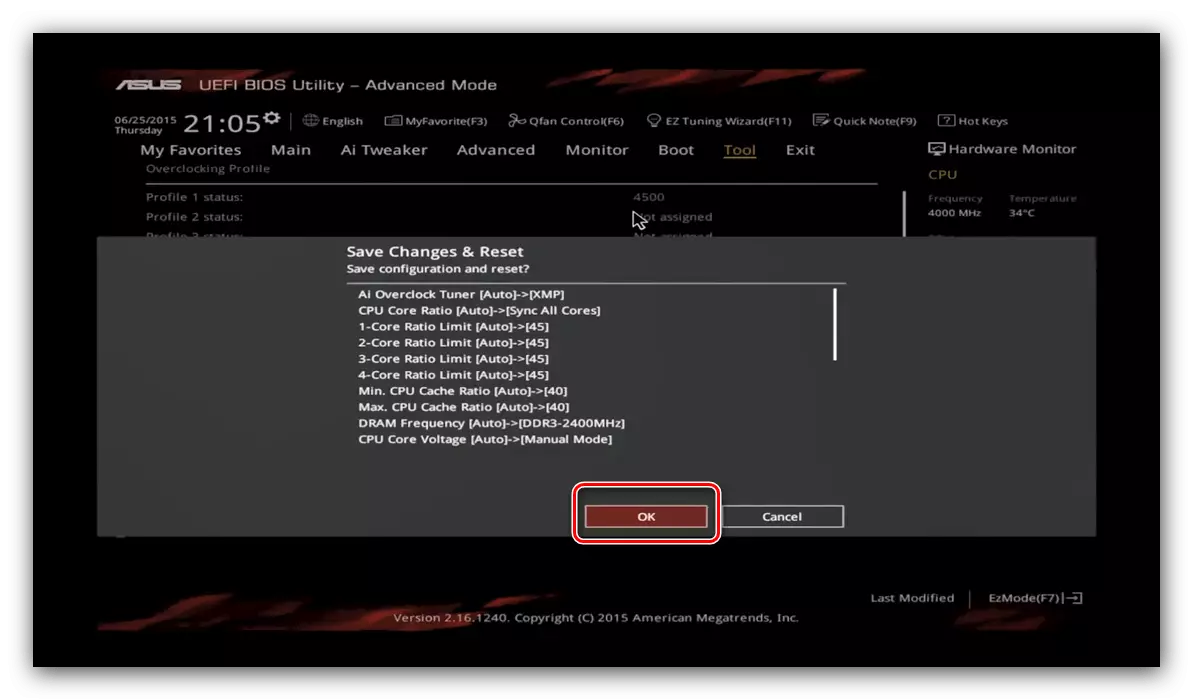
- After making all changes, use the "EXIT" tab and the Save & Reset item to save the parameters.
Gigabyte
- As in the case of other graphic shells, in the Gigabyte interface, you need to go to the advanced control mode, which here is called "Classic". This mode is available on the main menu button or by pressing the F2 key.
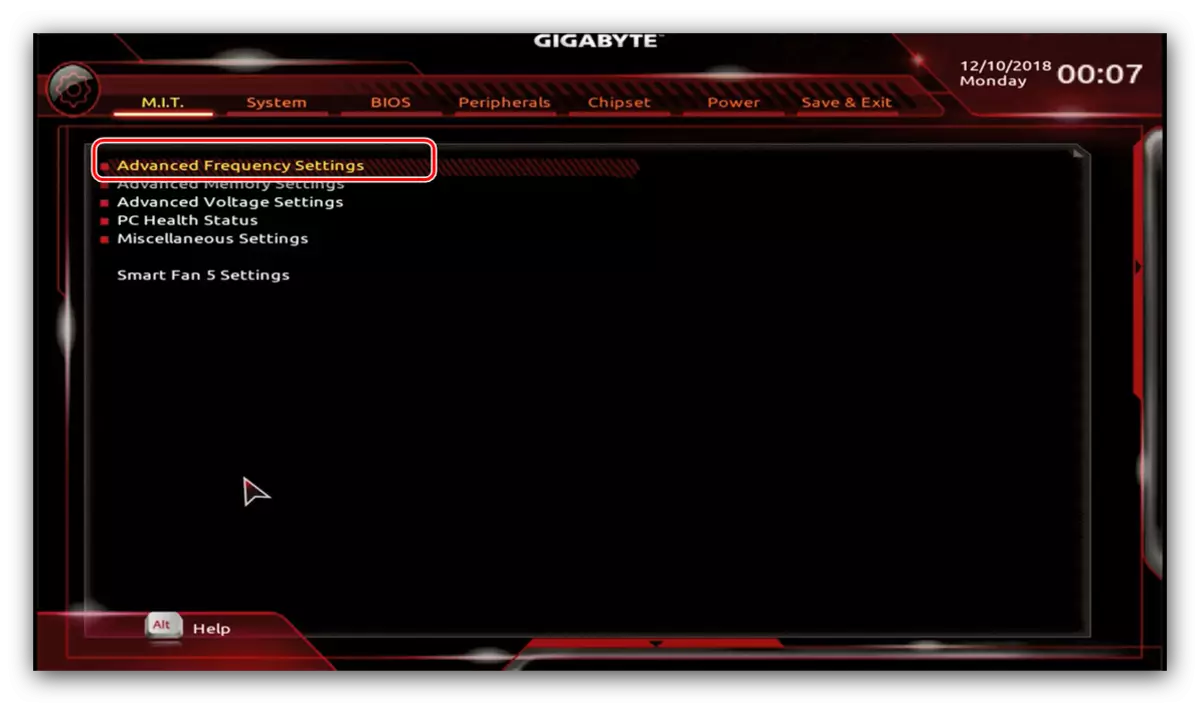
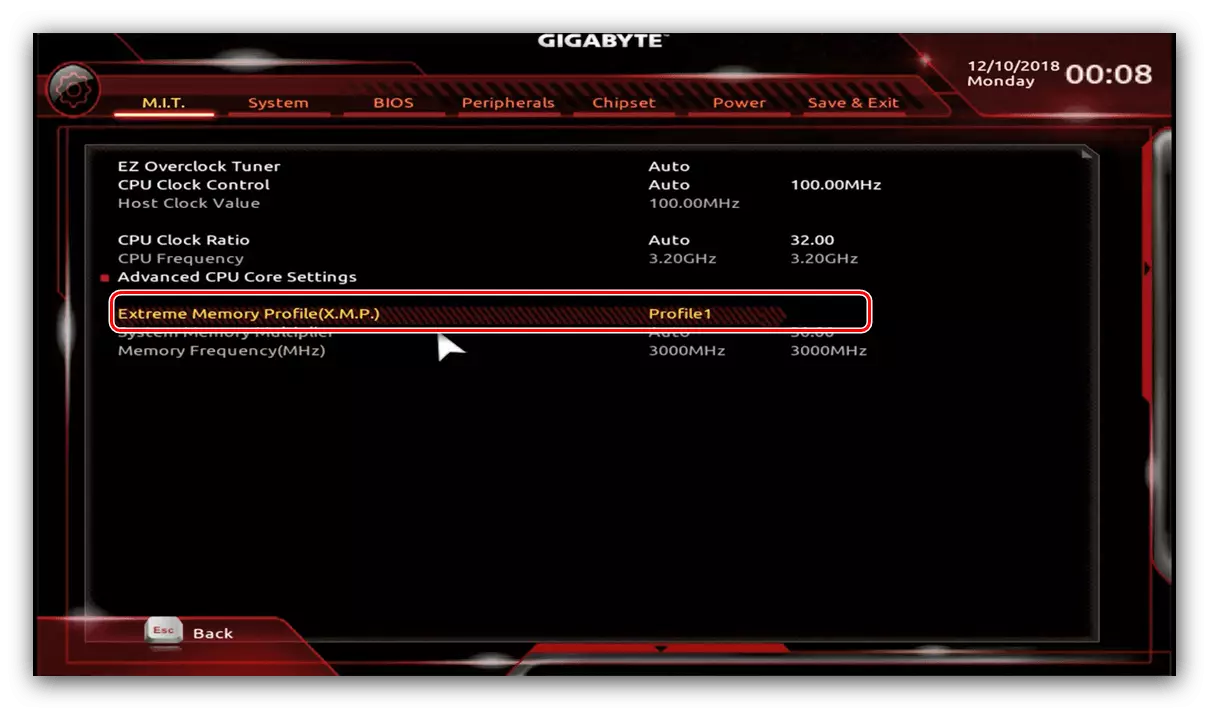
- Next, go to the "M.i.t." section, in which we are interested in the Advanced Frequency Settings block, open it.
- First, select a profile in the "Extreme Memory Profile" parameter.
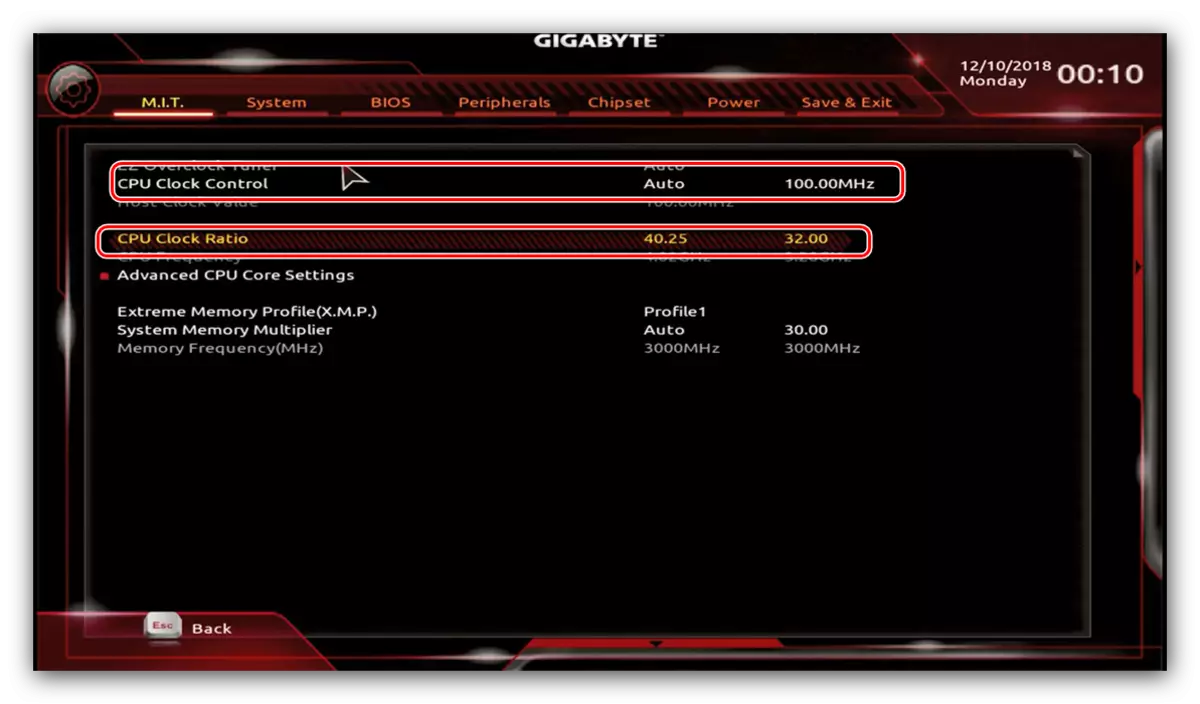
- Next, select the multiplier - enter the number suitable by specifications in the CPU Clock Ratio paragraph. You can also set the value of the base frequency, the option "CPU CLOCK CONTROL".
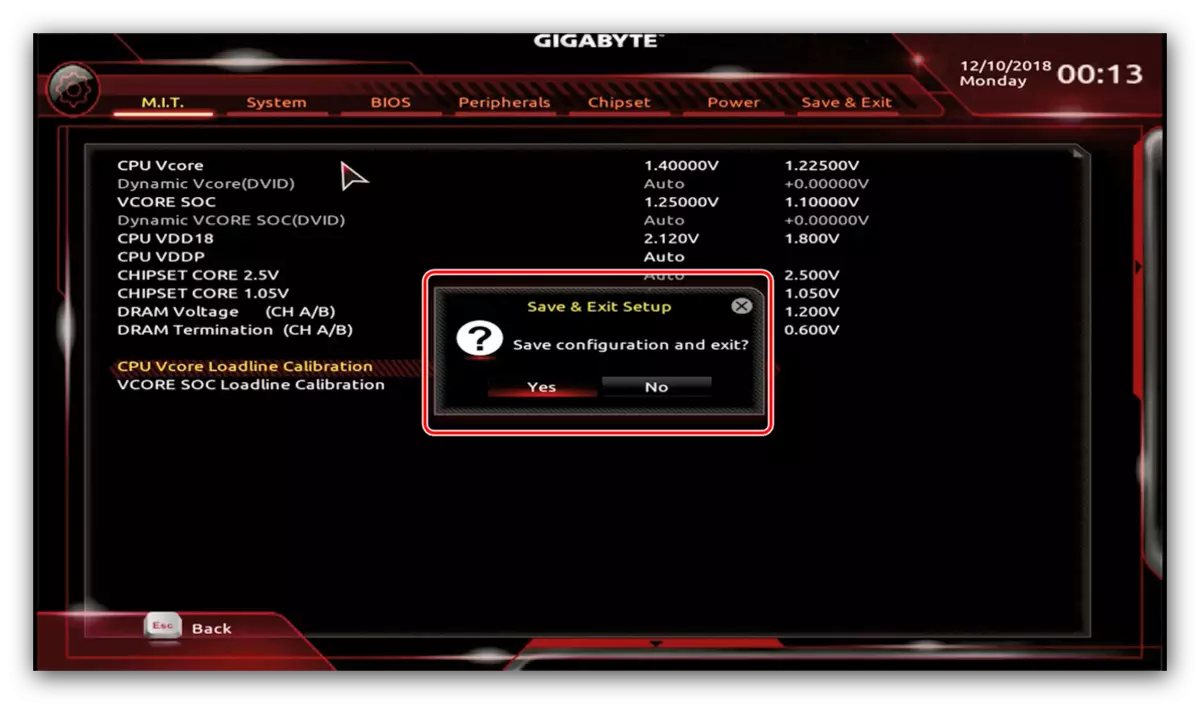
- The voltage settings are located in the Advanced Voltage Control unit tabs "M.I.T.".

Change the values to the suitable chipset and processor.
- Press F10 to call a dialog for saving entered parameters.


MSI
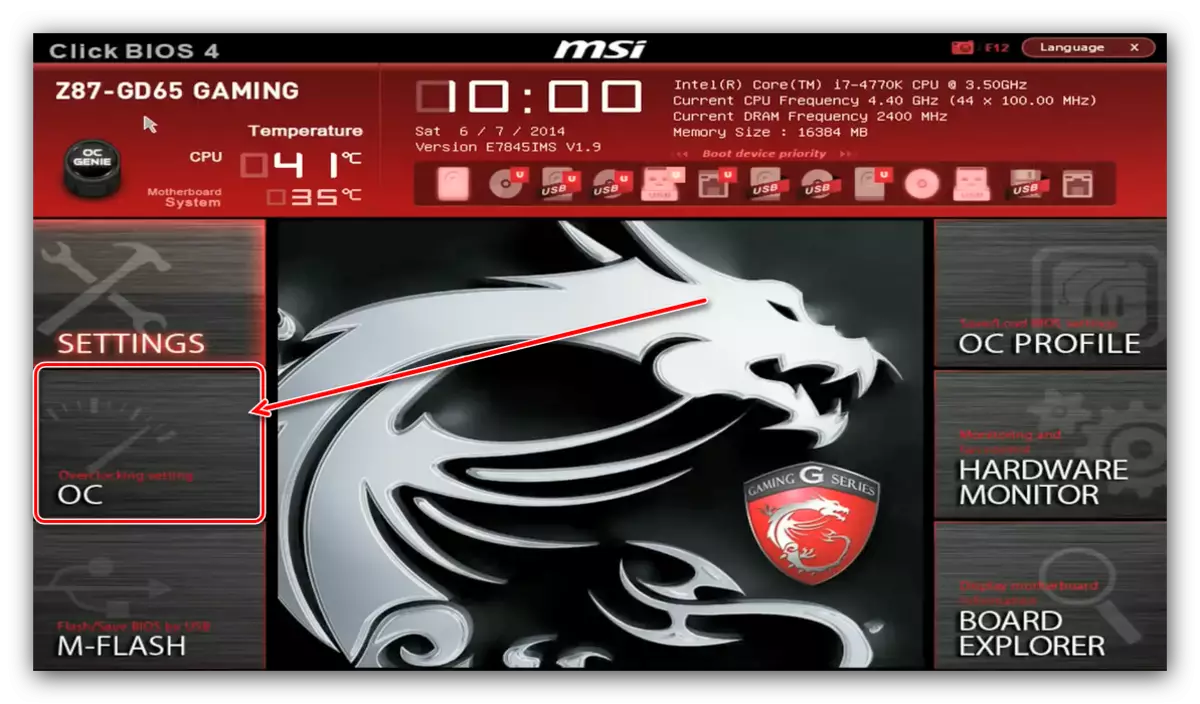
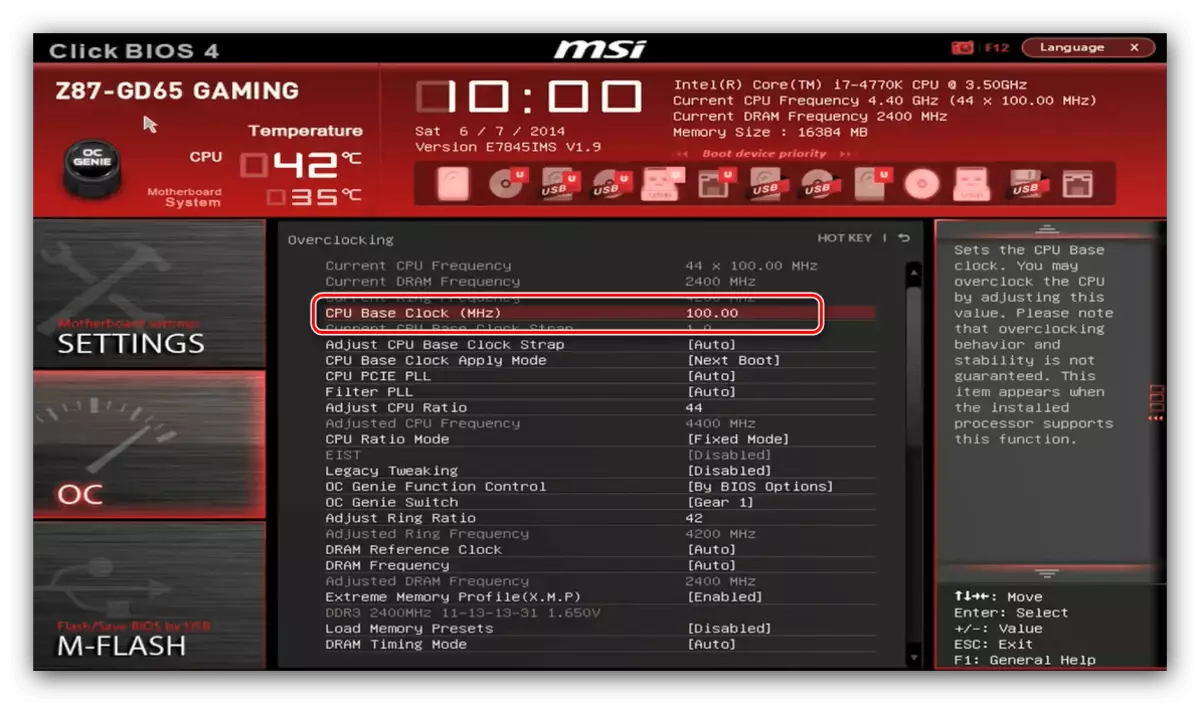
- Press the F7 key to go to an advanced mode. Next, use the "OC" button to access the overclocking section.
- The first parameter to be configured to overclock the base frequency. For this, the option "CPU Base Clock (MHz)" is responsible, enter the desired value to it.
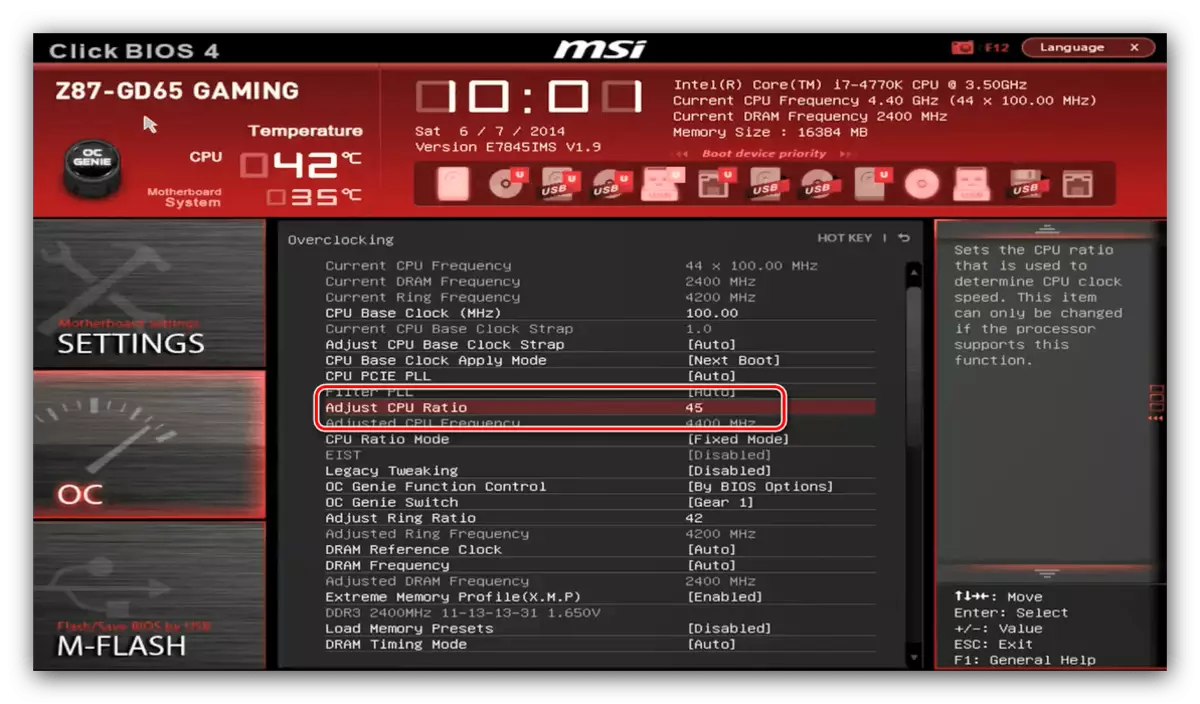
- Next, select the multiplier and enter it in the ADJUST CPU Ratio string.
- Make sure the "CPU Ratio Mode" option is in the "Fixed Mode" position.
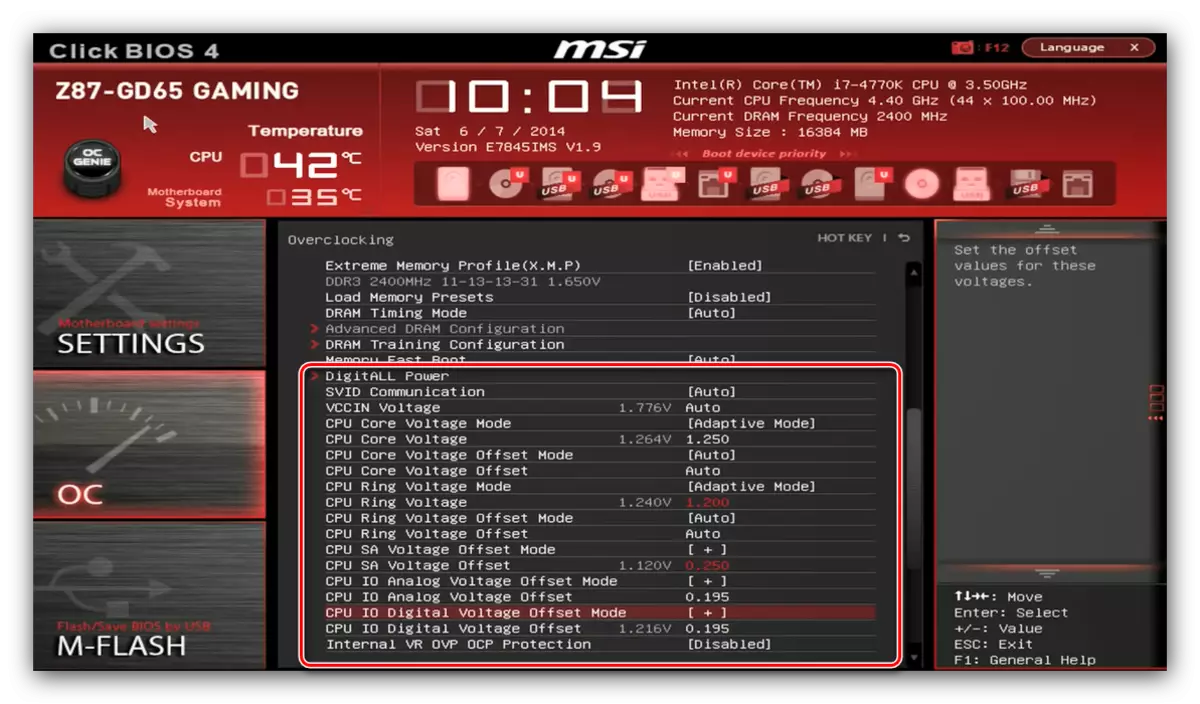
- The voltage parameters are located below the list.
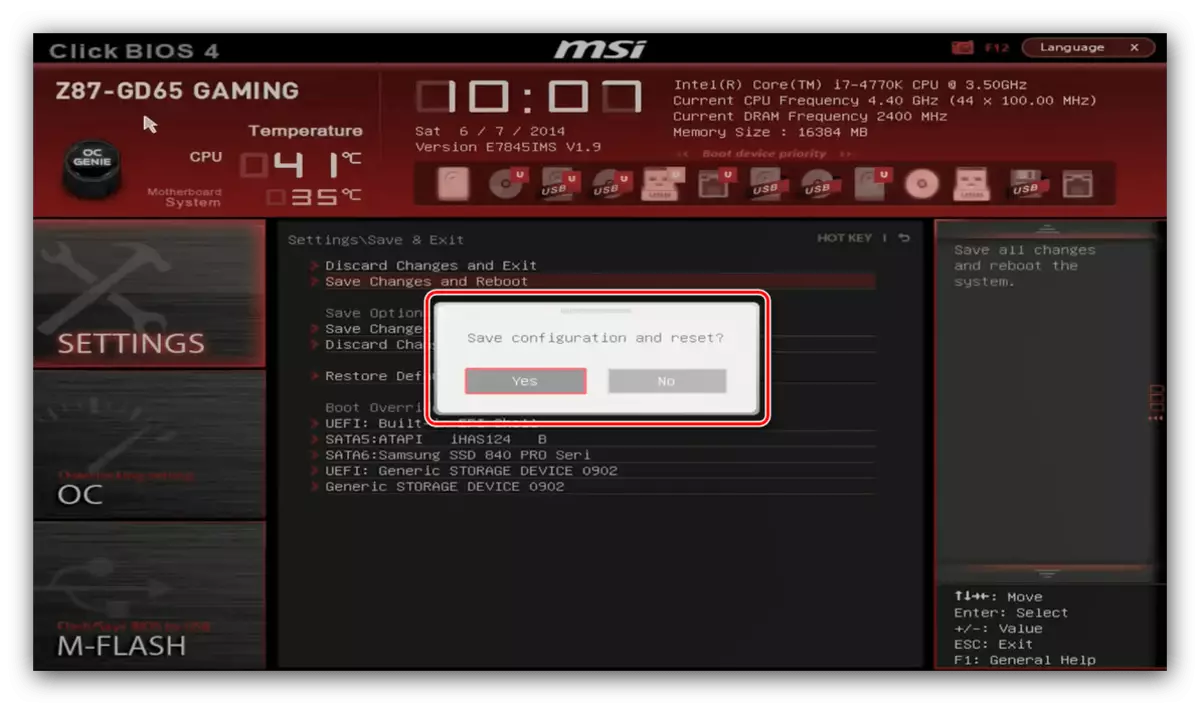
- After making changes, open the "Setting" block in which you select the "Save & Exit" option. Confirm the output.

Conclusion
We reviewed the processor acceleration method through the BIOS for the main options for the shells. As you can see, the procedure itself is simple, but all the required values need to know exactly the last digit.