

Before you start working with Adobe Photoshop on your own computer, you first need to properly configure this editor of graphics under your needs. Thus, Photoshop during the subsequent work will not cause any problems or difficulties, because the processing in such a program will be effective, fast and simple.
Installations of Photoshop
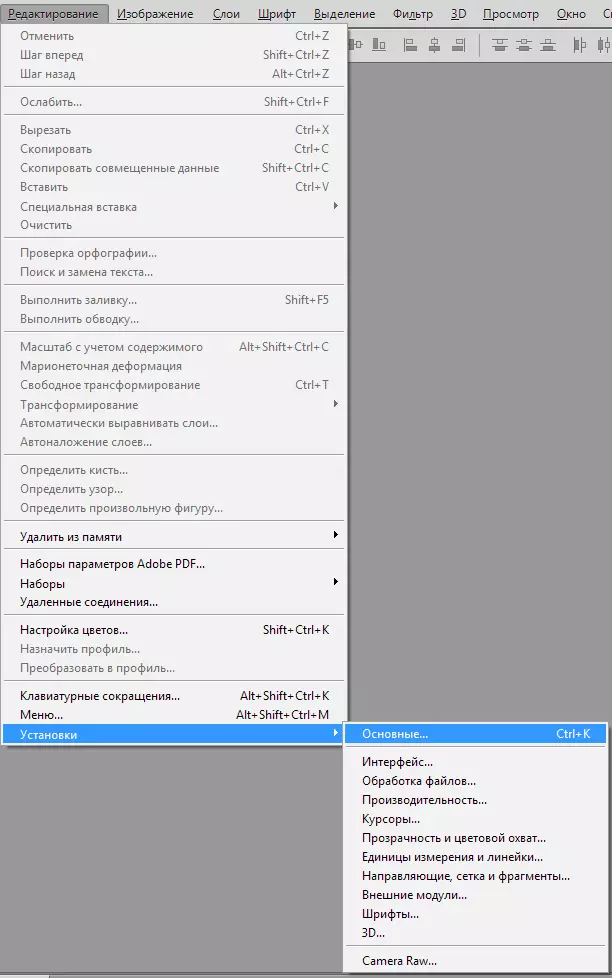
In all versions of the photoshop, installation are in the "Editing" section of the top menu. The setting is subject to a fairly large number of parameters. We will analyze the most useful from the user point of view.Basic
Go to the menu "Editing - Installations - Main" . You will see the settings window. We will deal with the opportunities available there.
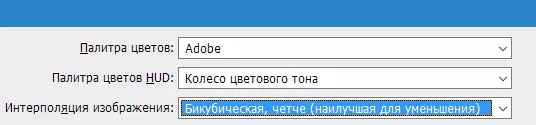
Color palette - Do not switch with "Adobe";
Palette HUD. - Leave "Color Tone Wheel";
Interpolation image - Activate "Biobubic (best to reduce)" . Quite often, it is necessary to make an image less in order to prepare it for posting on the network. That is why you need to choose this mode that is created specifically for this.
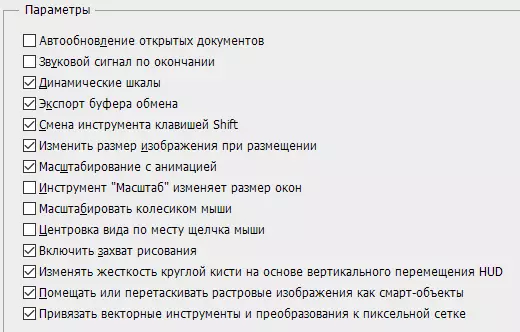
Will be viewed the remaining parameters that are in the tab. "Basic".
Here you can almost leave unchanged, except for the item "Tool change key Shift" . As a rule, to change the tool in one tab of the toolbar, we can press the key Shift. And with it a hot key assigned to this tool. It does not always turn out to be convenient, because a tick from this item can be removed and able to activate one or another tool only by pressing one hot button. This is quite convenient, but not necessarily.
In addition, in these settings there is an item "Scaling Mouse Wheel". Optionally, you can mark this item and apply settings. Now scrolling the wheel, the scale of the photo will change. If this feature is interested in you, install the appropriate check mark. If it still has not been installed, to change the scale of the image, you will have to hold the Alt button and only then turn the mouse wheel.
Interface
When the main settings are set, you can go to the item "Interface" And view its capabilities in the program. In the main color settings, it is better not to change anything, but in paragraph "The border" It is necessary to choose all items as "Do not show".
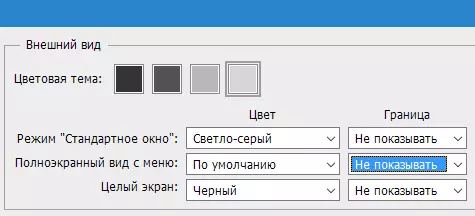
What do we get this way? According to the standard at the edges of the photo, the shadow is drawn. This is not the most important detail, which, despite the beauty, distracts and creates additional problems during the work. Sometimes confusion arises, whether this shadow actually exists, or is it just the effect of the program. In order to avoid this, the display of shadows is recommended to turn off.
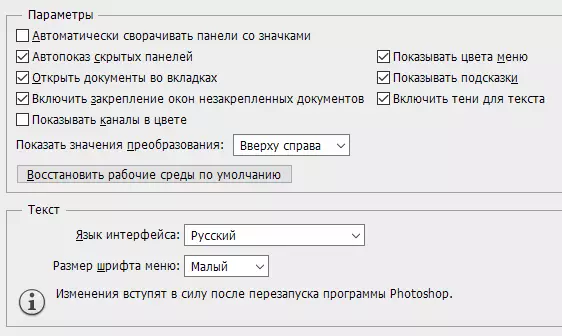
Next in paragraph "Parameters" need to put a tick in front "Auto-capezz of hidden panels" . Other settings are better not to change here. Do not forget to check the fact that the program language is set to you and the font size convenient for you is selected in the menu.
File processing
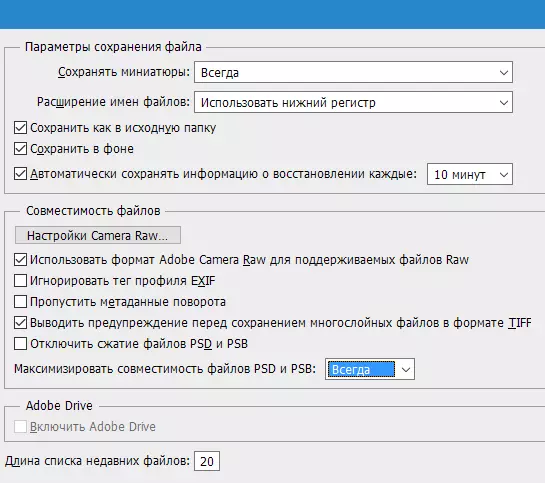
Let us turn to the point "File Processing" . Settings for saving files are best left without any changes. In the file compatibility settings, select item "Maximize PSD and PSB file files compatibility" , Install the parameter "Is always" . In this case, Photoshop will not make a request while maintaining whether it is worth improving compatibility - this action will be carried out automatically. The remaining items are best to leave as it is, without changing anything.
Performance
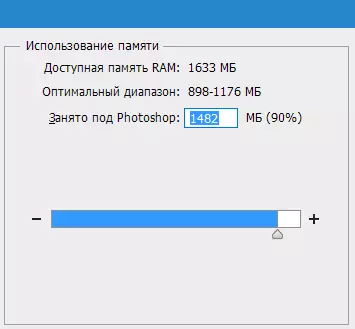
We turn to the performance parameters. In configuring memory, you can configure the allocated RAM specifically for the Adobe Photoshop program. As a rule, the majority prefers to choose the highest possible values, making it possible to avoid possible slow-moving during the subsequent work.
See also: Solving a problem with a lack of RAM in Photoshop
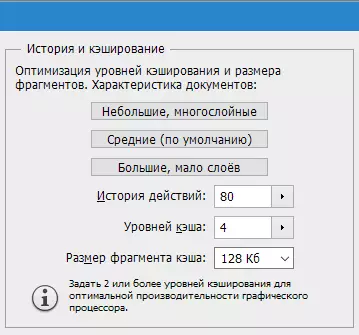
The settings item "History and Cash" also needs minor changes. In the "Story of Action" it is best to establish a value equal to eighty. In the course of work, the preservation of a large history of change can significantly help. Thus, we will not be scary to make mistakes in work, because we can always be back to an earlier result.
A small change history will not be enough, the minimum value that will be convenient in operation is approximately 60 points, but the more, the better. But do not forget that this parameter can load a multiple system, so when it is configured, consider the power of your computer.
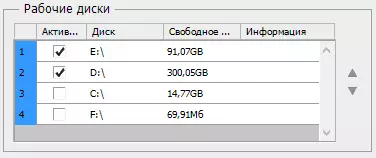
Settlement item "Work disks" It has a special importance. It is extremely recommended to choose as a work disc system "WITH" disk. It is best to choose a disk with the highest amount of free space in memory. If two (or more) disks are selected, the program will use them in the order in which they are listed.
In addition, in the processor settings processing graphics, you should activate the draw OpenGL . Here you can also configure in paragraph "Extra options" , but here it is still preferable "Normal" mode ".
Cursors
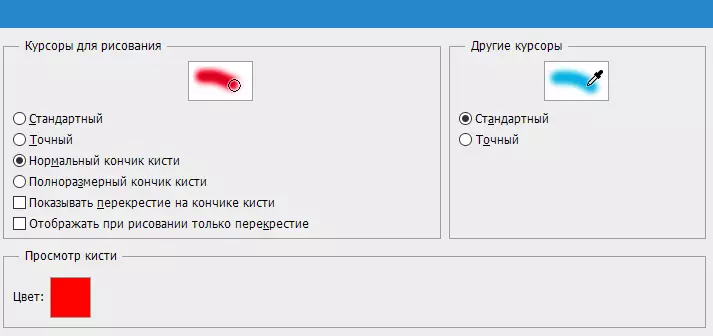
After configuring performance, you can go to the "Cursors" tab, here you can configure it. You can make sufficiently serious changes, which, however, will not affect work.
Color coverage and transparency
There is an ability to set up a warning if the color coverage is output, as well as the display of the region itself with a transparent background. You can play with these settings, but they will not affect performance.

Units
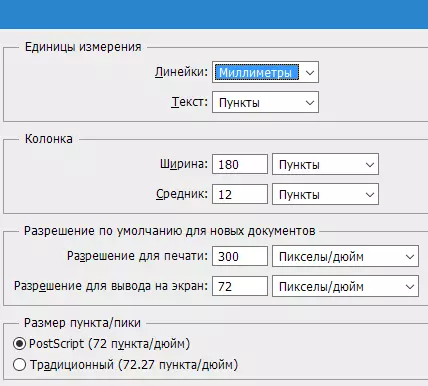
Here you can also configure the lines, text columns and standard permission for the newly created documents. The line is best to choose a display in millimeters, "Text" Preferably install B. "Pix" . This will precisely determine the size of the letters depending on the size of the picture in pixels.
See also: How to use a line in Photoshop
Guides
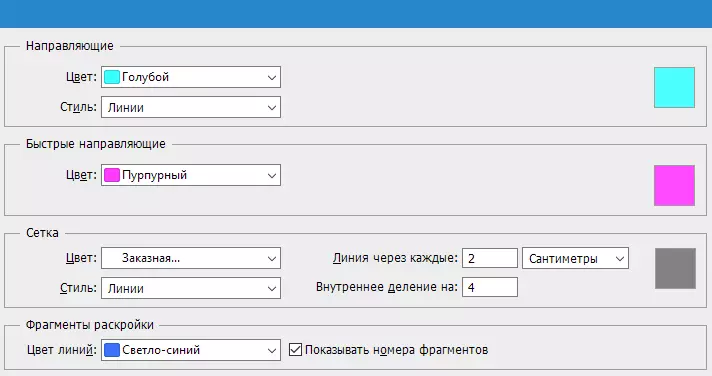
Settlement item "Guides, grid and fragments" Configured to specific needs.
See also: Applying guides in Photoshop
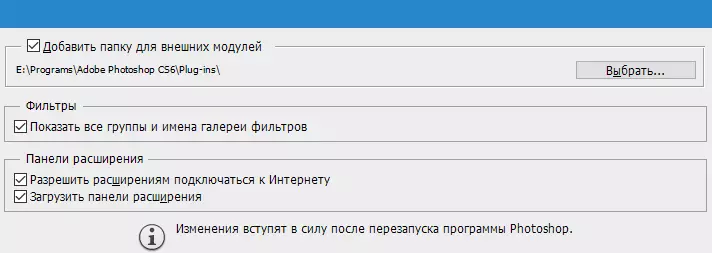
External modules
At this point, you can change the storage folder of additional modules. When you add additional plugins to it, the program will apply for them. Paragraph "Extension panels" Must have all active checkboxes.
Fonts
In-interest changes. You can not make any changes, leaving everything as it is.
See also: Install Fonts in Photoshop
3D
Tab "3D" Allows you to configure the parameters to work with three-dimensional images. Here it is necessary to ask a percentage of video memory. It is best to set maximum use. There are settings for rendering, quality and detailed, but they are best to leave unchanged. Upon completion of the settings, click on the "OK" button.Turn off the notification
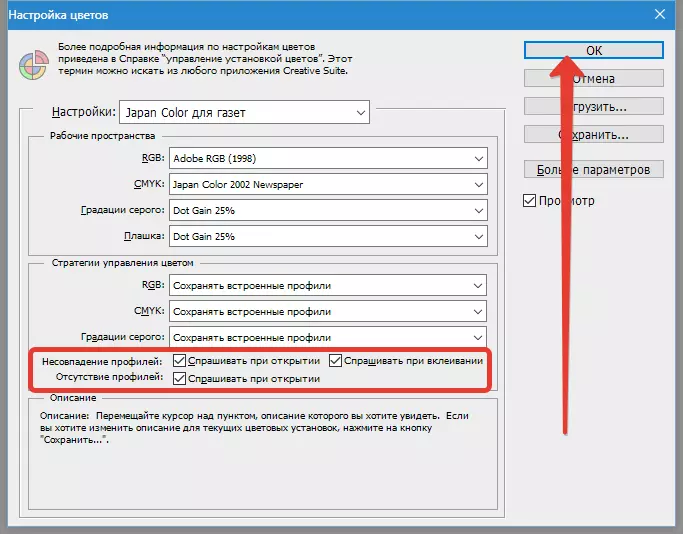
The final setting that costs separate attention is the ability to disable different notifications in Photoshop. First of all click on "Editing" and "Color setting" , here you need to remove the checkboxes next to "Ask for opening" , and "Ask for insertation" . Constantly pop-up notifications reduce the convenience of use, because there is a need to constantly close them and confirm with the key "OK" . Therefore, it is better to do it once in the setting and simplify your life during the subsequent work with images and photos.
After you have done all the changes, it is necessary to reboot the program for their entry into force - the key settings for effective use of photoshop are specified. Now you can safely begin to work with Adobe Photoshop. Above the key changes to the parameters that will help start working in this editor were presented.