Now there are two generally accepted types of modeling - highly polled and low-poly. Accordingly, they differ in the number of polygons in the created model. However, even when performing certain works of the first variant, the user strives to reduce the number of polygons, not to mention the supporters of Low Poly, which allows you to optimize the figure or character. The polygons calls the unit of a geometric shape (more often a rectangle or triangle), with which objects are created. Reducing their quantity will lead to more convenient management and further interaction with the figure. Today we want to consider the available options for such an optimization in the well-known Many 3DS MAX from Autodesk.
We reduce the number of landfills in 3DS MAX
The following operation will be implemented on the example of using standard and additional utilities, because the task is to reduce the polygons on the already finished figure. If you are just going to develop a model and are interested in using a minimum number of connections, just get rid of unnecessary as the workflow. We go to the review of modifiers and plugins.Method 1: Optimize modifier
The first way is to apply the Optimize modifier, which is intended to break the face and edges, and also has one parameter responsible for the number of polygons. In some cases, it will become an ideal solution for optimization, and it happens as follows:
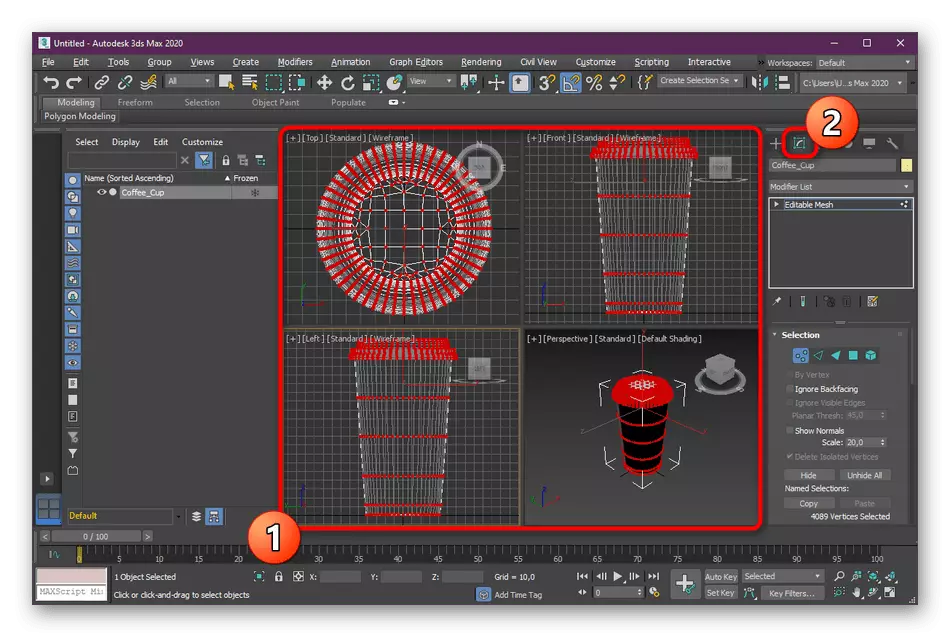
- Open 3DS MAX and run the project with the desired model. Highlight all the points by closing the Ctrl + A. combination. Then move to the "Modifiers" tab.
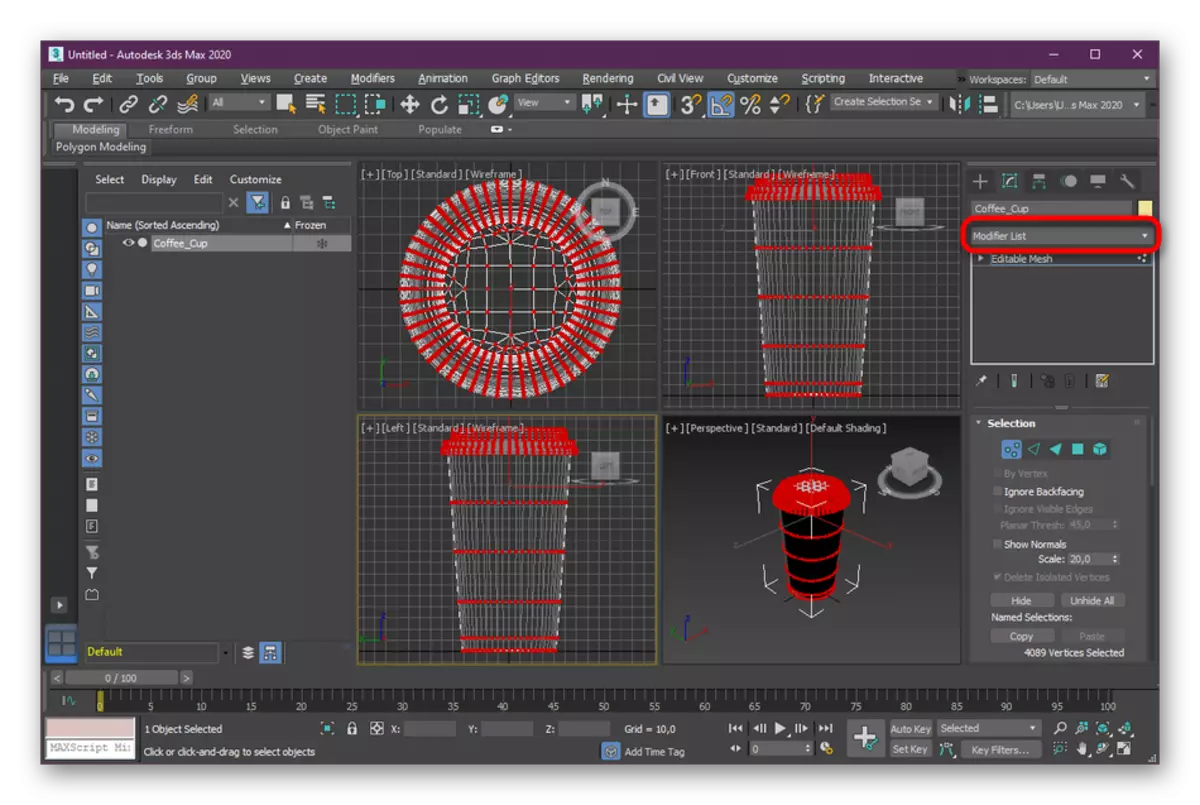
- Expand the pop-up list called "Modifier List".
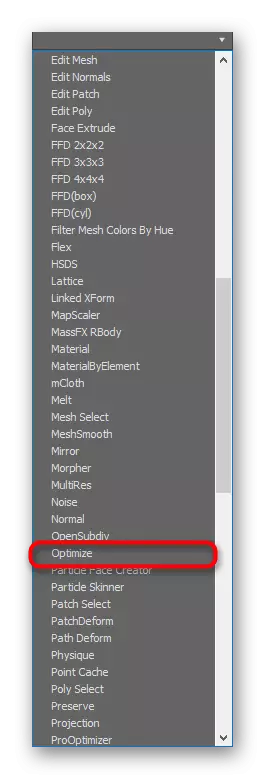
- Among all items, find it off and select Optimize.
- Now you can configure all the parameters responsible for the number of polygons. Below we will consider in detail each setup. Change values better in Realistic mode, the transition to which is carried out by pressing SHIFT + F3. There is an assessment of smoothness model.
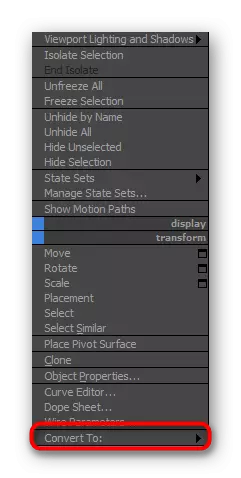
- After all changes, it is recommended to view the total number of remaining polygons. To do this, click on the Right-click window and select "Convert To" - "Editable Poly".
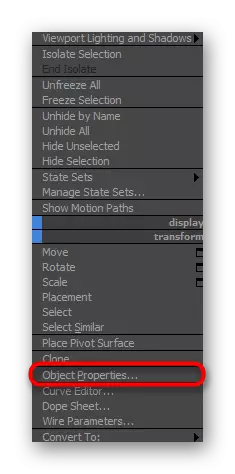
- Click PCM again and go to Object Properties.
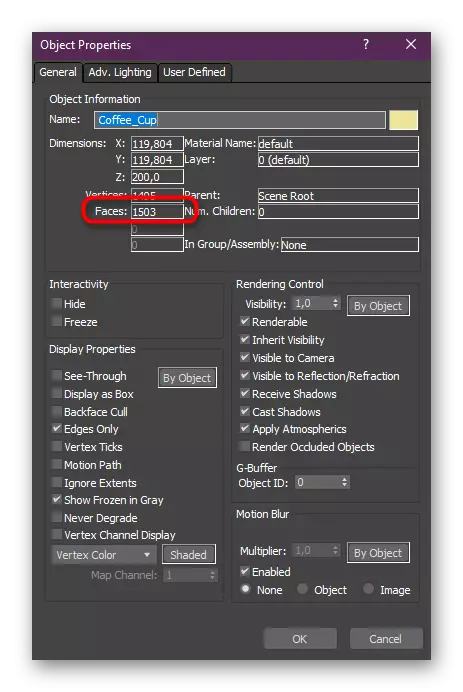
- The value "faces" is responsible for the total number of polygons.
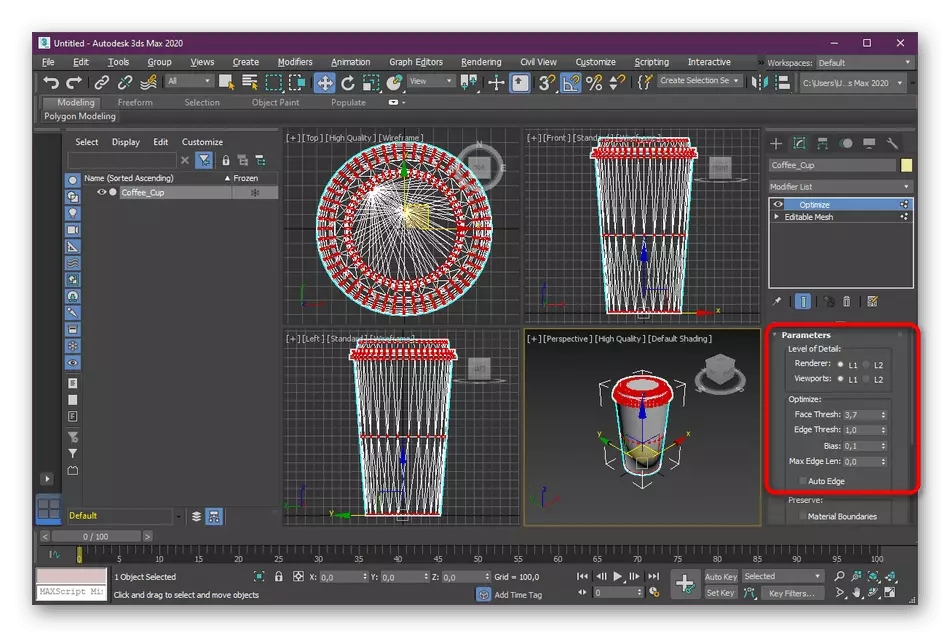
Now let's discuss all the values that you can change in the Optimize modifier to reduce the landfills of the object:
- Fase Thresh - allows you to split the face or reduce them;
- Edge Thresh - the same thing happens, but only already with ribs;
- Max Edge Len - changes affect the maximum rib length;
- AUTO EDGE - automatic optimization mode. Will help in cases where you want to fulfill the task in two clicks;
- BIAS - Specifies the number of polygons of the selected area.
As you can see, the standard OPTIMIZE software modifier works quite well. From the user you need to change only a few values to achieve the desired result. However, Optimize is not always suitable. Because of this, we advise you to familiarize yourself with other available options.
Method 2: Modifier PROOPTIMIZER
Another standard modifier that allows you to optimize the object is called proptimizer and acts automatically. It is not suitable for especially complex shapes, because in such cases it is impossible to say exactly how the algorithm built into the proptimizer behaves. However, nothing prevents you from trying this plugin in action to look at the final version. To do this, simply select the figure and expand the MODIFIER LIST list.
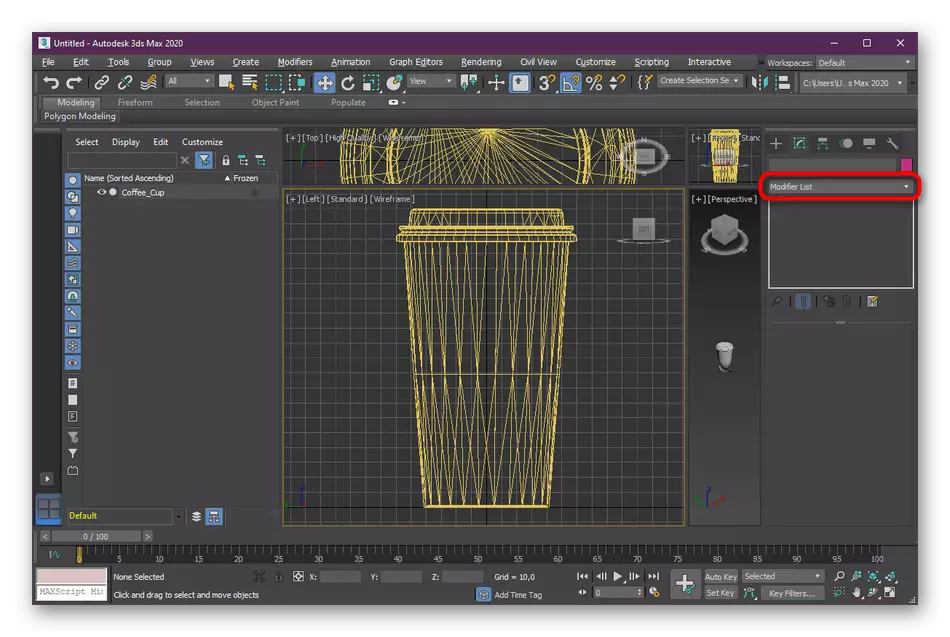
Select "PROOPTIMIZER", and then compare the result with the fact that it was before the modifier.
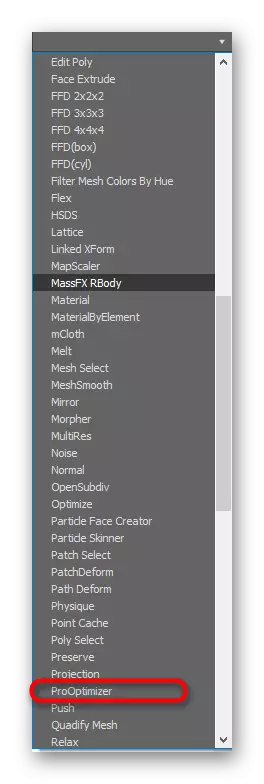
If the appearance of the ultimate figure suits you, immediately go to preservation or further work. Otherwise, go to the following methods.
Method 3: Multires modifier
The last modifier in our list is manually configured and called Multires. His principle of operation is a bit similar to Optimize, but the settings are few others. It is sharpened to work with the tops and the percentage. Adding and use occurs in the same way as in other options:
- Open the modifier list and select "Multires".
- In the "Multires Parameters" section, change the values as you personally need it, periodically browsing the changes made.
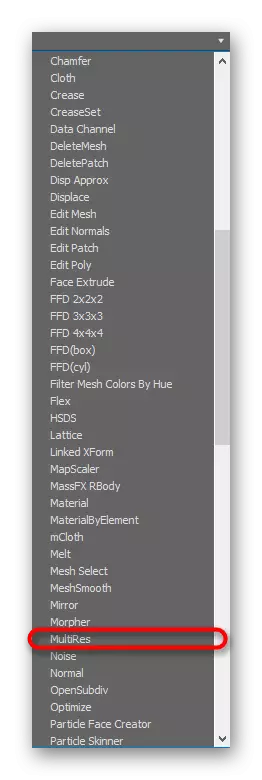
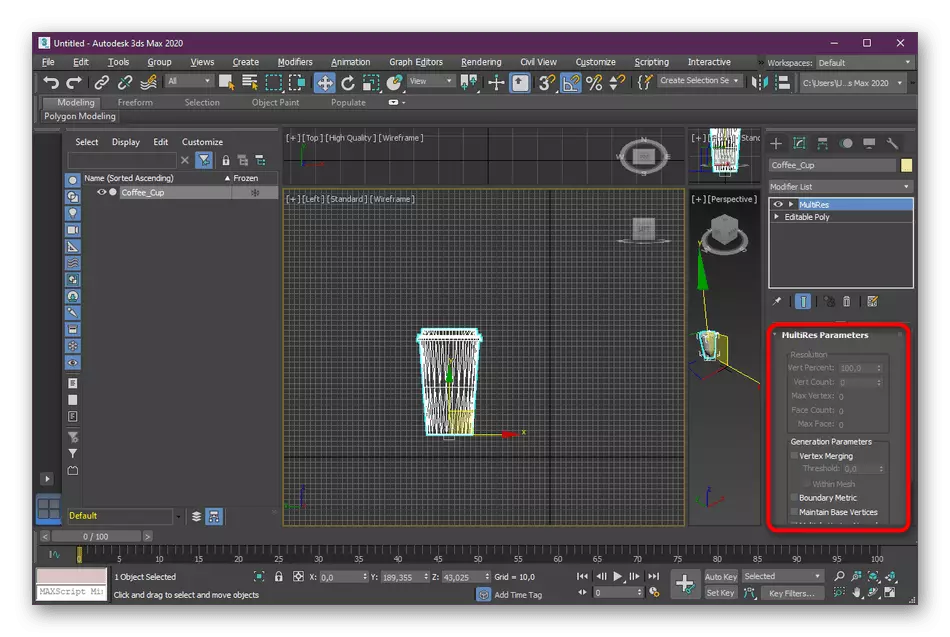
Let's, on the same principle, as it was with Optimize, consider the basic settings:
- VERT PERCENT - denotes the percentage of vertices and can be changed manually;
- VERT COUNT - determines the number of vertices of the selected object;
- FASE COUNT - displays the total number of vertices upon completion of optimization;
- Max Fase - shows the same information, but before optimization.
Method 4: Polygon Cruncher utility
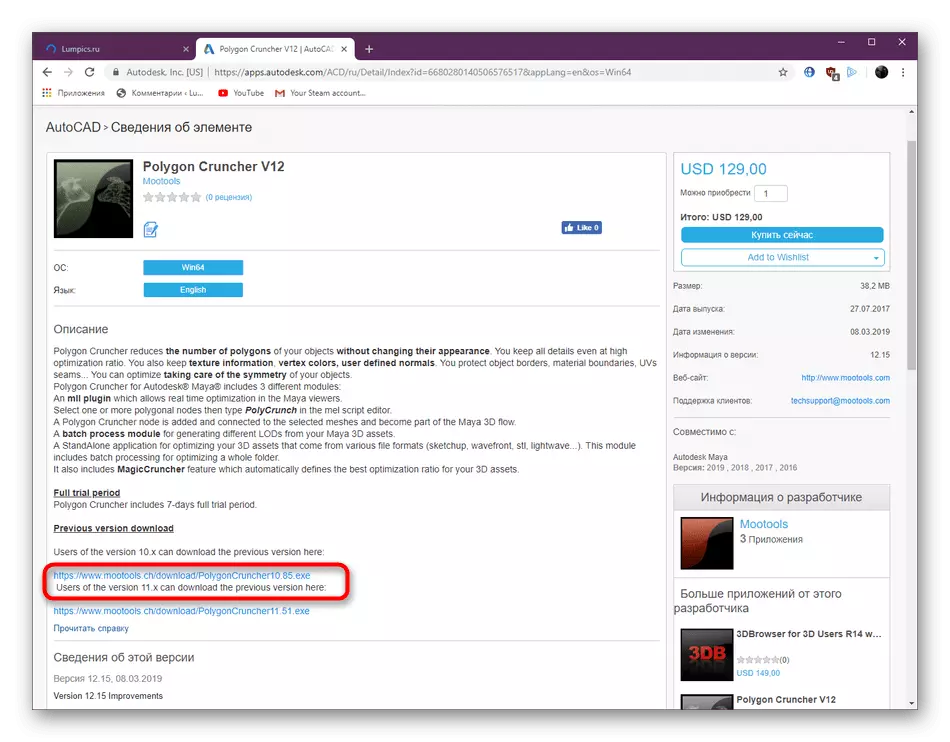
Autodesk on its website publishes not only personal development, but also proven additions from independent users. Today we recommend paying attention to the Polygon Cruncher utility, the basic functionality of which is just focused on optimizing the polygons of one object. It is distributed for a fee, but on the site you can download a trial version for a period of three days, which we suggest to do.
Download Polygon Cruncher from the official site
- Go to the above link to get on the required page. There, find the link to the trial version and click on it.
- Upon completion of the download, the standard installer window opens. Follow the instructions inside it to complete the installation.
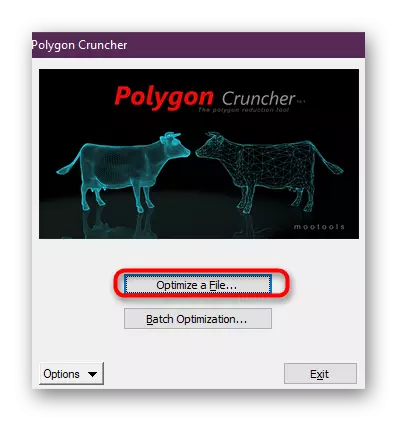
- Now you can open Polygon Cruncher. In the main menu, click on the "Optimize A File" button.
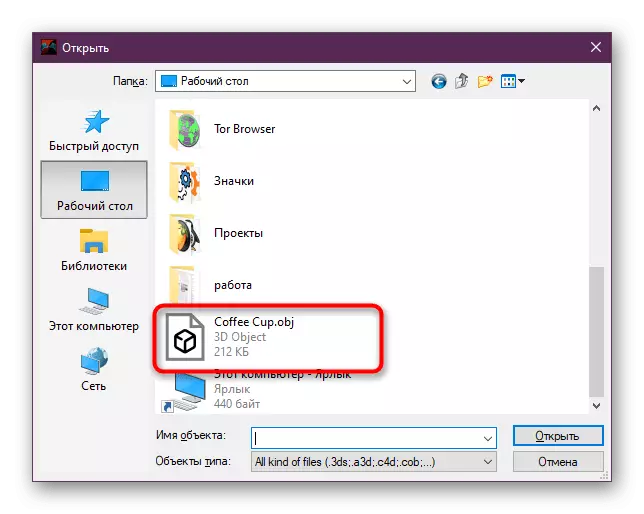
- A conductor will open in which to select the desired file. If you have not yet saved it, then do it. After optimizing the file will be available to further import and edit in 3DS MAX.
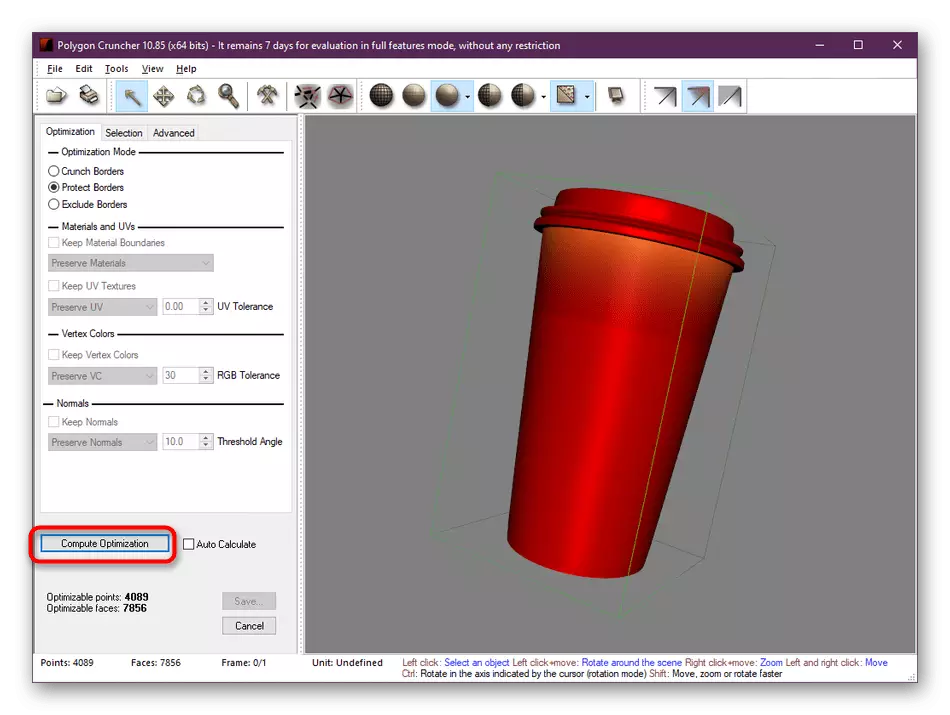
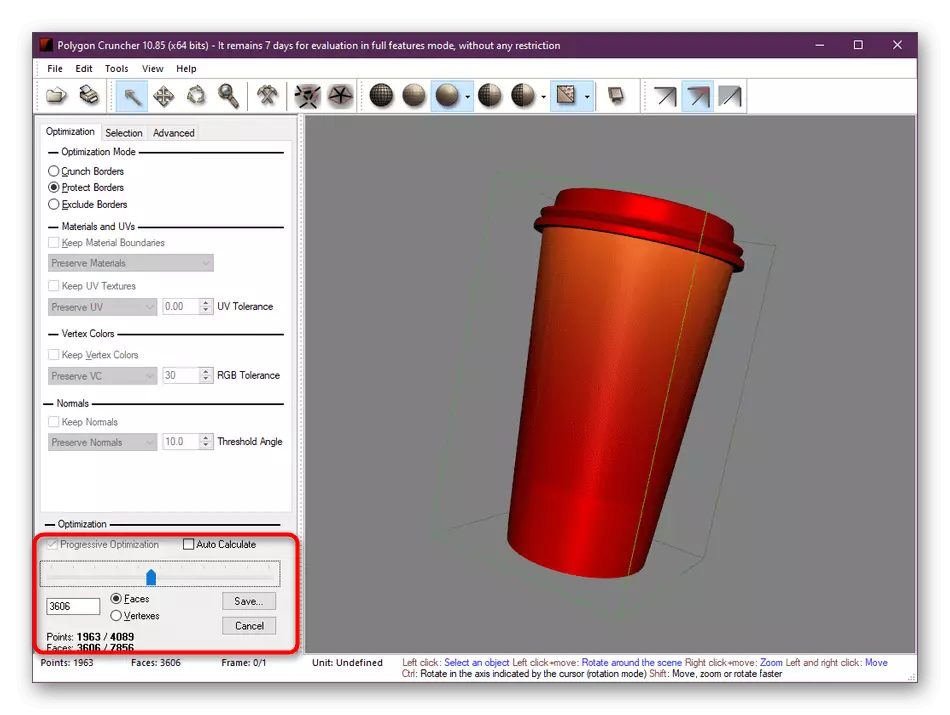
- The Polygon Cruncher itself offers a selection of three types of optimization. The number of polygons will appear at the bottom after applying the settings. Select one of the types, and then click on Compute Optimization.
- After below, the scale will appear. Adjust it to set the number of polygons and immediately see how this will affect the overall form of the object. When the result is satisfactory, click on "Save".
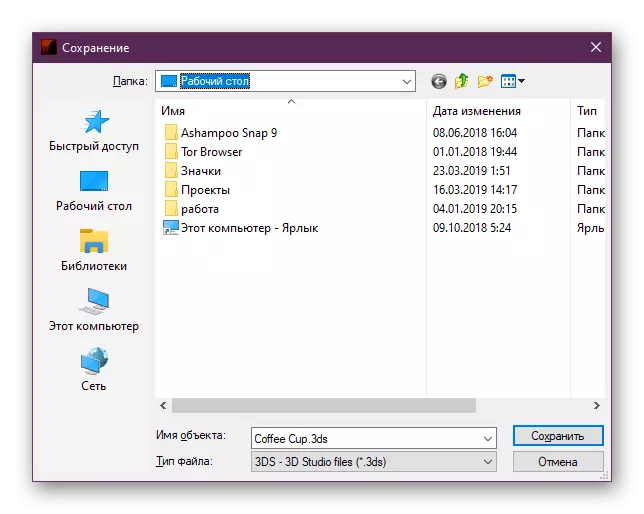
- Select a convenient file format and a place on the computer where you want to save it.
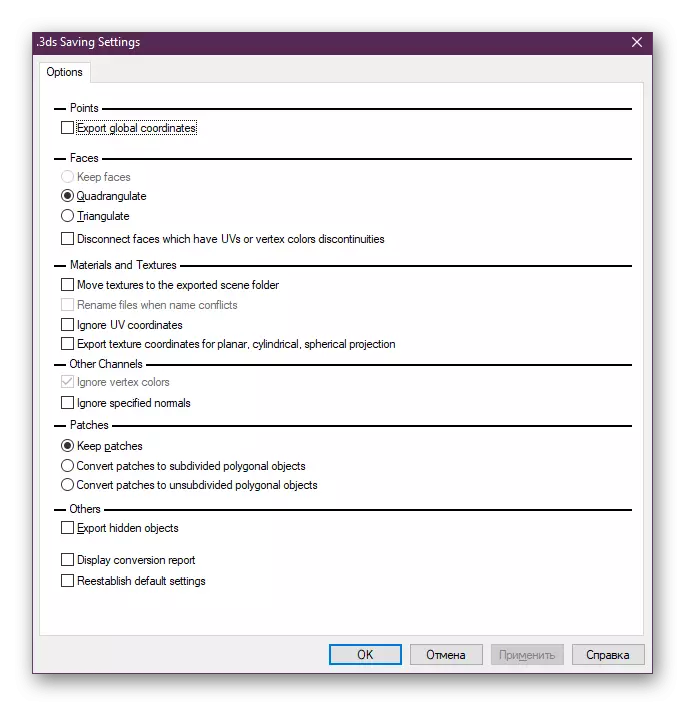
- Specify additional saving options if necessary.

On this, our article comes to completion. Now you know about four available options for reducing the number of polygons in 3DS MAX. Of course, there will certainly have many more modifiers and third-party add-ons, allowing these actions, but it is impossible to consider everything, because we have led only the most popular methods.
