
Now many users still prefer to install Windows 7 on their computers, bypassing newer versions of this family of operating systems. When replacing the hard disk on SSD, the task of installing the OS to a new drive occurs. At the same time, the user is important to know about some features of interaction with solid-state information storage devices, which will be discussed further. We invite you to familiarize yourself with the step-by-step guide to install Windows 7 on SSD to fulfill this operation quickly and easily.
To begin with, we will specify that it is possible to transfer the operating system with the HDD to SSD, completely retaining its performance. However, for this will have to perform complex actions in third-party software. If you are interested in this topic, we suggest reading certain instructions related to it by clicking on the following link.
See also: How to transfer the operating system and programs with HDD on SSD
Step 1: Record OS image on a USB flash drive
If you are going to install the operating system using a licensed disc for this, simply skip this step and immediately go to the second. Otherwise, you will have to prepare a flash drive by making it loading. There is nothing complicated in this, because all actions occur in automatic mode through special software. However, for the beginning, the user will have to find the image of Windows 7 in ISO format and select software through which it will be recorded. Read more about all this in the manual further.

Read more: Create a bootable USB flash drive with Windows 7
Step 2: BIOS Preparation
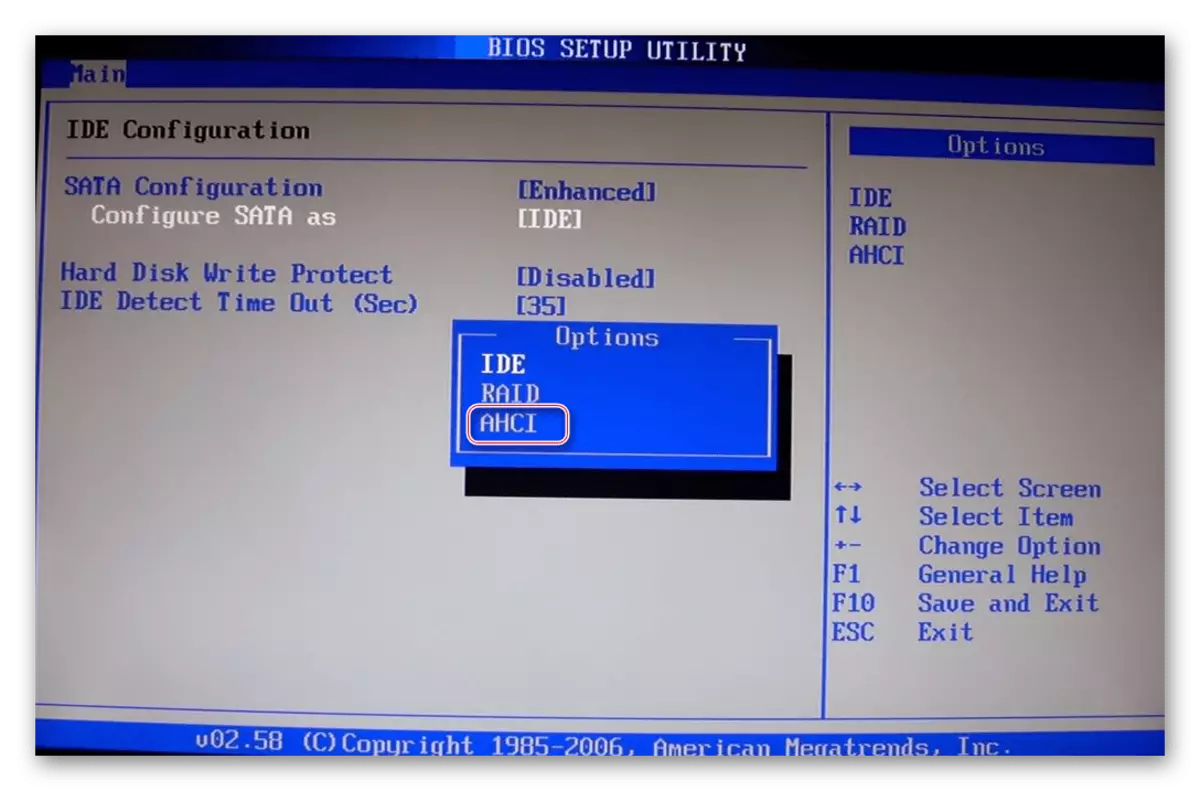
The only feature of the installation OS on the solid state drive is the need to change one BIOS parameter by setting AHCI compatibility mode. It is required for correct interaction of the information storage used with the motherboard. The item responsible for the inclusion of such a mode is present in absolutely in all versions of BIOS and UEFI, but can be located in different menus, so the user has to independently find it and activate that it should not take a long time.
Read more: turn on AHCI mode in BIOS
Step 3: Disk Markup Selection
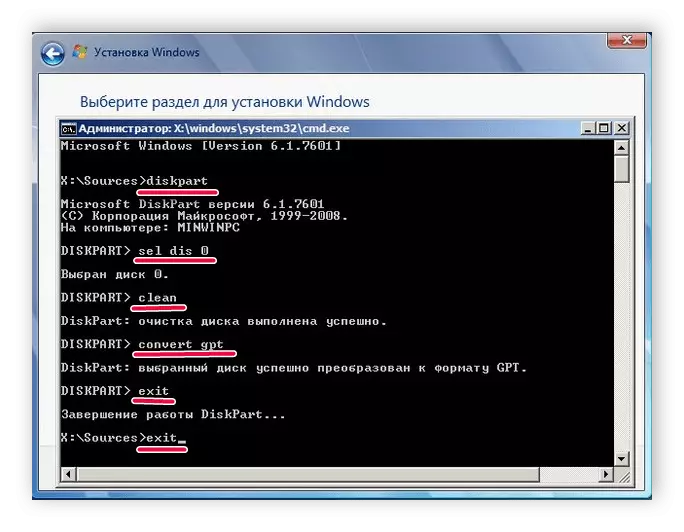
At the current time, there are two types of disk markup: MBR and GPT. Each of them has its own characteristics and is recommended for use in different situations. If you are not familiar with such concepts or doubt the choice of correct marking, we advise you to get acquainted with the special training material on our website by clicking on the link below. There you will find detailed descriptions of these two technologies, as well as useful tips that will help immediately before installing the operating system.Read more: Select the GPT or MBR disk structure to work with Windows 7
Step 4: Studying SSD formatting rules
This stage is intermediate, and we decided to include it in the framework of today's material only as familiarization. The fact is that some users when using SSD do not quite understand the principle of operation of such a device and are even afraid to format it, referring to a significant reduction in service life when performing such actions. However, without cleaning the structure, it will not be possible to start the installation of the OS, even if we are talking about the acquired drive. We advise you to read all the information about SSD formatting to know when you need to do and how this procedure is reflected in the component itself.
Read more: Is it possible to format SSD
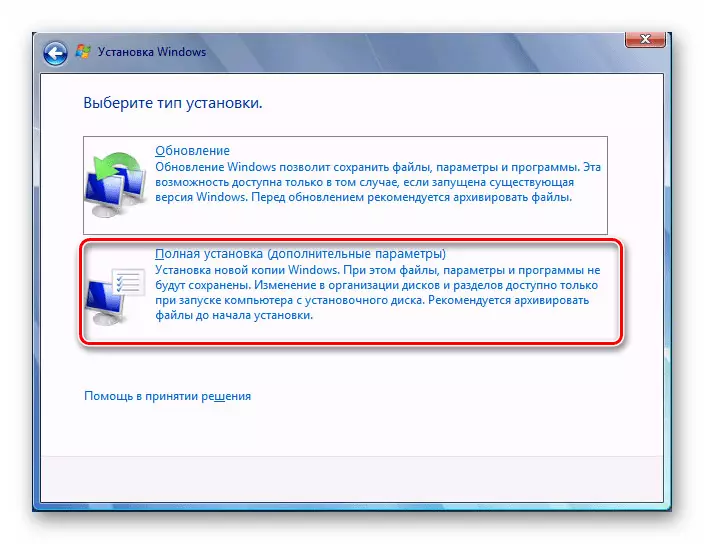
Step 5: Installing the operating system
So we got to the most basic stage, which is to install Windows 7 on a solid-state drive. All preparation nuances are already disassembled higher, so no more features are available. However, users who choose the GPT structure should pay attention to one small detail, which is associated with manual formatting of the drive in accordance with the sections system. If you prefer the GPT, click on the following link and install the OS installation in accordance with the instructions.
Read more: Installing Windows 7 on GPT disk
In cases where the markup remains in the standard MBR format, it remains only to start the disk or loading flash drive to start the installation. These topics are also devoted to individual materials to which you can go through by pressing one of the following headers.
Read more:
Installing the Windows 7 operating system from the CD
Installing Windows 7 with a boot flash drive
Step 6: Installation of Drivers
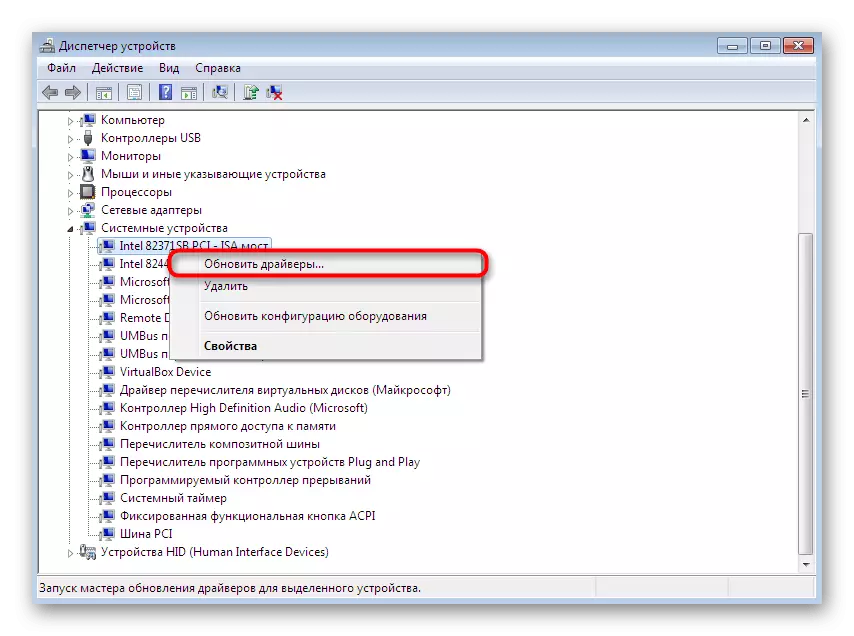
After the first successful launch, the operating system is not entirely ready for operation, since it does not have built-in component and peripheral drivers. They are necessary to ensure that the equipment correctly performs all its functions and could interact with each other. If you have never come across the installation of such software, other instructions on our website will help to deal with this software.
Read more:
Windows 7 Driver Update
Manual installation of drivers in Windows 7
Step 7: Setting for weak computers
The final stage is designed for owners of weak computers that wish to optimize the operation of the installed OS to ensure maximum speed. There are a number of recommendations that are recommended to accomplish the load on the OS. This includes disabling unnecessary services, autoload programs, visual effects and the use of special software.
Read more:
Setting up Windows 7 for weak computers
What to choose a browser for a weak computer
Just you learned all about installing Windows 7 on SSD. As can be seen, there are almost no unique features of such a method, so it remains only to follow each stage to easily complete the installation and proceed to the full use of the computer.