Method 1: Reduced Output Resolution
The output screen resolution is the main factor that affects the loading of the encoder in the OBS when the video streaming. It is logical, because from increasing the number of pixels, the load on the central processor is growing. Therefore, we first advise you to configure this parameter, trying to lower the output permission, if it is acceptable for the broadcast recorded.
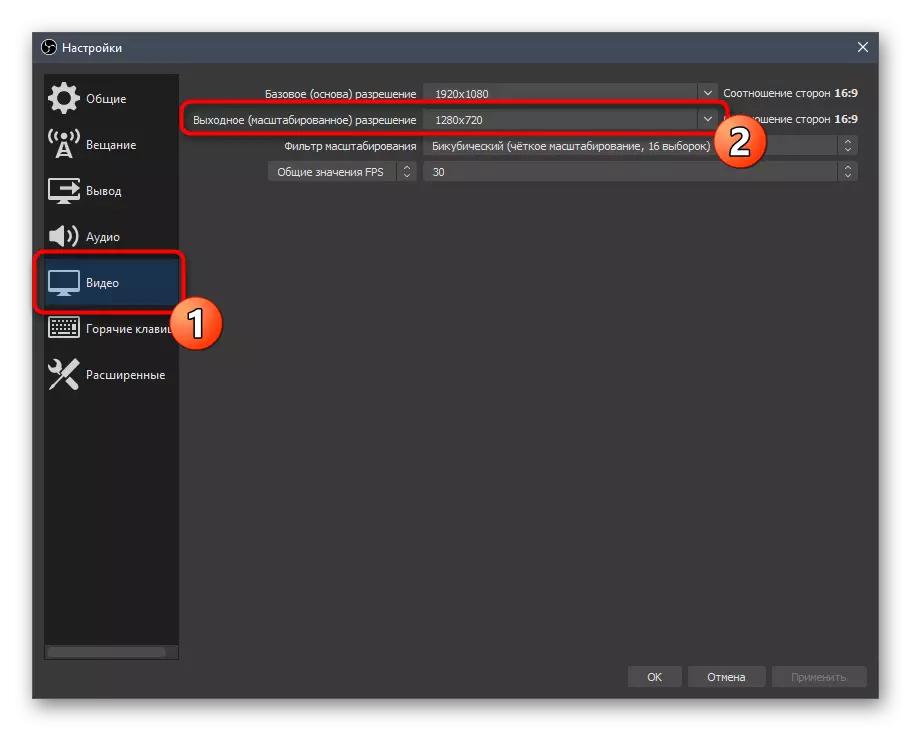
- In the OBS main window, click the "Settings" button located in the right block.
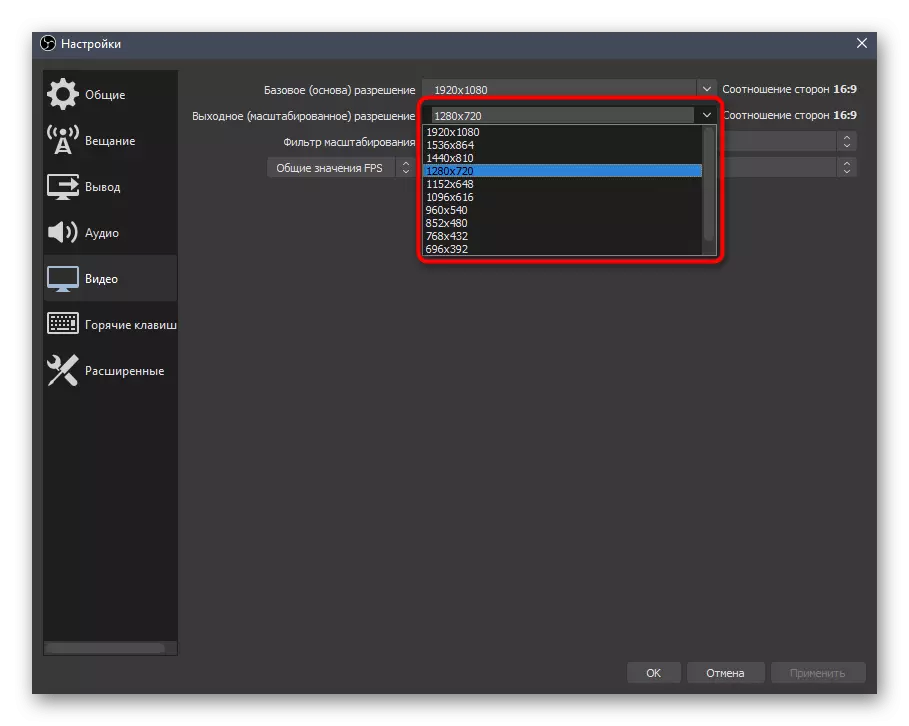
- Open the "Video" section and expand the List "Output (Scaled Resolution)".
- In it you will see the support of all screen resolutions that are compatible with the video card used and the monitor. Try a little to reduce it by applying new settings after that.
Run the test broadcast with the output of the same content that has been demonstrated before. If the encoder is overloaded again, return the resolution back or leave it so far in such a state, trying to combine several ways to solve this problem.
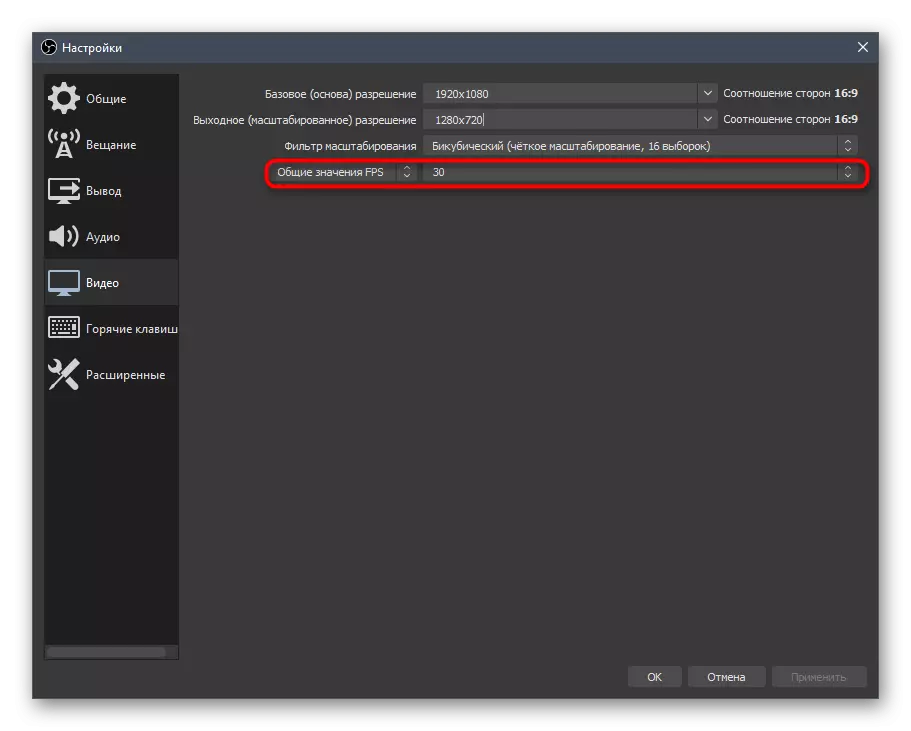
Method 2: Reducing FPS
Every second processing of a huge number of frames already has a load on the graphics processor, and if it does not cope, delays or microphrises affect the viewing of the content appear. In parallel, the inscription indicating the overload of the encoder can also be displayed, therefore users who have established the FPS value to a state of 48-60 frames can reduce it to 30, thereby significantly reducing the load on the graphics processor. The change in this parameter is already carried out through the familiar section "Video" in the "Common FPS" drop-down list.
Method 3: Changing the Coder Preset
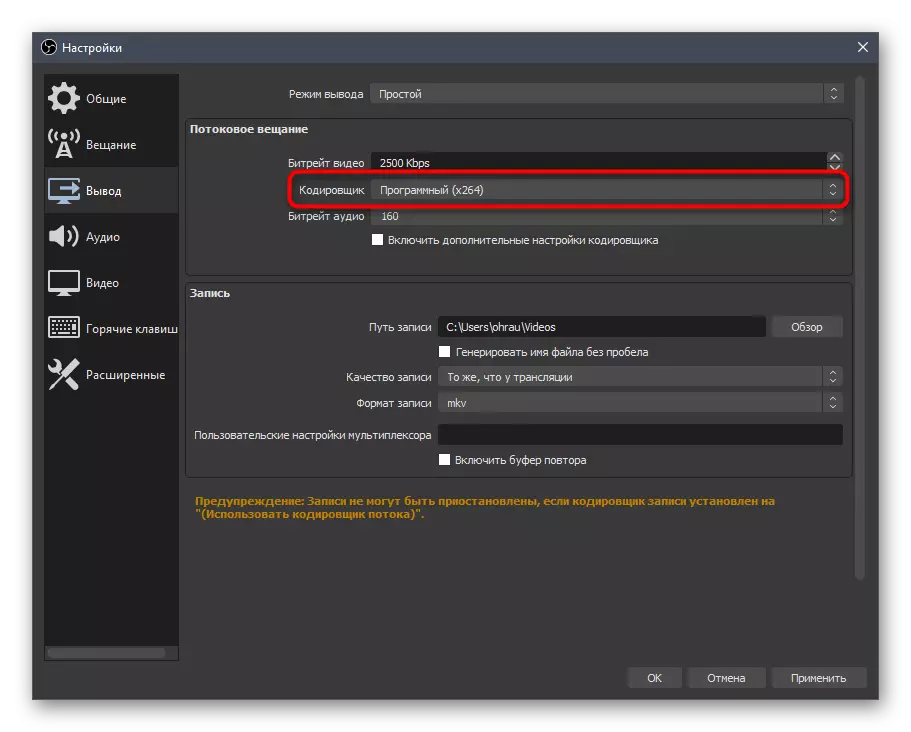
Many content creators working in OBS, when an error occurs with an overloading of the encoder immediately want to change it to the hardware, thereby throwing the load from the processor on the video card, if it allows you to make the hardware installed in the computer. However, it is recommended to check the encoder preset and change it by checking how new parameters affect the video output.
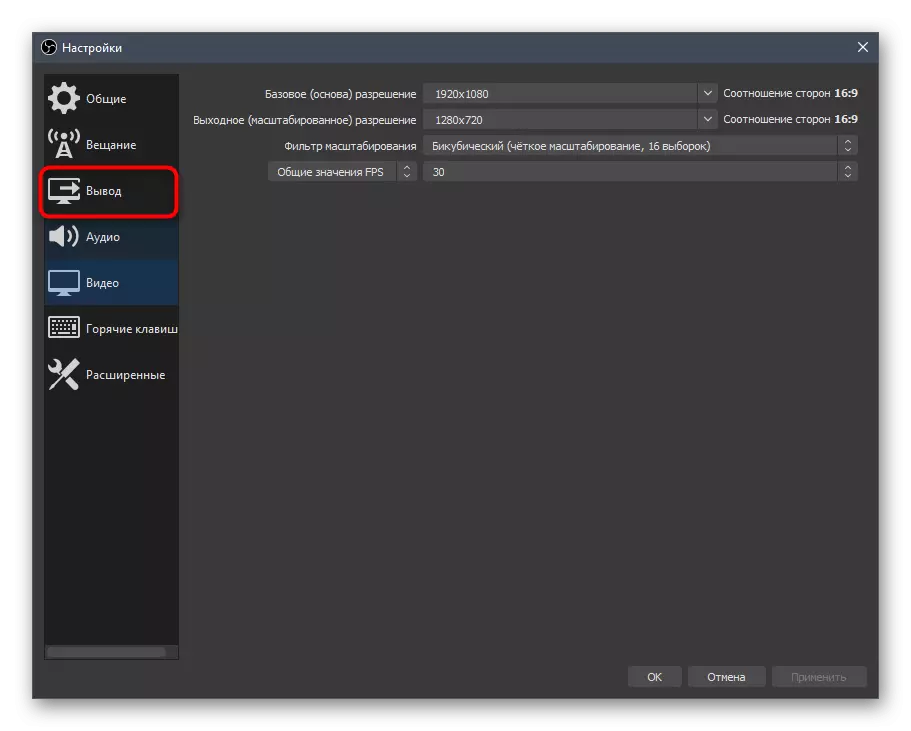
- To do this, in the same menu "Settings", go to the "Output" section.
- Make sure the standard software encoder is installed - "x264".
- In the following, activate the checkbox "Enable Advanced Codes".
- The encoder presets implies the speed of processing parts. The faster it is, the more details are skipped and less load on the processor. Here the main thing is not to confuse the value, since "quickly" means - worse, but with a smaller load, and "slowly" is the best processing of parts with a huge load on iron.

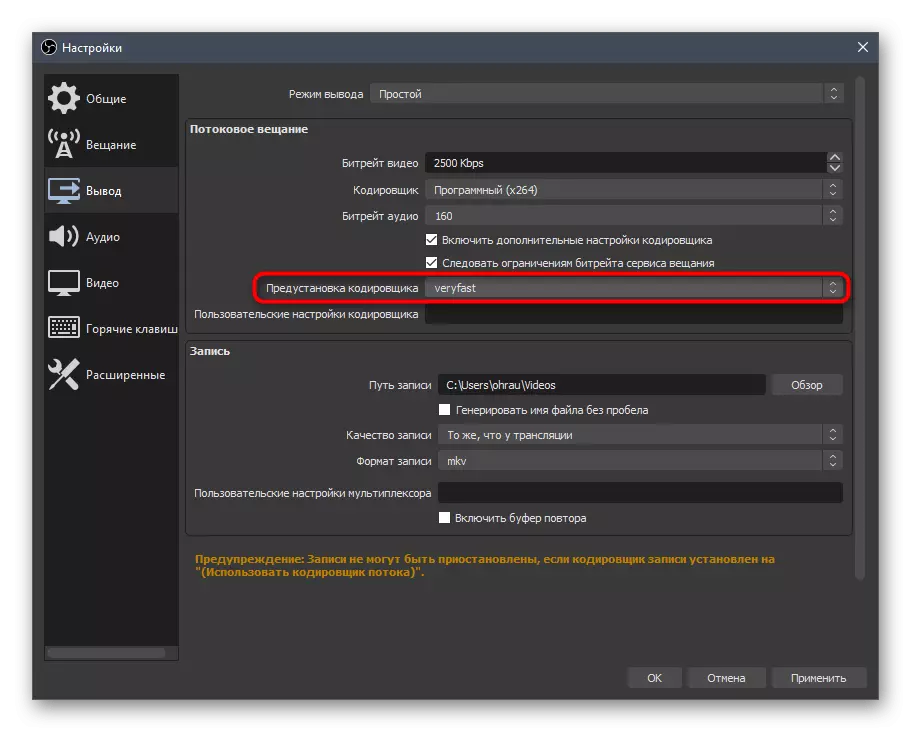
If it is already worth the "Fast" value, change it to "Veryfast" or even higher, apply the change and run the broadcast. Now the processing detail will slightly decrease, but at the same time you will immediately feel that the processor is slightly or even for a significant number of percentage.
Method 4: Change of used encoder
This method will be discussed about the solution for those users who have a rather weak processor and are ready to transfer some tasks for processing the flow on the video card if its power allows you to fully reveal and during the game, and during the broadcast. The default software encoder X264 consumes the power of the processor, so it will be needed to switch to "hardware (nvenc)". It is important to understand that hardware encoders do not completely unload the processor, but only take on certain actions, forcing the processing of the information set in the video card, which is only for coding and is intended. At the output, the picture quality is worse when installing the same bitrate, so hardware coding is inferior to software, but allows you to record broadcasts to users who have not yet acquired a powerful processor for Stryming.
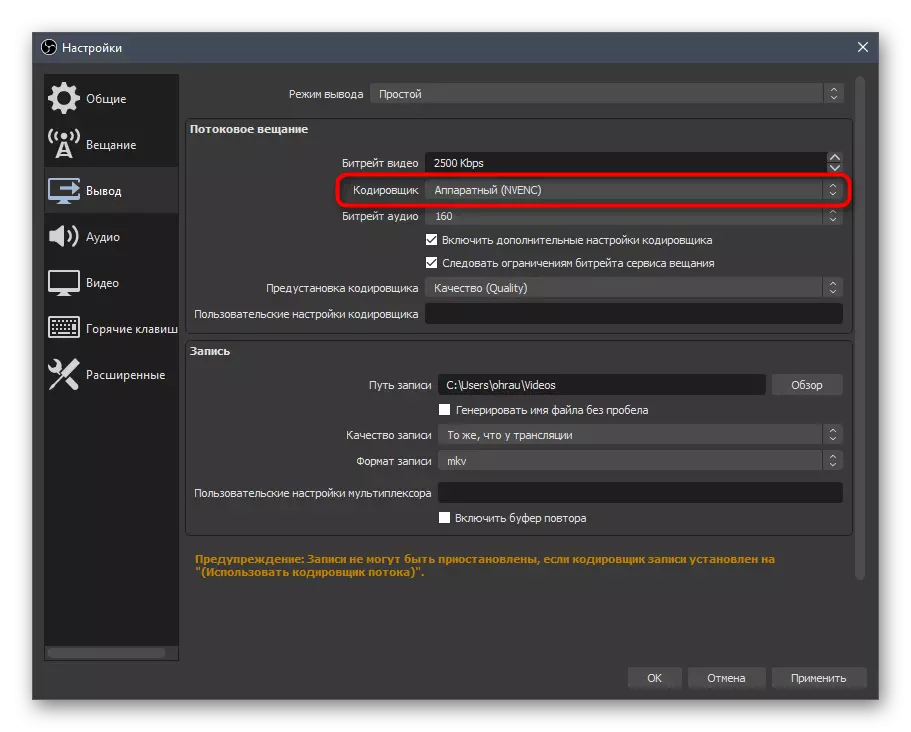
The second version of the encoder is "AMF". We do not advise you to use it at the flow of broadcasting games, because when rendering a video card and is so busy, and the additional load from OBS with AMF encoder will only add translation friezes. When properly configured, the QuickSync encoder is good for which the ICQ value is recommended to specify from 20 to 23. If you want to select QuickSync, but it is not displayed in the program, log in to the BIOS and make sure that the integrated graphics are enabled.
Read more: How to enable the built-in video card
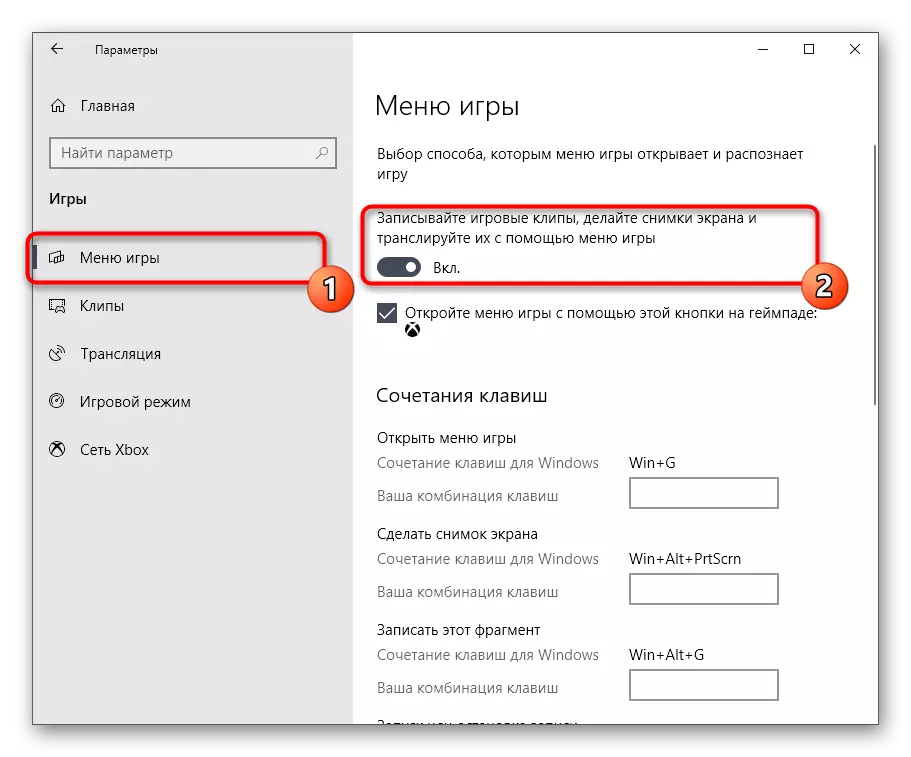
Method 5: Disable the game mode in Windows 10
Embedded in Windows 10 gaming mode quite aggressively distributes system resources, giving the maximum priority to the running application. Accordingly, in such conditions of capacity for OBS is extremely small. In most cases, the game mode is not needed at all during the streaming, so it is almost always favorably affected on the redistribution of the load and sometimes allows you to completely get rid of the encoder overloading message.
Read more: Disable game mode in Windows 10
Method 6: Improving OBS Priority
According to the reviews of many OBS users, when overloading the encoder sometimes helps to increase the priority of the program. Moreover, it is necessary to do this both in the OBS itself and in the operating system.
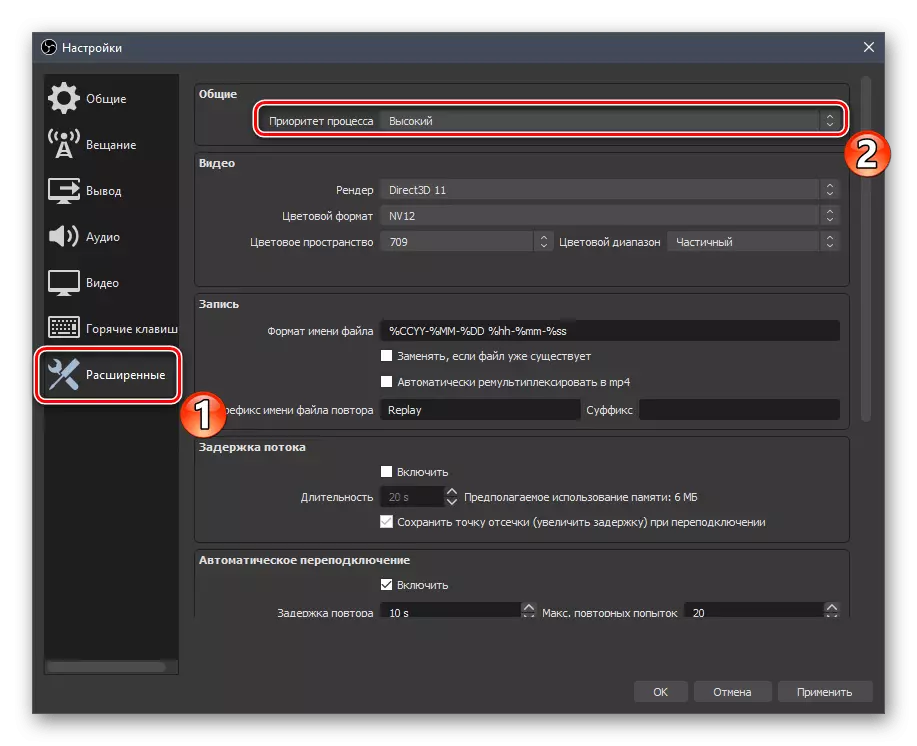
- In the main window of the program, press the "Settings" button or use the "Alt + F" combination first, and then press the "S" key. Note that when using hot keys, you must activate the English layout in the system.
See also: Changing the keyboard layout in Windows 10
- In the Settings window, activate the "Extended" tab. Next, change the mode of the process priority function to "high". To do this, click on the specified row and select the appropriate option from the drop-down list. After that, apply the changes made by clicking the OK button.
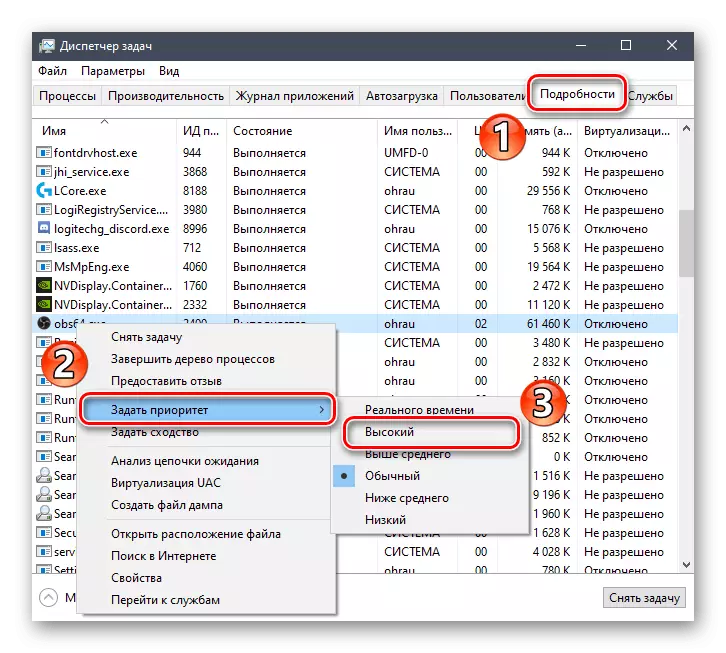
- Next, click on the "taskbar" with the right mouse button. From the opened context menu, select "Task Manager".

READ ALSO: Methods for launching task dispatcher in Windows 10
- A utility window appears in which you want to open the "Details" tab. In it, you will see a list of processes running in the system. Find among them the process «OBS64.exe» or "obs.exe", then click on it by PKM. In the context menu that opens, hover the cursor to the "Set Priority" string and select "High" from the next submenu.
- Close the Task Manager window and check the performance of the OBS program.
Method 7: Activation of Compatibility Mode
In some cases, it is possible to unload the encoder using the compatibility mode for the OBS program. It is realized literally in several clicks.
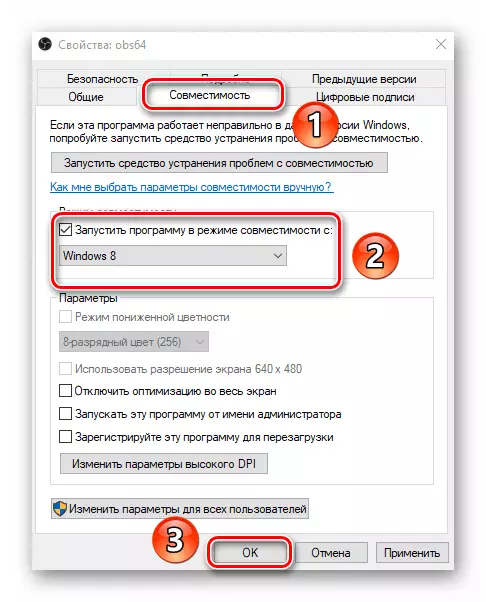
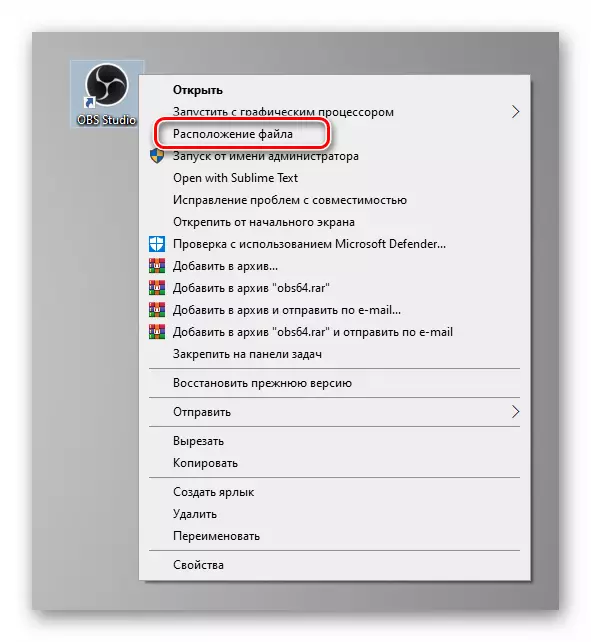
- Open the folder in which the executable program executable is located. If you do not know its location, click on the OBS label right-click, then select "File Location" from the context menu.
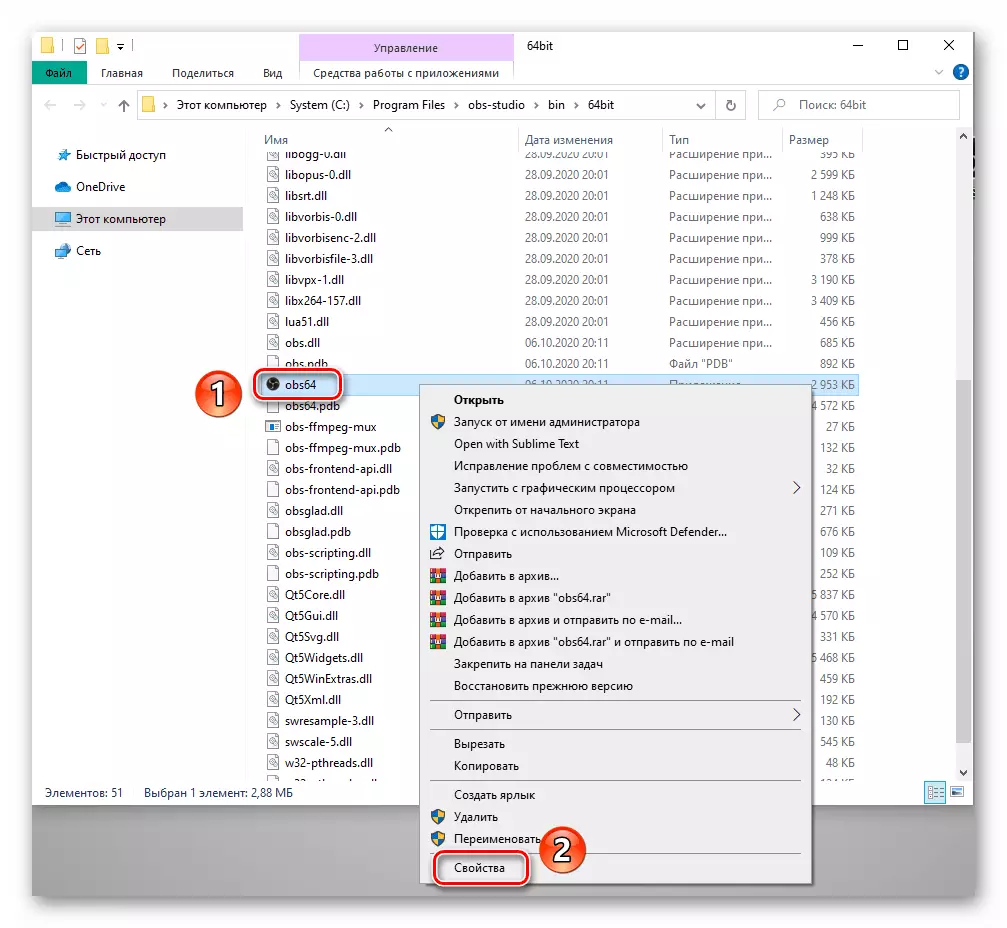
- The directory with the desired file will automatically open, and it will already be highlighted. You need to click on it PCM and select the item "Properties" from the menu that appears.
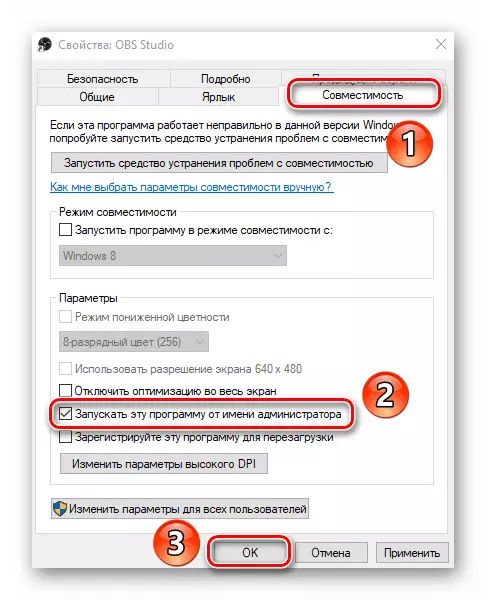
- In the next window, go to the Compatibility tab. In it, check the box in front of the string marked in the screenshot below. After that, from the drop-down list with the list of operating systems, select Windows 8. The compatibility mode is exactly often to get rid of the problem. Save the changes by clicking the "OK" button.
See also: Enable compatibility mode in Windows 10
- Now you can only close all the windows open earlier and restart OBS. It is likely that the work of the encoder will be established.
Method 8: Starting the program on behalf of the administrator
This method looks trite, however, you can even find user research that show that the launch of the OBS program on behalf of the administrator significantly reduces the load on the encoder.
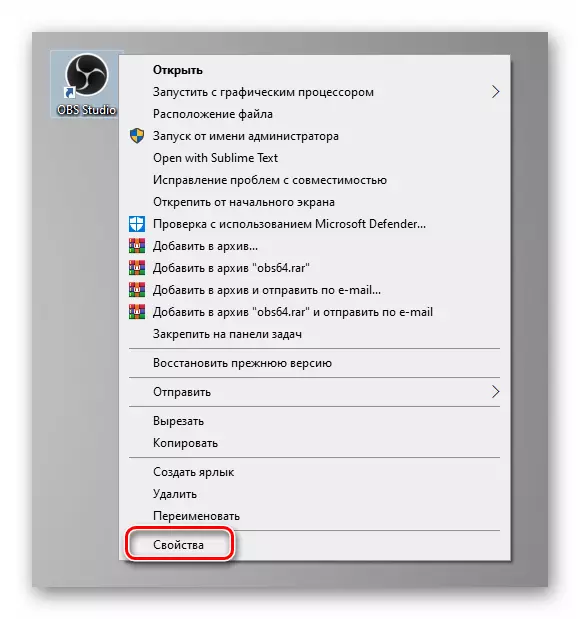
- Click on the program shortcut or executable OBS file with the right mouse button and select the "Run from the administrator" line.
- In order not to perform these actions every time the program is initialized, activate the function that will constantly run OBS on behalf of the administrator. To do this, click on the shortcut or file of the PCM program and select "Properties" from the context menu.
- Activate the Compatibility tab and put the mark in this tab next to the "Run the program on behalf of the administrator". After that, do not forget to click OK.
See also: Starting programs on behalf of the administrator
- After starting the program in this way the load on the encoder will be reduced, and most likely, the problem will be solved.

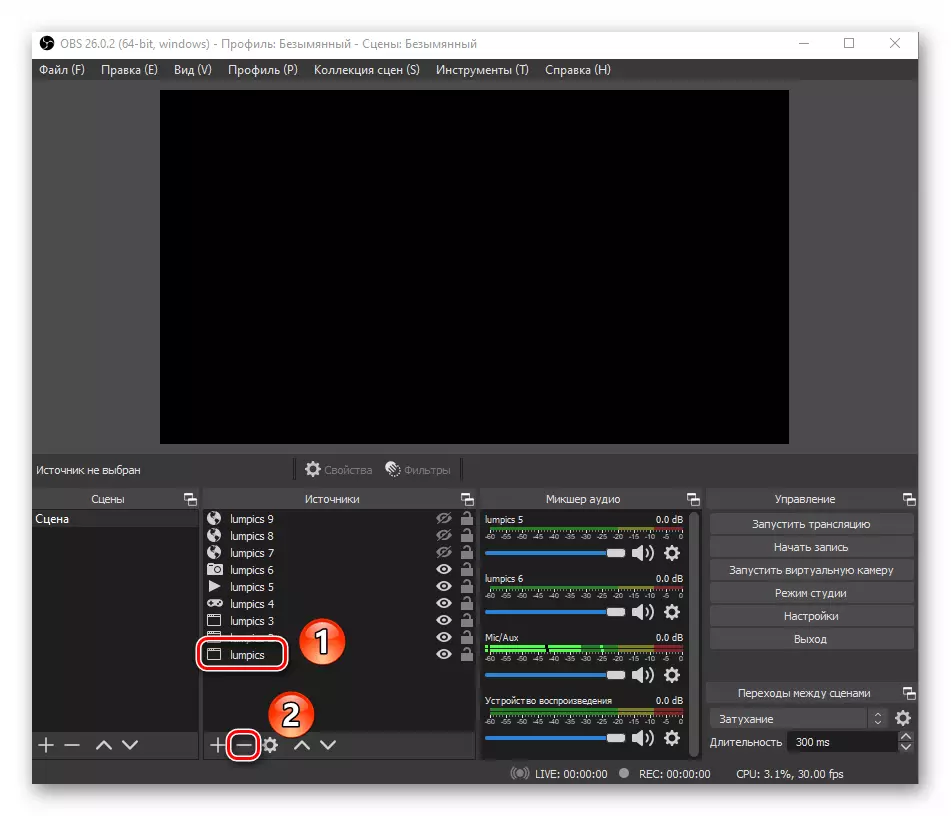
Method 9: Reducing the number of sources
Each source added to OBS loads the program and consumes a certain number of system resources. If you have added too much, then try to remove some to troubleshoot.
- Browse the list of all added sources at the bottom of the program window.
- Single click left mouse button Select the one you want to delete. After that, click on the button with the image of the minus, which is slightly lower than the list. If necessary, repeat the procedure the desired number of times with all unused sources.
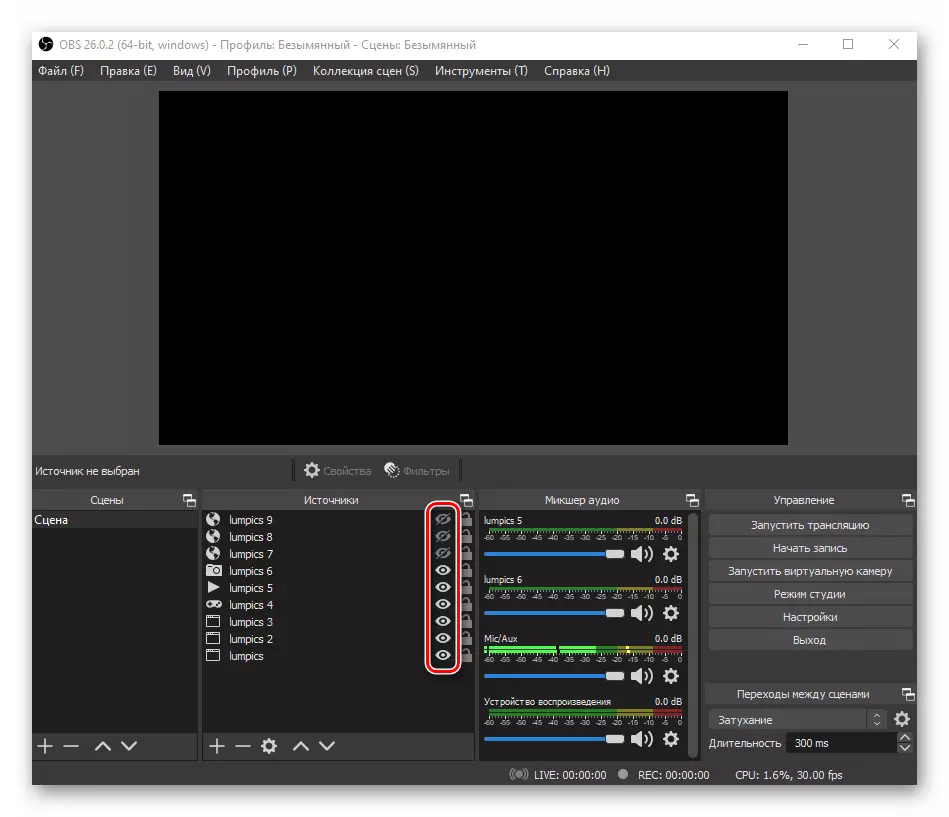
- Please note that visually shutting down the source does not unload the system and the OBS program. You simply stop seeing information while recording or broadcast. Hidden sources in OBS are marked with an eye icon. Instead of hiding it is better to remove such sources if you do not use them.