

Page fields in the MS Word document is an empty space located on the edges of the sheet. Text and graphic contents, as well as other elements (for example, tables and diagrams) are inserted into the print area, which is located inside the fields. With changing the page fields in the document, the area containing text and any other content is also changed on each page.
To resize fields in the Word, you can simply select one of the variants available in the default program. Also, you can create your own fields and add them to the collection, making it available for further use.
Lesson: How to make an indent to word
Selection of page fields from finished sets
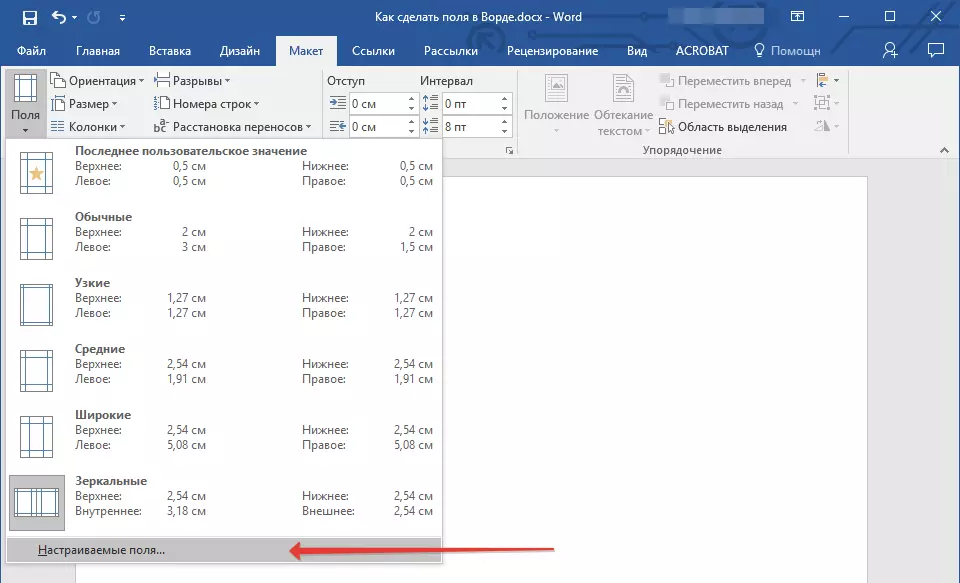
1. Go to the tab "Layout" (In older versions of the program, this section is called "Page layout").
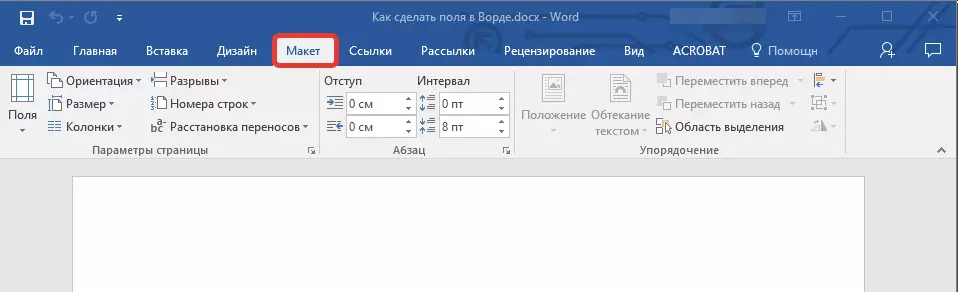
2. In group "Page settings" Click on the button "Fields".

3. In the unfolded list, select one of the proposed field sizes.
Note: If in the text document you work with which you are working with several partitions you selected the field size will be applied exclusively to the current section. To resize fields in several or in all sections immediately, highlight them before choosing a suitable template from the Arsenal MS Word.
If you want to change the page fields that are set by default, select from the available set of those that you are suitable and then in the button menu. "Fields" Select the last item - "Customizable fields".
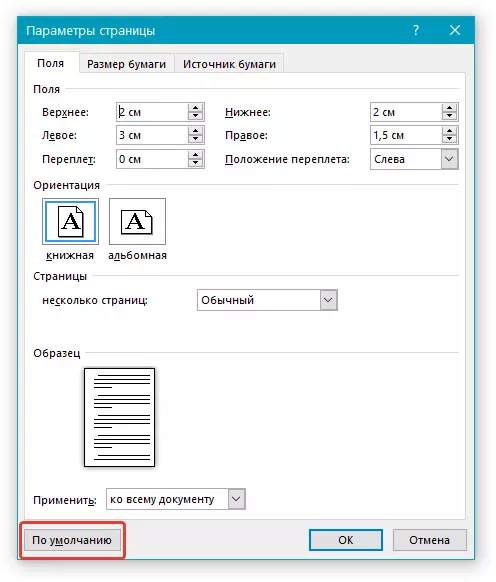
In the unfolded dialog box, select the parameter "Default" By clicking on the appropriate button located left below.
Creating and Changing Page Field Parameters
1. In the tab "Layout" Click on the button "Fields" located in the group "Page settings".

2. In the menu that appears, where the collection of available fields will be displayed, select "Customizable fields".
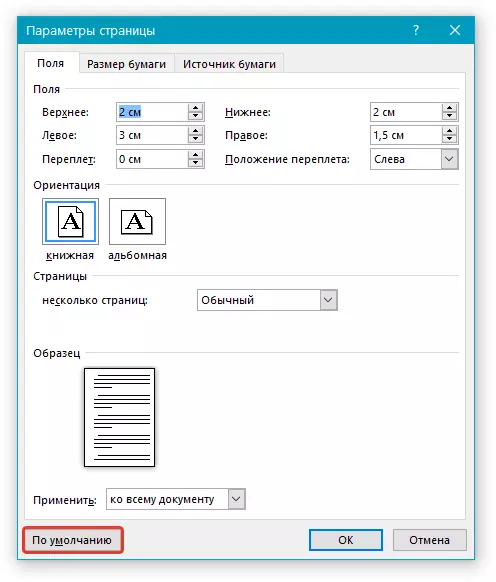
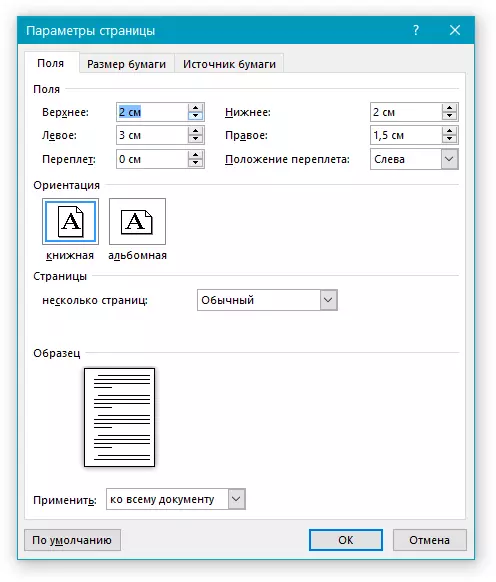
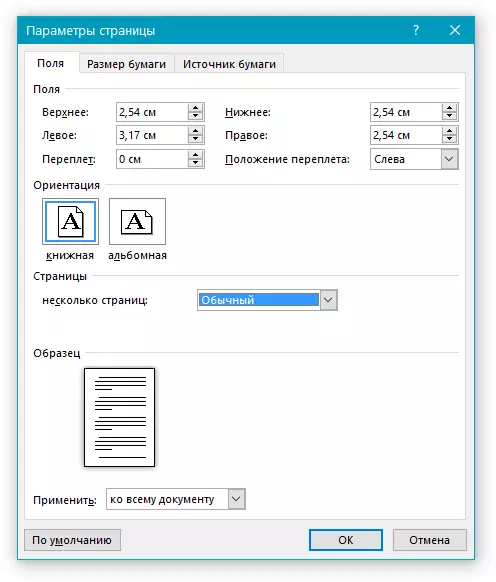
3. The dialog box appears "Page settings" where you can set the necessary field size parameters.
Notes and recommendations regarding configuration and change of page field parameters
1. If you want to change the default fields, that is, those that will be applied to all documents created in the Word, after selecting (or change) the required parameters, press the button "Fields" After that, in the unfolded menu, select "Customizable fields" . In the dialog that opens, click "Default".
The changes you entered will be saved as a template, on which the document will be based. This means that each document you create will be based on this template and have the field size specified.
2. In order to resize fields in a document part, select the desired fragment using the mouse, open the dialog box "Page settings" (Described above) and enter the necessary values. In field "Apply" In the unfolding window, select "To the dedicated text".
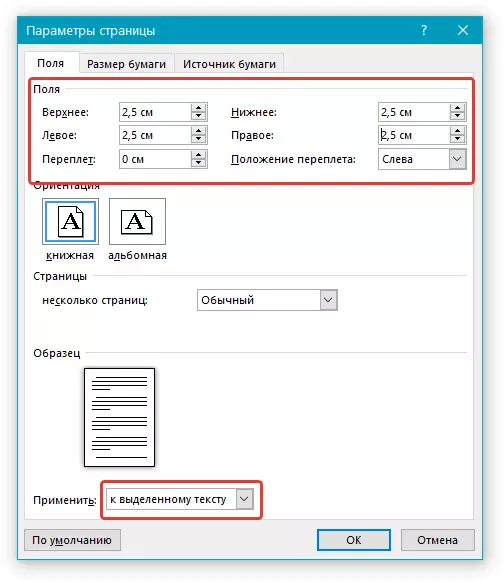
Note: This action will add automatic separations of sections before and after the fragment you have selected. If the document has already been divided into partitions, select the sequences you need or simply select the one you need and change the parameters of its fields.
Lesson: How to make a page break in Word
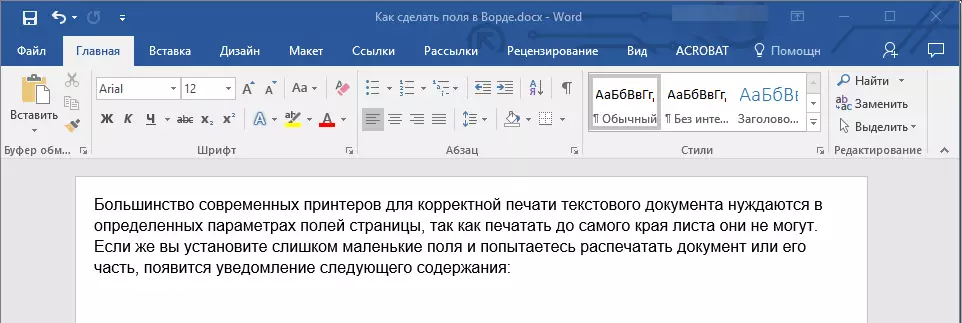
3. Most modern printers for the correct printing of the text document need certain parameters of the page fields, as they cannot print until the edge of the sheet. If you install too small fields and try to print a document or part of it, the following content will be notified:
"One or more fields are outside the print area"
To eliminate the unwanted trimming of the edges, click in the button that appears on the button "To correct" - This will automatically increase the width of the fields. If you ignore this message, when the print attempt, it will appear again.
Note: The minimum dimensions of the permissible field printing fields, first of all, depend on the printer used, paper size and installed on the PC associated software. With more detailed information you can read the guide to your printer.
Setting different field sizes for even and odd pages
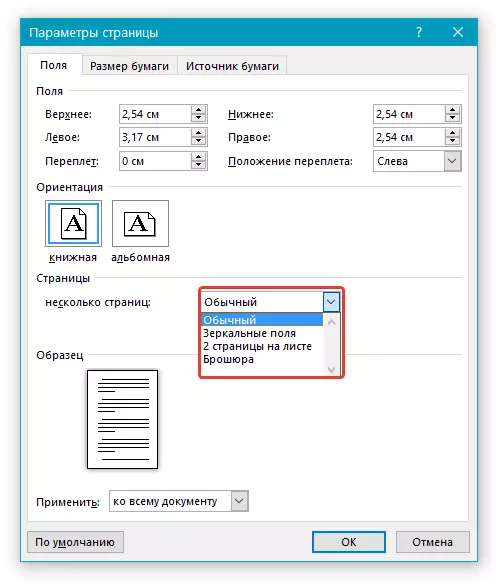
For bilateral printing of a text document (for example, a log or book), you must configure the fields of even and odd pages. In this case, it is recommended to use the parameter "Mirror Fields" choose which you can in the menu "Fields" Located in the group "Page settings".
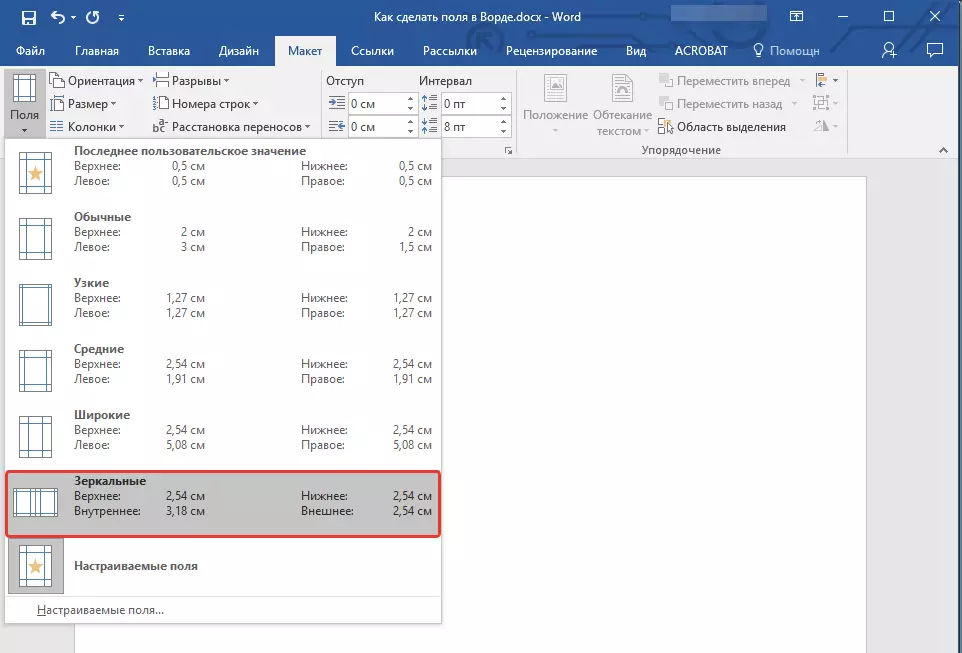
When installing mirror fields for the left page field, mirrors reflect the fields right, that is, the internal and external fields of such pages become the same.
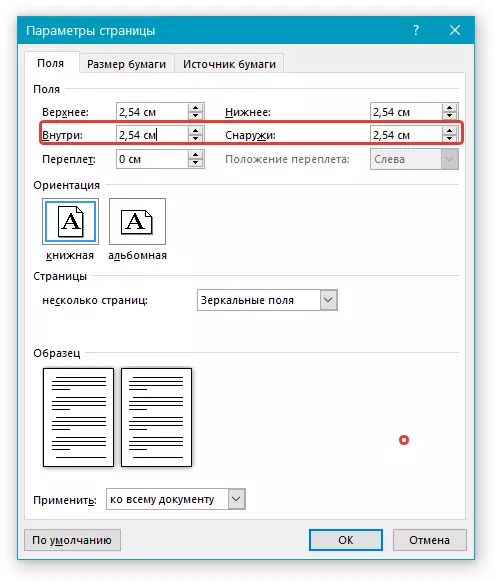
Note: If you want to change the parameters of the mirror fields, select "Customizable fields" in the button menu "Fields" and set the necessary parameters "Inside" and "Outside".
Adding binding fields for brochures
Documents to which the binding will be added after printing (for example, brochures), need additional space on the side, upper or internal fields of the page. It is these places that will be used for binding and are a guarantee that the text content of the document will be visible and after its brochure.
1. Go to the tab "Layout" and click on the button "Fields" which is located in the group "Page settings".

2. In the menu that appears, select item "Customizable fields".

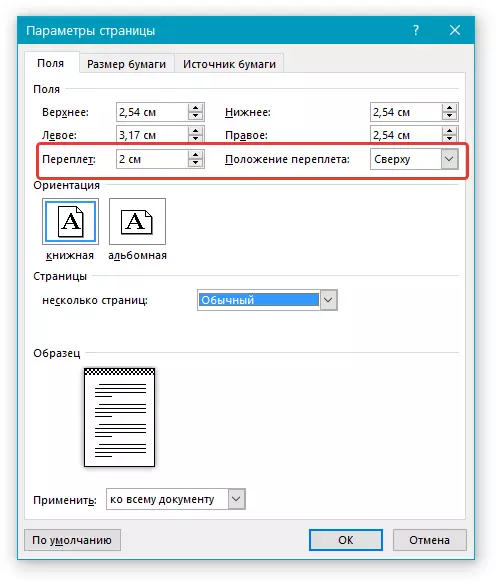
3. Set the necessary parameters for binding by specifying its size in the corresponding field.
4. Select the binding position: "Above" or "Left".
Note: If in the document you work with, one of the following field parameters is selected - "Two pages on a sheet", "Brochure", "Mirror Fields" , - field "Binding position" in the window "Page settings" It will be inaccessible, since this parameter in this case is determined automatically.
How to view page fields?
In MS Word, you can enable the display in the text document, which corresponds to the text border.
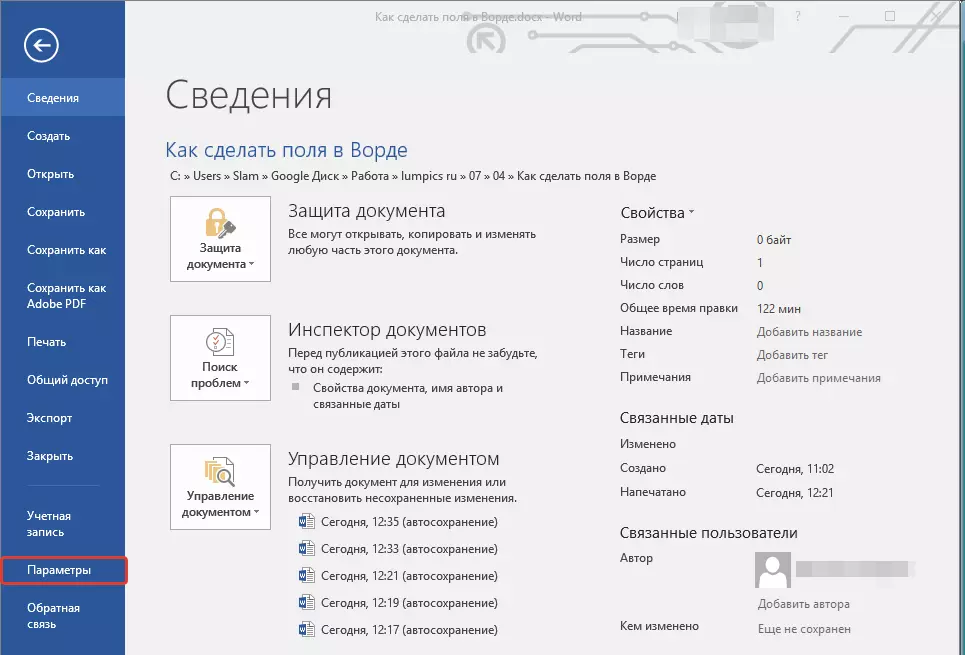
1. Press the button "File" and choose a point there "Options".
2. Go to the section "Additionally" and install a tick opposite the item "Show the borders of the text" (group "Show the content of the document").
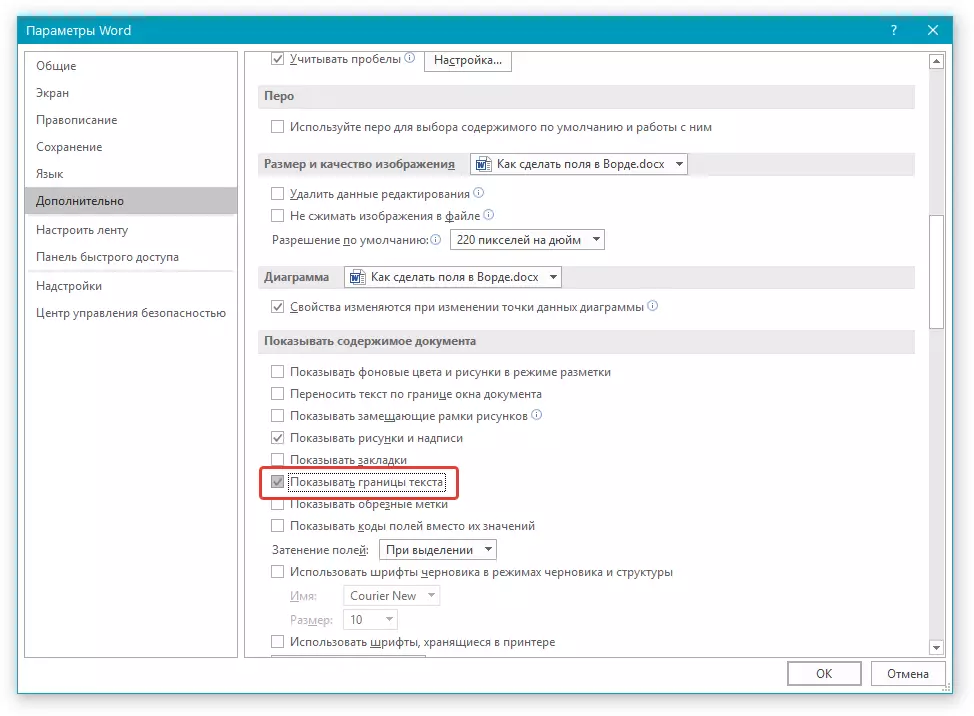
3. Page fields in the document will be displayed by dotted lines.
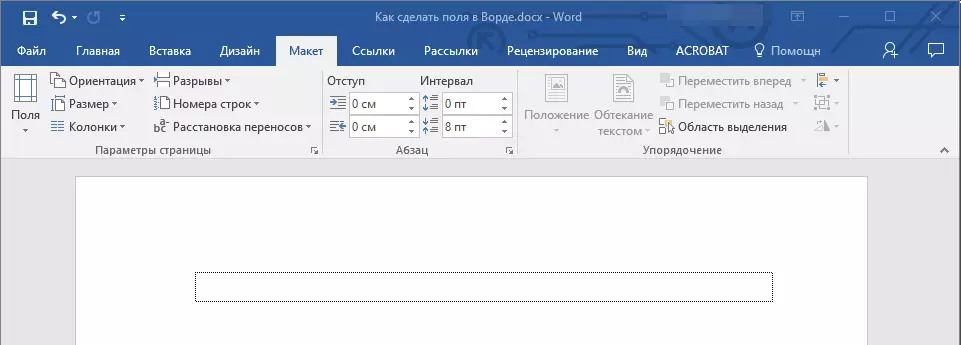
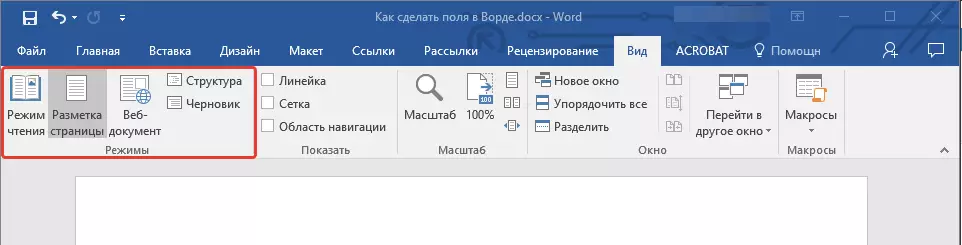
Note: You can also view page fields in document viewing mode. "Page layout" and / or "Web document" (tab "View" , group "Modes" ). It is not output to print the displayed boundaries of the text.
How to remove page fields?
To remove the fields of the pages in the MS Word text document is extremely recommended, at a minimum, for two reasons:
- In the printed document, the text located along the edges (outside the print area) will not be displayed;
- This is considered a violation from the point of view of documents.
And yet, if you need to completely remove the fields in a text document, it can be done in the same way as you can configure any other parameters (set values) for fields.
1. In the tab "Layout" Press the button "Fields" (group "Page settings" ) and select item "Customizable fields".
2. In the dialog that opens "Page settings" Set the minimum values for the upper / lower, left / right (inside / outside) fields, for example, 0.1 cm.
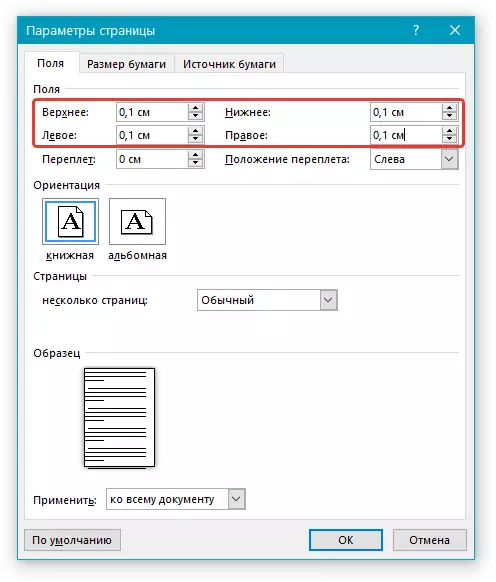
3. After you click "OK" And start writing in the document text or insert it, it will be located from the edge to the edge, from the top to the bottom of the sheet.
On this, everything, now you know how to make, change and configure fields in Word 2010 - 2016. The instruction described in this article will definitely apply to the earlier versions of the Microsoft program. We wish you high productivity in the work and achieve your goals in learning.