

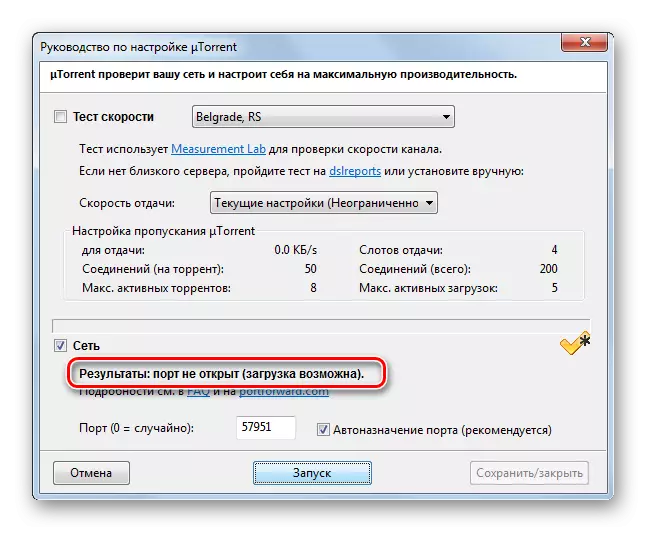
For the correct functioning of some software products, you need to open certain ports. Installation, how can this be done for Windows 7.
Lesson: Ports required for incoming SKYPE connections
Method 3: "Windows Firewall"
This method provides for the execution of manipulations through the "Window Firewall", that is, without the use of third-party applications, but only with the help of the resources of the operating system itself. The specified option will suit both users using a static IP address and applying dynamic IP.
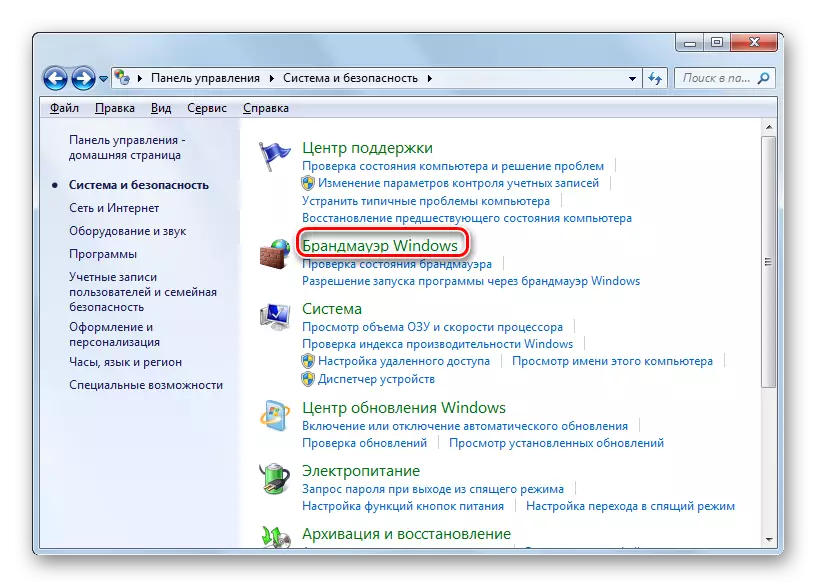
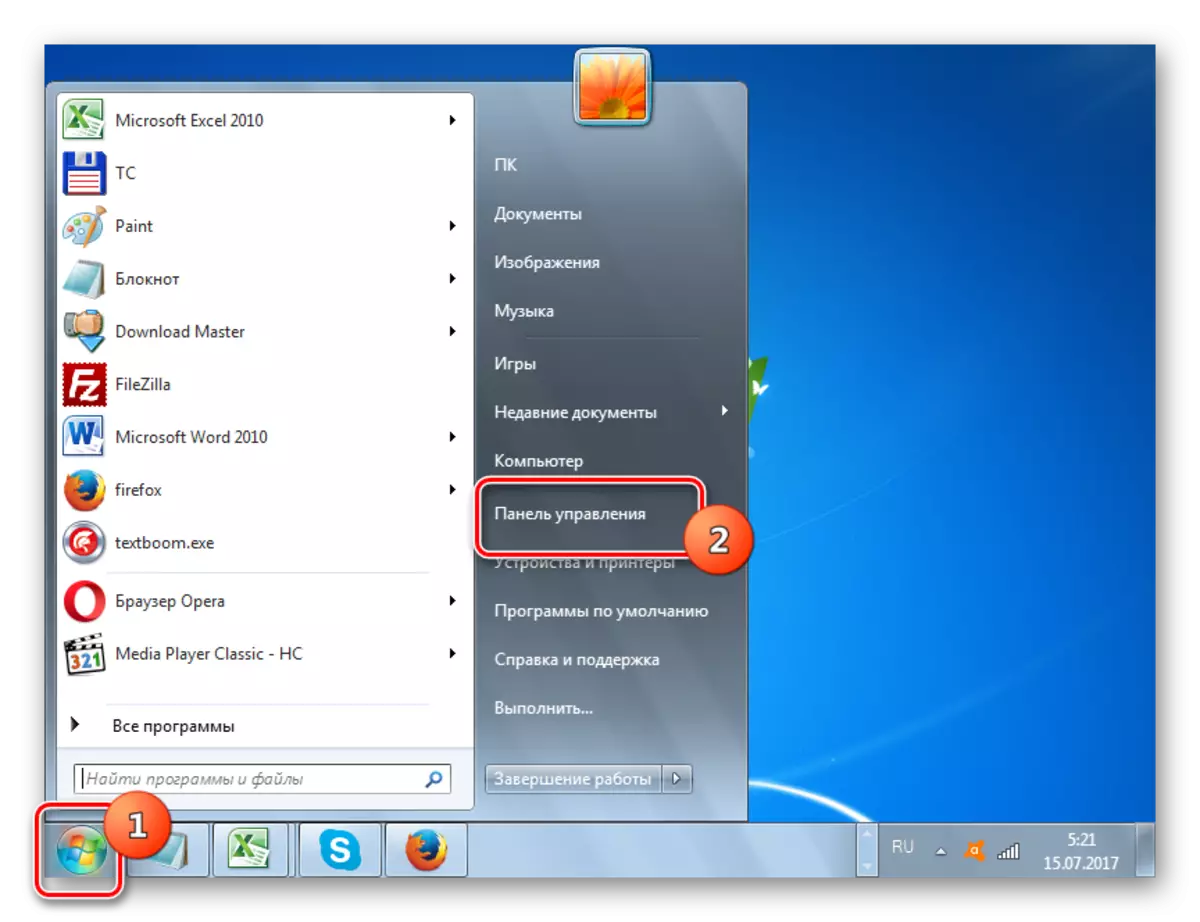
- To go to the Windows Firewall launch, click "Start", then click on the Control Panel.
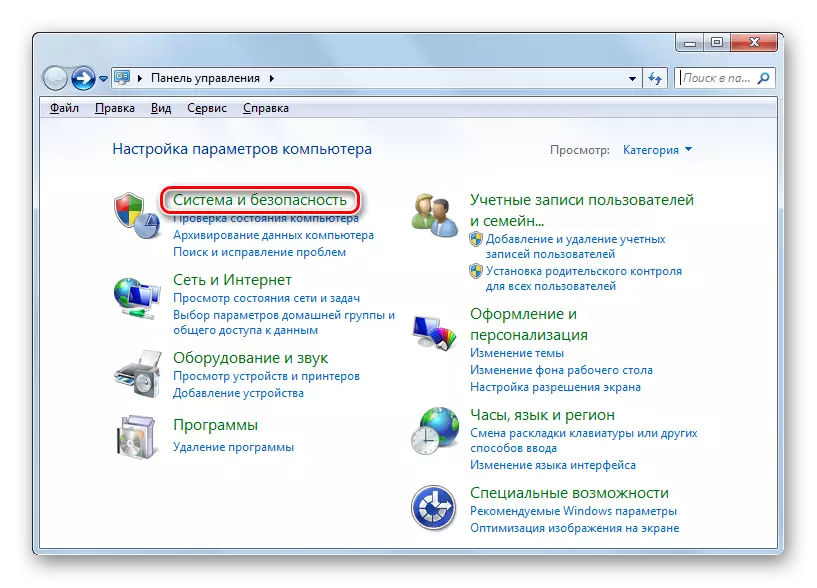
- Next click "System and Security".
- After that, click "Windows Firewall".
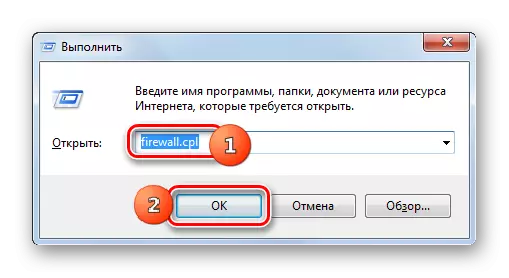
There is a faster option to go to the desired section, but requiring memorizing a specific command. It is carried out by the "Run" tool. Call it by pressing Win + R. Enter:
firewall.cpl
Click OK.
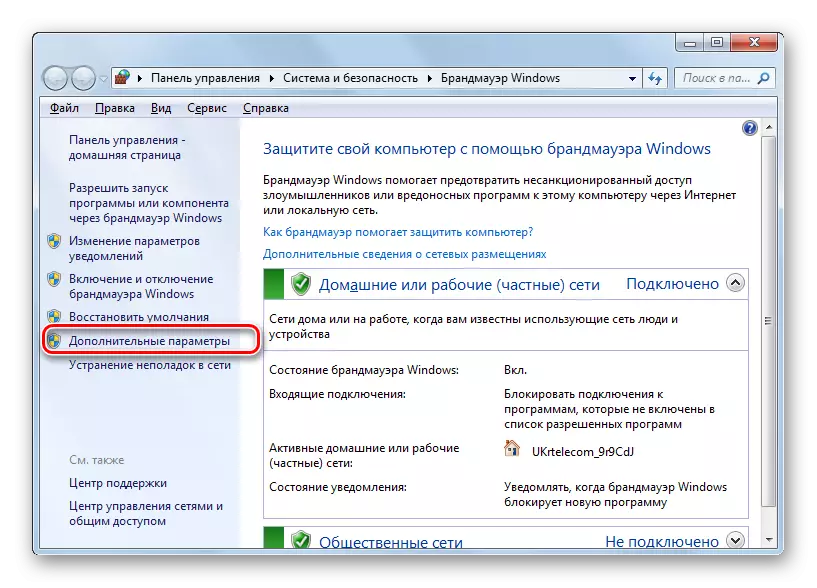
- With any of these actions, the "Firewall" configuration window is launched. Click "Advanced Parameters" in the side menu.
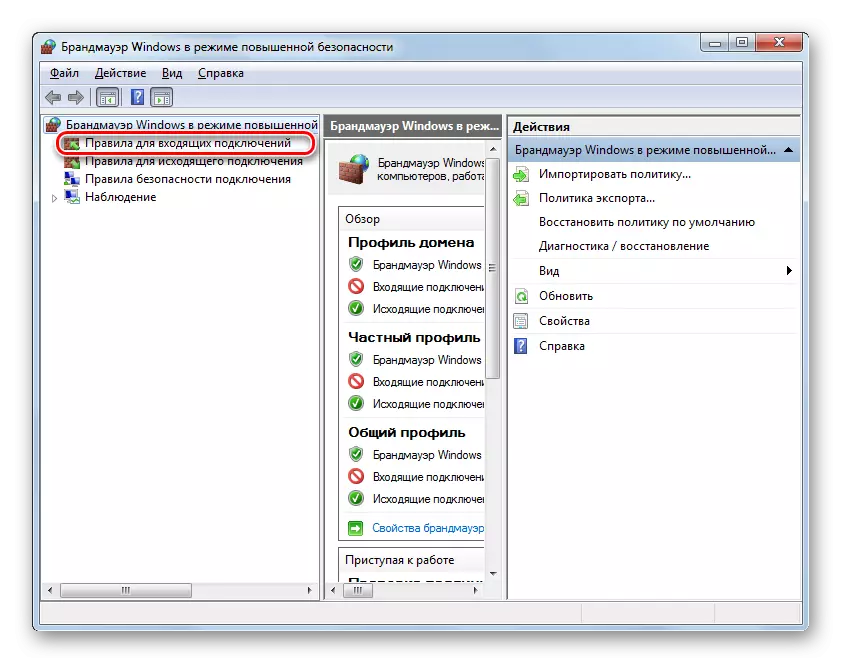
- Now move through the side menu to the "Rules for Inbound Rules" section.
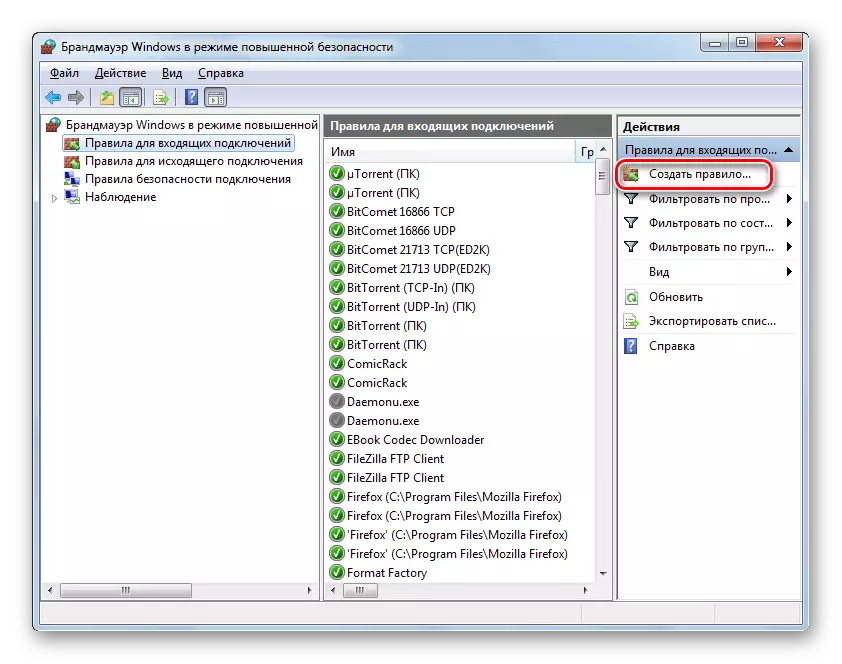
- The Incoming Connection Rules Management Tool opens. To open a specific socket, we have to form a new rule. In the side menu, press "Create Rule ...".
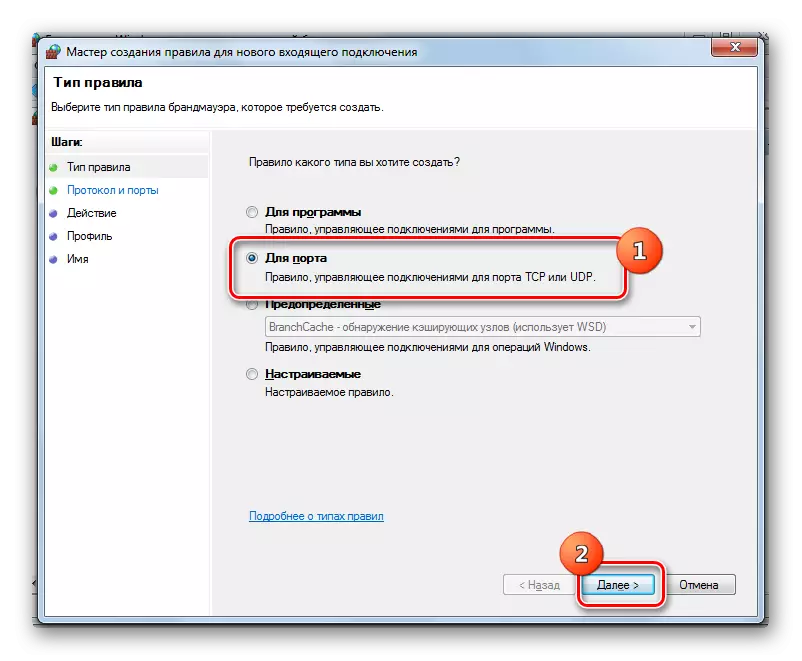
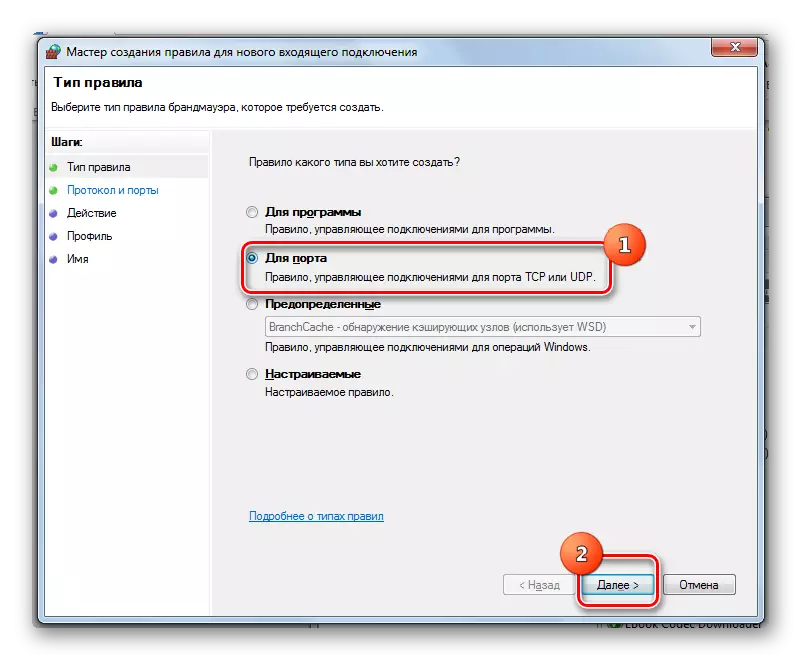
- The rules forming tool is launched. First of all, you need to choose its type. In the "Rule of which type you want to create?" Install the radio button to the "For Port" position and click "Next".
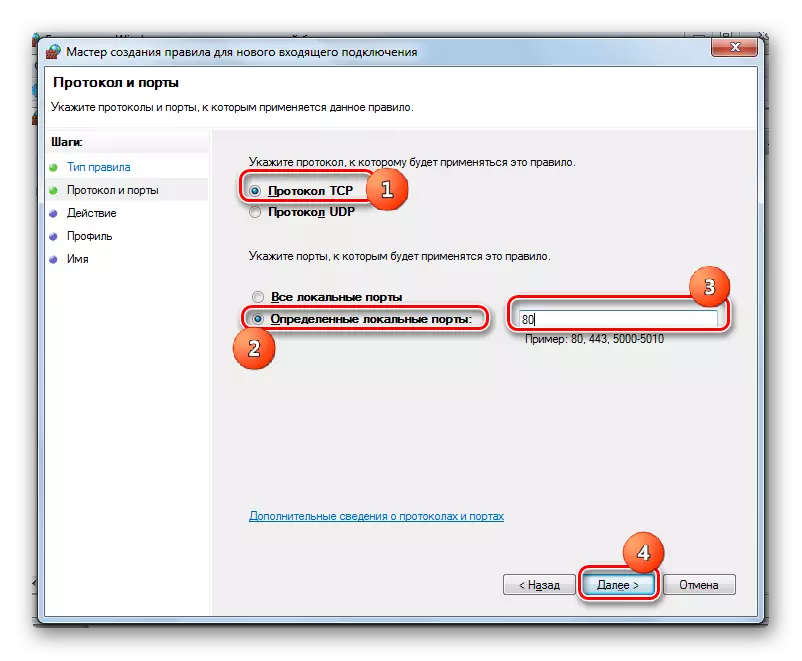
- Then in the "Specify the Protocol" block, leave the radio button in the TCP protocol position. In the "Specify ports" block, we put the radio button to the "Defined Local Ports" position. In the field to the right of this parameter, enter the number of a specific port that is going to activate. Click "Next".
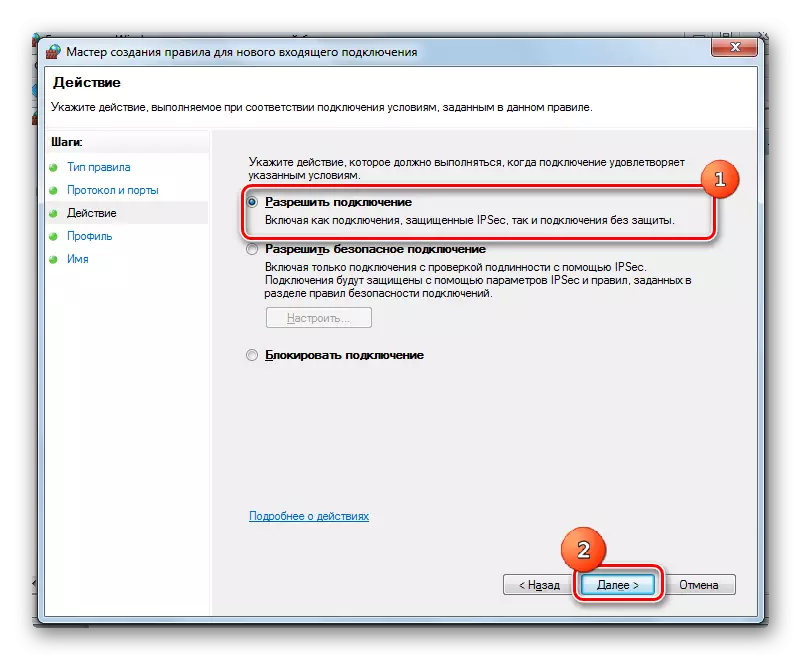
- Now you need to specify the action. Set the switch to the "Allow Connection" item. Press "Next".
- Then you should specify the profile type:
- Private;
- Domain;
- Public.
Around each of the specified items must be installed a check mark. Press "Next".
- In the next window in the "Name" field, you need to specify an arbitrary name of the rule being created. In the "Description" field, you can immediately leave a comment on the rule, but it is not necessary to do this. After that, you can click "Finish."
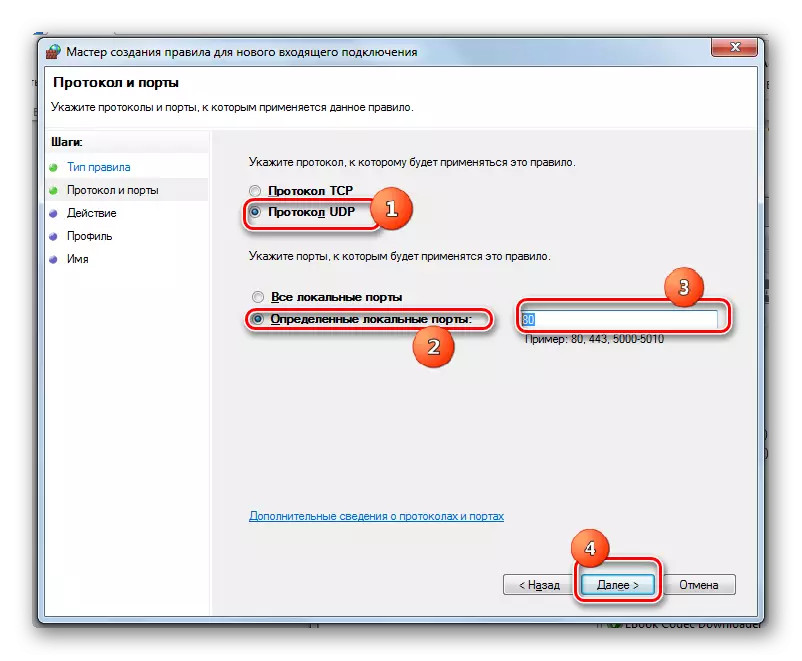
- So, the rule for the TCP protocol is created. But to ensure the guarantee of the correct work, you need to create a similar entry for the UDP to the same society. To do this, click "Create Rule ...".
- In the window that opens, set the radio button to the "For Port" position. Press "Next".
- Now set the radio button to the UDP protocol position. Below, leaving the radio button in the "Certain Local Ports" position, exhibit the same number as in the situation described above. Click "Next".
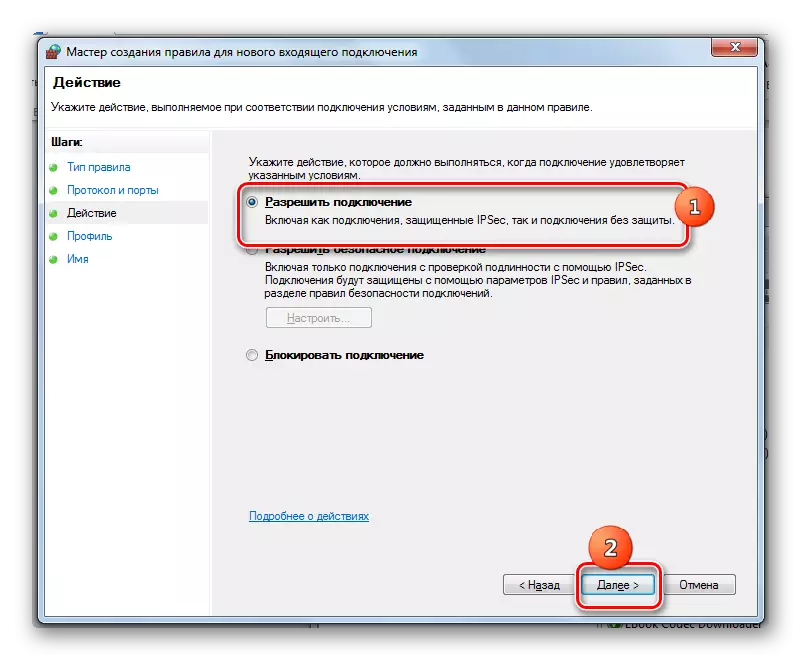
- In a new window, we leave an existing configuration, that is, the switch must stand in the "Allow connection" position. Click "Next".
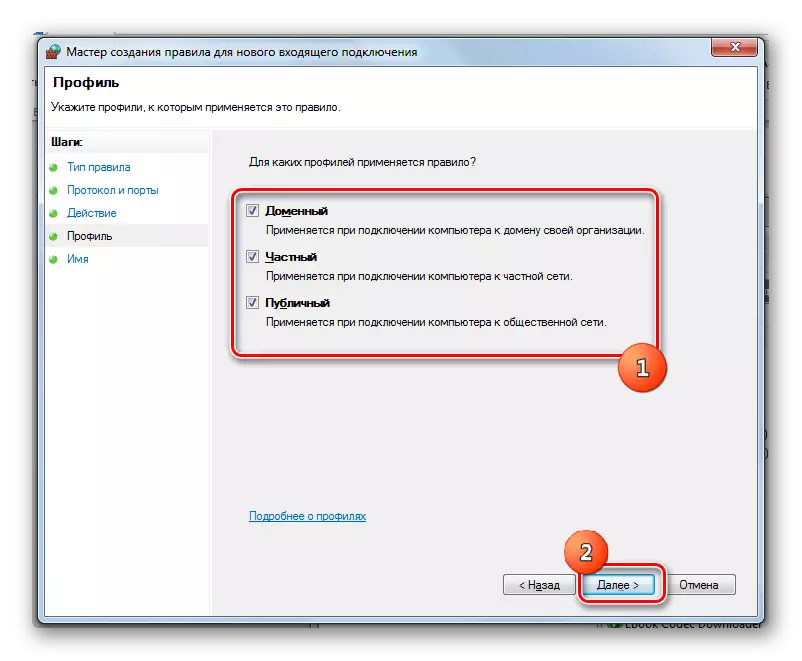
- In the next window, again, make sure that the checkboxes are installed near each profile, and press "Next".
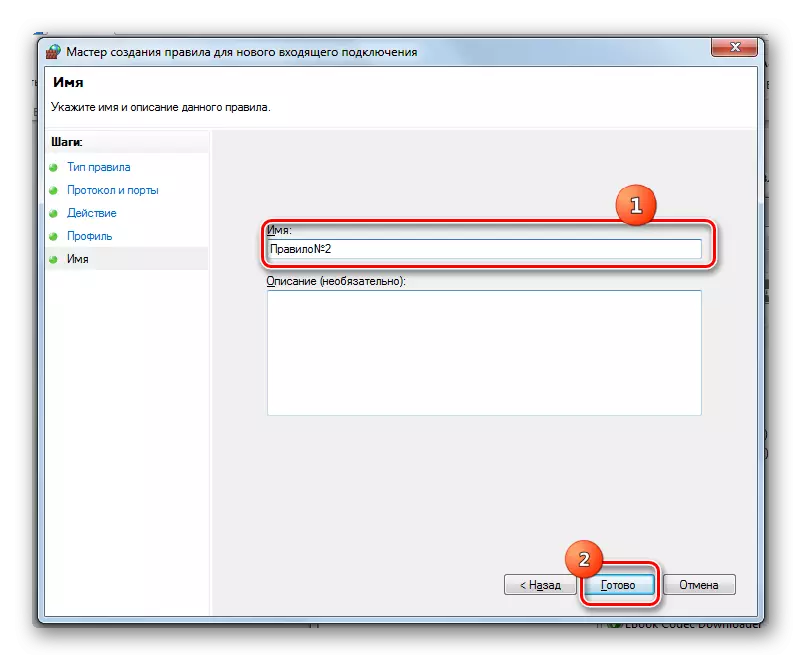
- At the final step in the "Name" field, enter the name of the rule. It should be different from that name that was assigned to the previous rule. Now you should harm "ready."
- We formed two rules that will ensure the activation of the selected socket.


Method 4: "Command String"
You can perform the task using the "Command Line". Its activation must be carried out necessarily with administrative rights.
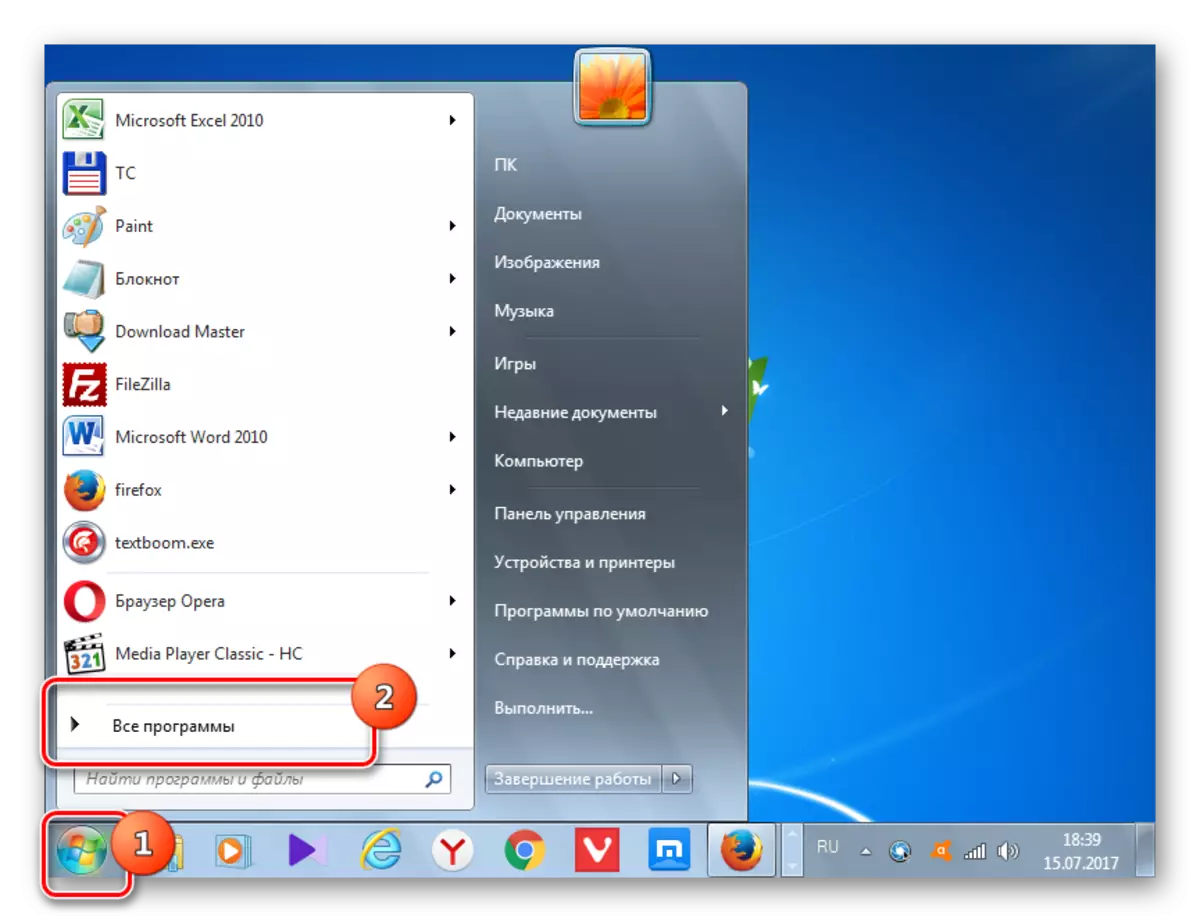
- Click "Start". Move all programs.
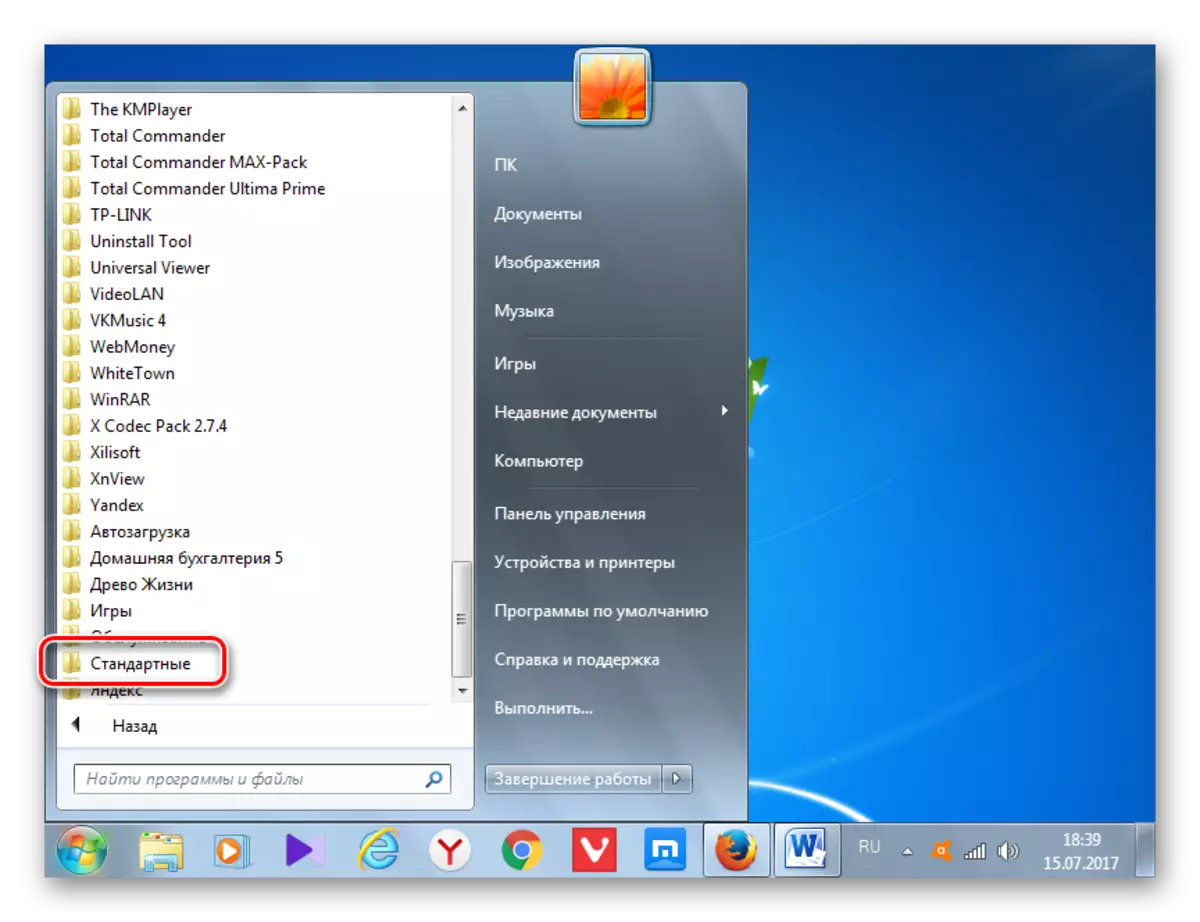
- Find the "Standard" directory in the list and log in to it.
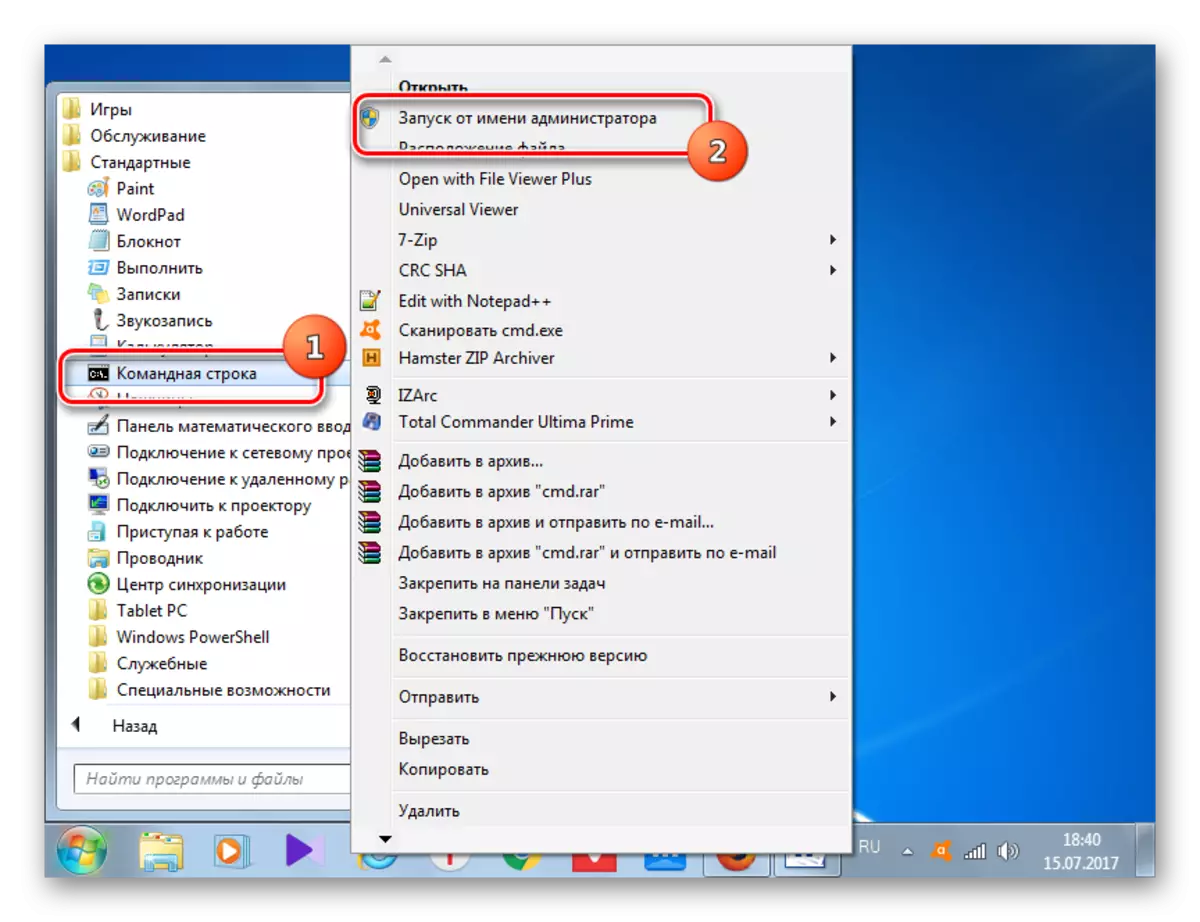
- In the list of programs, find the name "Command Line". Click on it with the mouse using the button on the right. In the list, stop at the "Startup on behalf of the administrator".
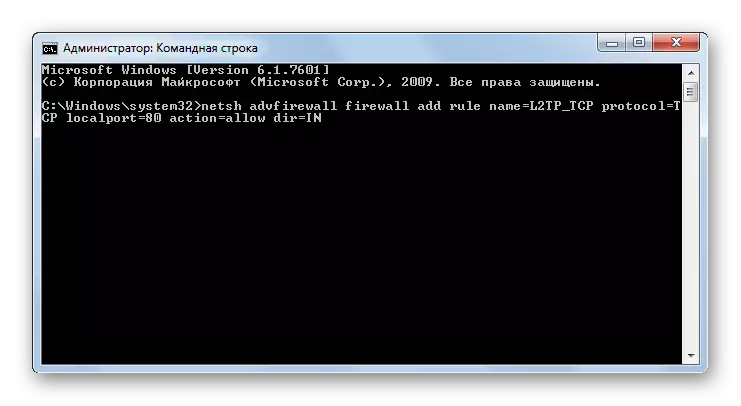
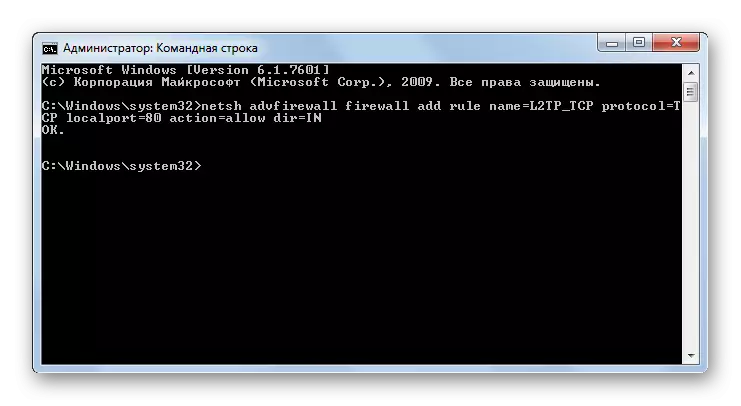
- The "CMD" window opens. To activate the TCP socket, you need to enter a template expression:
Netsh Advfirewall Firewall Add Rule Name = L2TP_TCP Protocol = TCP LocalPort = **** Action = ALLOW DIR = IN
"****" characters are required to replace the specific number.
- After entering the expression, press ENTER. The specified socket is activated.
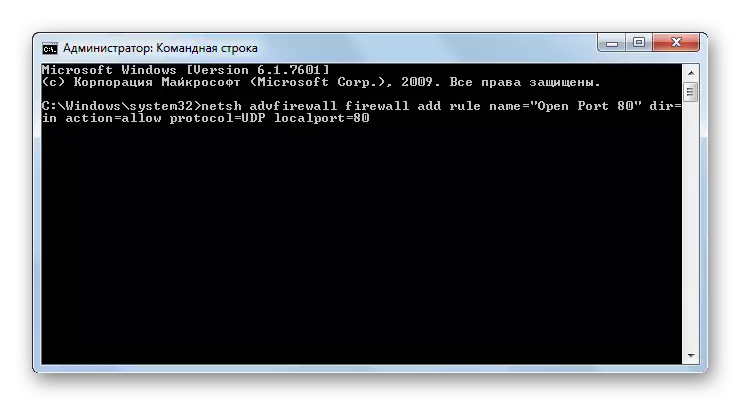
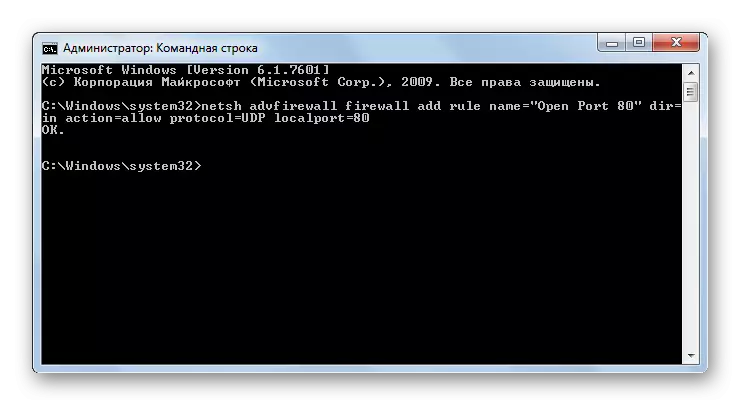
- Now we will activate the UPD. The expression template is:
Netsh Advfirewall Firewall Add Rule Name = "Open Port ****" Dir = In Action = Allow Protocol = UDP LocalPort = ****
Replace stars numbering. VBE expression in the console window and click ENTER.
- UPD activation is performed.
Lesson: Activation of the "Command Line" in Windows 7
Method 5: Port Forwarding
Finished this lesson description of the method using an application that is specifically designed to perform this task - Simple Port Forwarding. The application of this program is the only option from all described, performing which you can open the socket not only in the OS, but also in the router parameters, and in the window of its settings you do not even have to go. Thus, this method is universal for most models of routers.
Download Simple Port Forwarding
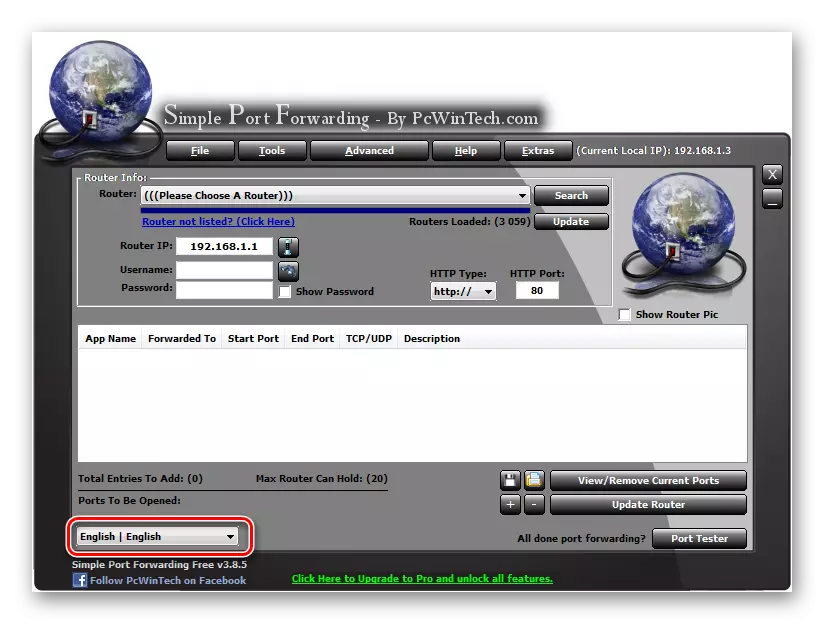
- After running Simple Port Forwarding, first of all, for greater convenience in this program, you need to change the interface language from English, which is set by default, to Russian. To do this, click on the field in the lower left corner of the window, in which the specified name of the current program language. In our case, it is "English I English".
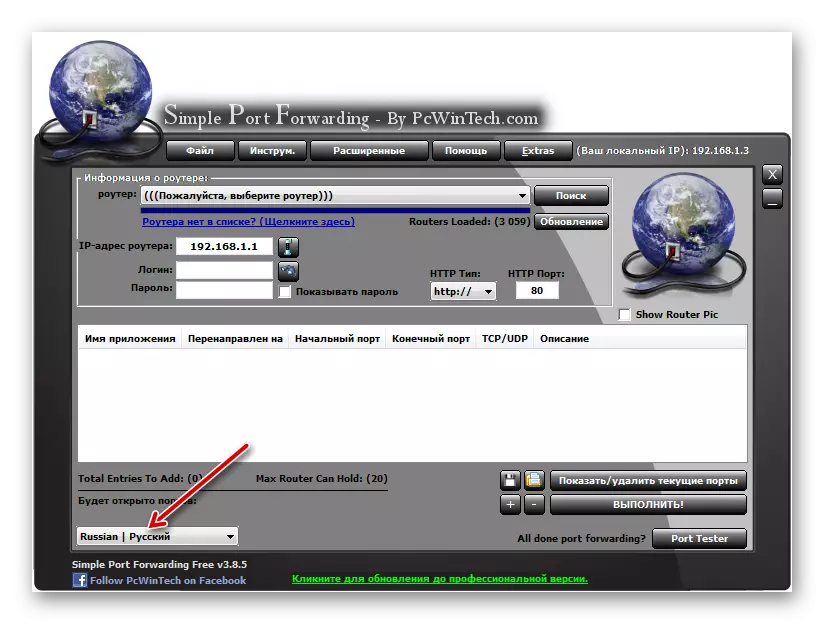
- A large list of different languages opens. Choose "Russian i Russian" in it.
- After that, the application interface will be Russified.
- In the "Router IP Address" field, your router's IP should automatically be displayed.
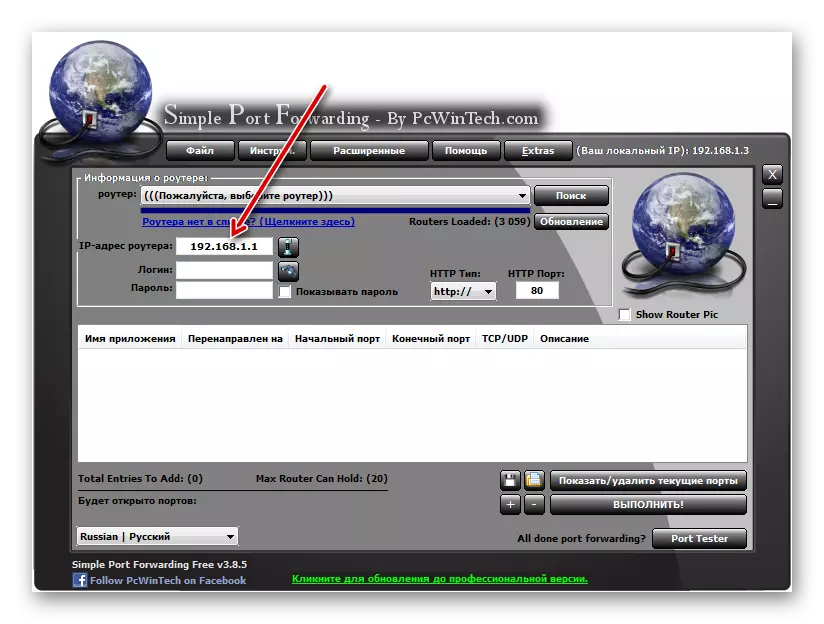
If this did not happen, it will have to be drove it manually. In the overwhelming majority of cases it will be the following address:
192.168.1.1
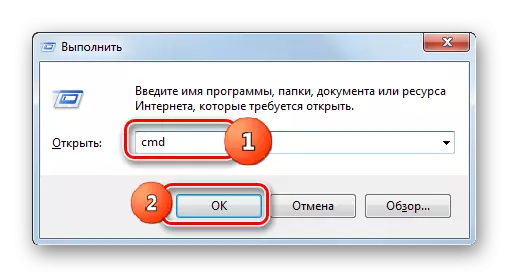
But it is still better to make sure of his correctness through the "Command Line". This time it is not necessary to launch this tool with administrative rights, and therefore we will run it in a faster way than us previously was considered. Type Win + R. In the "Run" field that opens:
cmd.
Press "OK".
In the "Command Line" window, enter the expression:
Ipconfig
Press ENTER.

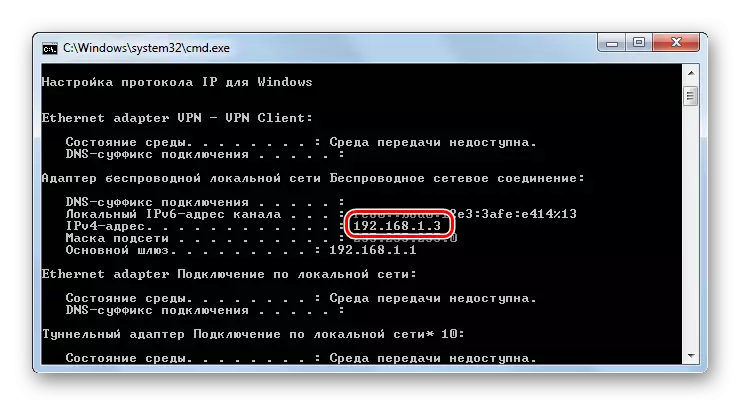
After that, the main connection information will be displayed. We need a value opposite the "Main Gateway" parameter. It is it that you should enter in the "Router IP Address" field in the Simple Port Forwarding application window. The "Command Line" window is not yet closed, since the data displayed in it can be useful in the future.
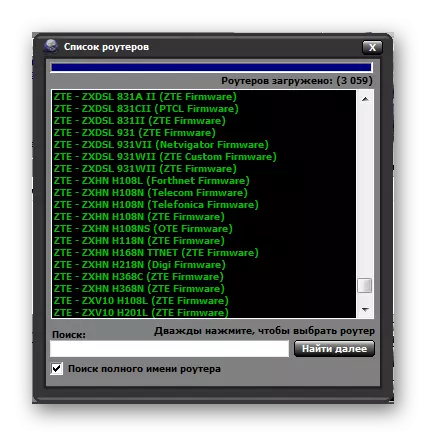
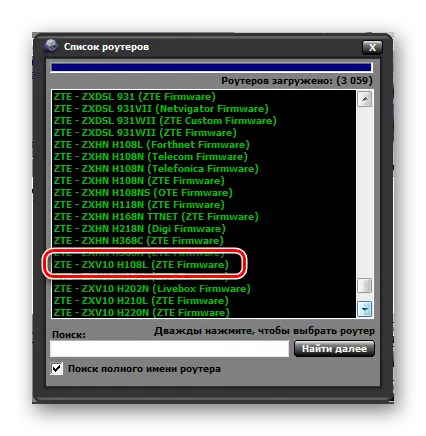
- Now you need to find a router through the program interface. Press "Search".
- There is a list with the name of various models of more than 3000 routers. It needs to find the name of the model to which your computer is connected.
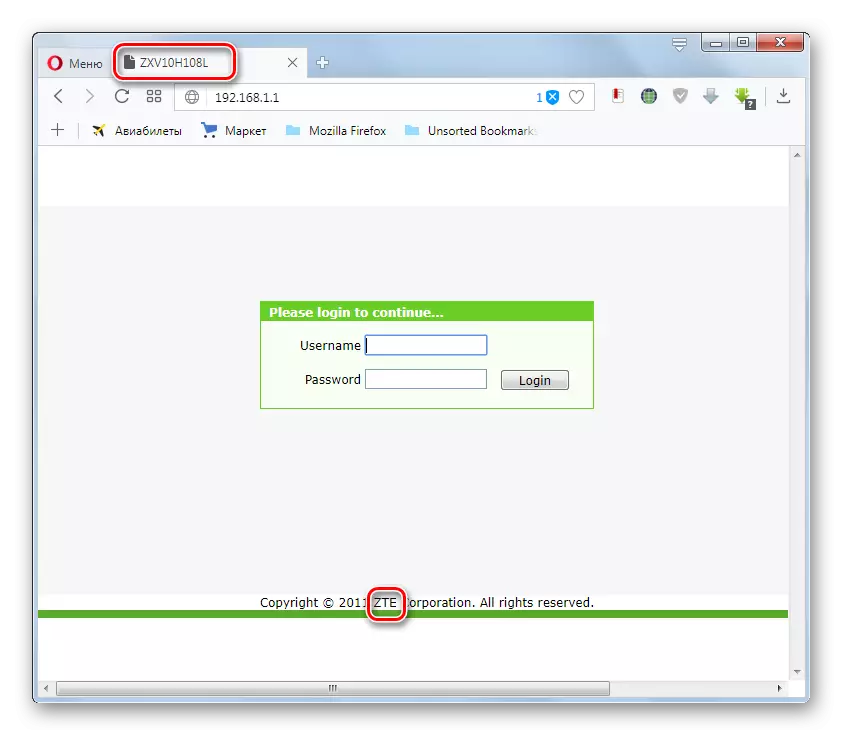
If you do not know the name of the model, then in most cases it can be seen on the router housing. You can also find out its name through the browser interface. To do this, enter any web browser to the address bar, which we previously defined through the "Command Line" in the address bar. It is located near the "Main Gateway" parameter. After it is entered into the browser's address bar, press ENTER. The router settings window opens. Depending on its brand, the name of the model can be found either in the window that opens, or in the title tab.
After that, find the name of the router in the list that is presented in Simple Port Forwarding, and click on it twice.
- Then in the Login and Password Program fields will be displayed standard account data for a specific router model. If you have previously changed them manually, you should enter the currently current usernas and password.
- Next click on the "Add Entry" button ("Add Record") as the "+" sign.
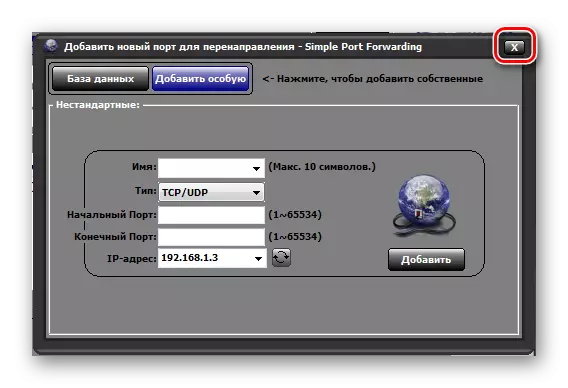
- In the new socket window that opens, click the "Add Specific" button.
- Next, the window is started in which you want to specify the parameters of the opened socket. In the "Name" field, write any arbitrary name, in length not exceeding 10 characters by which you will identify this entry. In the "Type" area, we leave the parameter "TCP / UDP". Thus, we do not have to create a separate entry for each protocol. In the "Starting Port" and "End Port" area, we take the number of the port that you are going to open. You can even drive a whole range. In this case, all sockets of the specified number interval will be opened. In the "IP address" field, the data must be tightened automatically. Therefore, do not change the existing value.
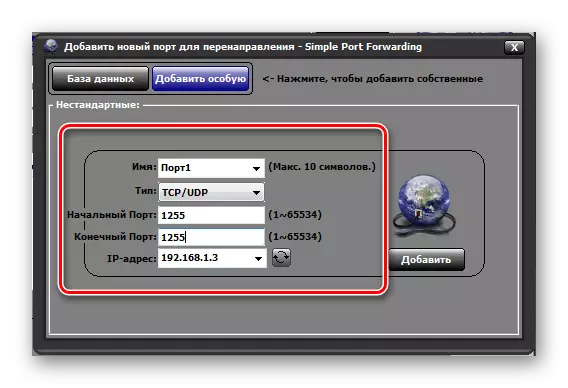
But just in case it can be checked. It must fit the value that is displayed near the "IPv4 address" parameter in the "Command Line" window.
After all the specified settings are made, press the "Add" button in the Simple Port Forwarding program interface.
- Then, to return to the main program window, close the port add window.
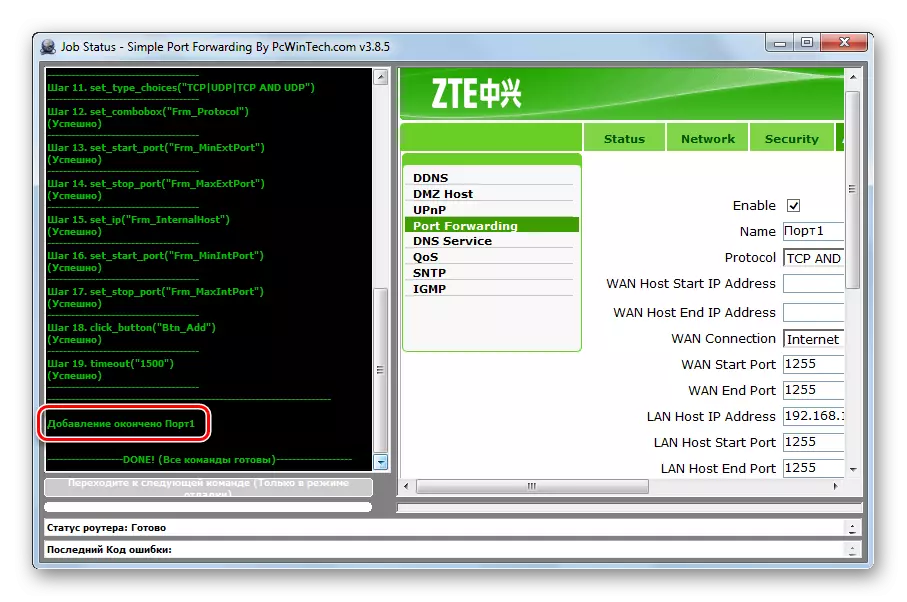
- As we can see the record created by us appeared in the program window. We highlight it and click "Run."
- After that, the procedure for opening a socket will be completed, after which the inscription "Appended" appears at the end of the report.
- So, the task is completed. Now you can safely close Simple Port Forwarding and "Command Line."


As you can see, there are many ways to open the port in both the built-in Windows tools and through third-party programs. But most of them will open only the socket in the operating system, and its opening in the router settings will have to be performed separately. But still there are separate programs, such as Simple Port Forwarding, which will help to cope with the user with both voiced tasks at the same time without holding manual manipulations with the router settings.