
Now physical DVD or CDs lose their relevance, since they are not always convenient to use them. More universal drives come to replace, allowing you to store much more information and overwrite it as much as you like. However, some users still resort to burning, while maintaining a disc, for example, music. As part of this article, we want to pay separate attention to this and show how you write audio files to such media using additional software.
Write music to the disk
As mentioned earlier, it is proposed to use a special software that performs the burning of the disc. All similar tools work in approximately the same principle, but have their own characteristics. Next, we suggest familiarizing yourself with the three most popular options so that you can pick up the most suitable for yourself.Method 1: BURNAWARE
The first on our list will be the program called BurnaWare. Its advantage is the convenience of using and presence of a special version of the recording designed to save music. The whole process is carried out as follows:
- Insert the drive into the drive and run BurnaWare.
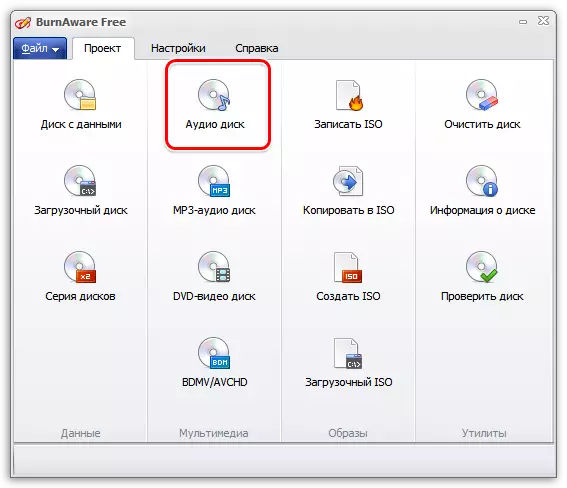
- Select "Audio Disc".
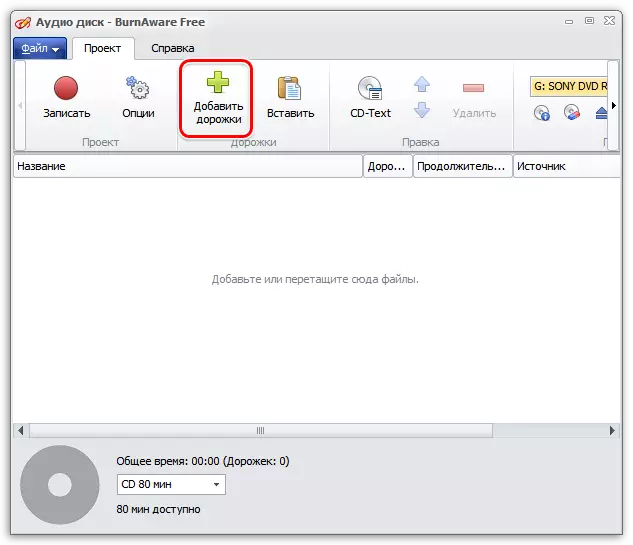
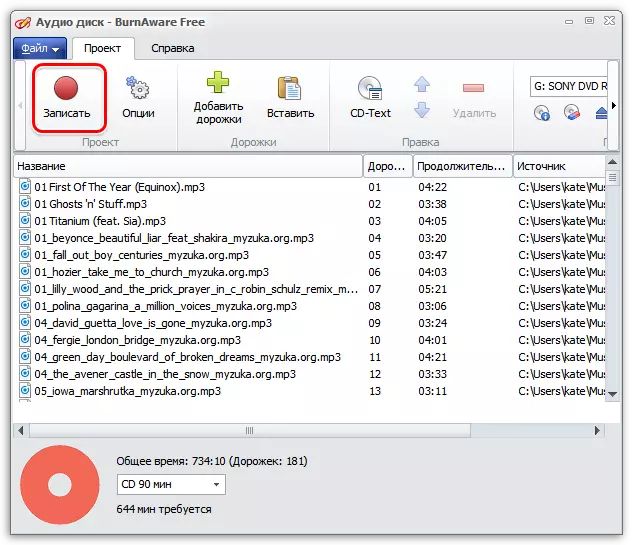
- In the displayed window, you will need to drag the tracks to be added. Tracks You can also add by clicking the "Add Tracks" button, after which the conductor opens on the screen.
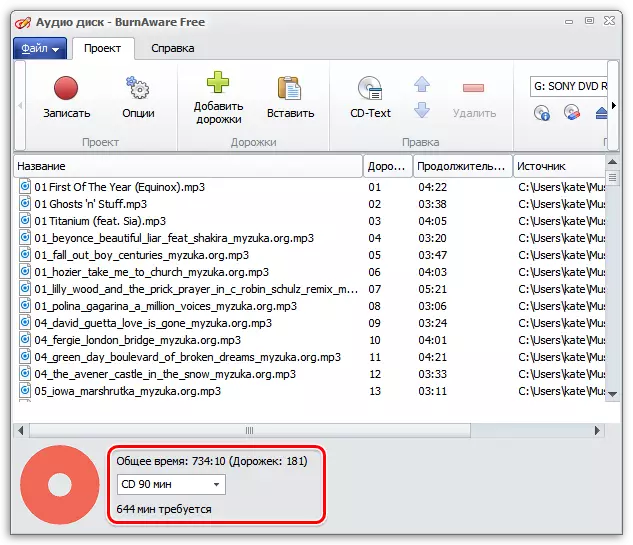
- By adding tracks, you will see the maximum size for the recordable disk (90 minutes). The line below will show the place that is not enough for the burning of the audio system. There are two outputs here: or remove unnecessary musical compositions from the program, or to record the remaining tracks to use additional discs.
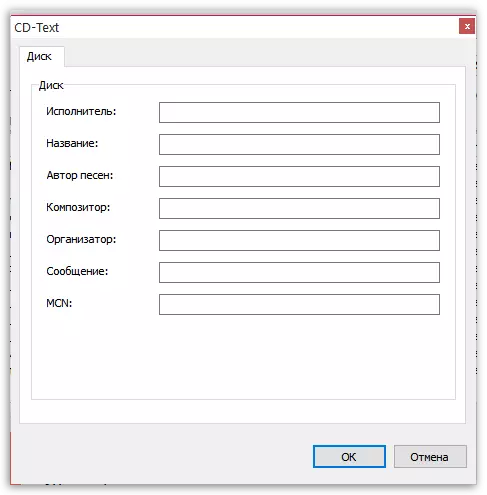
- Now pay attention to the program header where the CD-TEXT button is located. After clicking this button, the window shows the window in which you need to fill out the basic information.
- When the preparation for the record is completed, you can begin to burn yourself. To start, click the "Write" button in the header.
A record will start, which will take a few minutes. At the end, the drive will automatically open, and the message appears on the successful completion of the process.
Method 2: Nero Burning Rom
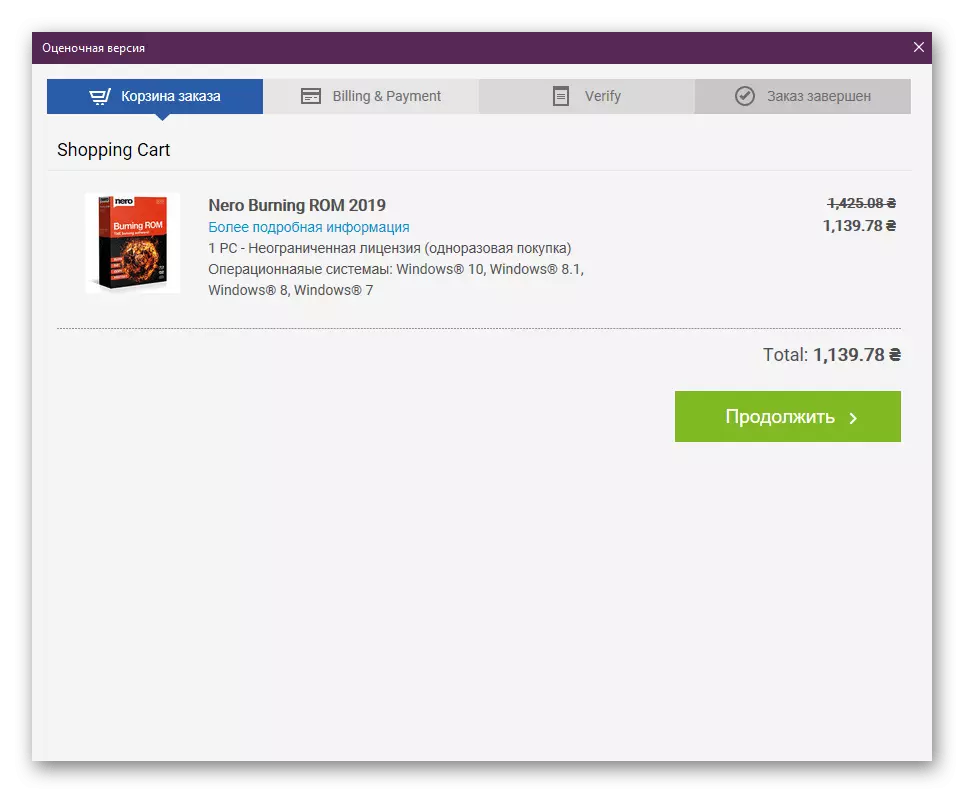
Surely almost every user heard about the softe called Nero. The company is engaged in the production of various focus, and the Nero Burning ROM is called with the recording of disks. Unfortunately, the program applies for a fee, but there are no restrictions in the demo version that can interfere with the correct burning. Therefore, we decided to include this decision in our present material.
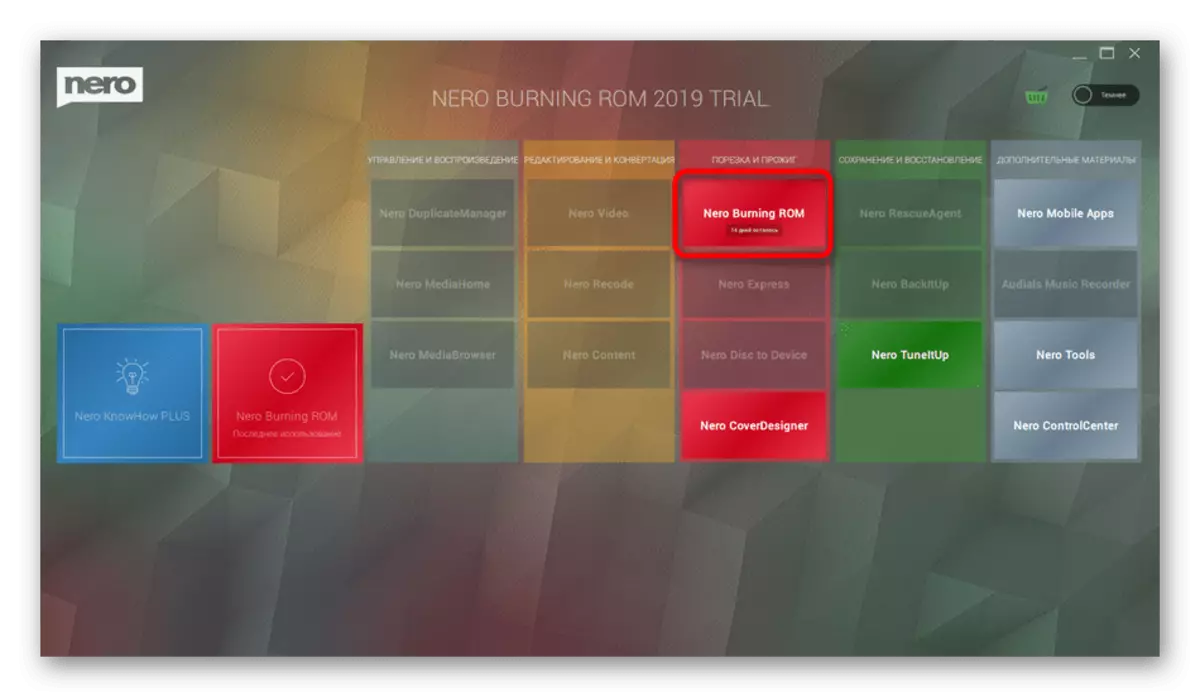
- First of all, download the software from the official site, install and run it. Next, in the "Core and Burn" section, select the "Nero Burning ROM" option.
- When you start the trial version, the Acquisition window will be displayed on the screen. Just close it to proceed to use by.
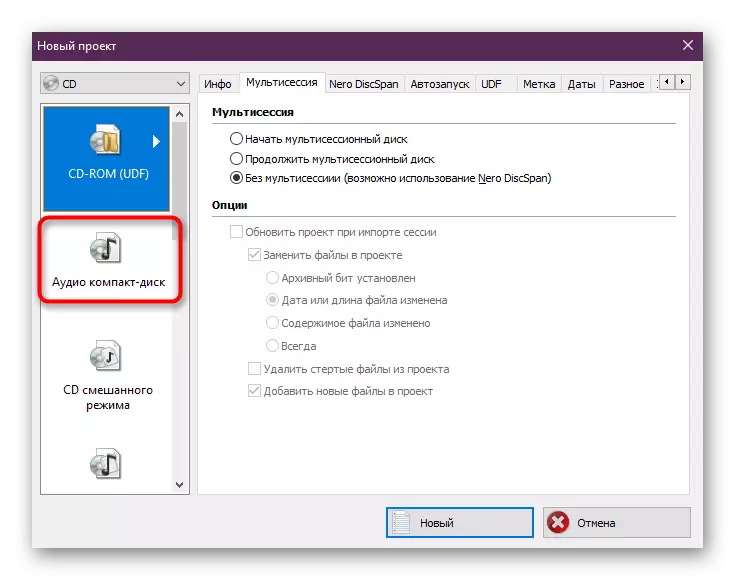
- The creation of a new project will begin, where you need to select the "Audio CD" mode.
- Now set the basic settings in accordance with your requirements. If some unusual desires are missing, leave all default values. Then click on the "New" button.
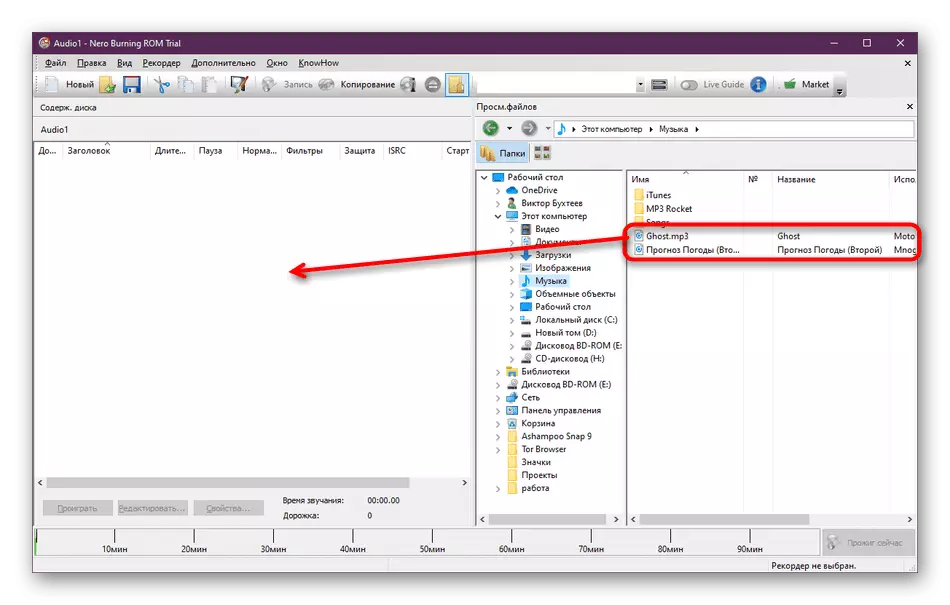
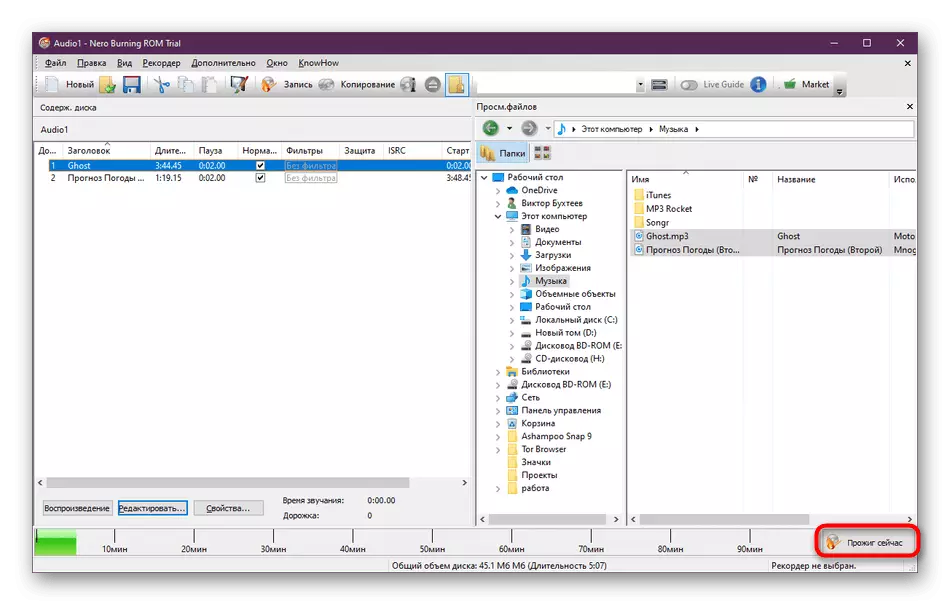
- The main working environment will appear, where the place on the right will be assigned to the browser. In it, select the necessary music files and move them to the "Disk Content" section.
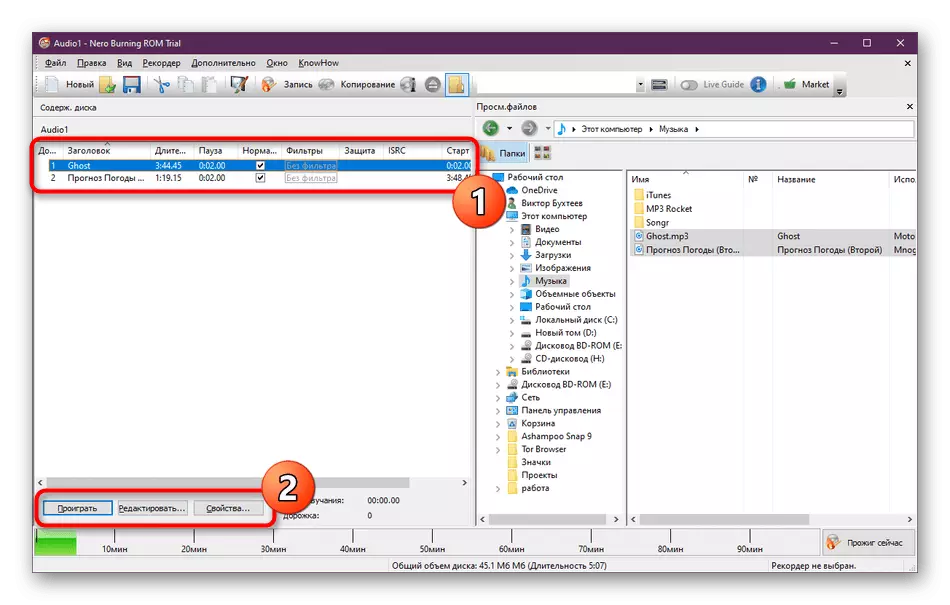
- Added compositions You can listen, edit the parameters or proceed to view the main properties.
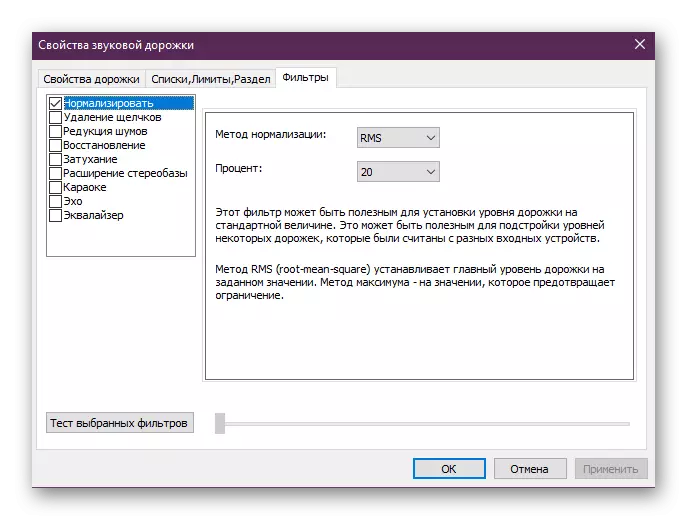
- In addition, Nero Burning Rom offers defined effects on the track. Of course, this is few people use, but look there if you wish to somehow change the available music.
- When you finish all the addition and settings, click the "Burn Now" button.
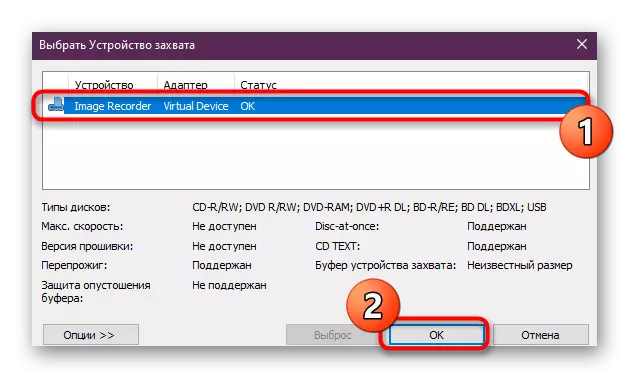
- Select the capture device, that is, that disk where all the contents are placed.
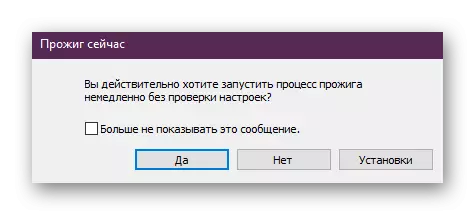
- Confirm the launch of the burn.
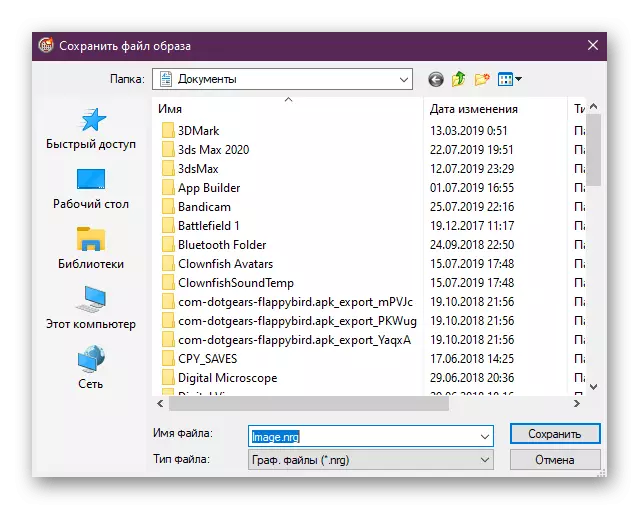
- In case of need, you can save the disk image at any convenient location on your computer.
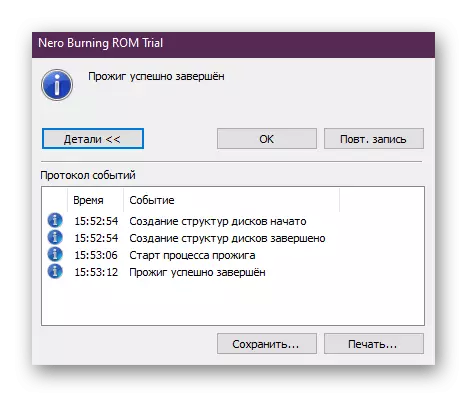
- After the successful end of the burning, you will receive an appropriate notice of this and you can familiarize yourself with all events.

As you can see, you just need to set basic settings and run burning, the rest of the program does everything automatically. At the same time, most popular audio formats are supported, which will not create extra difficulties when you try to write.
Method 3: Astroburn Lite
Astroburn Lite is the most simple of all programs presented today. Lite version provides not so many functions, but it applies for free. Therefore, we recommend looking at this option. As for the burning, here it is literally a couple of clicks.
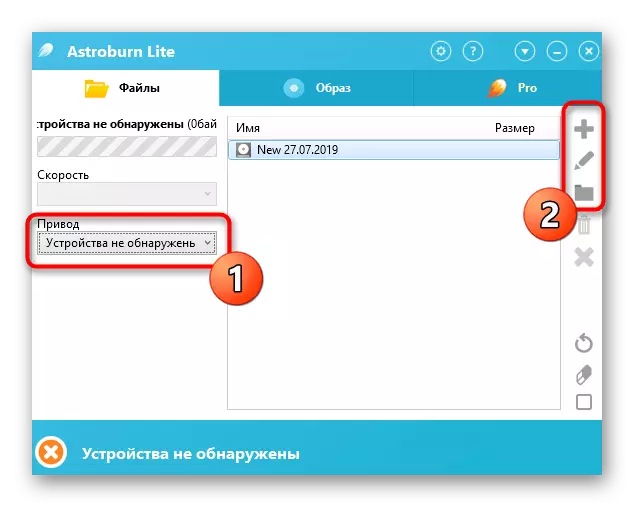
- Run Astroburn Lite and first select the device from the pop-up menu where musical compositions will be saved. Next, you can create a new folder where objects will be placed, and go to add. This is done using the buttons on the right pane.
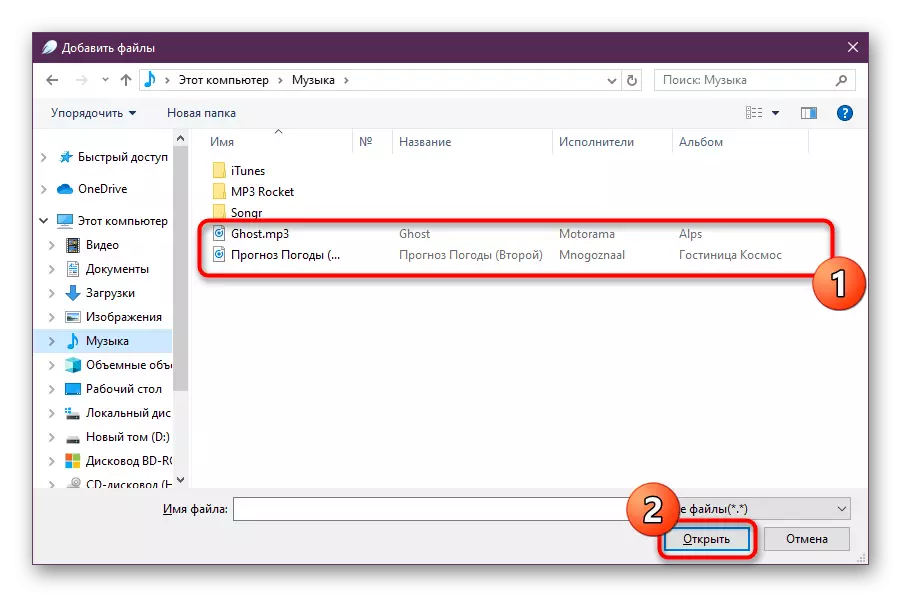
- A new conductor window opens. Here, check the necessary files and click on "Open". If they are located in different directories, the operation will have to repeat several times.
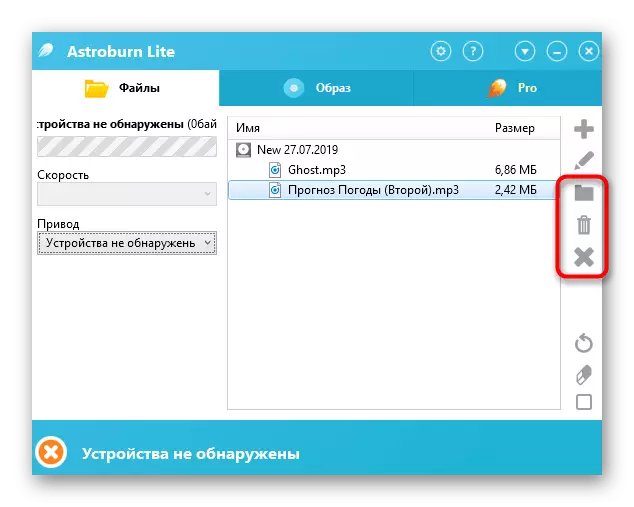
- Next, pay attention to the rest of the tools on the right pane. They allow you to delete some compositions or completely clean the project from files.
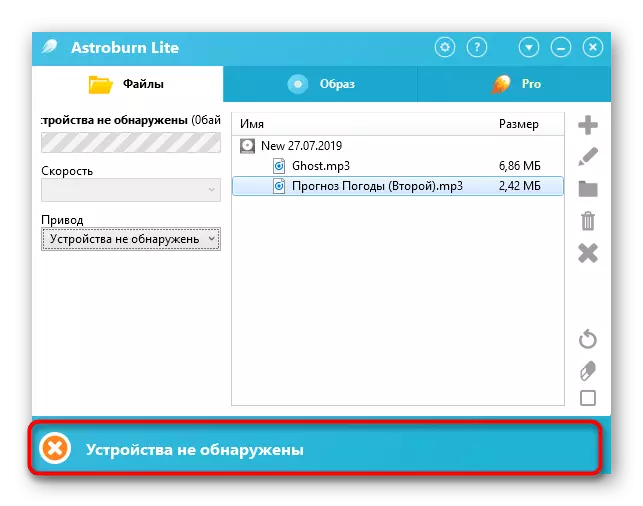
- On the screenshot below shows the inscription "Devices not detected". It is present because the computer does not have a drive. In your case, there will be a button "Start recording". Click on it, and the burn will be automatically started. It will only be left to wait for its end, after which the disc can be used in any device.
Now there are still many programs on the Internet, which will be copred with the fulfillment of the considered task. However, as already mentioned above, they all work approximately equally. Therefore, if you do not fit the above software, we advise you to get acquainted with other options by using the material that is listed below.
Read more: Programs for recording disks
On this, our article comes up to the logical conclusion. Today you have learned about the methods of recording music to the disk. As you can see, there is nothing complicated in this, you only need to choose the best support and follow the instructions.