

Often active Skype users lead conversations using the image transmission through a webcam. Sometimes there are interesting things on the screen that I would like to capture by creating one or more frames. This will help the built-in software function or additional software, loaded separately.
Create photos in the Skype program
Earlier in Skype, there was an opportunity to create avatars using a webcam. At the same time, the ready-made snapshots were saved in a separate folder on the computer. In the latest versions of the developers, they removed this function, because it will be further going exclusively about creating screenshots of the entire window or only the image of the interlocutor. Because if you are interested in creating a snapshot from a webcam, use any other convenient method by reading the following materials.Read more:
Take pictures using a laptop webcam
We take a snapshot with webcam online
Method 1: snapshot through Skype during a conversation
In Skype, there is one built-in function, which allows you to quickly take a picture of what is happening on the screen, capturing an exemplary displacement area. This process is performed by pressing only one button. Just be careful if you do not use the most relevant software version, the location of the button under consideration may be different.
- As usual, everything starts with a banal call. Select a friend from the list of contacts and type it using one of the communication methods.
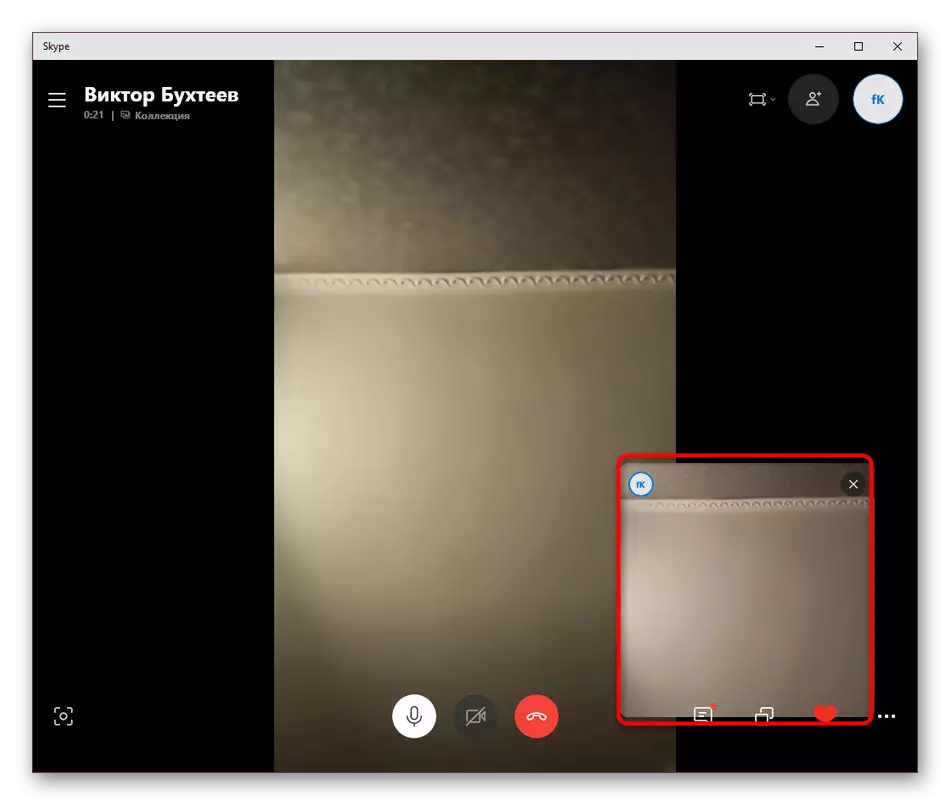
- After making a call, the next button will appear in this format as you see on the screenshot below. Click on it to make one snapshot. Repeated pressing will create another photo.
- The successful creation of the snapshot will notify the small window to the right of the thumbnail. Make the left mouse click on it to display the entire gallery just made frames.
- Move between them with the arrows to view the contents in more detail and select the required to save.
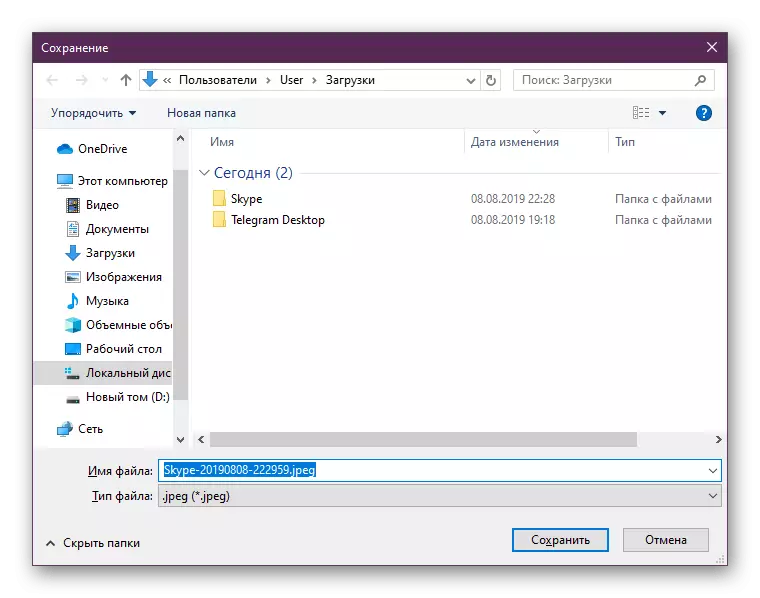
- Click the icon in the form of three points on the right above and in the context menu that opens, select the "Save As" option to put a snapshot into a suitable location on your computer.
- The new window of the standard conductor will start. Here specify the name of the file and specify the location of the save.


As you can see, the whole procedure consists only in pressing several buttons and is not difficult.
Method 2: Programs for creating screenshots
Sometimes the user faces the need to create a screenshot of the entire Skype window or only some particular area. In this case, special programs will come to the rescue, whose basic functionality is just focused on performing similar pictures. Consider a small example of this through Ashampoo Snap.
- Click on the link indicated above to go to the survey on Ashampoo Snap. There you will find a link to download this software.
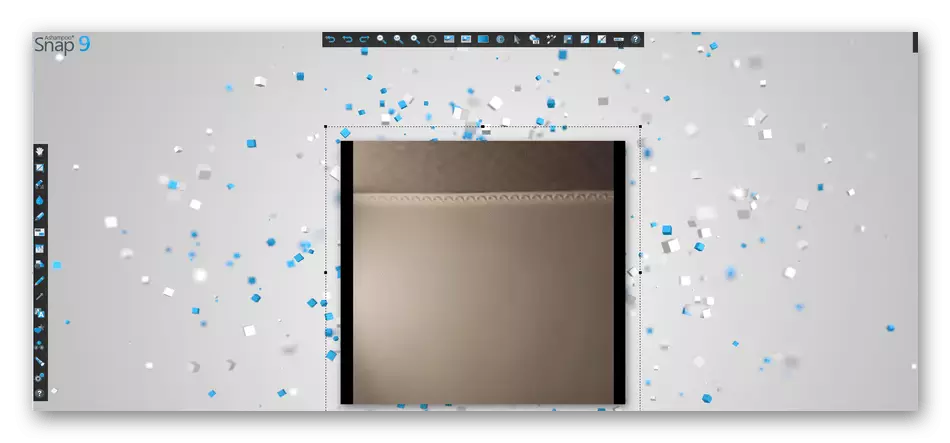
- After startup, a small blue strip will appear at the top of the screen. Mouse over it with the mouse to reveal all the items. Select one of the available screenshot creation modes. We will take a rectangular area.
- When the snapshot is made, the editor window opens. Here you can add text, stroke, pointers, trim and transform the image in every way. Upon completion, it remains only to click on ENTER so that the snapshot has been saved.
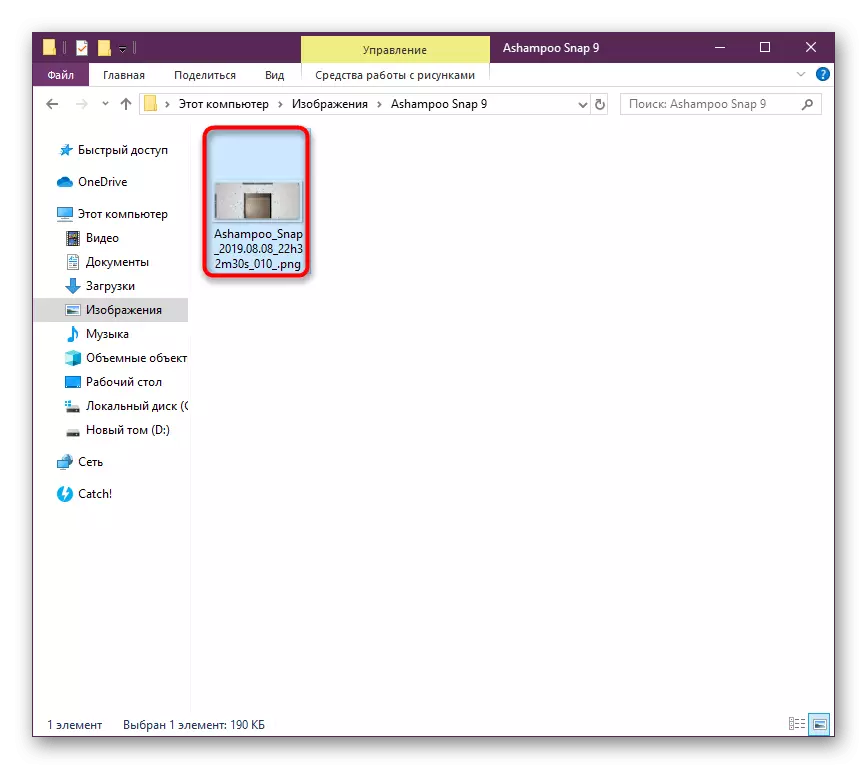
- Ashampoo SNAP creates a separate folder in the standard image directory. There are all the finished screenshots.

More detailed instructions with different methods for creating similar screenshots you can find in other materials on our website, if the ashampoo functionality does not suit you in anything.
Read more:
Making Screen Screenshot in Lightshot
4 ways to make a screenshot in windows
In addition, now there are many free and paid software on the Internet, which also allow you to create screenshots in various modes. The principle of operation in all of them is almost identical, therefore it makes no sense to disassemble everything, we will only recommend familiarizing yourself with the review of the most popular solutions.
Read more: Programs for creating screenshots
If you do not want to interact with third-party software at all, go to the next way or select one of the online services, which will allow you to quickly create a picture by saving it on the computer.
Read more: How to make a screenshot online
Method 3: Standard Windows
In the Windows operating system, the default sets are built in many functions and tools significantly simplifying the overall interaction process with PC. This includes creating screenshots. You can take a snapshot like this:
- Press the PRTSC or PRTSCR key (there are other variations in the "Print Screen" title) on the keyboard to capture the entire desktop. Alt + PRTSC allows you to capture only the active window.
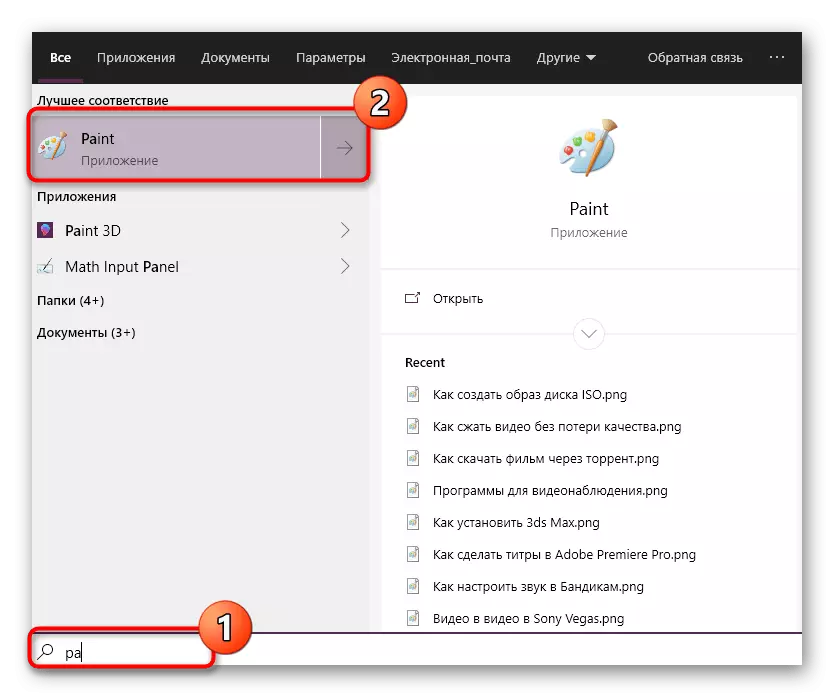
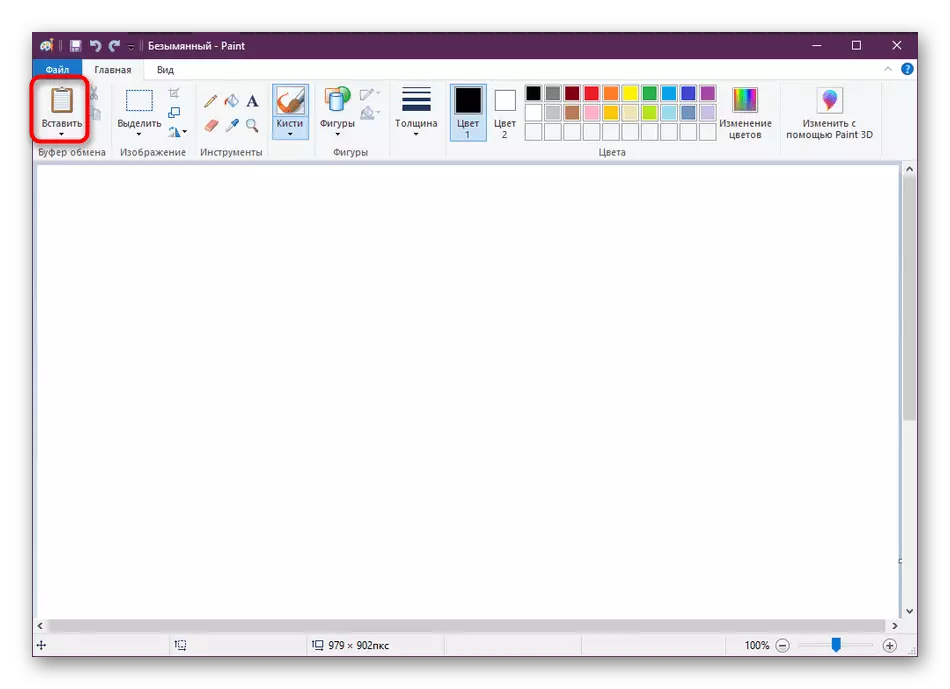
- Now the snapshot is placed in the clipboard. You can send it, for example, in the message by clicking on Ctrl + V or selecting the "Paste" tool. Edit the picture is the easiest way through the classic Paint. Find it through the "Start" and run.
- In the running application, click on "Paste".
- You can in every way to edit the existing screenshot, for example, trim it with the built-in tool.
- Upon completion, only to save the project will remain, clicking on the icon at the top or pressing Ctrl + S.


Now you are familiar with the available ways to create photos in Skype. As you can see, they all differ from each other and allow you to make completely different pictures intended for certain purposes.