

Many people like a variety and originality, and PC users are no exception. In this regard, some users do not satisfy the standard view of the mouse cursor. Let's figure it out how to change it on Windows 7.
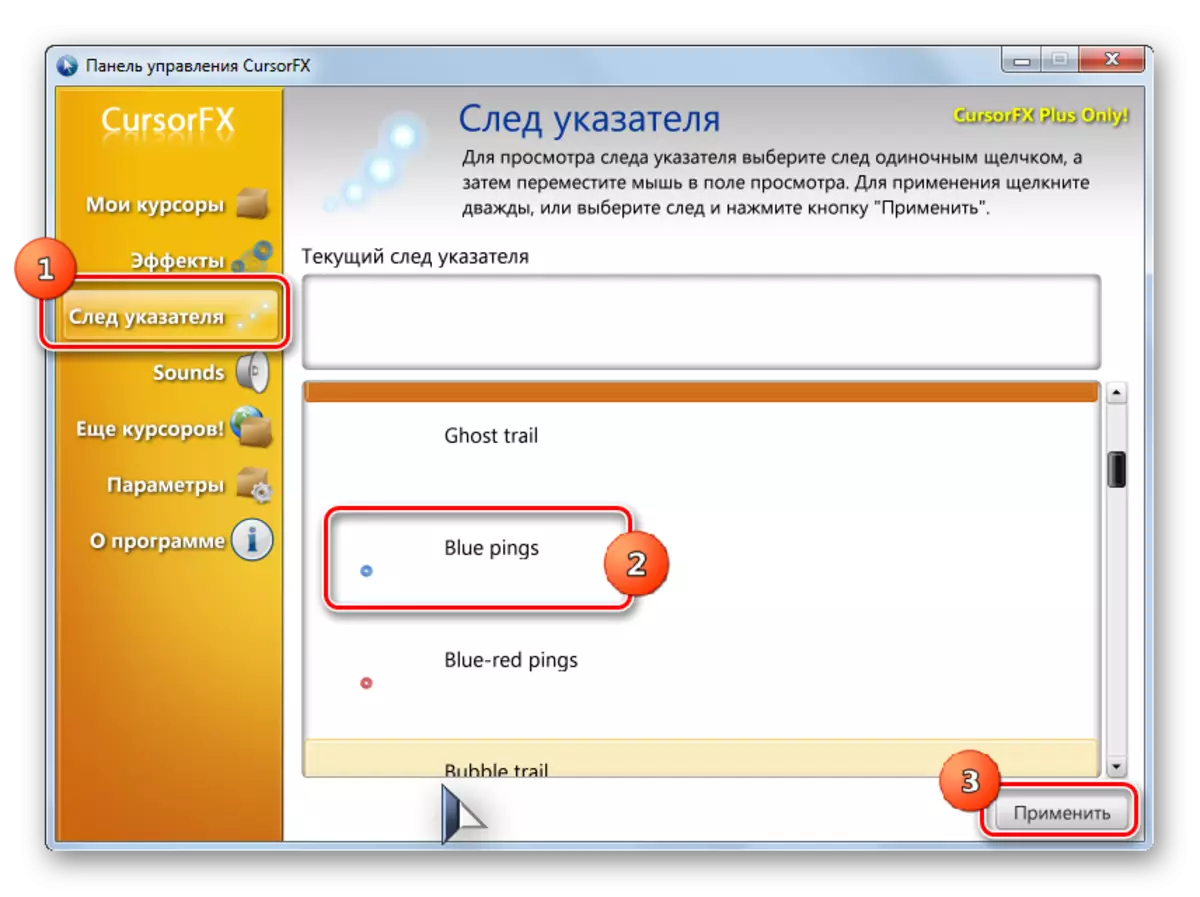
This method of changes in the cursors is probably the most variable of all methods for changing the pointer, which are presented in this article.
Method 2: Creating your own pointer
There are also programs that allow the user to draw that cursor he wishes himself. Such applications include, for example, RealWorld Cursor Editor. But, of course, this program is more complicated in mastering than the previous one.
Download Realworld Cursor Editor
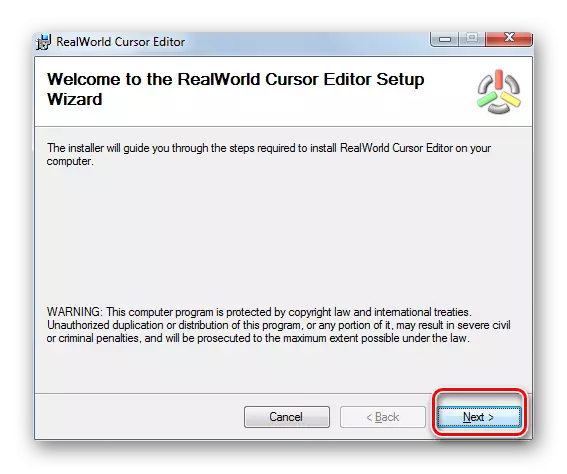
- After downloading the installation file, run it. The welcome window opens. Click "Next".
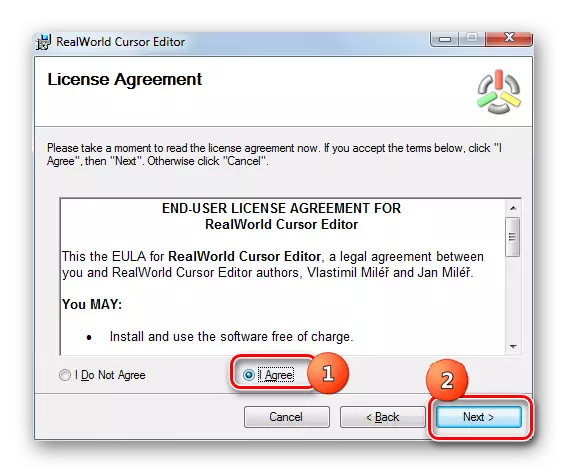
- Next, you need to confirm acceptance with license conditions. Install the radio button to the "I AGREE" position and press "Next".
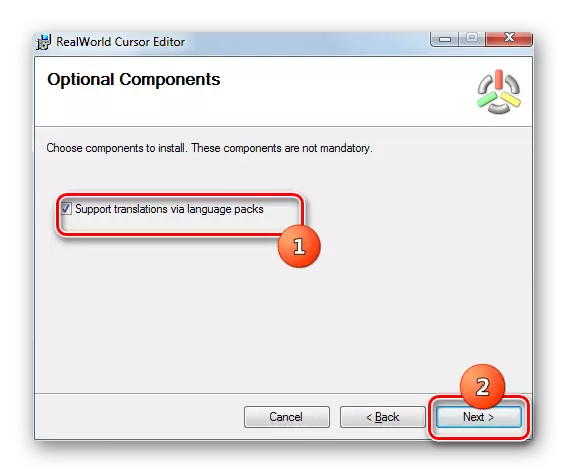
- In the next window, install the mark near the "Support Translations Via Language Packs" item. This will allow you to set a set of language packages with the installation of the program. If you do not execute this operation, the program interface will be English. Click "Next".
- Now the window opens where you can select a folder to install the program. We advise not to change the basic settings and simply click "Next".
- In the next window, it remains only to confirm the launch of the installation procedure by pressing "Next".
- The RealWorld Cursor Editor installation process occurs.
- After completing it, a window will appear, reporting on a successful completion. Close "Close" ("Close").
- Now run the application with the standard way to click on its label on the desktop. The main window of the RealWorld Cursor Editor opens. First of all, you should change the English-language application interface to the Russian-language option. To do this, in the "Language" block click "Russian".
- After that, the interface will be changed to the Russian-language option. To proceed to creating a pointer, click the "Create" button in the side menu.
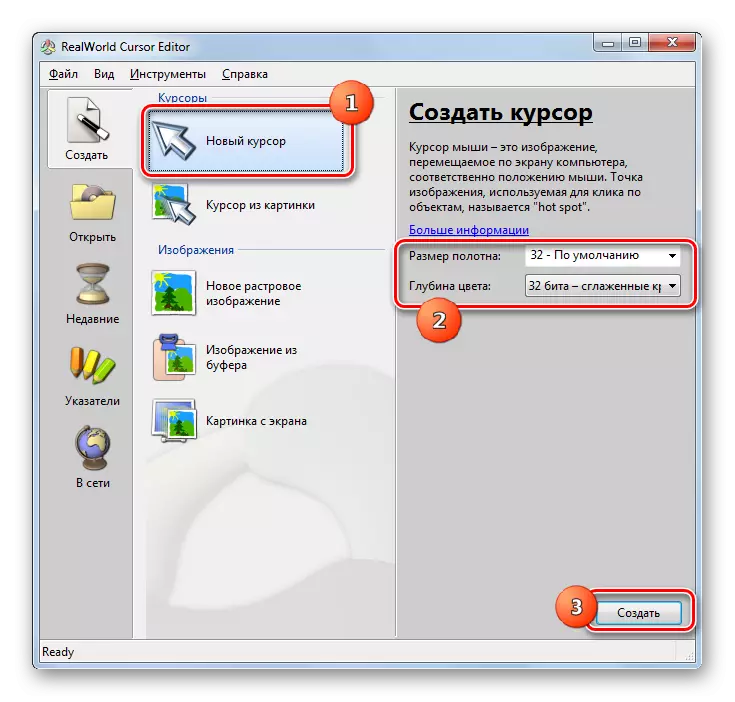
- A pointer creation window opens where you can choose which icon is the Create: Normal or from the already finished picture. Choose, for example, the first option. Highlight the item "New Cursor". In the right part of the window, you can select the size of the web and the color depth of the icon being created. Next click "Create".
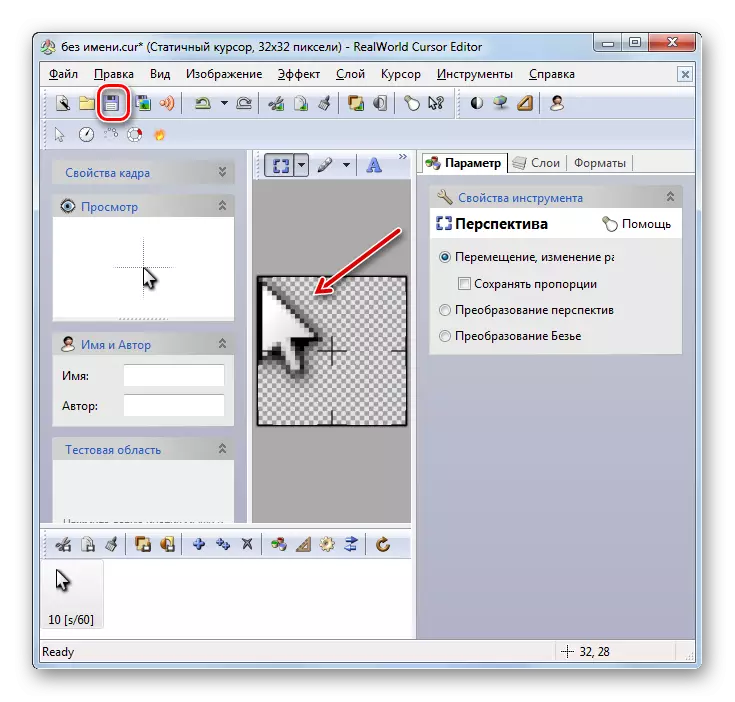
- Now, using editing tools, you draw your icon, adhering to the same drawing rules as in the usual graphic editor. After it is ready, press the diskette icon on the toolbar.
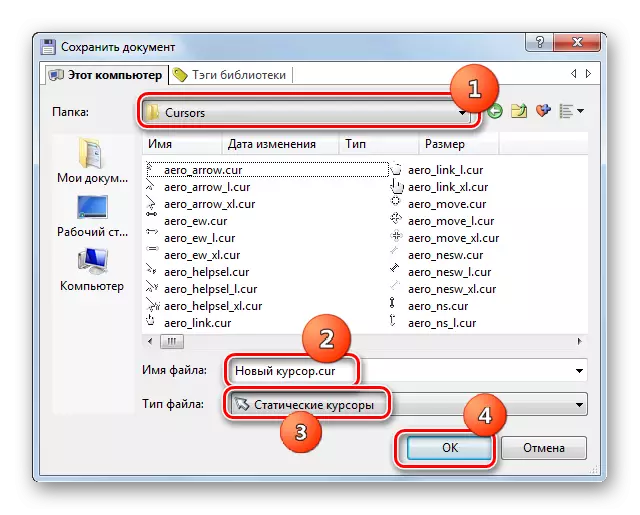
- The save window opens. Go to the directoric where you wish to save the result. You can use the standard Windows pointers folder to store. So it will be more convenient to install the cursor in the future. This directory is located at:
C: \ Windows \ Cursors
In the "File Name" field, arbitrarily set the name to your pointer. From the List "File Type" Select the desired file format option:
- Static cursors (CUR);
- Multilayer cursors;
- Animated cursors, etc.
Then apply "OK".


The pointer will be created and saved. On how to install it on the computer will be told when considering the following method.
Method 3: Mouse Properties
You can also change the cursor using the system capabilities through the control panel in the mouse properties.
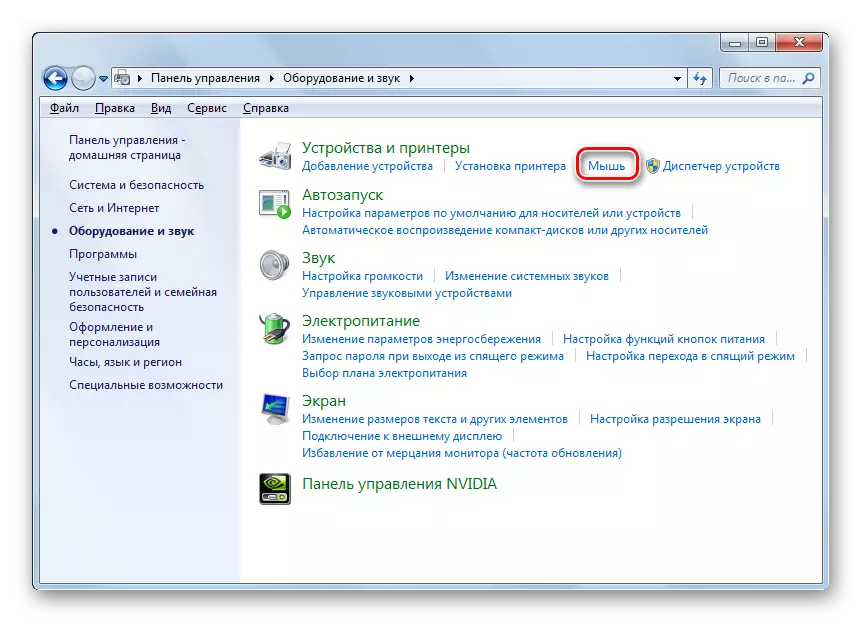
- Click "Start". Go to the "Control Panel".
- Select the "Equipment and Sound" section.
- Go through the "Mouse" in the "Device and Printers" block.
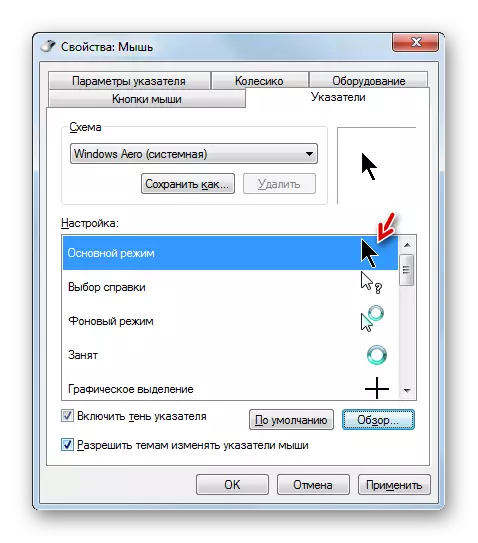
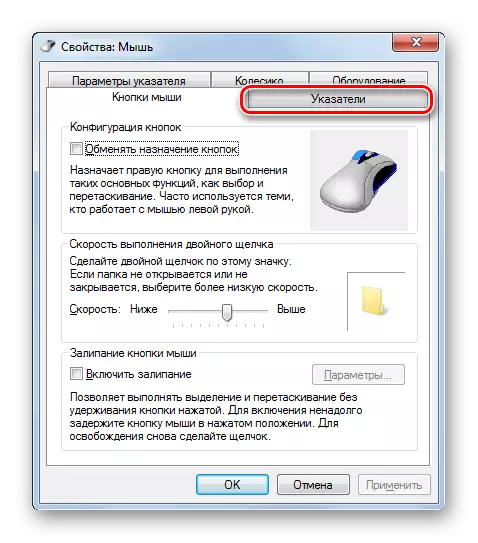
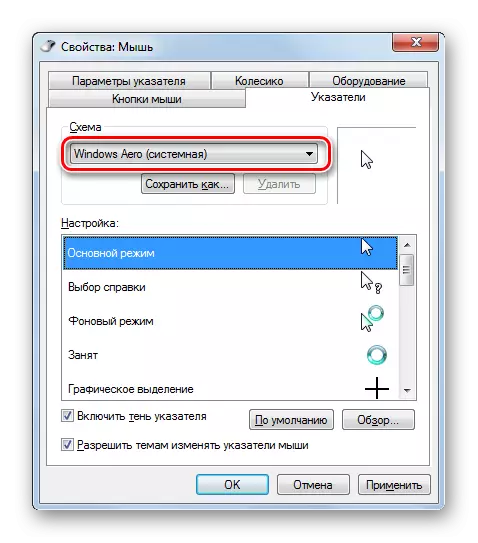
- The mouse properties window opens. Move into the "Pointers" tab.
- To select the appearance of the pointer, click on the "Scheme" field.
- A list of different schemes of the appearance of the cursor opens. Select the desired option.
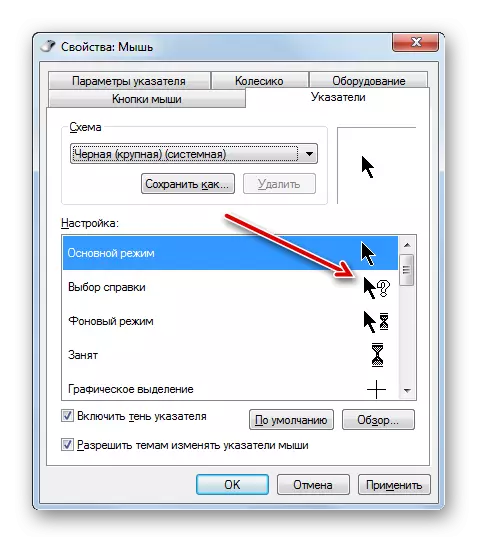
- After selecting the option in the "Setup" block, the appearance of the cursor of the selected scheme is displayed at different situations:
- Main mode;
- Certificate selection;
- Background mode;
- Busy, etc.
If you presented the appearance of the cursor does not suit, then again change the scheme to another, as shown above. Do it until you find your satisfying option.
- In addition, you can change the appearance of the pointer within the selected scheme. To do this, highlight the setting ("Main Mode", "Help", etc.), for which you want to change the cursor, and click on the "Overview ..." button.
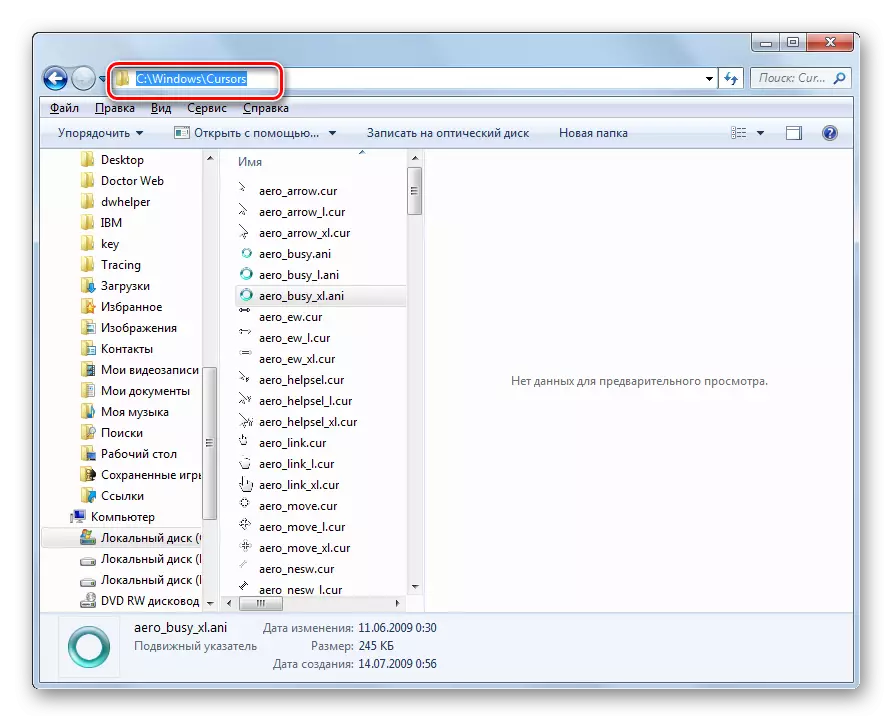
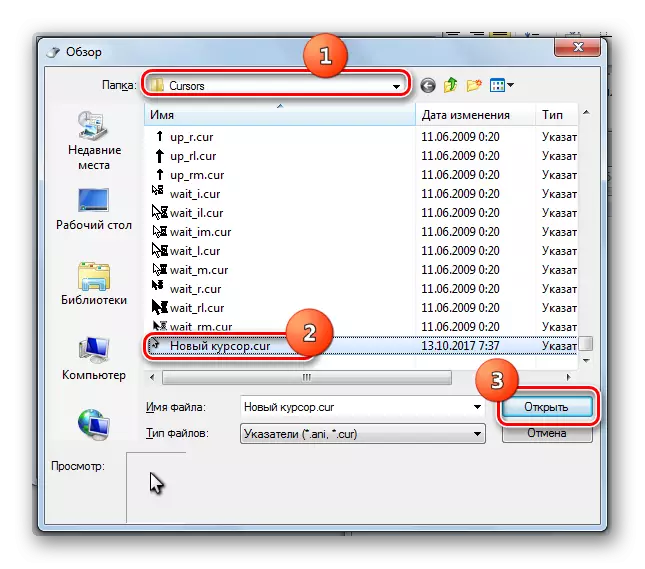
- A pointer select window opens in the "Cursors" folder in the Windows directory. Select the option of the cursor you want to see on the screen when installing the current scheme in the specified situation. Click "Open".
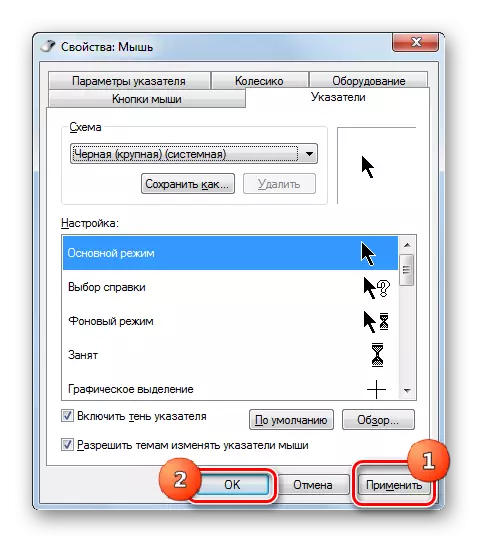
- The pointer will be changed inside the circuit.
In the same way, you can add cursors with the extension of CUR or ANI downloaded from the Internet. You can also install pointers created in specialized graphics editors, such as Realworld Cursor Editor, about which we have said earlier. After the pointer is created or downloaded from the network, the corresponding icon must be placed in the system folder at the following address:
C: \ Windows \ Cursors
Then you need to select this cursor, as described in previous paragraphs.
- When the appearance of the pointer obtained is suitable, then in order to use it, click on the "Apply" and "OK" buttons.


As you can see, the mouse pointer in Windows 7 can be changed both using the built-in OS tools, and using third-party programs. An option using third-party software provides more opportunities to change. Separate programs allow not only to install, but also create cursors through built-in graphic editors. At the same time, many users are just what can be done using the internal instruments of the OS to manage pointers.