
When working in offices, it is often necessary to create a terminal server to which other computers will be connected. For example, this feature is very in demand when group work with 1C. There are special server operating systems designed, just for these purposes. But, as it turns out, this task can be solved even with the help of conventional windows 7. We will see how the terminal server can be created from the PC on Windows 7.
Procedure for creating a terminal server
The Windows 7 operating system is not intended to create a terminal server, that is, does not provide the ability to work to several users simultaneously in parallel sessions. However, producing certain OS settings, it is possible to solve the task in this article.Important! Before the product of all manipulations that will be described below, create a recovery point or backup system.
Method 1: RDP Wrapper Library
The first method is carried out using a small RDP Wrapper Library utility.
Download RDP Wrapper Library
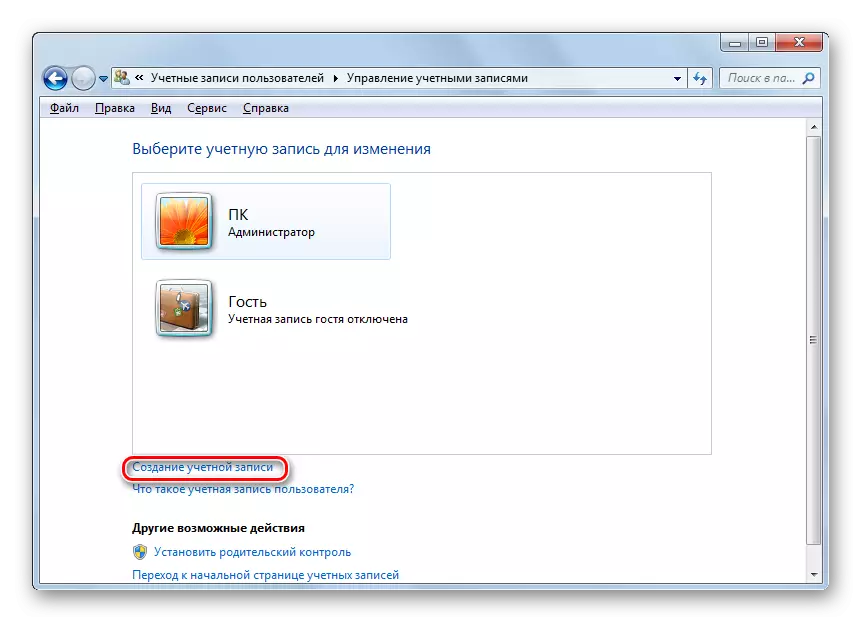
- First of all, on a computer intended for use as a server, create user accounts that will be connected from other PCs. This is done in the usual way, as in the staffing of the profile.
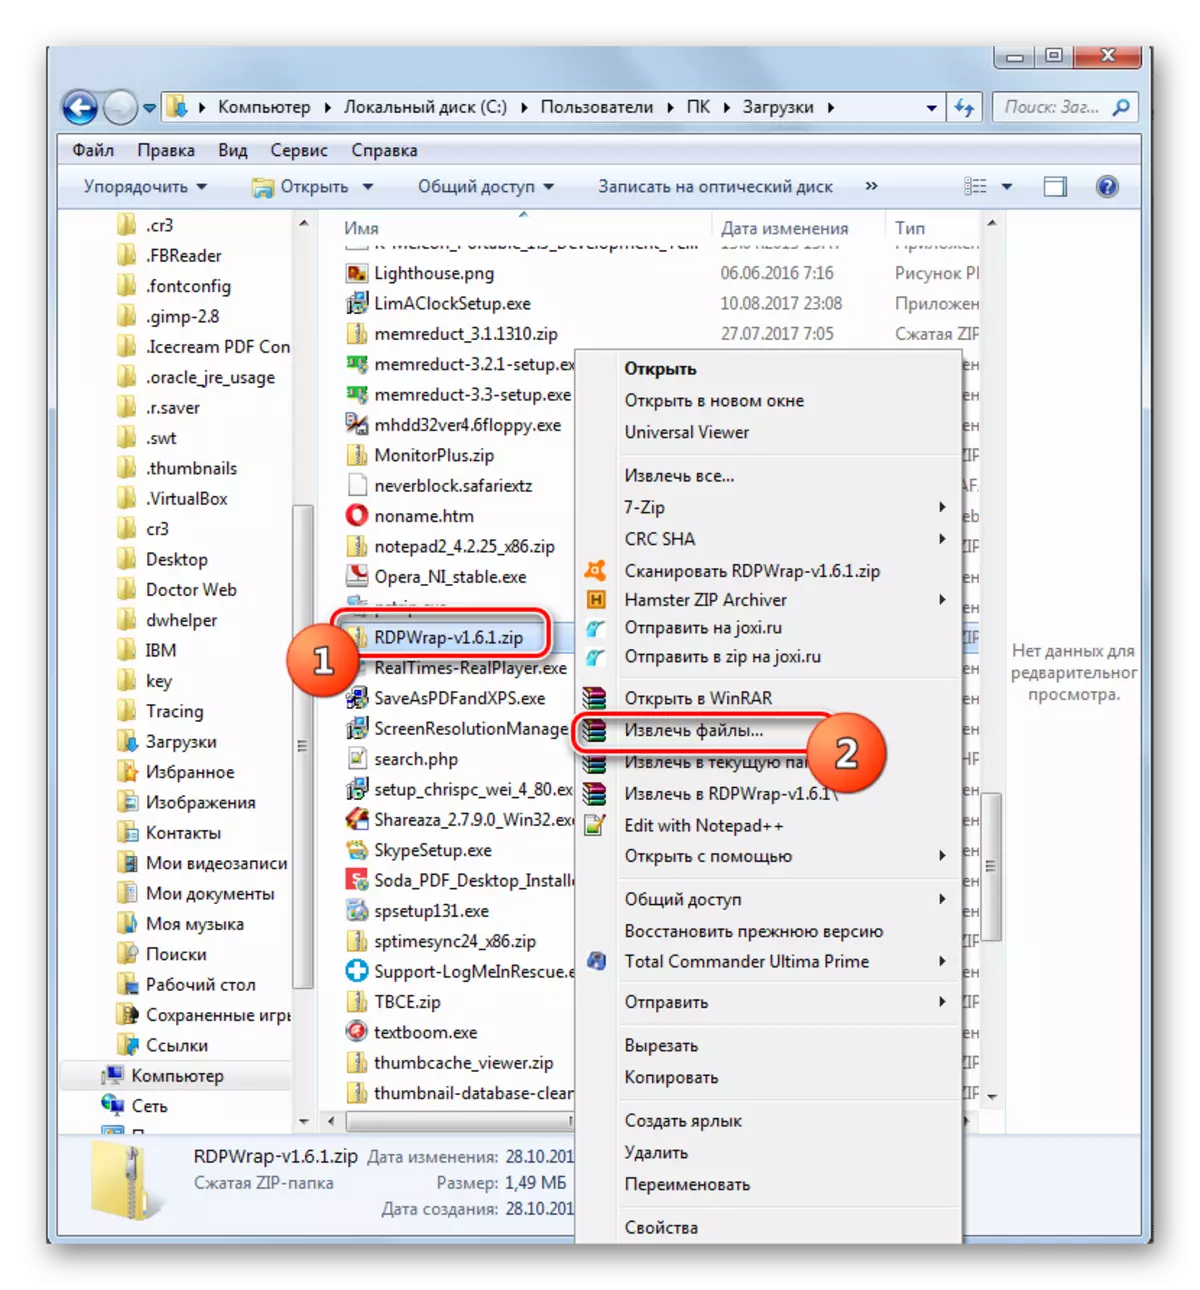
- After that, unpack the ZIP archive, which contains a pre-downloaded RDP Wrapper Library utility, in any directory on the PC.
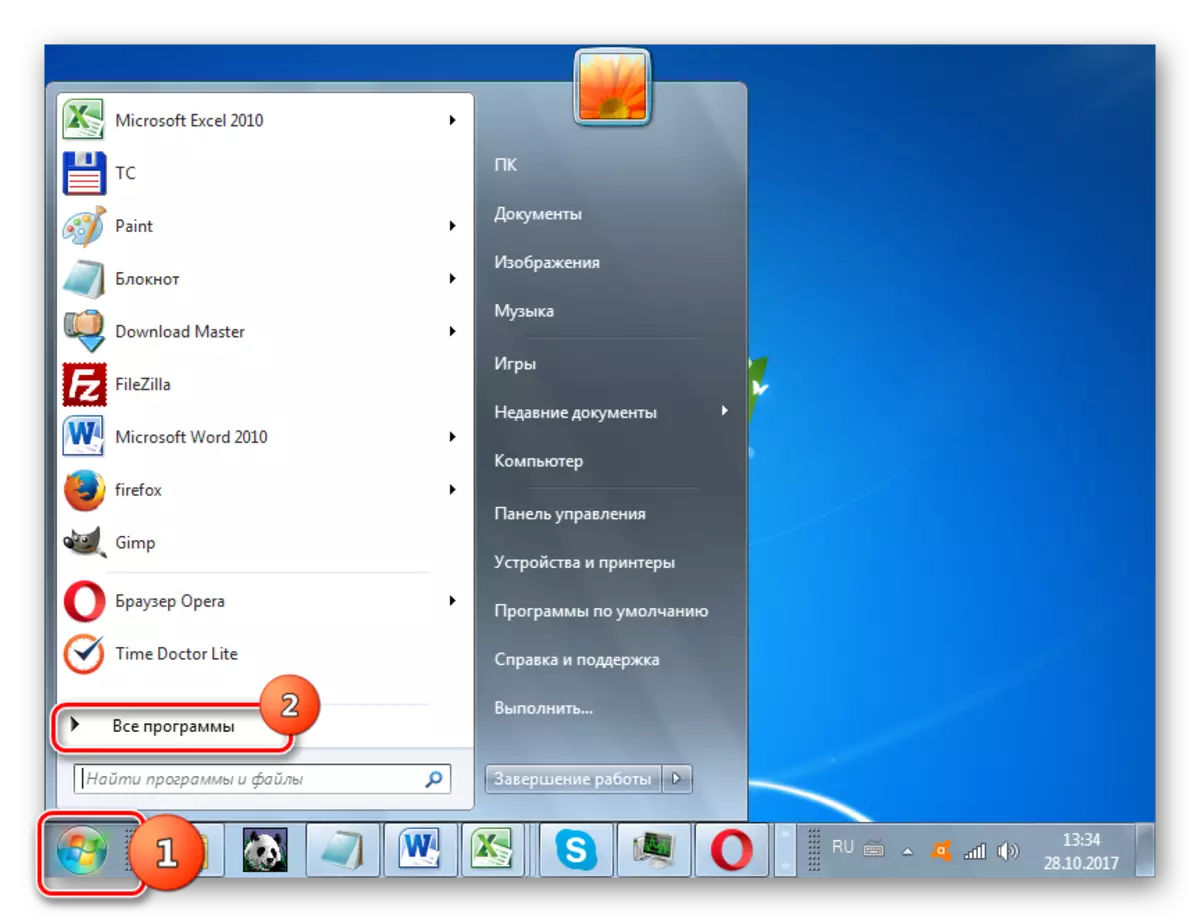
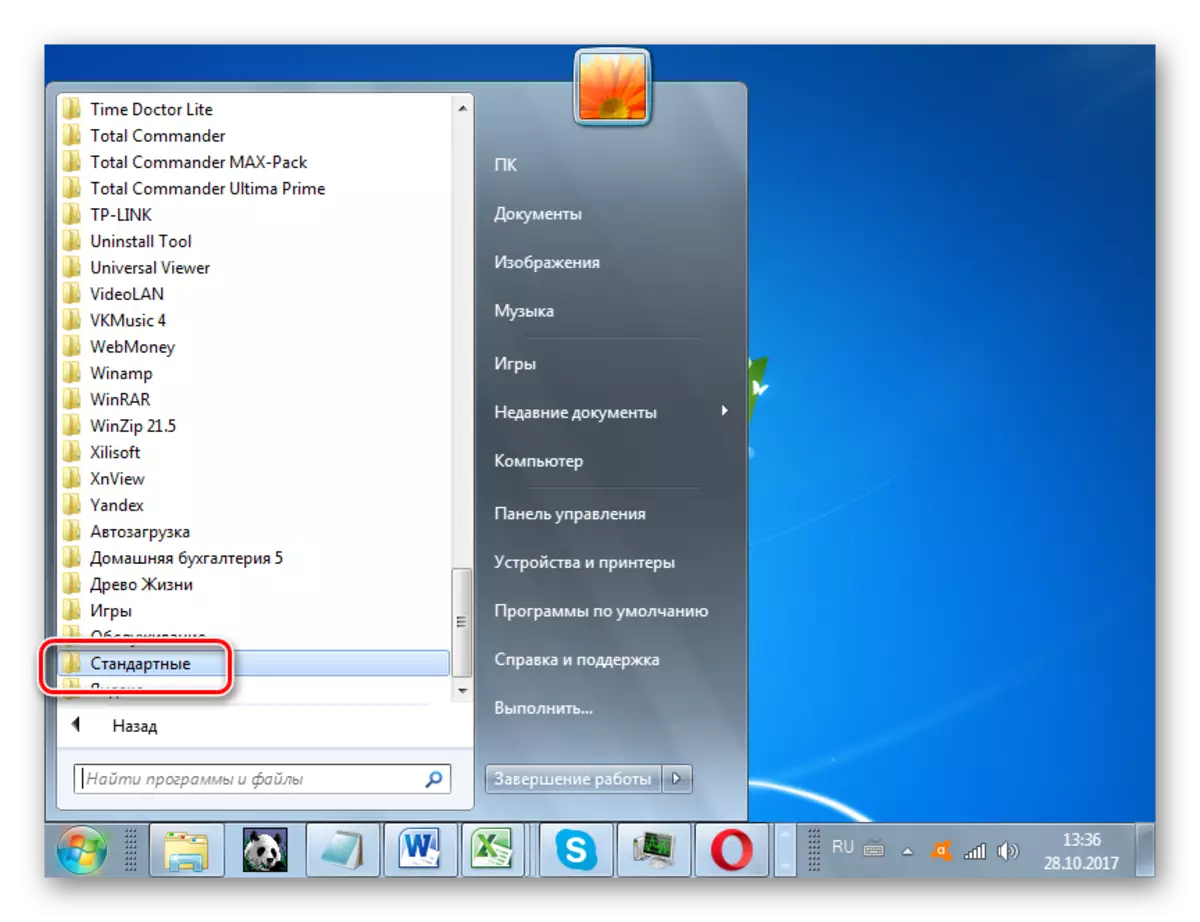
- Now you need to start the "command line" with administrative powers. Click "Start". Choose "All Programs".
- Go to the "Standard" directory.
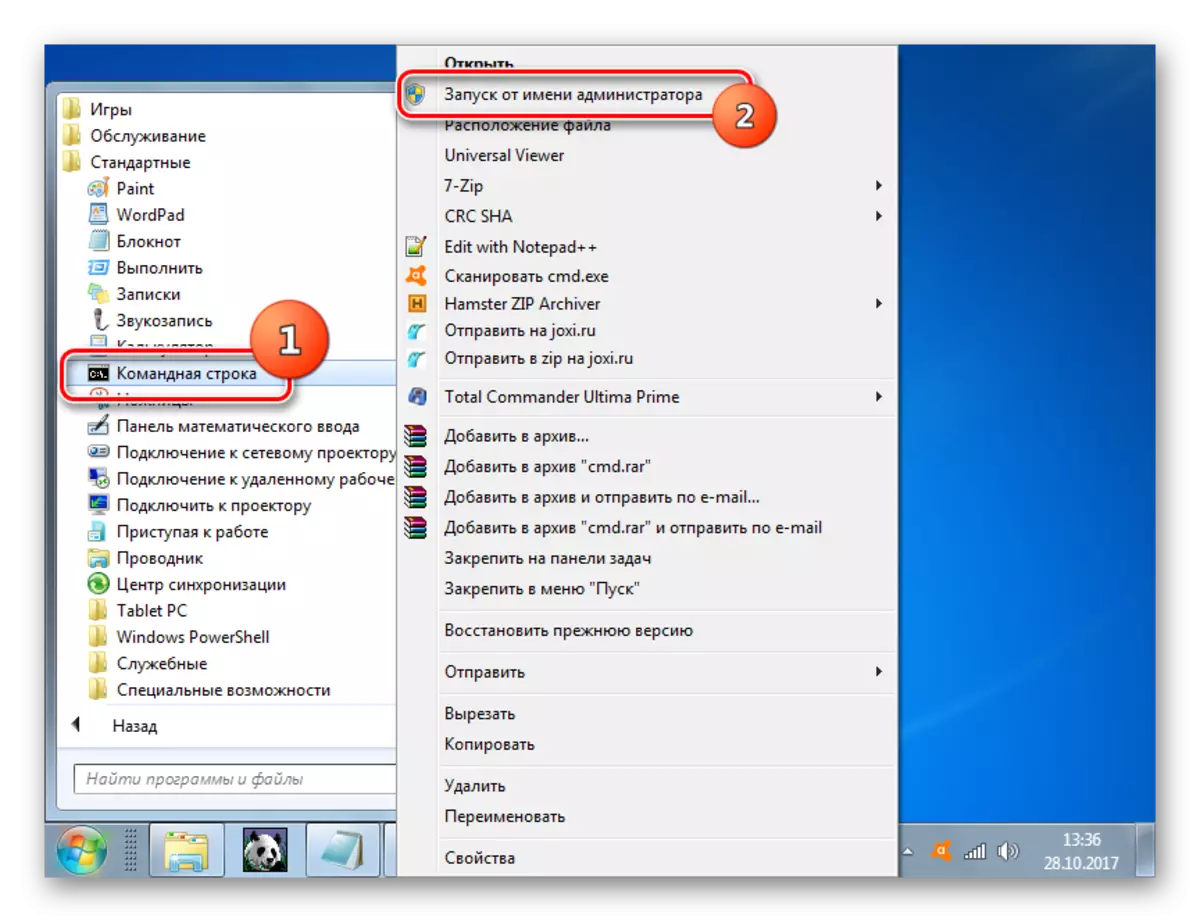
- In the list of tools, look for the inscription "Command Line". Right-click on it (PCM). In the list of actions that opens, select "Starting from the administrator".
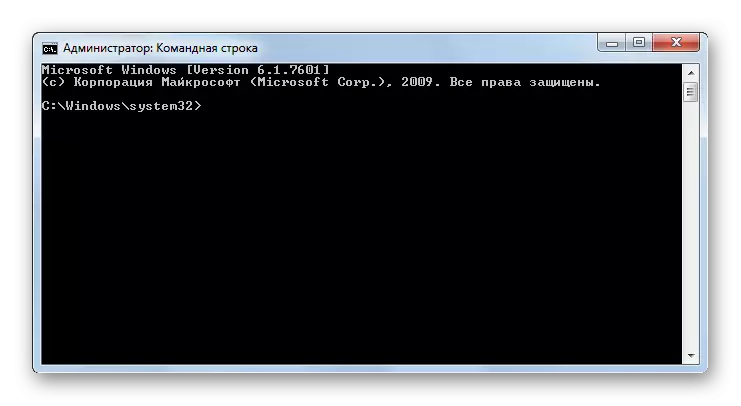
- The command line interface is running. Now you should enter the command initializing the RDP Wrapper Library program in the mode that is required to solve the task.
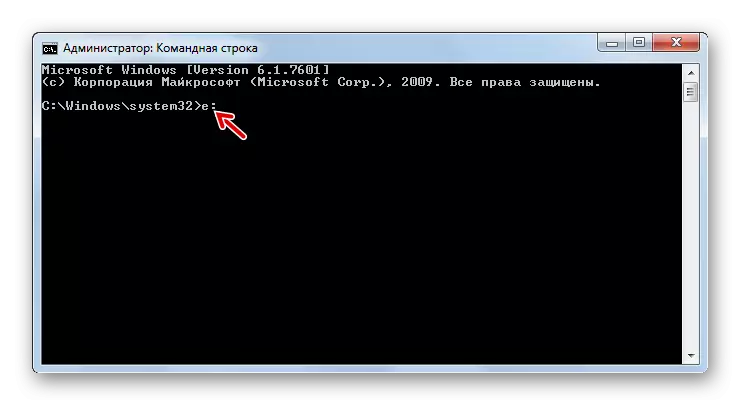
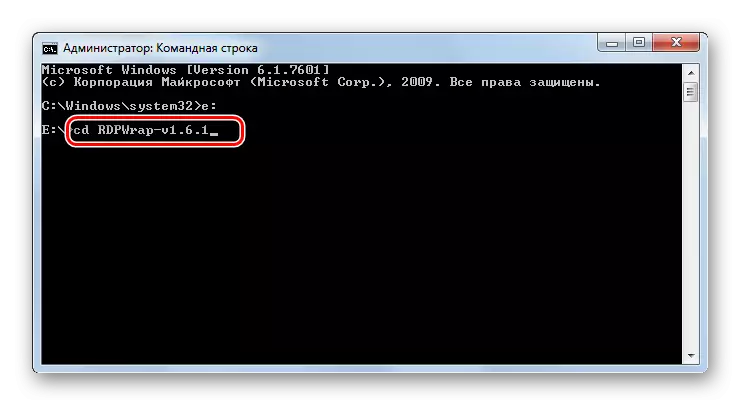
- Switch to the "command line" to the local disk where you unpacked the archive. To do this, simply enter the drive letter, put the colon and press ENTER.
- Go to the directory where you unpacked the archive contents. First enter the value "CD". Put a space. If the desired folder is in the root of the disk, simply take it the name, if it is a nested directory, you must specify the full path to it through the slash. Press ENTER.
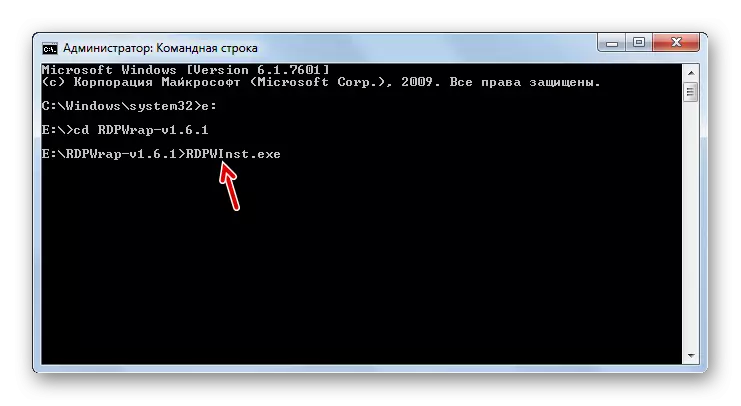
- After that, activate the rdpwinst.exe file. Enter the command:
Rdpwinst.exe
Press ENTER.
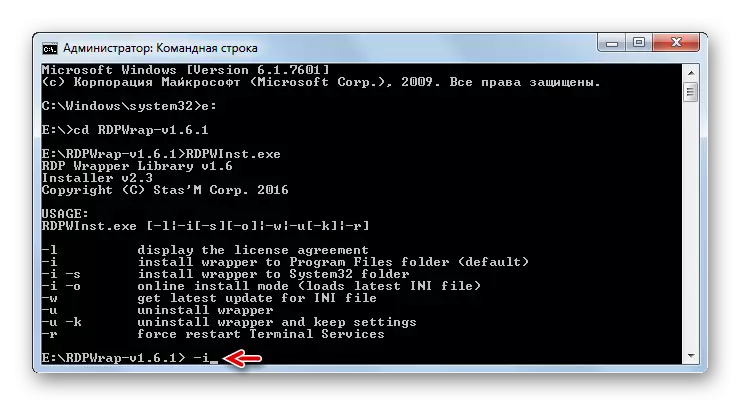
- A list of various modes of operation of this utility opens. We need to use the "Install Wrapper to Program Files Folder (Default)" mode. To use it, enter the "-i" attribute. Enter it and press ENTER.
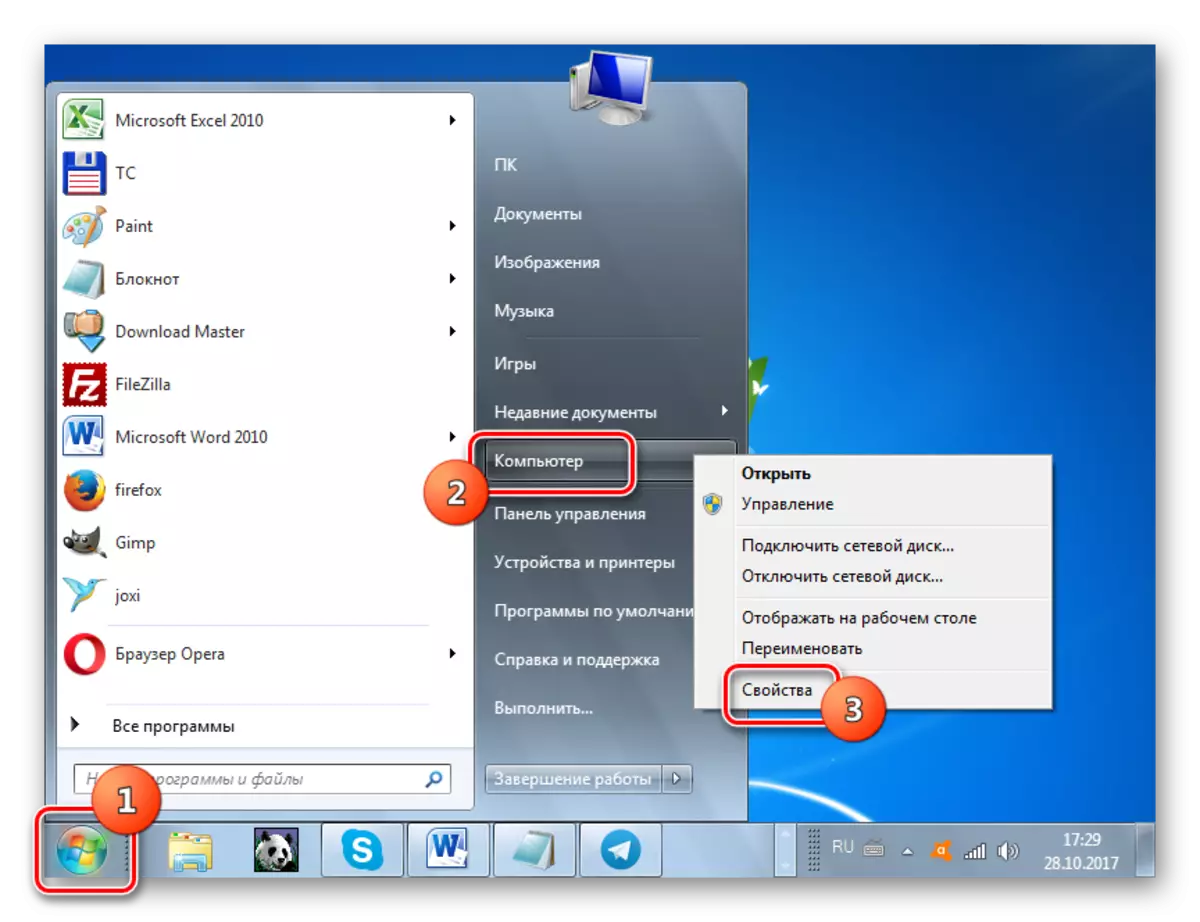
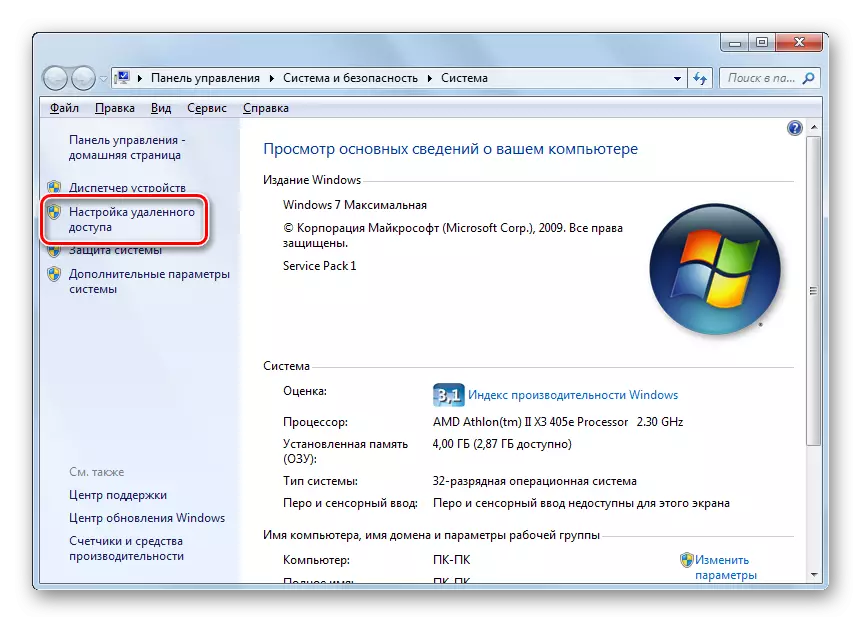
- Rdpwinst.exe will perform the necessary changes. In order for your computer to be used as a terminal server, you need to make another number of system settings. Click "Start". Click the PCM on the name "Computer". Select "Properties".
- In the computer properties window that appears through the side menu, go to "Setting the remote access".
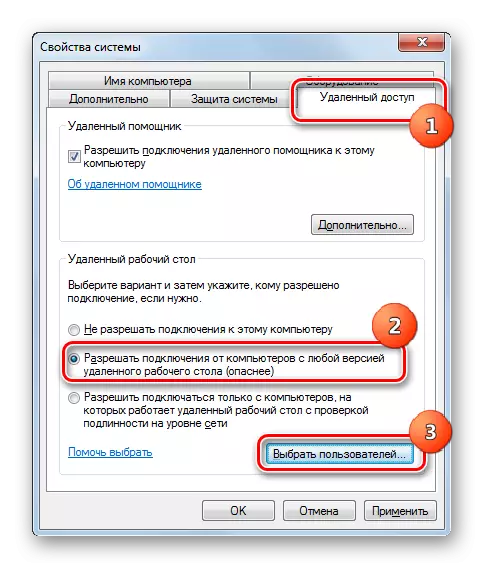
- The graphic shell of the system properties appears. In the "Remote Access" section in the "Remote Desktop" group, rearrange the radio button to "Allow connection from computers ...". Click on the "Select Users" item.
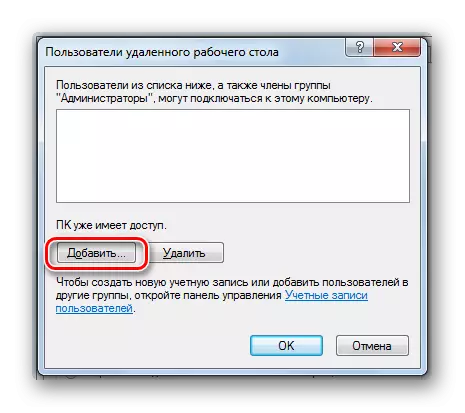
- The "Remote Table Users" window opens. The fact is that if you do not specify the names of specific users in it, only accounts with administrative authority will receive remote access to the server. Click "Add ...".
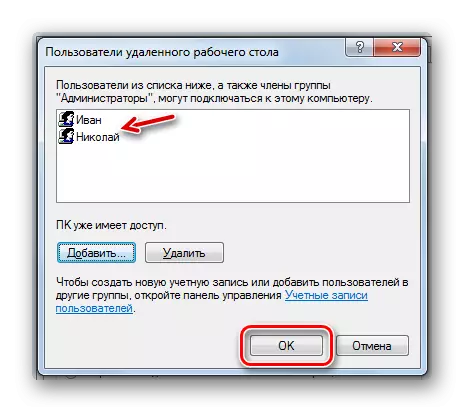
- The "Selection:" Users "window starts. In the Enter the names of the selected objects "through a comma point, make the names of the previously created user accounts that are required to provide access to the server. Click "OK".
- As you can see, the necessary names of accounts are displayed in the Remote Desktop Users window. Click "OK".
- After returning to the properties window, click "Apply" and "OK".
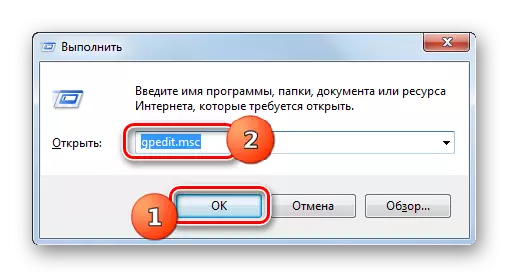
- Now it remains to make changes in the "Local Group Policy Editor" window. To call this tool, we use the method of entering the command to the "Run" window. Click Win + R. In the window that appears, vbo:
gpedit.msc.
Click "OK".
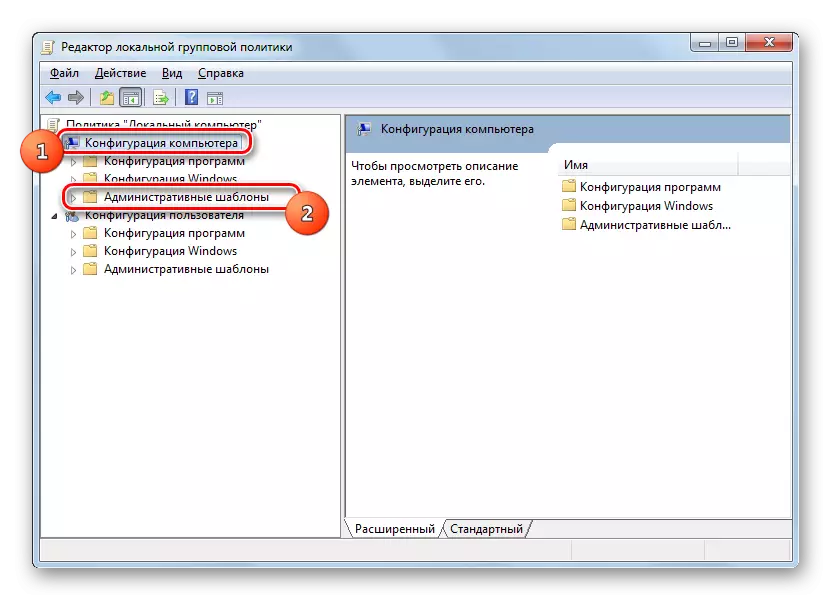
- The Editor window opens. In the left shell menu, click the "Computer Configuration" and "Administrative Templates".
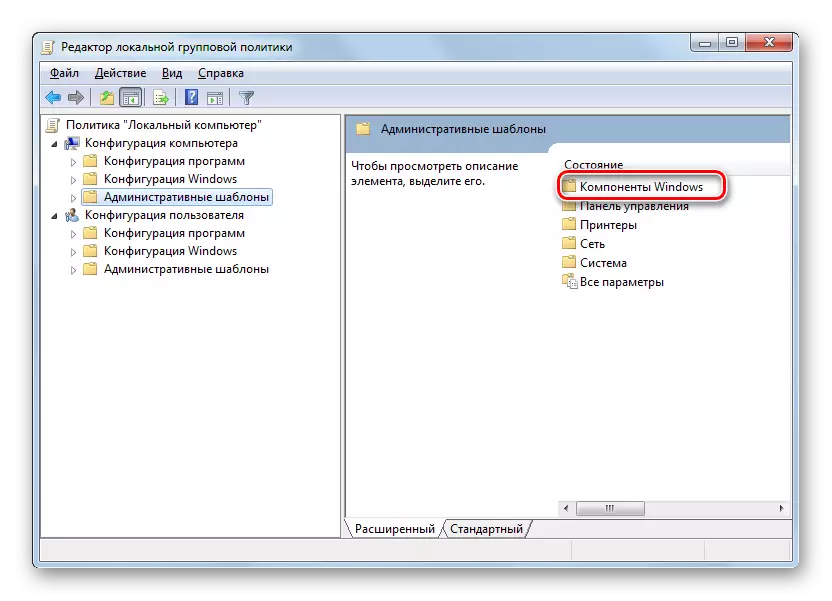
- Go to the right side of the window. Go to the Windows Components folder there.
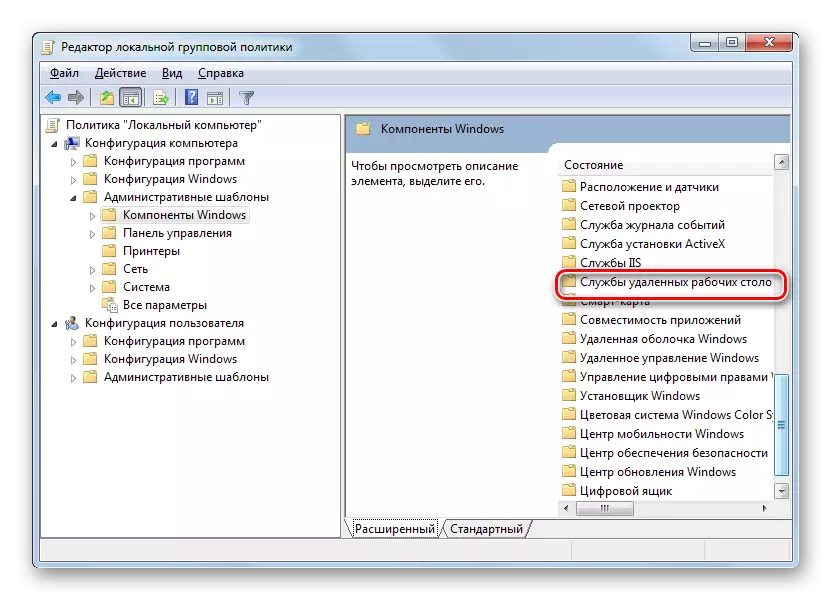
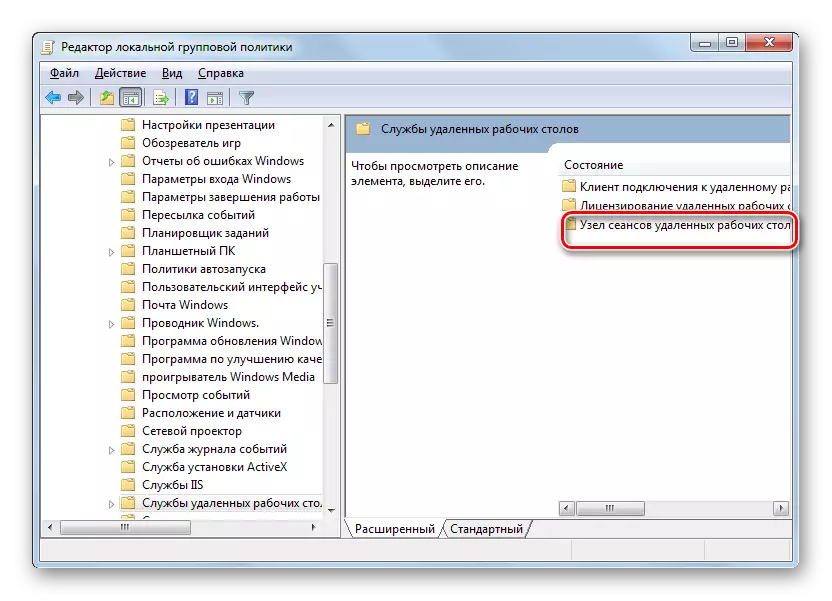
- Look for the "Deleted Work Table Services" folder and enter it.
- Go to the Catalog of Sessions of Remote Desktop.
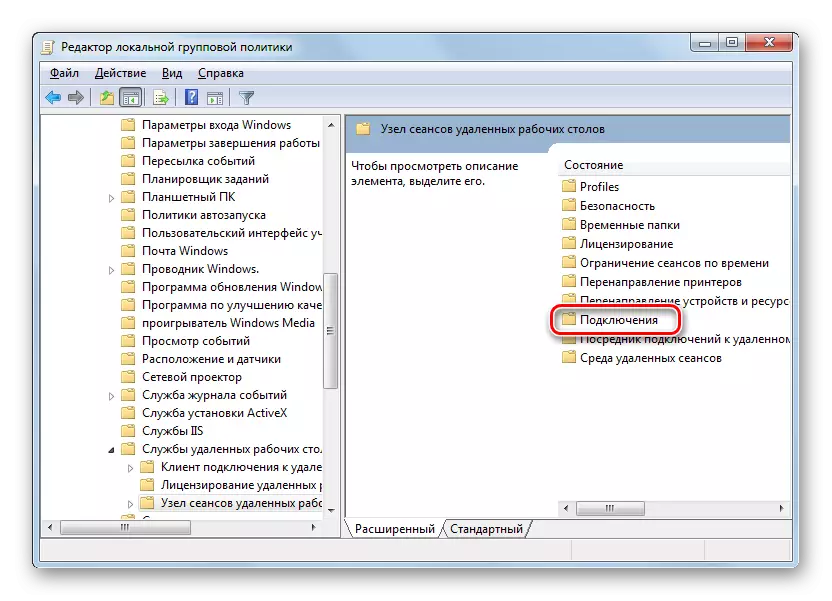
- Among the next list of folders, choose "Connections".
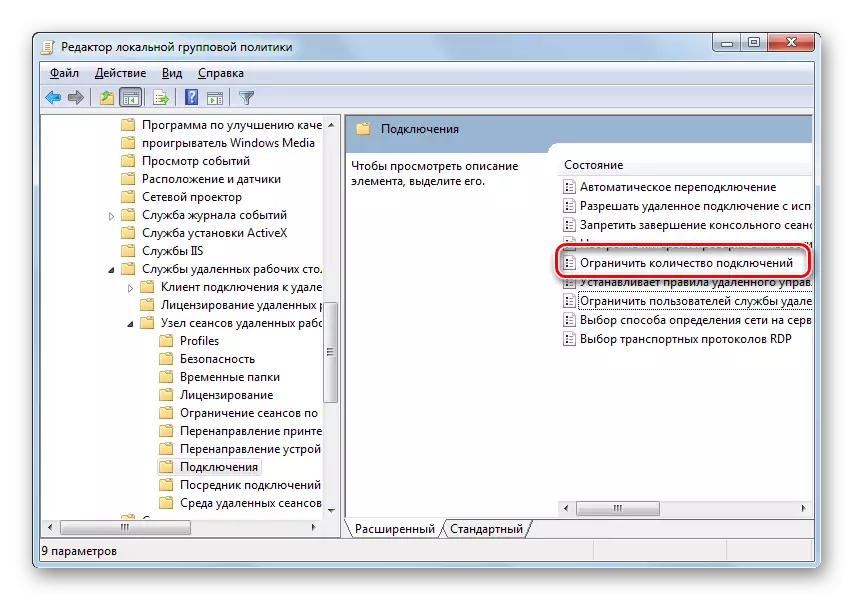
- A list of the "Connections" partition policy parameters opens. Select the "Restrict Number of Connections" option.
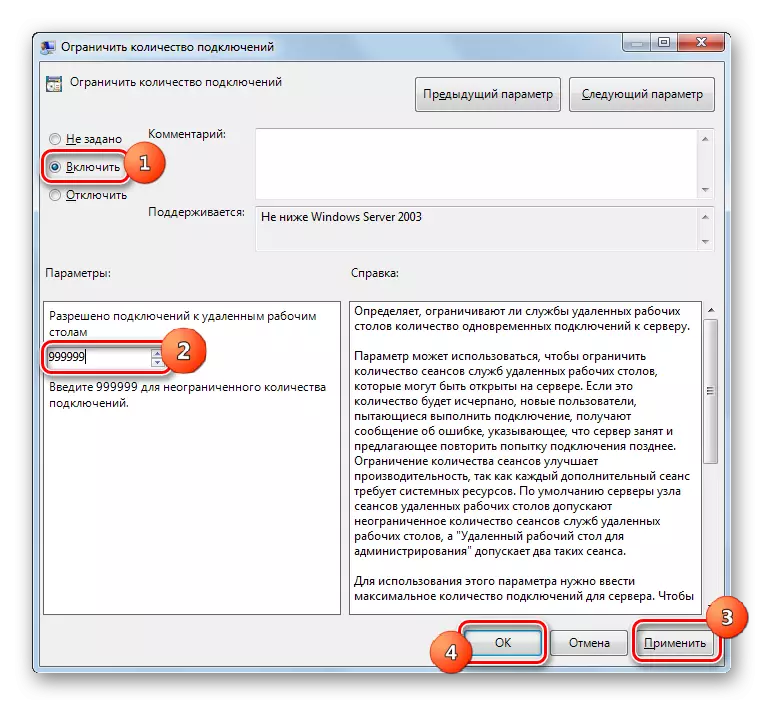
- The settings window of the selected parameter opens. Rearrange radio button to "Enable". In the "Allowed Remote Desktop Connections" field, enter the value "999999". This means an unlimited number of connections. Click "Apply" and "OK".
- After the specified actions, restart the computer. Now you can connect to the PC with Windows 7, over which the above manipulations were performed, from other devices, as to the terminal server. Naturally, it will be possible to enter only under the profiles that were entered into the database of accounts.


Method 2: UniversalterMSrvpatch
The following way provides for the use of a special patch of UniversalterMSrvpatch. This method is recommended only if the previous option did not help, since when Windows updates will have to do each time the procedure is again.
Download universaltermsrvpatch
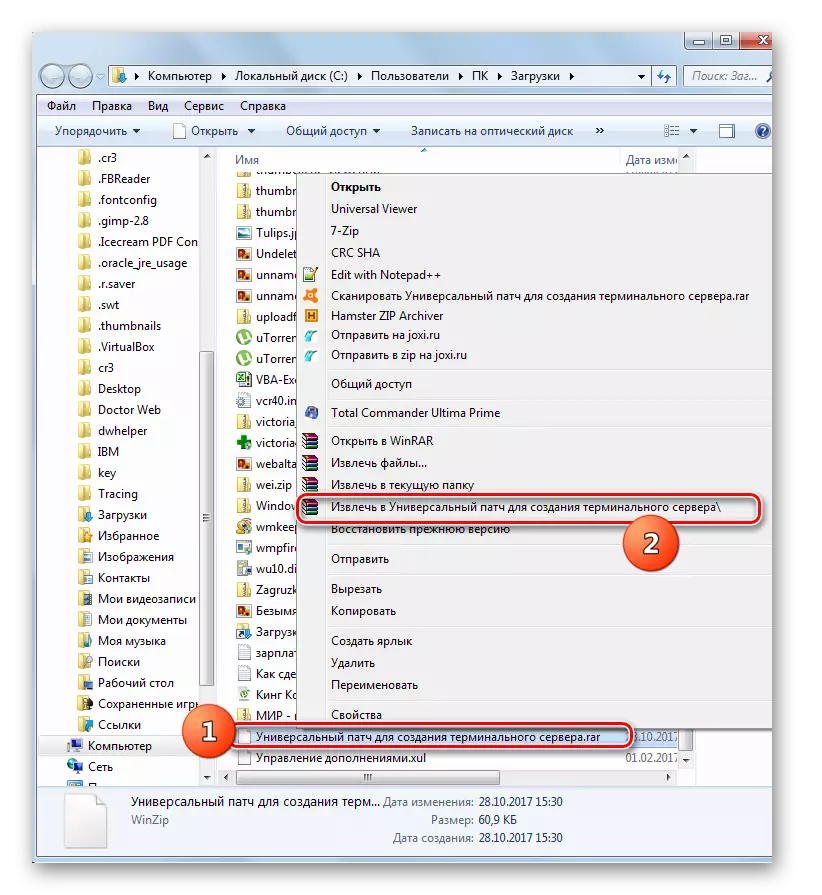
- First of all, create accounts on your computer to users to use it as a server, as was done in the previous method. After that, downloaded universaltermsrvpatch Unpack from the RAR archive.
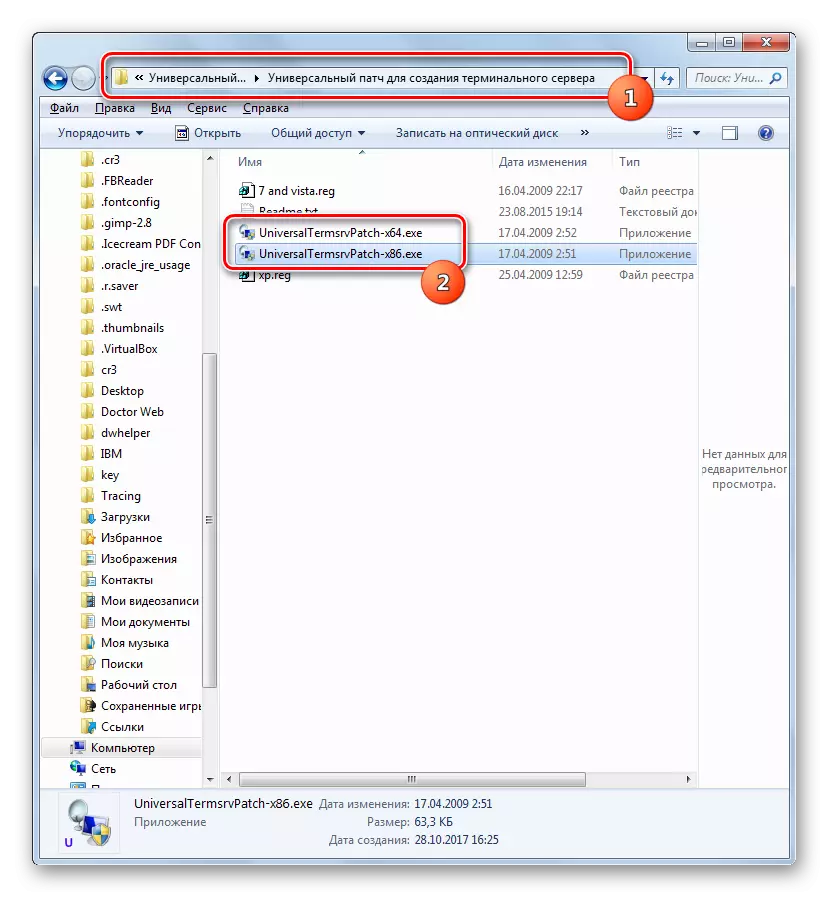
- Go to the unpacked folder and run the universaltermsrvpatch-x64.exe or universaltermsrvpatch-x86.exe file, depending on the processor's discharge on the computer.
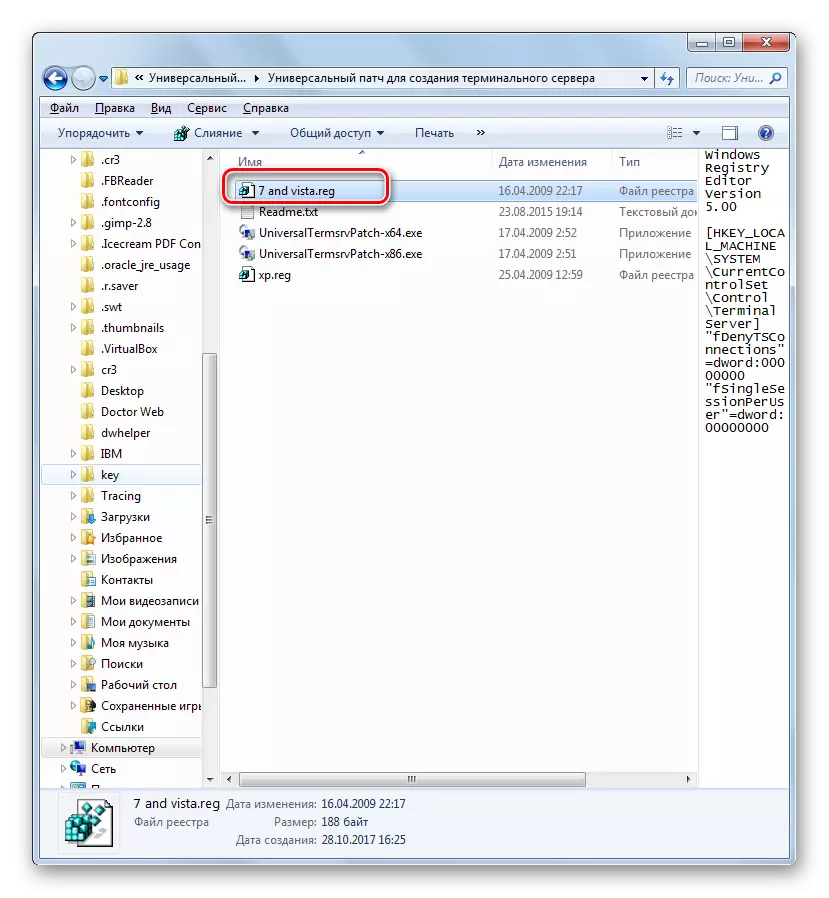
- After that, to make changes to the system registry, run the file called "7 and vista.reg", located in the same directory. Then restart the computer.
- The necessary changes are made. After that, it is necessary to successively do all those manipulations that we have described when considering the previous method, starting in paragraph 11.
As you can see, the operating system Windows 7 is not intended to work as a terminal server. But installing some software add-ons and making the necessary setting, you can achieve the fact that your computer from the specified OS will work exactly as a terminal.