

Many users face problems when trying to configure an Internet connection to Ubuntu. Most often it is associated with inexperience, but there may be other reasons. The article will provide an instruction on setting up several types of connections with a detailed analysis of all possible complications during execution.
Configure the network in Ubuntu
There are many types of Internet connections, but this article will consider the most popular: wired network, PPPoE and Dial-Up. It will also be described about a separate configuration of the DNS server.
After all the actions done, your computer will establish an Internet connection if you did everything right.
Please note that the default PPPOECONF utility calls the Created DSL-Provider connection. If you need to break the connection, then run the command in the Terminal:
$ sudo poff dsl-provider
To install the connection again, enter:
$ sudo pon dsl-provider
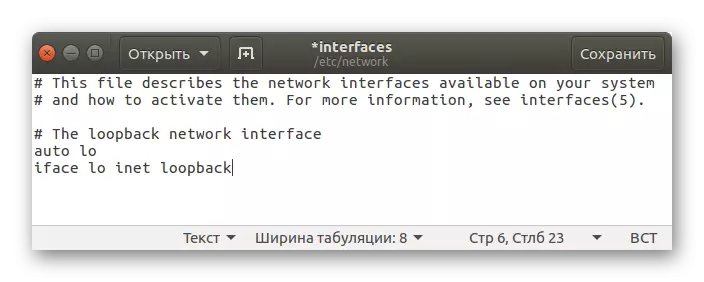
Note: If you connect to the network using the PPPOECONF utility, the network management via Network Manager will be impossible, due to the parameters to the "Interfaces" configuration file. To reset all settings and transfer the Network Manager control, you need to open the "Interfaces" file and replace all the contents to the text below. After entering, save the changes and restart the network with the command "$ sudo /etc/init.d/networking restart" (without quotes). Also restart the Network Manager utility by performing "$ sudo /etc/init.d/networkmanager Restart" (without quotes).
Configuring Dial-Up Connection
To configure the Dial-Up, you can use two console utilities: PPPConfig and WVDIAL.
Configure Connection using PPPConfig is simple enough. In general, this method is very similar to the previous one (PPPOECONF): You will also be asked questions, responding to which by the result you install the Internet connection. First, run the utility itself:
$ sudo pppconfig
After that follow the instructions. If you do not know some of the answers, it is recommended to contact the operator from those. Support your provider and consult with him. After completing all the settings, the connection will be installed.
As for the setting with WVDIAL, it happens a little more difficult. First you need to install the package itself through the "Terminal". To do this, run the following command:
$ sudo apt install wvdial
It includes a utility designed to automatically configure all parameters. It is called "wvdialconf". Run it:
$ sudo wvdialconf.
After her performance in "Terminal" will display a set of parameters and characteristics - to understand them is not necessary. It is only known that the utility has created a special file «wvdial.conf», which automatically made the necessary settings by reading them from the modem. Next you need to edit the generated "wvdial.conf" file, open it via the "Terminal":
$ Sudo gedit /etc/wvdial.conf
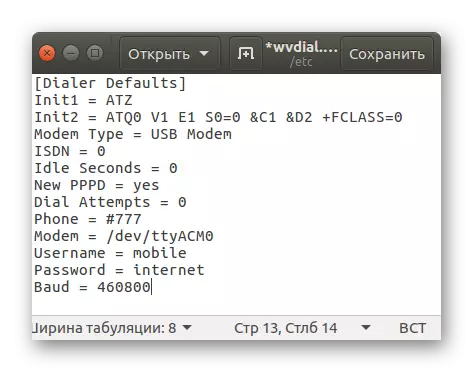
As you can see, most of the settings have already spelled out, but the last three points still need to be supplemented. You will need to register in their phone number, login name and password, respectively. However, do not rush to close the file, several parameters is recommended to add to a more comfortable work:
- Idle Seconds = 0 - the connection is disconnected, even after long inaction on the computer;
- Dial Attempts = 0 - makes endless attempts to establish a connection;
- Dial Command = ATDP - a set of numbers will be pulsed.
According to the results of the configuration file will have the following form:

Note that the settings are divided into two sections entitled titles in parentheses. It is necessary to create two versions of the use of parameters. Thus, the parameters under «[Dialer Defaults]», will be carried out always and under «[Dialer puls]» - when specifying the appropriate option on the team.
After all the settings to connect DIAL-UP, you will need to run this command:
$ Sudo wvdial
If you want to install the impulse connection, then write the following:
$ Sudo wvdial pulse
In order to break an established connection, in the "Terminal" to press a combination of keys Ctrl + C.
Method 2: Network Manager
In Ubuntu there is a special utility that helps to connect the majority of species. Besides, it has a graphical user interface. This Network Manager, which is invoked by clicking on the appropriate icon on the right side of the top panel.

Wired network setup
We'll start in the same way with the wired network settings. First we need to open the utility itself. To do this, click on its icon and then click "Change Connection" from the shortcut menu. Next in the window that appears, do the following:
- Click on the button "Add".

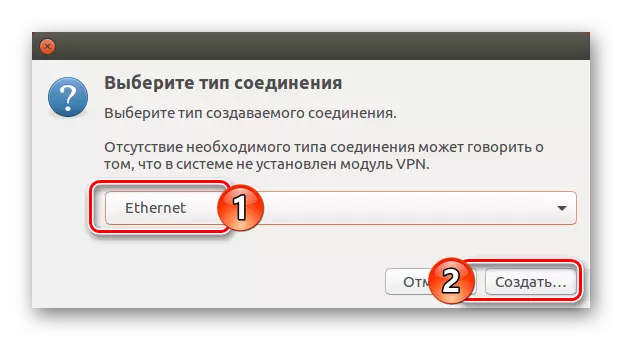
- In the window that appears, from the drop-down list, select the «Ethernet» option and click on "New ...".
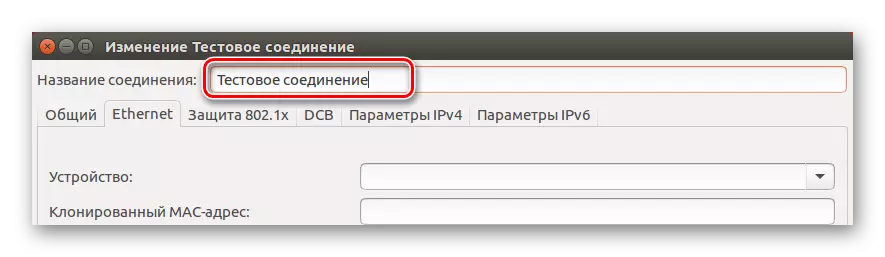
- In the new window, specify the connection name in the appropriate input box.
- In the «Ethernet» tab from the drop-down list "Device" used to determine the network card.

- Go to the "Shared" tab and put the checkboxes next to items "automatically connect to this network when it is available" and "All users can connect to this network."

- In the "IPv4 parameters" tab, determine the configuration method as "automatically (DHCP)" for a dynamic interface. If you have a static, then you need to select "manually" and specify all the necessary parameters, which provided the provider for you.
- Press the "Save" button.
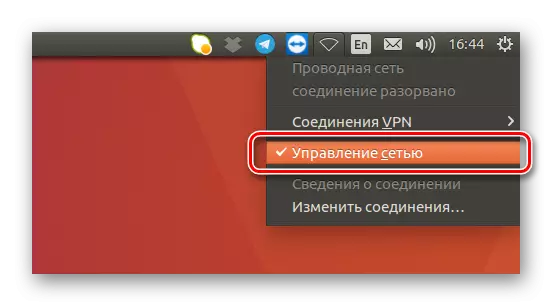
After all the actions made, the wired Internet connection must be installed. If this did not happen, check all the parameters entered, perhaps you have made a mistake somewhere. Also, do not forget to check whether the check mark is on the "network management" in the drop-down utility menu.
Sometimes it helps the reboot of the computer.
Setting up DNS.
To set the connection, you may need manual configuration of DNS servers. To do this, follow the following:
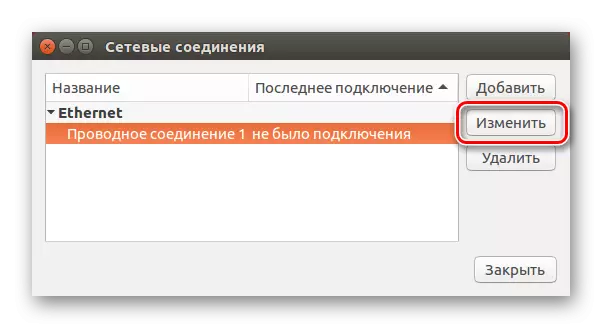
- Open the network connections window in Network Manager by selecting the "Change Connections" utilities from the menu.
- In the next window, select the previously created connection and press the LCM to "change".
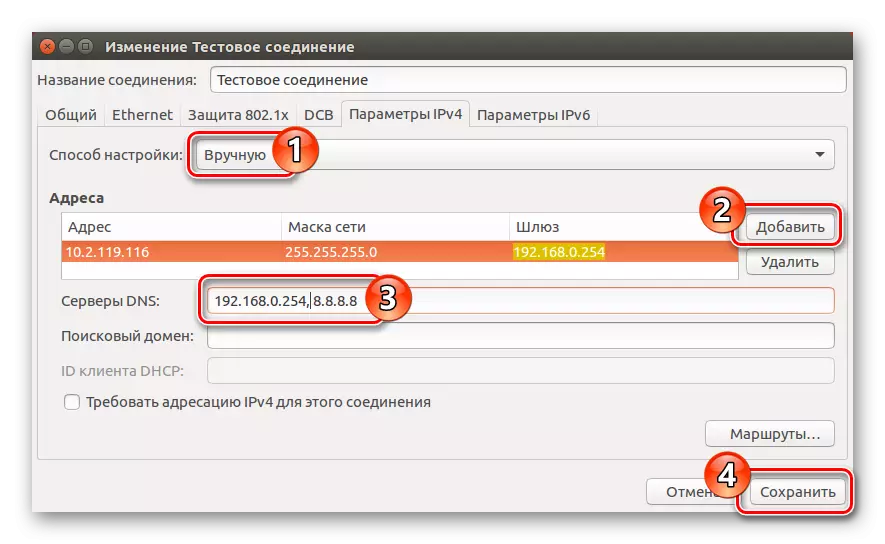
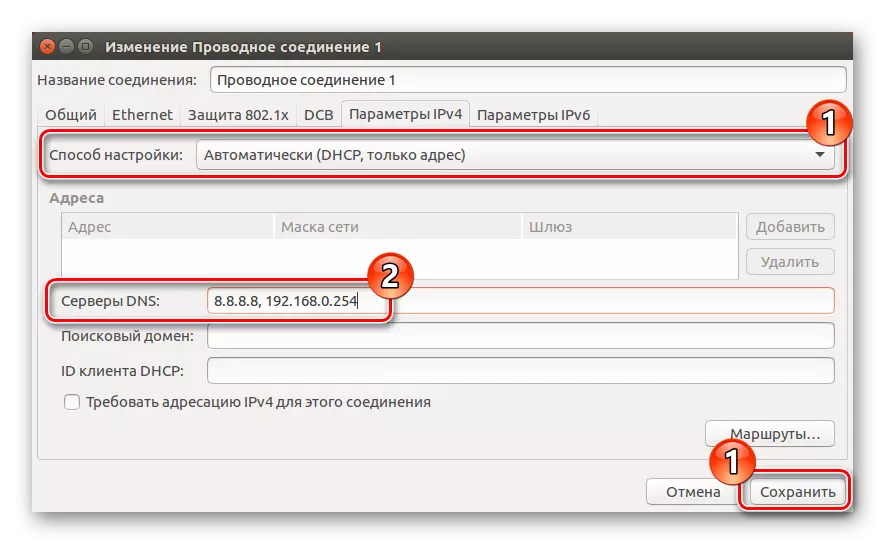
- Next, go to the "IPv4 parameters" tab and in the "Setup Method" list, click on "Automatic (DHCP, only address)". Then in the DNS servers string, enter the necessary data, and then click the Save button.
After that, the DNS configuration can be considered complete. If no changes, then try to restart the computer so that they come into force.
PPPOE Setup
Configuring the PPPoE connection to Network Manager is also performed as simply as in the Terminal. In essence, you will need to specify only the login and password received from the provider. But consider more and more detailed.
- Open the All connections window by clicking on the Network Manager utility icon and selecting the "Change Connections" item.
- Click "Add", and then from the drop-down list, select "DSL". After click "Create ...".

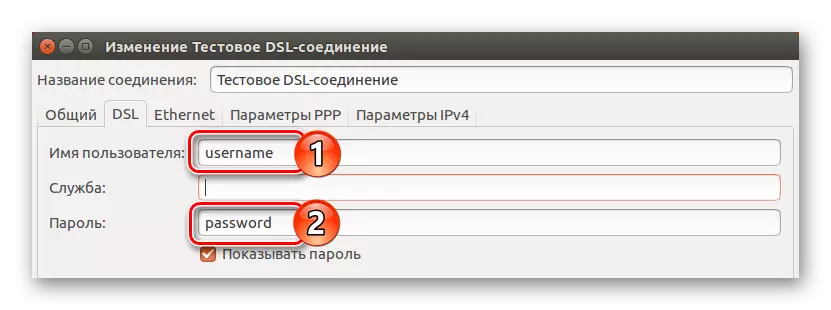
- In the window that appears, enter the connection name that will be displayed in the Utility menu.
- In the DSL tab, write a login and password in the appropriate fields. If you wish, you can also set the name of the service, but it is optional.
- Go to the "Shared" tab and check the ticks next to the first two points.

- In the Ethernet tab in the "Device drop-down list, determine your network card.

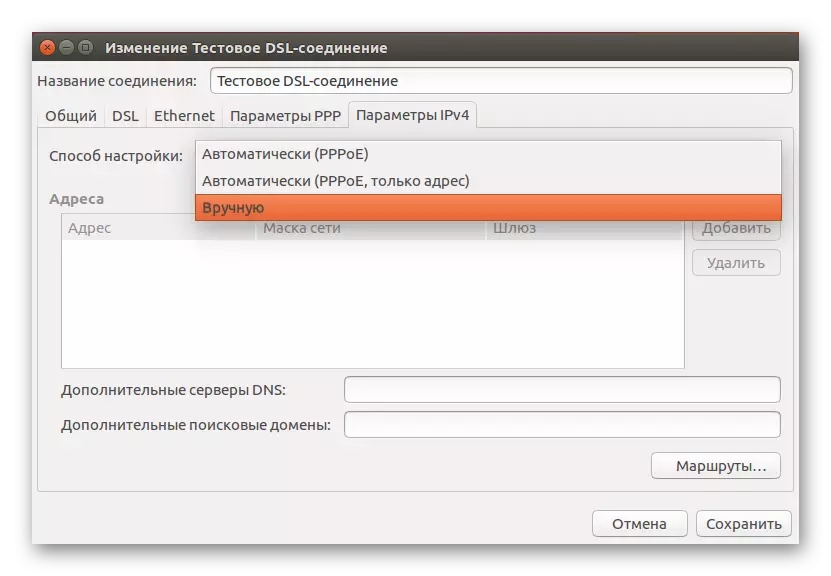
- Go to "IPv4 parameters" and determine the setting method as "automatically (PPPOE)" and save your choice by pressing the appropriate button. If you need to enter the DNS server manually, select "Automatically (PPPOE, only address)" and set the desired parameters, then click "Save". And if you need to enter all settings manually, select the item of the same name and enter them into the appropriate fields.
Now a new DSL connection appeared on the Network Manager menu by selecting which you will get access to the Internet. Recall that sometimes you need to restart the computer so that the changes take effect.
Conclusion
According to the result, we can say that in the Ubuntu operating system there are many tools to configure the necessary Internet connection. The Network Manager utility has a graphical interface that it simplifies work at times, especially for beginners. However, the "Terminal" allows you to carry out a more flexible setting, introducing those parameters that in the utility are not.