
The MemTest86 + program is designed to test RAM. Check occurs in automatic or manual mode. To work with the program, you need to create a boot disk or flash drive. What we will do now.
Creating a boot disk with MemTest86 + in Windows
We go to the official website of the manufacturer (there is also an instruction on Memtest86 +, truth in English) and download the installation file program. Then, we need to insert a CD drive into a drive or a USB flash drive into a USB connector.
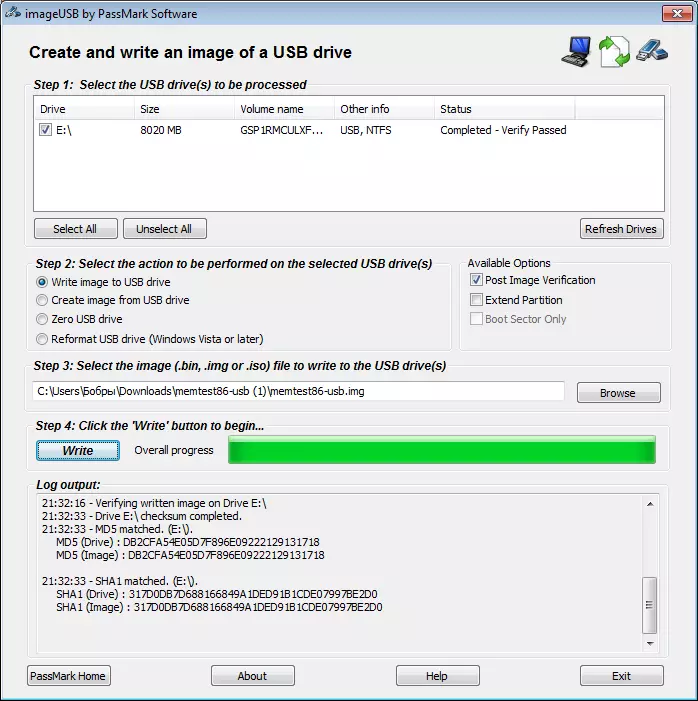
Run. On the screen you will see the program window to create a bootloader. Choose where to throw information and "WRITE" . All data on the flash drive will be lost. In addition, some changes will occur in it, as a result of which its volume can decrease. How to fix it I will describe below.
Start testing
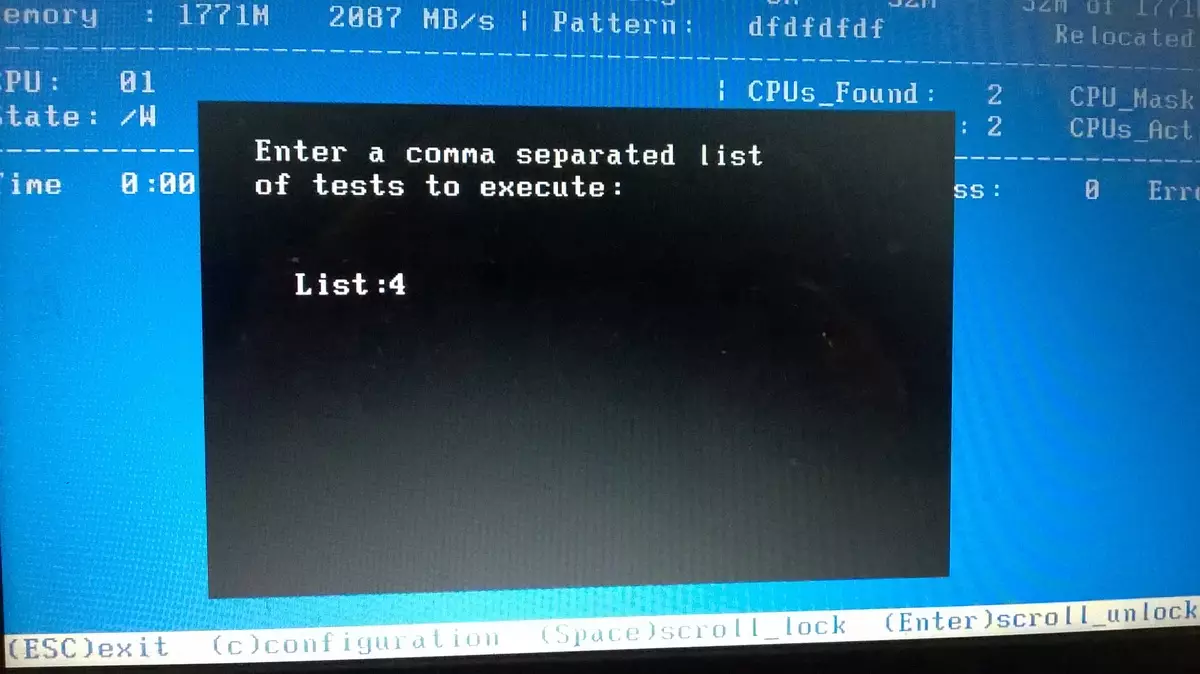
The program supports the download from the UEFI and the BIOS system. To start testing RAM in Memtest86 +, when rebooting the computer, put in the BIOS, loading from the flash drive (it must be first in the list).You can do it using keys "F12, F11, F9" , it all depends on the configuration of your system. You can also press the key in the process of turning on. "ESC" A small list will open in which you can set the load priority.
Setting MEMTEST86 +.
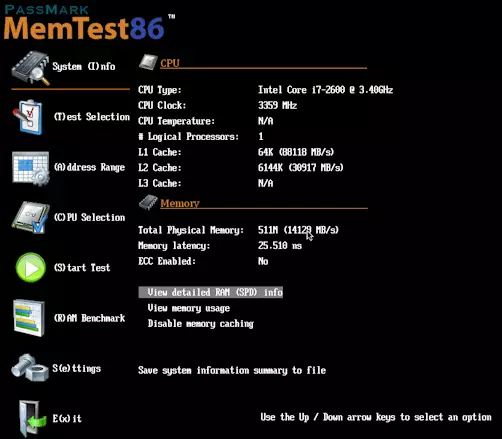
If you purchased the full version of Memtest86 +, then the screensaver will appear after it starts, in the form of a 10-second countdown timer. After this time, MemTest86 + automatically starts the memory tests with default settings. Pressing the keys or movement of the mouse must stop the timer. The main menu allows the user to configure parameters, for example, execution tests, address range for checking and which processor will be used.
In the trial version, after loading the program, you will need to click "1" . After that, memory test will begin.

Main menu MEMTEST86 +
The main menu has the following structure:
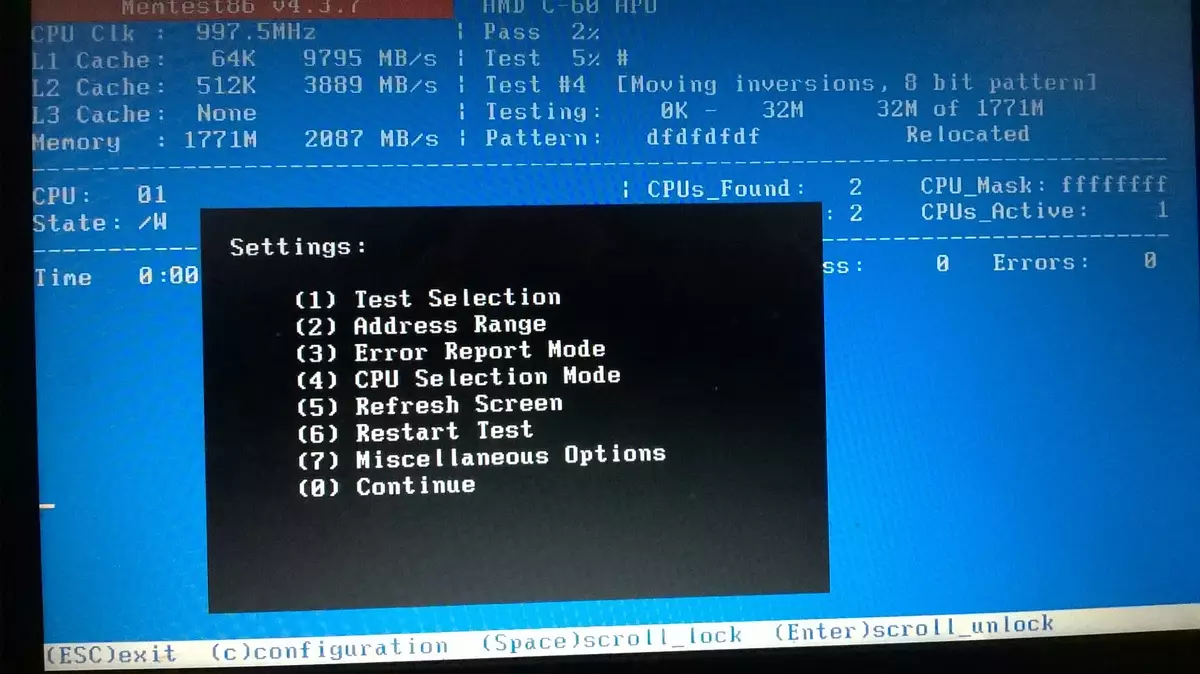
In order to start checking in manual mode, you need to select tests by which the system will be scanned. Make it can be in graphic mode in the field "Test Selection" . Or in the check window by pressing the key "WITH" , To select additional parameters.
If nothing was configured, testing will be held according to a given algorithm. Memory will be checked by all tests, and, if errors occur, the scan will continue until the user stops the process. In the absence of errors, the appropriate entry and checking will appear on the screen.
Description of individual tests
MemTest86 + performs a number of numbered tests to verify errors.
Test 0. - Address bits are checked in all memory straps.
Test 1. - more in-depth option "Test 0" . He can catch any mistakes that were not previously discovered. Performed sequentially from each processor.
Test 2. - Checks in fast mode hardware of memory. Testing occurs in parallel with all processors.
Test 3. - Tests in fast mode hardware of memory. Uses an 8-bit algorithm.
Test 4. - Also uses an 8-bit algorithm, only scans more in-depth and identifies the slightest errors.
Test 5. - Scans Memory Schemes. This test is especially effective in finding hard mistakes.
Test 6. - Receives mistakes "DATA SENSITIVE ERRORS".
Test 7. - Fits memory errors in the recording process.
Test 8. - Scans Kesh errors.
Test 9. - Detailed test that checks the cache memory.
Test 10. - 3-hour test. First scans and memorizes memory addresses, and after 1-1.5 hours it checks whether there were no changes.
Test 11. - Scans cache errors using its own 64-bit instructions.
Test 12. - scans cache errors using its own 128-bit instructions.
Test 13. - Details scans the system to identify global memory problems.
MEMTEST86 + program terminology
"TSTLIST" - List of tests to perform a test sequence. They are unreamed and separated by the comma.
"NUMPASS" - The number of repeats of the test sequence of execution. It should be a number of more than 0.
"Addrlimlo" - Lower limit of the range of addresses for verification.
"Addrlimhi" - upper limit of the range of addresses for verification.
"CPUSEL" - Selection of the processor.
ECCPOLL and ECCINJECT - Indicates ECC errors.
"Memcache" - Used to caching the memory.
"Pass1full" - Indicates that a reduced test will be used in the first pass, to quickly detect obvious errors.
"AddR2ChBITS, AddR2SLBITS, AddR2CSBITS" - A list of bit positions of memory address.
"Lang" - Indicates the language.
"REPORTNUMERRS" - The last error number for outputting the report file. This number should be no more than 5000.
"REPORTNUMWARN" - The number of recent warnings to display in the report file.
"MINSPDS" - minimum number of RAM.
"Hammerpat" - Specifies a 32-bit data duration template "Hammer (test 13)" . If this parameter is not specified, random data models are used.
"Hammermode" - indicates the choice of a hammer in Test 13..
"Disablemp" - Indicates whether to disable multiprocessor support. This can be used as a temporary solution for some of the firmware UEFIs that have problems with running MemTest86 +.
Test results
After testing, the test will be displayed.
Lowest Error Address:
Highest Error Address:
Bits in Error Mask:
Bits In Error:
Max Contiguous Errors:
ECC Correctable Errors:
Test Errors:

The user can save results as reports in HTML file..
Lead time
The time required for the full passage of MemTest86 + strongly depends on the speed of the processor, speed and amount of memory. Usually, one pass is enough to determine everything except the most incomprehensible errors. For complete confidence, it is recommended to make a few runs.Restore disk space on a flash drive
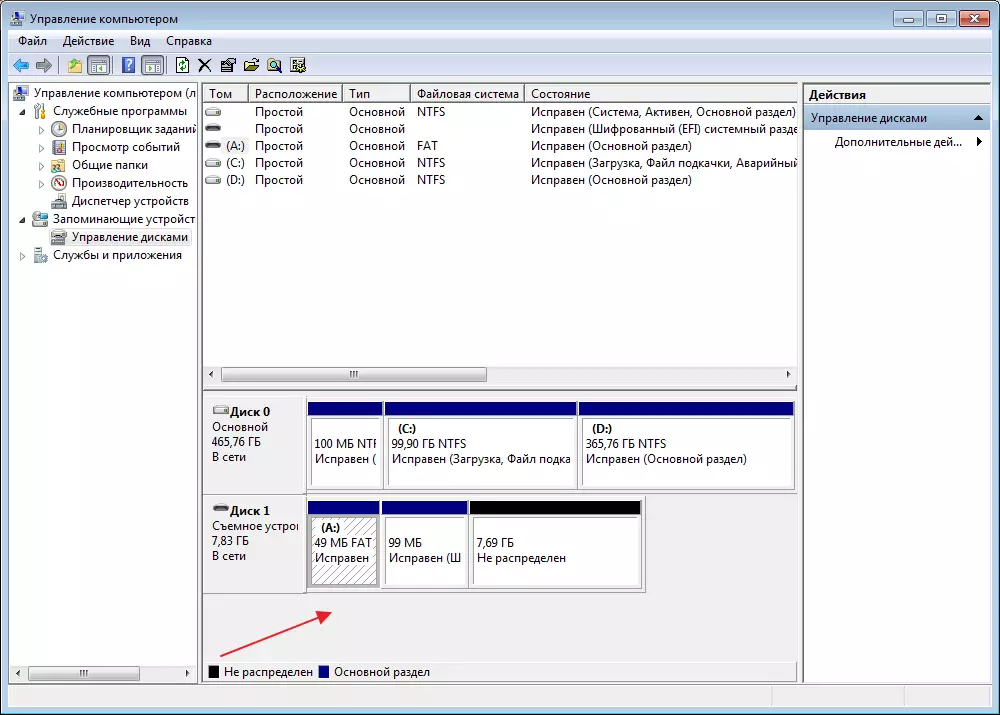
After using the program on the flash drive, users note that the drive has decreased in volume. This is true. Capacity of my 8 GB. Flashki decreased to 45 MB.

To correct this problem you need to go to "Control Panel-Administration Computer Disk Management" . We look at us with a flash drive.
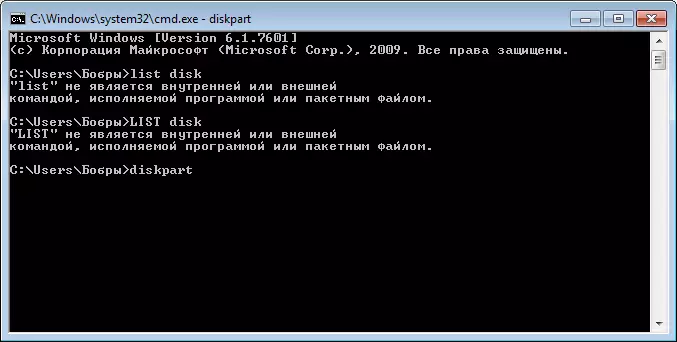
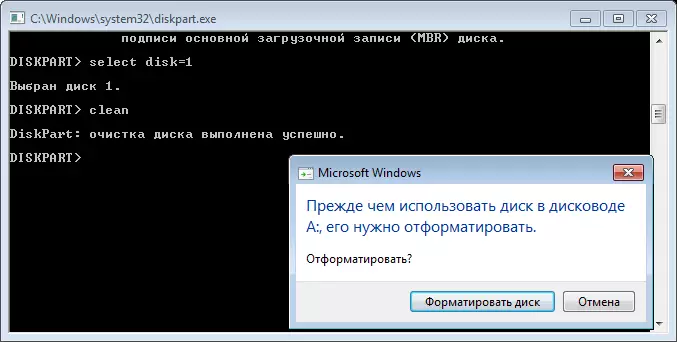
Then go to the command line. To do this, enter the command in the search field. "CMD" . In the command line we write "Diskpart".
Now we go to find the desired disk. To do this we enter the command "LIST DISK" . By volume we define the desired and enter the dialog box "SELECT DISK = 1" (in my case).
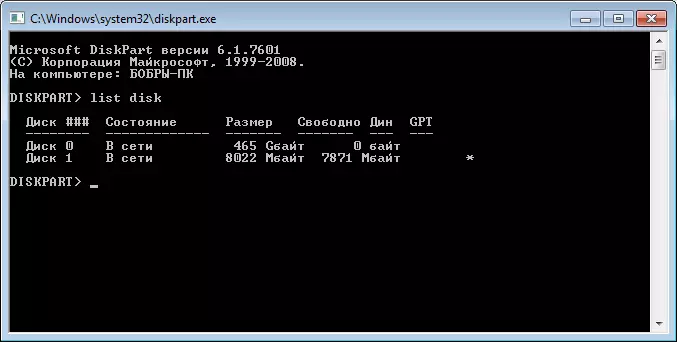
Next enter "Clean" . The main thing is not to be mistaken with the choice.
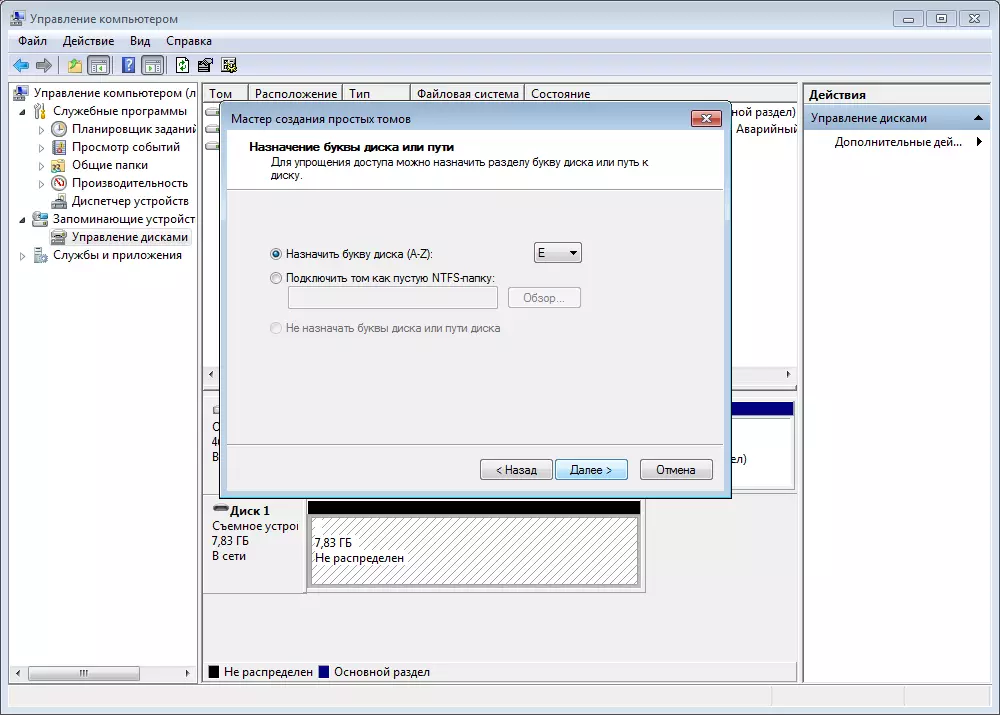
Go again in "Disk management" And we see that the entire area of the flash drive has become not marked.

Create a new volume. To do this, click on the flash drive area and choose "Create a new volume" . A special master will open. Here we need to press everywhere "Further".
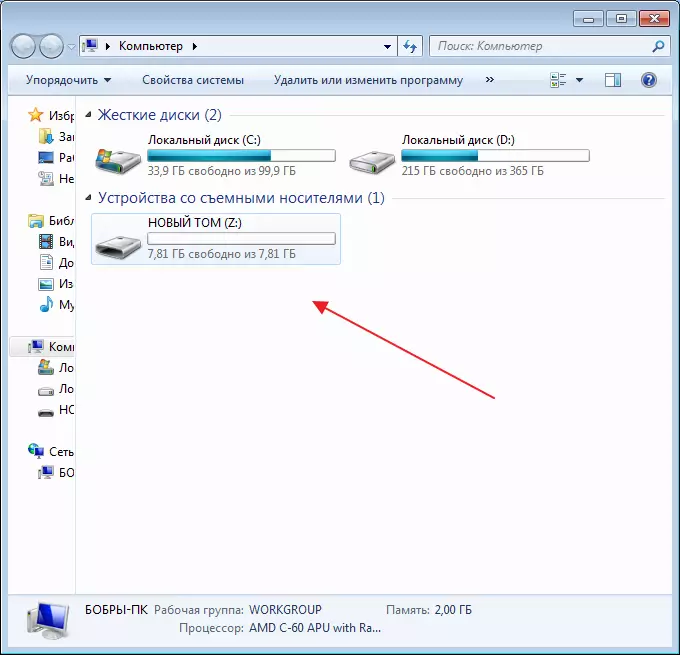
At the final stage, the flash drive is formatted. You can check.
Video lesson:
Testing the MEMTEST86 + program, I was satisfied. This is a truly powerful tool that allows you to test the RAM in various ways. However, in the absence of the full version, only the automatic check function is available, but in most cases it is sufficient to identify most of the RAM problems.