

Debian is a specific operating system. Most users, setting it, are experiencing a different kind of problem when working with it. The fact is that this OS needs to configure most of the components. The article will talk about how to configure the network in Debian.
According to the result, the configuration file should look like this:
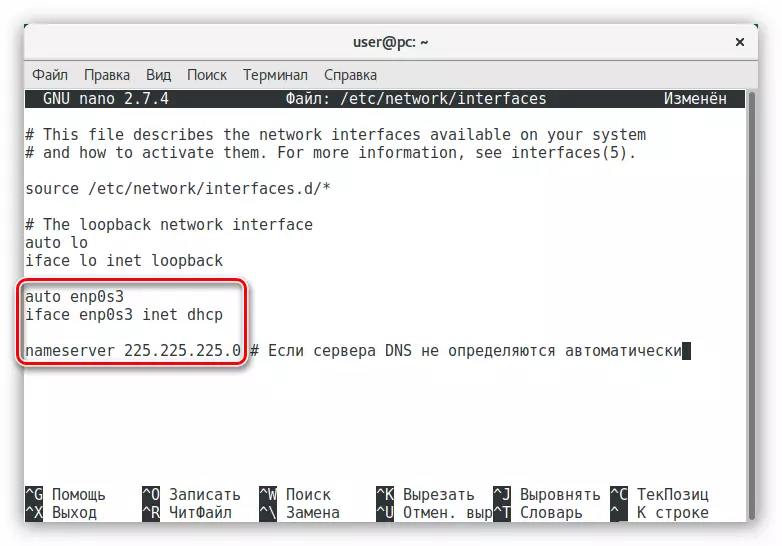
Only the name of the network interface can differ.
A wired connection with a dynamic address has just been configured. If you have a static IP address, then you need to configure the network otherwise:
- Open the configuration file in the Terminal:
Sudo Nano / etc / Network / Interfaces
- Having retreated one line at the end, enter the text below, simultaneously introducing the necessary data to the appropriate places:
AUTO [Network Interface Name]
IFACE [Network Interface Name] INET STATIC
Address [Address]
NetMask [Address]
Gateway [Address]
DNS-NameServers [Address]
- Save the changes and exit the Nano editor.
Recall that the name of the network interface can be found by entering the "IP Address" command in the Terminal. If you do not know all other data, they can be found in the documentation from the provider or ask the operator from technical support.
According to the total of all actions, the wired network will be configured. In some cases, so that all changes take effect, you need to perform a special command:
Sudo SystemCTL RESTART NETWORKING
Or restart the computer.
Method 2: Network Manager
If you are inconvenient to use the terminal connection to configure the terminal connection or you are faced with difficulties when executing previously outlined instructions, you can use the special Network Manager program that has a graphical interface.
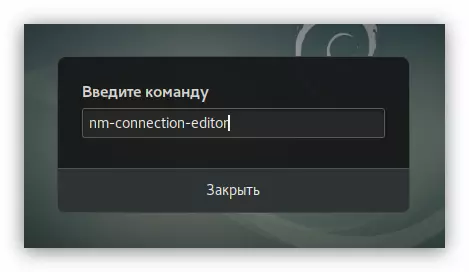
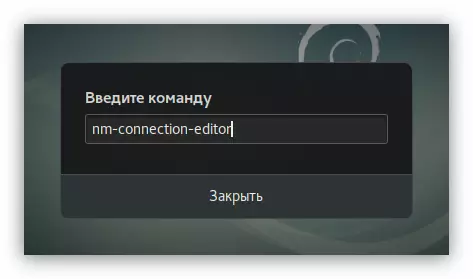
- Open the Network Manager settings window by pressing the Alt + F2 keys and entering this command to the corresponding field:
NM-Connection-Editor
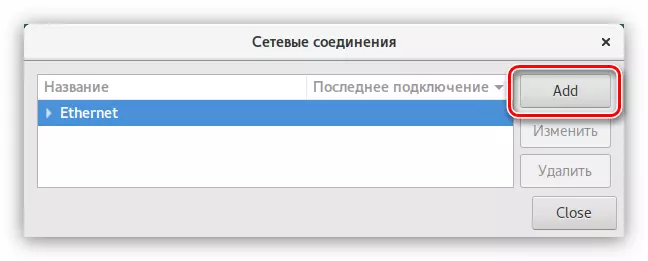
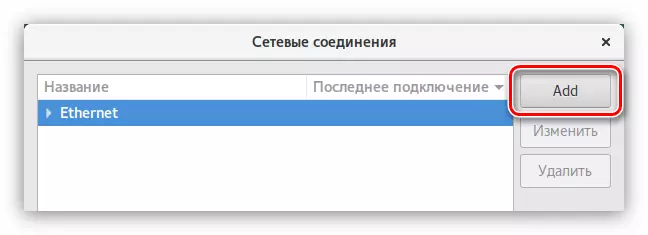
- Click the "Add" button to add a new network connection.
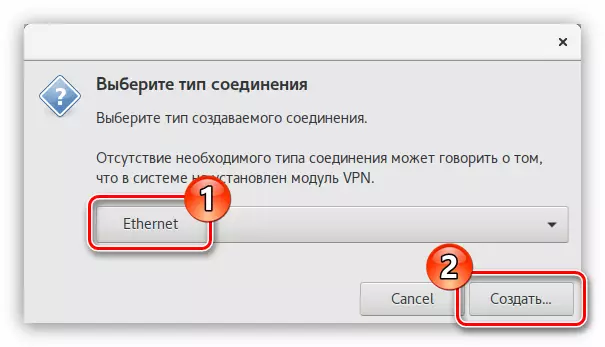
- Determine the type of new connection as "Ethernet" by selecting the point of the same name from the list and clicking "Create ...".
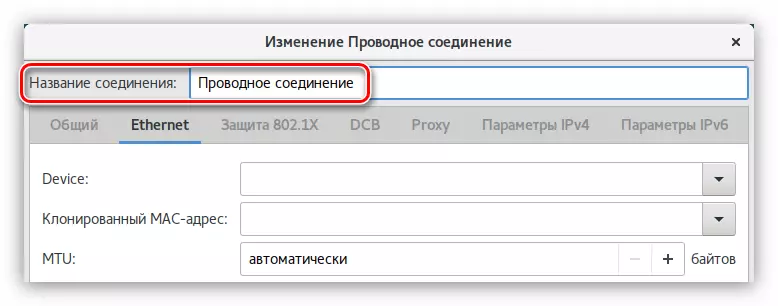
- In the new window that opens, enter the name of the connection.
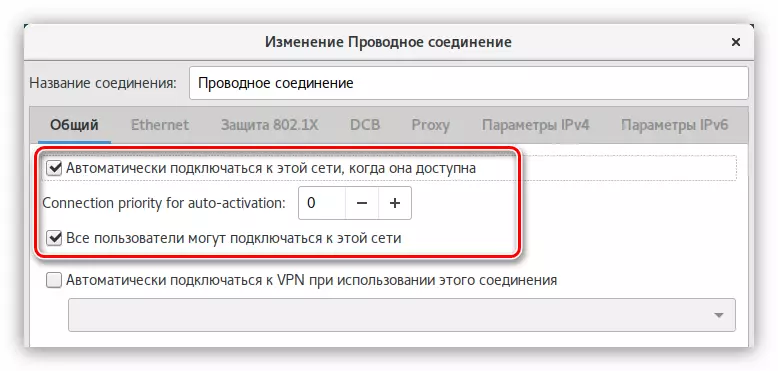
- On the General tab, install the checkboxes at the first two items so that after starting the computer, all users can automatically connect.
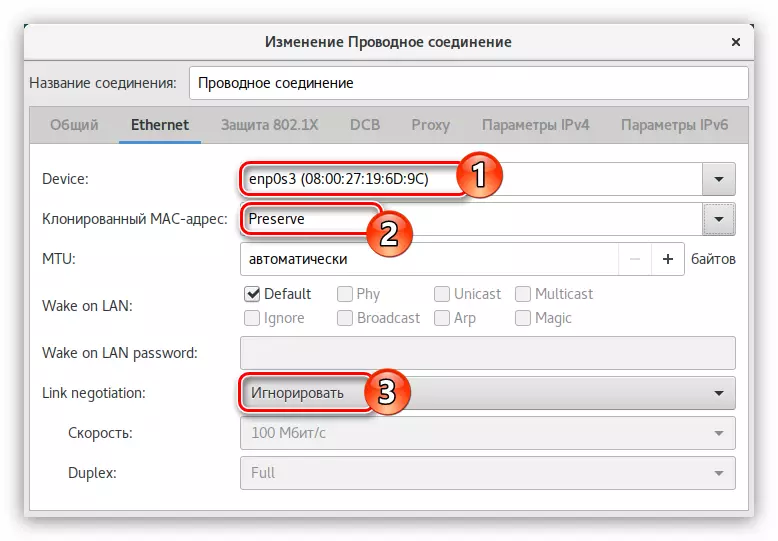
- In the Ethernet tab, determine your network card (1) and select the method of cloning MAC address (2). Also in the Link Negotiation list, select the "ignore" (3) string. All remaining fields do not change.
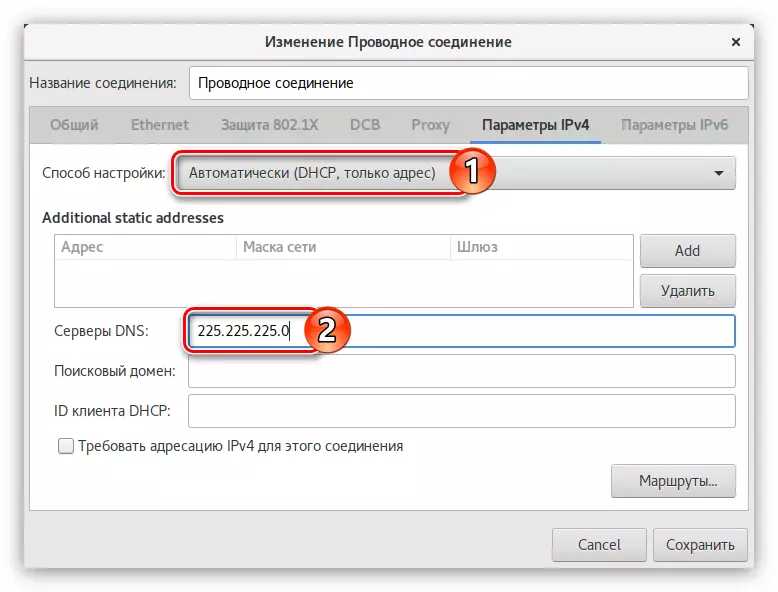
- Click the "IPv4" tab and select the setup method as "automatic (DHCP)." If the DNS server you receive not directly from the provider, select "Automatic (DHCP, only address)" and enter the DNS servers to the field of the same name.
- Click "Save".
After that, the connection will be installed. But in this way, you can only configure the dynamic IP, if the address address address, follow these steps:
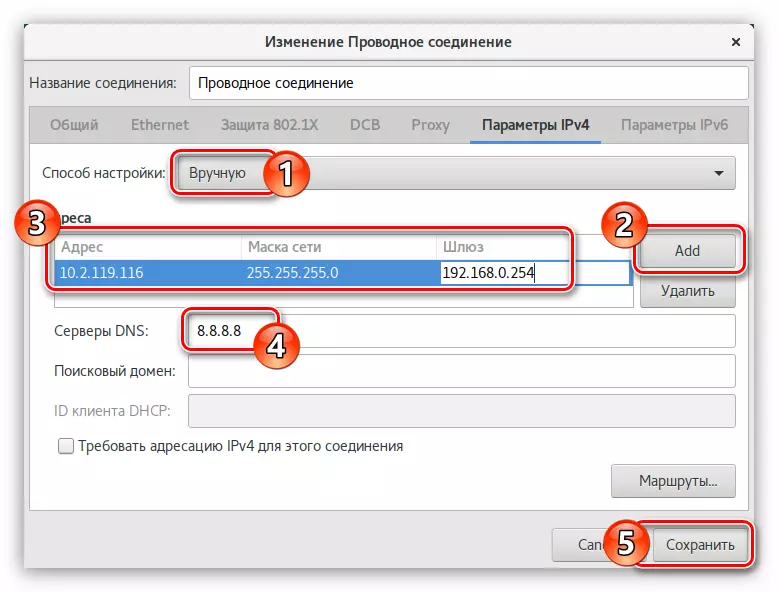
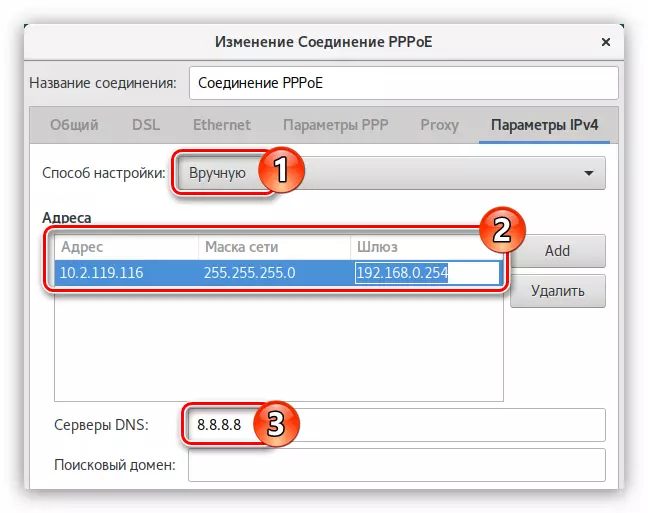
- From the "Setup Method" list, select the "Manual" string.
- In the "Address" area, click the "Add" button.
- Alternately enter the address, network mask and gateway.
Note: You can find out all the necessary information by contacting your provider.
- Specify the DNS servers in the field of the same name.
- Click "Save".
Finishing the network will be installed. If you still do not open the sites in the browser, it is recommended to restart the computer.
Method 3: System utility "Network"
Some users may encounter a problem when running Network Manager. In this case, it is recommended to use the system utility that always works stably. You can open it in two ways:
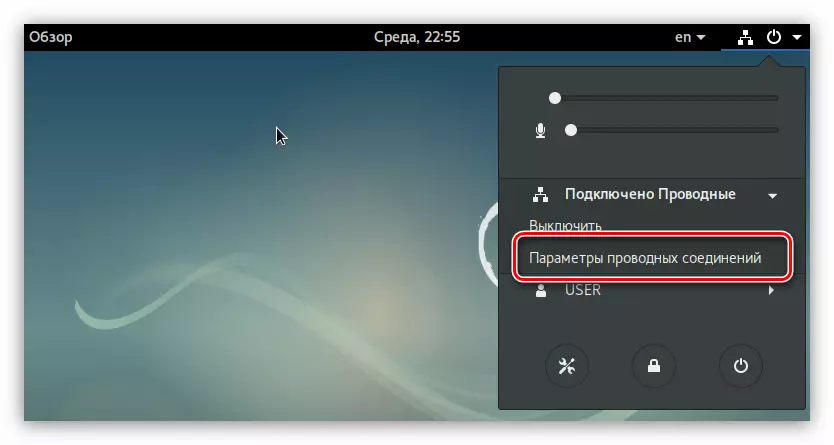
- By clicking on the network indicator on the right side of the GNOME panel and selecting the "Wired Network Parameters" item.
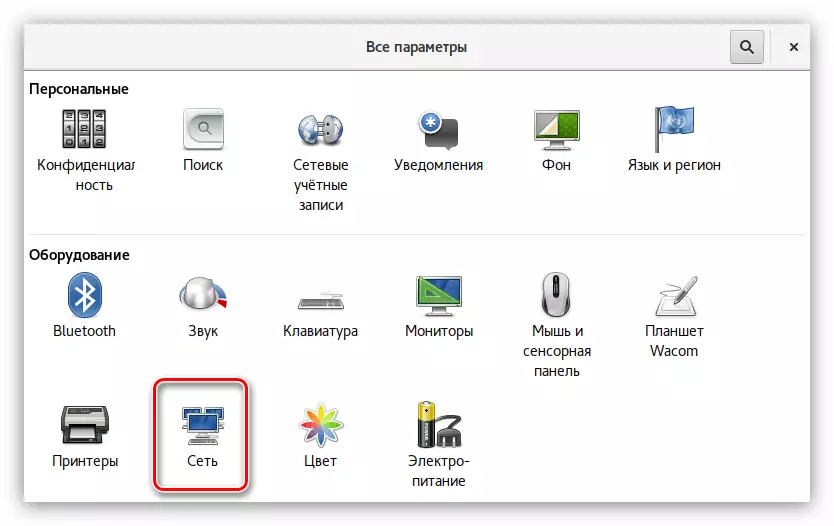
- Entering the system parameters through the menu and clicking on the "Network" icon.
Once the utility is open, to configure a wired connection, do the following:
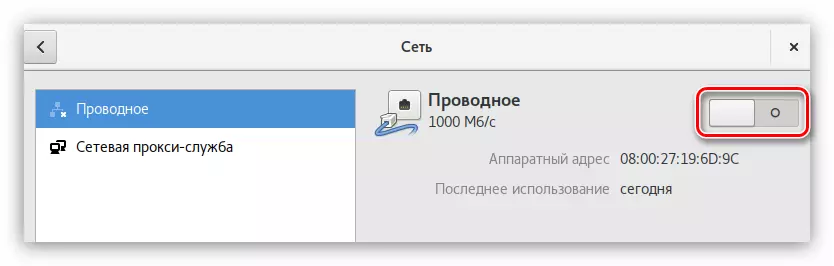
- Turn the network switch to the active position.
- Click on the button with the image of the gear.
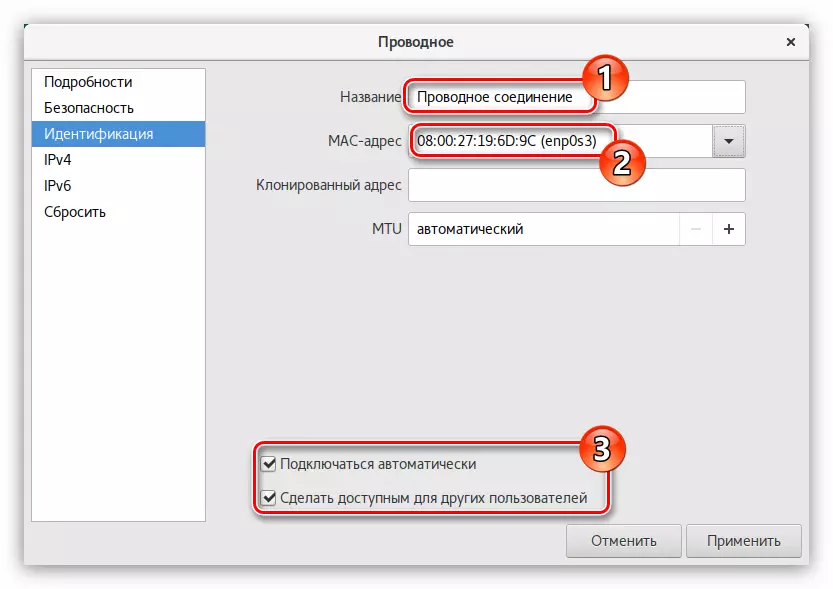
- In a new window, open the category "Identification", specify the name of the new connection and select the MAC address from the list. Also here you can enable automatic connection to the computer network after starting the OS and make a connection available to all users by setting the check mark at the respective items.
- Go to the "IPv4" category and set all the switches to the actual position if the provider provides a dynamic IP address. If the DNS server needs to be entered manually, then deactivate the "DNS" switch and enter the server yourself.
- Click "Apply".


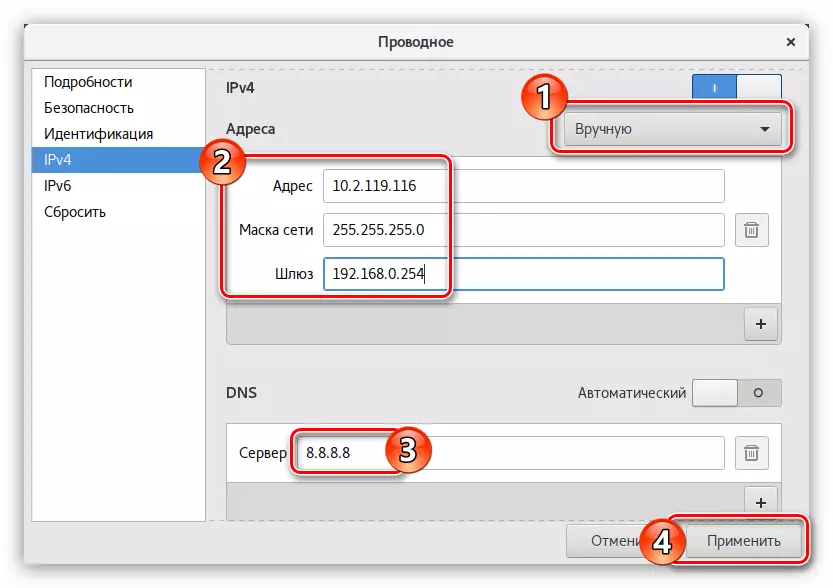
With static IP, you must specify other settings in the IPv4 category:
- From the drop-down list "Address", select Manual.
- In the form that appears for filling, enter the address of the network, mask and gateway.
- Just below deactivate the "DNS" switch and enter its address to the appropriate field.
Note: If necessary, you can click on the "+" button and specify additional DNS servers.
- Click "Apply".
Now you know how in the Debian operating system, configure a wired connection with static and dynamic IP. It remains only to choose a suitable way.
PPPoe
Unlike a wired connection, you can configure the PPPoE network to Debian in two ways: through the PPPOECONF utility and using the already known Network Manager program.
Method 1: PPPOECONF
The PPPOECONF utility is a simple tool with which you can in any operating system based on the Linux kernel, configure the connection via PPPoE. But unlike most distributions, in Debian, this utility is not pre-installed, respectively, it must be downloaded and installed first.
If you have the ability to configure an Internet connection on a computer by using an open access point, such as Wi-Fi, you need to execute this command to install PPPOECONF to install this command:
Sudo Apt Install PPPOECONF
If you cannot connect to Wi-Fi, you can not, then the utility must be preloaded on another device and place on the Flash drive.
Download PPPOECONF for 64-bit systems
Download PPPOECONF for 32-bit systems
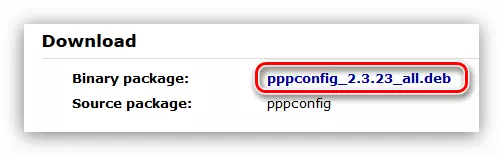
After that, insert the USB flash drive and do the following:
- Copy the utility to the "Download" folder using the Nautilus standard file manager for this.
- Open the Terminal.
- Go to it to the directory where the file is located. In this case, you need to go to the "Downloads" folder. To do this, follow:
CD / Home / UserName / Downloads
Note: Instead of "UserName", you must specify the username that was specified when installing Debian.
- Sign up the PPPOECONF utility by running the command:
Sudo Dpkg -i [Packagename] .deb
Where, instead of "[PackageName], you need to specify the full file name.
Once the utility is installed in the system, you can go directly to the PPPoE network. For this:
- Run the installed utility by running in the Terminal:
Sudo PppoConf.
- Wait for the scanning of devices.
- Determine the network interface from the list.
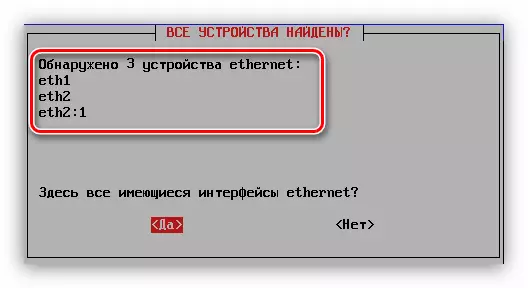
Note: If the network card is only one, the network interface is automatically determined and this step will be missed.
- Answer the approval - utility offers you the use of popular connection settings that are suitable for most users.
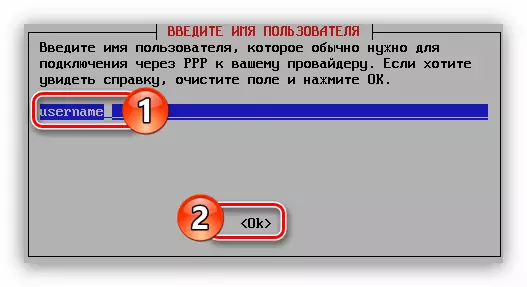
- Enter the login that has been issued by your provider and click OK.
- Enter the password that has given you the provider and click OK.
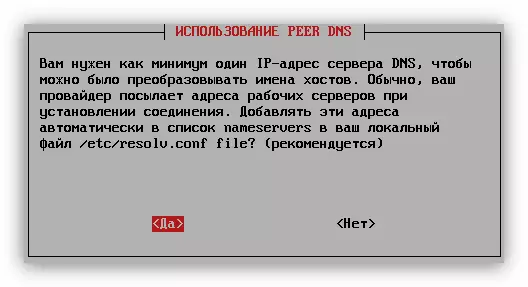
- Answer in the affirmative if the DNS servers are automatically determined. Otherwise, select "No" and specify them yourself.
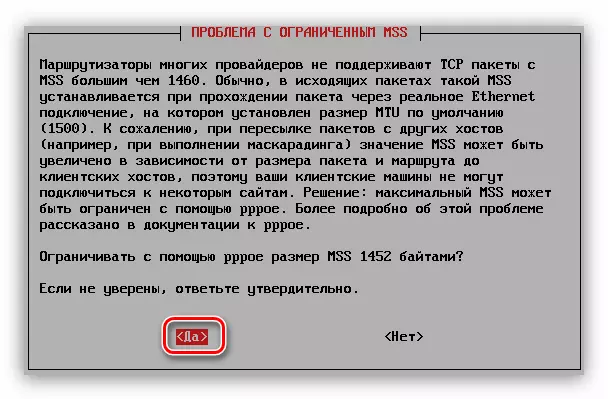
- Allow the utility to limit the volume of MSS to 1452 bytes. This will exclude errors when opening some sites.
- Select "Yes" so that the PPPoE connection is installed automatically each time the system starts.
- To establish a connection right now, answer "Yes."


If you chose the answer "Yes", the Internet connection must already be installed. Otherwise, to connect, you must enter the command:
Sudo Pon DSL-Provider
To turn off, perform:
Sudo POFF DSL-PROVIDER
On this instruction for setting up the PPPoE network using the PPPOECONF utility, it can be completed. But if you encountered some difficulties when it is fulfilled, then try using the second way.
Method 2: Network Manager
Using Network Manager, the PPPoe connection will take longer, but if you do not have the ability to download the PPPOECONF utility to your computer, then this is the only way to configure the Internet in Debian.
- Open the program window. To do this, click the Alt + F2 key combination and enter the following command to the field that appears:
NM-Connection-Editor
- In the window that opens, click on the "Add" button.
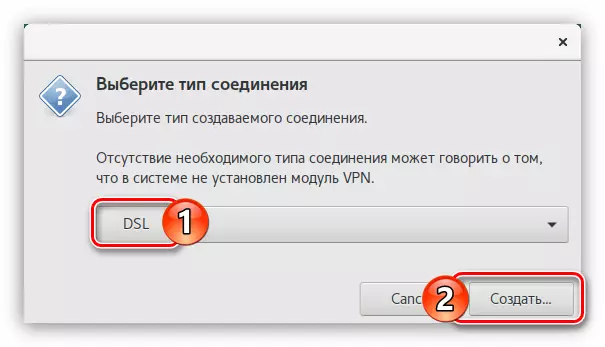
- Select the "DSL" string from the list and click the Create button.
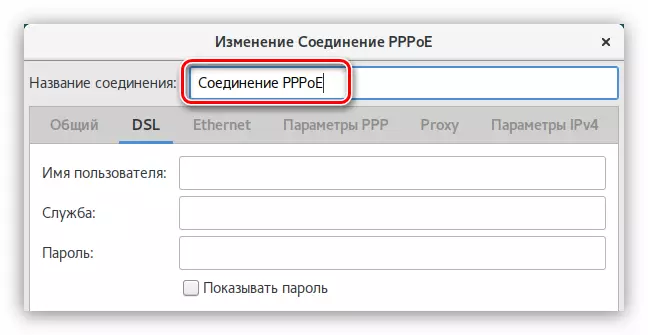
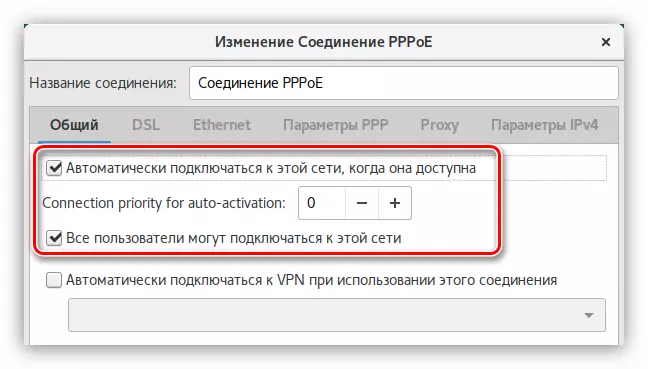
- A window will open in which you need to enter the name of the connection to the appropriate string.
- In the General tab, it is recommended to put ticks on the first two points so that when you turn on the PC, all users have access to it.
- On the DSL tab, enter the username and password to the appropriate fields. If you do not have this data, you can find them from the provider.
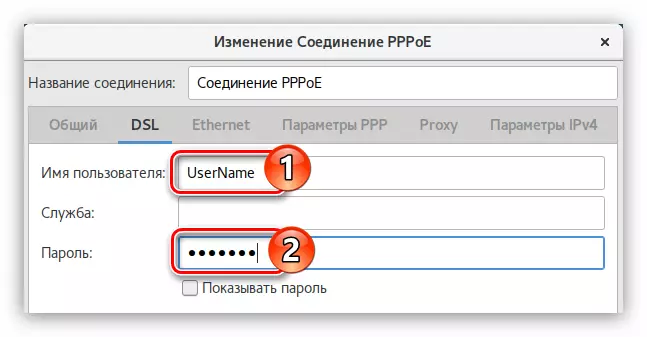
Note: The name of the service is not necessarily.
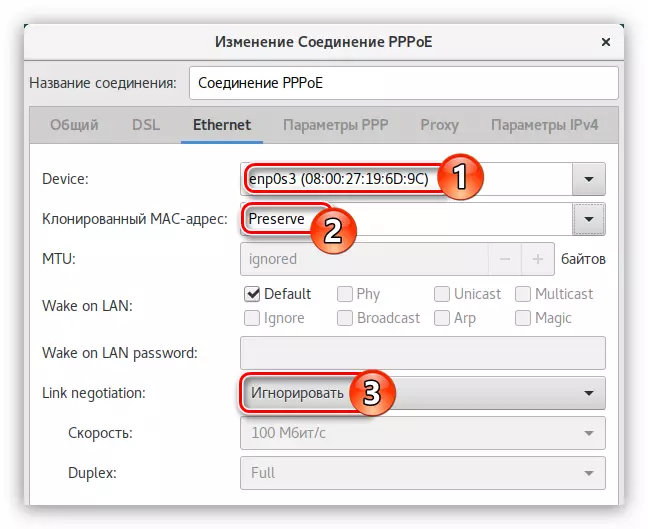
- Going to the "Ethernet" tab, select the Network Interface name in the "Device" list, in the Link Negotiation list - "ignore", and in the "Cloning MAC address" field, specify "Preserve".
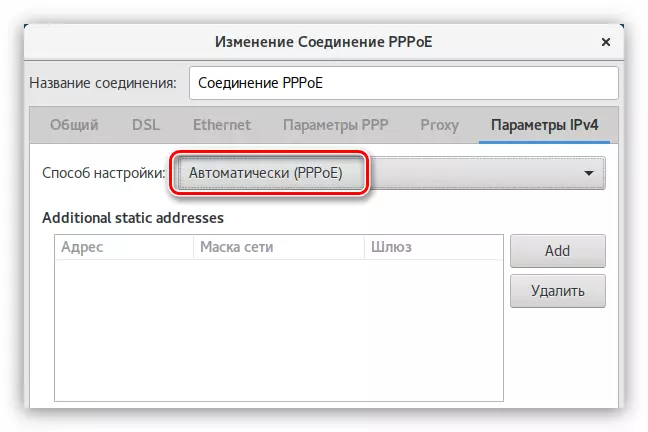
- In the "IPv4" parameters tab, with a dynamic IP, you need to select "Automatically (PPPoE)" during a dynamic IP.
- Click "Save" and close the program window.
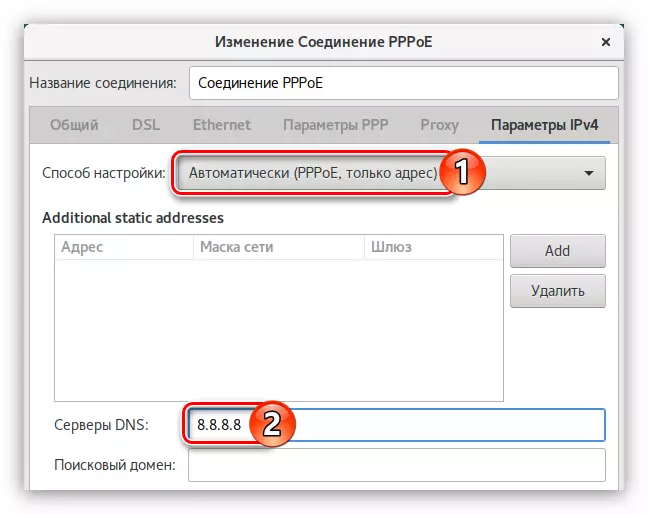
If the DNS server arrives not directly from the provider, select "Automatically (PPPoe, only address)" and enter them yourself in the field of the same name.
In the case when you have a static IP address, you need to choose a manual way and register all the parameters to the appropriate fields for input.
An Internet connection after all actions must be installed. If this is not the case, the computer reboot will help.
Dial-Up.
Of all the types of Dial-Up Internet connections are now considered the least popular, therefore programs with a graphical interface, in which you could make a setting, in Debian there. But there is a pppconfig utility with a pseudographic interface. You can also set up using the WVDIAL utility, but everything is in order.
Method 1: pppconfig
The PPPConfig utility is largely similar to PPPoEConfig: when setting up you just need to give answers to questions, after which the connection will be installed. But this utility is not pre-installed in the system, so download it through the "Terminal":
Sudo Apt Install Pppconfig
If you do not have access to the Internet to do this, you will have to install from the flash drive. To do this, first download the PPPConfig package and discard it to the drive.
Download pppconfig for 64-bit systems
Download pppconfig for 32-bit systems
Then, for the installation, do the following:
- Insert the USB flash drive into your computer.
- Move the data from it to the "Downloads" folder, which is located in the home directory of the operating system.
- Open the Terminal.
- Go to the folder where you moved the file with the utility, that is, in "Downloads":
CD / Home / UserName / Downloads
Only instead of "UserName" enter the username that was specified when installing the system.
- Install the PPPConfig package using a special command:
Sudo Dpkg -i [Packagename] .deb
Where replace "[PACKAGENAME]" on the name of the Deb file.
As soon as the desired package is installed in the system, you can proceed directly to configuring the Dial-Up connection.
- Run the pppconfig utility:
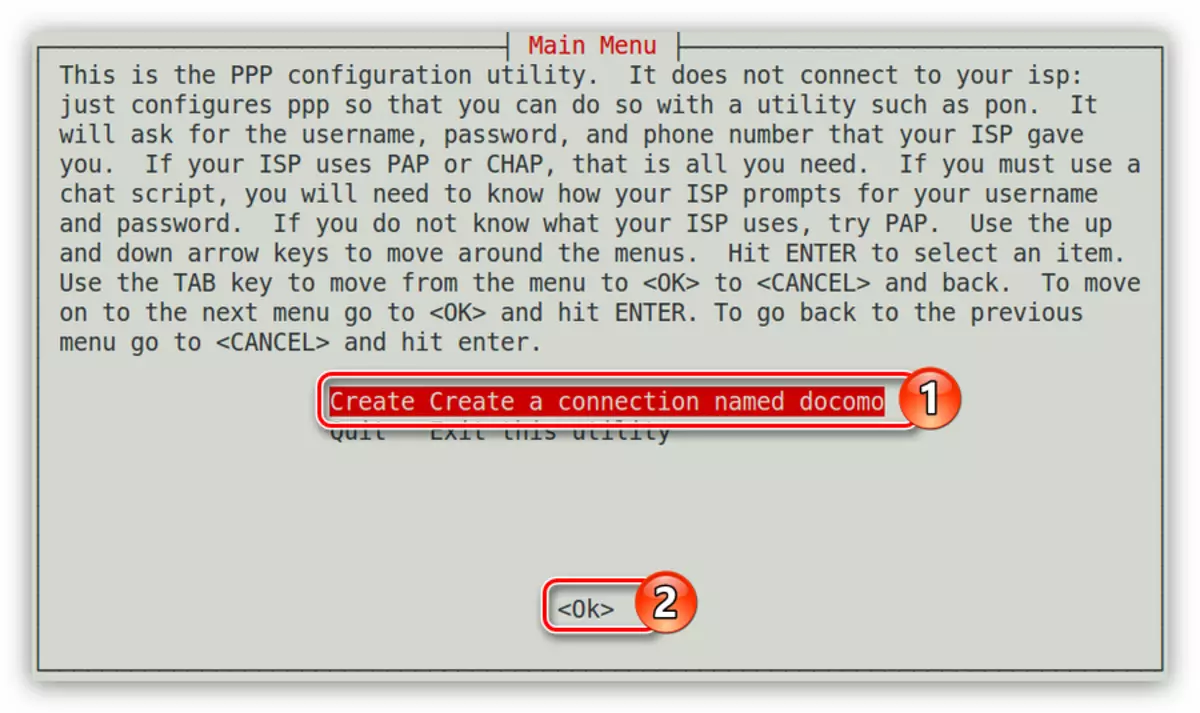
Sudo Pppconfig Docomo.
- In the first window of the pseudographic interface, select "Create a Connection Named Docomo" and click OK.
- Then define a method for configuring DNS servers. With a static IP, select "Use Static DNS", with dynamic - "Use Dynamic DNS".
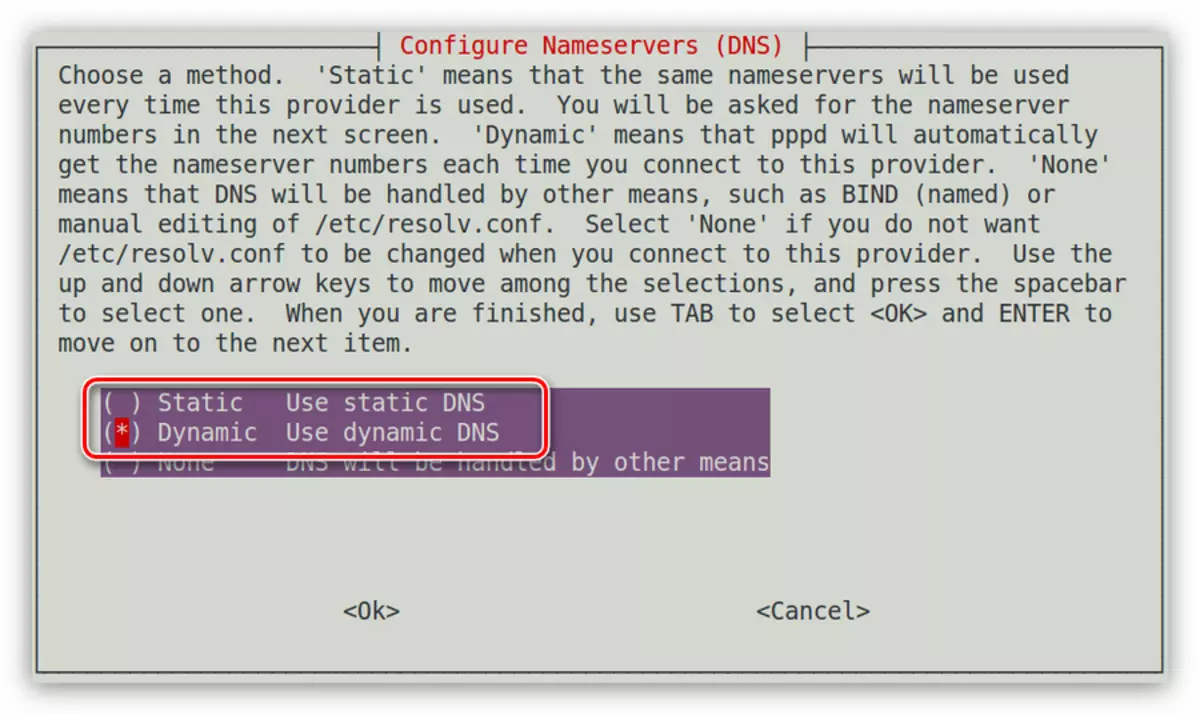
Important: If you have chosen "Use Static DNS", then you need to manually enter the IP address of the main and, if there is an additional server.
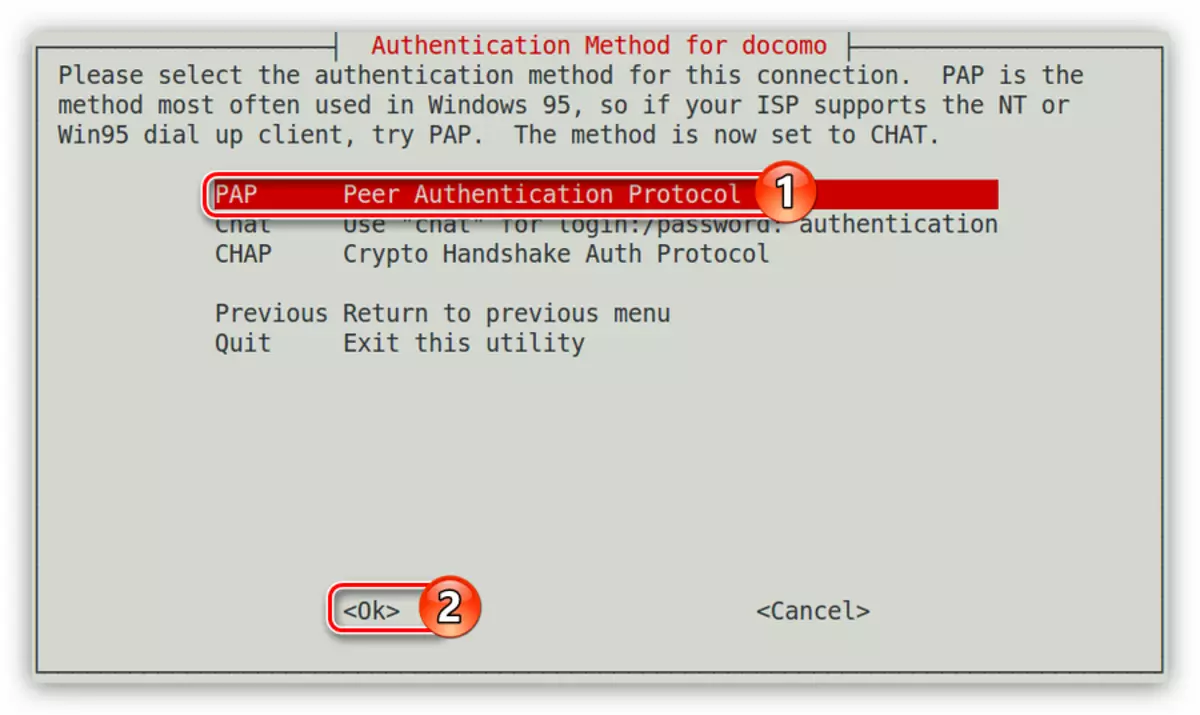
- Determine the authentication method by selecting the "Peer Authentication Protocol" item and click OK.
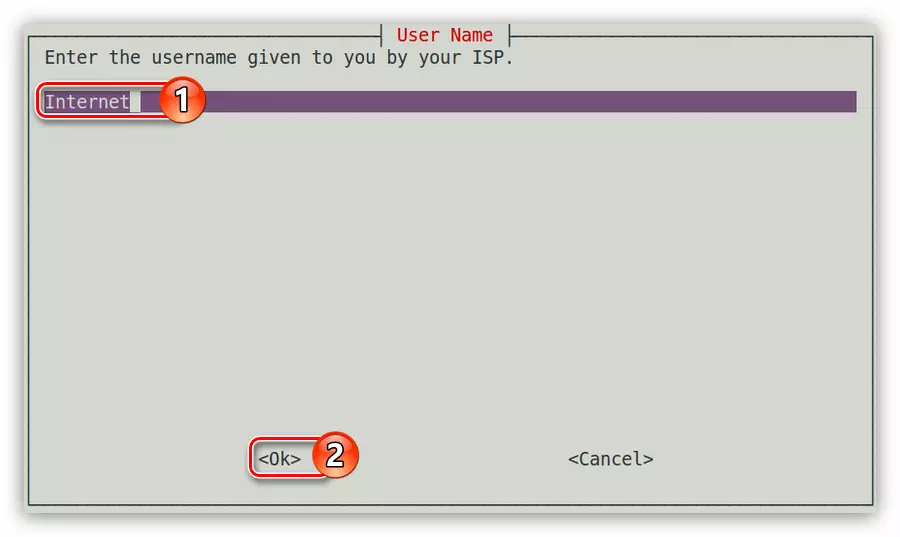
- Enter the login that has been given to you by the provider.
- Enter the password you also received from the provider.
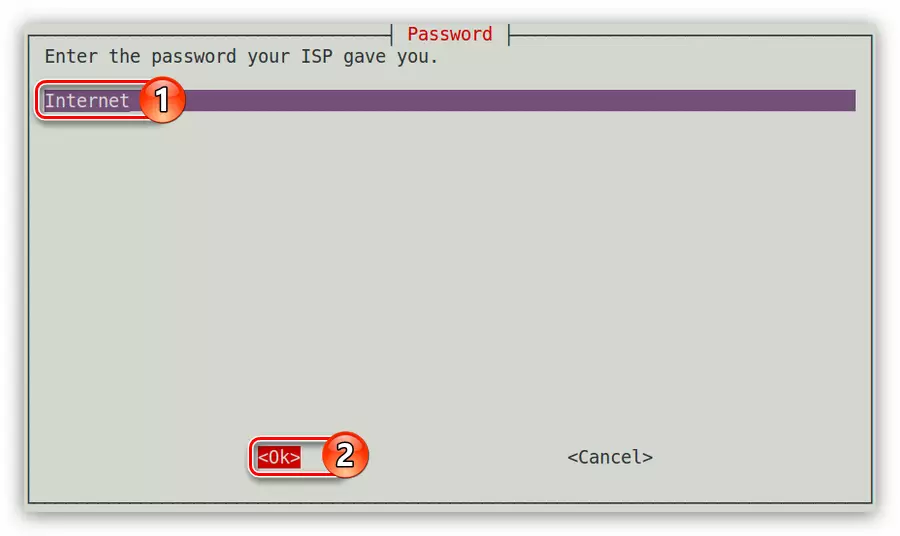
Note: If you do not have this data, contact technical support for the provider and find out them from the operator.
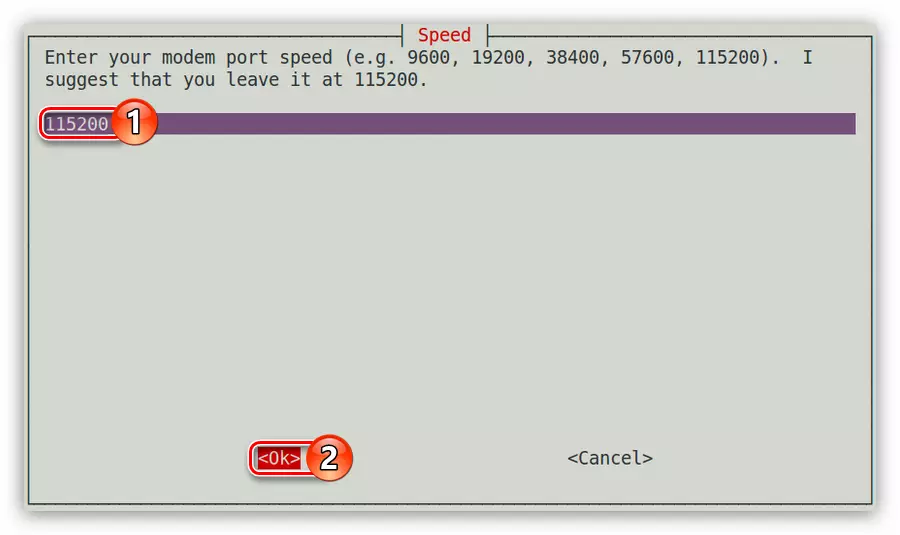
- Now you need to specify the maximum speed of the Internet, which will give you a modem. If it is not necessary to limit it, you do not need to enter the maximum value in the field and click OK.
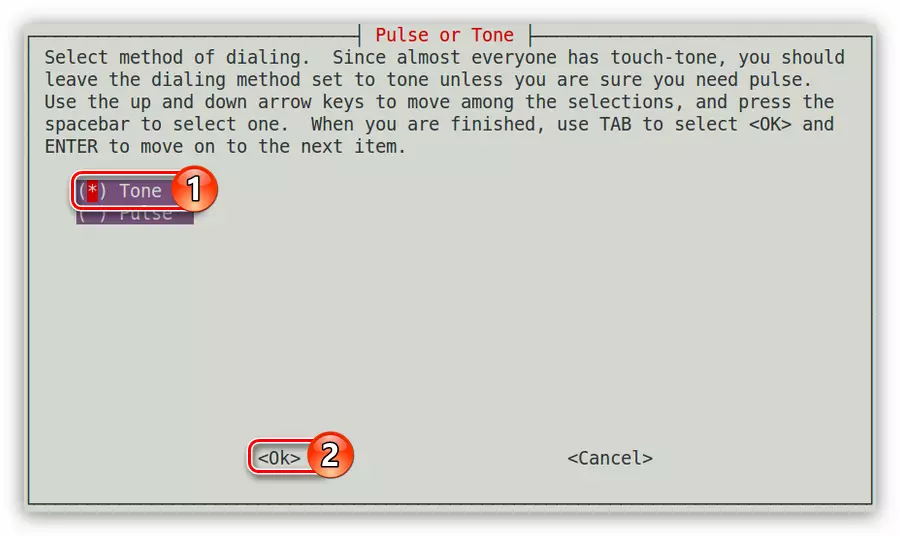
- Determine the method of dialing as a tonal, respectively, select "Tone" and click OK.
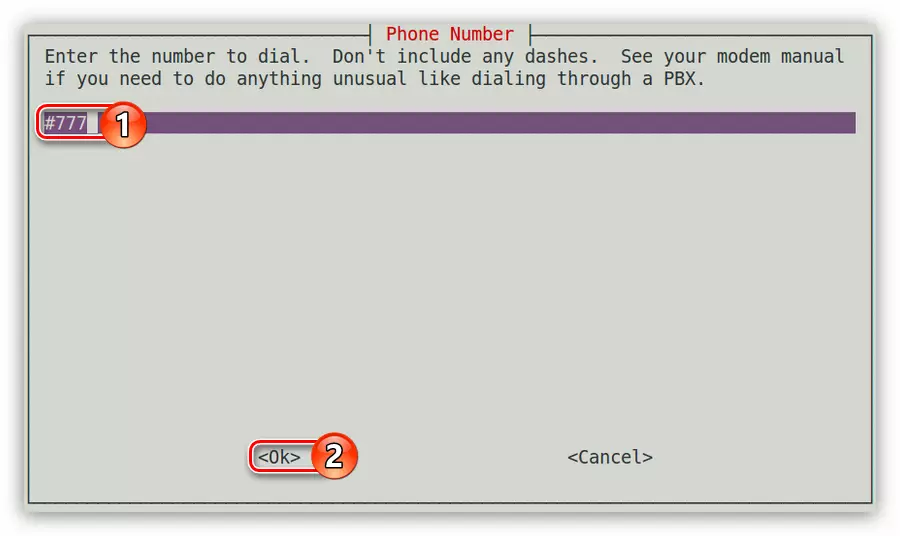
- Enter your phone number. Please note that you need to enter the data without using the dash sign.
- Specify the port of your modem to which it is connected.
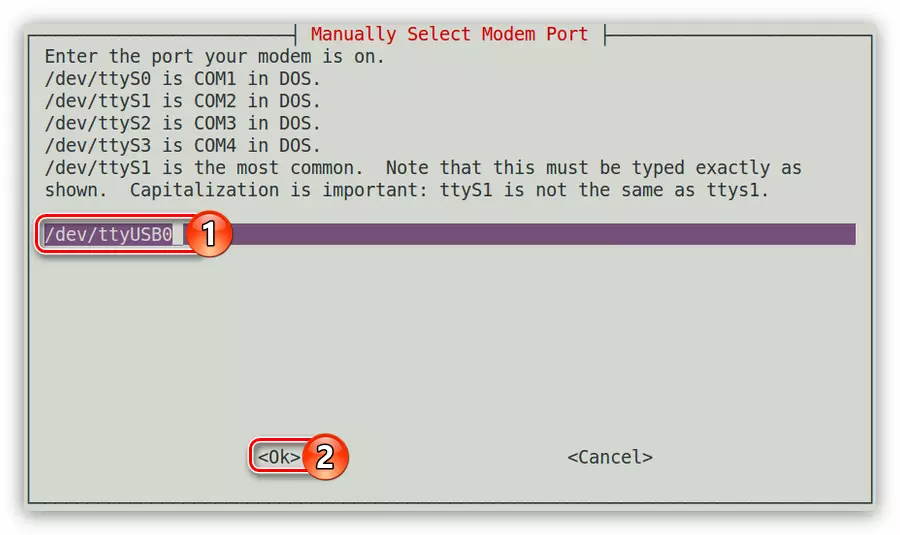
Note: TTYS0-TYS3 type ports can be viewed using the Sudo LS -L / DeV / TTYS * command
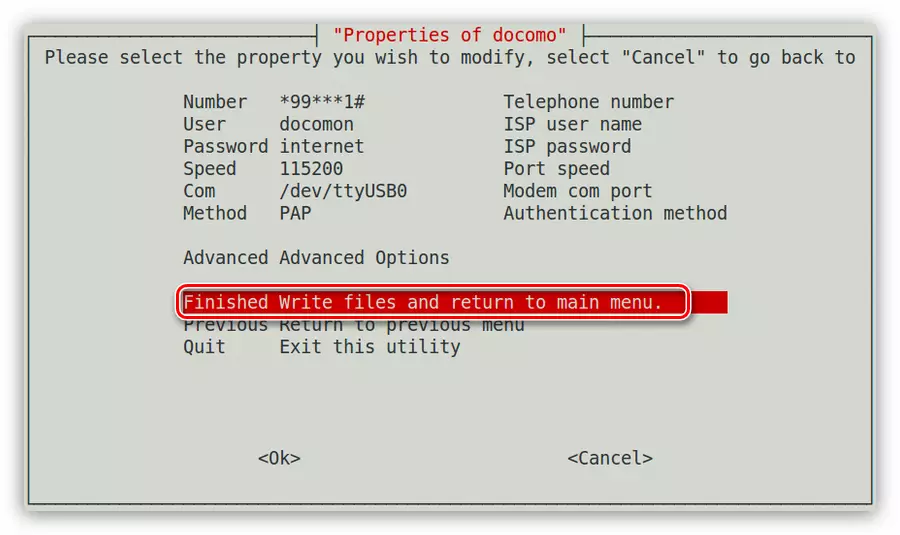
- In the last window, you will be presented with a report on all previously entered data. If they are all correct, then select the "Finished Write Files and Return to Main Menu" string and press ENTER.
Now for connecting you remains only one command:
Pon docomo.
To break the connection, use this command:
poff docomo.
Method 2: WVDIAL
If you failed to configure the Dial-Up connection using the previous way, it will definitely do with the WVDIAL utility. It will help create a special file in the system, after which it will be necessary to make some changes. Now it will be detailed how to do it.
- First you need to install in the WVDIAL system, for this, in the Terminal, it is enough to perform:
Sudo Apt Install Wvdial
Again, if at this moment you are not configured at this point, you can pre-download the desired package from the site on another device, throw it on the USB flash drive and install on your computer.
Download WVDIAL for 64-bit systems
Download WVDIAL for 32-bit systems
- After the utility was installed on your system, it must be started to create the same configuration file that we will subsequently change. To start, run the following command:
Sudo WvdialConf.
- The file was created in the "/ etc /" directory and it is called "wvdial.conf". Open it in a text editor:
Sudo Nano /etc/wvdial.conf.
- It will store parameters read by utility from your modem. You also have to fill out three lines: Phone, UserName and Password.
- Save the changes (Ctrl + O) and close the editor (Ctrl + X).

Dial-UP connection is configured, but to turn it on, you need to execute another command:
sudo wvdial
To configure an automatic connection to the network, when the computer starts, it is enough to make this command in the Debian autoload.
Conclusion
There are several types of Internet connection, and Debian has all the necessary tools for their configuration. As it can be noted from the foregoing, there are even several ways to configure each type of connection. You still have to decide for yourself how to use them.