

Users often make mistakes or infect computer viruses. After that, the system works with malfunctions or does not load at all. In this case, it is necessary to prepare for similar errors or viral attacks in advance. You can do this by creating an image of the system. In this article, we will analyze the process of its creation in detail.
Create an image of the Windows 7 system
The image image is needed to in order to roll back the system exactly to the state in which it was during the image creation. This process is carried out using standard Windows tools, a little different in two ways, let's consider them.Method 1: Disposable creation
If you need a disposable copy creation, without subsequent automatic archiving, then this method is ideal. The process is performed very simple, for this you need:
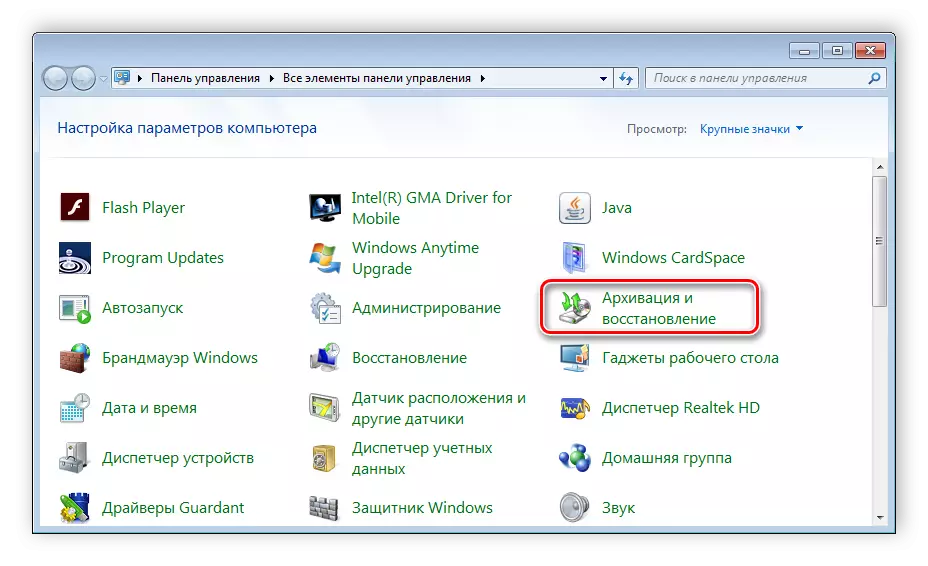
- Click "Start" and go to the control panel.
- Log in to the "Archiving and Recovery" section.
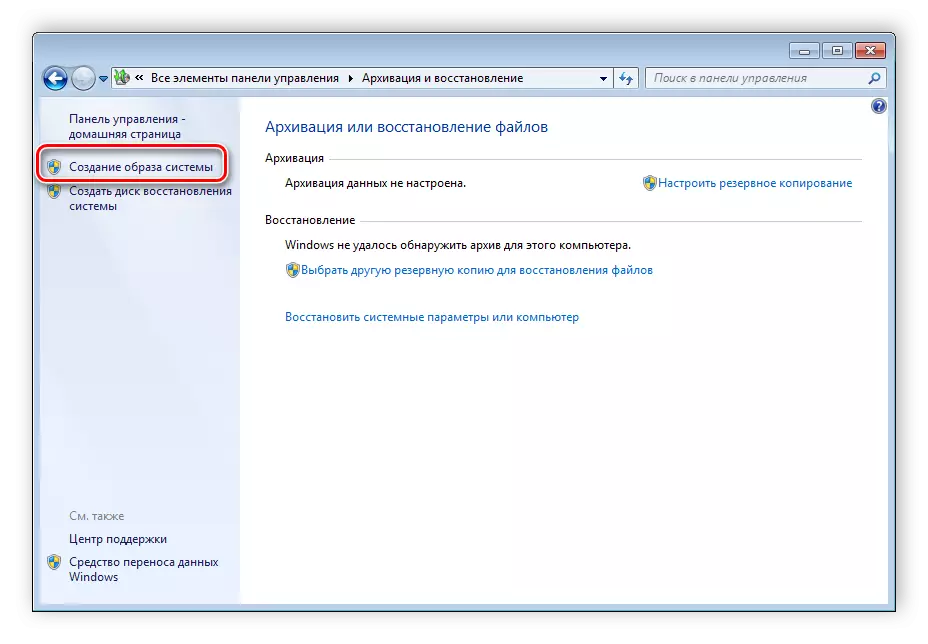
- Click on "Creating a System Image".
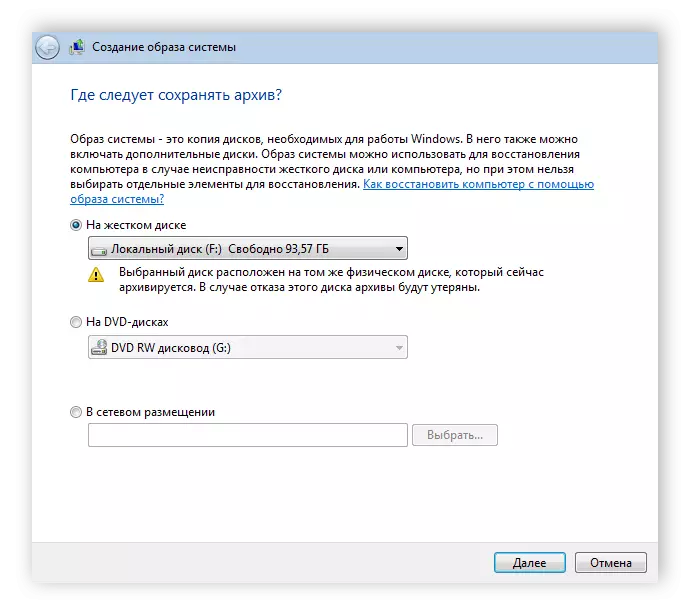
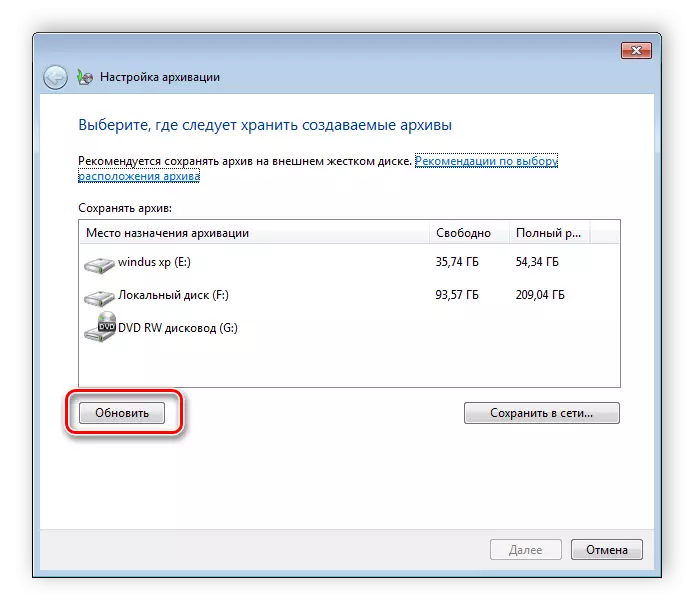
- Here you will need to choose a place where the archive will be stored. A flash drive is suitable or an external hard disk, as well as the file can be saved on the network or on the second partition of the hard disk.
- Check the checkboxes for archiving and click Next.
- Make sure the data entry is correct and confirm with archiving.


Now it remains only to wait for the end of the archiving, and this is completed on this copy of the system. It will be stored in the specified location in the folder under the name "WindowsImageBackup".
Method 2: Automatic Creation
If you need that the system creates the image of Windows 7 at a certain period of time, we recommend using this method, it is also carried out using standard system tools.
- Perform steps 1-2 from previous instructions.
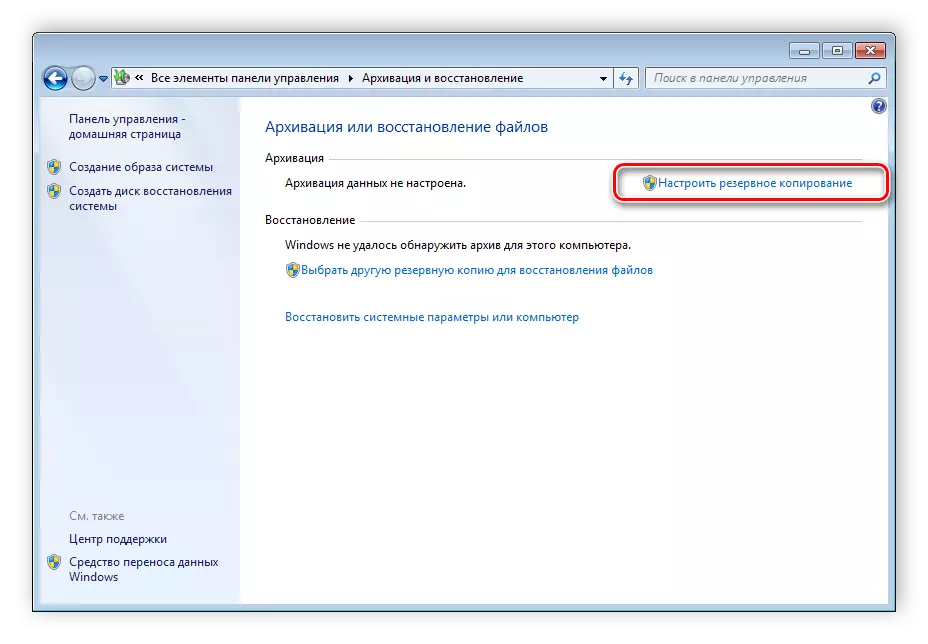
- Select "Configure Backup".
- Specify the place where the archives will be stored. If the connected drive is missing, then try updating the list.
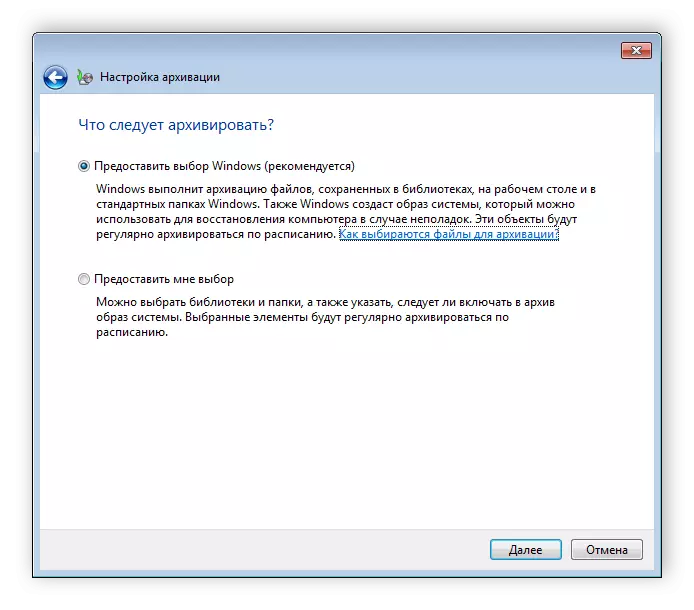
- Now you need to specify that you should archive. By default, Windows itself chooses files, but you can choose the necessary one.
- Tick the checkbox all the necessary objects and click "Next".
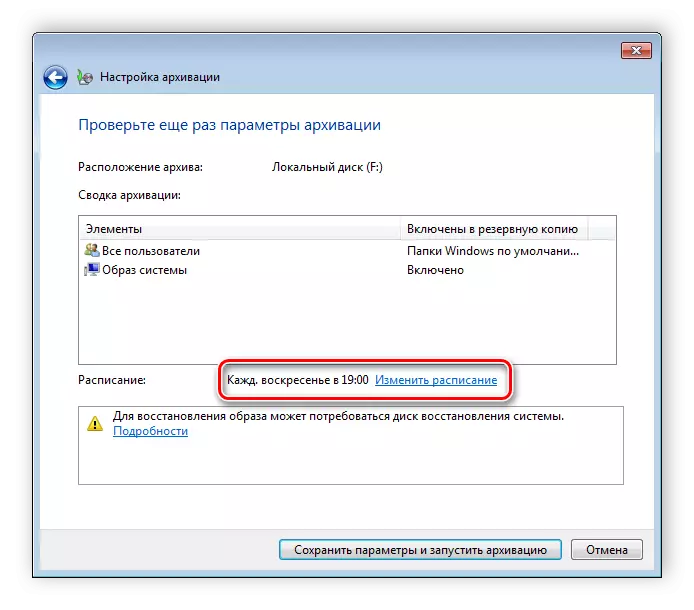
- The next window features a schedule change. Click on "Change Schedule" to go to the dates.
- Here you specify the days of the week or daily image creation and the exact time of the beginning of the archive. It remains only to make sure that the installed parameters are correct and save the schedule. On this, the whole process is over.


In this article, we have disassembled two simple standard ways to create an image of the Windows 7 system. Before starting the schedule, or create one image, we recommend that you make sure that the necessary free space on the drive, where the archive will be placed.
See also: How to create a recovery point in Windows 7