
Any modern motherboard is equipped with an integrated sound card. The quality of recording and playing sound with this device is far from perfect. Therefore, many PC owners conduct an upgrade of equipment by setting in a PCI slot or a separate internal or outer sound fee with good characteristics in the USB port.
Turn off the integrated audio card in BIOS
After such a hardware update, sometimes there is a conflict between the old built-in and new installed device. Turn off the correctly integrated audio card in Windows Device Manager is not always possible. Therefore, it becomes necessary to do it in the BIOS.Method 1: AWARD BIOS
If the phoenix-award firmware is installed on your computer, then a little refreshing the knowledge of the English language and begin to act.
- We make a reboot of the PC and press the BIOS call key on the keyboard. In the version of Award, this is most often DEL, options from F2 to F10 and others are possible. A hint appears at the bottom of the monitor screen. You can see the necessary information in the description of the motherboard or on the manufacturer's website.
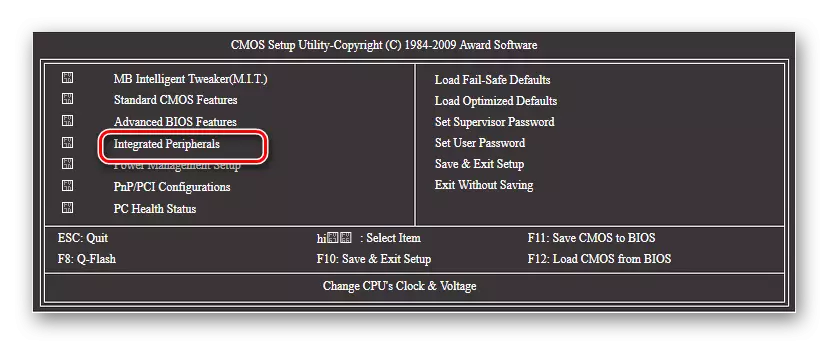
- Throws the arrow keys to move on the "Integrated Peripherals" string and press ENTER to enter the section.
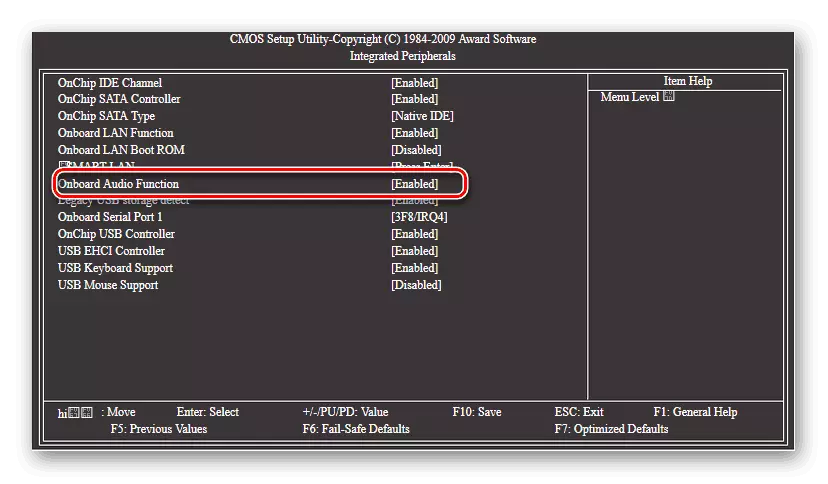
- In the next window we find the "Onboard Audio Function" string. Install the "Disable" value opposite this parameter, that is, "off".
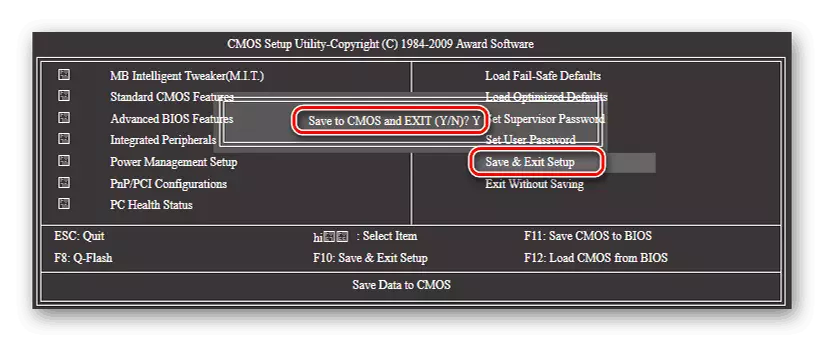
- We save the settings and exit from the BIOS by pressing the F10 or selecting "Save & Exit Setup".
- Mission accomplished. The built-in sound card is disabled.
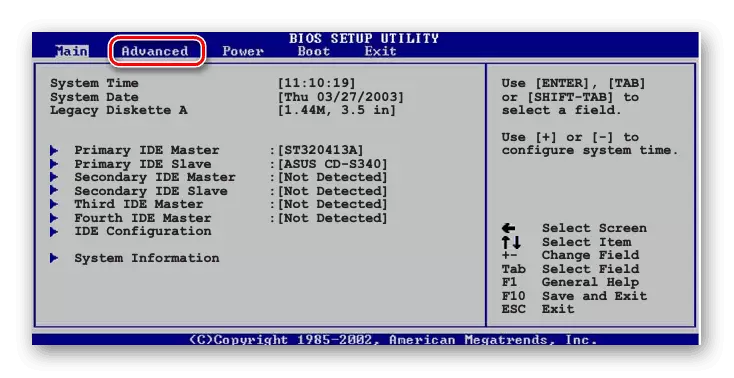
Method 2: AMI BIOS
There are also BIOS versions from American Megatrends Incorporated. In principle, the appearance of AMI is not very different from Award. But just in case, consider this option.
- We enter BIOS. AMI most often serves as the F2 or F10 keys. Other options are possible.
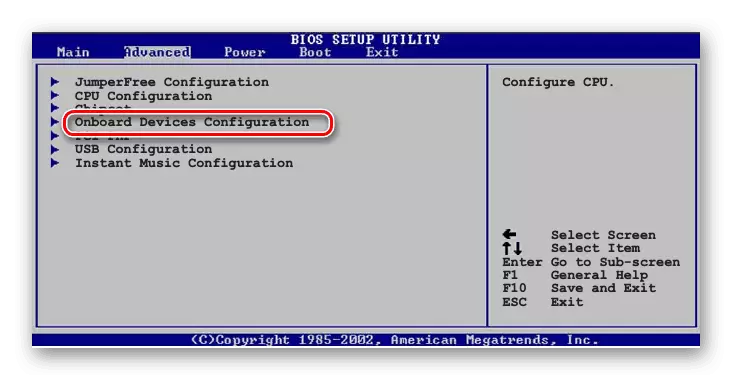
- In the BIOS top menu, go to the Advanced tab.
- Here you need to find the "Onboard Devices Configuration" parameter and enter it by pressing ENTER.
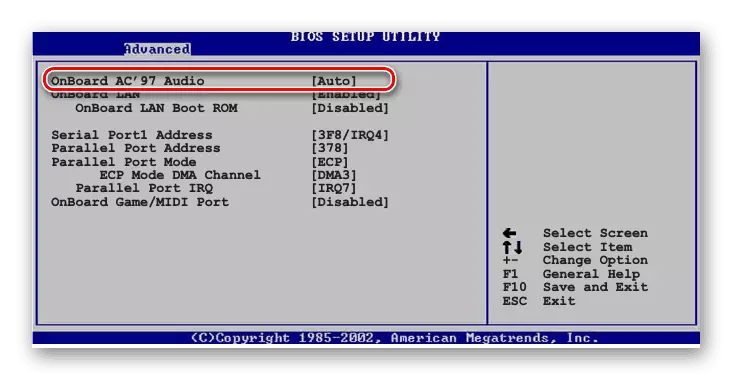
- On the Integrated Device page we find the "Onboard Audio Controller" or "Onboard AC97 Audio" string. We change the state of the audio controller on "disable".
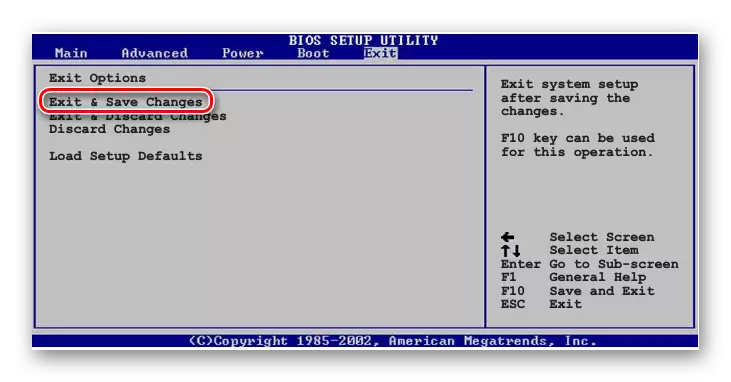
- Now we move to the "EXIT" tab and select "EXIT & SAVE CHANGES", that is, output from the BIOS with the preservation of changes made. You can use the F10 key.
- The integrated audio card is safely disabled.
Method 3: UEFI BIOS
On most modern PCs there is an advanced version of BIOS - UEFI. It has a more convenient interface, mouse support, sometimes even there is Russian. Let's see how to turn off the integrated audio card here.
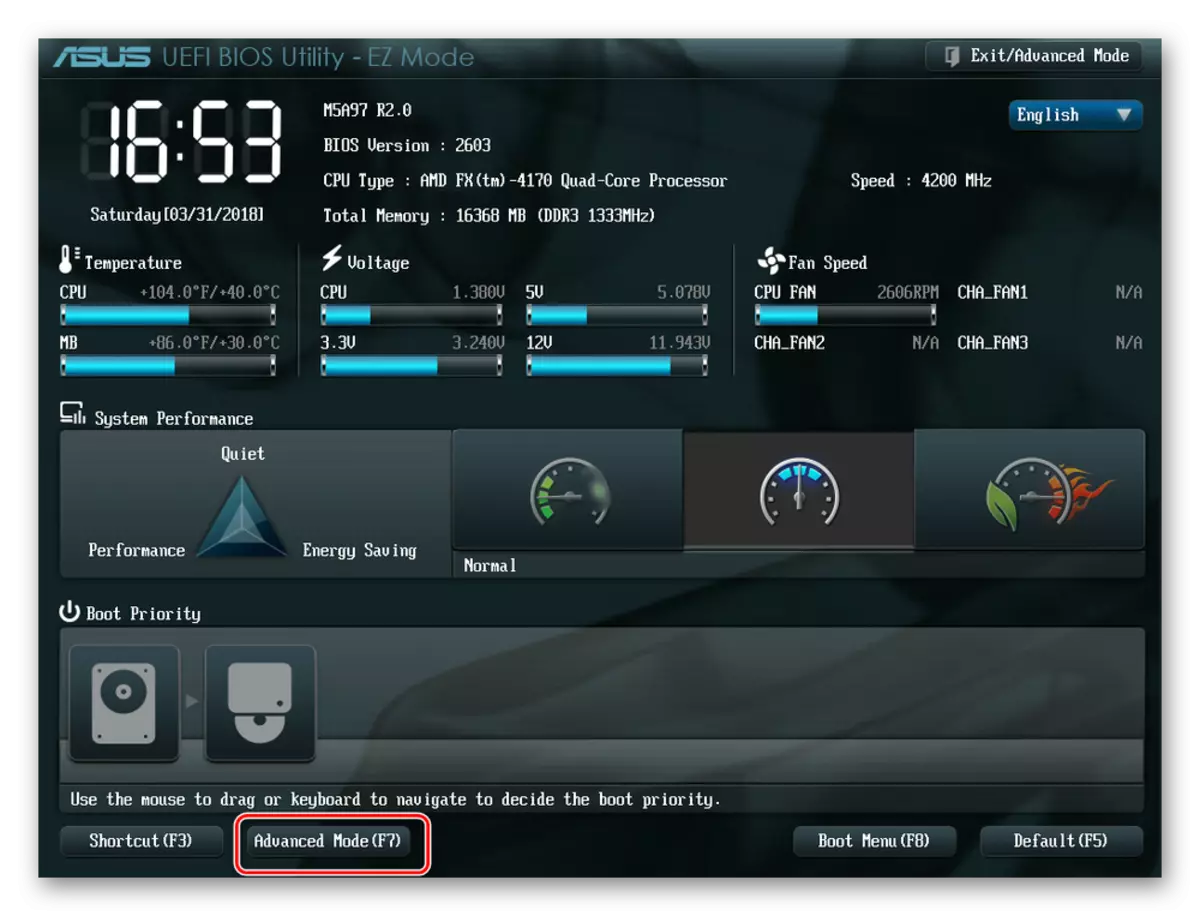
- We enter the BIOS using the service keys. Most often delete or F8. We get to the main page of the utility and choose ADVANCED MODE.
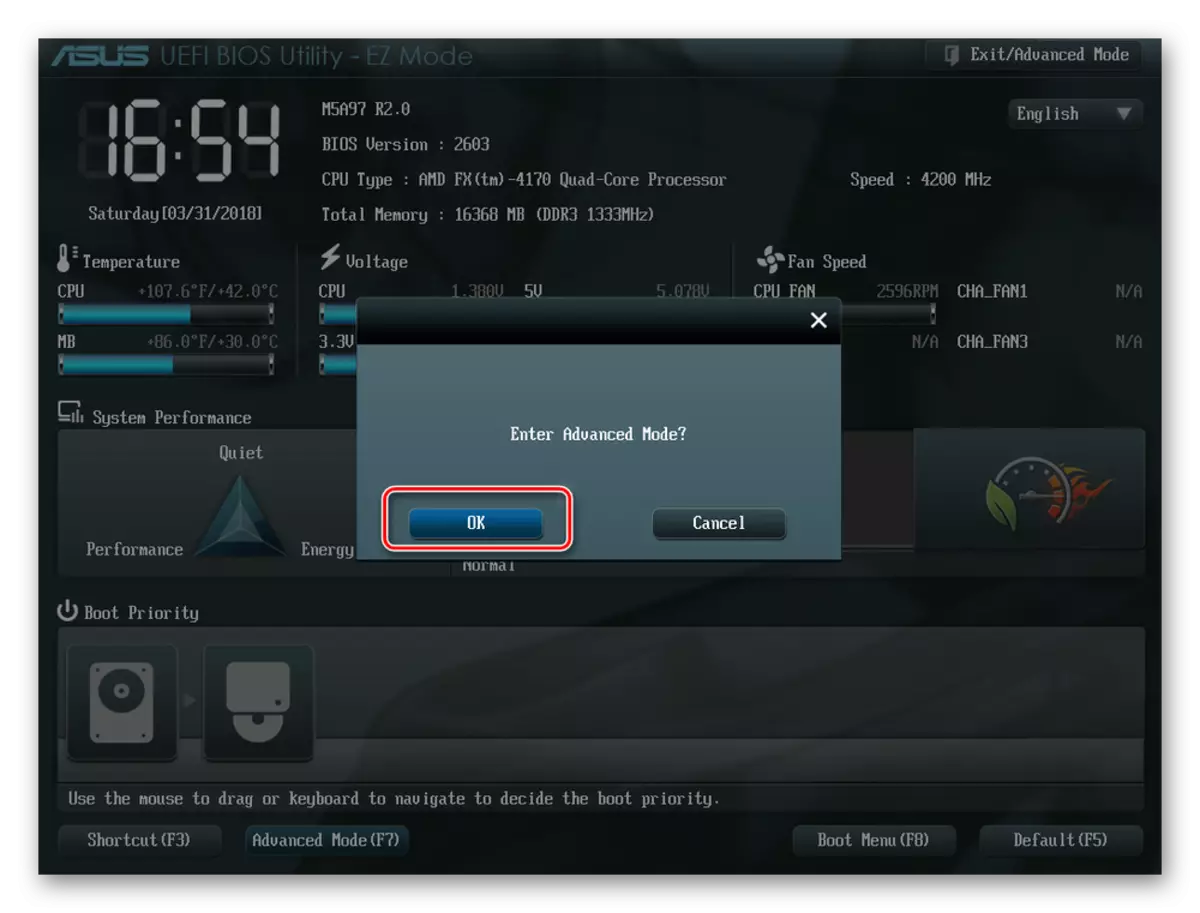
- Confirm the transition to the extended settings with the "OK" button.
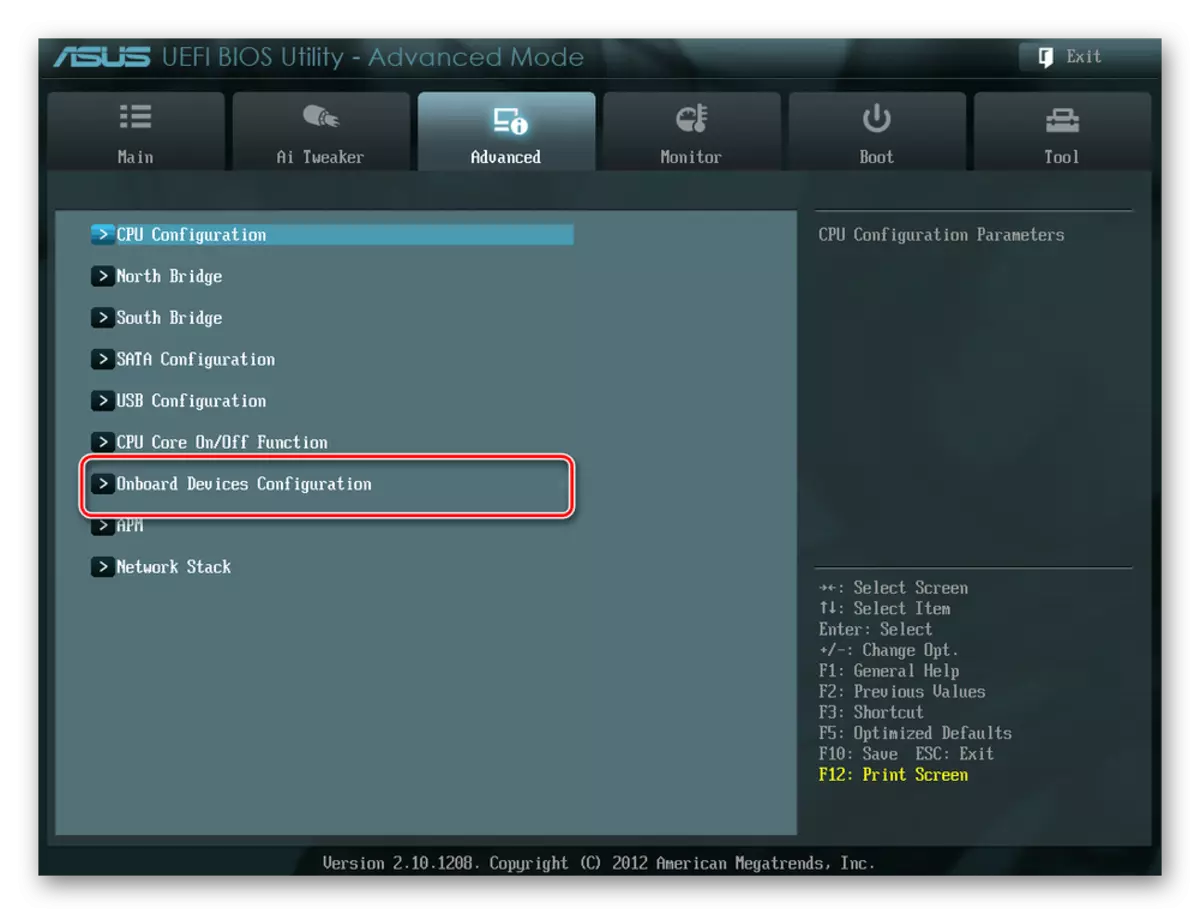
- On the next page, we move to the Advanced tab and select the ONBOARD Devices Configuration section.
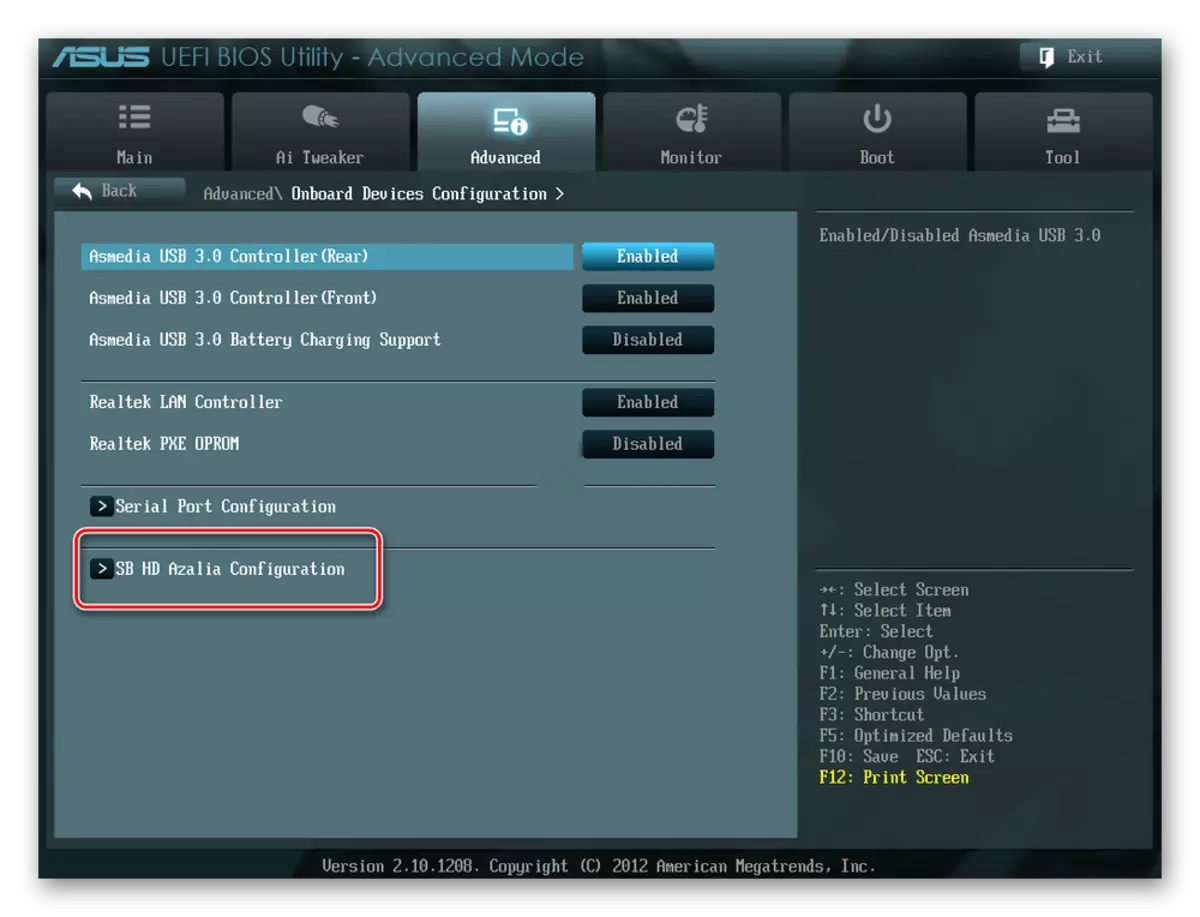
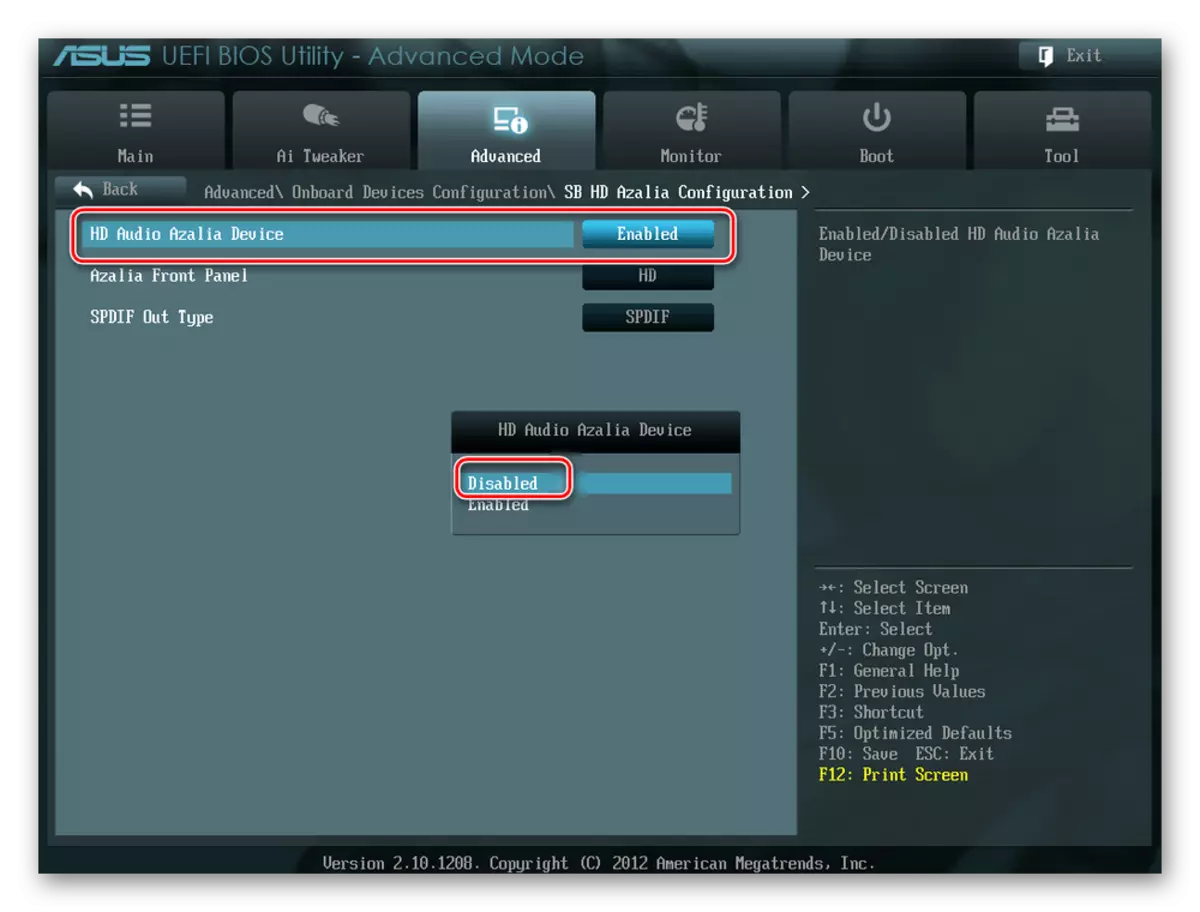
- Now we are interested in the "HD Azalia Configuration" parameter. It can be called simply "HD Audio Configuration".
- In the settings of the audio devices, we change the "HD Audio Device" status on "disable".
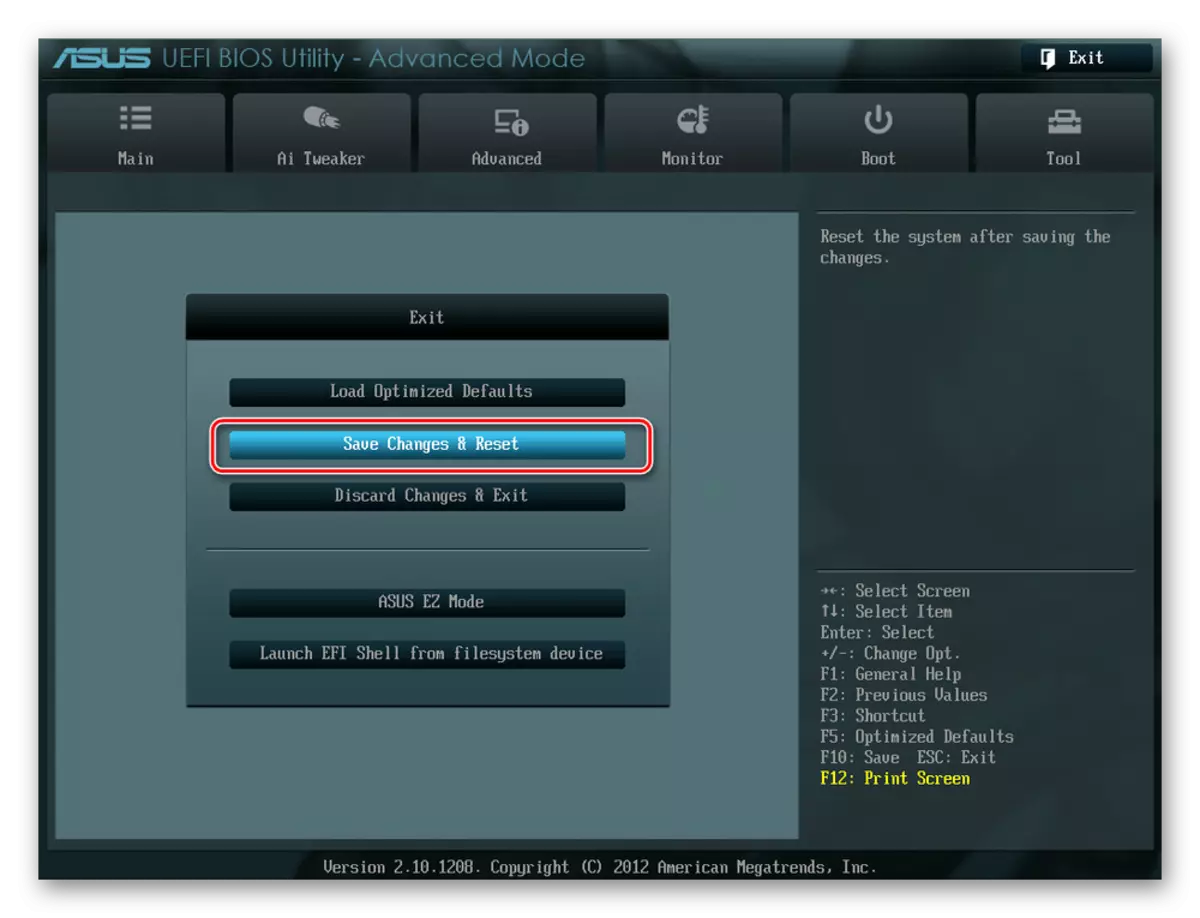
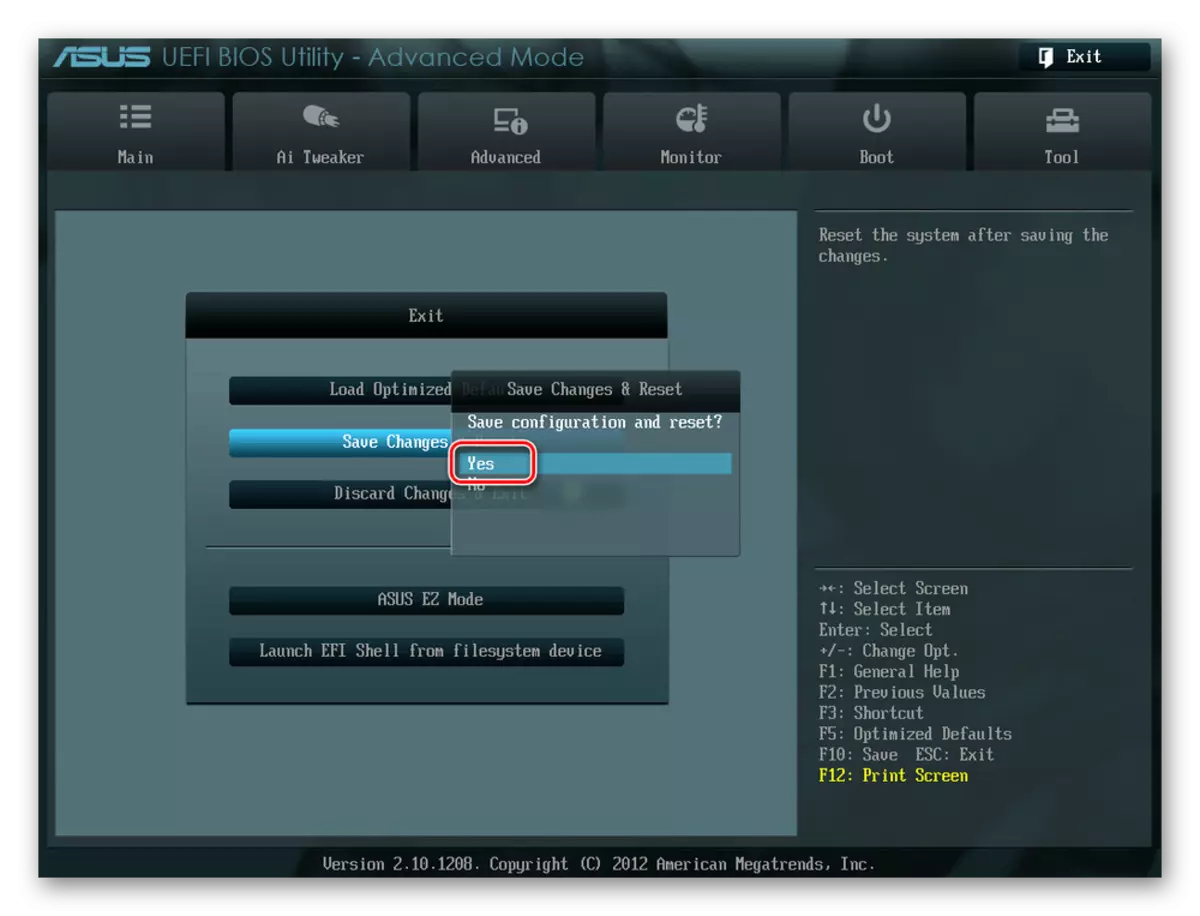
- The built-in sound card is disabled. It remains to save the settings and exit the UEFI BIOS. To do this, press "EXIT", choose "Save Changes & Reset".
- In the window that opens, successfully finish your actions. The computer reboots.
As we can see, turn off the integrated audio device in the BIOS is not at all difficult. But I would like to note that in different versions from various manufacturers, the names of the parameters may slightly differ with the preservation of the general meaning. With a logical approach, this feature of the "sewn" firmware will not complicate the solution of a substituted problem. Just be careful.
See also: turn on the sound in BIOS