I recommend using the new and most relevant instructions for changing the firmware and the subsequent configuration of Wi-Fi routers D-Link DIR-300 REV. B5, B6 and B7 - Configuring the D-Link DIR-300 router
Instructions for setting up the D-Link DIR-300 router with firmware: rev.b6, rev.5b, A1 / B1 is also suitable for the D-Link DIR-320 router
Connecting router
Unpack the purchased device and connect it as follows:
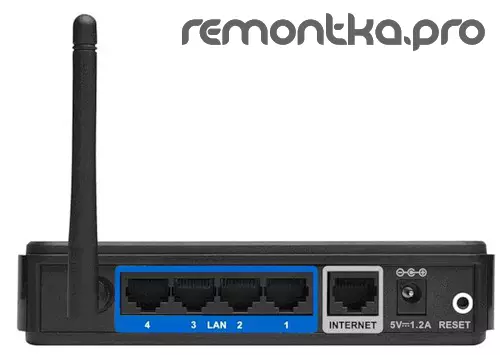
WiFi D-Link Dir 300 Router Round
- Finish the antenna
- In the socket, indicated by the Internet, connect the line of your Internet provider
- In one of the four sockets marked with LAN (no matter which one), connect the attached cable and connect to the computer from which we will configure the router. If the setting is made from a laptop with WiFi or even from a tablet - this cable will not need, all steps of the setup can be performed without wires
- We connect the power cord to the router, waiting for a while until the device boots
- If the router was connected to a computer using a cable - you can start the next setup step, if you decide to do without wires, then after loading the router when the WiFi WiFi module is on in your device, an unprotected DIR network should appear in the list of available networks. 300, to which we should connect.
Setting up router
We start directly to configure your router. To do this, on a computer, laptop or other device, run any Internet browser (Internet Explorer, Mozilla Firefox, Google Chrome, Safari, etc.) and enter the following address in the address bar: 192.168.0.1, press ENTER.
After that, you should see the entry page, and it is different for the same outdoor D-Link routers, because They have different firmware. We will consider the setting at once for three firmware - DIR 300 320 A1 / B1, DIR 300 NRU Rev.B5 (Rev.5B) and DIR 300 Rev.b6.

Login to Set up DIR 300 ReV. B1, DIR-320

Login and password DIR 300 Rev. B5, DIR 320 NRU
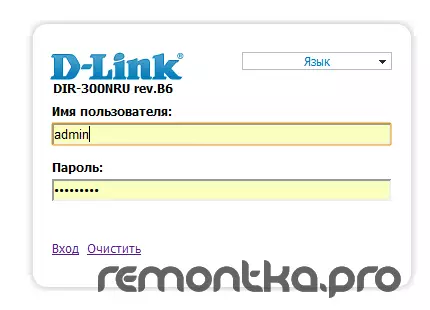
D-LINK DIR 300 REV B6 input page
(If you press the login and password entering the login and password page, check the connection settings used to communicate with the router: in the Internet Protocol properties of version 4 of this connection, it should be specified: to get an IP address automatically, to get the DNS address automatically. Connection settings can be View in Windows XP: Start - Control Panel - Connections - Click Right-click on Connection - Properties, in Windows 7: Click right-click on the network icon on the right at the bottom - Network Management Center and Common Access - Adapter Settings - Right-click Connection Mouse - properties.)
On I enter the username (login) admin page, the password is also an Admin (the default password in various firmware may differ, information about it is usually available on the reverse side of the WiFi router. Other standard passwords are 1234, Password and simply empty field).
Immediately after entering the password, you will be offered to set a new password, which is recommended to do - in order to avoid access to the settings of your router of unauthorized persons. After that, we need to go to the manual configuration mode of the Internet connection in accordance with the settings of your provider. To do this, in the firmware Rev.B1 (orange interface), select Manual Internet Connection Setup, in Rev. B5 Go to the Network / Connection tab, and in the firmware Rev.B6, select manual setting. Then it is necessary to configure the connection parameters themselves directly, which differ for various Internet providers and types of Internet connections.
Configuring VPN Connections for PPTP, L2TP
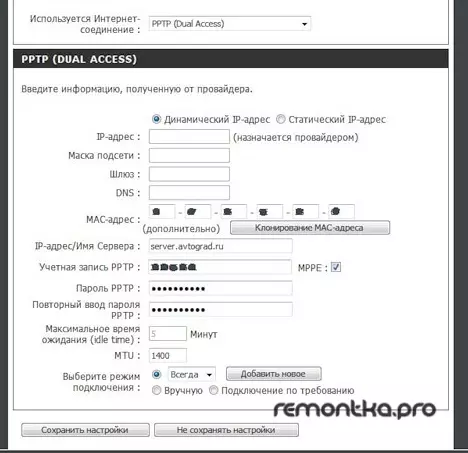
The VPN connection is the most common type of internet connection used in large cities. At the same time, the connection is not used by the modem - there is a cable directly headed into the apartment and ... it is necessary to believe .. already connected to your router. Our task is to make that the router itself "raised VPN", making the "extext" available for all devices connected to it, for this in the B1 firmware in the My Connection Type field or use the Internet connection to select the appropriate connection type: L2TP Dual Access RUSSIA, PPTP Access RUSSIA. If there are no items with RUSSIA, you can simply select PPTP or L2TP
DIR 300 Rev.B1 Connection type selection
After that, you must fill in the Provider Server Name field (for example, for Beeline is a VPN.internet.beeline.ru for PPTP and TP.internet.beeline.ru for L2TP, and the screen shows an example for the provider of Togliatti - Stork - Server .Avtograd.ru). You should also enter the username (PPT / L2TP Account) and Password (PPTP / L2TP Password) issued by your provider. In most cases, you do not need to change any other settings, just save them by pressing the Save or Save button. For the Rev.B5 firmware, we need to go to the Network / Connection tab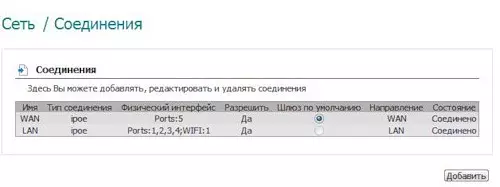
Configuring DIR 300 Rev B5 Connection
Then you need to click the Add button, select the connection type (PPTP or L2TP), in the column Physical interface Select Wan In the Service Name field, enter the address of the VPN server of your provider, then in the respective graphs, specify the username and password issued by your provider to access the network. Press Save. Immediately after that we will return to the list of connections. In order for everything to work as we need to specify the newly created connection as the default gateway and save the settings again. If everything was done correctly, then opposite your connection it will be written that the connection is installed and all that you will remain is to configure the parameters of your access point WiFirouettes DIR-300 NRU N150 from the latter at the time of writing the Rev firmware instructions. B6 are configured approximately. After selecting a manual setting, you must enter the Network tab and click Add, after which you specify the above items described above for your connection and save the connection settings. For example, for Internet provider Beeline, these settings may look as follows: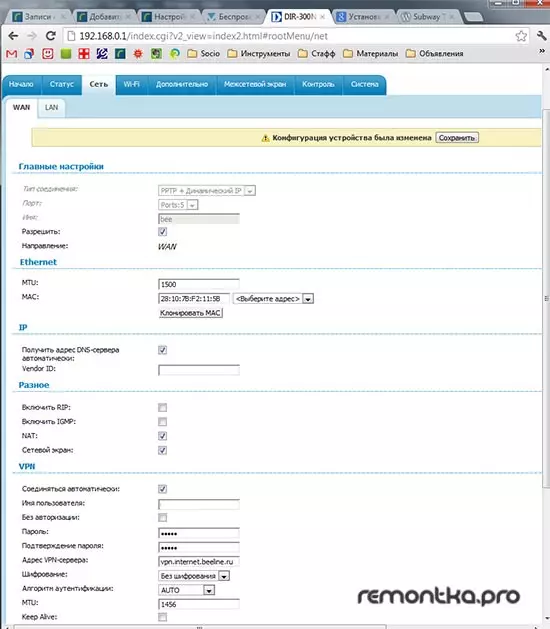
D-Link Dir 300 Rev. B6 Beeline PPTP connection
Immediately after saving the settings, you can access the Internet. However, it is also desirable to configure and configure the WiFi network security settings, which will be written at the very end of this instruction.Configure Internet Connection PPPOE when using ADSL Modem
Despite the fact that ADSL modems are used more often, but this type of connection is still used by many. If you have been spelled out to buy a router to buy a network connection to the Internet, you have been spelled out directly in the modem itself (when you turn on the computer has already had access to the Internet, it is not necessary to start separate connections) - then maybe no special connection settings you are not required: try to go to A site and if everything works - just do not forget to configure the WiFi access point settings, which will be written in the next paragraph. If you specifically start the PPPoE connection (often called high-speed connection), then you should specify its paramets (username and password) in the router settings. To do this, do the same as described in the instructions for the PPTP connection, but by selecting the type you need - PPPoE by entering the name and password provided by the Internet provider. The server address, in contrast to the PPTP connection, is not specified.WiFi Access Point Setup
To configure WiFi Access Parameters, go to the appropriate tab on the router settings page (called WiFi, Wireless Network, Wireless LAN), Specify the name of the SSID access point (this is the name that will be displayed in the list of available access points), authentication type (WPA2 is recommended -Personal or WPA2 / PSK) and password to the WiFi access point. Save the settings and can use the Internet without wires.
Have questions? WiFi router does not work? Ask in the comments. And if this article helped you - share with her friends, using the social network icons below.