

In this article we will talk about such a small prostrated problem as the appearance on the inscription screen "Input Not Supported" on the screen. It may occur as when the computer is turned on and after installing some programs or games. In any case, the situation requires a solution, since it is impossible to use a PC without output.
Troubleshooting "INPUT NOT Supported" error
To begin with, we will understand the reasons for the appearance of such a message. Actually, it is only one - the permission set in the settings of the video driver, the screen system parameters block or in the game is not supported by the monitor used. Most often, the error appears when changing the latter. For example, you worked on a monitor with a resolution of 1280x720 with a screen update frequency of 85 Hz, and then for some reason, connected to the computer another, with a large resolution, but 60-hertz. If the maximum operating frequency of updating the newly connected device is less than the previous one, then we will get an error.Less often this message occurs after installing programs forcingly exposing its frequency. In most cases, these are games, mostly old. Such applications can cause a conflict that leads to the fact that the monitor refuses to operate at these parameter values.
Next, we will analyze options for eliminating the causes of the "INPUT NOT Supported" message.
Method 1: Monitor Settings
All modern monitors have pre-installed software that allows you to perform various settings. This is done using the on-screen menu that is called by the corresponding buttons. We are interested in the option "AUTO". It can be located in one of the sections either have its own separate button.
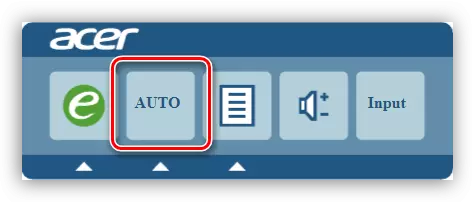
The minus of this method is that it works only when the monitor is connected to an analog method, that is, through a VGA cable. If the connection is digital, this function will be inactive. In this case, the reception will help, which will be described below.
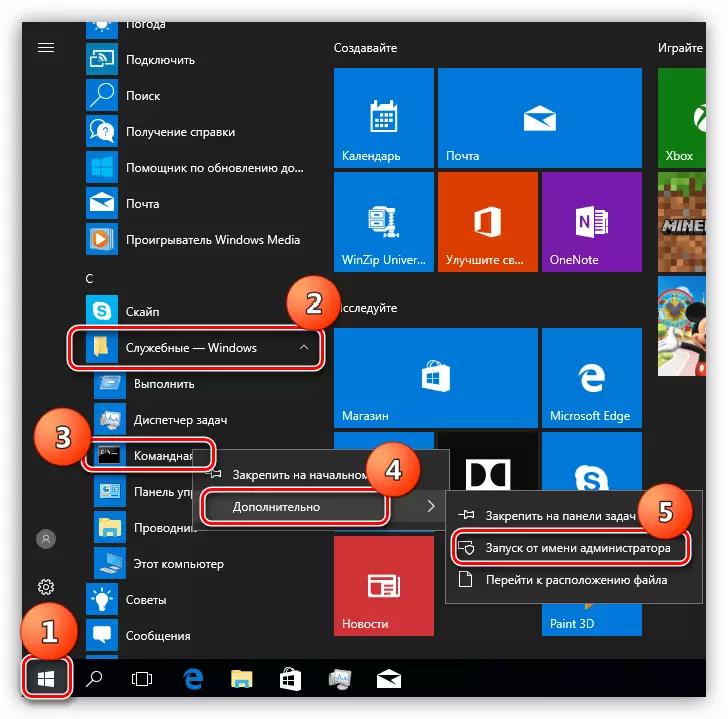
To disable the boot menu, run the "Command Line" on behalf of the administrator. In Windows 10, this is done in the "Start - Service - Command Line" menu. After pressing the PCM, select "Optional - start on behalf of the administrator."
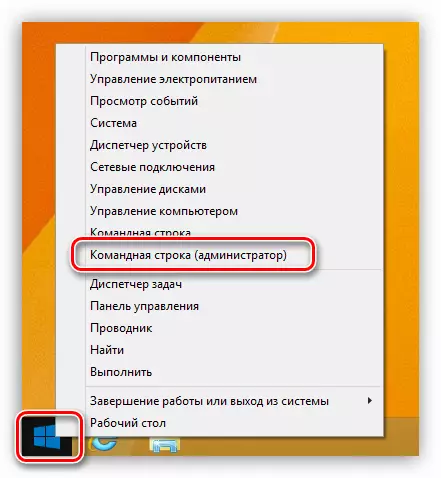
In the "eight" press the PKM on the "Start" button and select the corresponding item of the context menu.
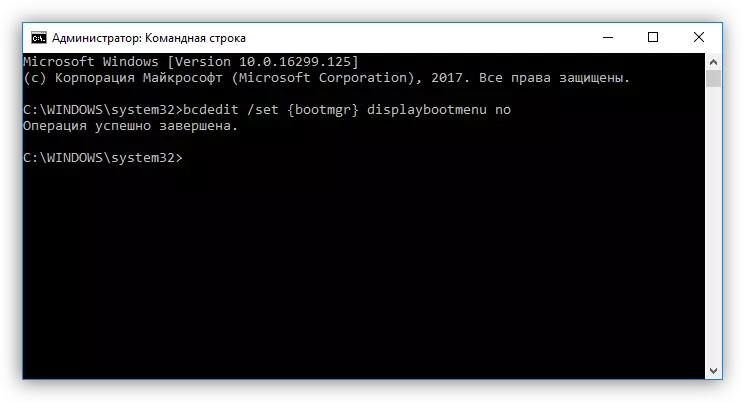
In the console window, enter the command specified below and press ENTER.
BCDEDIT / SET {bootmgr} displaybootmenu no
If there is no possibility to use the disk, then you can make the system think that the download fails. It is just the promised trick.
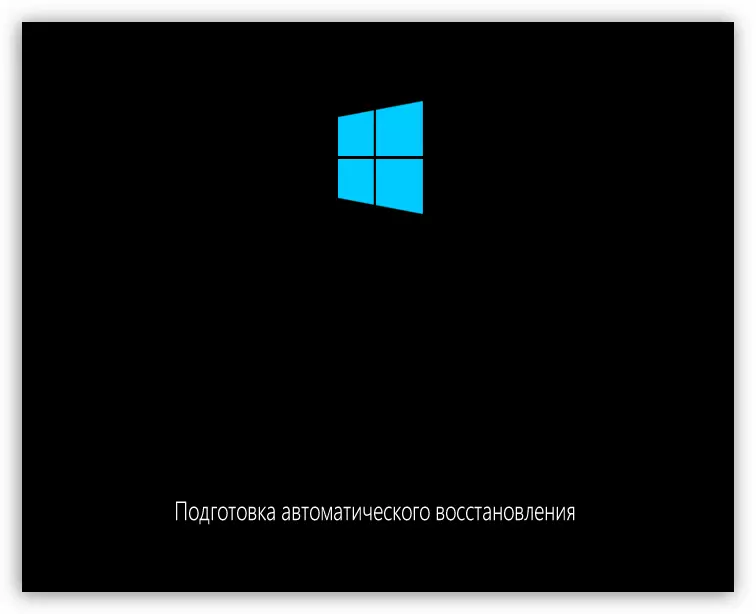
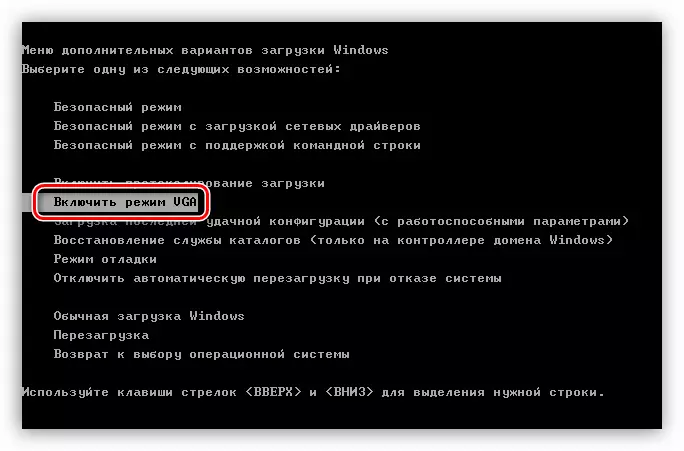
- When the OS start, that is, after the boot screen appears, you need to click the "Reset" button on the system unit. In our case, the signal to press will be the appearance of an error. This means that the OS start loading components. After this action is performed 2-3 times, a bootloader will appear on the screen with the inscription "Preparation of automatic recovery".
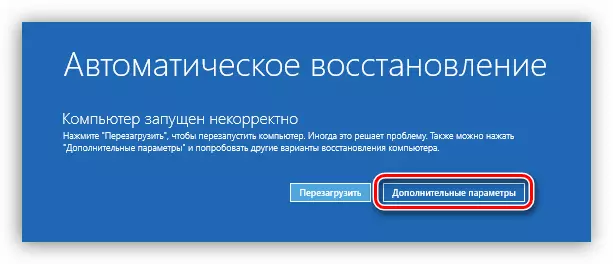
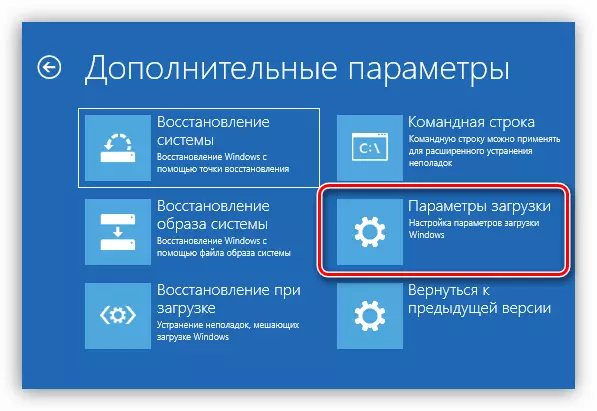
- We wait for the download and click the "Advanced Settings" button.
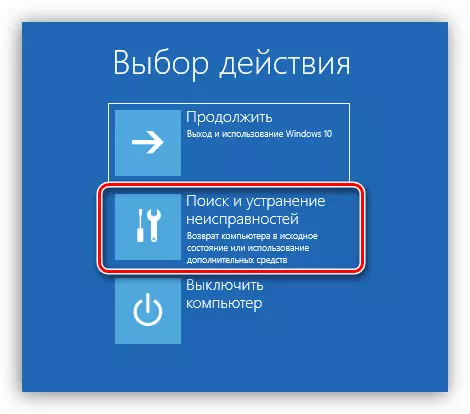
- We go to "Troubleshooting". In Windows 8, this item is called "Diagnostics".
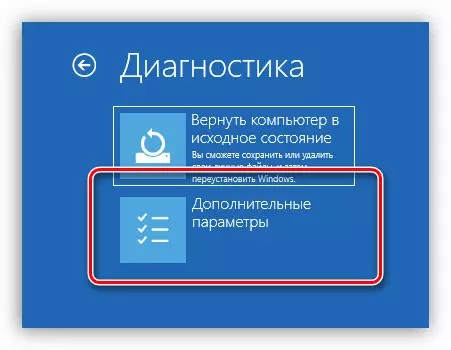
- Repeat the "Advanced Parameters" item again.
- Next, click "Download Options".
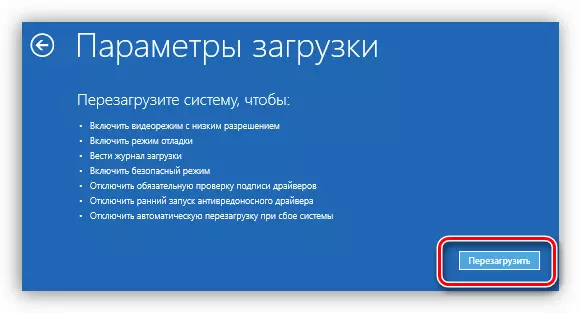
- The system will offer to reboot to give us the ability to select the mode. Here we click the "Restart" button.
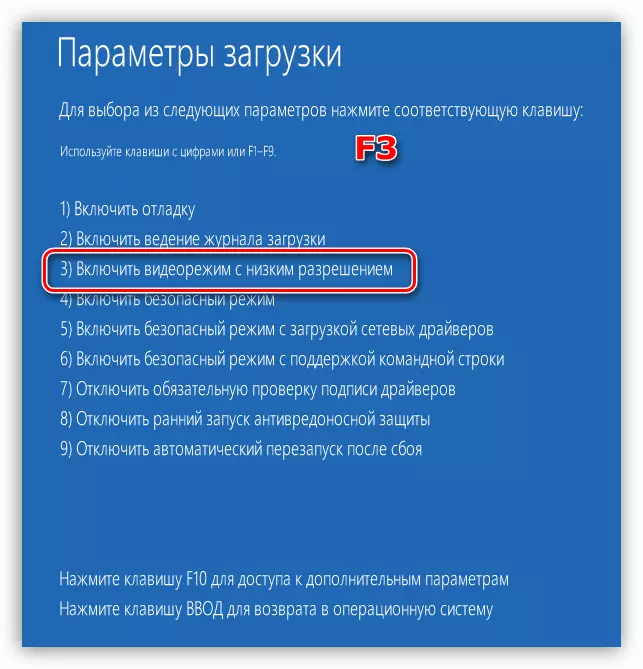
- After restart using the F3 key, select the desired item and wait for Windows downloads.
Windows 7 and XP
You can run the "seven" with such parameters by pressing the F8 key when loading. After that, this is such a black screen with the ability to select mode:
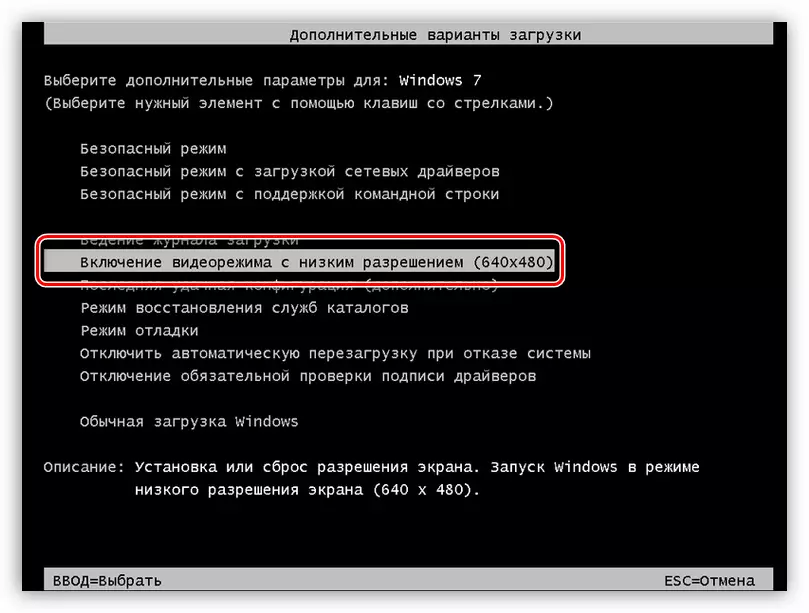
Or such, in windows xp:
Here, we select the desired mode and press ENTER.
After downloading, you must reinstall the video card driver with the required removal pre-it.
More: reinstall video card drivers
If you use the means described in the article above, it is not possible, the driver must be removed manually. To do this, use the "Device Manager".
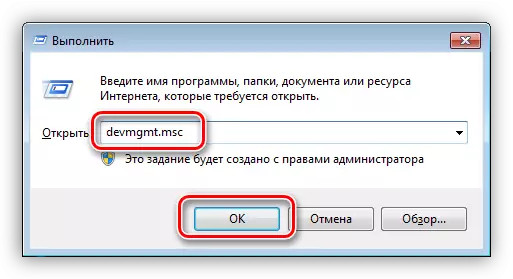
- Press the combination of the Win + R keys and enter the command
Devmgmt.msc.
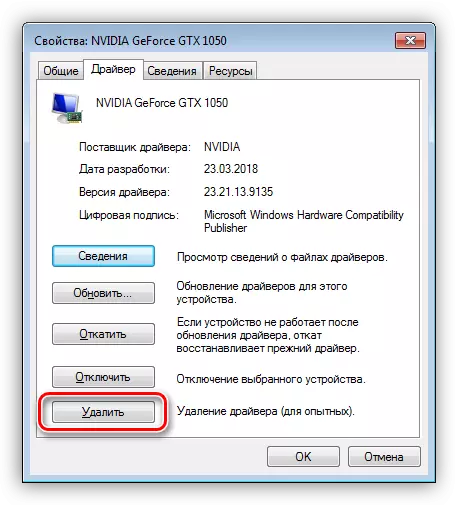
- Select the video card in the corresponding branch, click on it PCM and select the item "Properties".

- Next, on the "Driver" tab, click the Delete button. We agree with the warning.
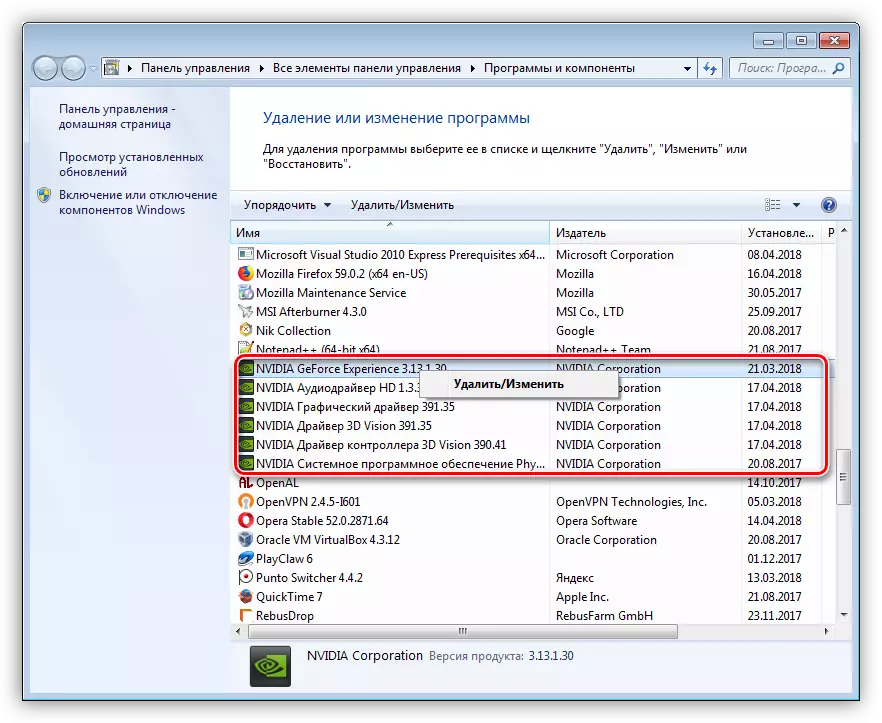
- It is also desirable to uninstall and additional software supplied with the driver. This is done in the "Programs and Components" section, which can be opened from the same line "Run"
appwiz.cpl
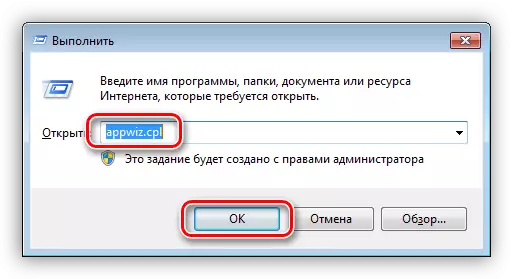
Here we find an application, click on it by PKM and choose "Delete".
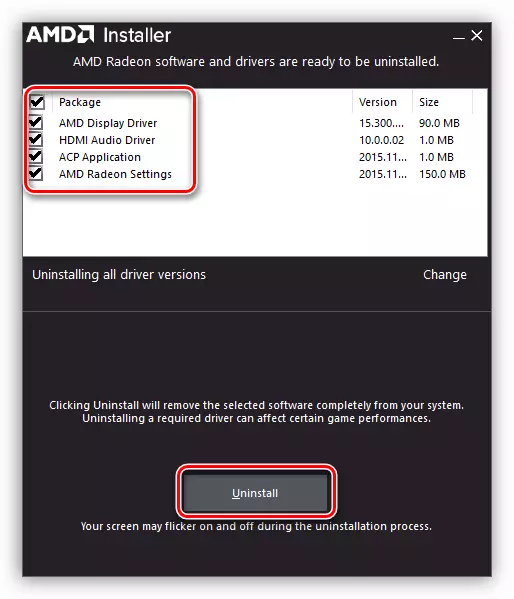
If the card is from "red", then in the same section you need to select the program "AMD Install Manager", in the window that opens, put all the daws and click "Delete" ("Uninstall").
After uninstalling software, reboot the machine and re-install the video card driver.
Read more: How to update the video card driver on windows 10, windows 7
Conclusion
In most situations, the presented recommendations allow you to get rid of the "Input Not Supported" error. If nothing helps, then you need to try to replace the video card on knowingly good. In the event that the error is repeated, you will have to contact your problem to the specialists of the service center, it is possible that the monitor itself is fault.