Method 1: Standard Tools
To create an inscription in history, it is possible to restrict ourselves to standard tools, using a separate text of adding text, drawing tools or stickers. Each tool is directly related to the editor of Storsith from the official application.Option 2: Drawing Tools
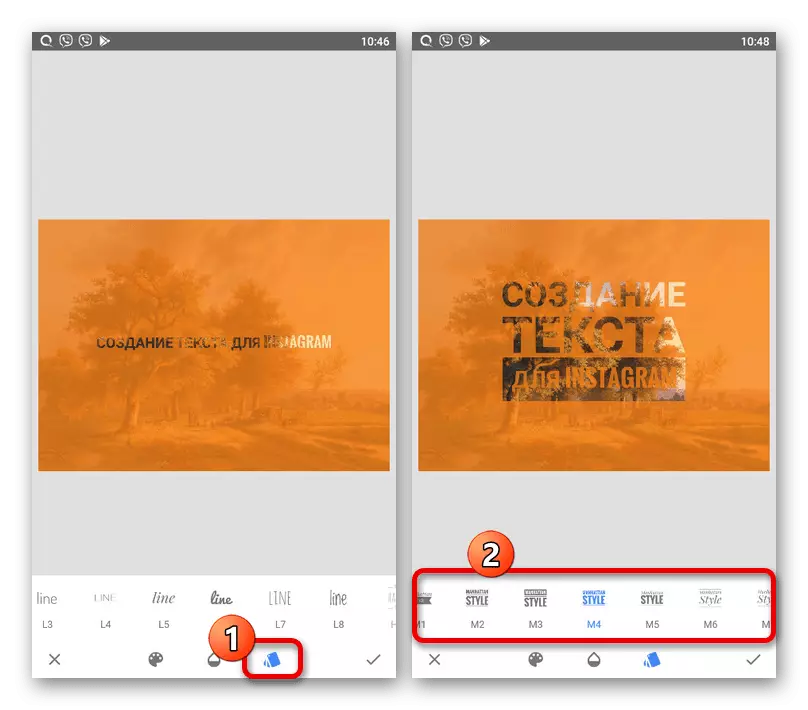
- To create text in history using drawing tools, you should prepare the contents and touch the button specified in the screedness in the application editor. After that, you can immediately choose one of the brushes, set the color, and also resize.
- You can change different parameters directly in the process of writing text. Unfortunately, there are no any auxiliary elements for creating inscriptions.

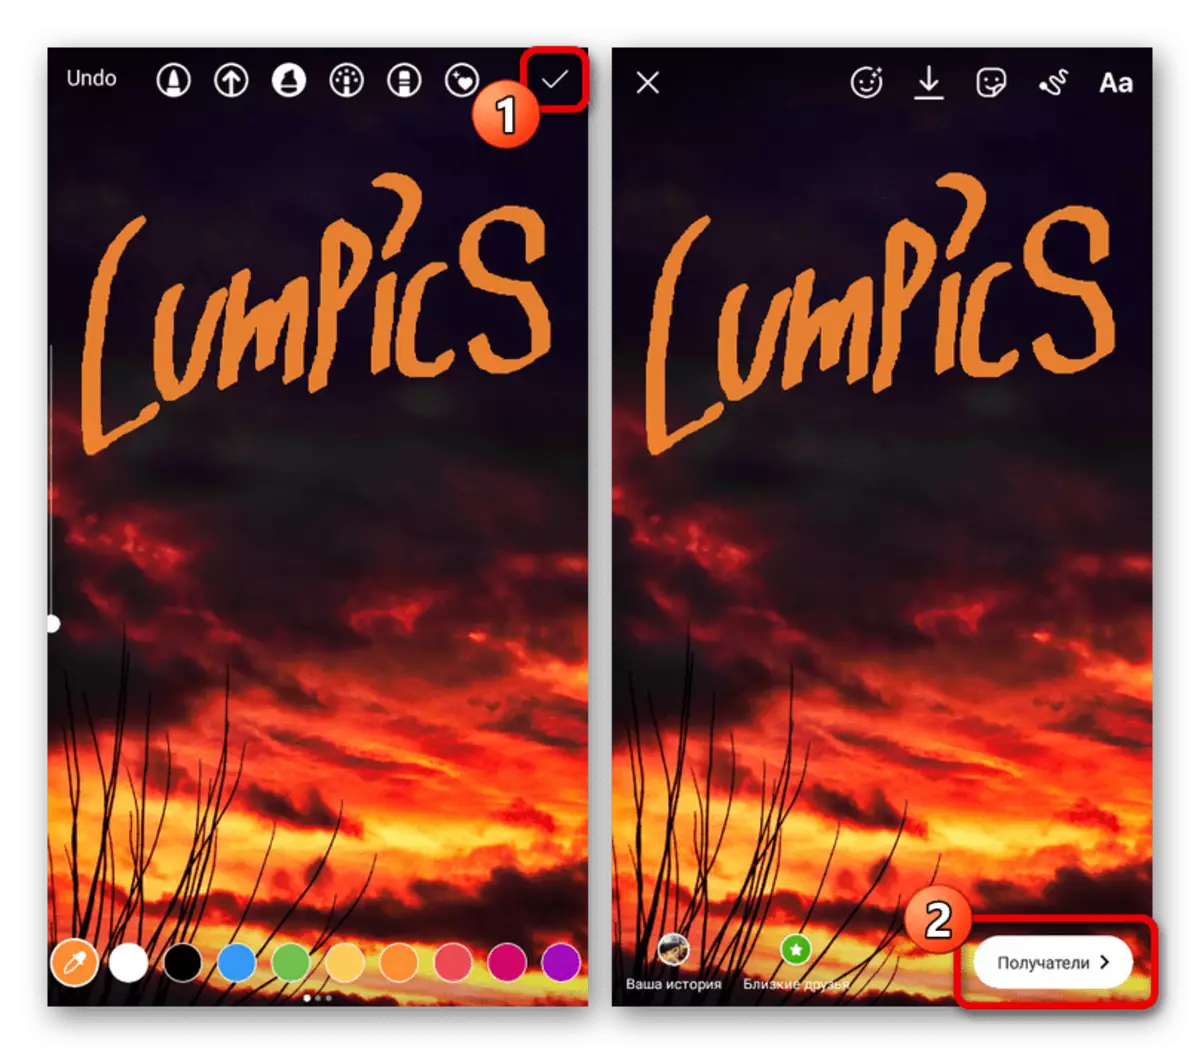
As before, saving is made using a tick in the corner of the screen. At the same time, before the Publication of Storsith, you can always return to the editor and make changes.
Option 3: Stickers
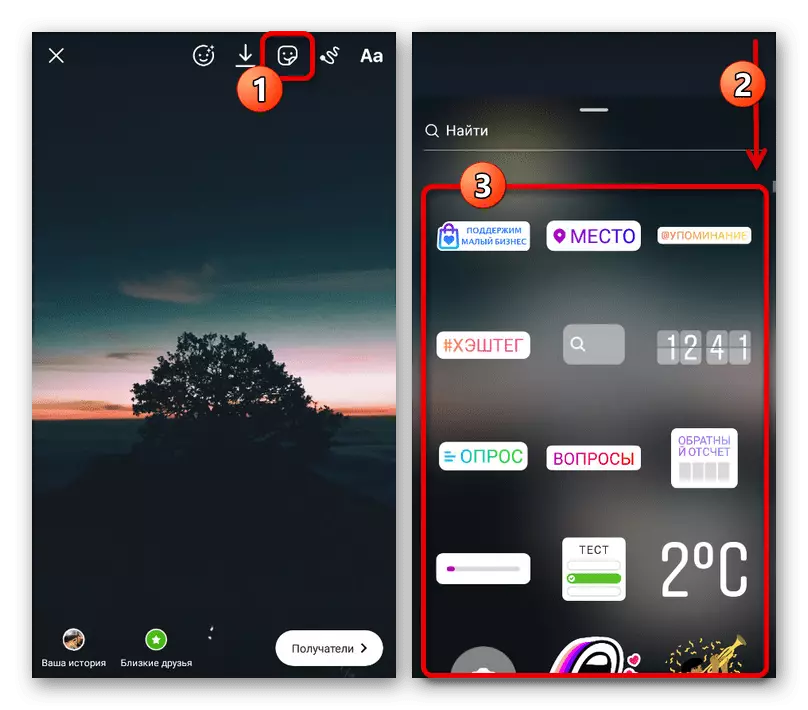
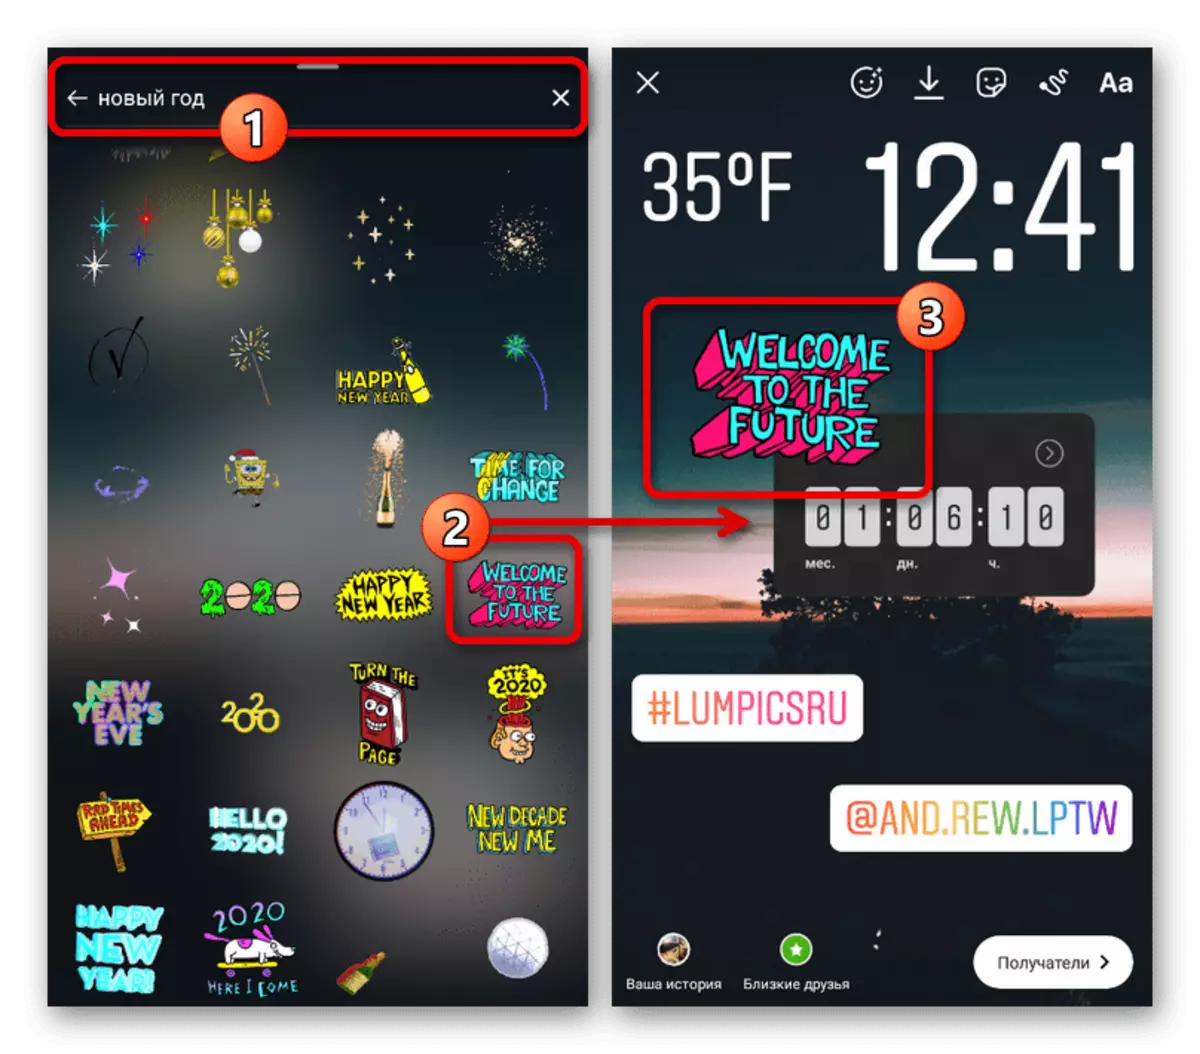
- The last way to add inscriptions is to use stickers provided by the application in huge quantities free of charge, some of them contain thematic text. To go to the full list, tap the sticker icons on the top panel and select the appropriate option in the pop-up window.
- If you want to manually specify the text that will be the optimal poll sticker, hashteg, mention, question, or test. Each of the options has a number of eigenous settings like changing color touch, and can also be placed anywhere in history.
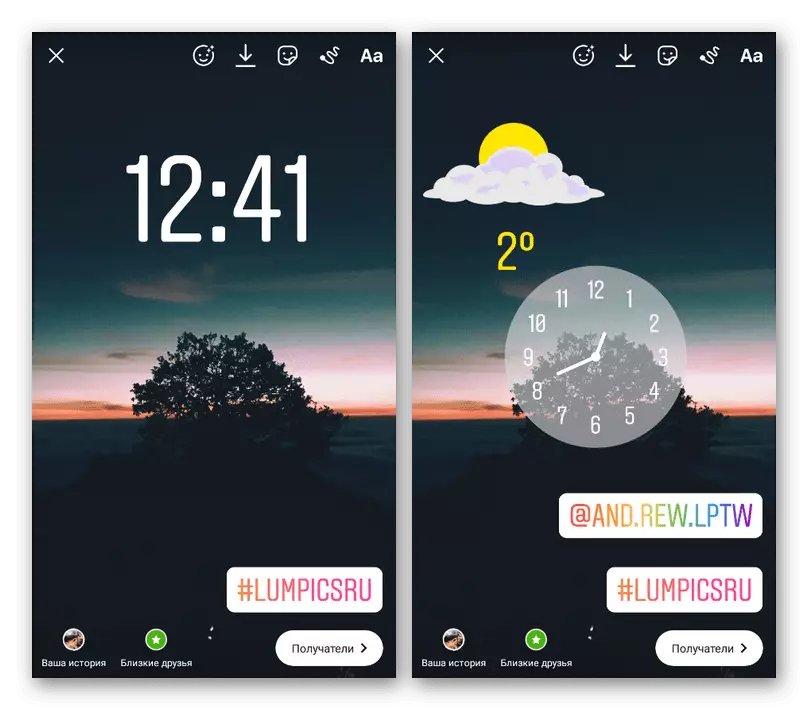
- As an additional solution, you can resort to search in the section with stickers to find a specific signature. As a rule, there are only animated inscriptions in English, edit which cannot be edited.
Saving the end result in this case is not required, as the placement is made immediately on the editor's main page. At this, you should not forget that the presented methods can be combined with each other.
Method 2: third-party applications
If you are not satisfied with the standard instagram capabilities, you can always use third-party Android or iOS applications that provide various design styles. We will only consider two completely different options, however, there are many alternative programs on the expanses of the Plate Market and the App Store.Option 1: fontify
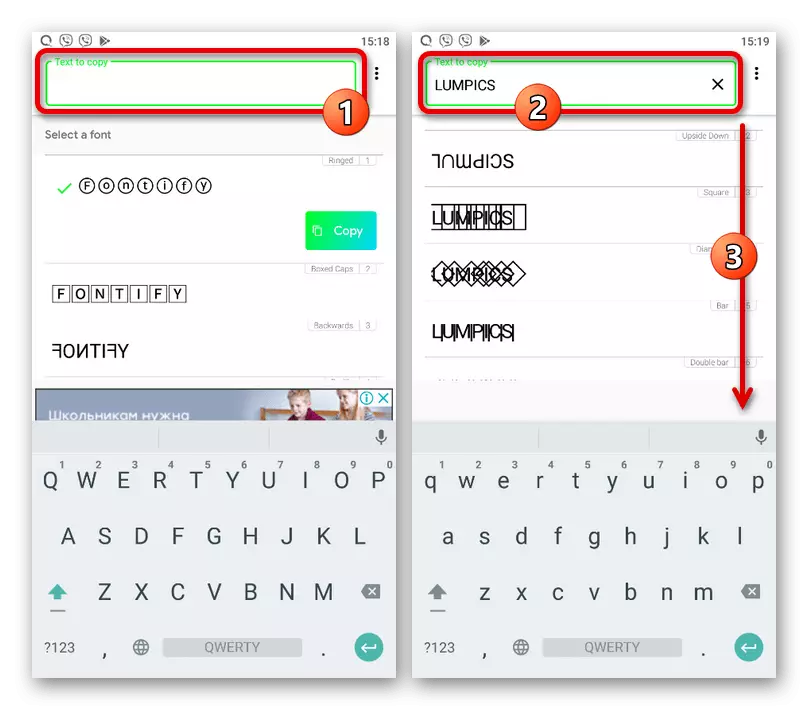
- This miniature application is a library of various fonts that allows you to create and copy the text that is subsequently used in the official client. To use the program, make installation on one of the links presented below and, after opening, fill in the Text to Copy text box.
Download fontify from Google Play Market
Download fontify from App Store
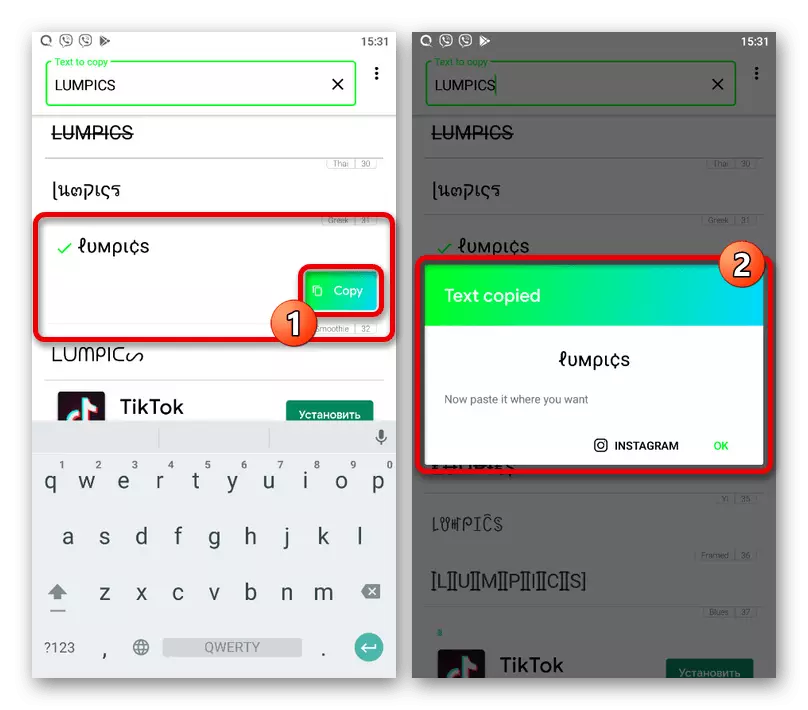
- From the list of available options, select the appropriate row with a single touch of the corresponding line. After that, click "Copy" and make sure that the "Text Copied" pop-up notification appears on the screen.
- Create or go to the pre-prepared story in Instagram, select the "Text" tool by analogy with the first way of the instruction and hook any screen location for a few seconds. To add copied characters, use the "Paste" button above the text entry field.
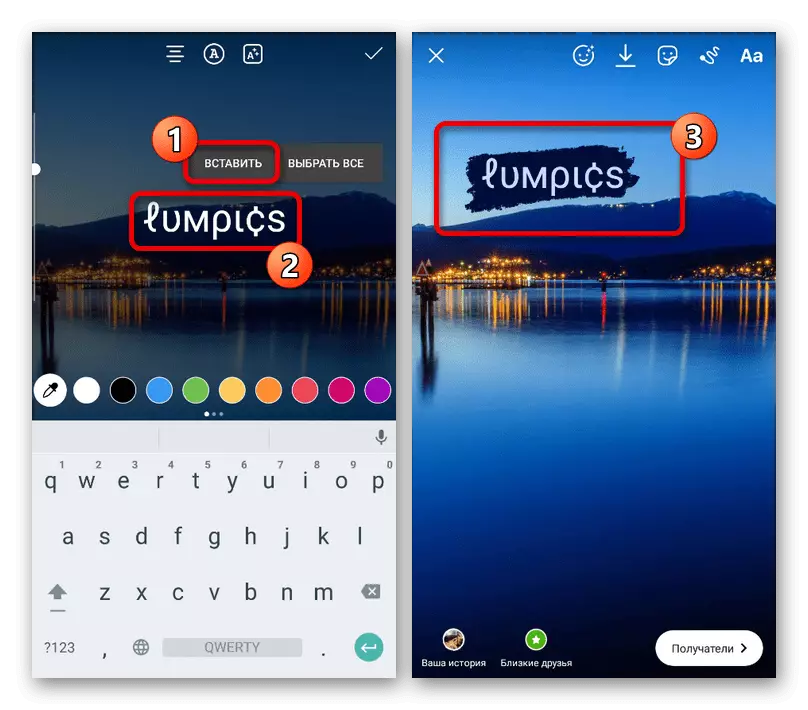
The screen displays the text in the style that was selected through the software in question. Of course, you can without restrictions to apply different effects, whether it is positioning, scaling, color change, and so on.
Option 2: Snapseed
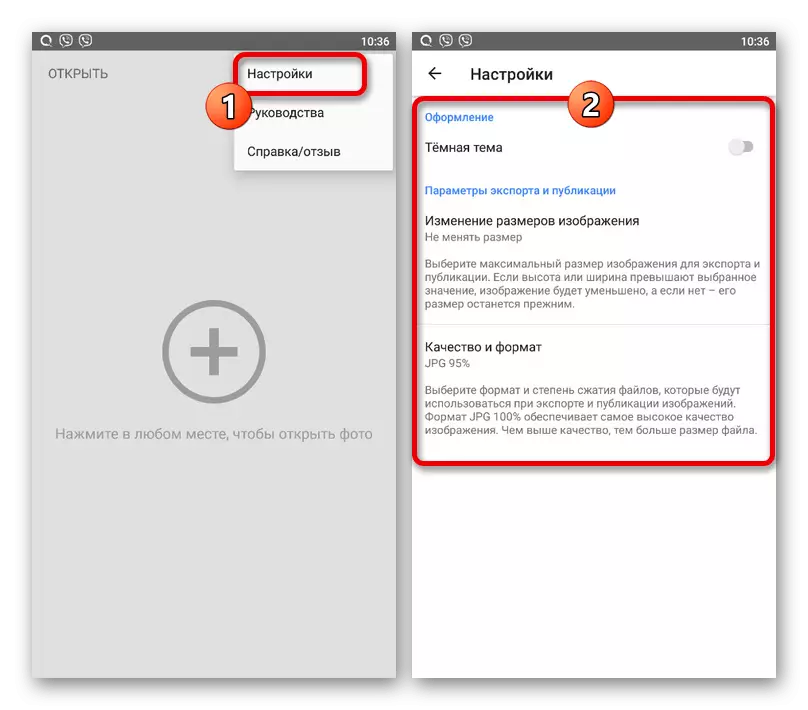
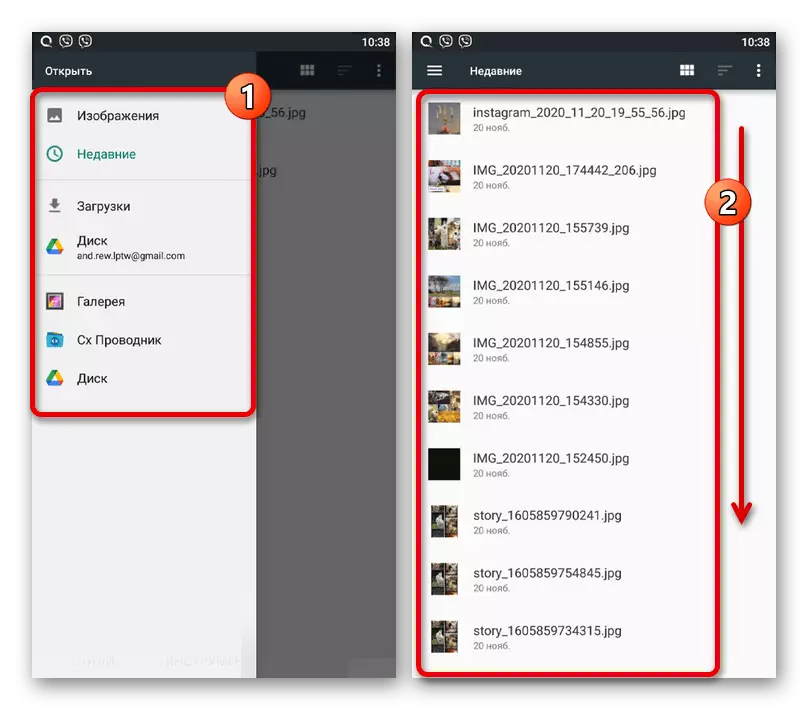
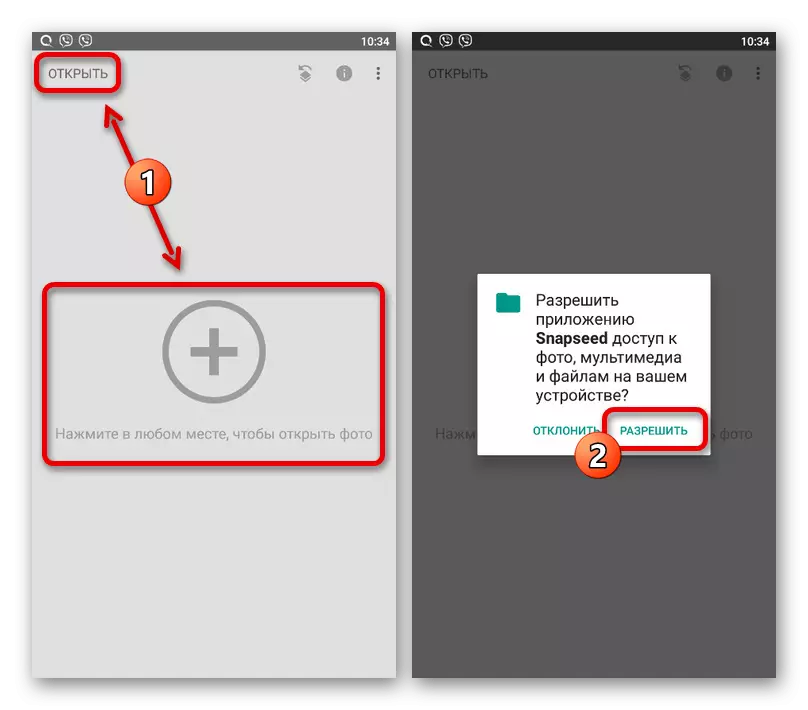
- The Snapseed application is a full-fledged alternative to the standard Storsith editor in Instagram and provides many interesting things and, importantly, free styles for text design. Load the program and on the main page, use the "+" or "Open" button to go to the selection of the background image, and necessarily providing access to files in the device's memory.
Download Snapseed from Google Play Market
Download Snapseed from App Store
You can additionally use the "settings" available for opening through the "..." menu on the main screen. For the most part, this refers to the parameters of the quality of photographs after processing.
- Using the file manager, select the image you want to use as a background. Unfortunately, only static pictures are supported here.
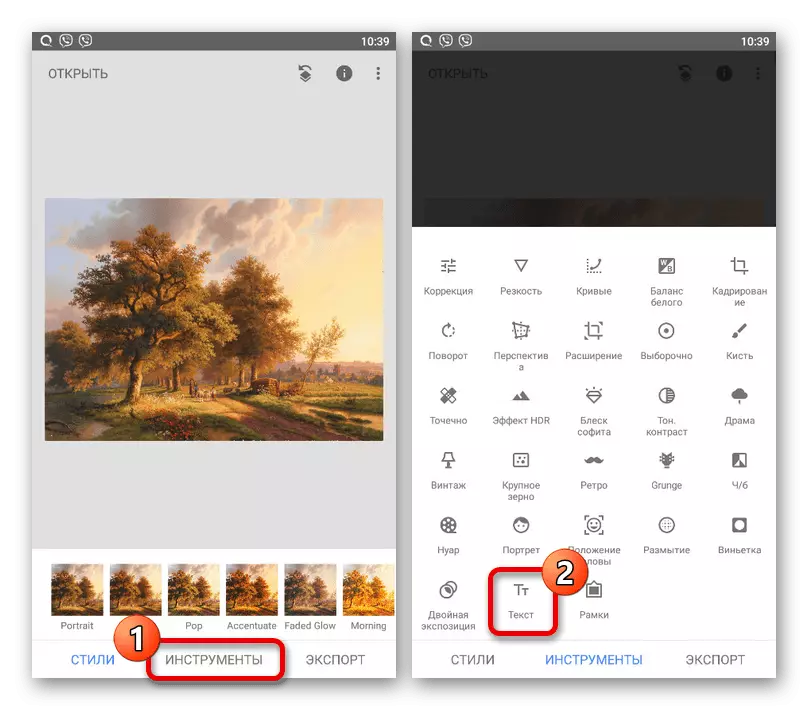
- Once on the Editor page, make changes, if necessary, and go to the Tools tab. From the list presented, select "Text".
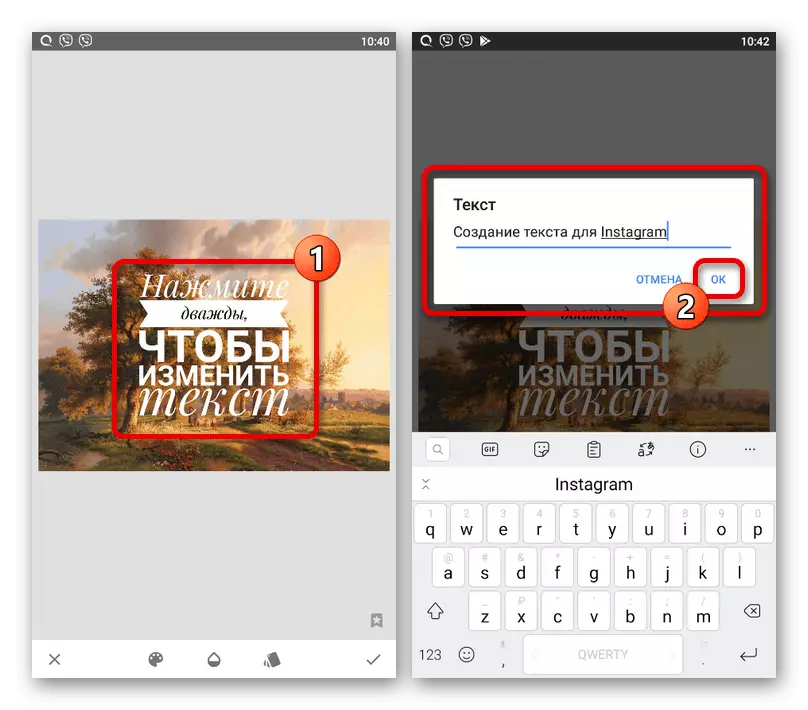
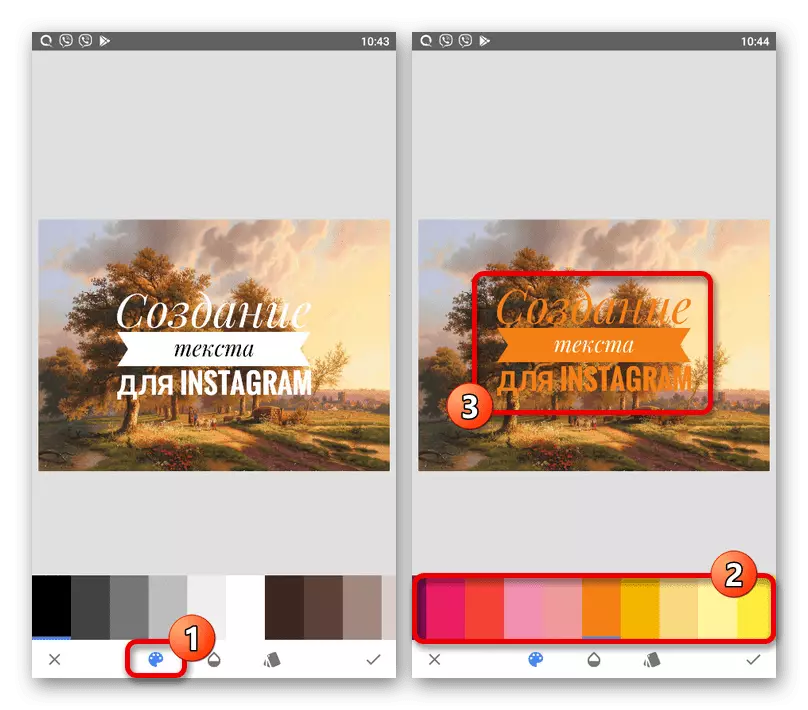
- Touch any point on the screen to place the basic template. After that, twice drag along the block that appears and fill in the text field at your discretion.
- After saving using the "OK" button, you can immediately get acquainted with the result. If you are not satisfied with the color of the text, you can touch the first tab on the bottom panel and choose the appropriate shade out of a rather extensive palette.
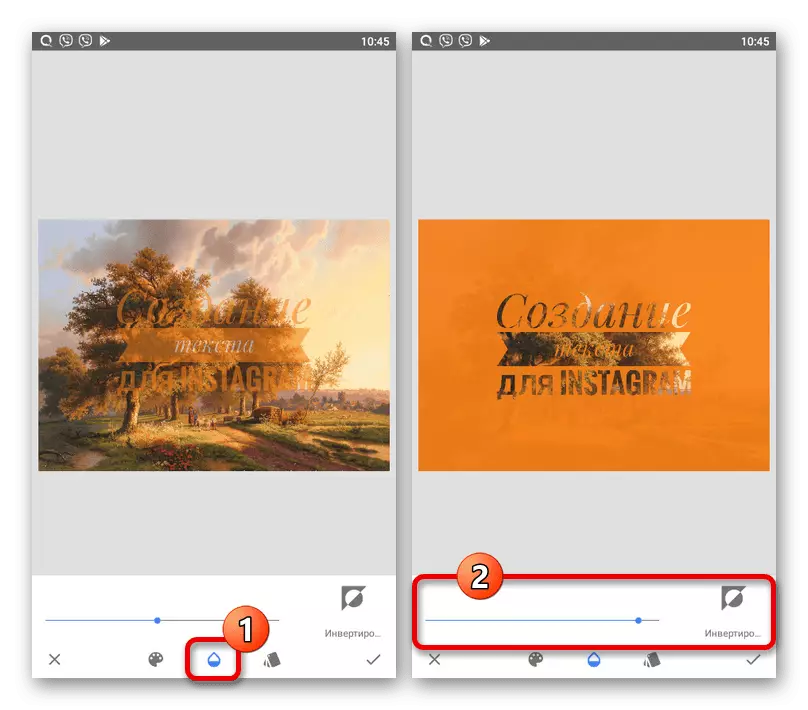
On the next page, the following page provides the ability to change the transparency of the template. Moreover, you can click the "Invert" button to paint the main part of the background, leaving only text content.
If you want to change the design style, go to the last tab and select the appropriate option, whether it is just a font or a full-font template. There are quite a few options here, but some can be blocked due to the lack of support for Cyrillic.
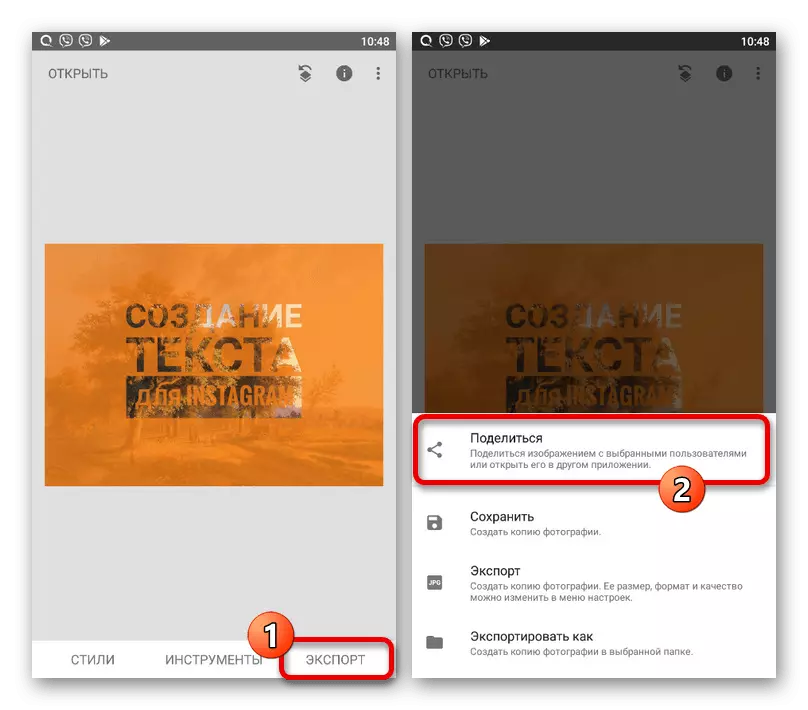
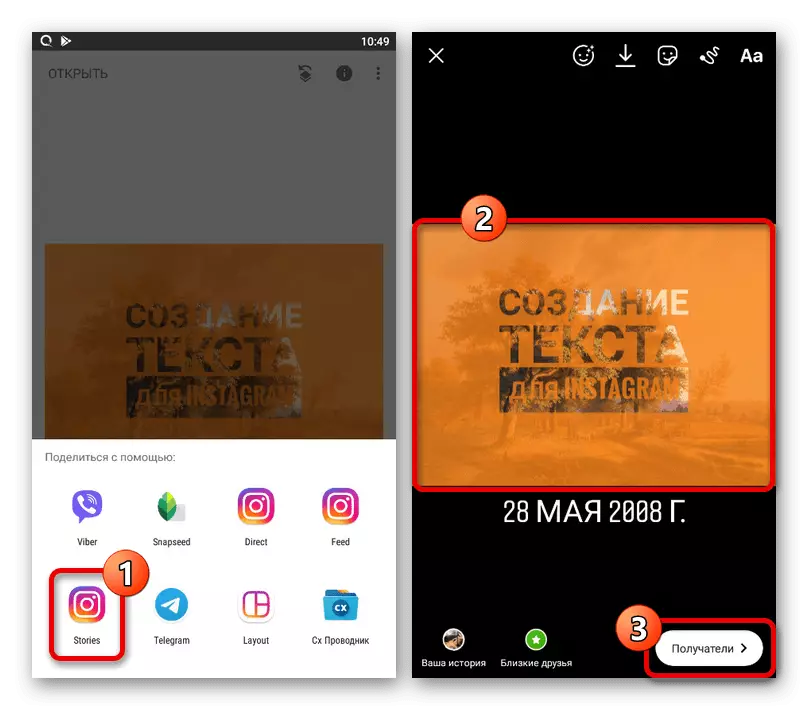
- After completing the storage editing, tap the tick in the lower right corner of the screen. To publish a result in Instagram, press "Export" and select "Share" in the pop-up window.
From the available options, tap Stories and, finding in the official application, make changes to standard means. For example, if the photo has a rectangular shape, you can produce scaling.
Consider that with a strong increase in the contents may be distorted due to quality. Saving the result is performed by pressing the button with the image of the arrow.