Method 1: Official Application
To add Storsith to Instagram from the phone, the easiest way to use the internal editor of the official application, which provides a sufficiently large number of basically free features. And although customers for different platforms are practically no different from each other, we have prepared separate instructions.Android
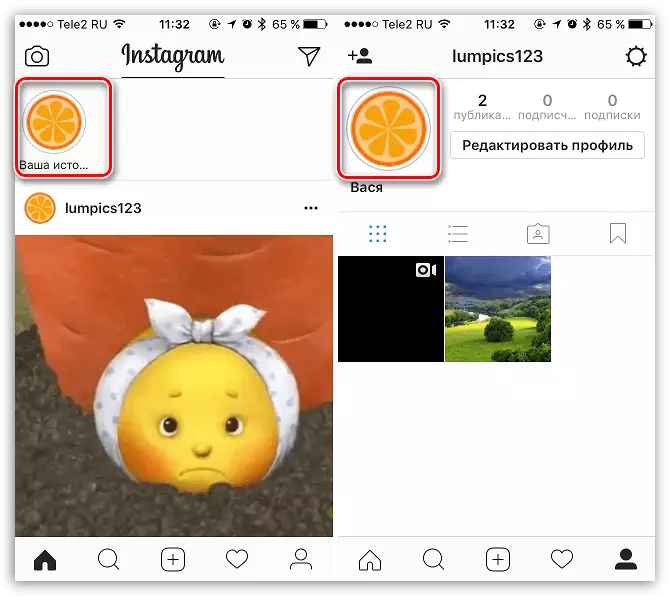
You can publish a history from the Android device by pressing the "Your History" button on the main page of the official client or through the "Share" option under the document in the file manager. While creating photos and videos will be available using a camera, several global filters, downloading files from the smartphone gallery, overlay effects and individual privacy parameters.
Read more: Adding stories in Instagram on Android
iOS.
On iOS devices, the transition to the creation of a new storage is also performed using the "Your History" button on the start screen or the camera pictograms in the upper left corner of the application. When working with the editor, made in a minimalist style, you can control privacy, create photos and videos, impose effects and when everything is completed, to publish using the button with the arrow.
Read more: Adding stories in Instagram on iOS
Method 2: third-party applications
The standard editor of Storsith in the official client provides not as much opportunities as I would like, so you can always use third-party applications. We will be considered as an example only one version of the software aimed at work with stories and affordable immediately on both mobile platforms.Option 1: Unfold
Probably the most popular current application to work with Storsith Instagram is Unfold, having a very high rating and a lot of positive feedback. The program has a Russian-speaking interface, a large number, including free templates with the ability to partially edit, support photo and video content, filters and much more.
Download Unfold from App Store
Download Unfold from Google Play Market
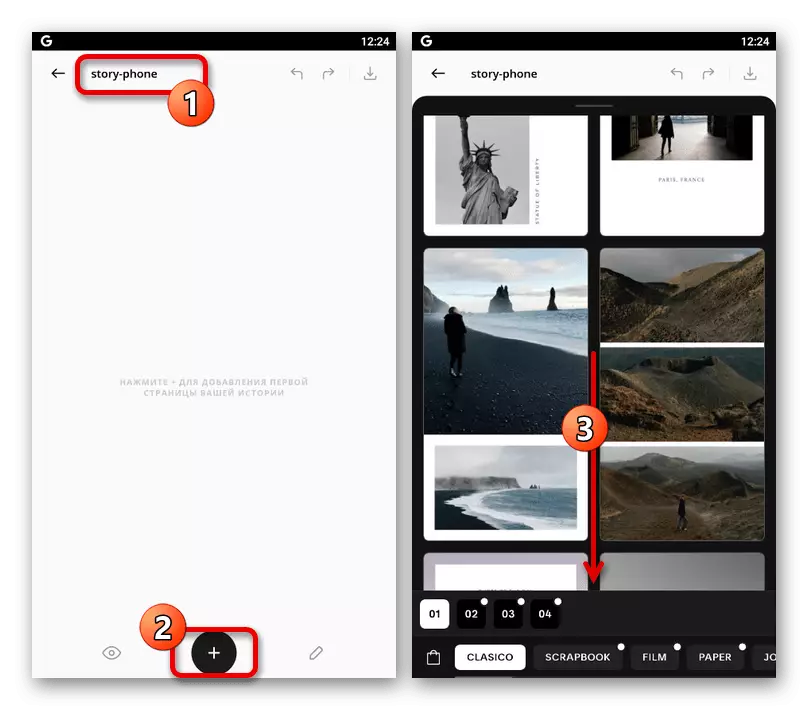
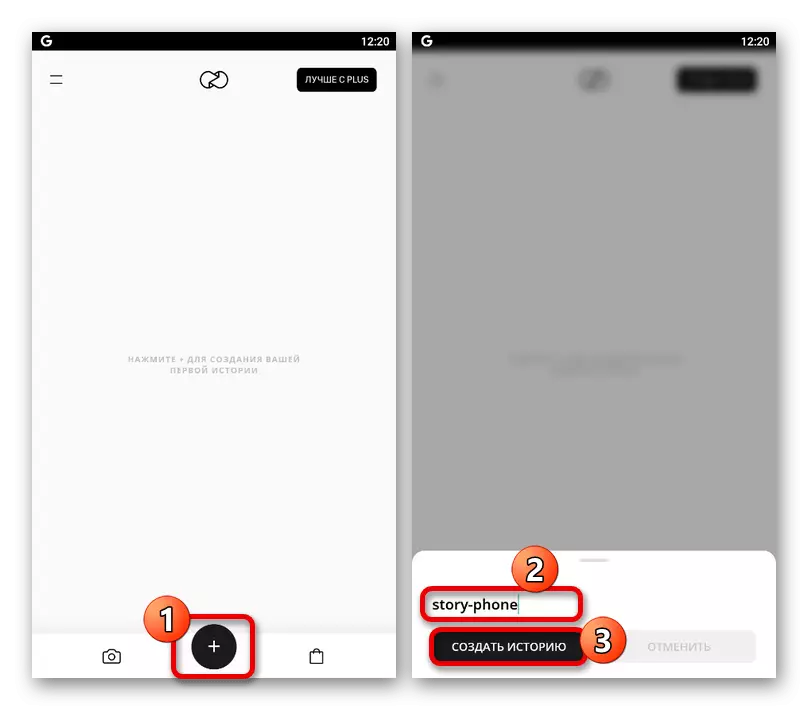
- Install the application from the store depending on the platform, open and wait for the preparation for work. After that, on the main page, tap the button with the image "+" in the center of the bottom panel, in the text box in the pop-up window, enter the project name and click "Create a Study".
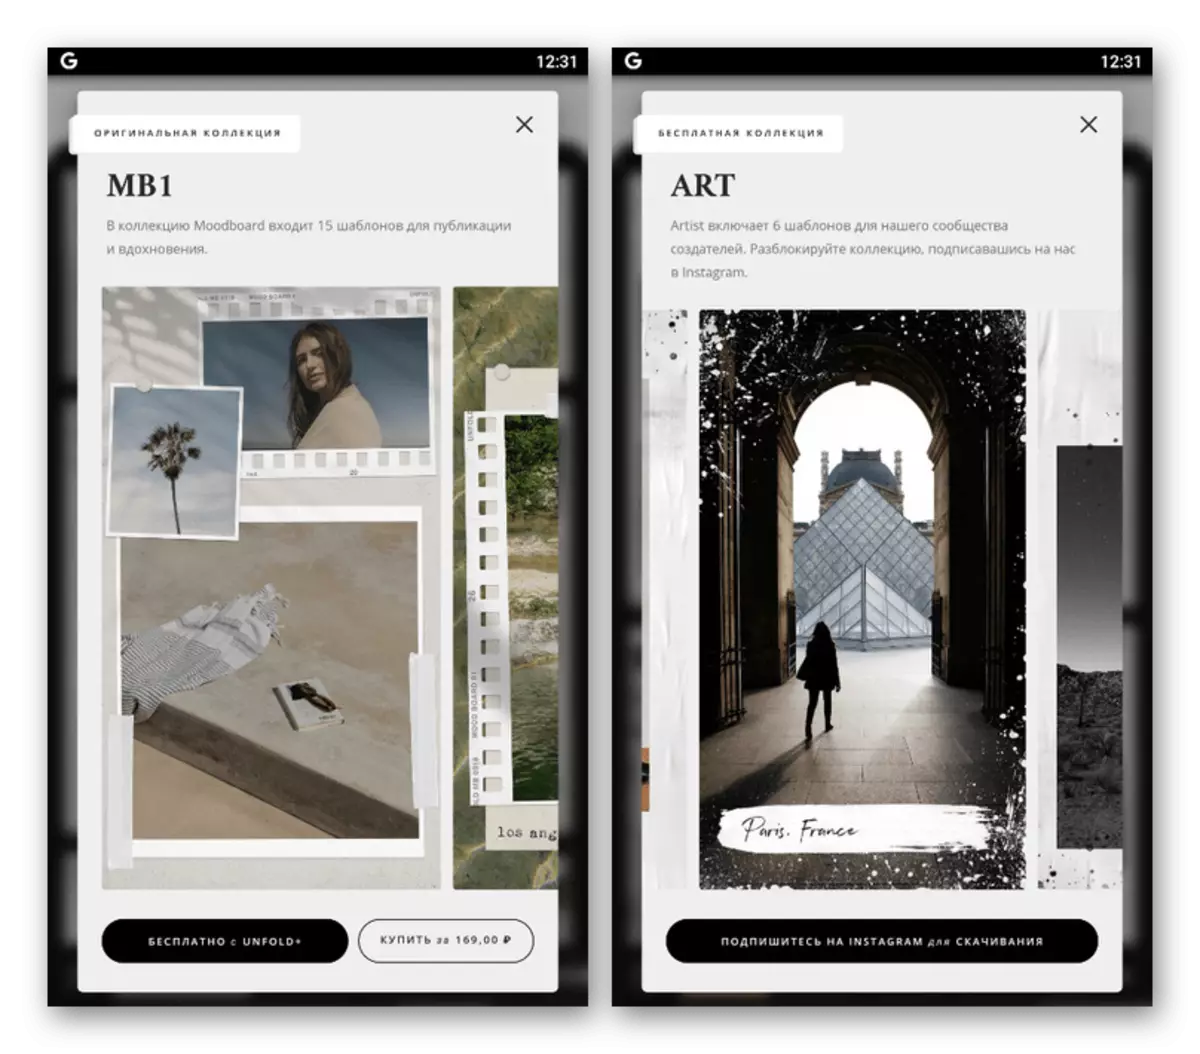
- Once inside the project, press the "+" icon on the bottom panel to go to the selection of the template. Here are a variety of options that are perfect for different situations and sorted by tabs.
Some templates have the "+" designation indicating that it is possible to gain access only by purchasing a set at a set value. There are also options with an instagram icon that will be available if you subscribe to a specific page.
- After automatic transition to the main editor, you can add media files, the limit to the number of which depends on the previous step using the "+" icon in one of the gray areas. For use in Storage, almost any documents are suitable from the mobile device stored in the memory and created using the camera.

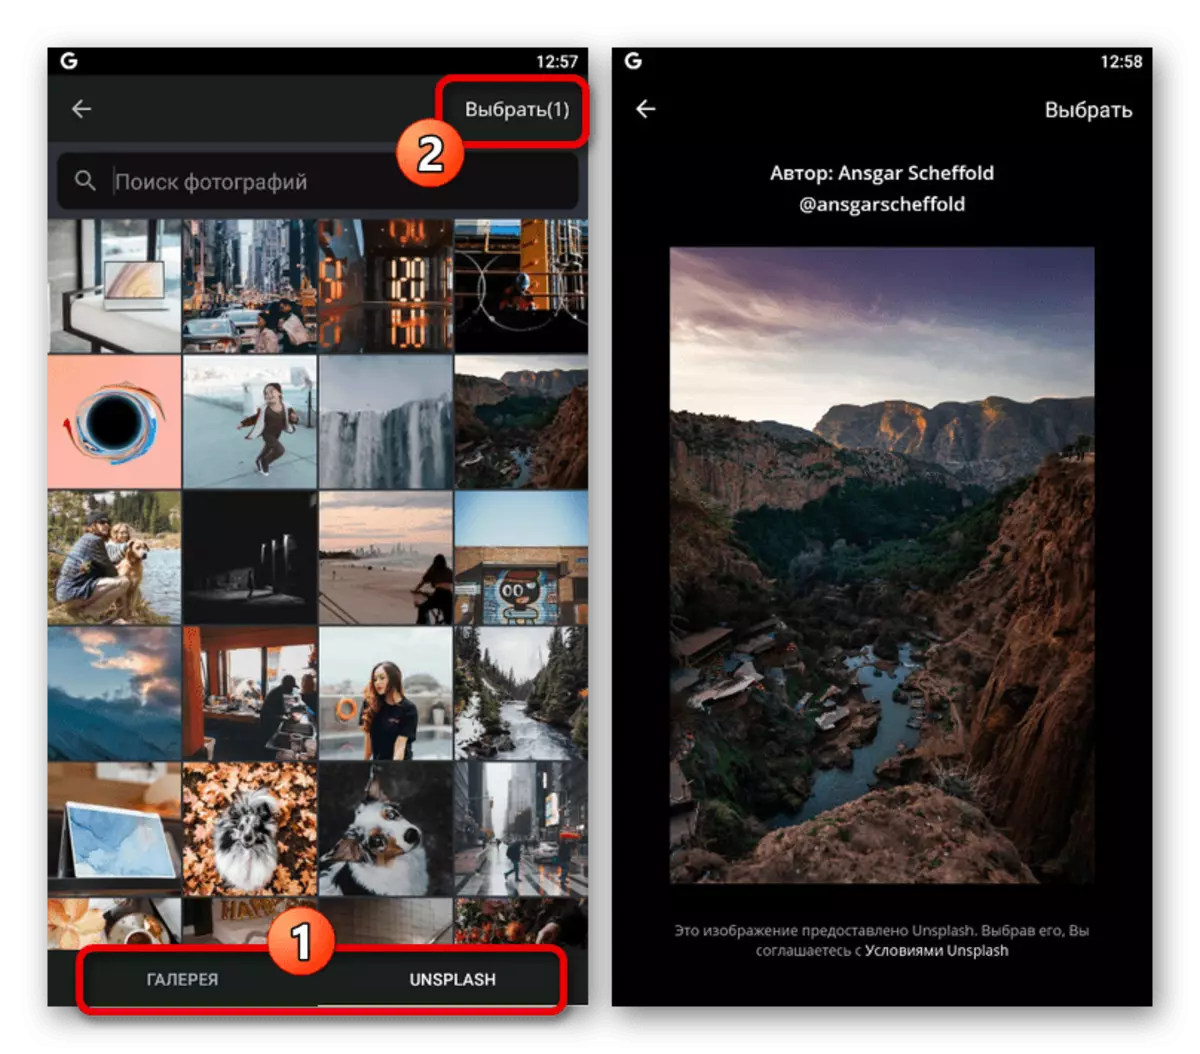
The appendix also provides its own gallery with several options for the photo, which can be used only under the compliance with the agreement. So that the pictures are loaded into history, touch each you need and click "Select" on the top panel.
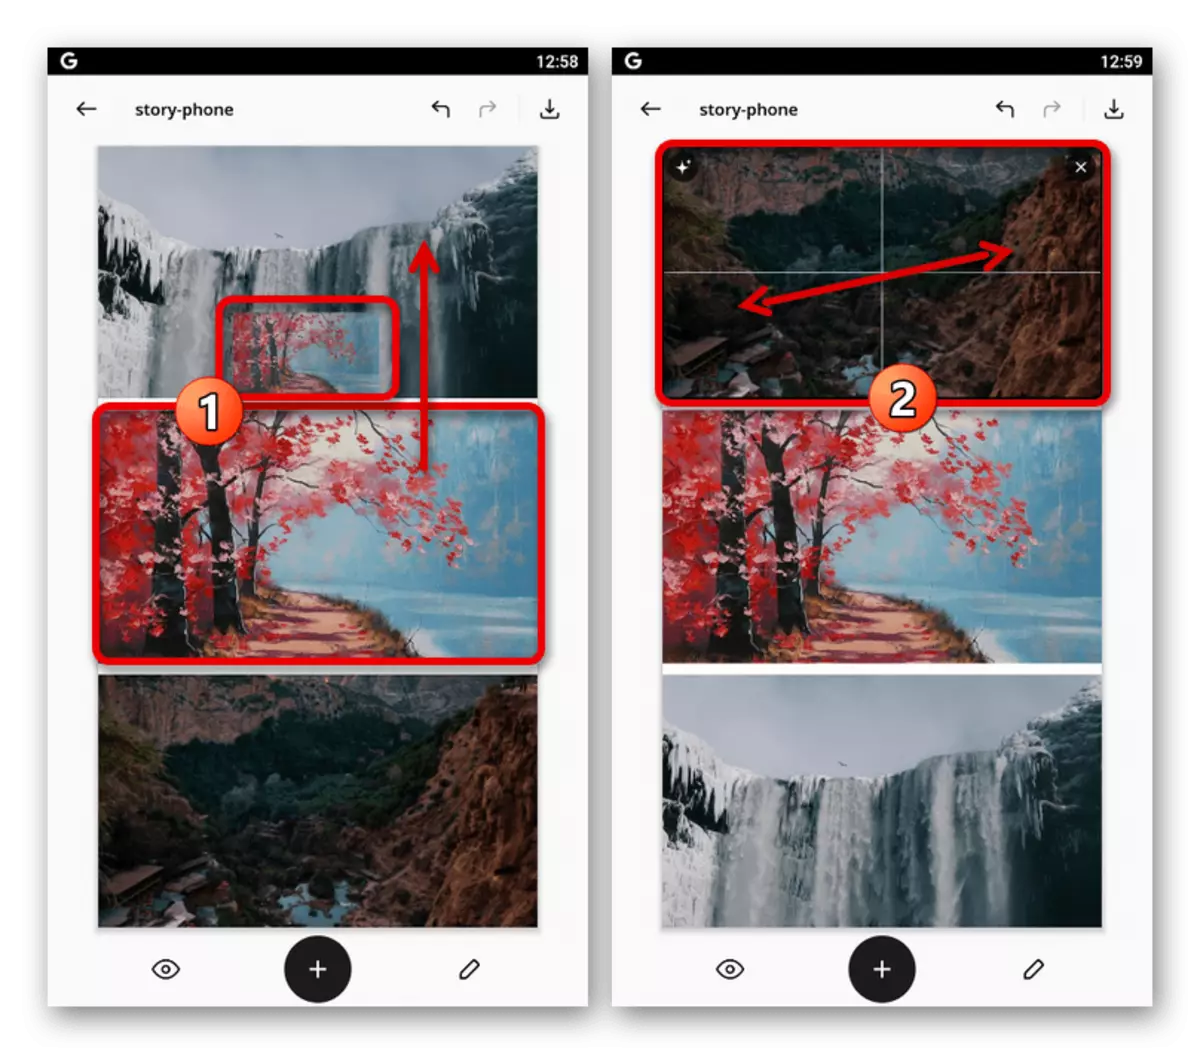
- If you want to change order, click the file and drag to another area of the template. Also can be aligned within the framework of the allotted area, before this taping on the image.
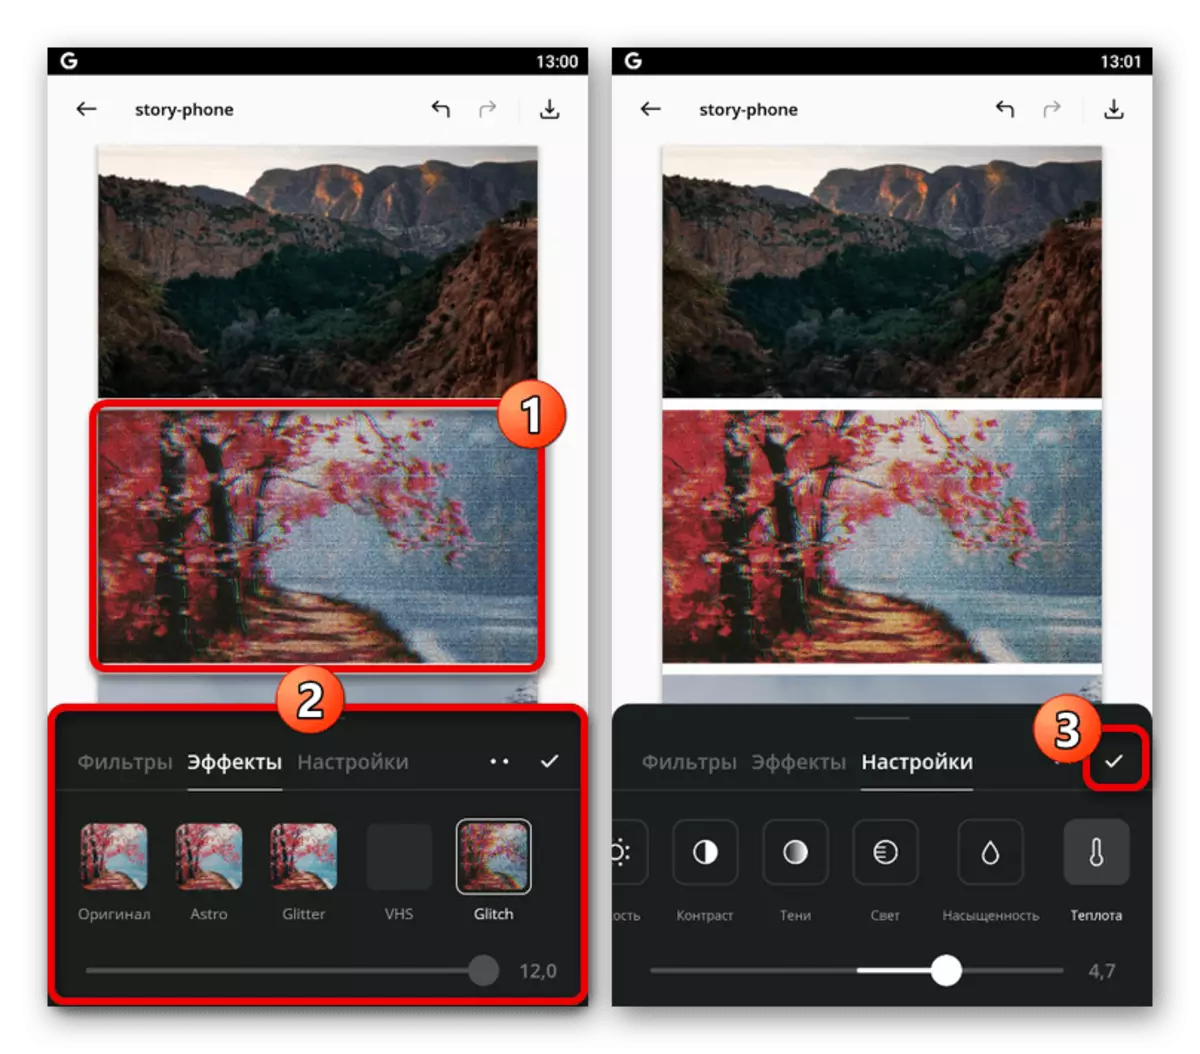
- When choosing a specific card, you can use the button in the upper right corner. As a result, a built-in filter gallery will open, consisting of several tabs.

Unfortunately, it is possible to apply only one effect from each subsection. In addition to this, some filters are available only after purchasing.
- After completing the work with the color correction, on the bottom panels tap the pencil icons. Each element presented here can be added to Storsith.
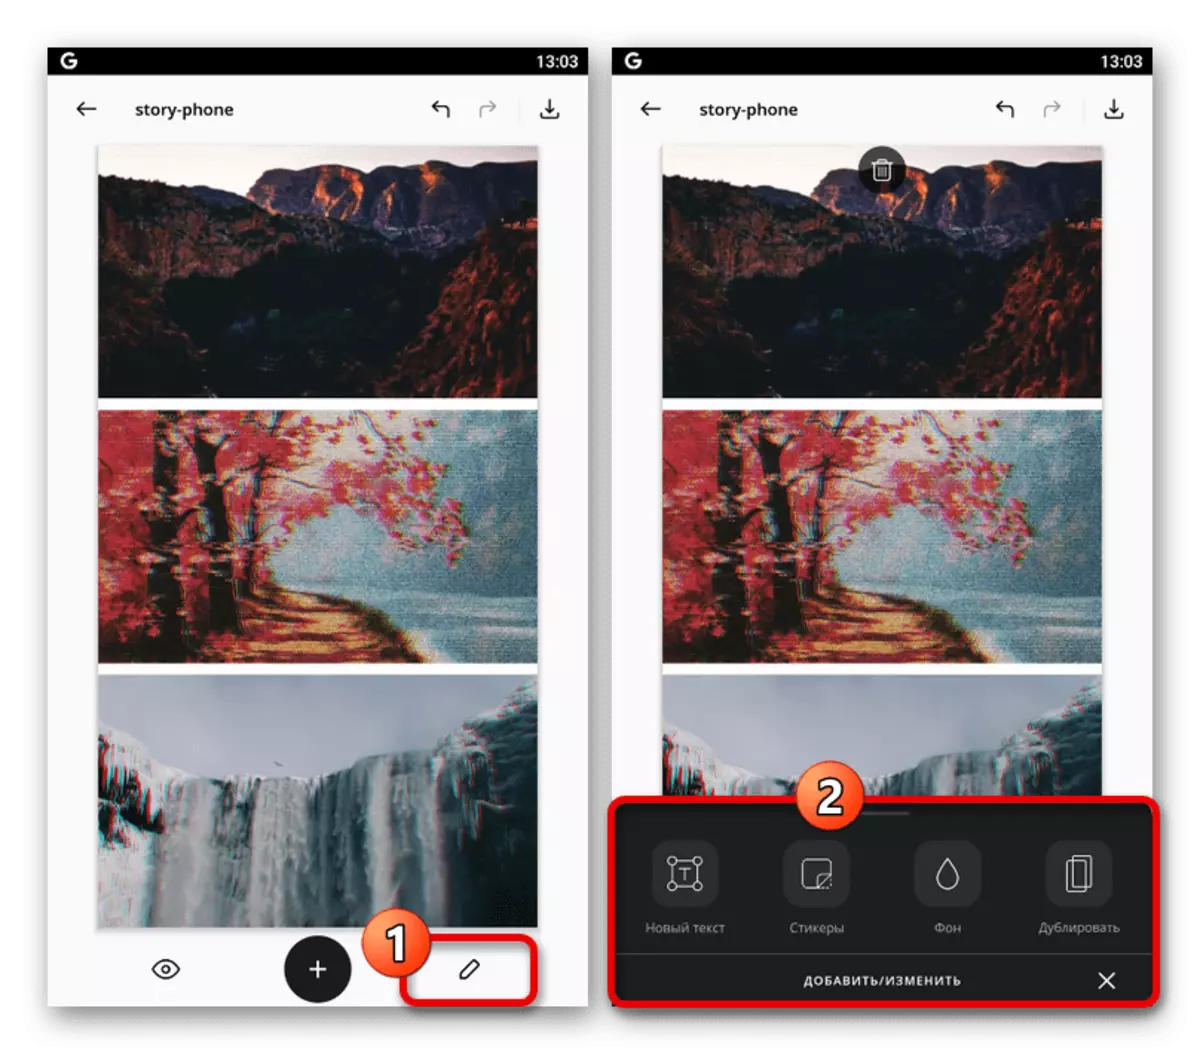
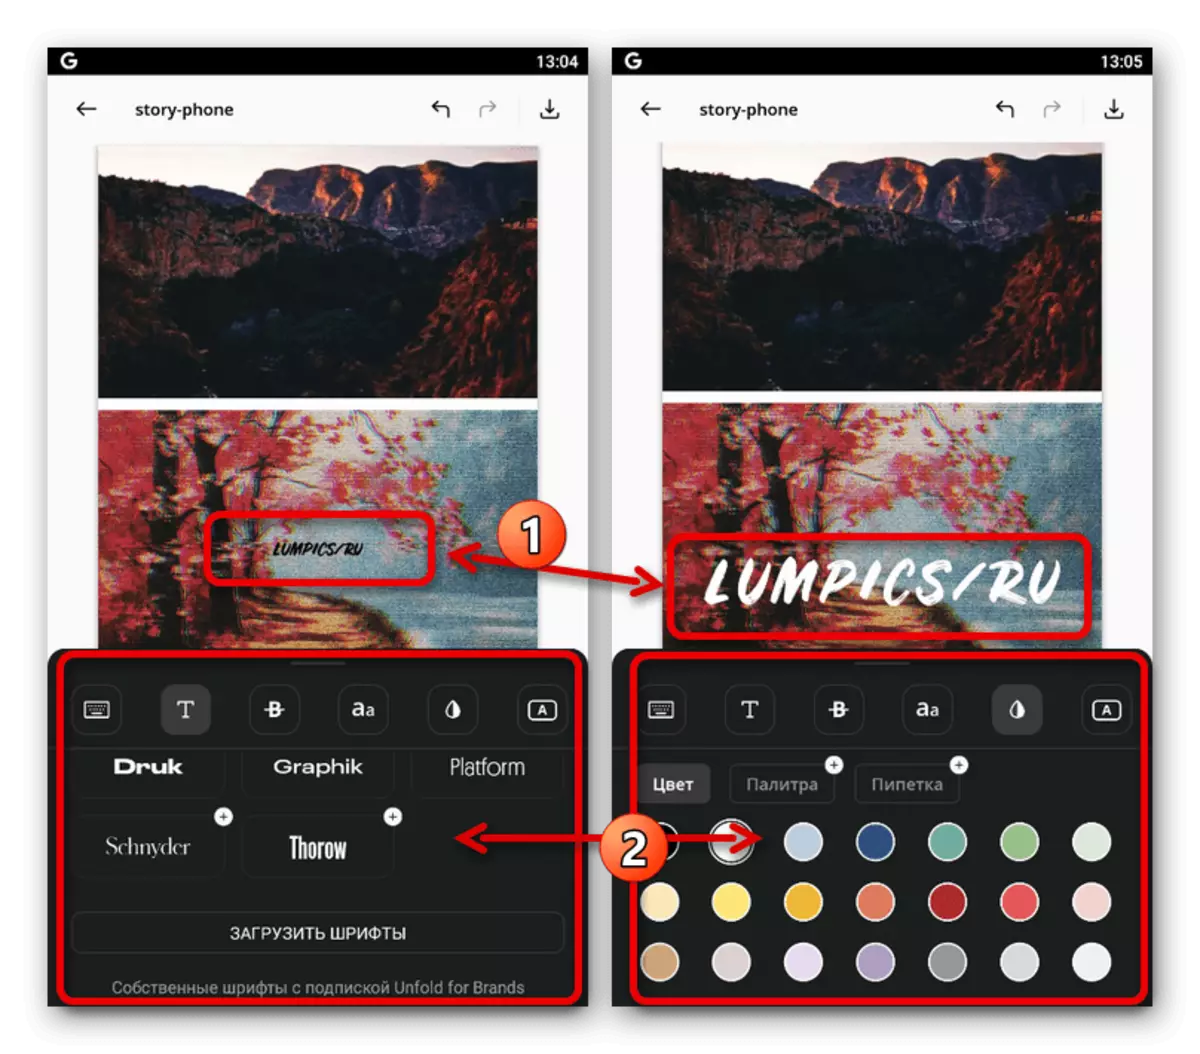
In the case of the text, the font, size, colors and location are available. Effects are applied to the layer, and not to individual characters.
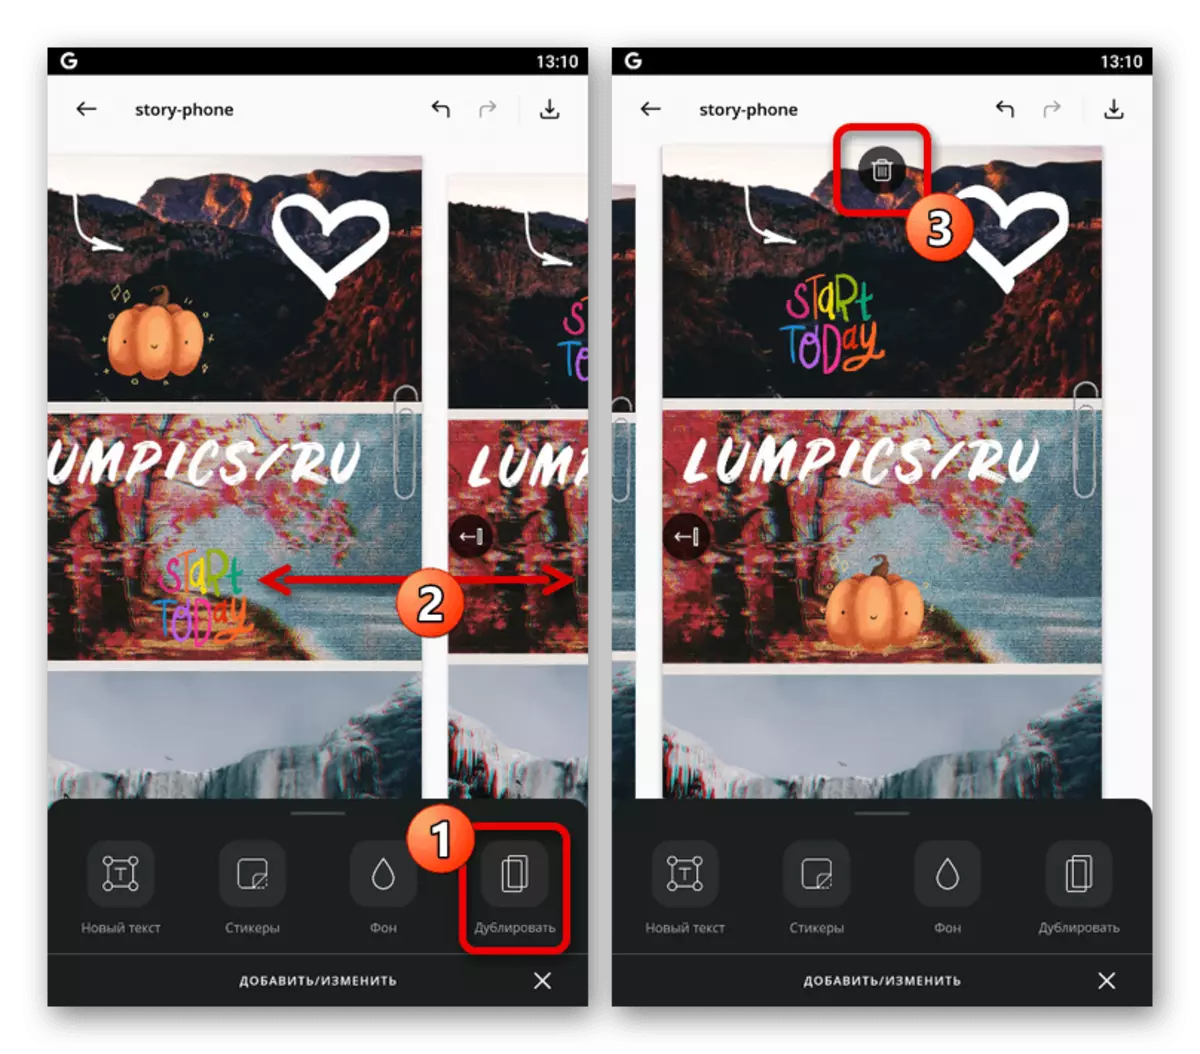
On the Stickers page there is an impressive library of various emoticons, stickers, drawings and other things. Immediately, note that adding animated elements to the history may result in problems when publishing.

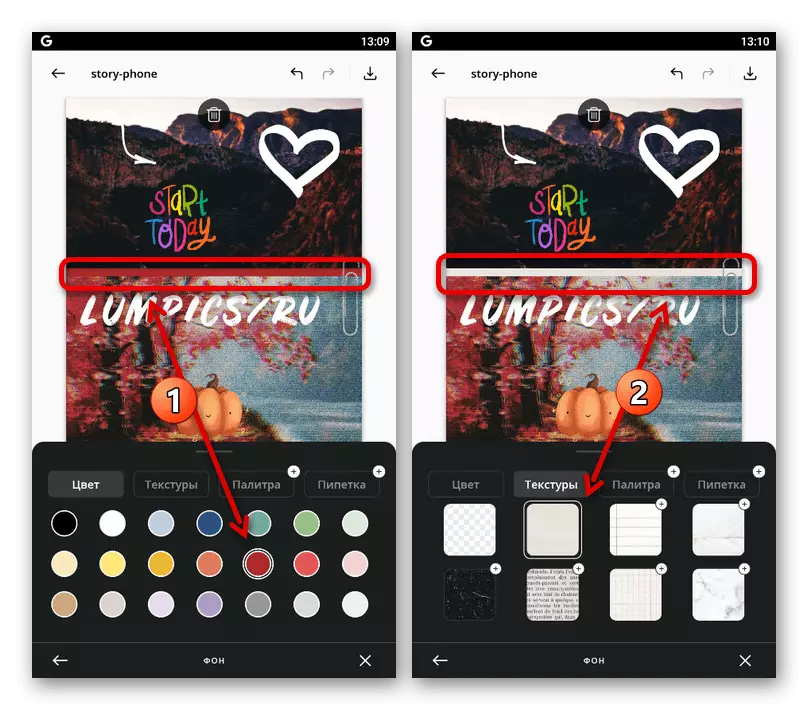
If you are not satisfied with the standard color of the template, presented in the form of circuit boards, you can use the "background" subsection. To choose from here different shades, textures and some paid options.
Using the latest button to "duplicate" on the edit pane, the entire contents of Storsith is copied to a new screen within the project. To delete, you need to touch the icon with the image of the basket.
- Having understood with the creation process, on the right side of the top panel, press the button with the download icon. In turn, in the pop-up window, go to the "Pages" tab and select "Instagram".
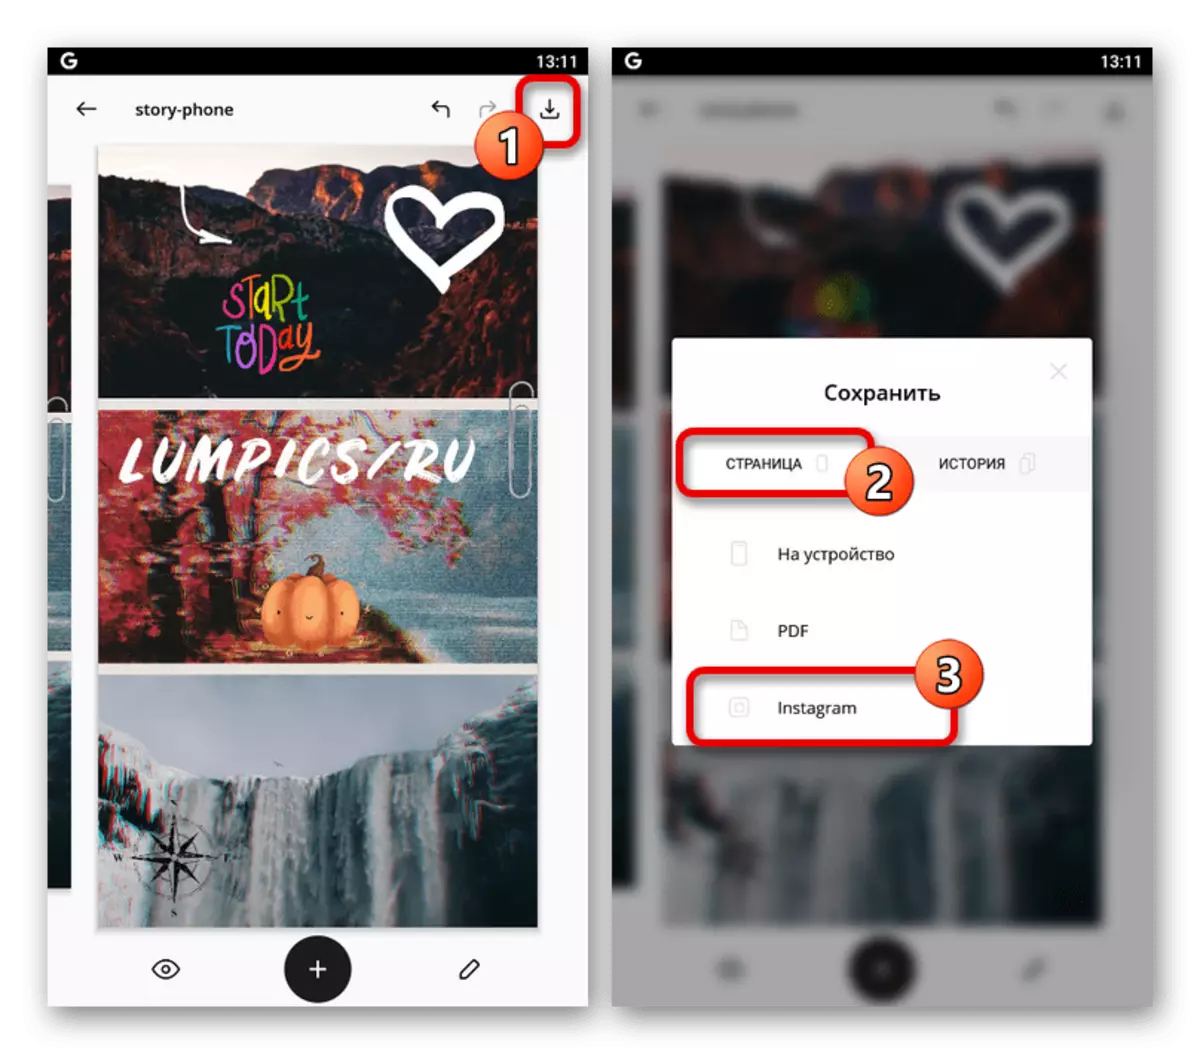
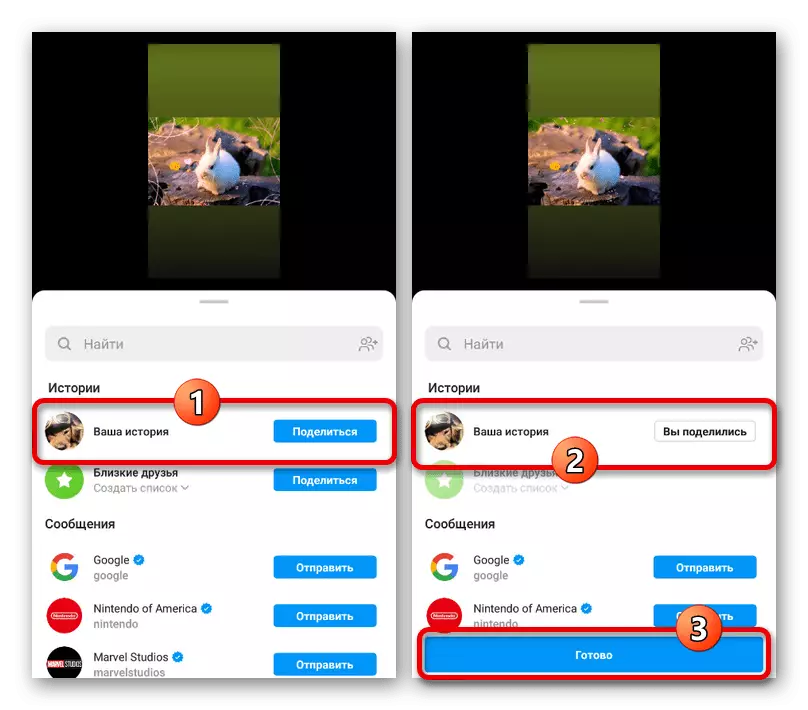
Wait until the project is saved in the application memory and opening the official Instagram client. After that, Storsith will be automatically transferred as a media file, where it can be additionally edited.
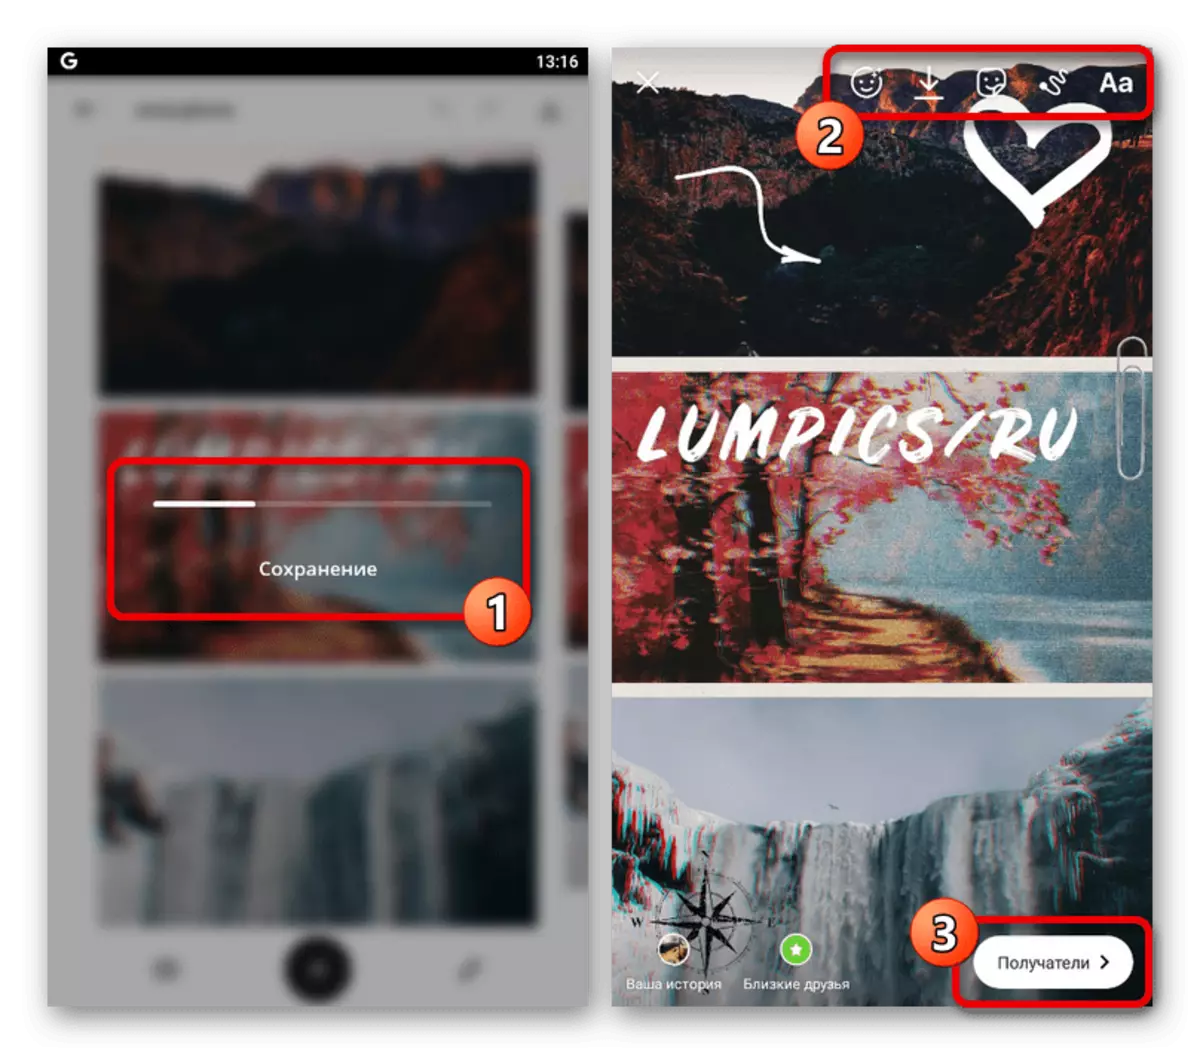
If there were several pages in the project, each of them appears in the editor, however, with too much elements, errors may occur. The final result is published in a similar way, like any other story.
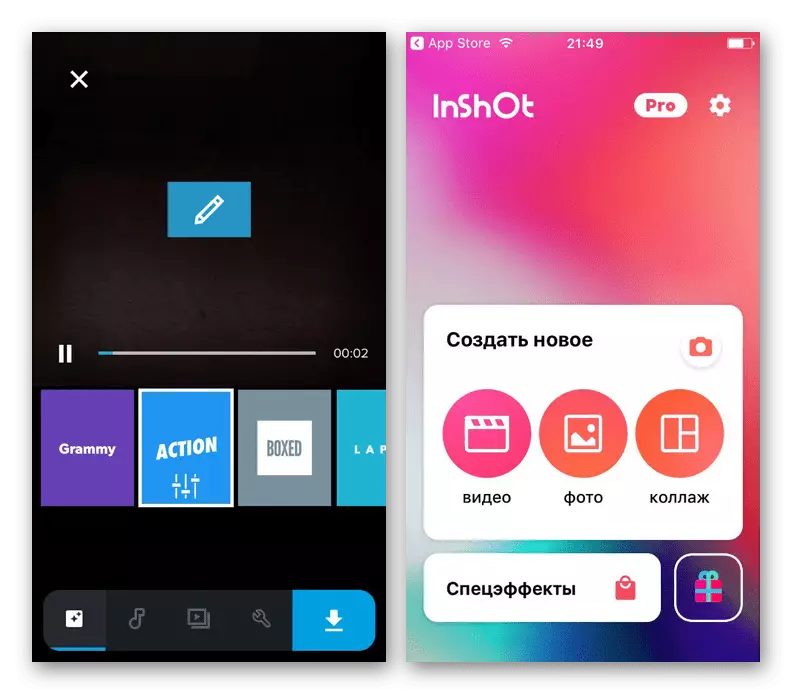
Option 2: Photos and video editor
A separate mention is worthy of photos and video edits, aimed not only to create a storage, but also to the processing of content for other purposes using a huge amount of tools. When working with such programs, the procedure for publishing projects in Instagram is not much different from what was shown on the example of the previous application, and therefore will not be considered in detail.
Read more:
Applications for editing video on Android and iOS
Photo and video edits for iOS
Photo edits for Android