
When installing or loading Windows 7 may be displayed BSOD with an error information 0x000000A5. Sometimes this situation is possible even when leaving the sleep mode. This problem is also accompanied by ACPI_BIOS_ERROR alert. Let's find out the reasons for this problem and how to eliminate it.
Lesson: Blue screen with an error 0x0000000A in Windows 7
Methods of troubleshooting
Error 0x000000A5 signals that the BIOS is not fully compatible with the ACPI standard. The correct cause of such a situation may be the following factors:- Defective PC RAM;
- Incorrect BIOS settings;
- Using the outdated version of the BIOS.
Next, we will focus in detail on the elimination options for the specified fault.
Method 1: BIOS Setup
First of all, you need to check the correctness of the BIOS settings and, if necessary, adjust them.
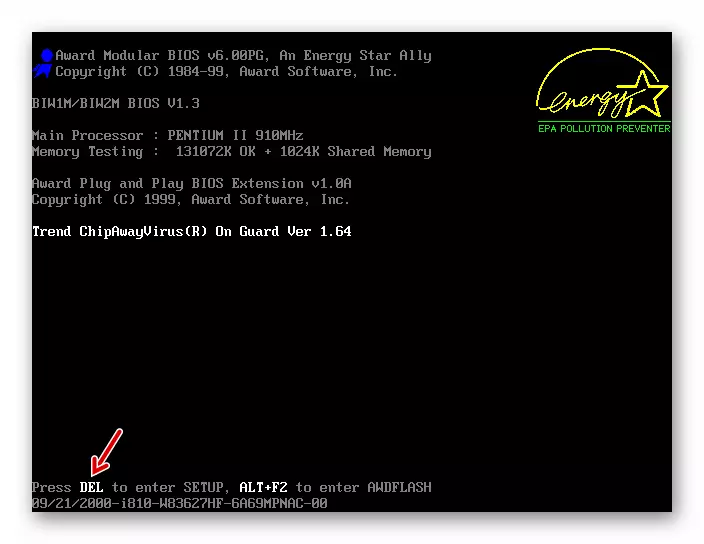
- After starting the computer, you will hear a characteristic signal. Immediately after that, to switch to the BIOS, hold down a specific key. What exactly the key depends on the version of your system software, but most often it is Del or F2.
Lesson: how to enter the BIOS on the computer
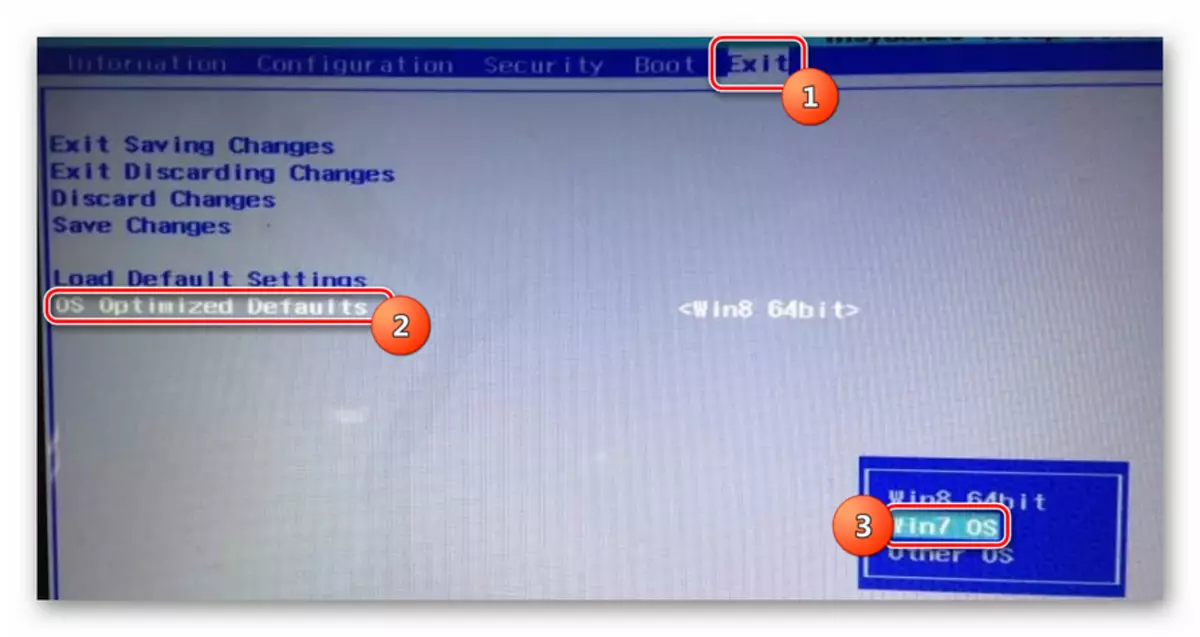
- The BIOS interface opens. Further actions also directly depend on the version of this systematic software and can be very different. We will consider a solution to the problem on the example of the BIOS InsyDeh20, but the general principle of action can be used for other versions. First of all, you need to specify the desired operating system. Move into the "EXIT" tab, select OS OPTIMIZED DEFAULTS and press ENTER. In the additional list that opens, stop the selection on "Win7 OS" after which press the Enter key again.
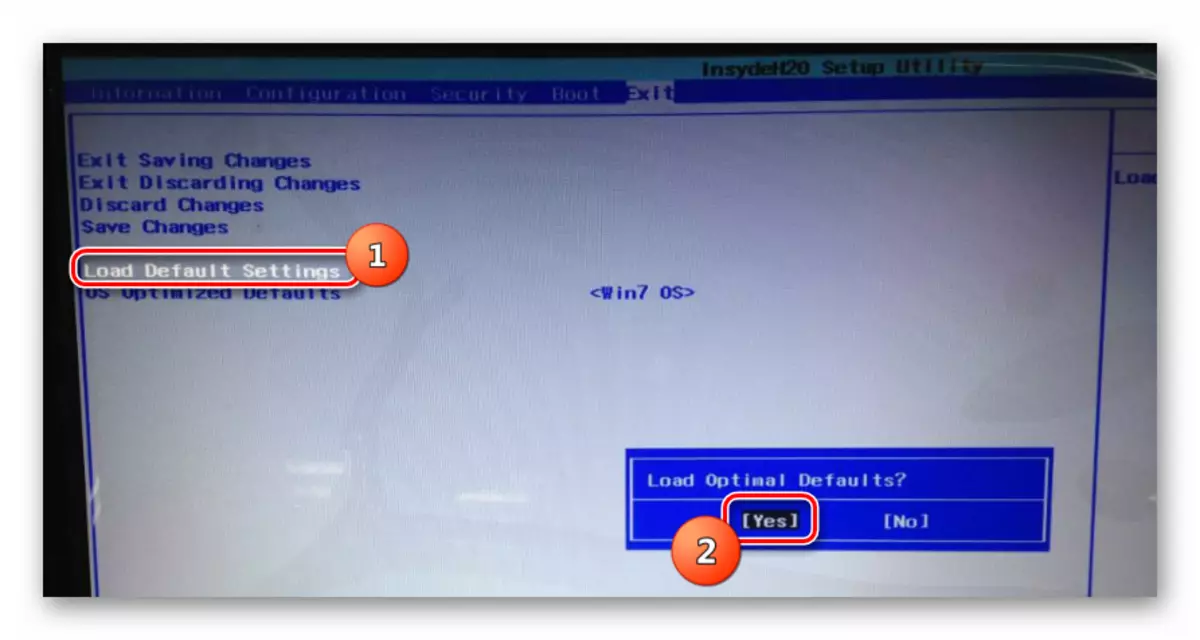
- Next, select In the same tab "Load Default Settings" and in the menu that appears, click "YES".
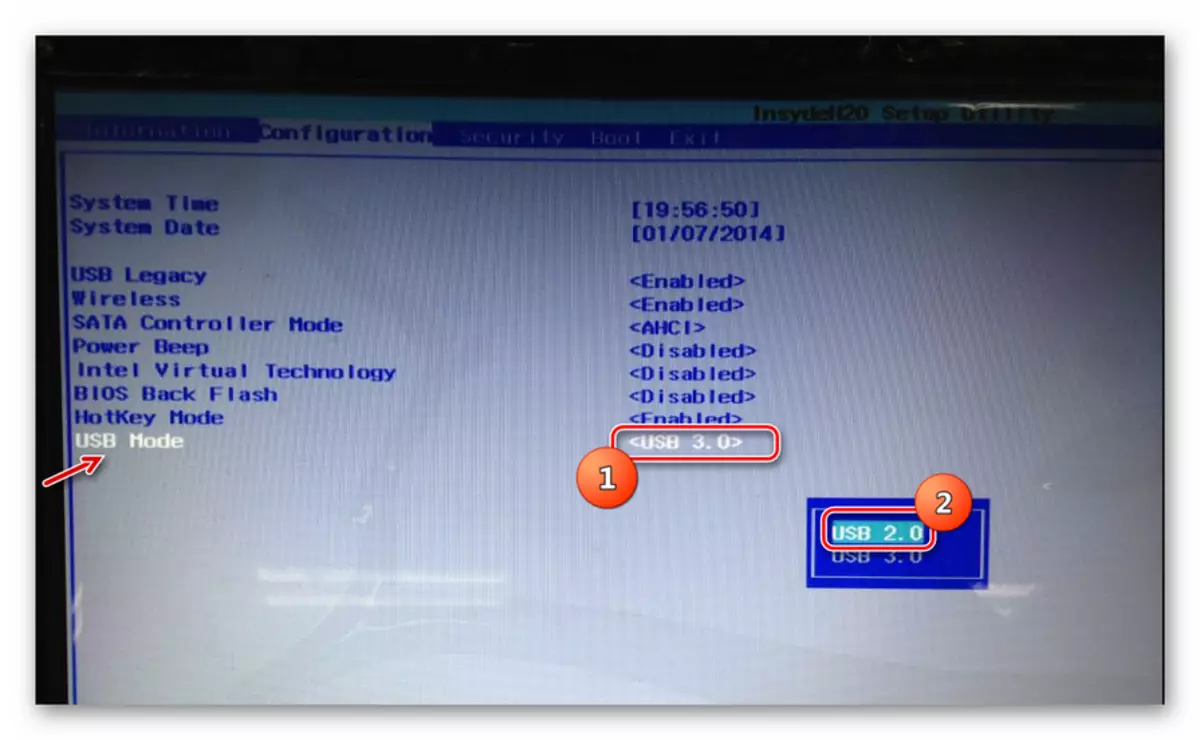
- Next, move to the "Configuration" tab. Opposite the name of the "USB MODE" parameter, select "USB 2.0" instead of "USB 3.0". Only then, when you already enable the installation of Windows 7, do not forget to return to BIOS and assign the previous value to this setting, since in the opposite case drivers will not be installed to work with USB 3.0, which will not allow you to transmit in the future and receive data on this protocol in the future.
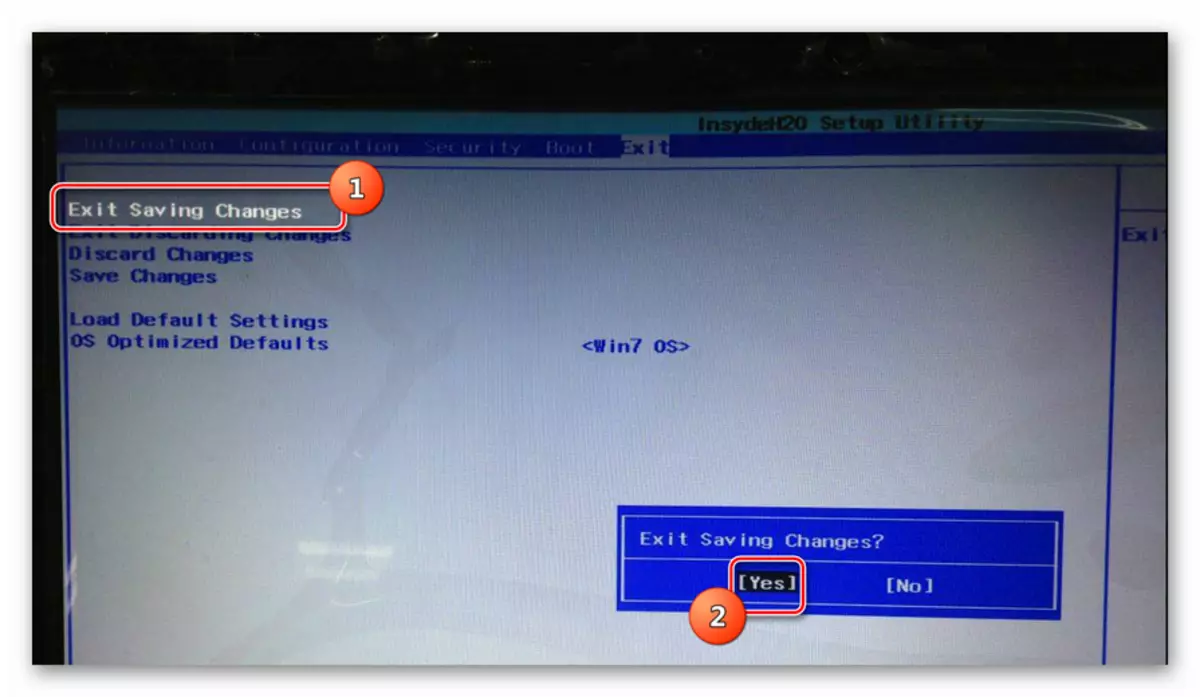
- Now, to save the changes made to the "EXIT" tab, select the "Exit Saving Changes" parameter by selecting and pressing the ENTER button. In the displayed menu, click "YES".
- A logging from BIOS will be completed with the preservation of the changes made and restart the computer. The next time you start, you can try again to install Windows 7. This time an attempt must be successful.
But the actions described may not help even when the problem lies in BIOS. If you use the outdated version of this system software, no parameter changes will eliminate the malfunction. Find out whether Windows installation is supported by an instance of the BIOS on your computer. If it does not support, then you need to quickly flash the motherboard with an urgent version downloaded from the official website of its manufacturer. At especially ancient PC "Motherland" and other hardware components can be incompatible with the "seven".
Lesson: How to configure BIOS on a computer
Method 2: Verification of RAM
One of the reasons 0x000000A5 may also be problems of RAM. To determine if it is, it is necessary to check the PC RAM.
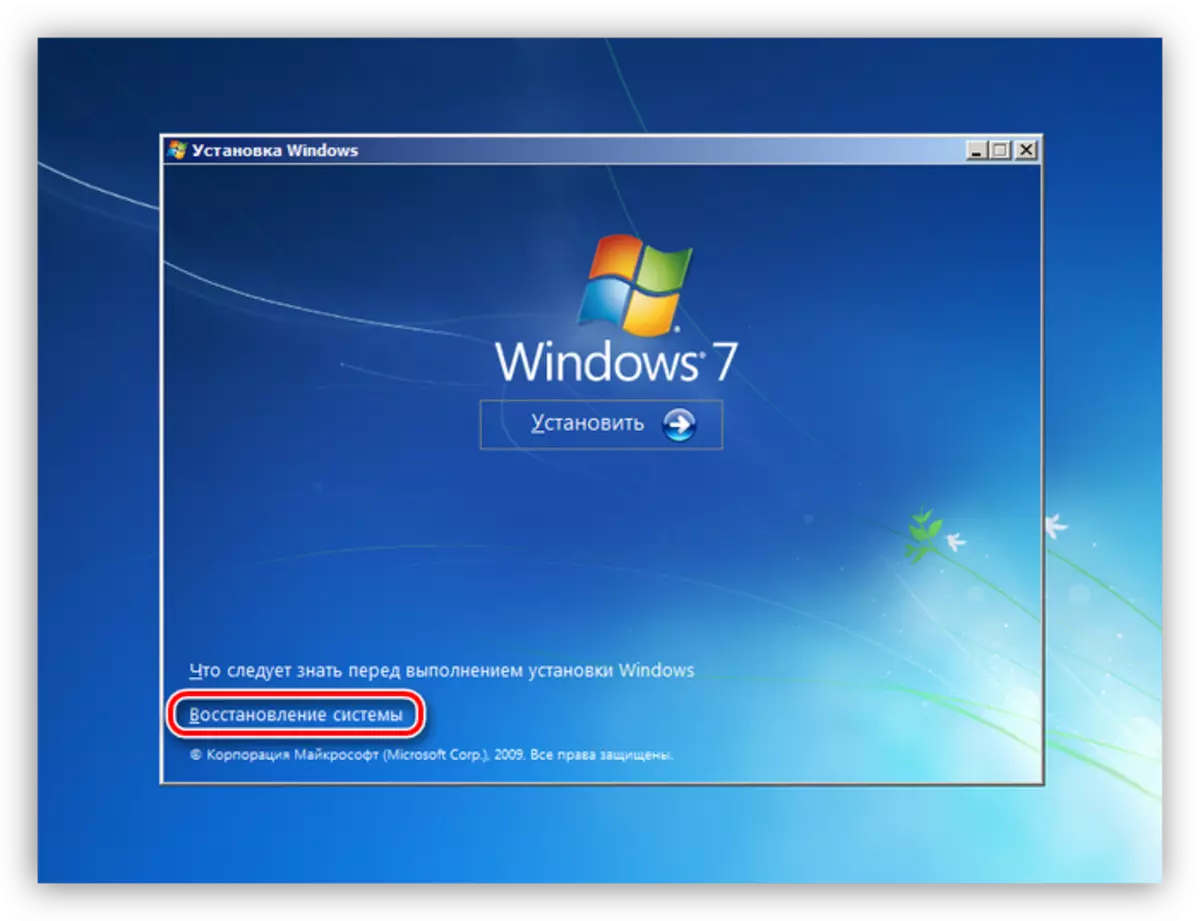
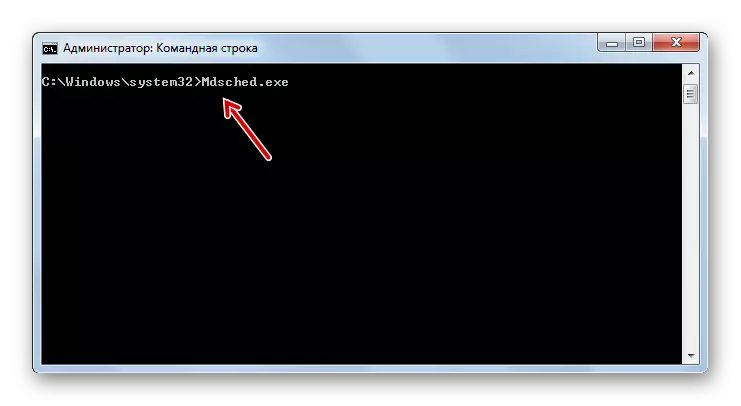
- Since the operating system on the computer has not yet been established, the verification procedure will be necessary to perform via the recovery environment by means of an installation flash drive or disc from which you are trying to install Windows 7. After starting the computer and open the installer startup, select "Restore System".
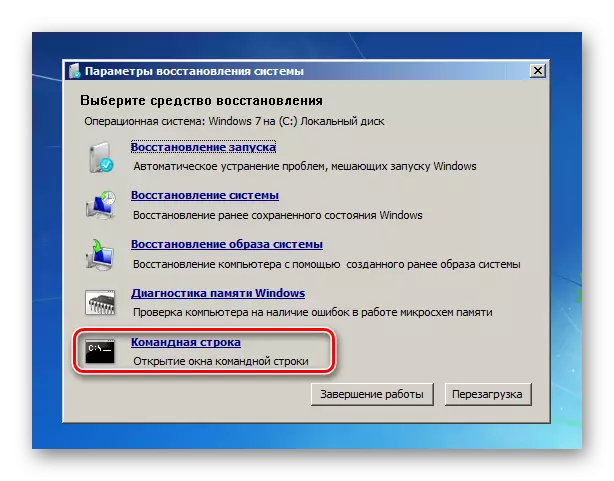
- In the recovery environment of the recovery tool, click on the "Command Line" item.
- In the "Command Line" interface, enter such expressions:
CD ..
CD Windows \ System32
Mdsched.exe.
After recording each of the specified commands, press ENTER.
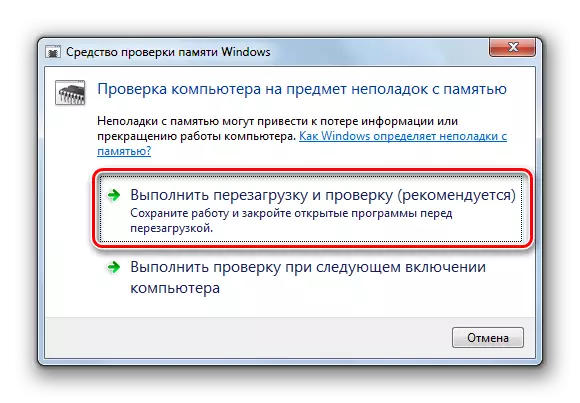
- The memory check utility window opens. Select the option "Run a reboot ...".
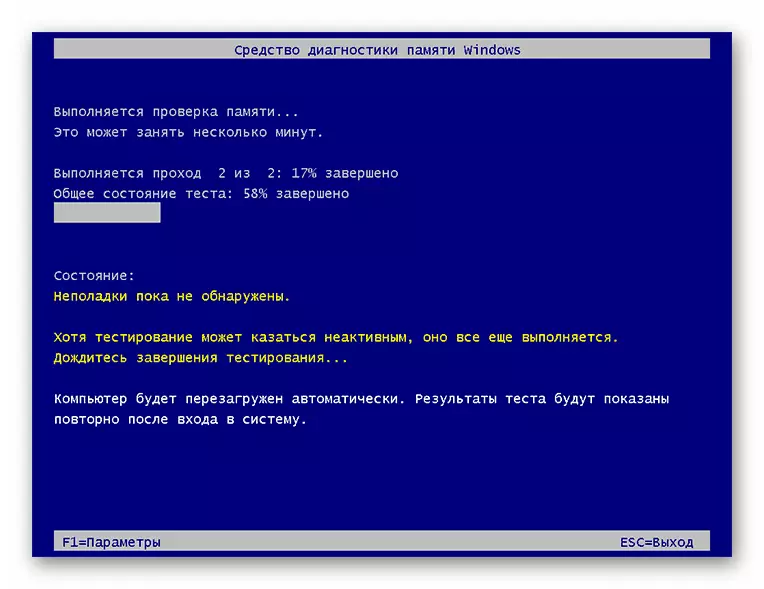
- Next, the computer will restart and start checking the memory for errors.
- After completing the procedure, the corresponding message will be displayed in case of detection. Then, if there are several races of RAM, leave only one, disconnecting all the others from the motherboard connector. The check will need to be repeated with each module separately. So you can calculate the failed bar. After detection, refuse to use it or replace the serviceable analogue. Although there is another option to clean the contacts of the module with an eraser and blow the connectors from dust. In some cases it can help.
Lesson: Verification of RAM in Windows 7
The cause of the error 0x000000A5 when installing Windows 7 is quite often the wrong BIOS settings, in this case it will be necessary to adjust them. But also the likelihood is not excluded that the malfunction is caused by the failure of the RAM. If the check revealed this particular problem, the "RAM" failure module needs to be replaced or fixed.