
Currently, NetGear is actively developing various network equipment. Among all the devices there are also a series of routers intended for home or office use. Each user who acquired such equipment, faces the need for its settings. This process is carried out in all models almost identical through the corporate web interface. Next, we will consider in detail this topic, taming all aspects of the configuration.
Preliminary actions
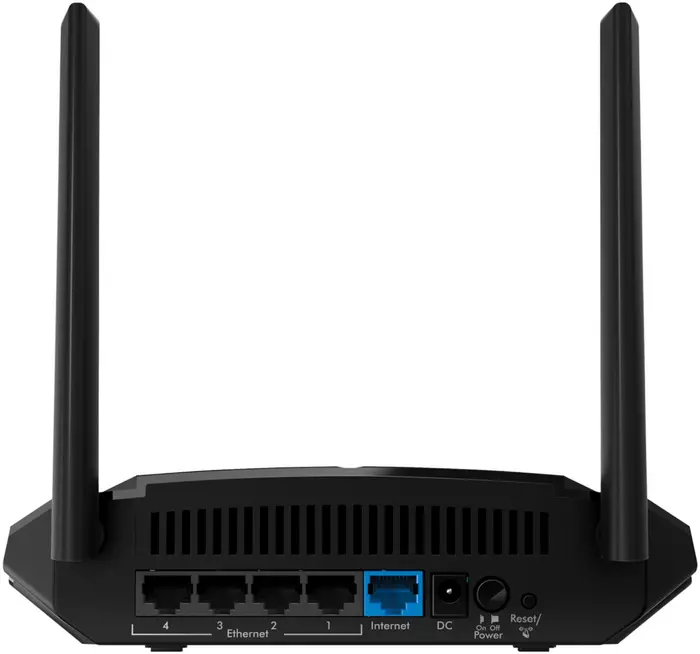
By selecting the optimal location of the equipment in the room, inspect it with the rear or sidebar, where all the buttons and connectors are displayed. According to the standard there are four LAN ports for connecting computers, one WAN, which is inserted with the wire from the provider, power connections, power button, WLAN and WPS.
Now that the router is detected by the computer, before going to the firmware, it is recommended to check the network settings of Windows Windows. Look at a specially designated menu where you make sure that the IP and DNS data is automatically obtained. If it is not, rearrange the markers to the right place. Read more about this procedure in our other material on the following link.
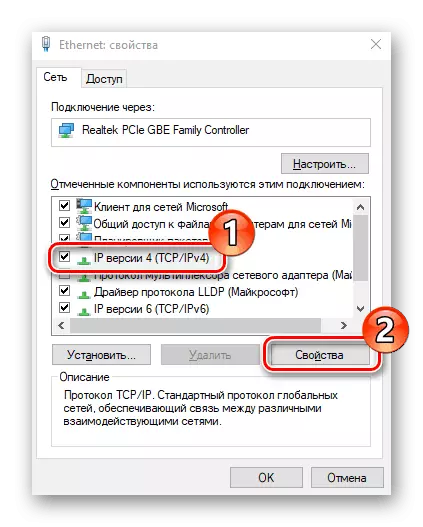
Read more: Windows 7 network settings
Customize NetGear routers
Universal firmware for the configuration of Netgear routers is practically no different and on functionality from those being developed by other companies. Consider how to go to the settings of these routers.
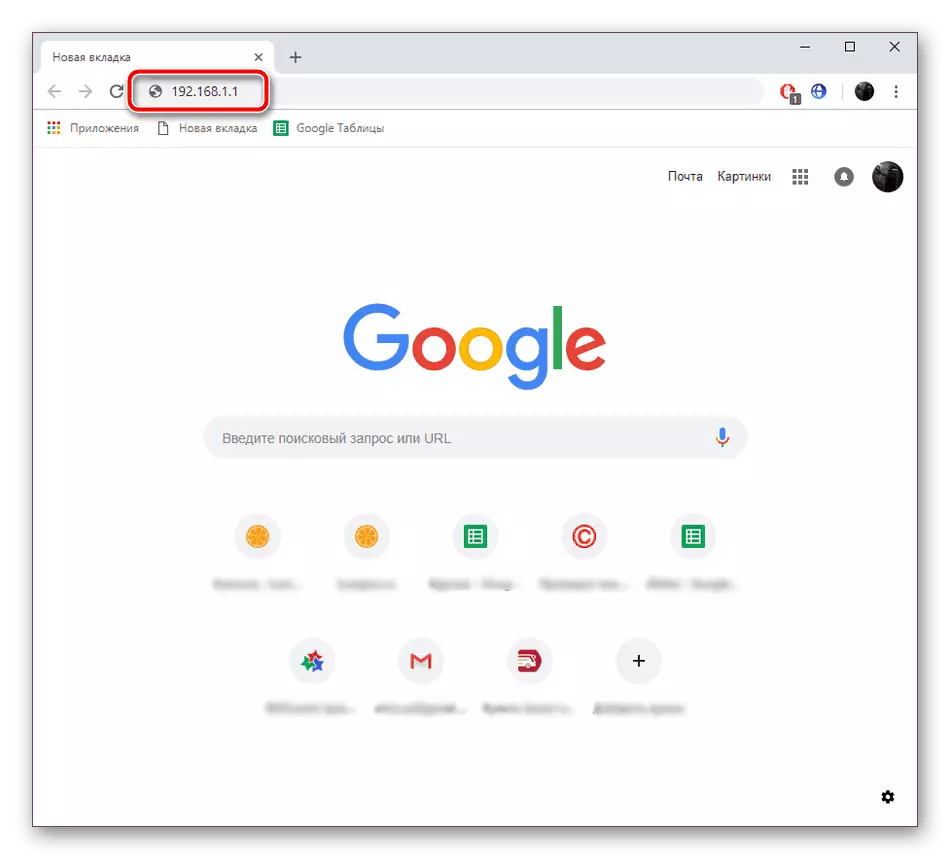
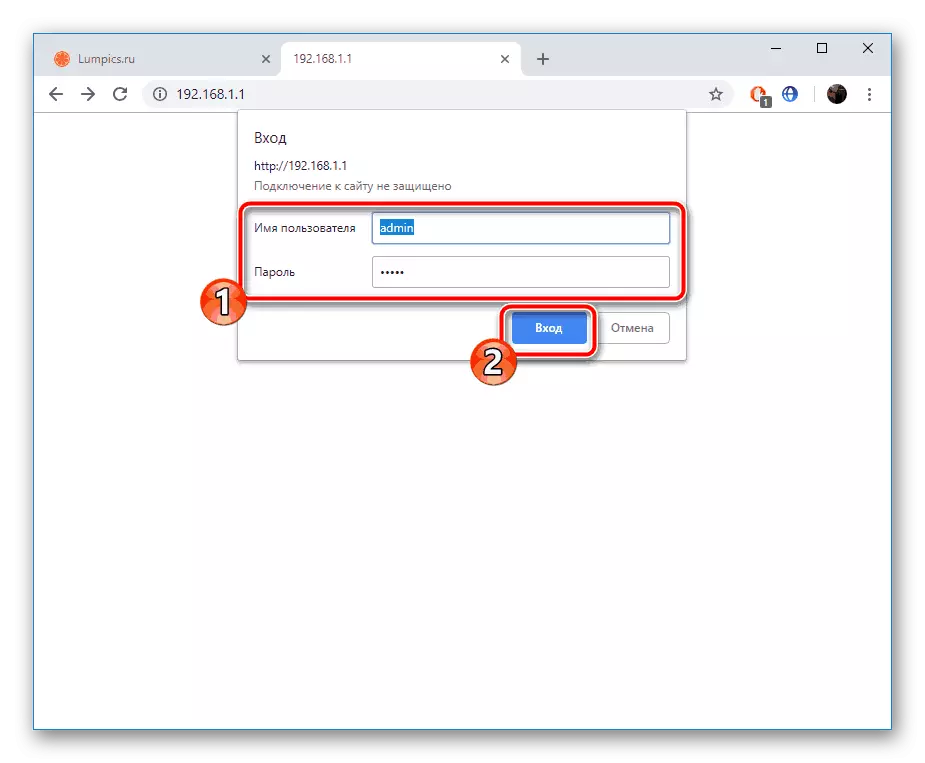
- Run any convenient web browser and in the address bar, enter 192.168.1.1, and then confirm the transition.
- In the applied form, you will need to specify the standard username and password. They matter admin.
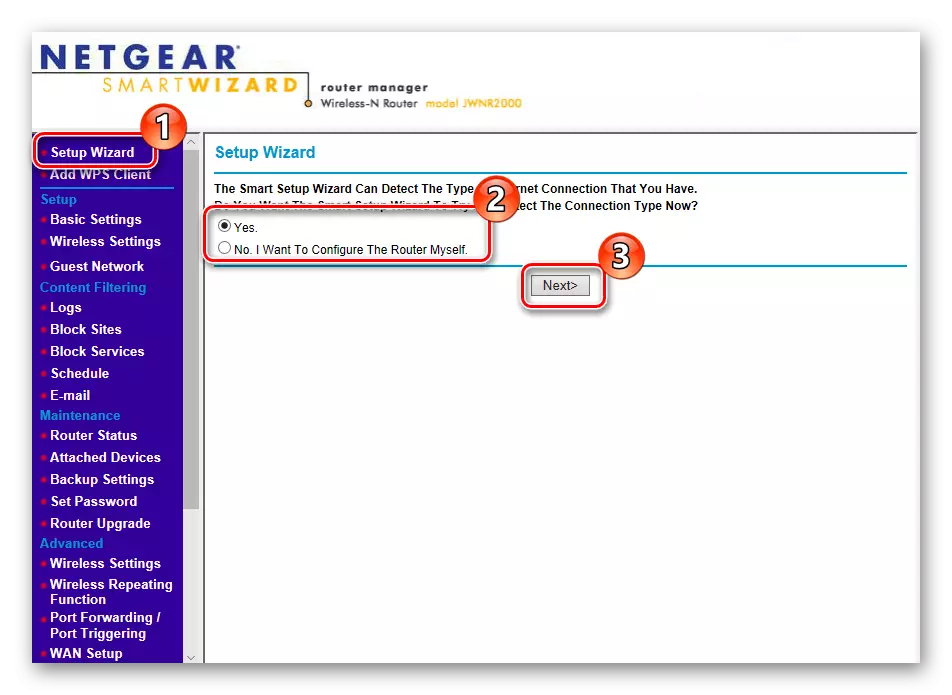
After these actions, you fall into the web interface. The quick configuration mode does not cause any difficulties and literally in a few steps are configured to configure the wired connection. To start the wizard, go to the category "SETUP WIZARD", mark the "YES" paragraph and follow. Follow the instructions and on their completion, go to more detailed editing the necessary parameters.
Basic configuration
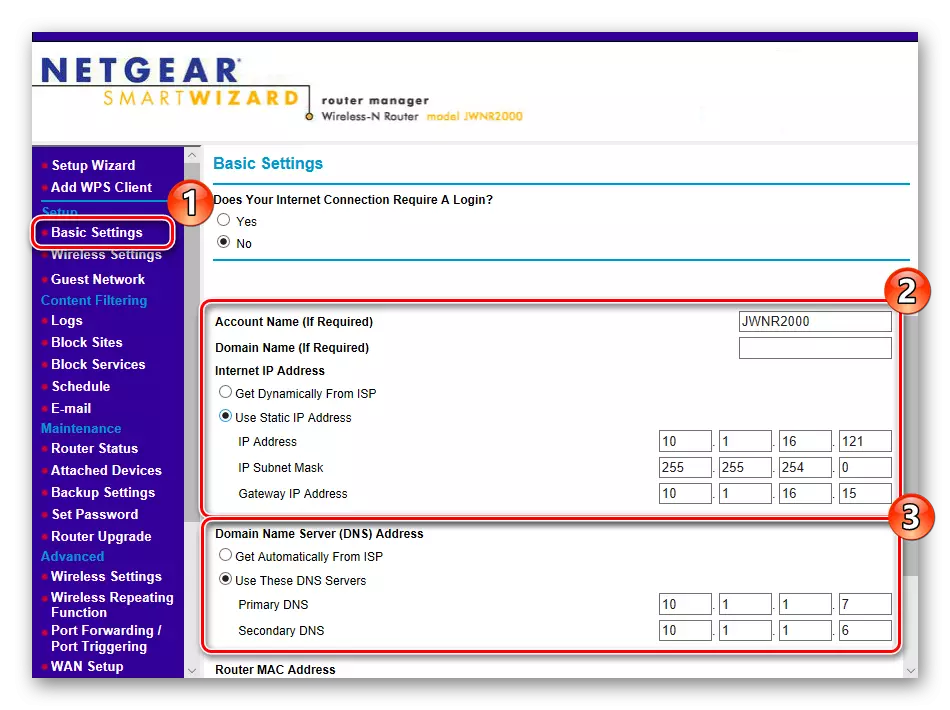
In the current WAN connection mode, the IP addresses are adjusted, the DNS server, MAC addresses and the account provided by the Account provided by the provider. Each item discussed below is filled in accordance with those data that you received when concluding an agreement with an Internet service provider.
- Open the "Basic Setting" section Enter the name and security key if an account is used for correct operation on the Internet. In most cases, it is needed with the active PPPoE protocol. Just below are fields for registering a domain name, setting up the IP address and DNS server.
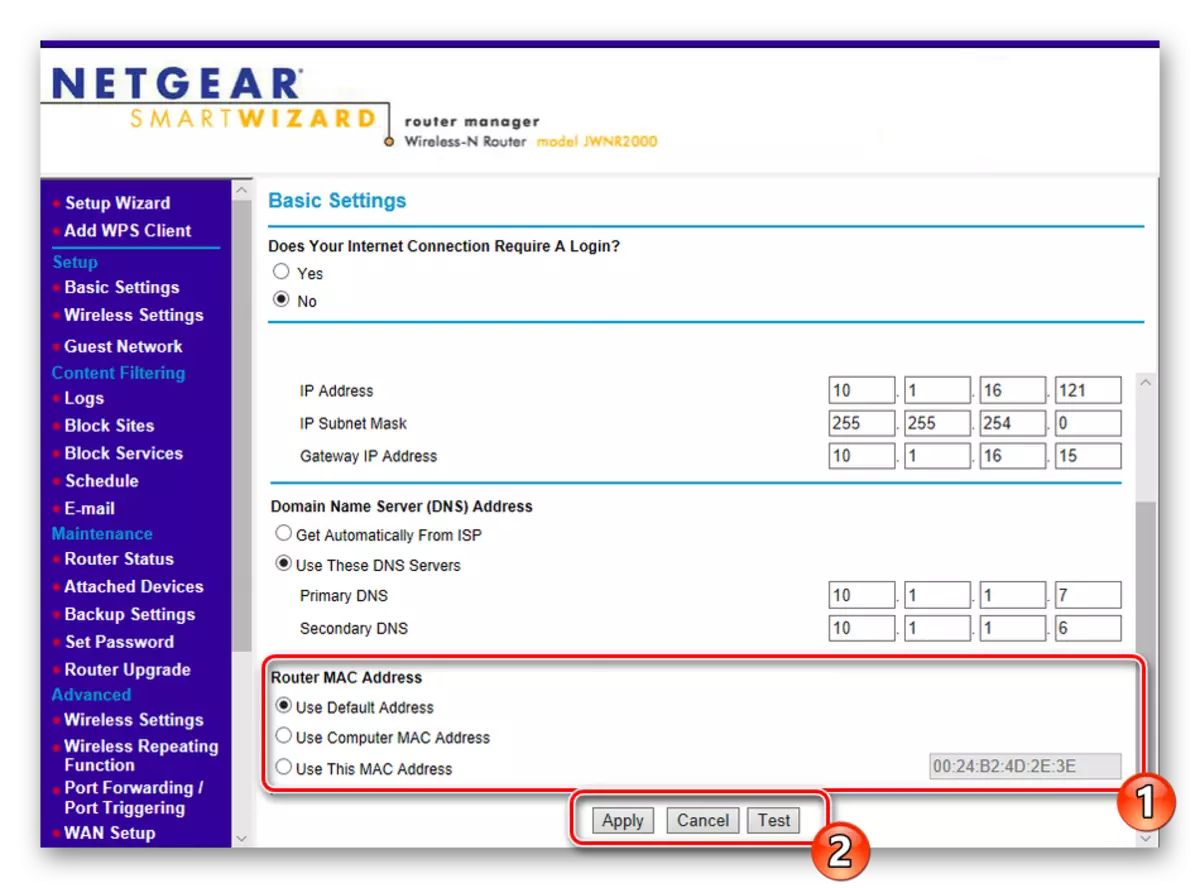
- If you spoke in advance with the provider, which MAC address will be used, set the marker opposite the corresponding item or print the value manually. After that, apply the changes and go further.
Now the WAN must function normally, but a large number of users involve Wi-Fi technology, so the operation of the access point is also set separately.
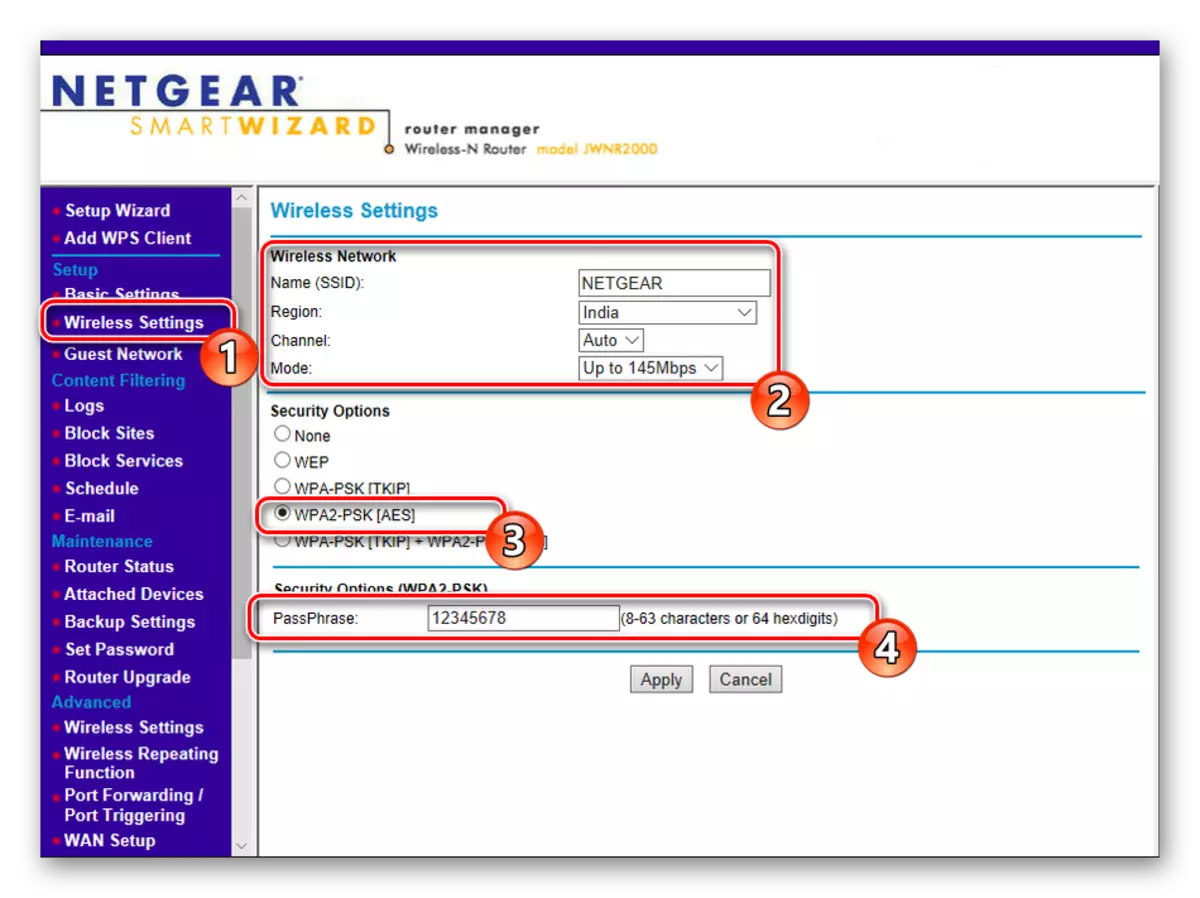
- In the Wireless Settings section, specify the name of the point with which it will be displayed in the list of available connections, specify your region, the channel and the operation mode, leave unchanged if the editing is not required. Activate the WPA2 Protection Protocol, marking the desired item, as well as change the password to a more complex consisting of a minimum of eight characters. At the end, do not forget to apply the changes.
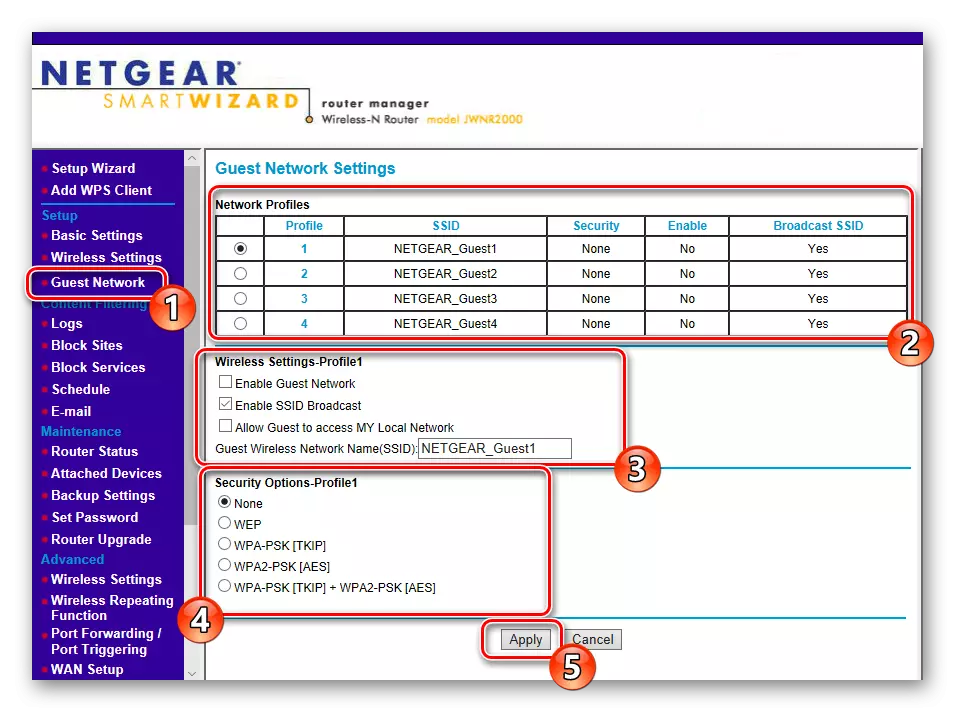
- In addition to the main point, some NetGear network equipment models support the creation of several guest profiles. Users connected to them can go online, but work with a home group is limited for them. Select the profile you want to configure, specify its basic parameters and set the level of protection, as shown in the previous step.
This is the basic configuration completed. Now you can go online without any restrictions. Below will be addressed by additional WAN and Wireless parameters, special tools and protection rules. We advise you to get acquainted with their adjustment to adapt the work of the router for yourself.
Setting up additional parameters
In NetGear routers, settings are rarely used in separate sections, rarely used by conventional users. However, occasionally their editing is still necessary.
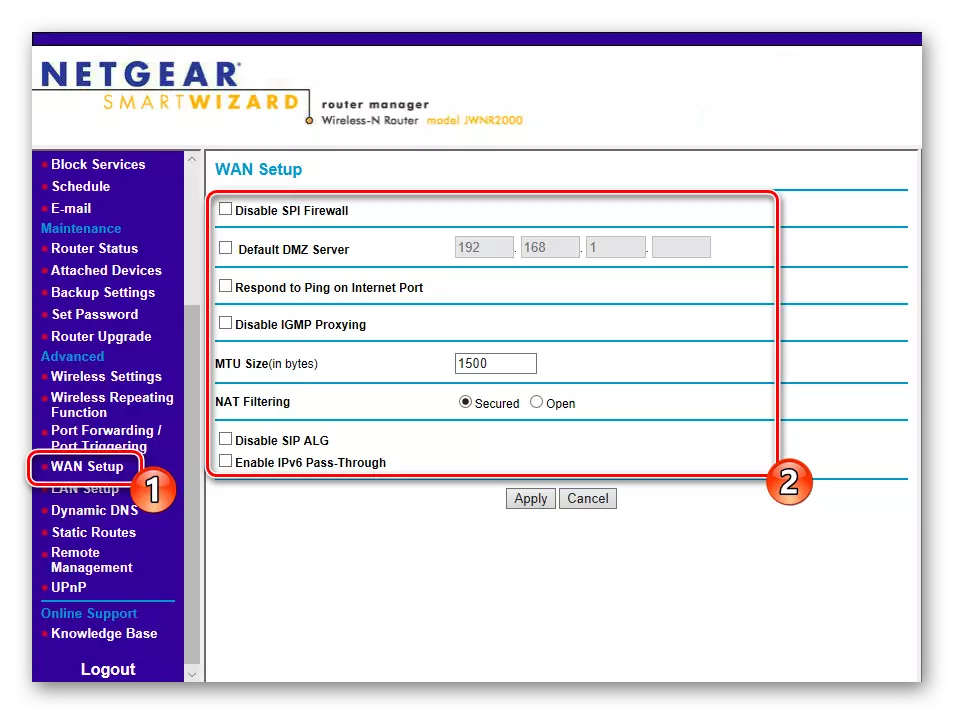
- First, open the "WAN SETUP" section in the Advanced category. The SPI Firewall feature is shown here, which is responsible for protection against external attacks, checking passing traffic on reliability. Most often, the editing of the DMZ server is not required. It performs the task of separating public networks from private and usually the value remains by default. NAT converts network addresses and sometimes it may be necessary to change the type of filtering, which is also done through this menu.
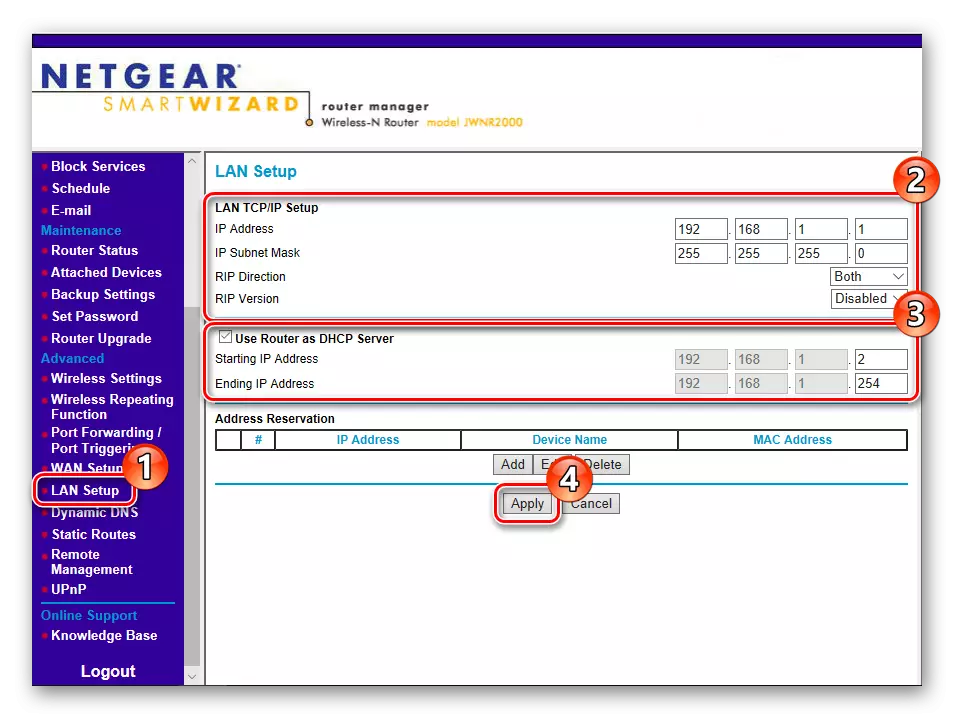
- Go to the "Lan Setup" section. Here it changes the IP address and the subnet mask used by default. We advise you to make sure that the "Use Router AS DHCP Server" item is marked. This feature allows all connected devices to automatically receive network settings. After making changes, do not forget to click on the "Apply" button.
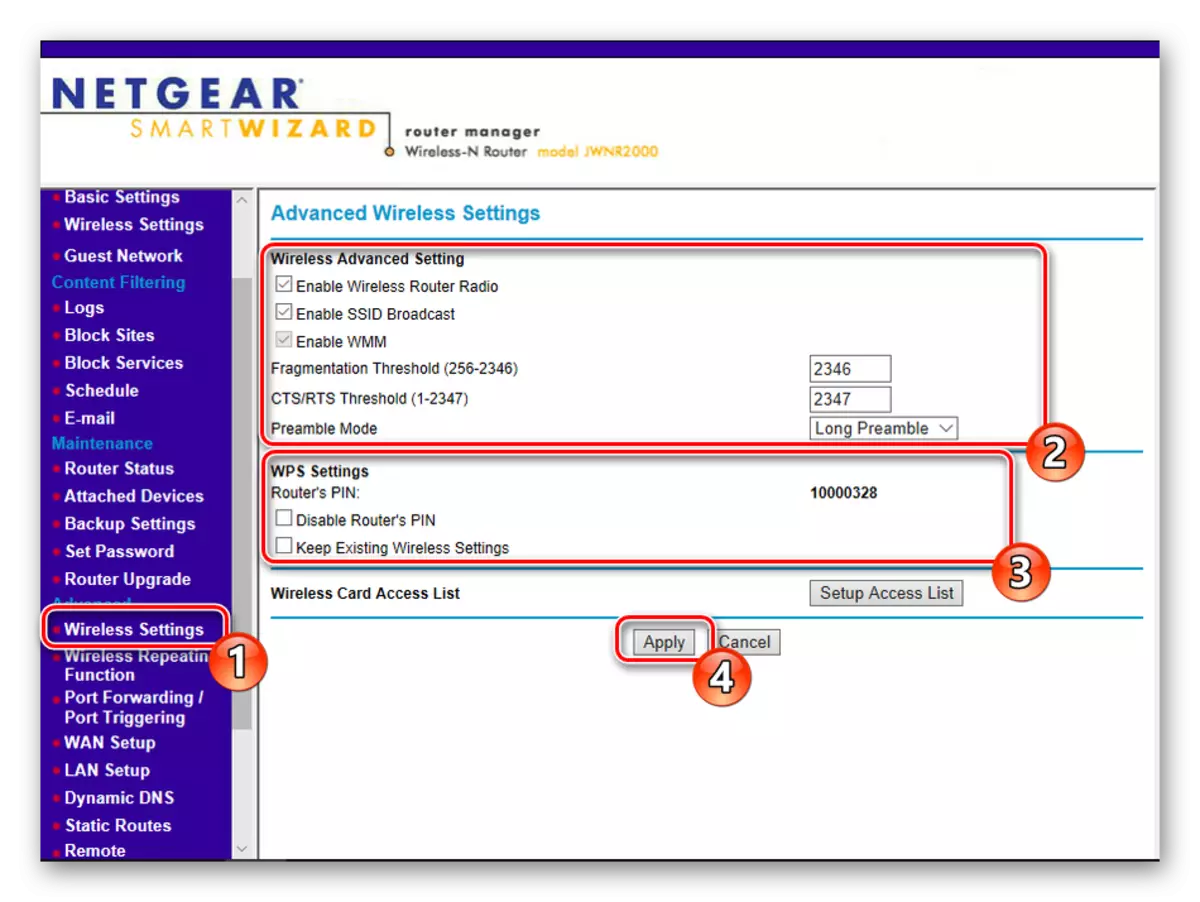
- Look in the "Wireless Settings" menu. If the items on broadcasting and network delay almost never change, then on WPS Settings should be paid attention to. WPS technology allows you to quickly and safely connect to the access point by entering the PIN code or activate the button on the device itself.
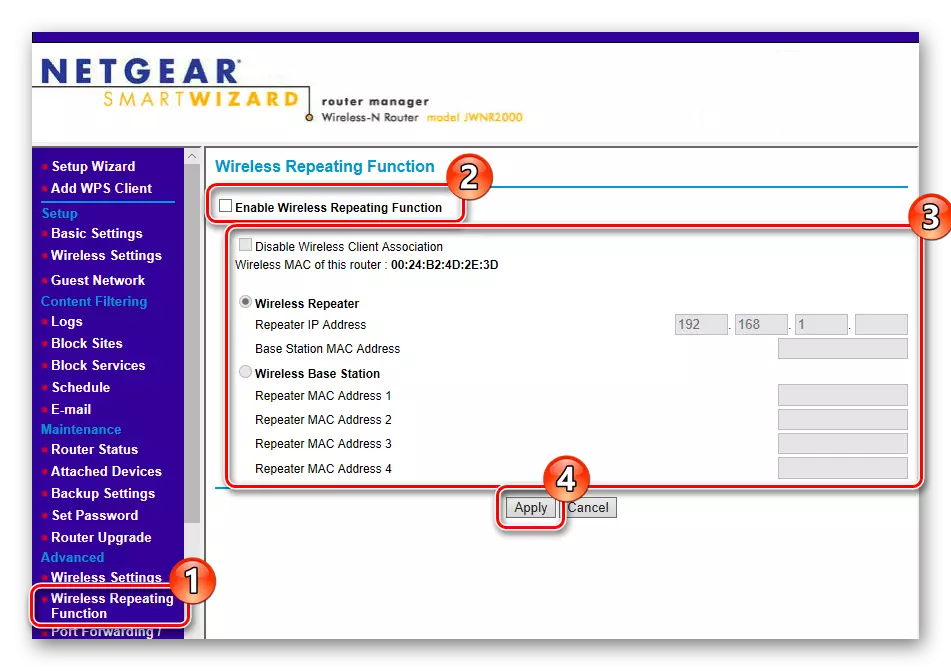
- Netgear routers can work in repeater mode (amplifier) Wi-Fi network. It turns on in the "Wireless Repeating Function" category. Here the client itself is configured and the receiving station itself, where the addition of up to four MAC addresses is available.
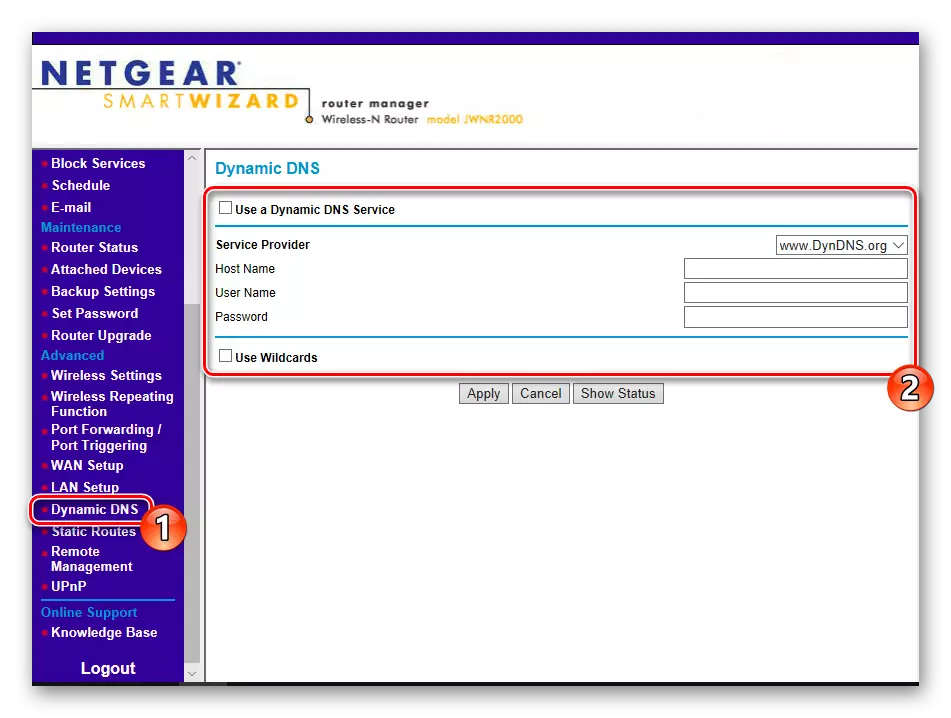
- Activation of the services of dynamic DNS occurs after its acquisition from the provider. A separate account is created for the user. In the web interface of the routers under consideration, the input of values occurs through the "Dynamic DNS" menu.
- The last thing I would like to be noted in the "Advanced" section - remote control. By activating this feature, you allow the external computer to enter and edit the router firmware options.
Read more: What is what and why the WPS is needed on the router
Usually you are given a login, password and server address to connect. This information is entered in this menu.

Security Setup
The network equipment developers have added multiple tools that allow not only to filter traffic, but also to restrict access to specific resources if the user tasks certain security policies. This is done as follows:
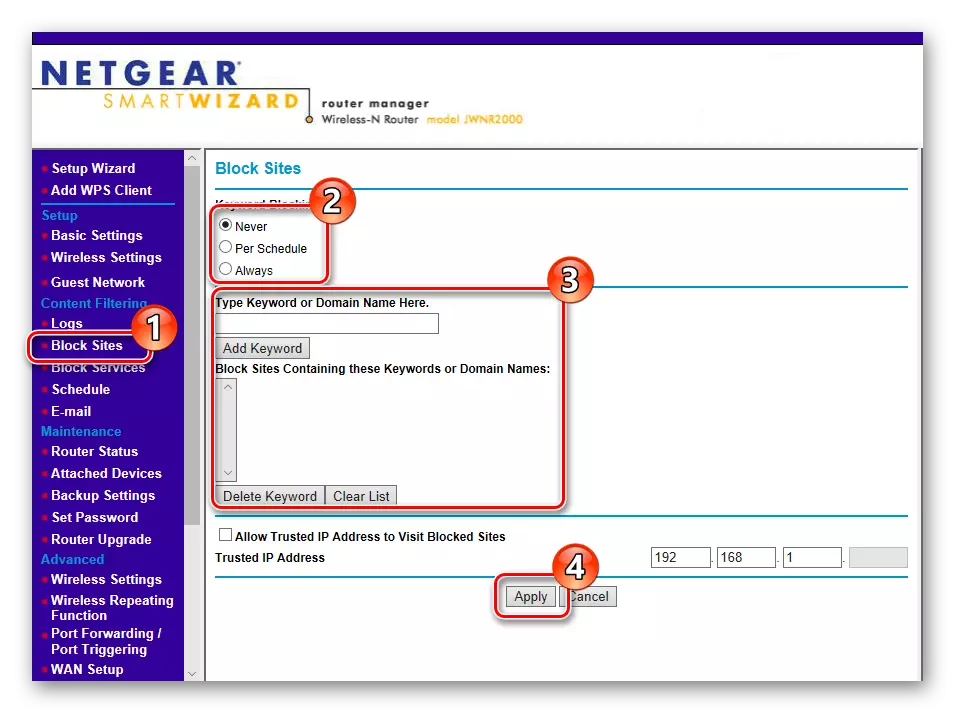
- The BLOCK SITES section is responsible for blocking individual resources, which will always work or only on a schedule. From the user you need to select the appropriate mode and make a list from keywords. After the changes, you must click on the "Apply" button.
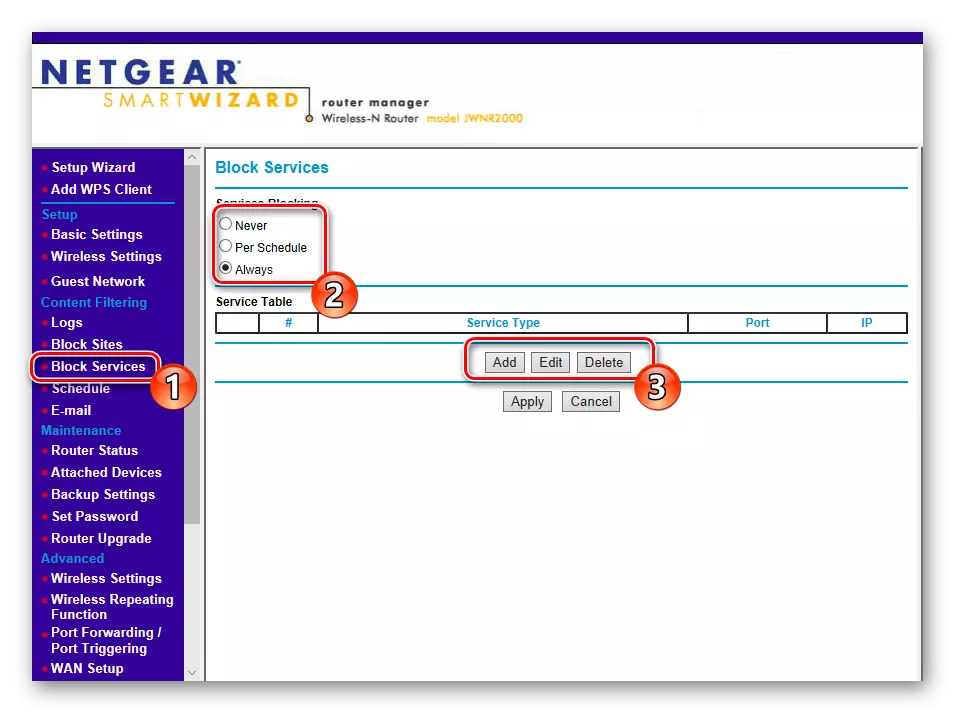
- Approximately the same principle runs blocking services, only the list is made up of individual addresses by pressing the "Add" button and enter the required information.
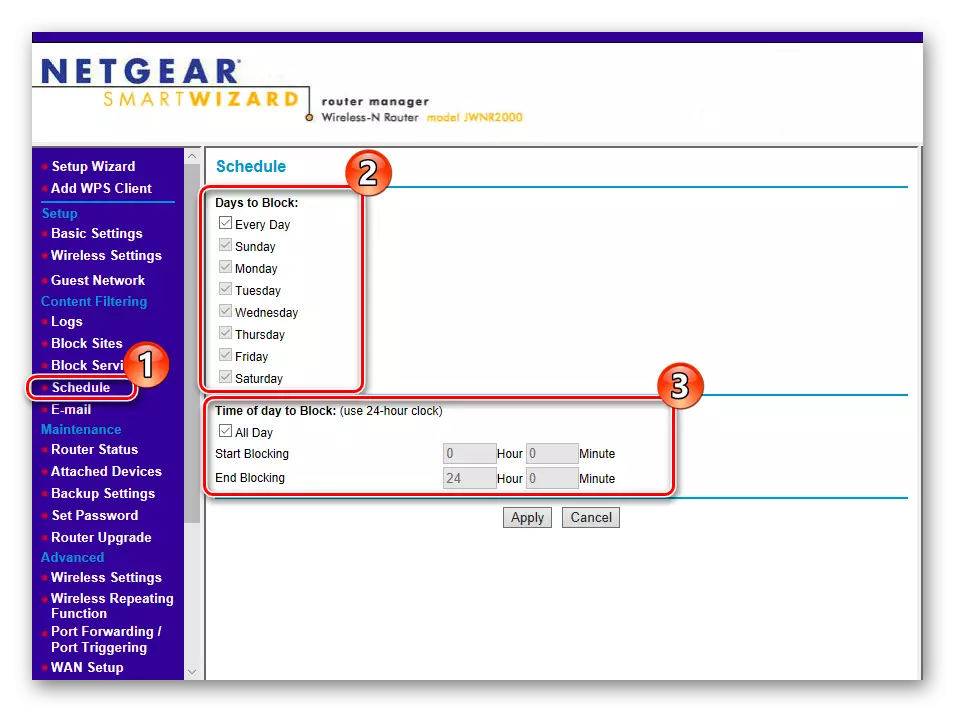
- Schedule - Security Policy Schedule. This menu indicates blocking days and the activity time is selected.
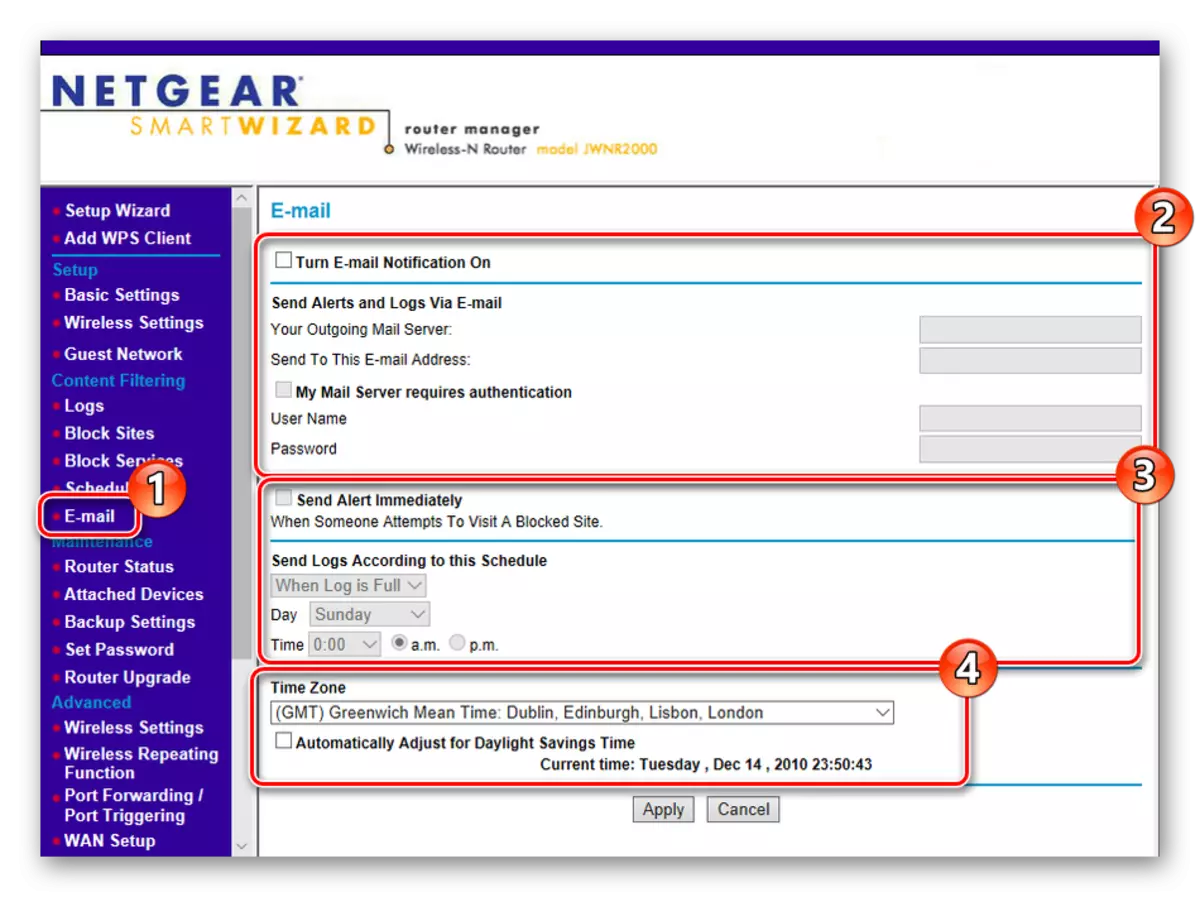
- In addition, you can configure the notification system that will come to email, for example, a log of events or attempts to enter blocked sites. The main thing to choose the right system time so that it all comes on time.
Finishing stage
Before closing the web interface and restart the router, there are only two steps, they will end the process.
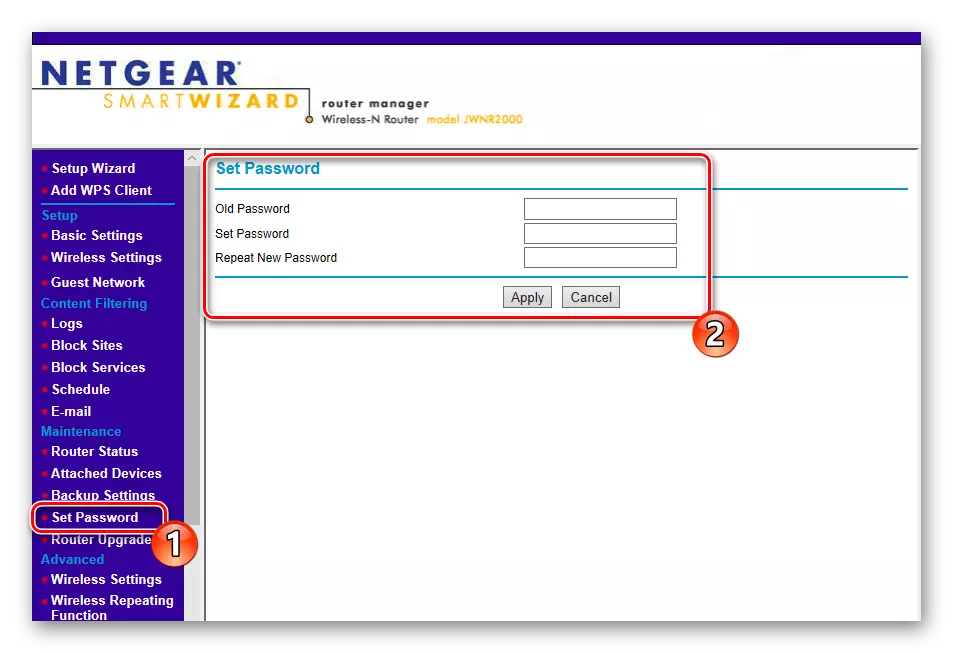
- Open the "Set Password" menu and change the password to more reliable to protect the configurator from unauthorized inputs. We remind you that the Admin security key is set.
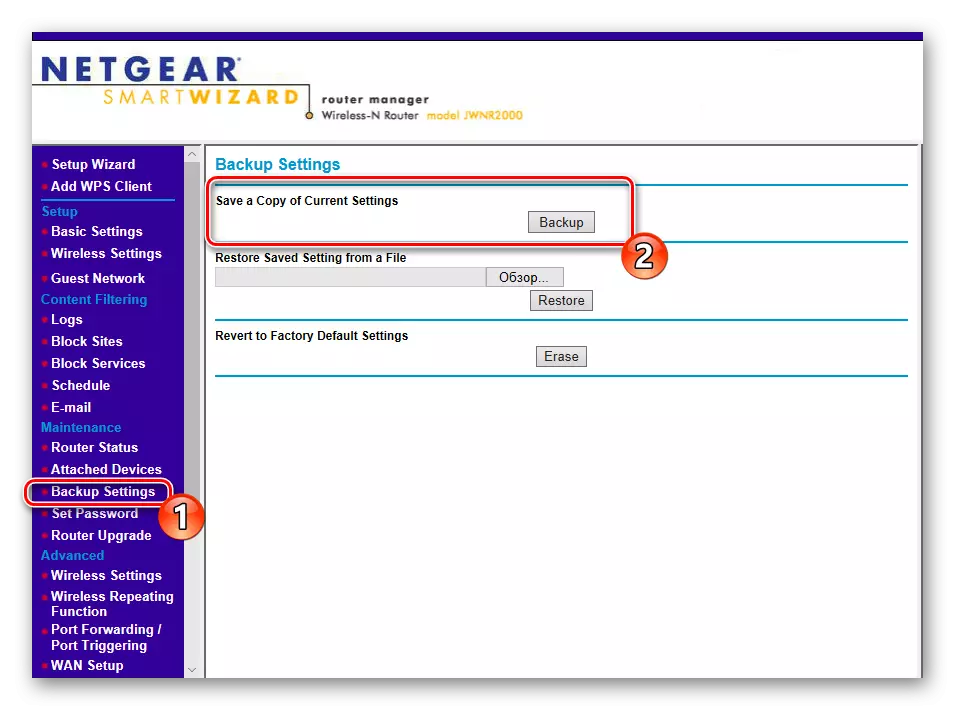
- In the "Backup Settings" section, save copies of current settings as a file for further restoration in case of need. There is also a reset function to factory parameters, if something went wrong.
On this, our guide is suitable for logical conclusion. We tried to tell the most detailed about the universal setting of NetGear routers. Of course, each model has its own characteristics, but the main process from this practically does not change and is carried out in the same principle.