Method 1: Adding Images
The simplest method of changing the background in Storsith comes down to loading the image from the Mobile Device Gallery. To do this, create a new story, click on the icon with the miniature of the last photo found in the lower left corner of the screen and through the file manager to select the desired file.
Read more: Adding a photo, creating a collage and embedding images in Storsith in Instagram
Alternatively, you can resort to some other tools like a special sticker that allows you to add a graphic file over the existing one, or use third-party applications. The combination of such approaches will create a truly unique background.
Method 2: Color Fill
Internal Instagram Editor allows you to create a color background without using a camera or download files. At the same time, the available options partly can be combined with each other and at certain manipulations even with the first way.Read more: Creating Storsis in Instagram from the phone
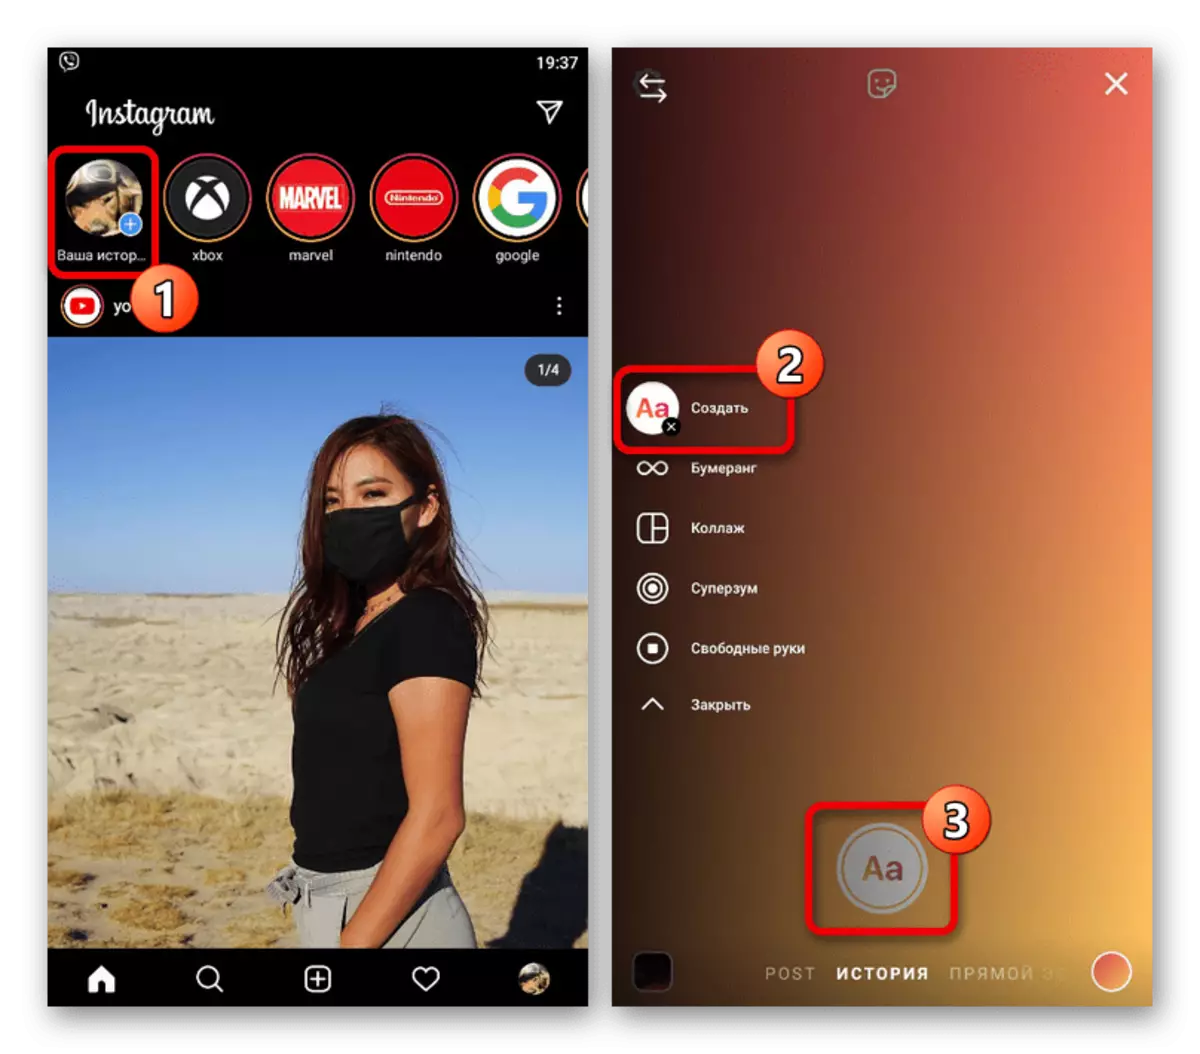
Option 1: Adding a gradient
- To use a multicolor gradient fill of the background, create a new storage, expand the side menu and select the "Create" tool. As a result, the image on the screen will be filled with a gradient, save which can be used using the "AA" button above the bottom panel.
- If you are not satisfied with the default gradient, tap the left icon on the toolbar. This will allow you to switch between multiple default options.
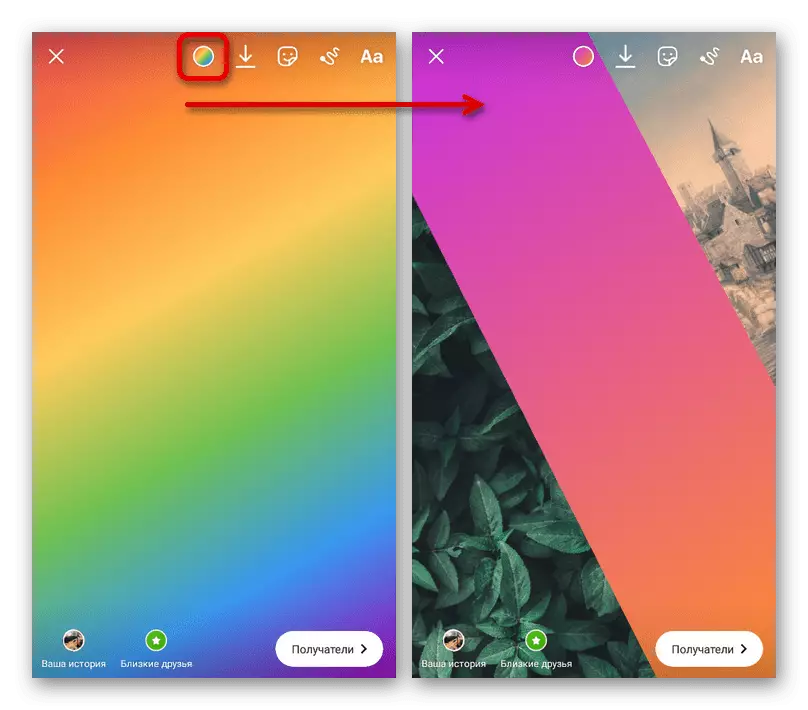
Despite restrictions on the plan of available styles, the fill can be diversified with brushes. In addition, the imposition of images is fully supported.
Option 2: Drawing Tools
To create a monochrome background, download any image or use gradient fill. After that, enable the drawing mode, select one of the brushes and the color on the appropriate panels, and for a few seconds you housing any place within the screen.
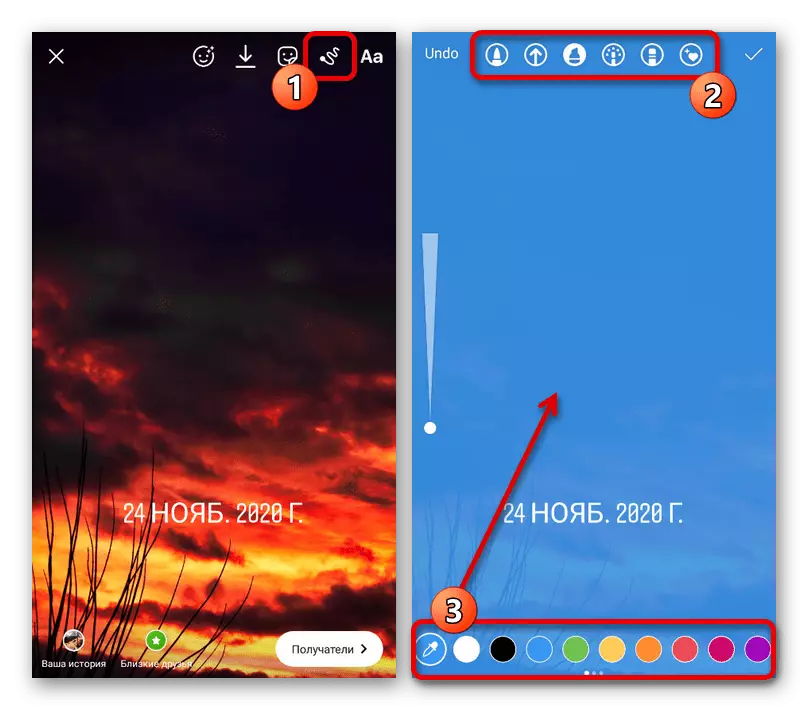
If you set the marker as a brush, a slightly transparent fill will be performed. However, when repeated use, the background drawing will finally disappear.
Method 3: Removal and Replacement Background
The last method of changing the background is to use special services and applications that provide tools for automatic or manually deleting content around any objects with a subsequent replacement at their discretion. Only two funds that differ in convenience will be considered in the quality of example, while there is actually a huge amount of alternative options.Option 1: Picsart
- Using the PICSART application for iPhone and Android, you can create a storage for instagram using various tools. First of all, install the program from the page in the store and after opening at your discretion you can perform authorization.
Download Picsart from Google Play Market
Download Picsart from App Store
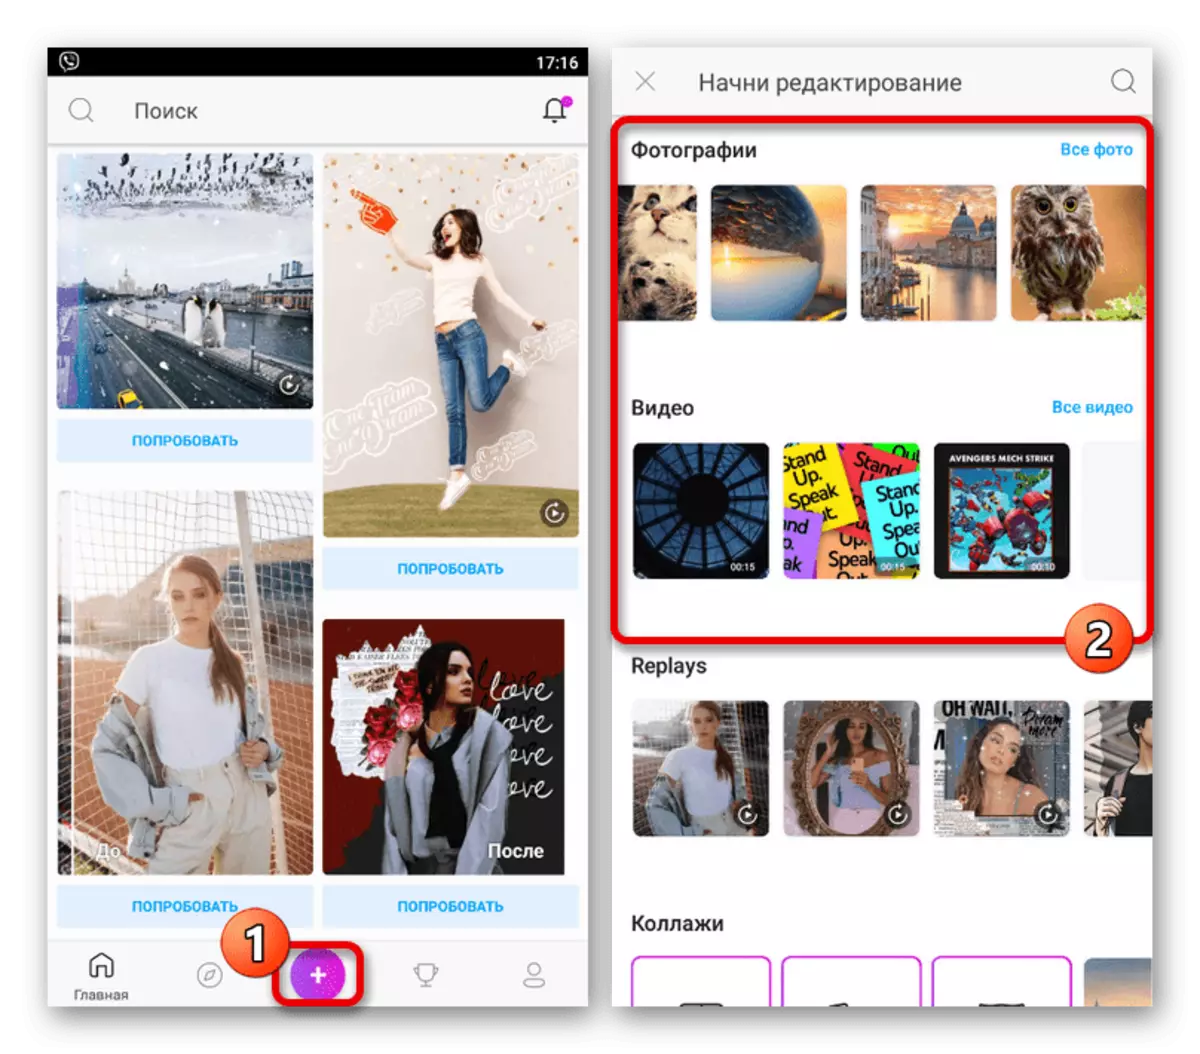
- When an application interface appears, provide access to the file storage on the device and on the bottom panel, use the "+" icon. As a result, the "Photo" and "video" block will be displayed, from where the initial photo should be selected, the background you want to delete.
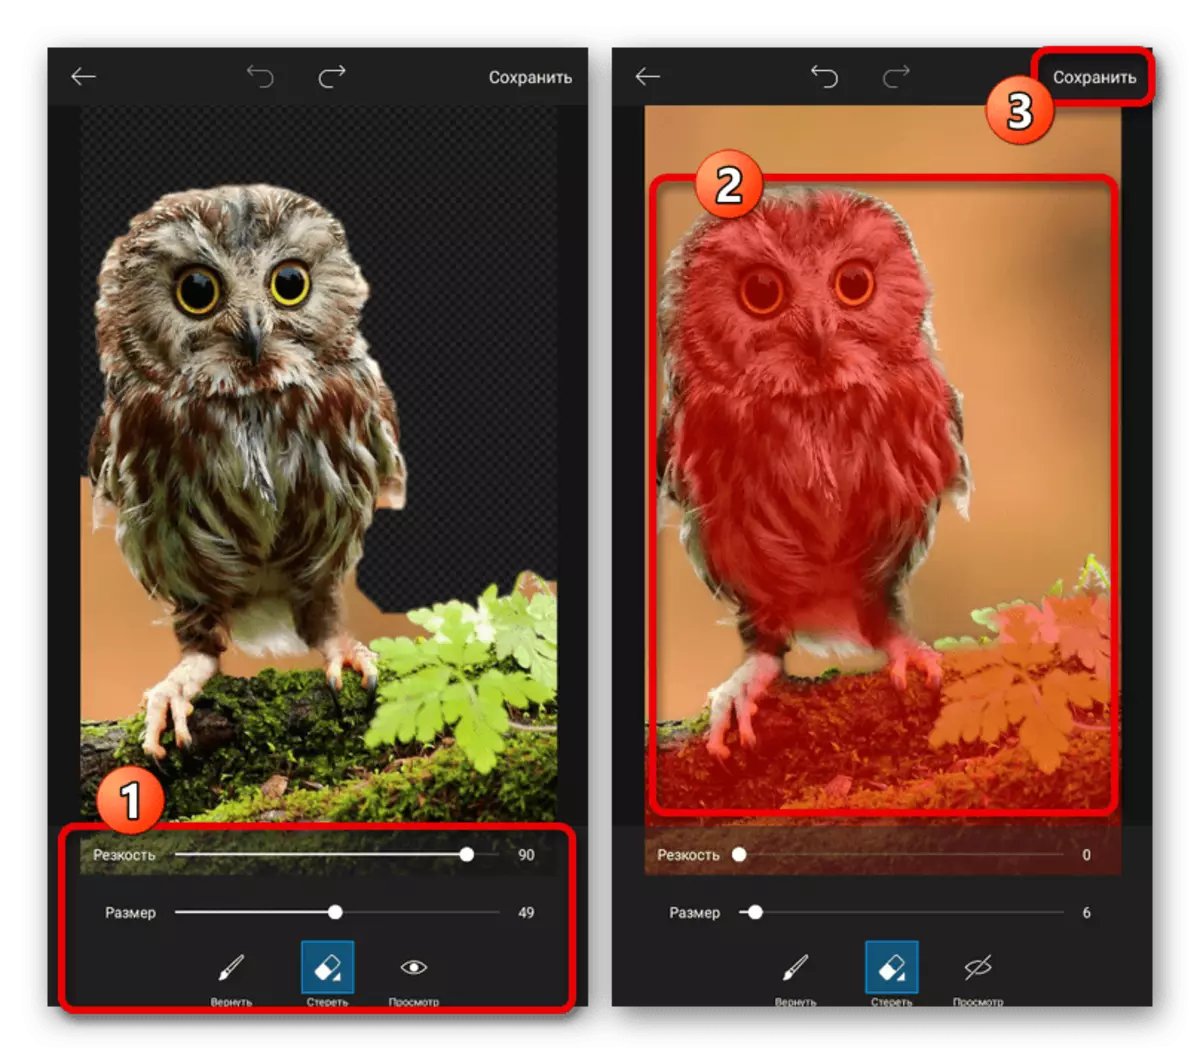
- On the bottom panel of the main editor, tap the "Cut" icon and read the internal help to use this tool. Note that it is easiest to edit images in high quality and a monophonic background.
- Return to the editor page using a cross in the upper left corner of the screen, on the bottom panel, set the "Select" mode and tap one of the standard options to produce fast selection. If on the image you need to highlight an object that does not fall under one of the standard criteria, use the "Contour" mode for manual stroke.
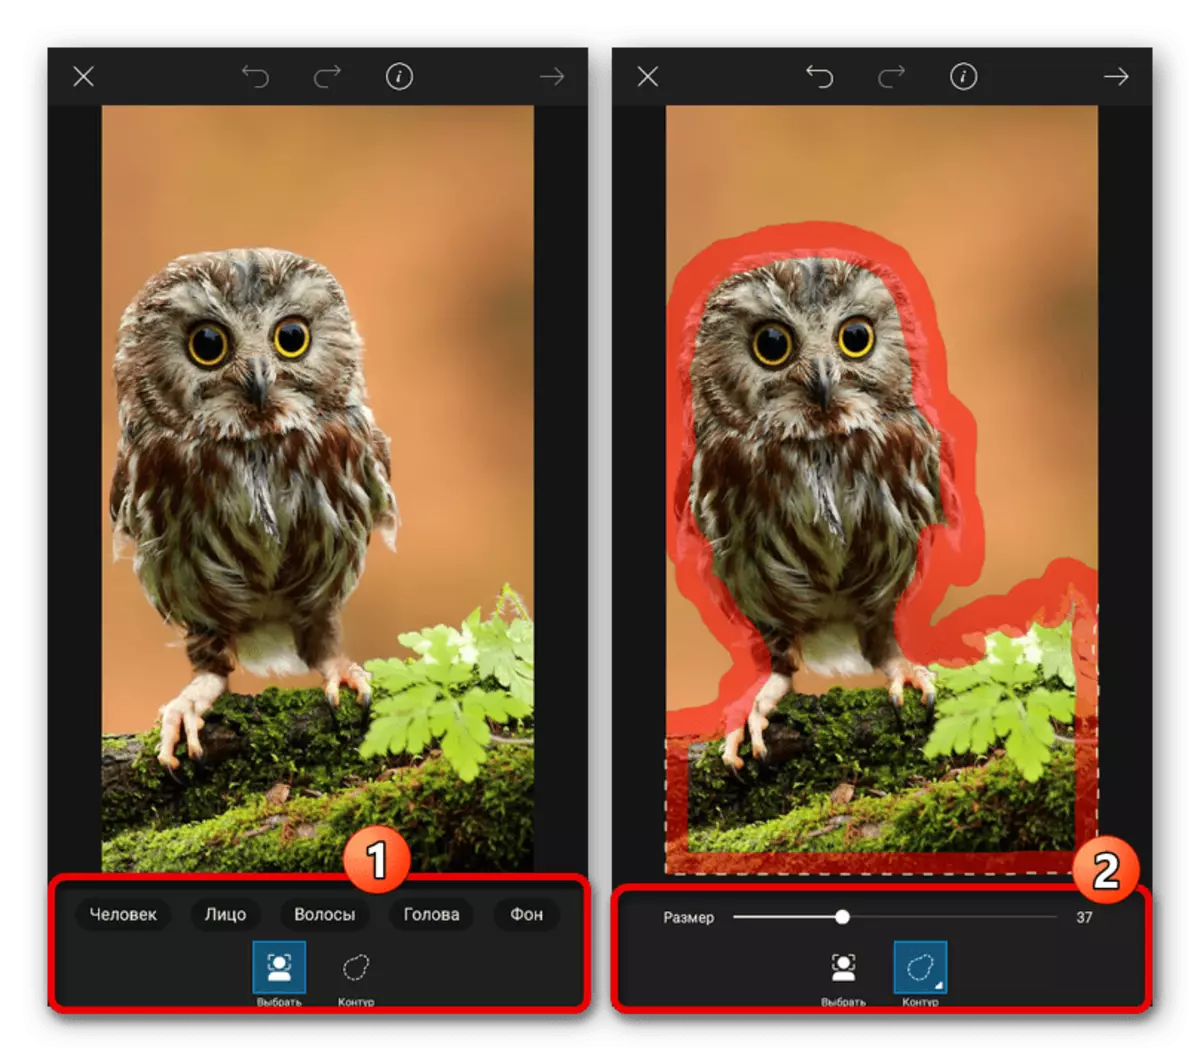
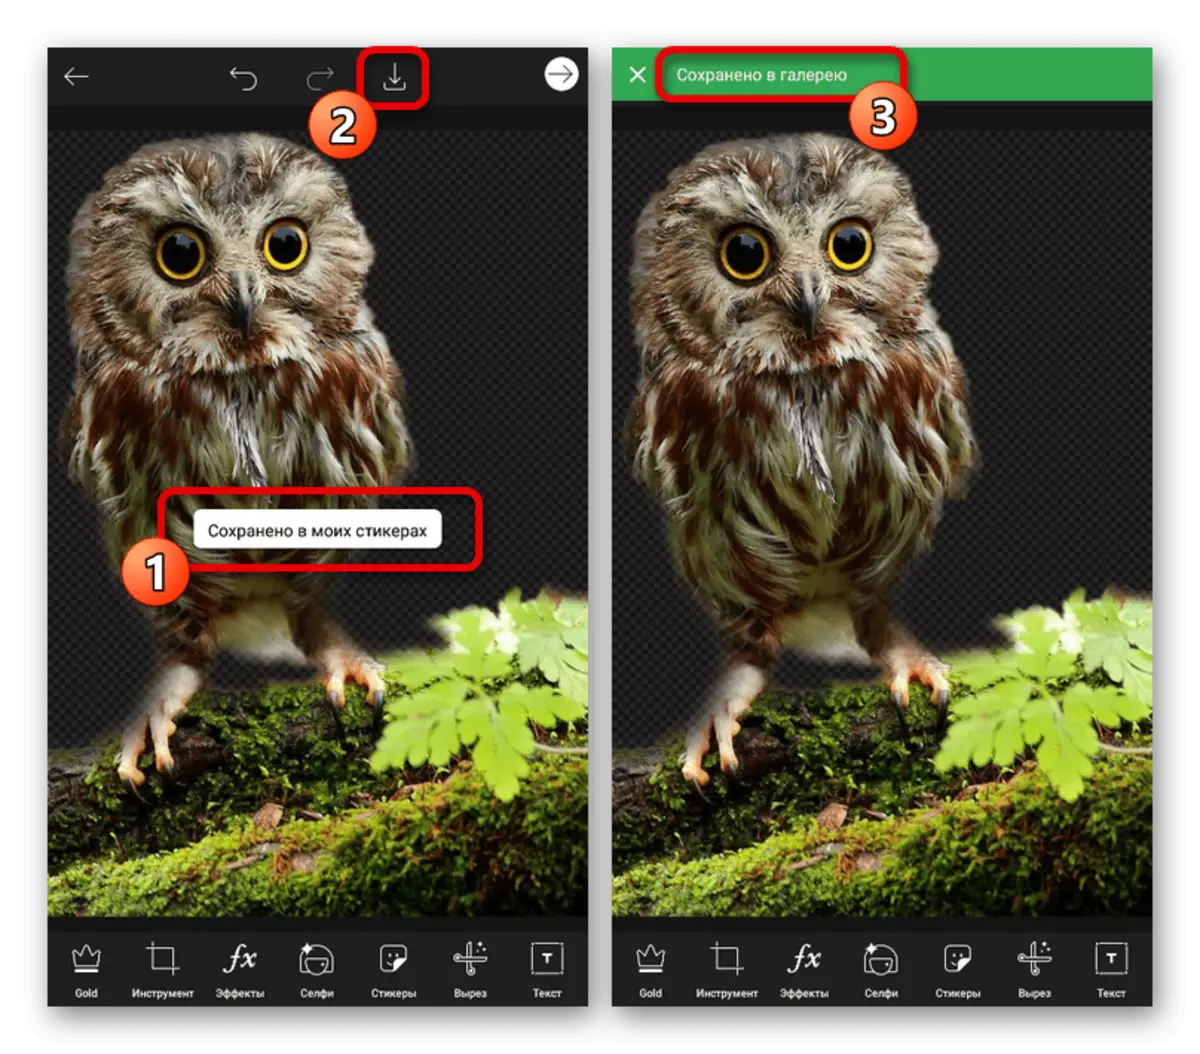
After completing the selection, use the arrow icon in the right corner and at the next step. Make the final changes, removing unnecessary parts and smoothding the edge of the file. To exit this mode, click "Save" on the top panel.
- Once again in the photo editor, tap the down arrow to save the file in the library. After that you can close the project, returning to the main page.
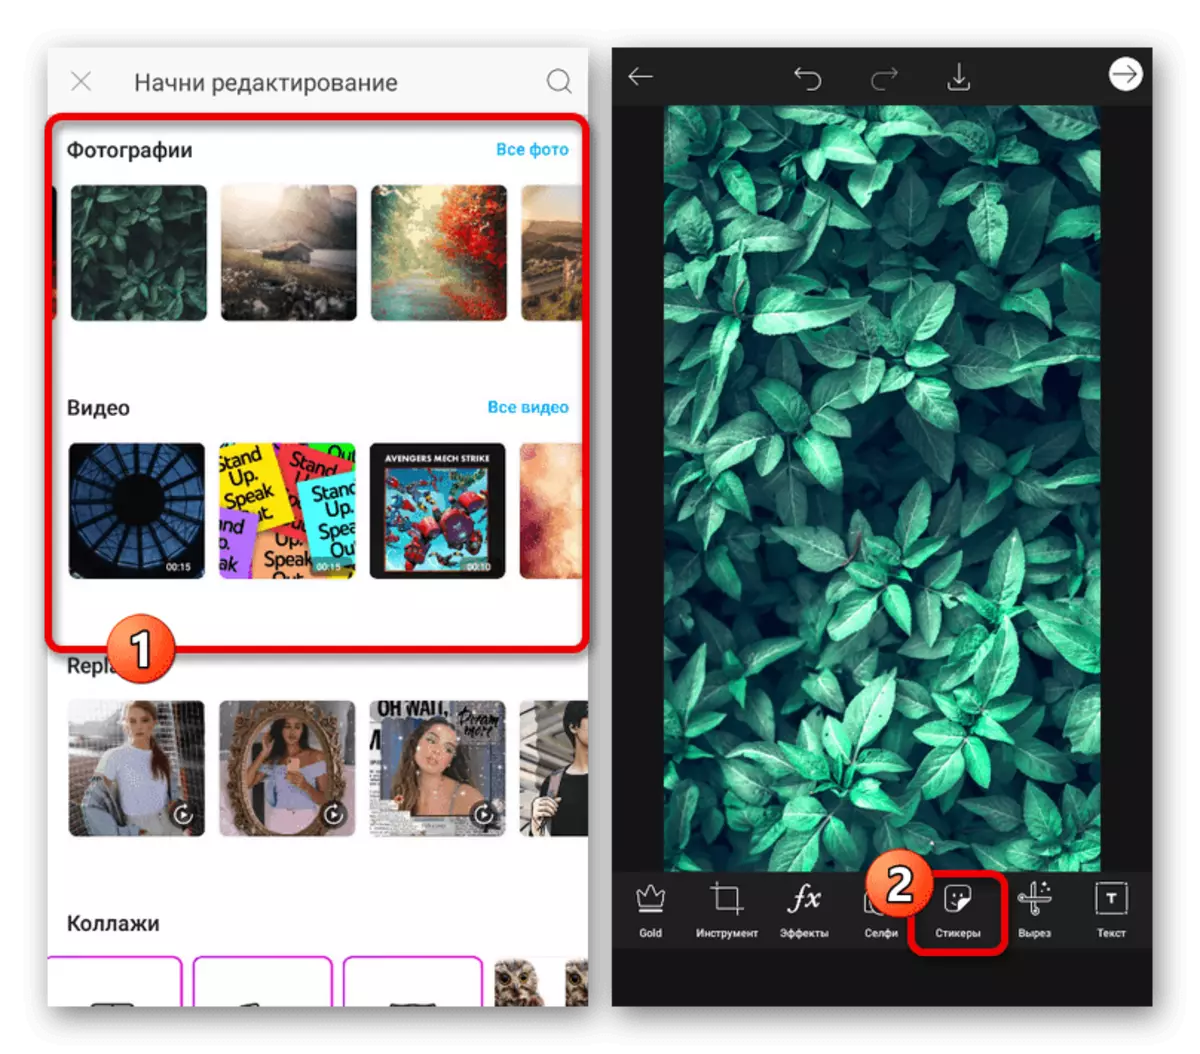
- By analogy with the first step, select an image that will now act as a new background. Make all the required changes using the editor functions and on the bottom panel, click the Stickers icon.
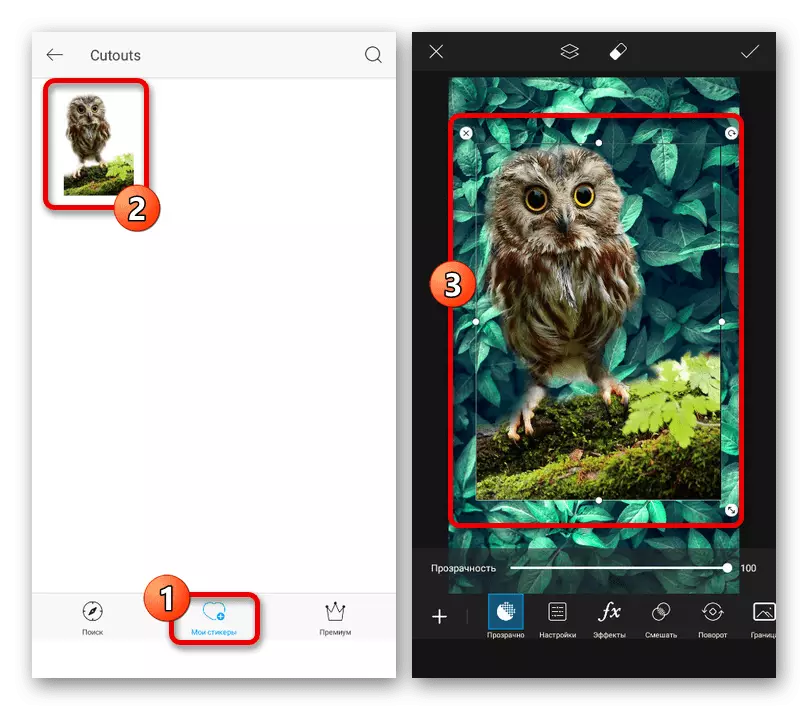
- Open the My Stickers tab, go to the "Cutouts" folder and tap the previously trained photo. Subsequently, you can use individual tools to select the contents in the desired way.
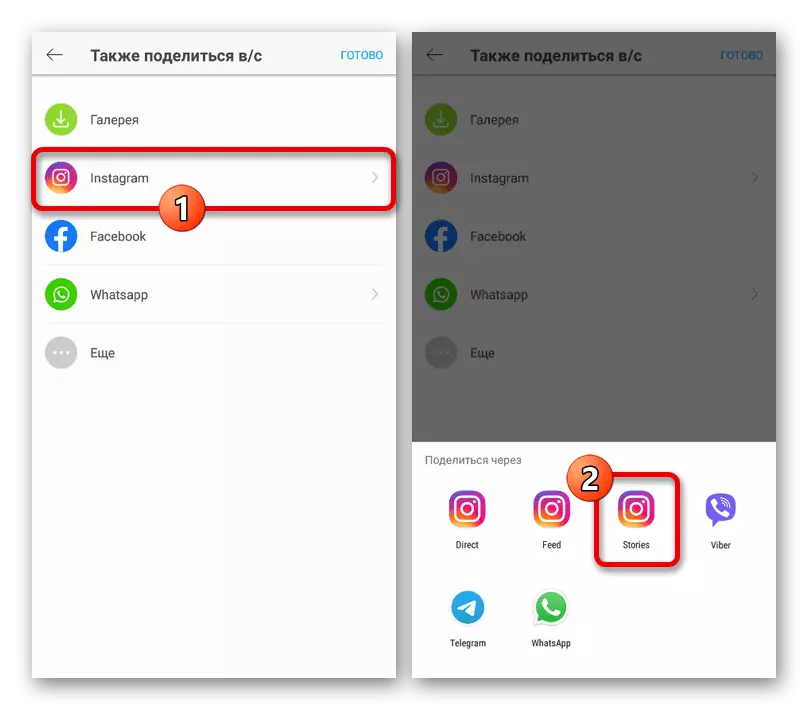
- To save the result on the top panel, tap the checkbox icons and save the file into the gallery using the down arrow. The application also allows you to immediately publish in Storsith through the "Share" section, accessible when you click on the icon in the upper right corner of the screen.
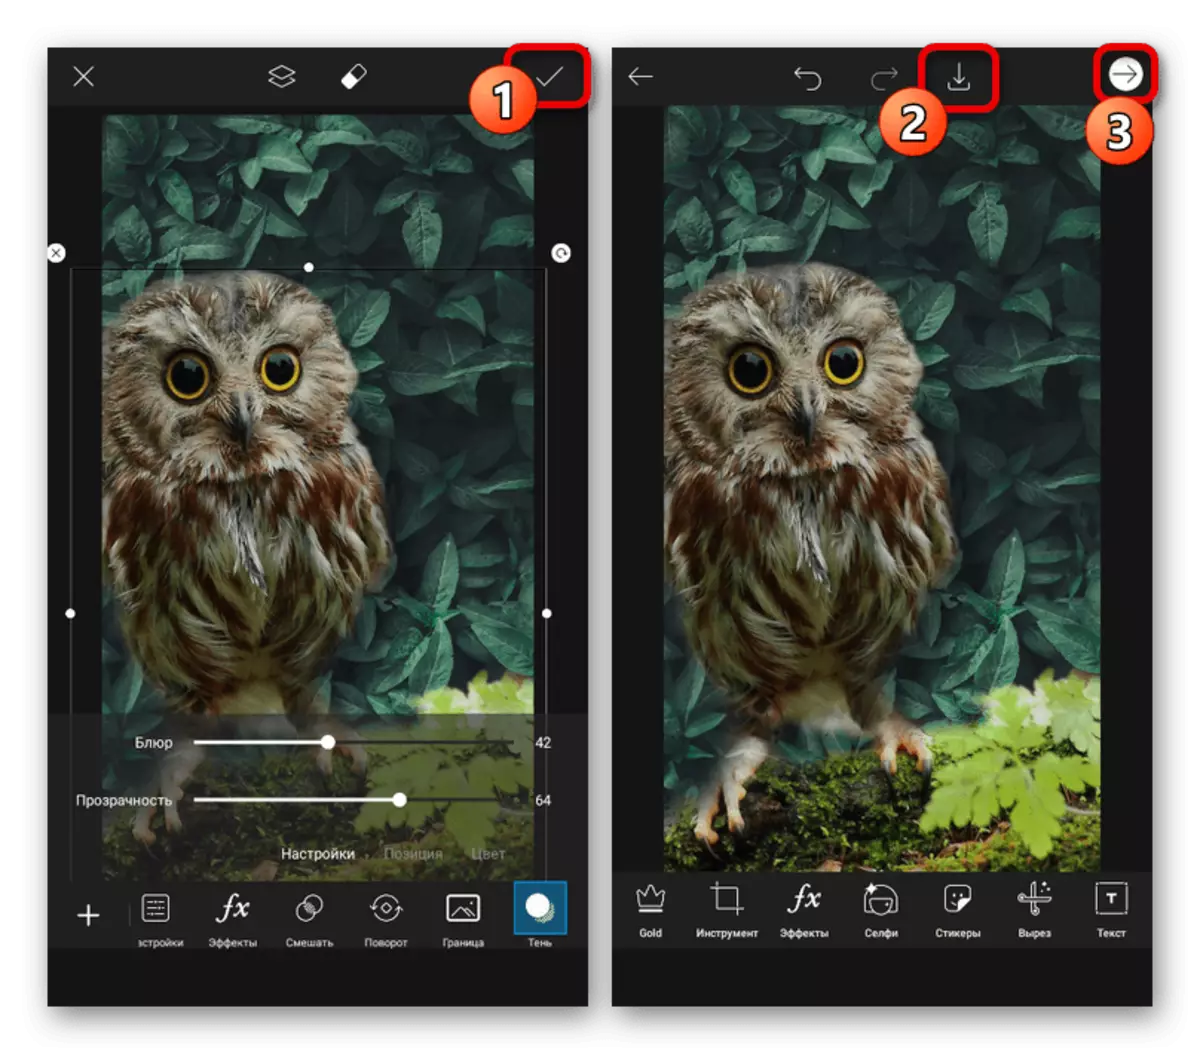
From the "Share V / C" list, select "Instagram" and in the pop-up window tap "Stories". As a result, the official application will be opened with automatically added file.

Option 2: Background Removal
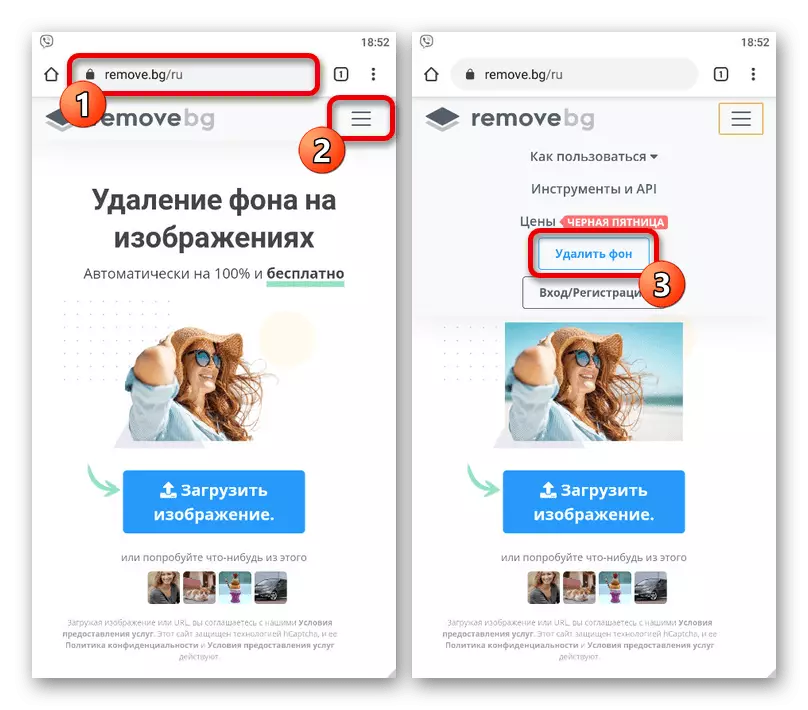
- One of the best online services that provide tools to remove and replace the background in the photo is background Removal. Go to the Main page of the site according to the link below through any mobile web browser, expand the main menu in the upper right corner of the screen and use the "Delete Background" option.
Go to the online booking book Background Removal
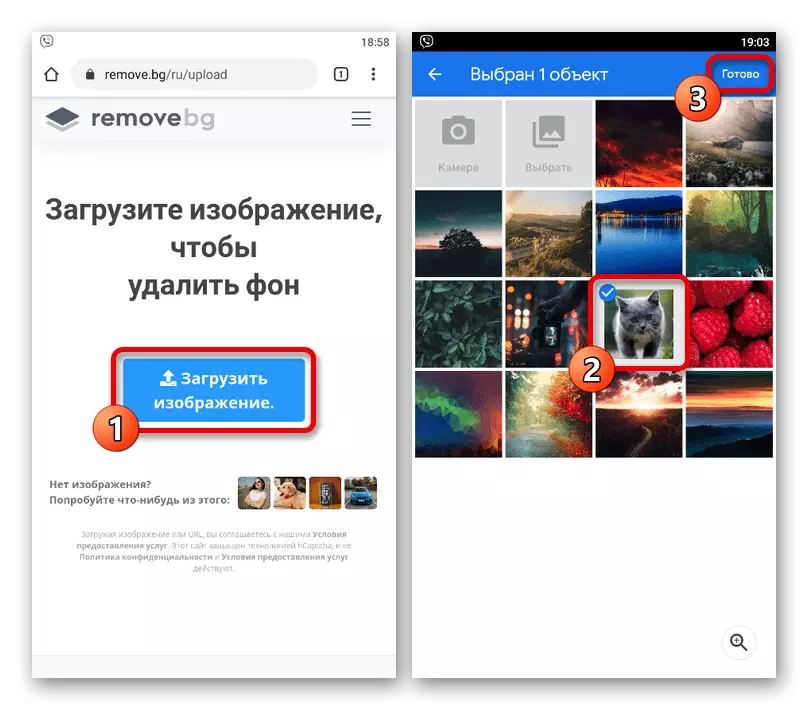
- Touch the "Download Image" button in the center of the page and through the file manager, select the desired snapshot in the device's memory. After that, tap "ready" on the top panel and wait for the processing completion, as a rule that requires a minimum of time.
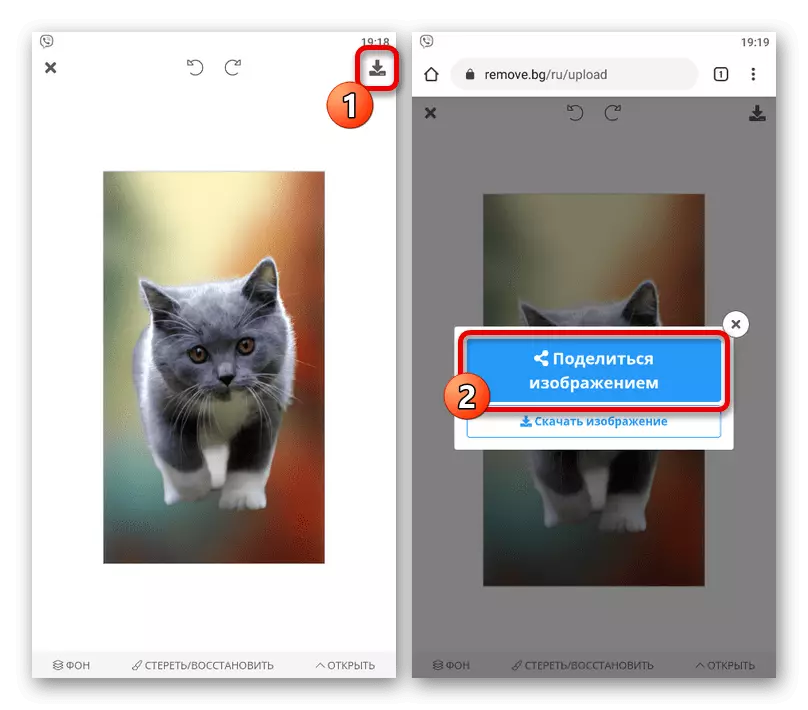
- As a result, the selected photo appears on the screen with a neatly cut background. To add a new image to the background, go to the internal graphic editor using the Edit button.
- On the "Background" tab in the "Photo" subsection, you can choose one of the standard options or use the "Select Photos" option. In addition, through the Blur Blochemia, you can apply the BBC effect exclusively for the rear background.
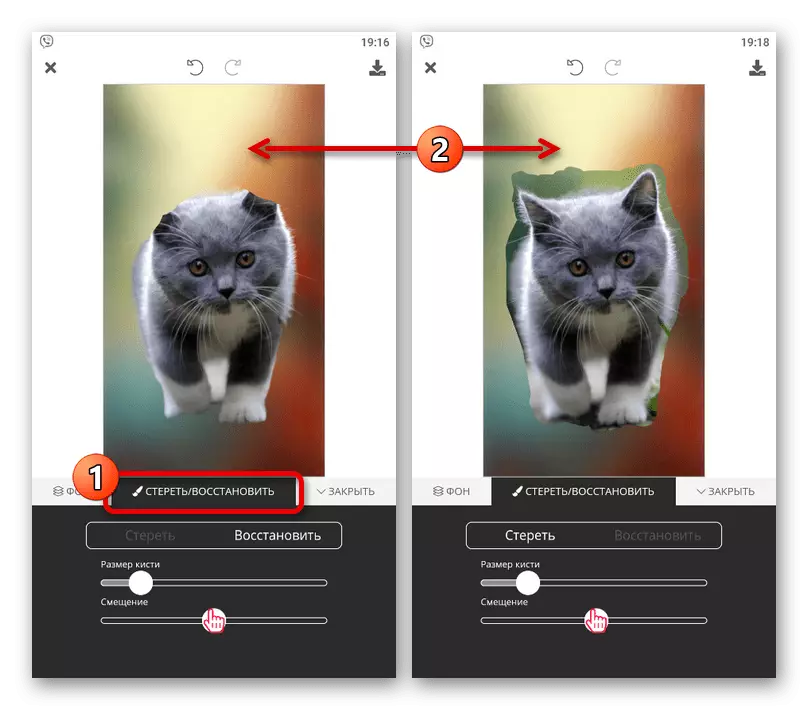
Using the tools on the "Erase / Restore" tab, it is possible to remove or vice versa to return some details from the initial file. Unfortunately, in this case there is only a rigid brush that limits independent creation of smooth boundaries.
- Prepare an image in the upper right corner, click on the download icon and in the pop-up window Touch the Share button. The file is also quite possible to download the device in memory, but at lower quality.
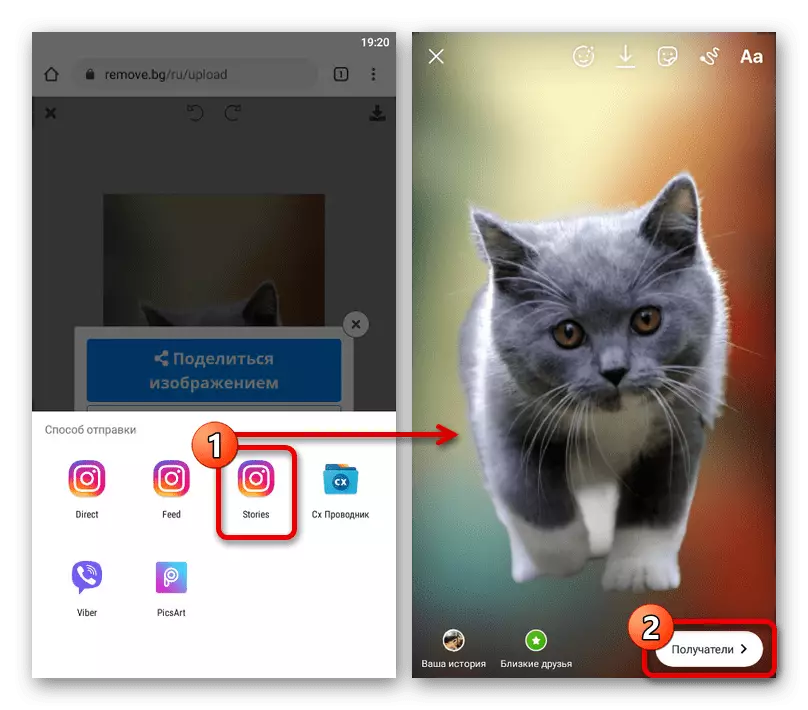
From the "Send Method" list, select "Stories" and wait for the appropriate application. The final result will be installed as an ordinary photo and can be published.