
On the application market for Android there are solutions for every taste, however the available software may not arrange certain users. In addition, many enterprises from the commercial sphere make a bet on Internet technologies and often need customer applications for their sites. The best solution for both categories will be the creation of your application. On online services for solving such tasks, we want to talk today.
How to make an Android application online
There are many Internet services that offer the service to create applications under the "green robot". Alas, but to the most part of them is difficult to access, because they require a paid subscription. If such a solution does not suit you - there are programs for creating applications for Android.Read more: The best programs for creating Android applications
Fortunately, there are free options among online solutions, the instructions for working with which we present below are also present.
AppsGeyser.
One of the few fully free application designers. To use it is quite simple - do the following:
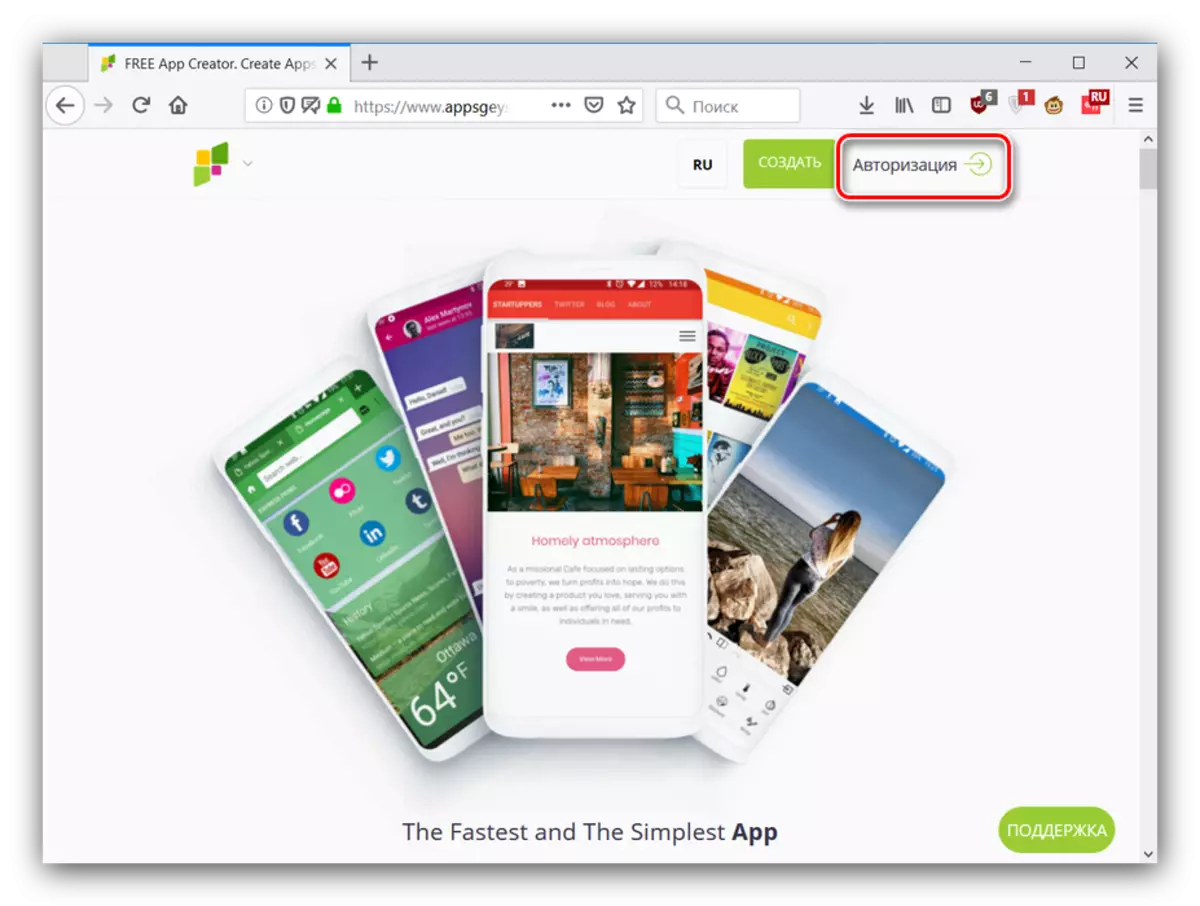
Go to the site appsgeyser
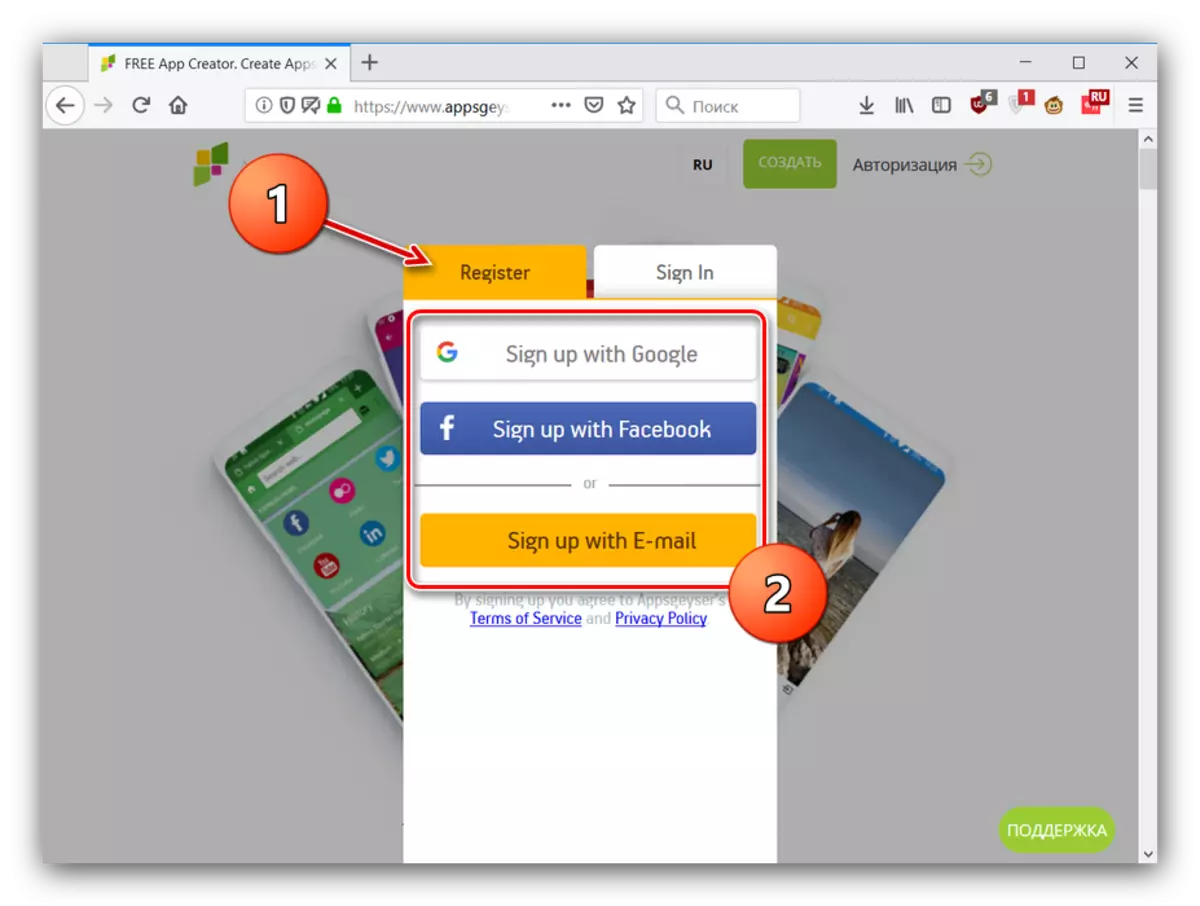
- Use the reference above. To create an application, you will need to register - for this, click on the inscription "Authorization" at the top on the right.
Then go to the "Register" tab and select one of the proposed registration options.
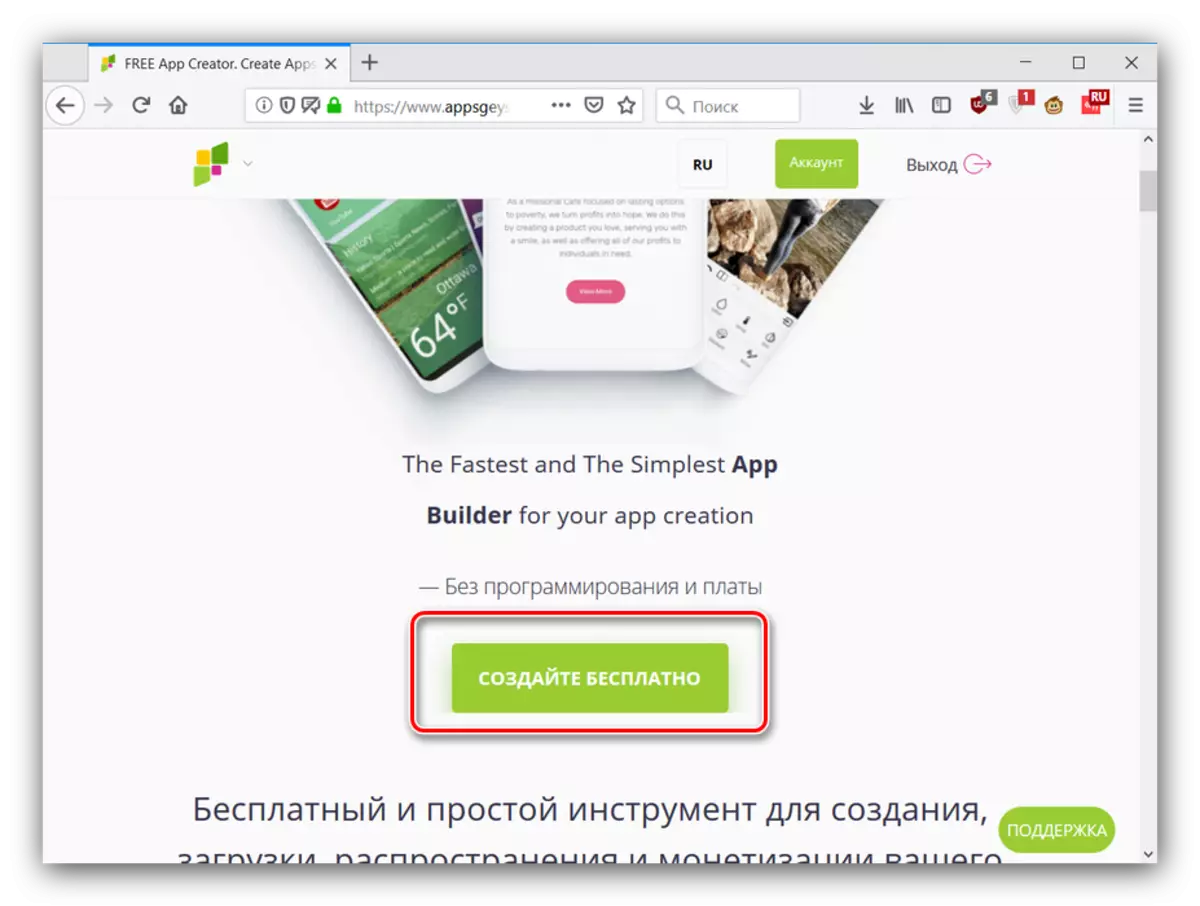
- After the procedure for creating an account and enter it, click on "Create Free".
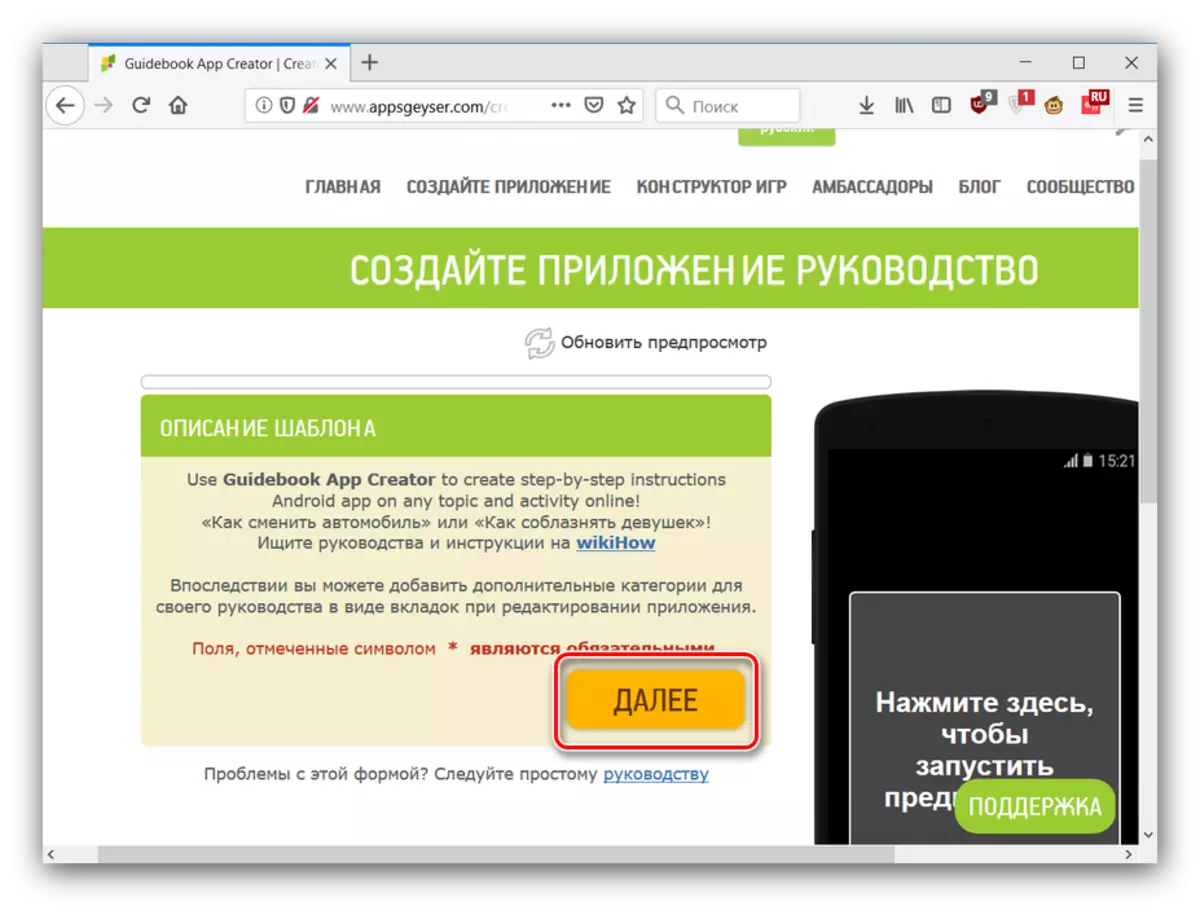
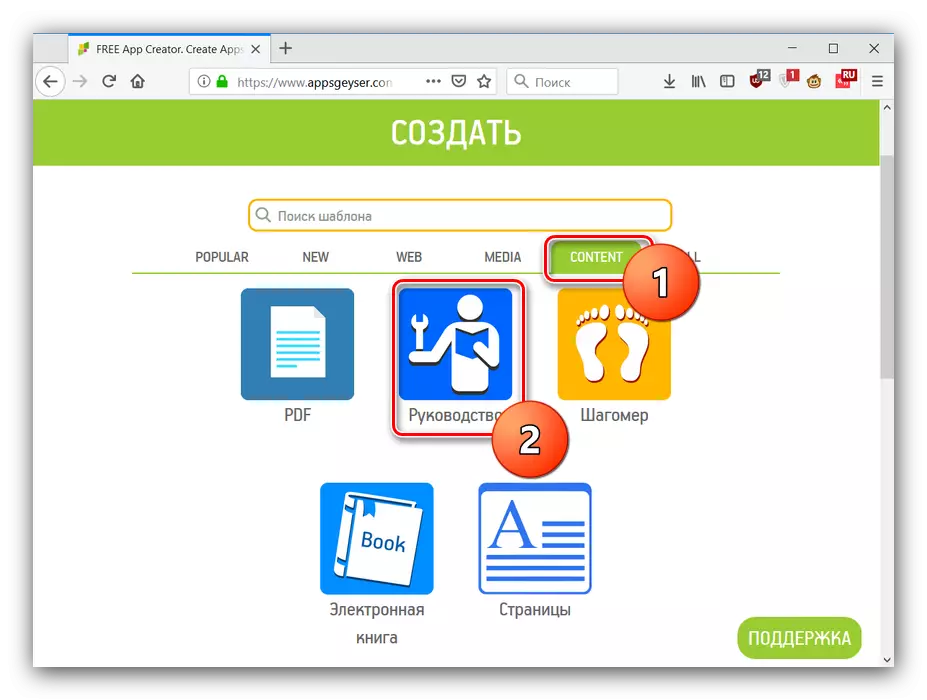
- Next, it is necessary to choose a template based on which the application will be created. Available types are sorted by a variety of categories placed on various tabs. The search works, but only for English. For example, select the "Content" tab and the Manual template.
- Creating a program is automated - at this stage, you should read a welcome message and click on "Next".
If you do not understand English, you have to translate sites for Chrome, Opera and Firefox browser.
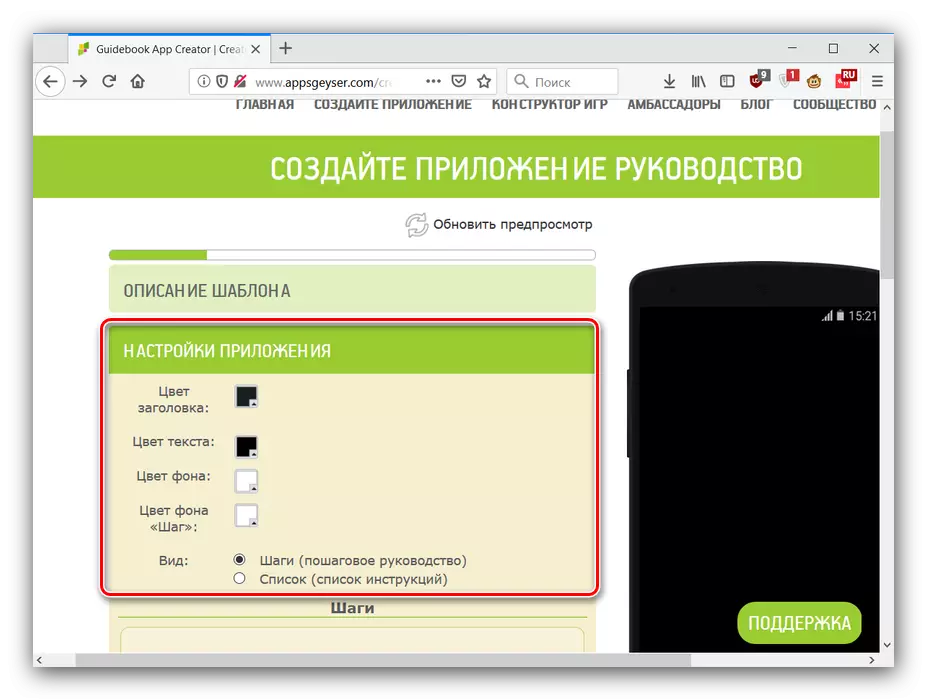
- First of all, you need to configure the color scheme of the future the tutorial and the view of the placed manual. Of course, for other templates, this stage is different, but implemented at exactly the same scheme.
Next, the actual body of the manual is introduced: heading and text. Minimal formatting is supported, as well as adding hyperlinks and multimedia files.
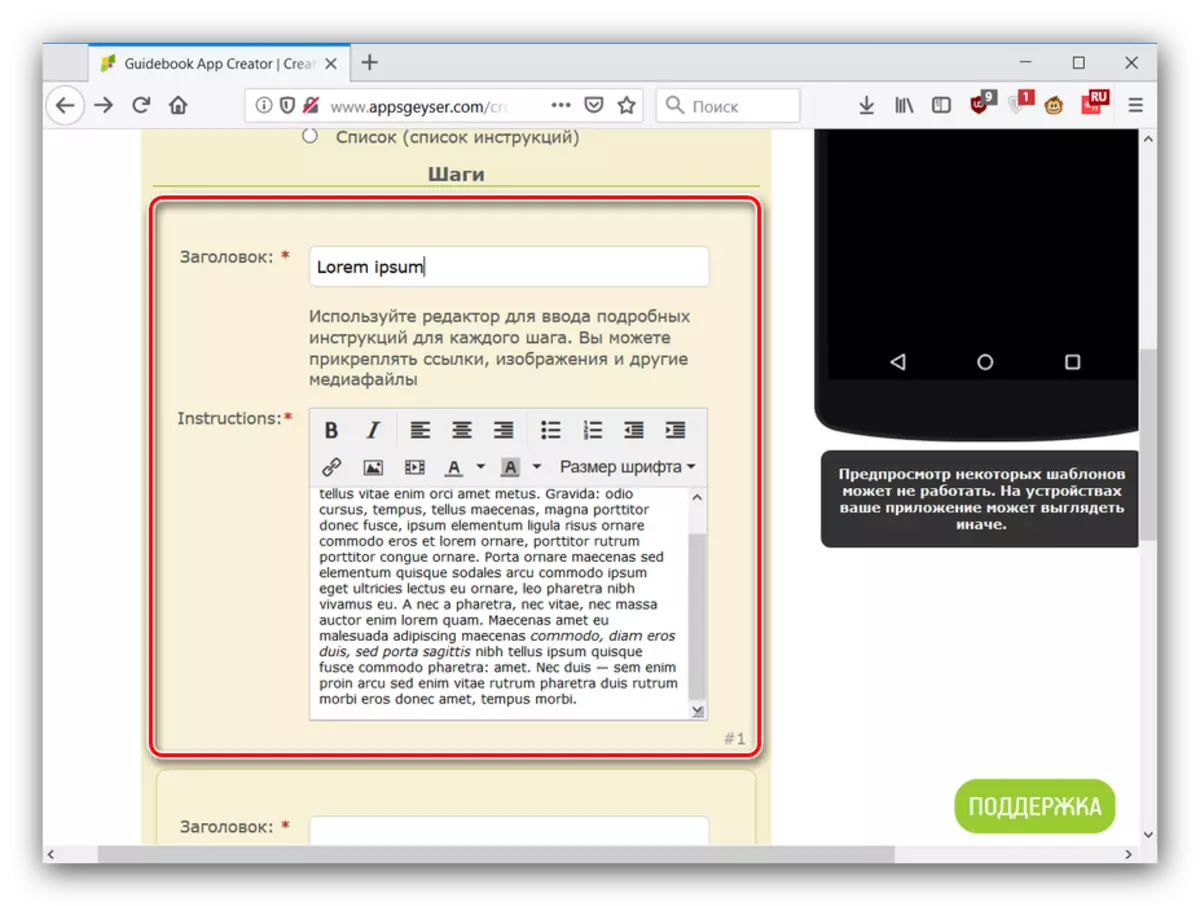
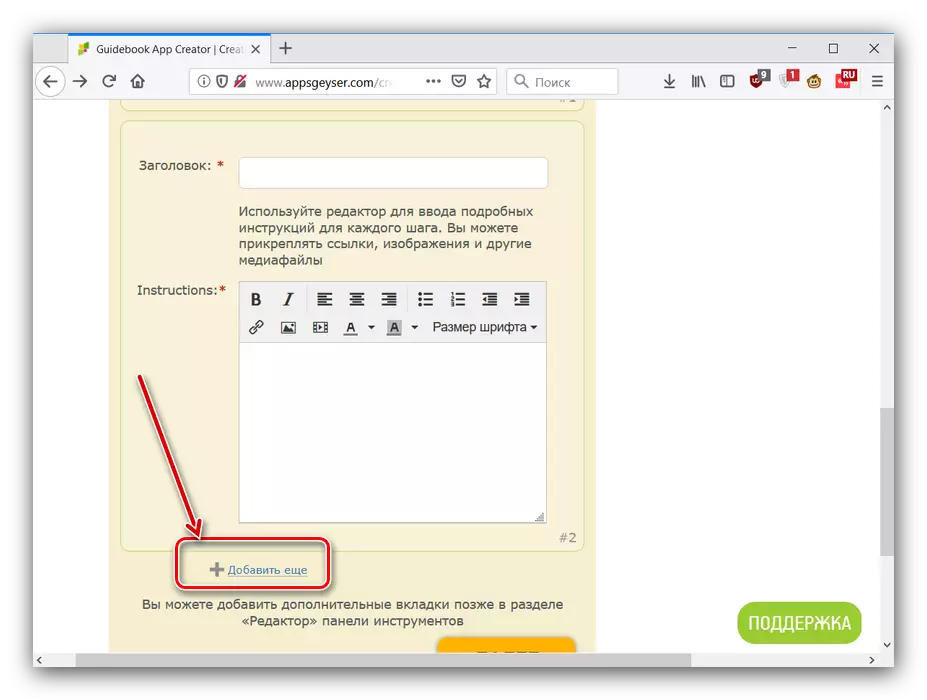
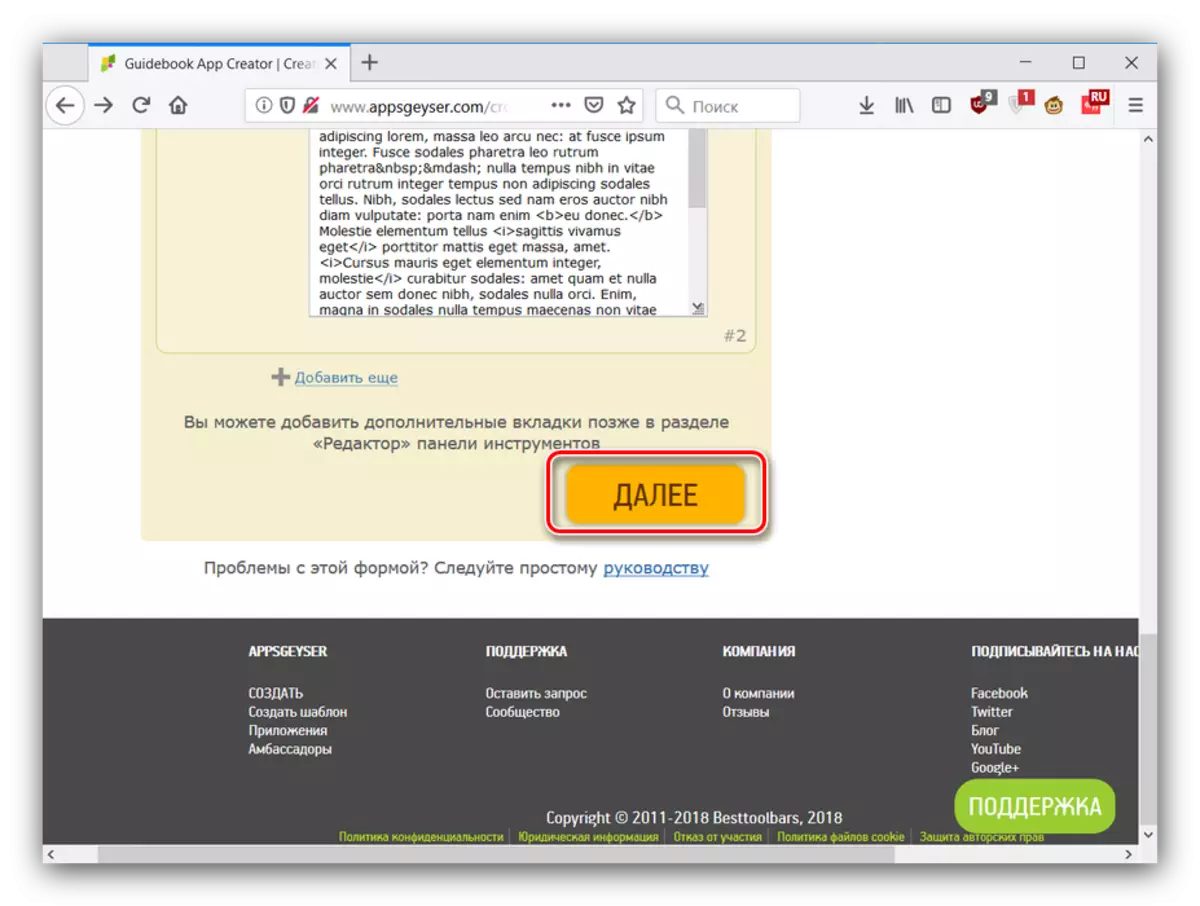
By default, only 2 elements are available - click "Add more" to add one editor field. Repeat the procedure to add several.
To continue the work, press "Next".
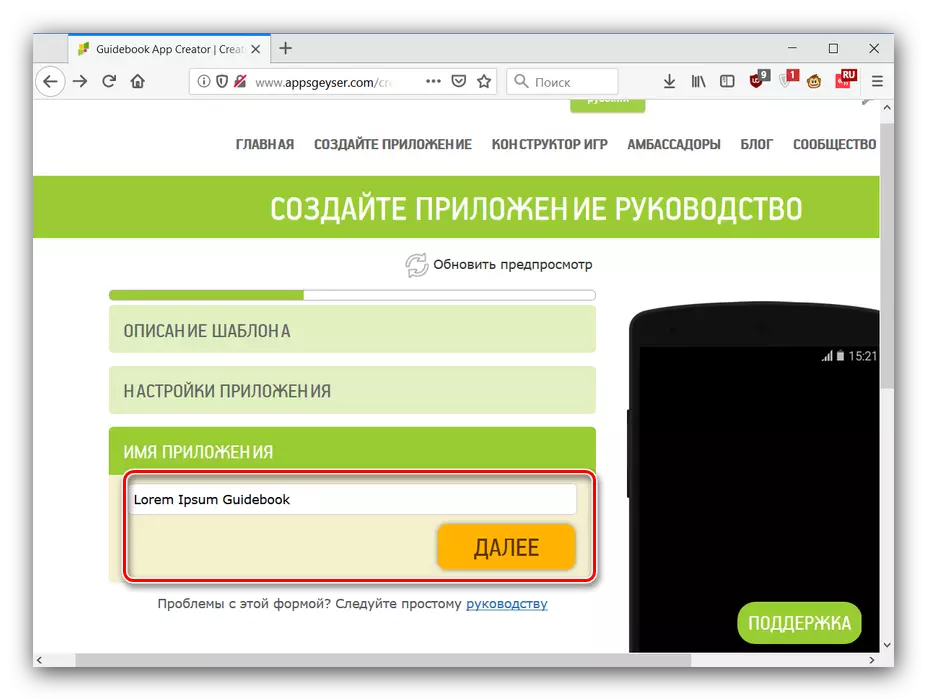
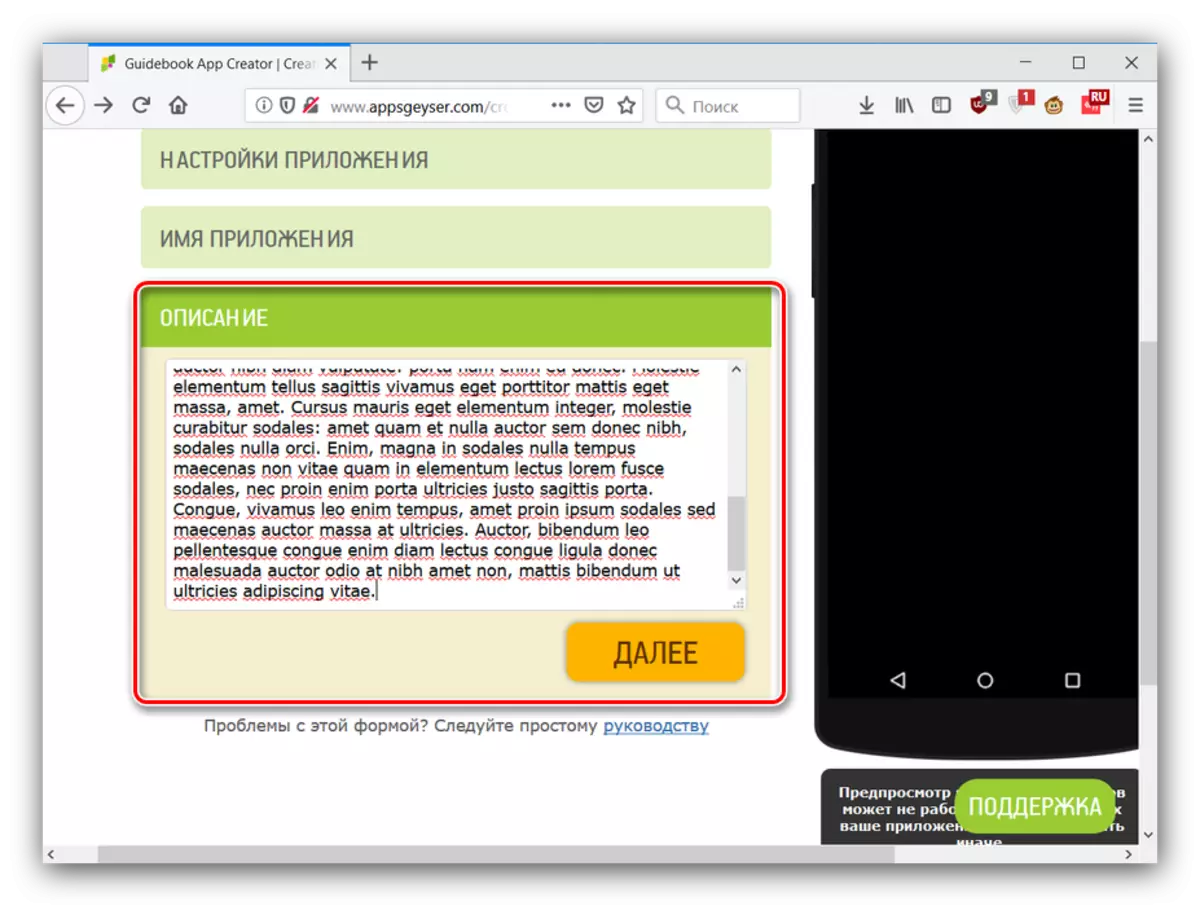
- At this stage, an application information will be input. First enter the name and click "Next".
Then write a suitable description and write it in the appropriate field.
- Now you need to select the application icon. The position of the "Standard" switch leaves the default icon that can be slightly edited (the "editor" button below the image).
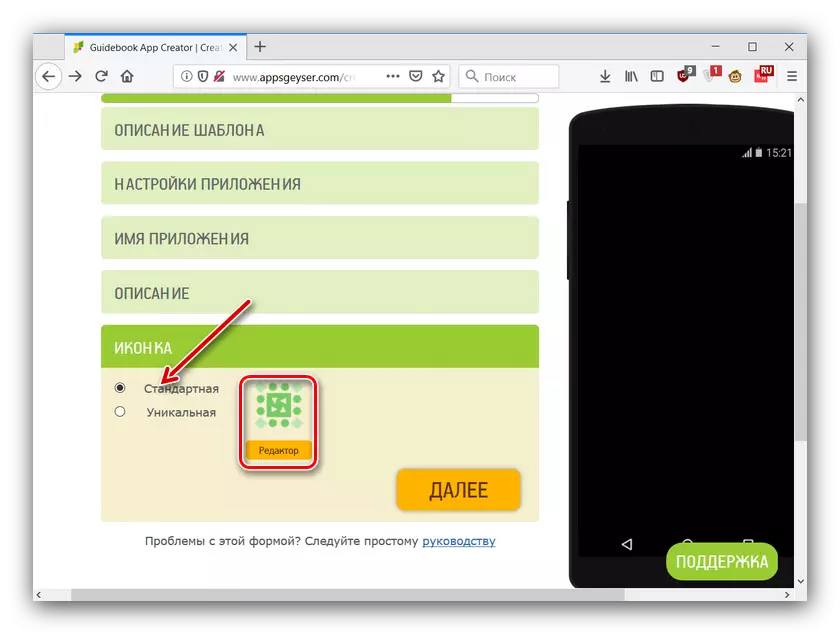
The option "unique" allows you to upload your image ¬ (JPG, PNG and BMP formats in the resolution of 512x512 points).
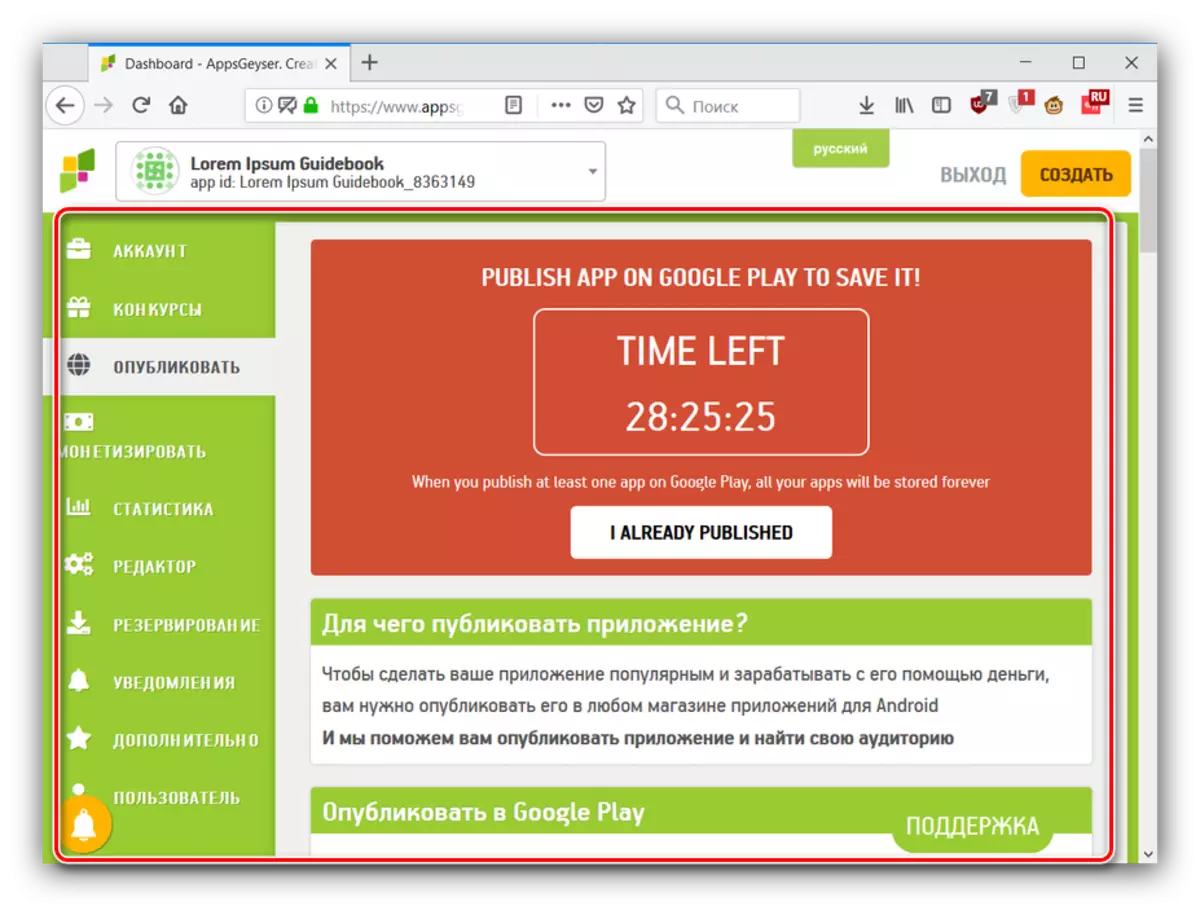
- After entering all the information, click on "Create".
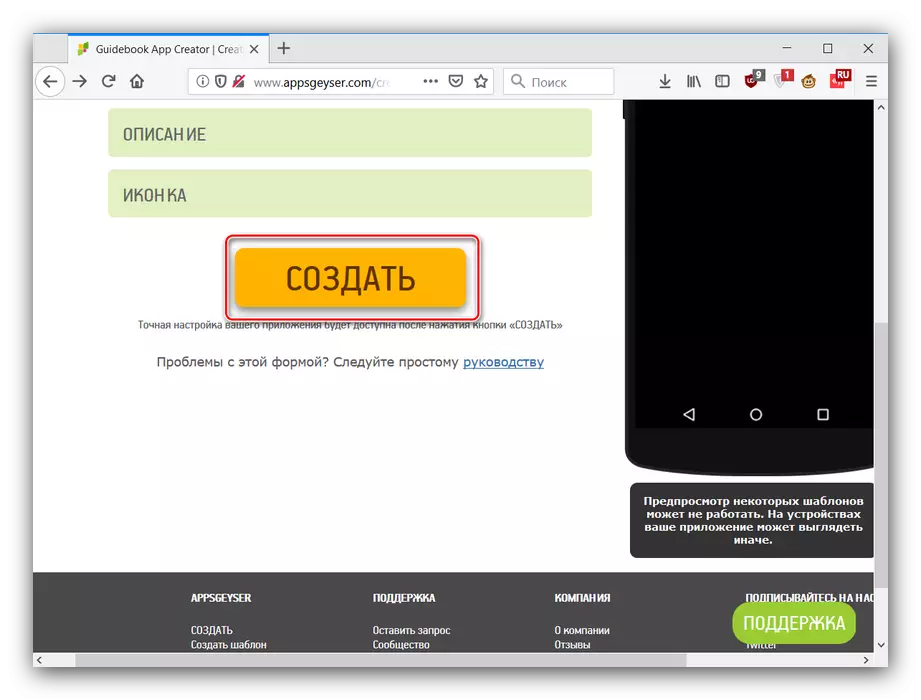
You will transfer to account data, from where the application can be published on Google Play Market or several other app stores. Please note that the application will be removed without publication after 29 hours from the moment of creation. Alas, other options for obtaining an APK file, except publication, is not provided.
The AppsGeyser service is one of the most friendly solutions, so the shortcomings in the form of poor localization in Russian and the limited time of the program can be completed.
Mobincube.
Advanced service that allows you to create applications for both Android and iOS. In contrast to the previous solution, the basic ways to create programs are available without making money. Positions itself as one of the easiest solutions.
To create a program through a minkyub, do the following:
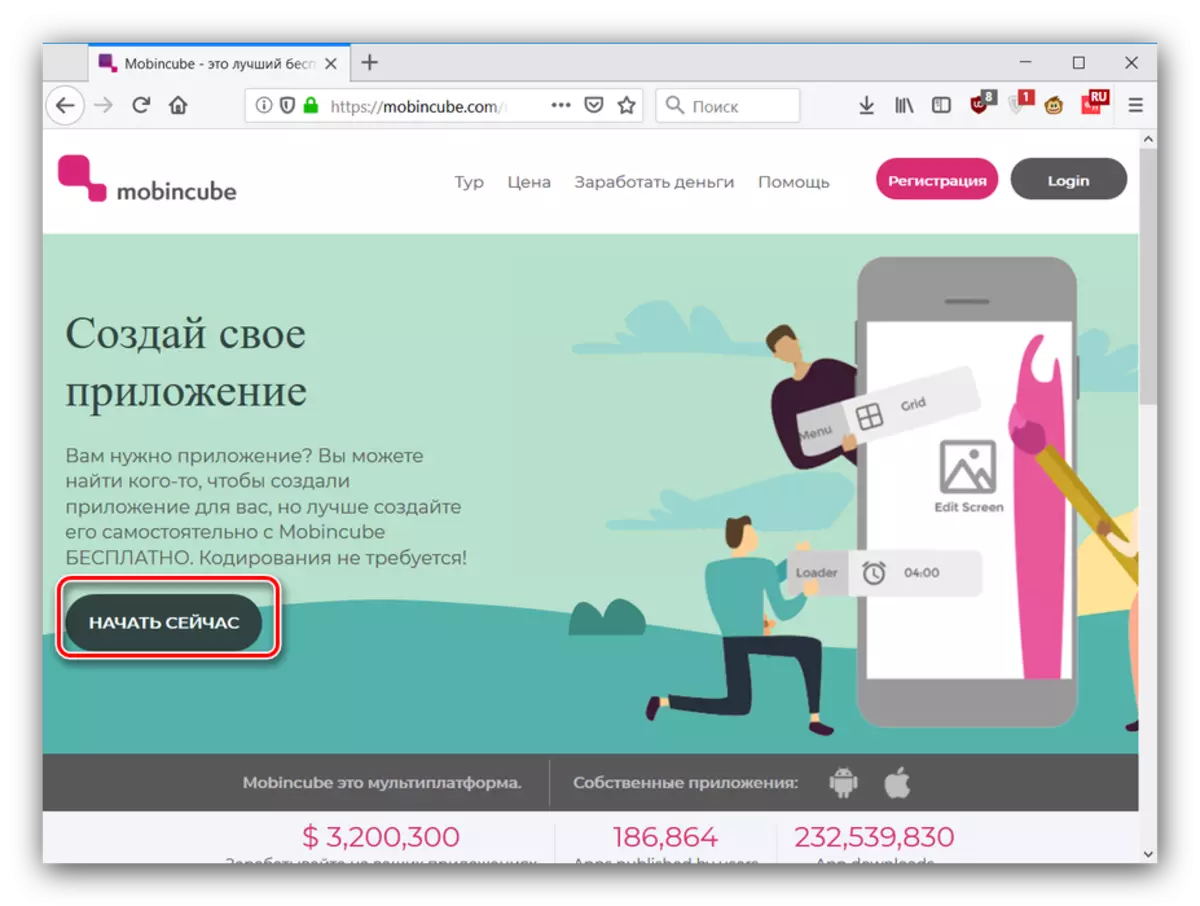
Go to Mobincube Main Page
- To work with this service, also need to register - click on the Start Now button to go to the data entry window.
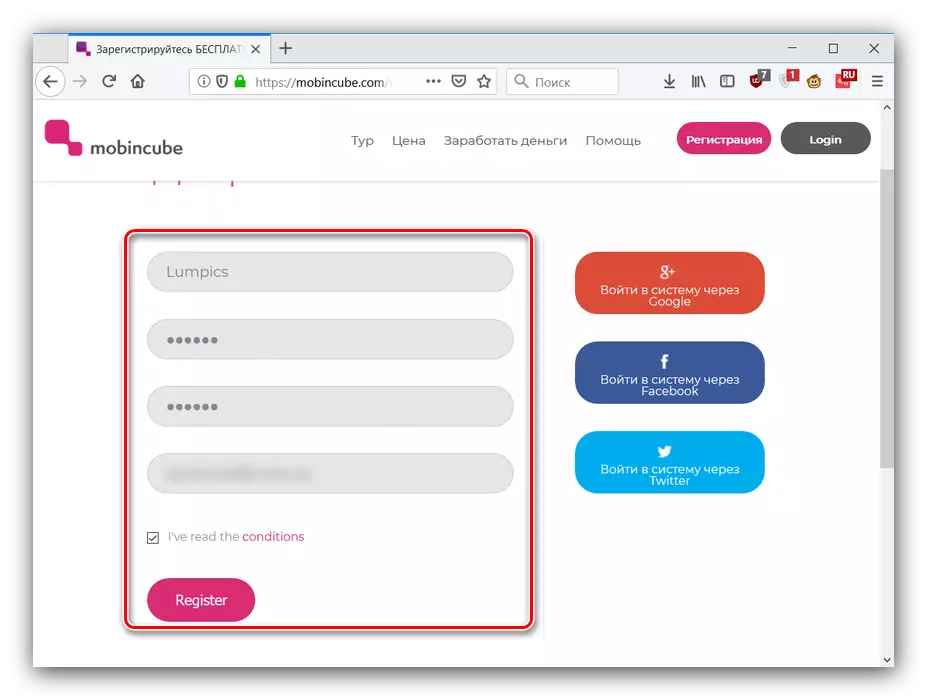
The process of creating an account is simple: enough to register the username, come up with and enter the password twice, then specify the mailbox, mark the check box about familiarizing the terms of use and click on "Register".
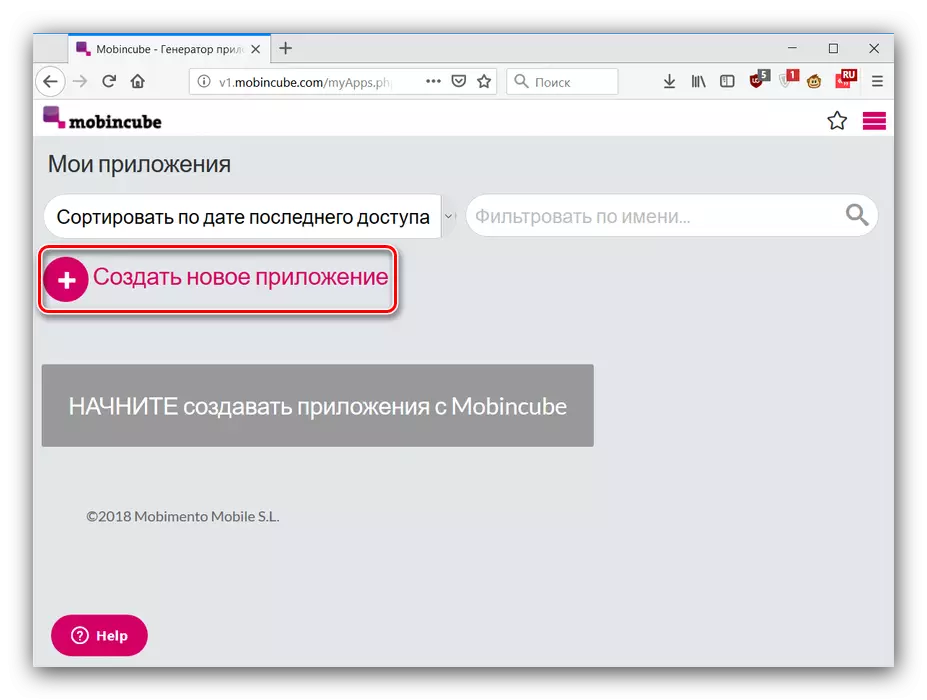
- After creating an account, you can move to the creation of applications. In the account window, click "Create a new application".
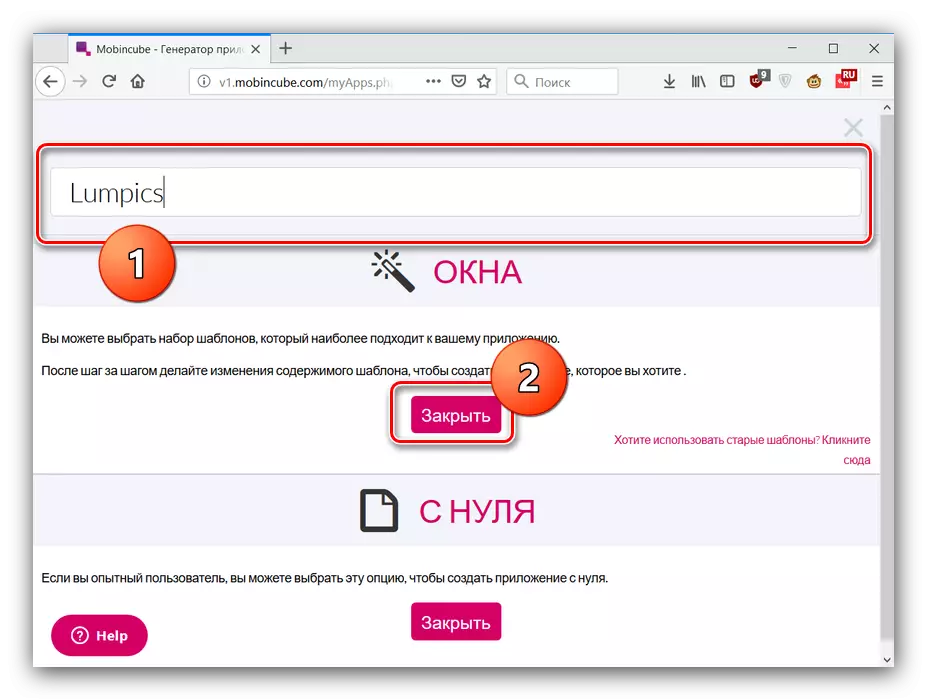
- Two options for creating an Android program are available - completely from scratch or using templates. Free users are open only second. To continue, you need to enter the name of the future application and click the "Close" button in the window "window" (costs of poor-quality localization).
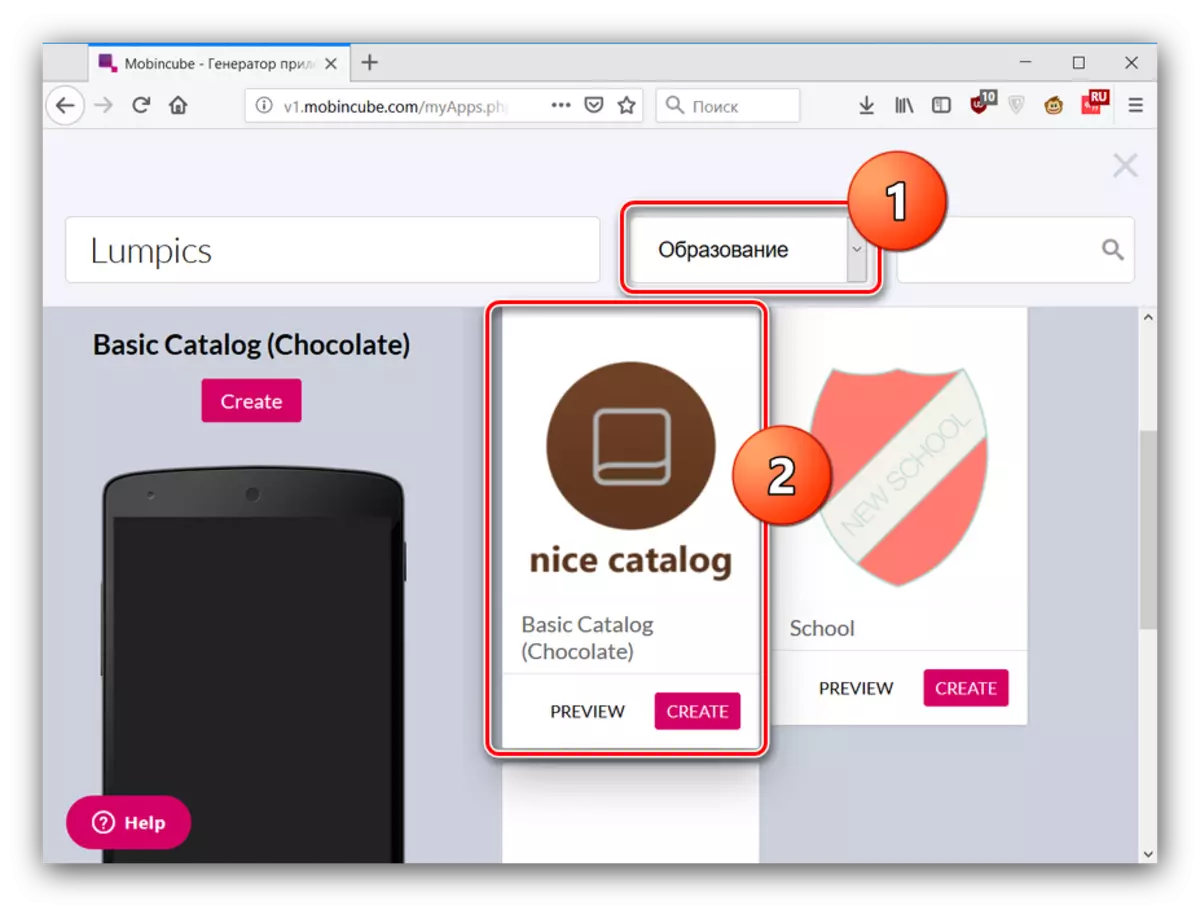
- First of all, enter the desired name of the application, if you did not do this at the previous stage. Next, in the drop-down menu, find the category of templates from which you want to choose a workpiece for the program.
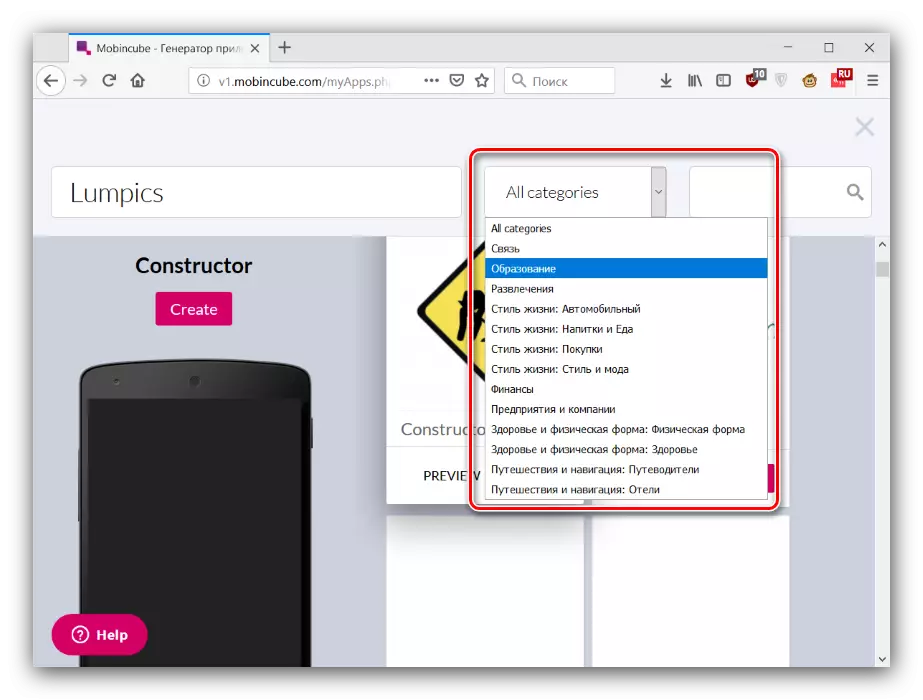
A manual search is also available, but for this you need to know the exact name of one or another sample, which is required to enter. As an example, choose the category "Education" and the Basic Catalog (Chocolate) pattern. To start working with it, click on "CREATE".
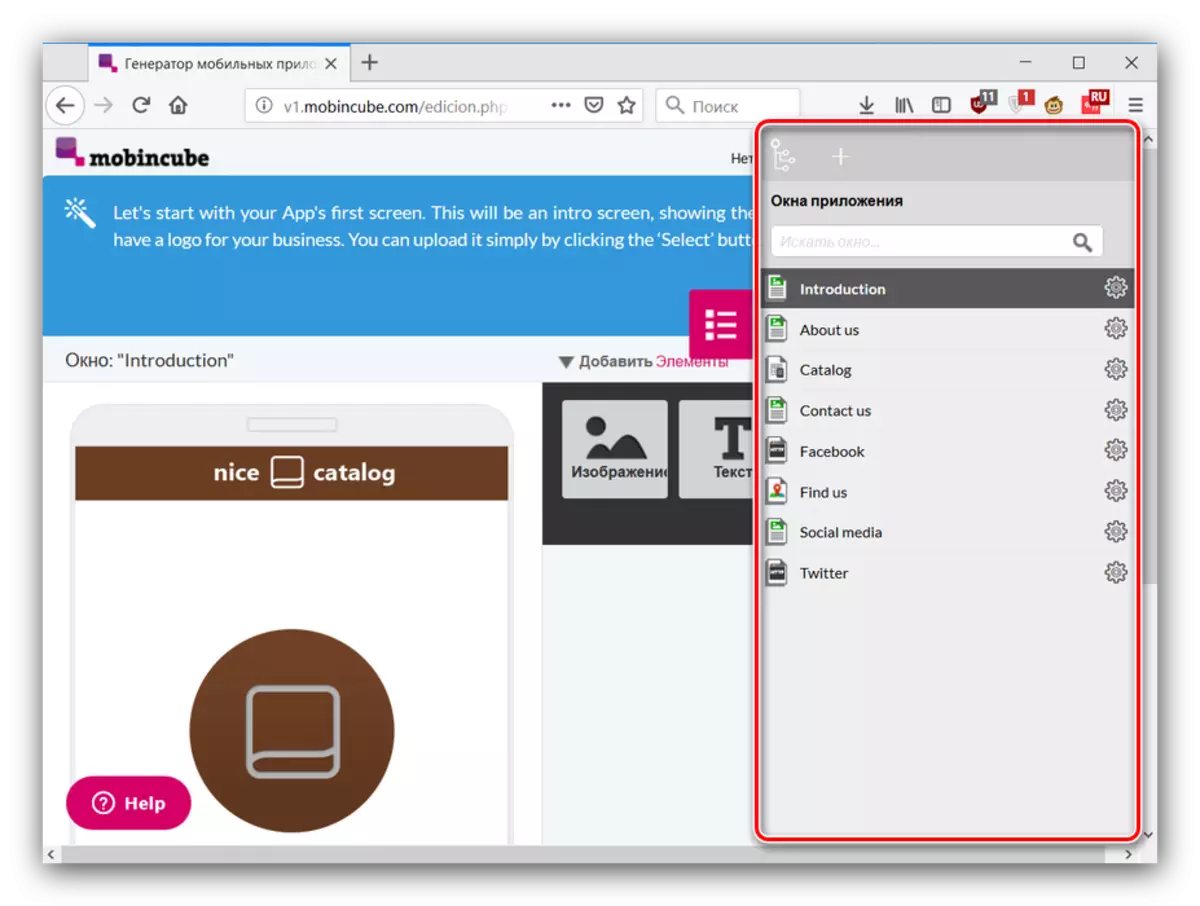
- Next, we appear the application editor window. From above, a small tutorial is displayed (unfortunately, only in English).
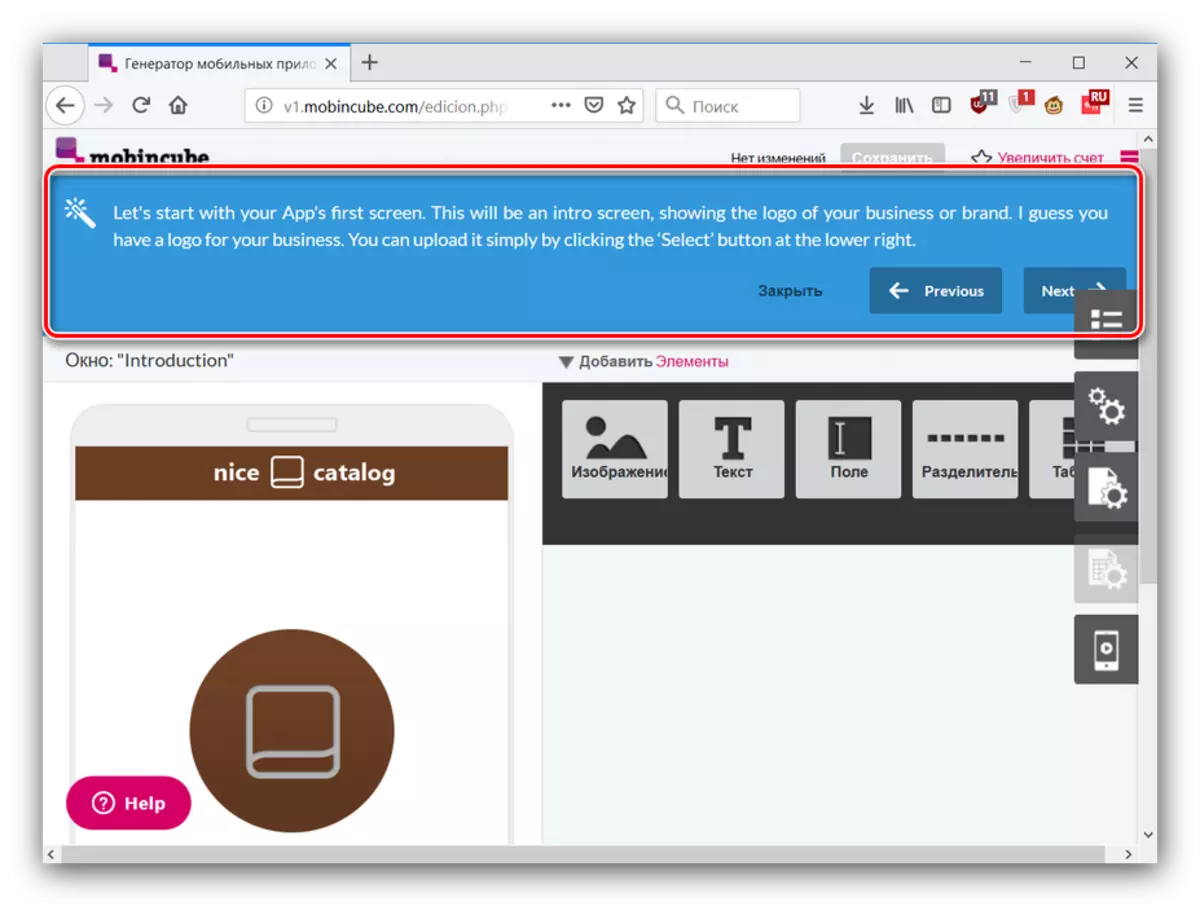
By default, the app of the application page opens on the right. For each template, they are different, but combines this control with the ability to quickly transition to one or another editing window. You can close the window by pressing the red item with the list icon.
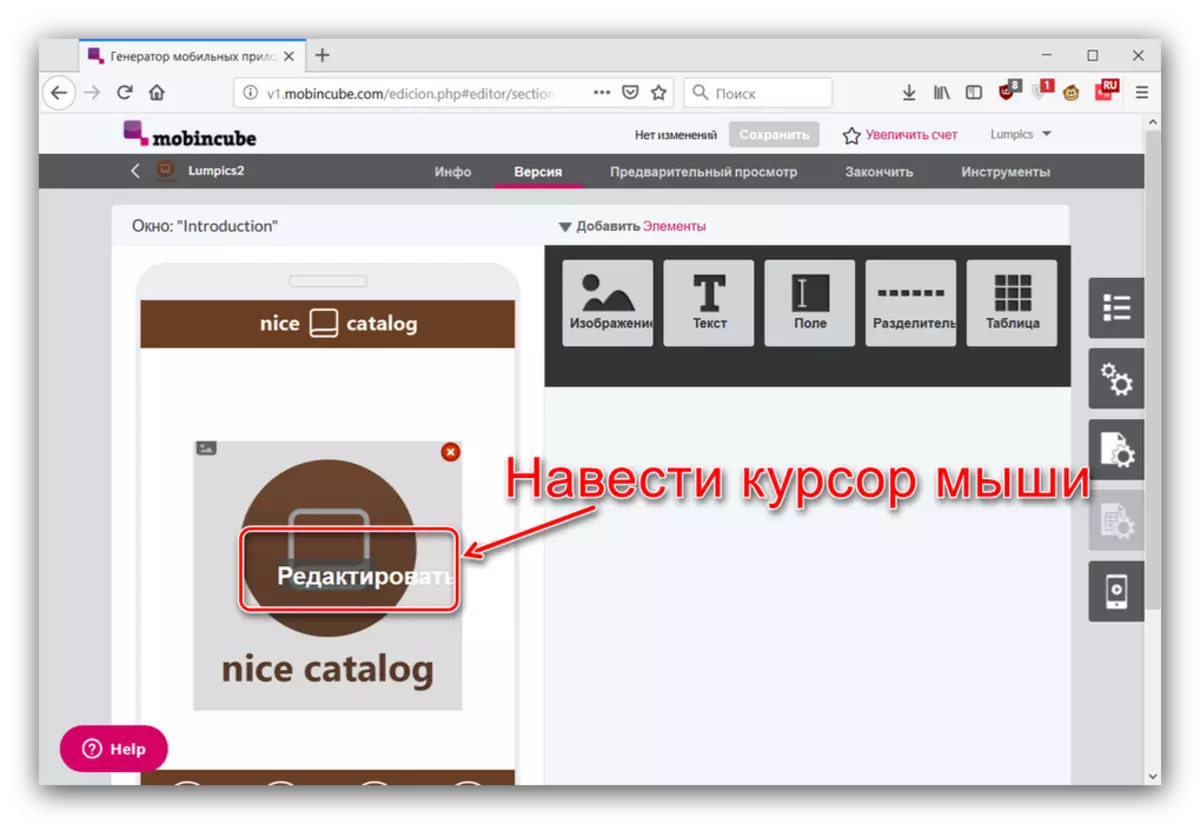
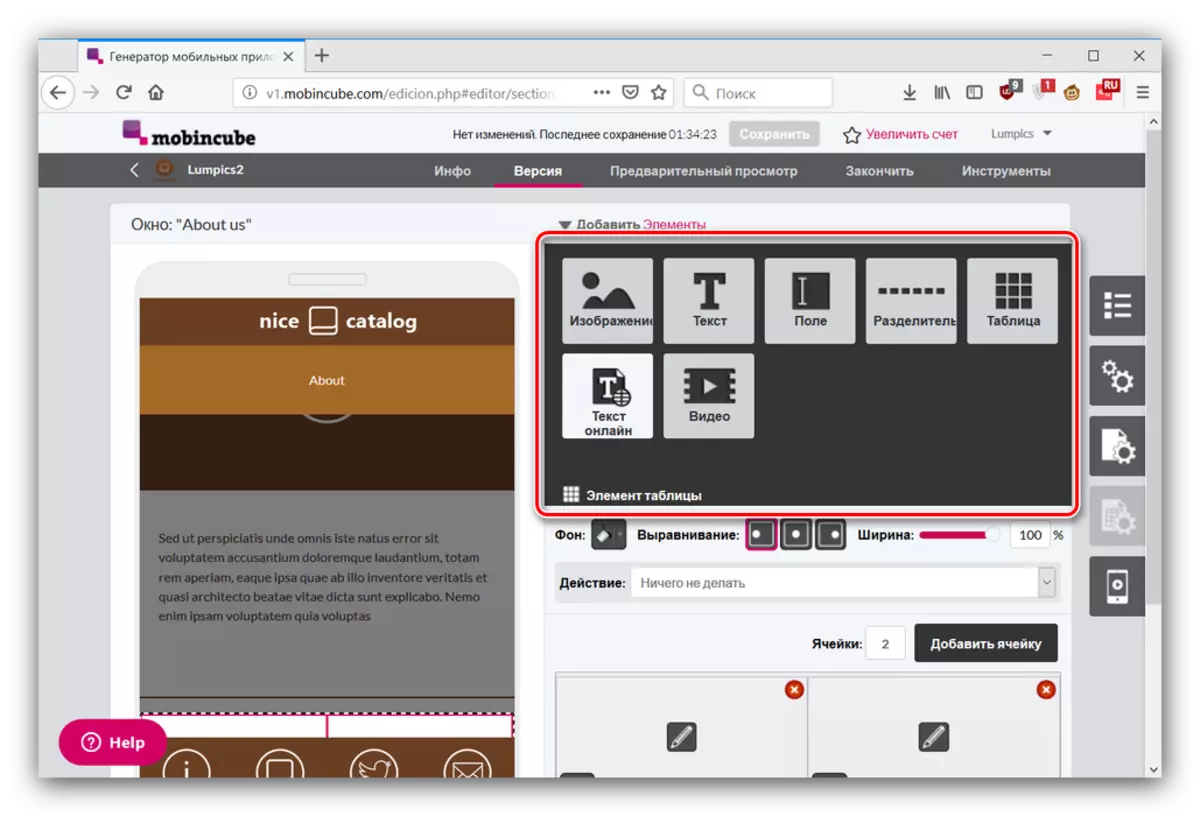
- Now let's go to directly creating an application. Each of the windows is edited separately, so consider the possibility of adding elements and functions. First of all, we note that the available capabilities depend on the selected template and the type of the variable window, so we continue to adhere to the example for the catalog sample. Customizable visual elements include background images, textual information (both administered manually and from an arbitrary resource on the Internet), separators, tables and even videos. To add a particular element twice click on it with LKM.
- Editing the parts of the application takes place on hovering the cursor - the inscription "Edit" will pop up, click on it.
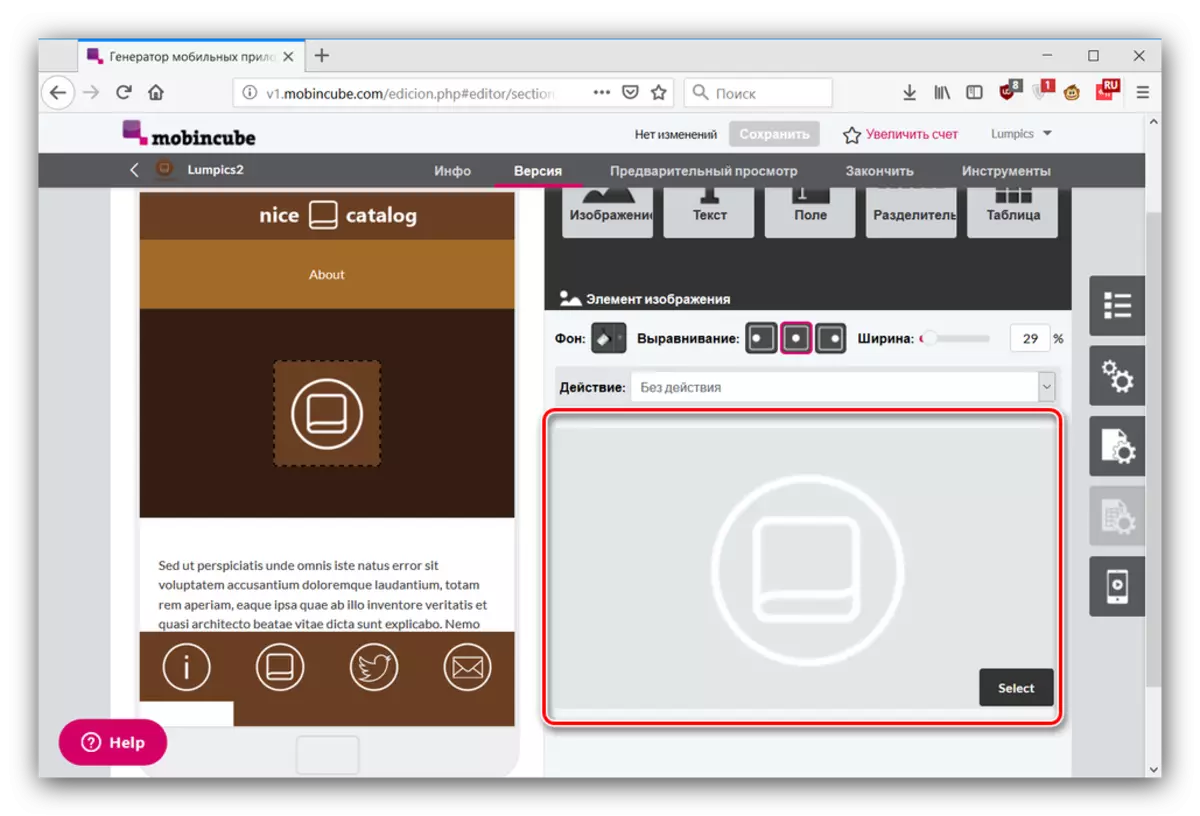
You can change the background, location and width of customizable, as well as tie certain actions to it: for example, go to a specified website, open another window, run or stop playing the multimedia file, etc.
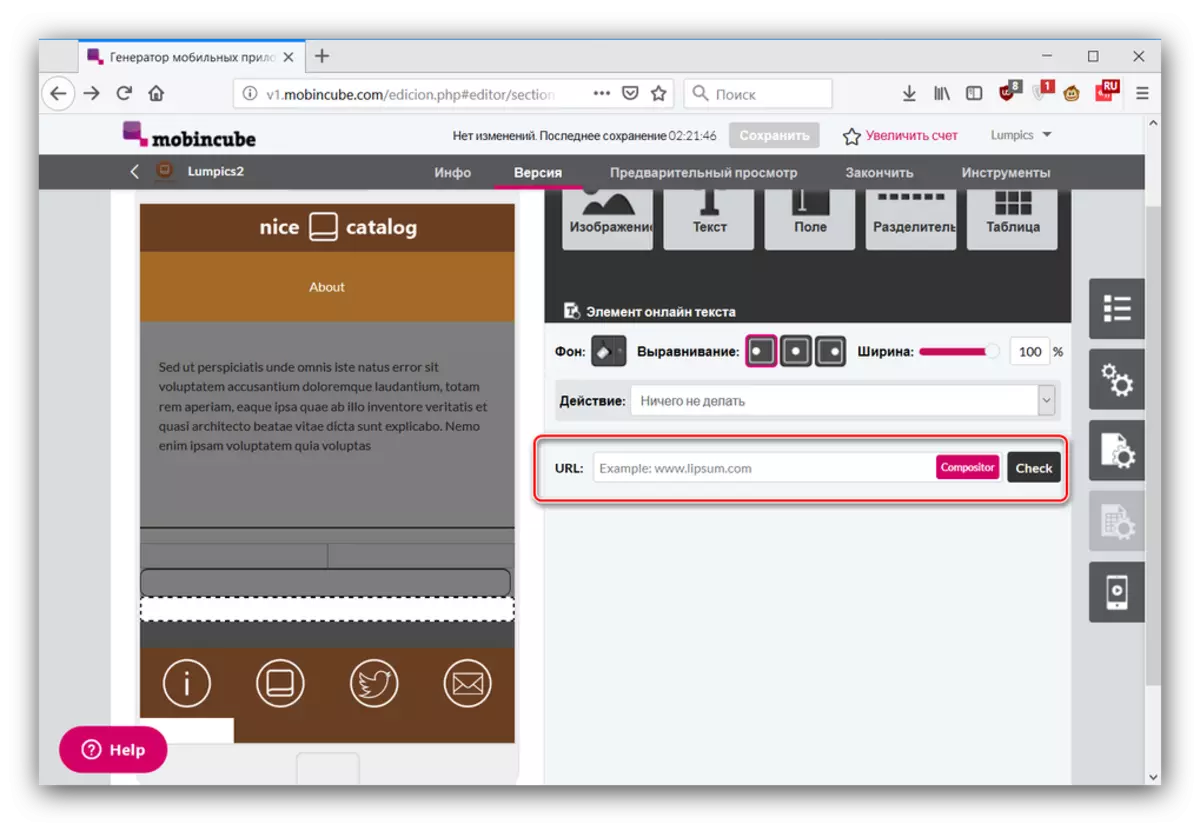
- Specific settings for a specific interface component include:
- "Image" - loading and installing an arbitrary picture;
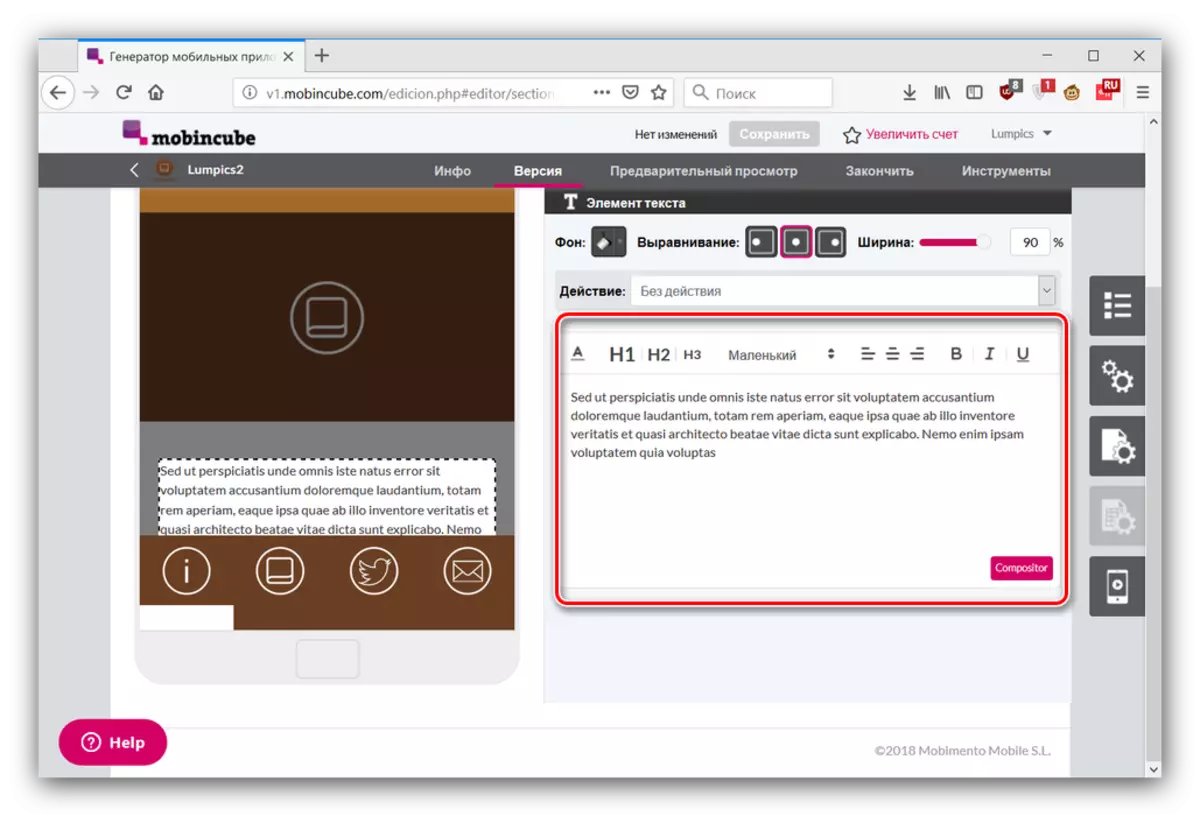
- "Text" - Enter text information with the possibility of simple formatting;
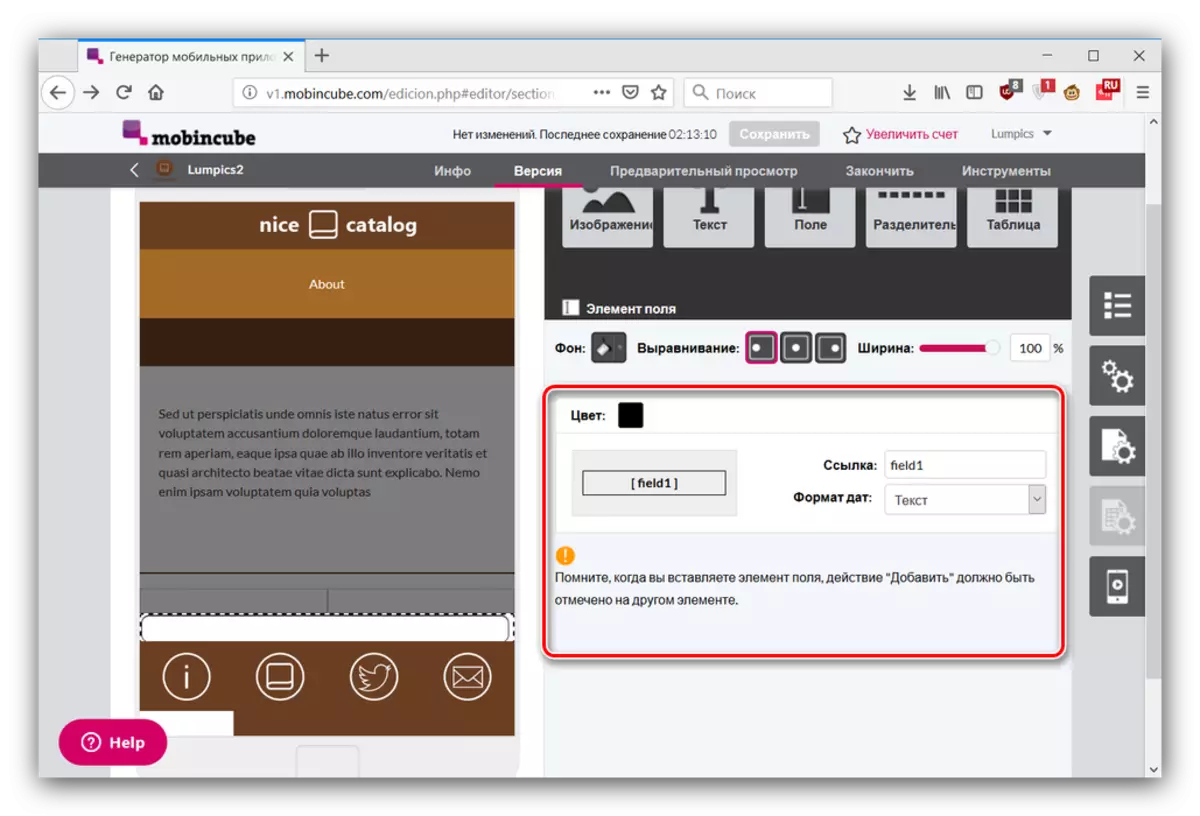
- "Field" - the name of the link and the date format (pay attention to the warning at the bottom of the window with editing);
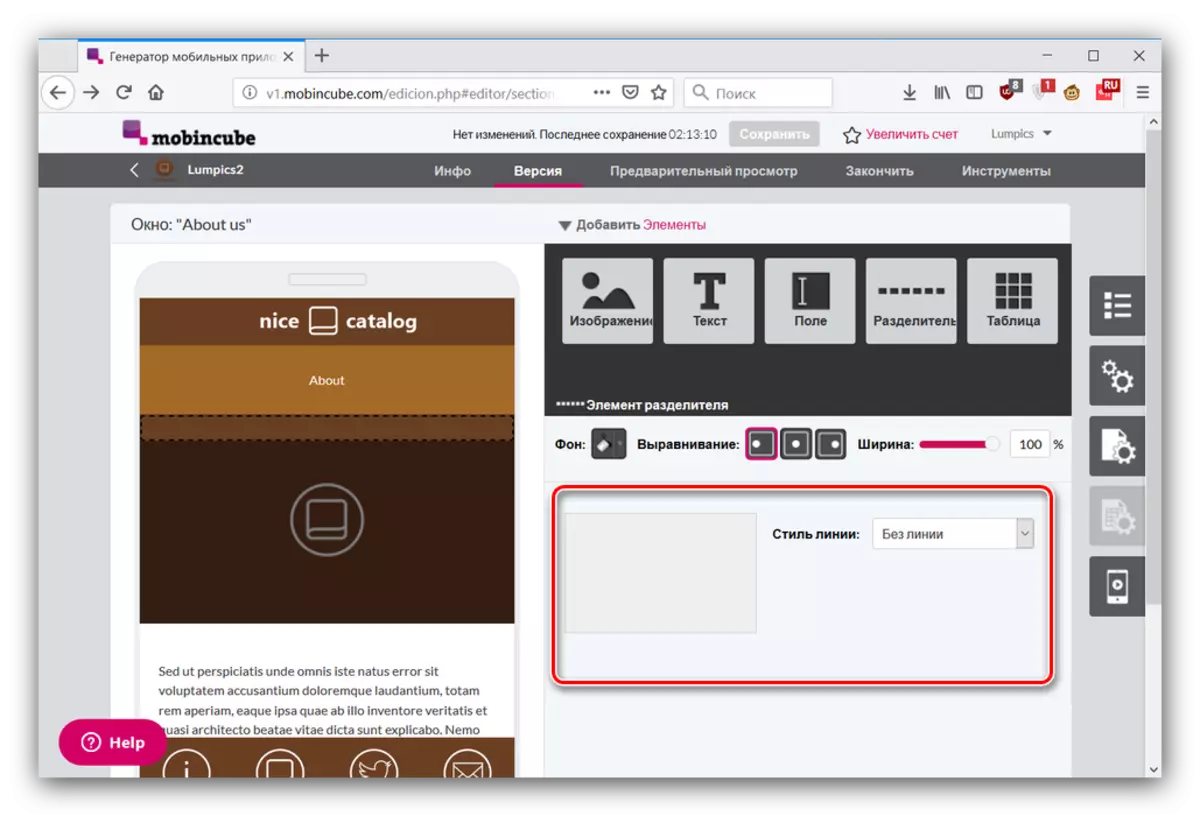
- "Separator" - selection of the style of the dividing line;
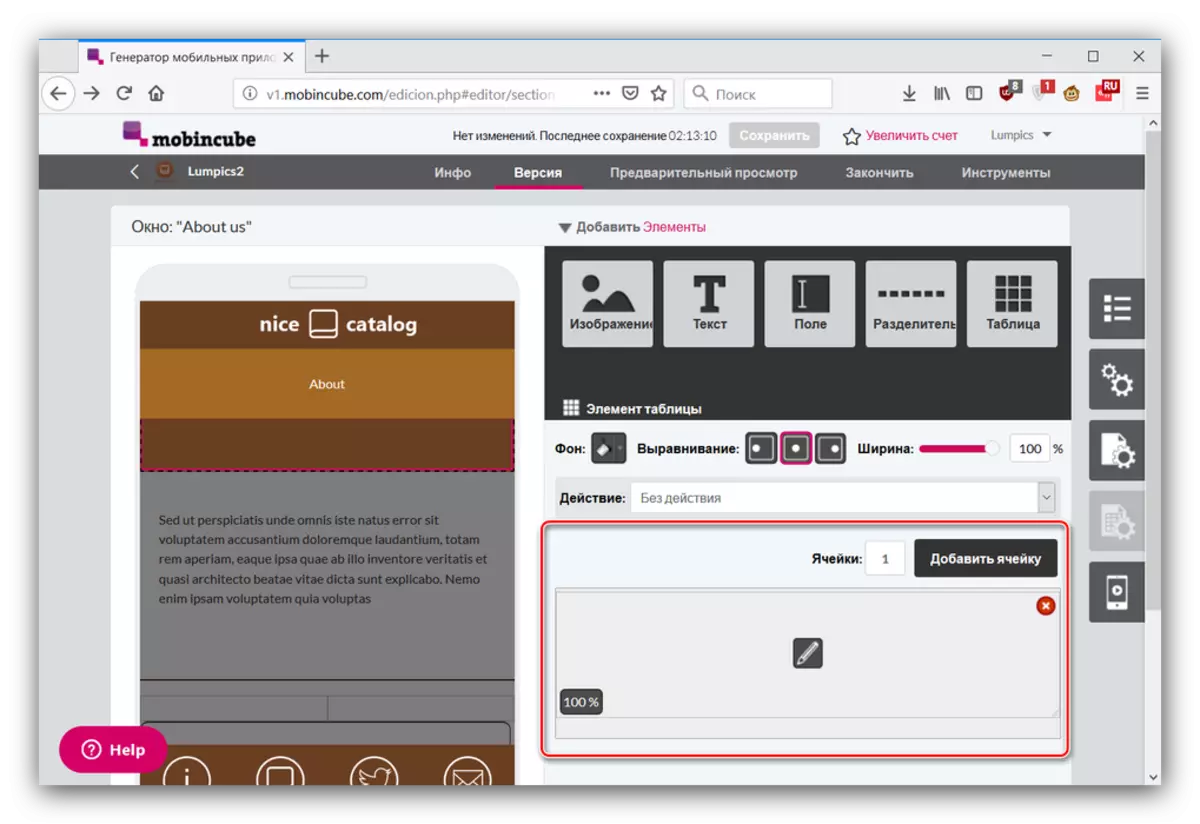
- "Table" - setting up the number of cell table cells, as well as installing icons;
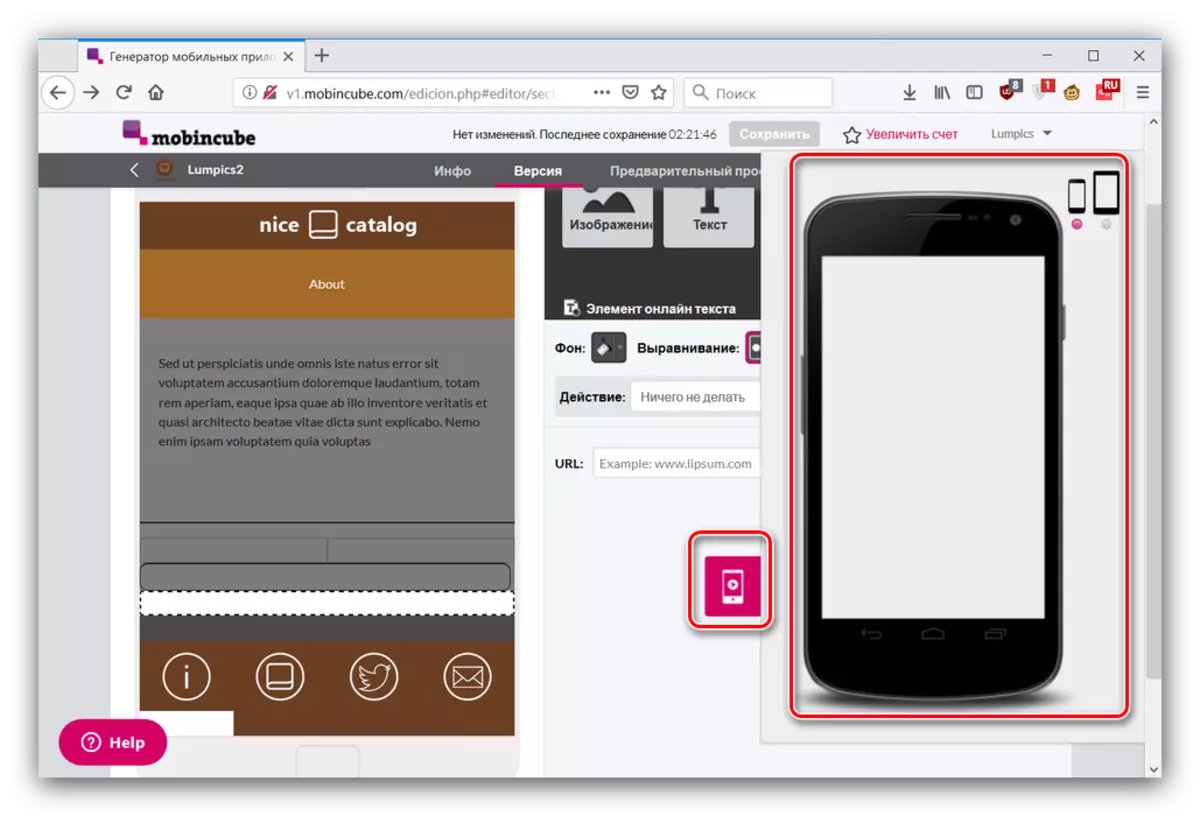
- "Text Online" - Enter links to the desired textual information;
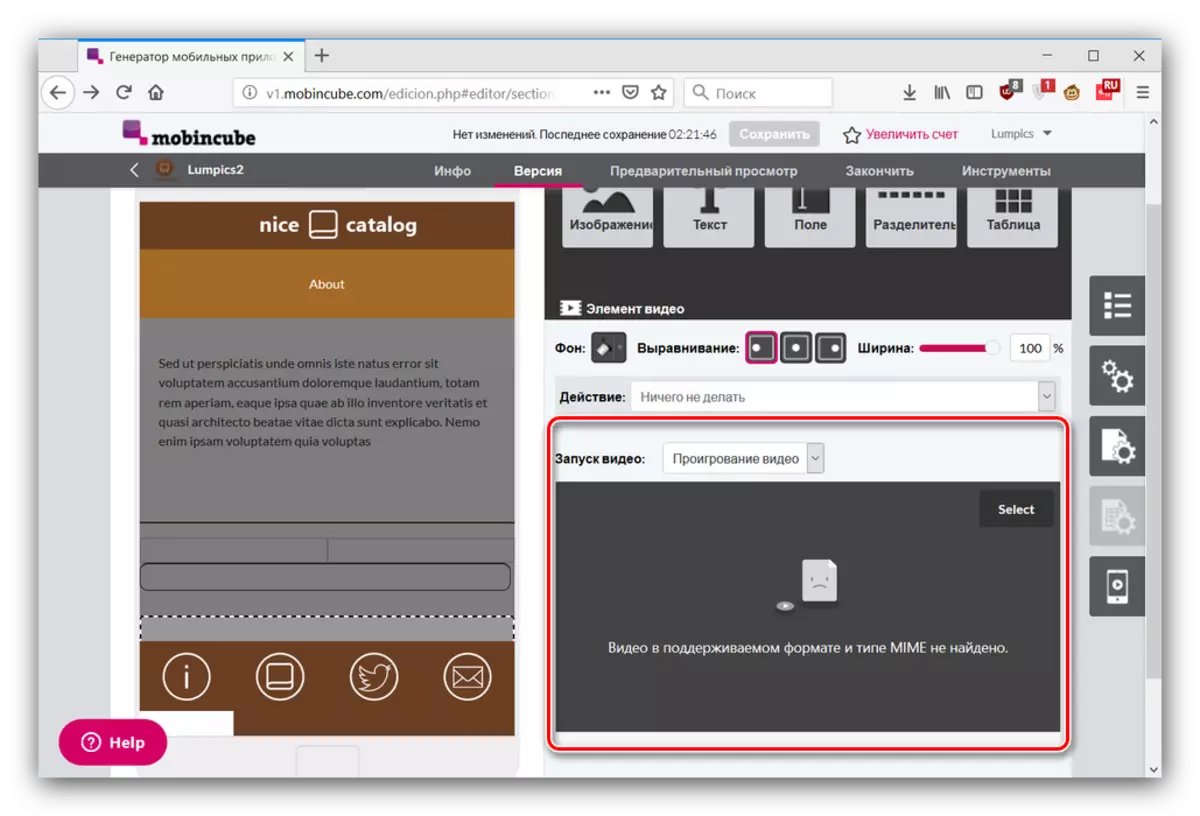
- "Video" - loading the roller or rollers, as well as an action by pressing this element.
- The side menu, visible on the right, contains tools for advanced editing application. The "Application Properties" item contains the options of the general design design and its elements, as well as resource managers and databases.
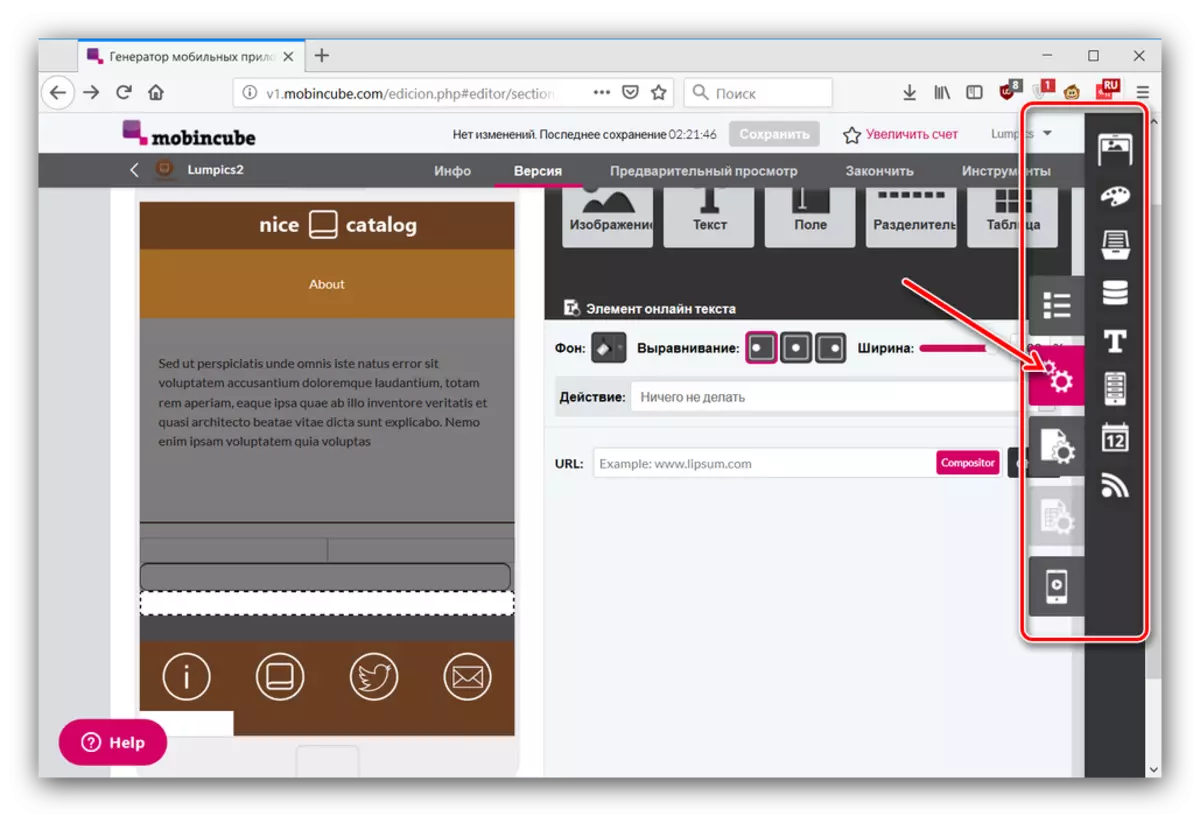
The "Windows Properties" item contains the image settings, background, styles, and also allows you to set the display timer and / or an anchor point to return by action.

The option "Properties of the View" is blocked for free accounts, and the last item generates an interactive preview of the application (not in all browsers).
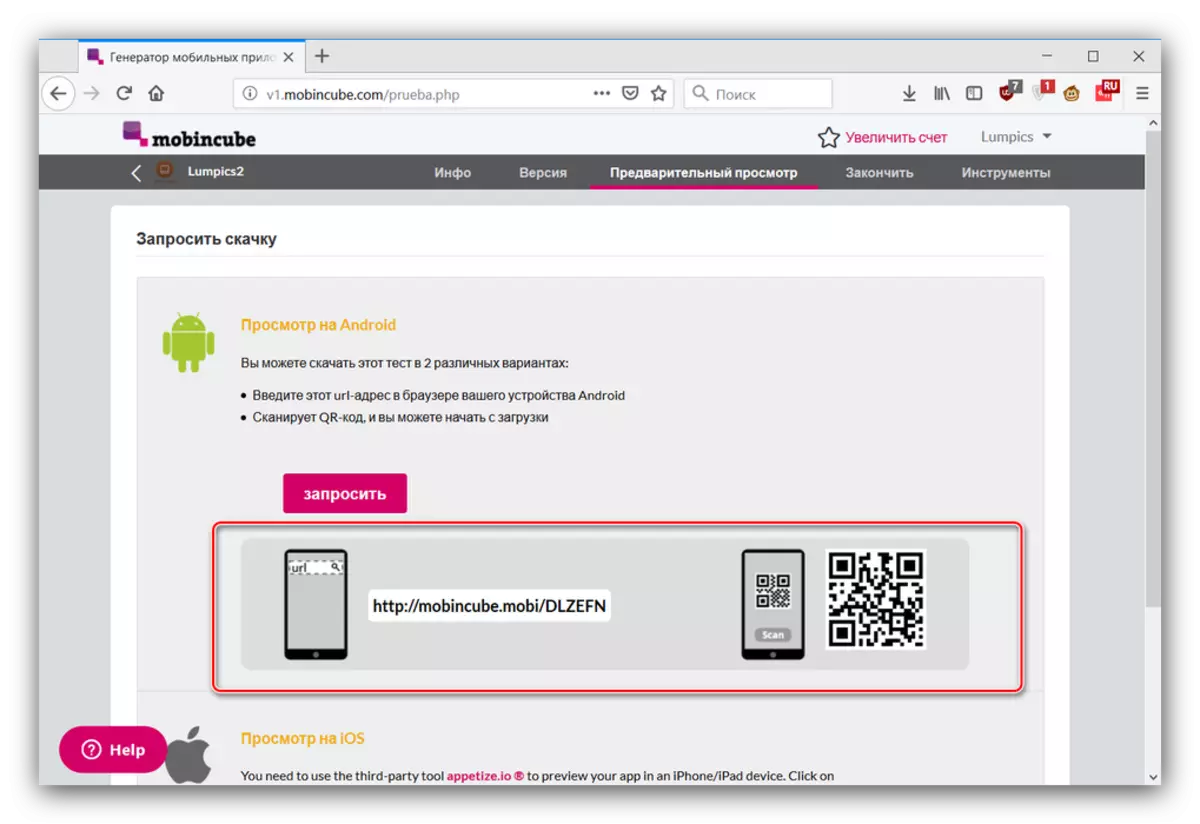
- To obtain a demo version of the created application, locate the toolbar at the top of the window and go to the Preview tab. On this tab, click "Request" in the "View on Android" section.
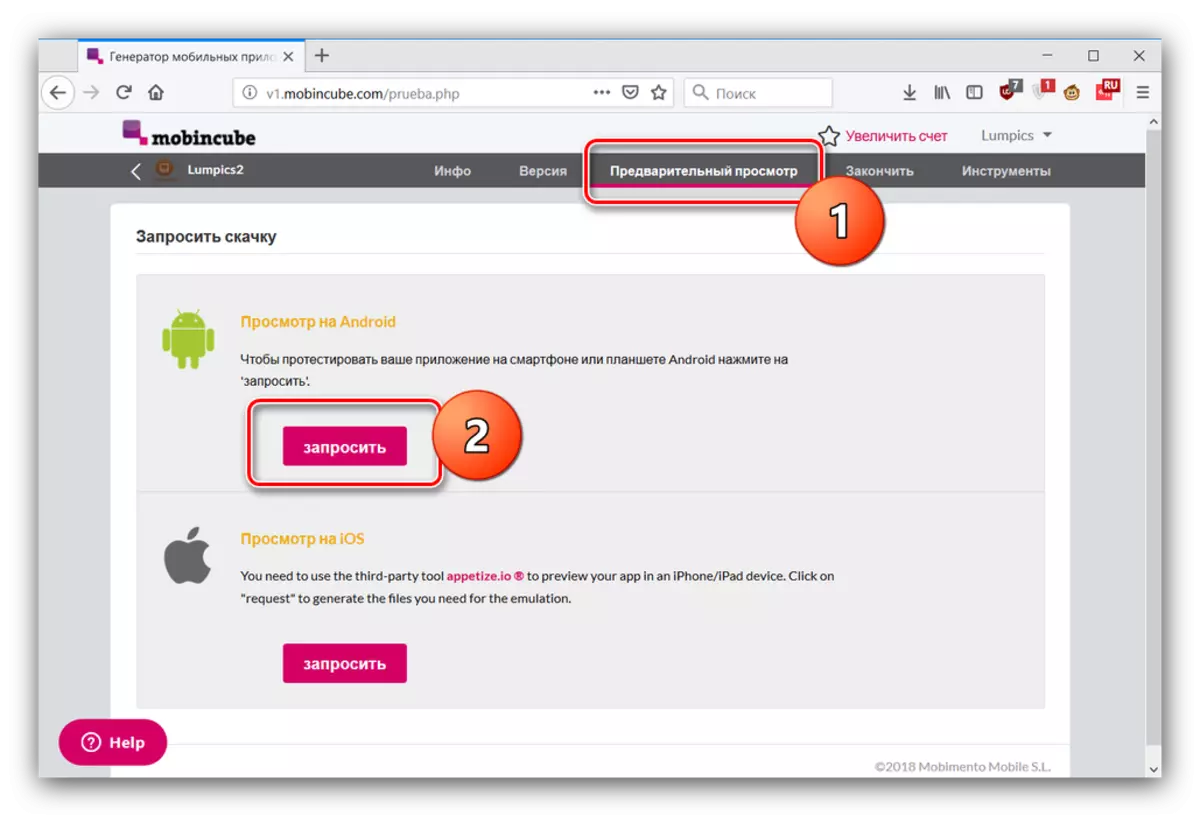
Wait for a while until the service generates an APK file, then use one of the proposed boot methods.
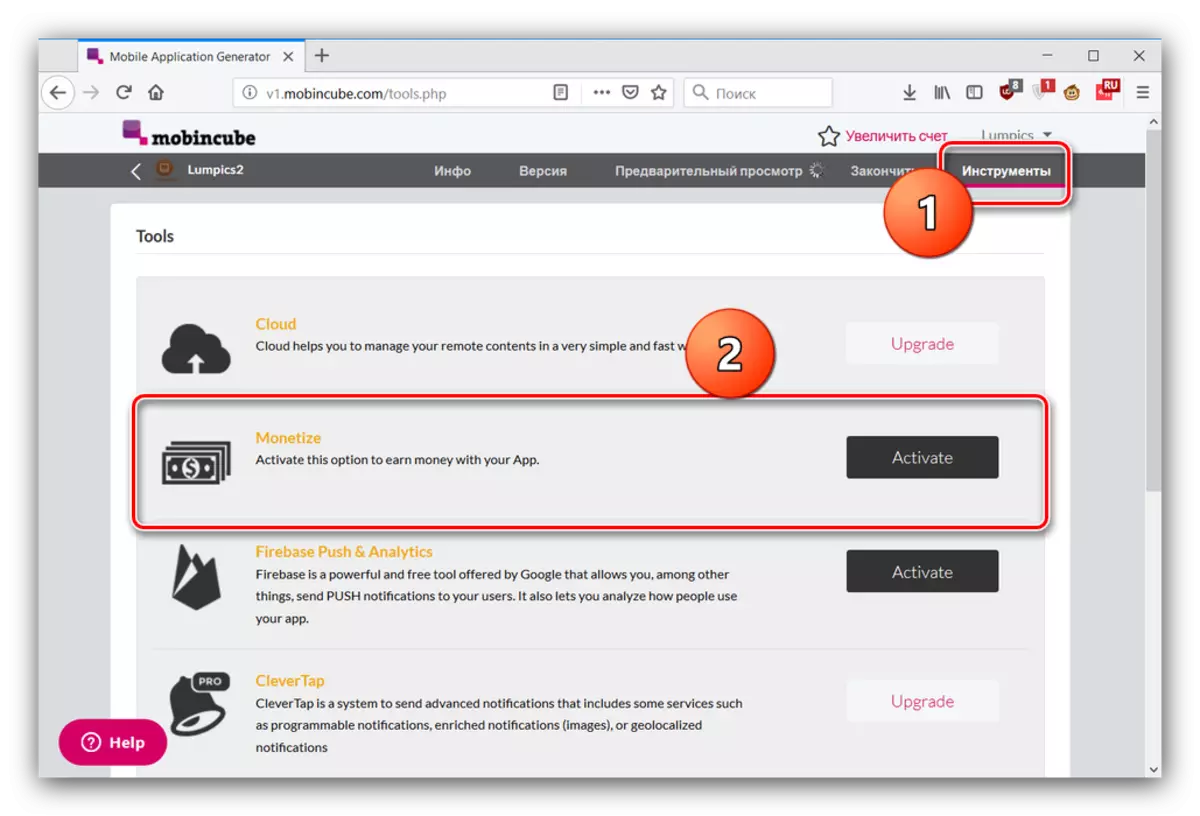
- Two other tabs of the toolbars allow you to publish the resulting program in one of the application stores and activate some additional features (for example, monetization).
As you can see, Mobincube is a much more complex and advanced service of creating Android applications. It allows you to add more opportunities to the program, but the price of this is low-quality localization and limitations of the free account.
Conclusion
We reviewed ways to create an Android application online on the example of two different resources. As you can see, both decisions are compromise - it is easier to make their programs in them than in Android Studio, but such a freedom of creativity, as an official development environment, they do not offer.